A6 - Electronic Design
Stepper Board
http://archive.fabacademy.org/2016/fablabsingapore/students/156/exercise06.html
In the file menu, in the "Open" button you can choose to import the libriaries form EasyEDA, Altium, Eagle or KiCad.
I use the Fab library
You have to manually select all the libraries that you need.
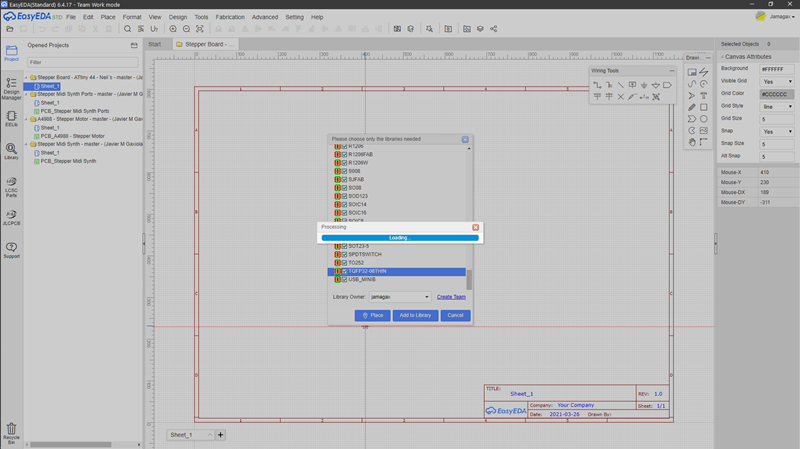
I place all the components and I connect them according Neil´s board.
BOM Stepper Board
| 1 | 12V STEPPER MOTOR |
|---|---|
| 1 | ATTINY44 MICROCONTROLLER |
| 3 | 2x2 HEADER (POWER) |
| 1 | 3X2 PIN HEADER (AVRISP & SERVO) |
| 2 | CAPACITOR 10 uf |
| 1 | CAPACITOR 1 uf |
| 2 | CAPACITOR 0.1 uf |
| 3 | 10k Ohm RESISTOR RES-US1206FAB |
| 1 | 1k Ohm RESISTOR RES-US1206FAB |
| 1 | 5V REGULATOR |
| 1 | LED 1206 SMD |
| 2 | A4950 H-BRIDGE MOTOR DRIVER |
| 1 | SNAP ACTION SWITCH |
The Data Sheet
Easy EDA
I´ve heard great stuff about Easy EDA that I decided to give it a try.
I´ll recomend this playlis to get started Playlist Easy EDA
What is Easy EDA.Benefits of Easy EDA:
In Easy EDA the libraries are online, so each time someone upload a new component the library upgrades.
Install or open editor online
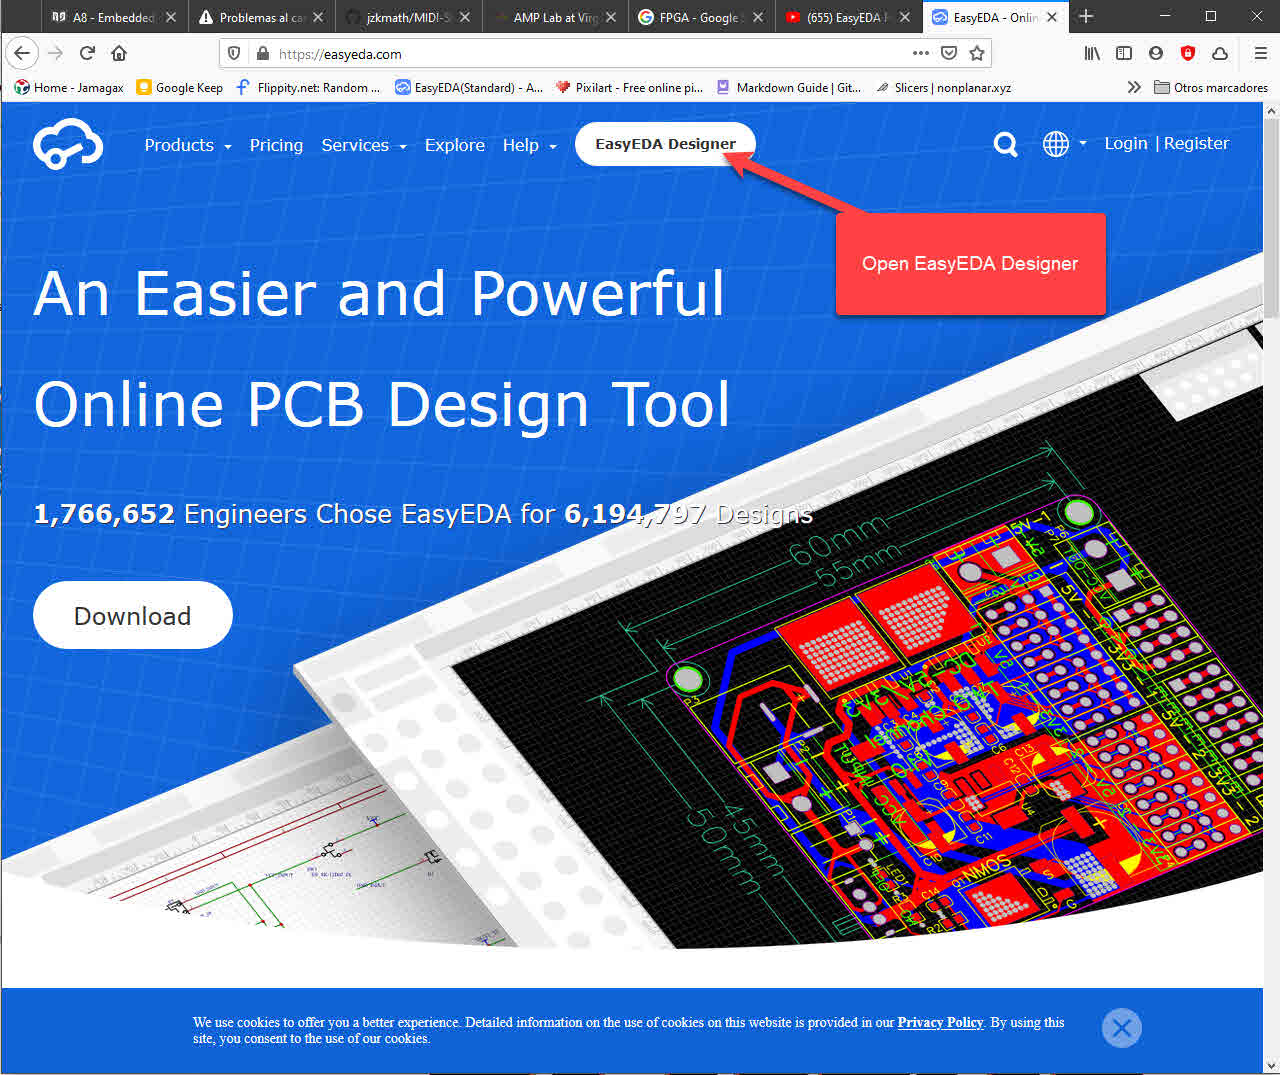
You have to enter Easy EDA Editor, you can download an installation file or run your project online, you have to register in Easy EDA.
In the main page go to "EasyEDA Designer"
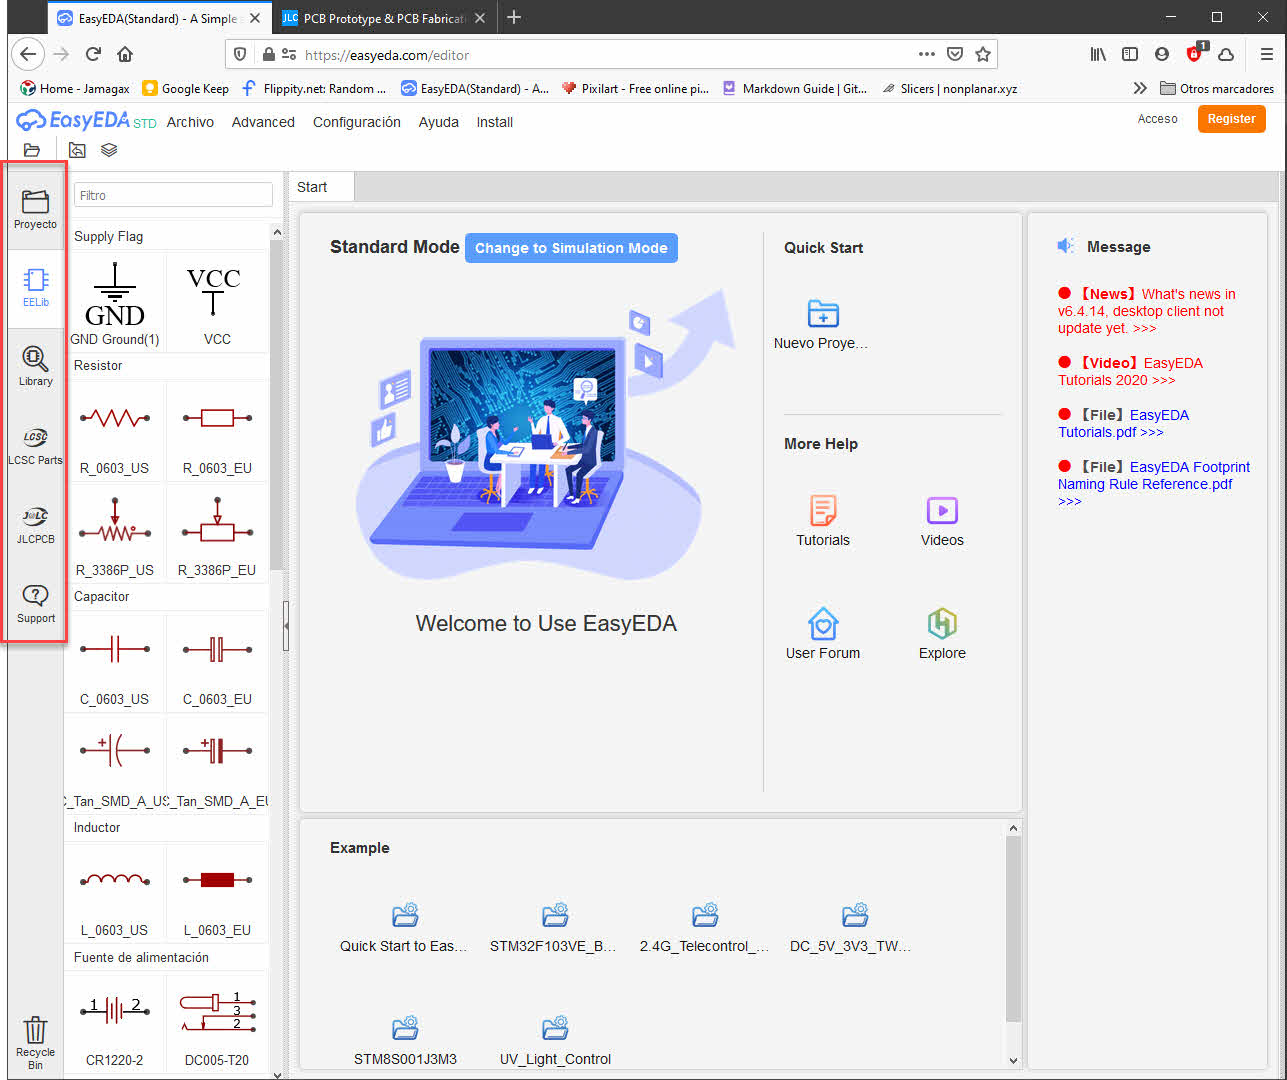
How to create a project:
Click on the main menu and create a new schematic.
Name the project and add a description, after you can save the project.
In the left side you can choose your project, components, libraries, parts and you can send directly to (JLCPCB)[https://jlcpcb.com/] to manufacture your boards.
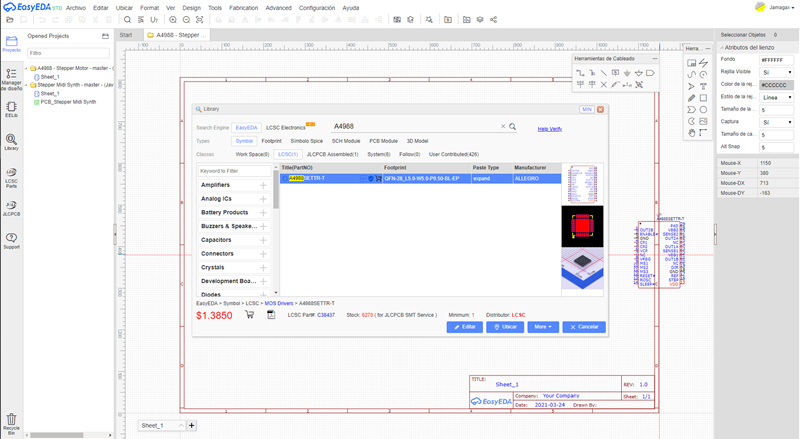
The libraries in Easy EDA are divided by Search Engine, Types or Classes as many other PBC Design Programs you have to find the part, the libraries and the footprint of your components, you array them in the canvas and connect the relationships with the line tool you can also use the port component to assign a unique id to a connection and keep the project more organized.
BOM
I look up for the parts of my BOM.
| Name | Quantity |
|---|---|
| Pololu_Breakout_A4988 | 4 |
| 47uF | 4 |
| 330nF | 1 |
| 100nf | 1 |
| 1N914BWS | 1 |
| Motor | 4 |
| Power | 1 |
| 61300811121 | 2 |
| 1x6HEADER-A500Components | 1 |
| Socket_Arduino_Uno:Socket_Strip_Arduino_1x10 | 1 |
| 220 | 2 |
| 4.7k | 1 |
| MIDI Connector | 1 |
| 6N138 | 1 |
| LM7809T | 1 |
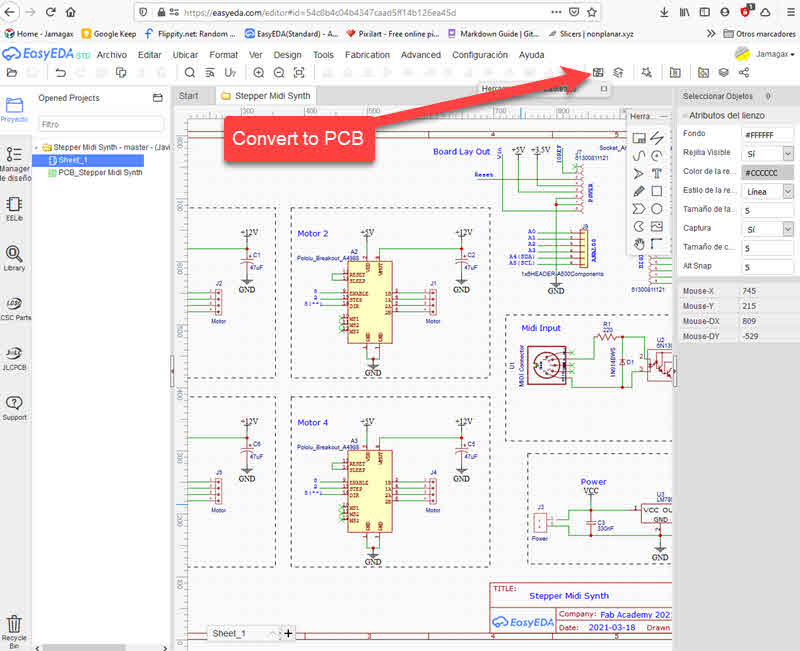
I divided my project in different parts and connect each of them in the schematic board.
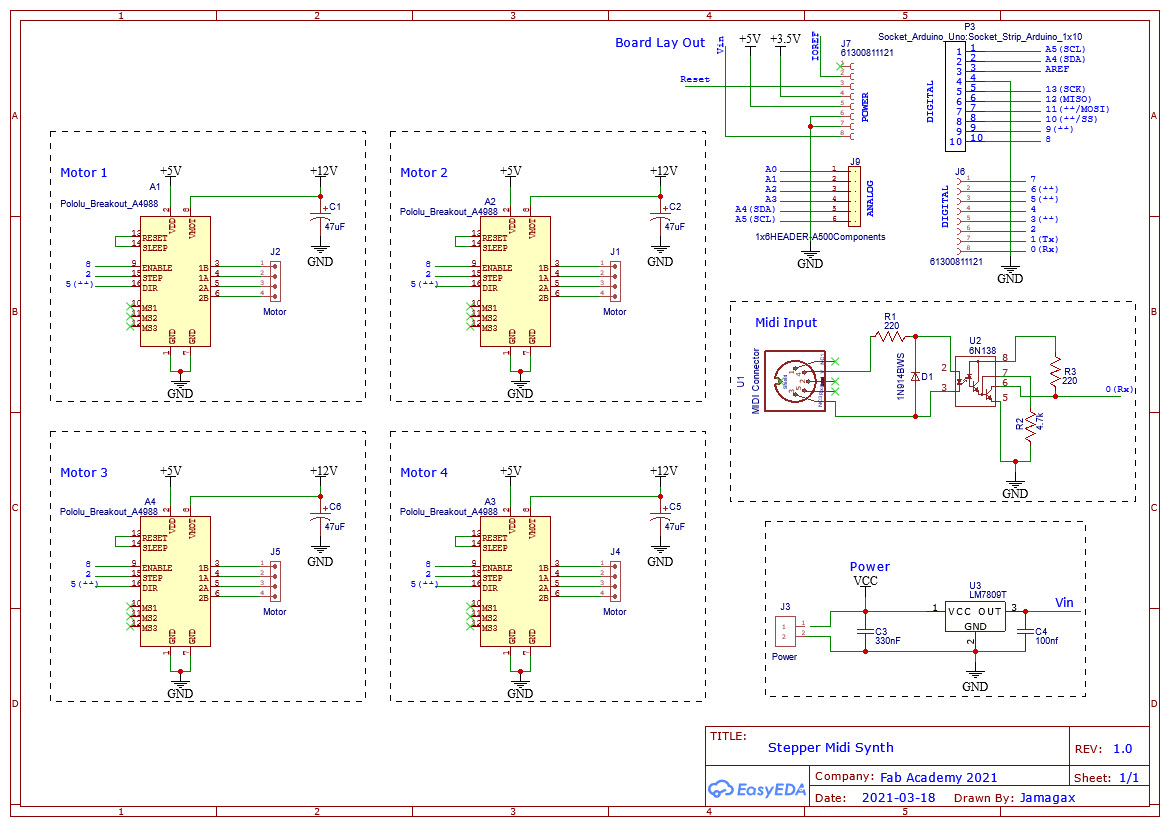
Power

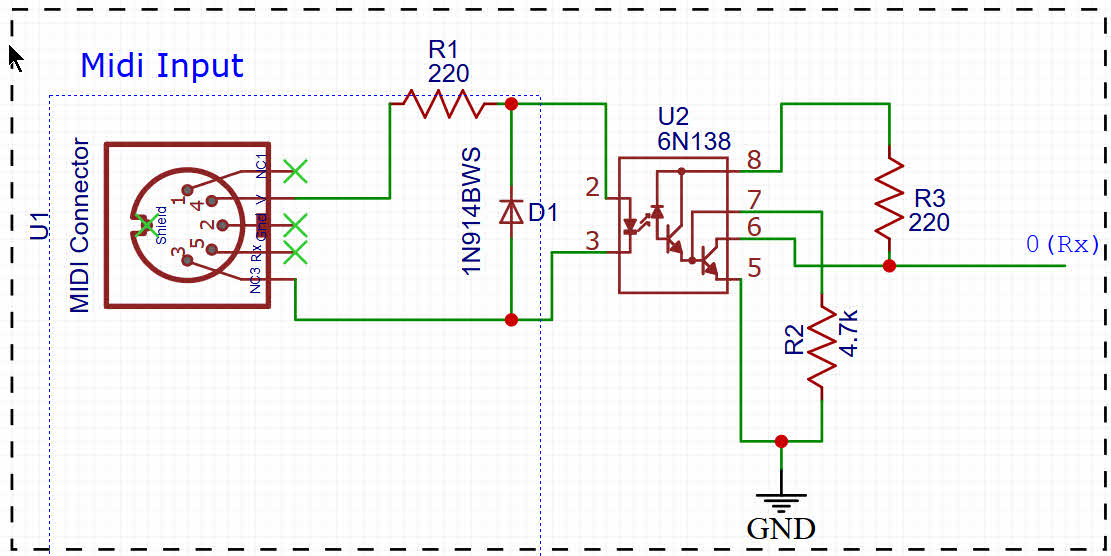
Midi
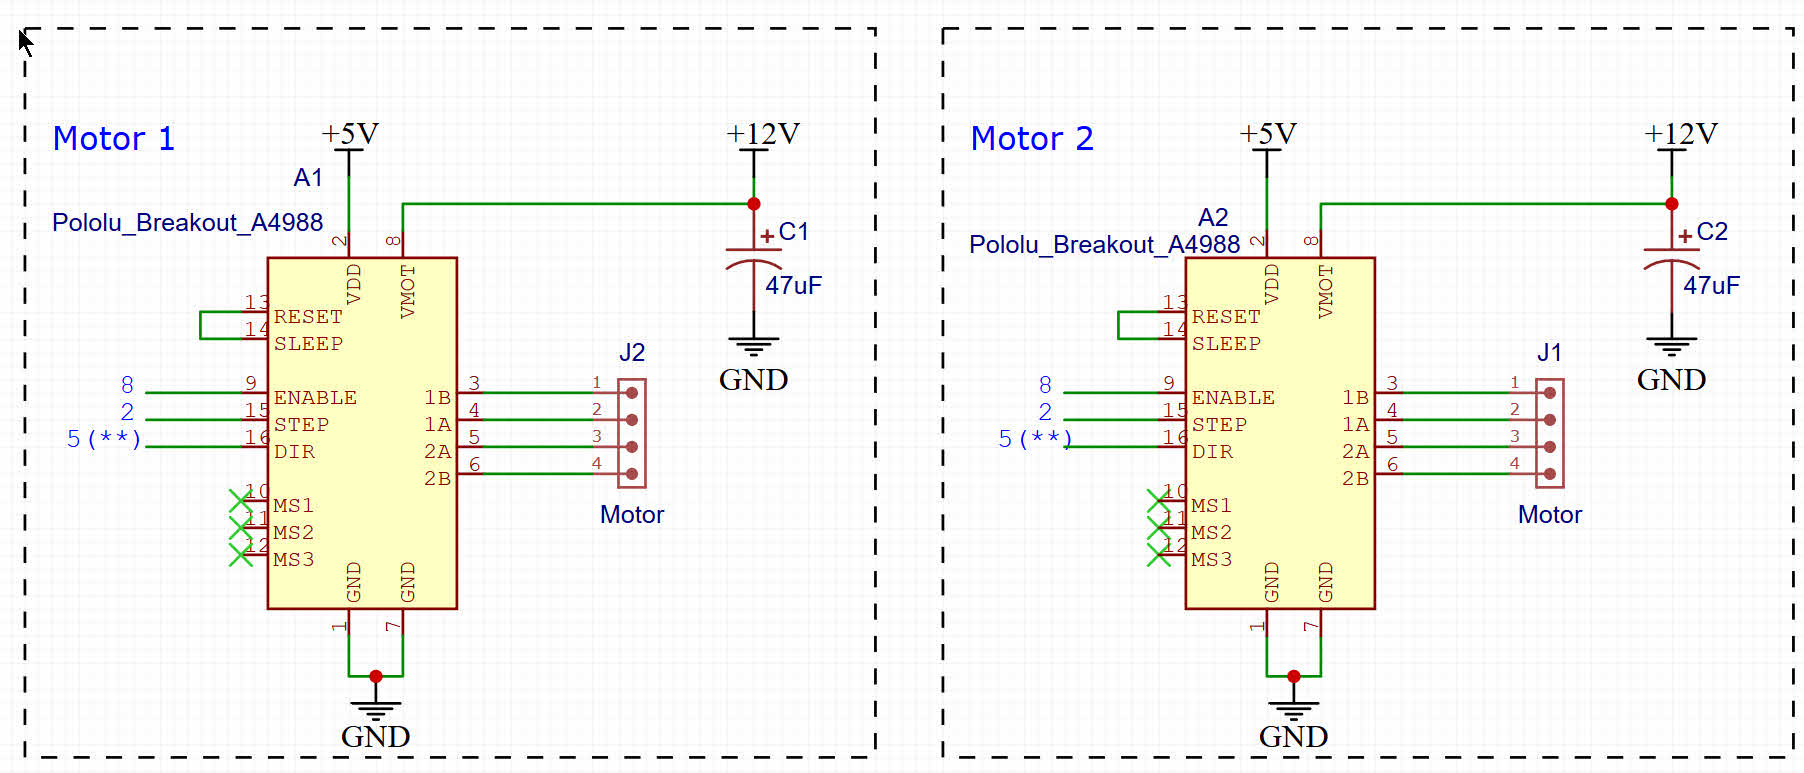
Motors
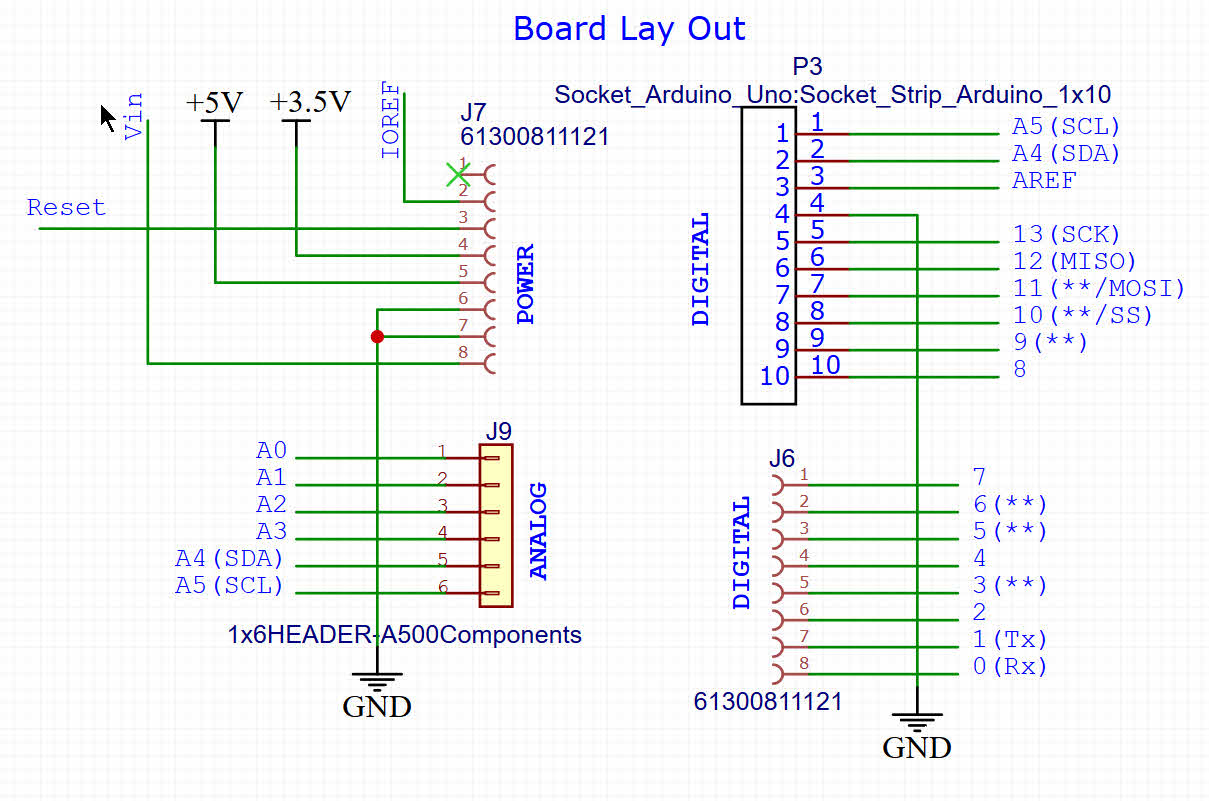
Board Lay Out
After wiring all the connections you can convert to PCB.
Teamwork
Version control
Create schematic Symbol
PCB Foot Print
Bind or Create 3d Model
Find Components
Simulation
Schematic from simulation
PCB Layout
MIDI Controller
BOM
[https://easyeda.com/component/Pololu_Breakout_A4988-bf27b0ace2db497e972dc111910f216c] (Pololu_Breakout_A4988)
Checklist
- [ ] Linked to the group assignment page
- [ ] Documented what you have learned in electronics design
- [ ] Explained problems and how you fixed them, if you make a board and it doesn't work; fix the board (with jumper wires etc) until it does work.
- [ ] Included original design files (Eagle, KICad, - whatever)
- [ ] Included a 'hero shot of your board
- [ ] Loaded a program and tested if your board works