A2 - CAD Modelling
Since 2005 I´ve been teaching 3d modeling for industrial Design and Architecture.
As part of my Fab Academy research in Computational Design, last year I decided to publish a Computational Design Encyclopedia, is´s about to be printed and publish in 2021.
A 2.1 Use and practice a bitmap software editor
Process:
In this Assignment we have to try some 2d and 3d drawing and modeling software. The recommendation in the class was to use Inkscape to make vectorial drawings and Gimp for bitmap processing. Both softwares are free and open source. I already tried both programs and I don't feel very comfortable using them, because I learn in the Adobe programs. Now I feel more comfortable with the Affinity software, that is an affordable solution to de Adobe Suite with almost all the same tools.
You can download them from here. Affinity
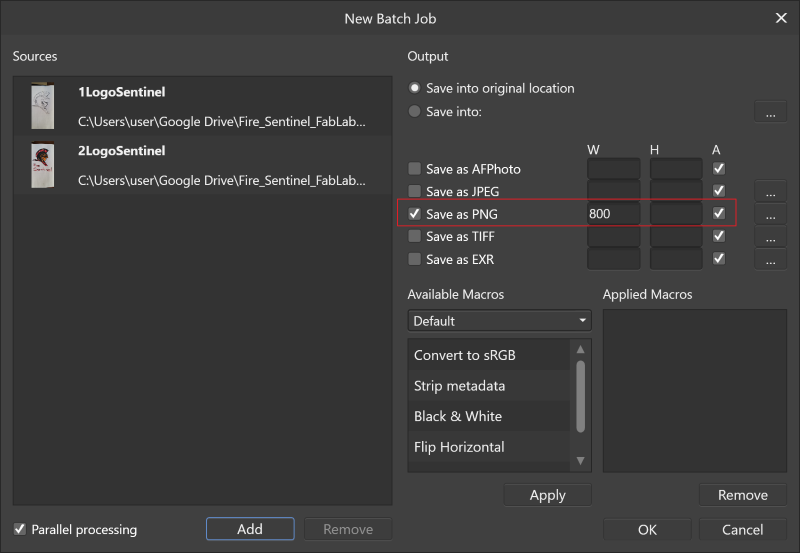
Batch Image Optimization on Affinity Photo
I utilize Affinity Photo to optimize the file size and format of the sketches of the logo for my final project. I use the batch process to resize and change the format of the pictures taken in my celular phone.
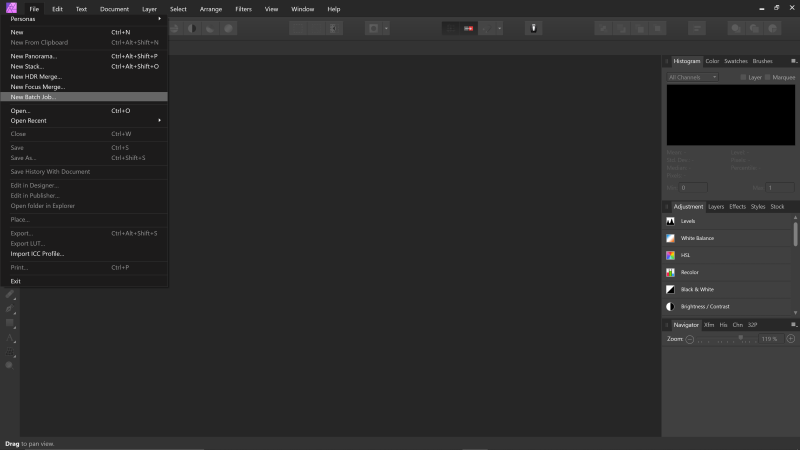
The software automatically resize all the images, rename them and ask if you want to save in the same folder or in another.
A 2.2 Use and practice a vector drawing software editor
Objective:
To practice vectorial drawing.
Process:
I utilize Affinity Design to make the vectorial drawing of the logo.
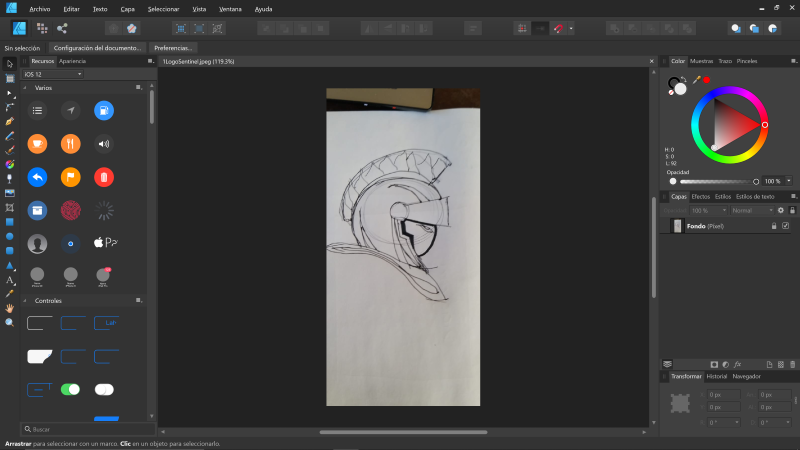
Mainly I deform primitive shapes as circles to generate the main lines.
I use the boolean intersection and subtraction to clean the main shapes.
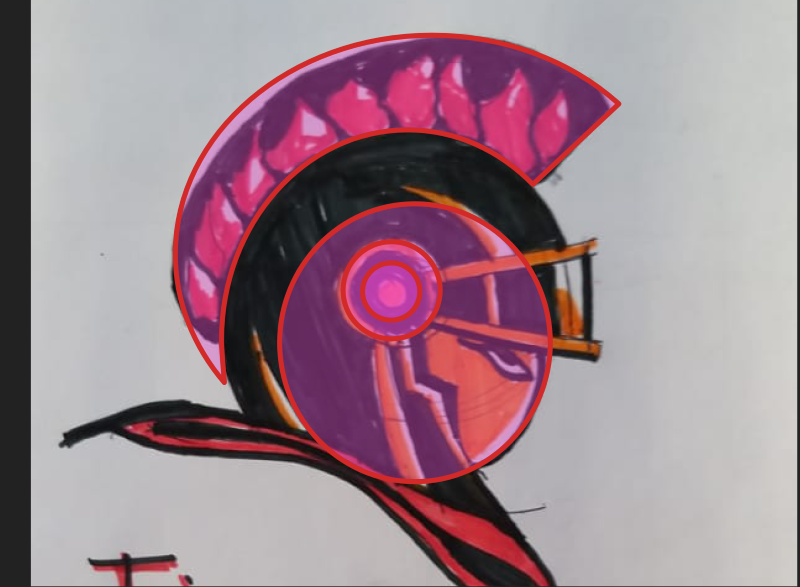
With the pen tool I draw the small reflections and details.

This is the final result, in the future want to explore with another fonts put some more detail in it.It was nice to do vectorial drawing again since it was a wile i didn't do it.

A 3.a Parametric 3d model - System System
Process:
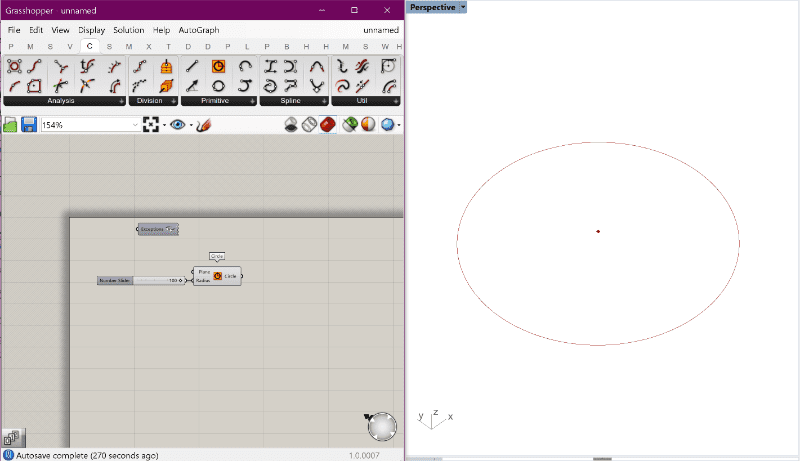
I design a circular joint test to verify the joint clearance of the laser cutter in Grasshopper 3d.
In Grasshopper I define the radius of a circle and I find the center of the circle.
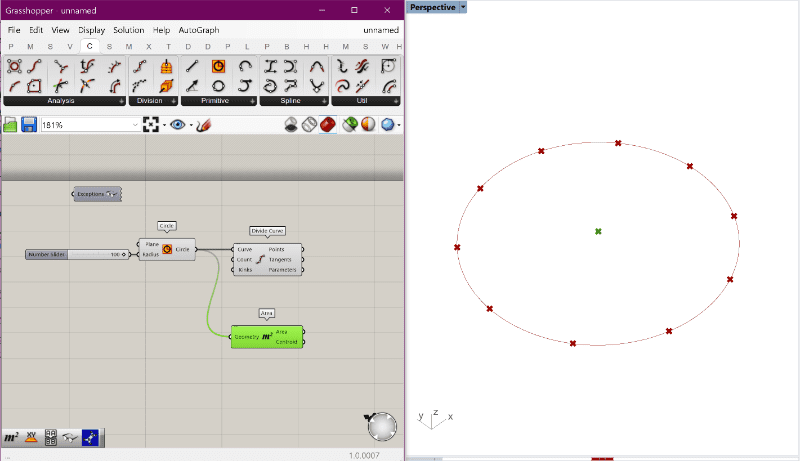
I parametrically divide the circle in 10 parts.
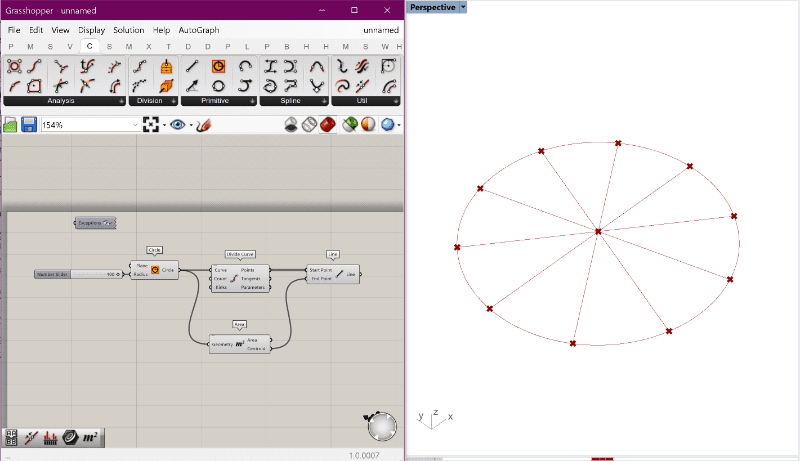
I connect the divisions with the center of the circle.
Then I offset with cap the lines in increments of 0.2 mm to have orientated rectangles.
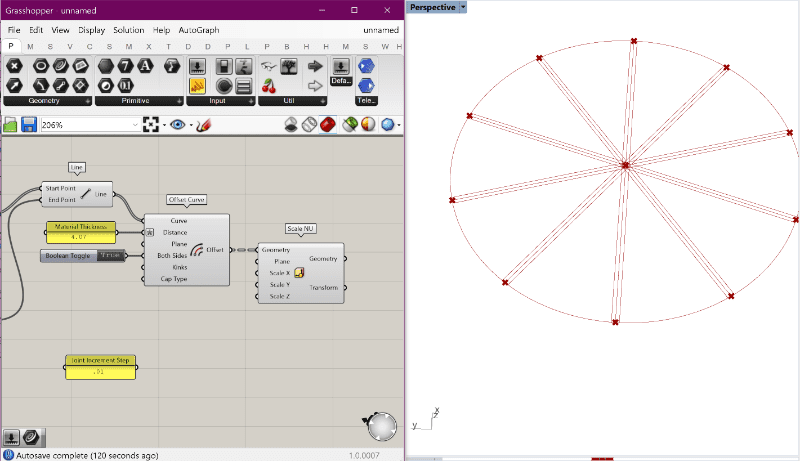
I have to find the perpendicular planes for the divisions.
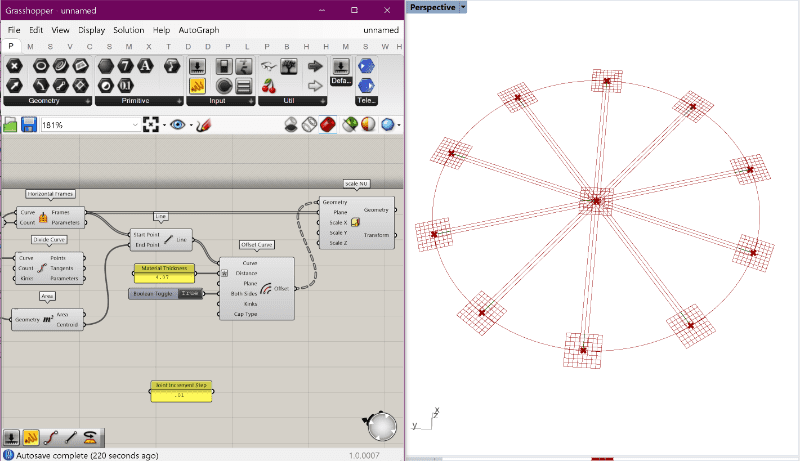
With the perpendicular planes I scale 1D the rectangles.
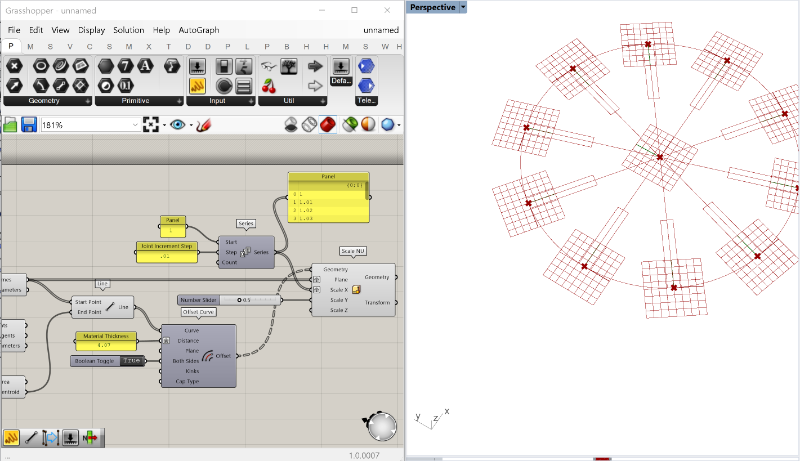
After the scale with 2 sets off regions, one is the circle, and the another are the closed rectangles.
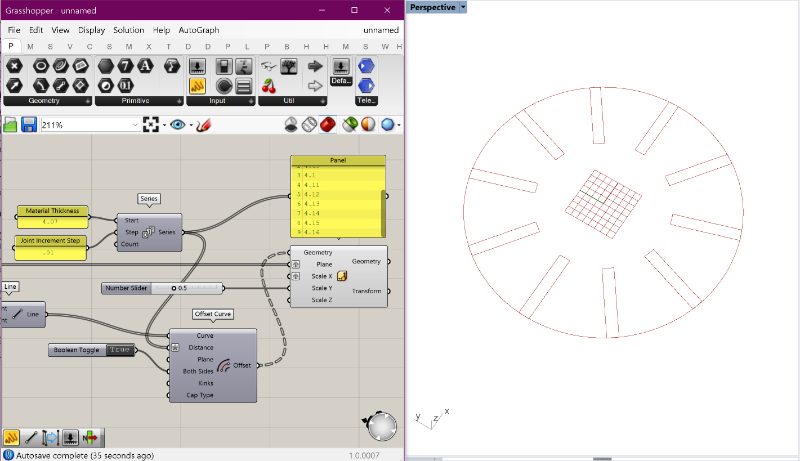
Then I use the "Region difference" command to extract the intersections of the regions.
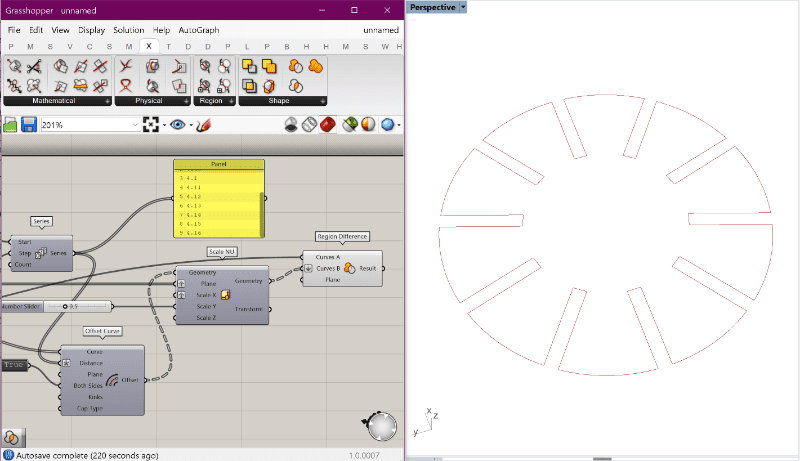
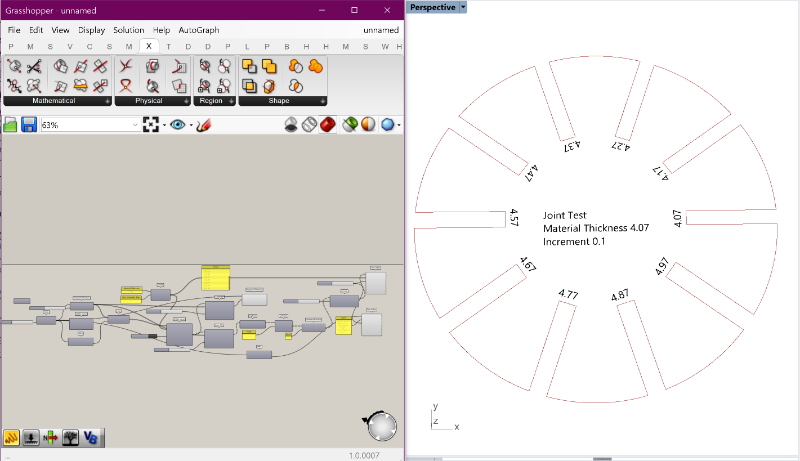
I used a text 3d tag to display the resulting numbers of the increments.
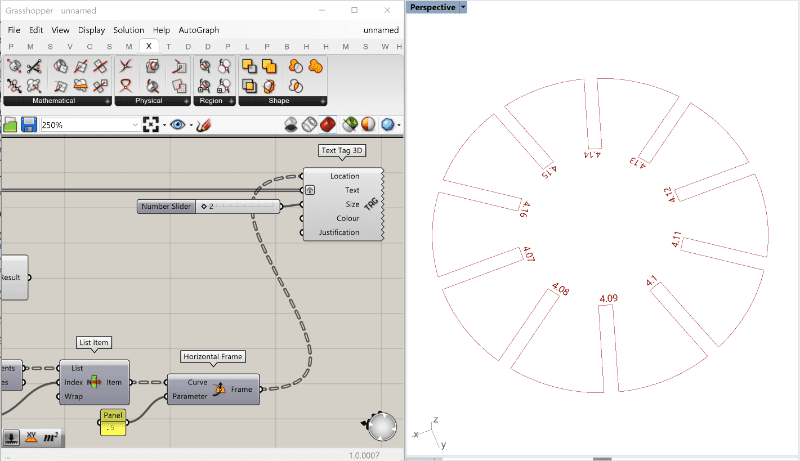
This is the final result.
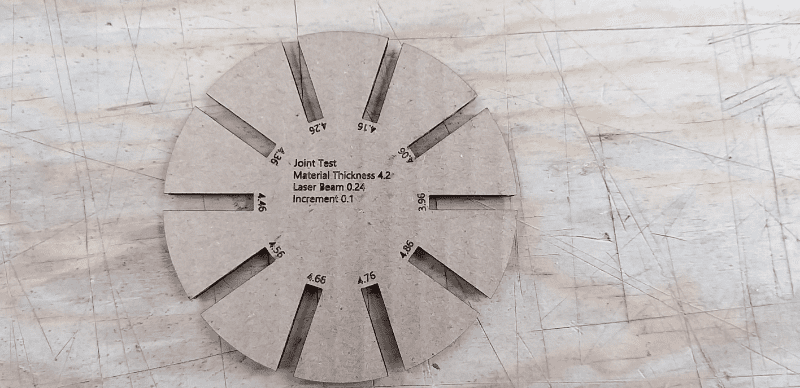
Test Assembly
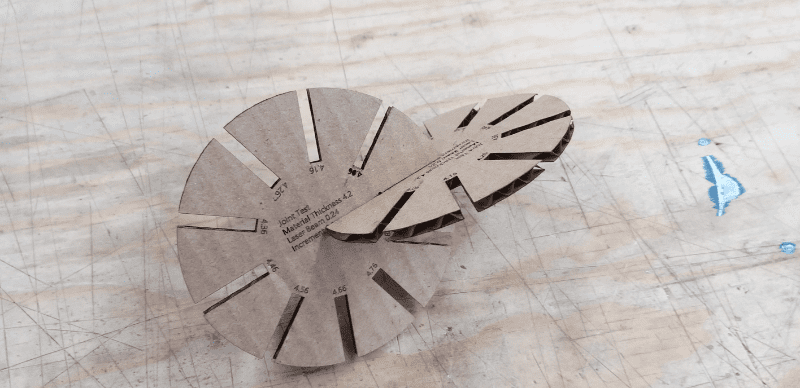
[Download Grasshopper File]
Explore Parametric Modelling
In this example I model a parametric cage that envelopes a series of sensors and components.
It mainly uses a bounding box that surrounds all the components, the top cover is made by an inclined plane where the edges between the face and the boxes are connected by a loft, I smoot the shape using subdivision surfaces.
Individual Assignment - Second Try
Sub División Modelling
Sub Division Bench
For the individual assignment, I design a small bench for my daughter, we have a bench at the dining table but it´s very tall for her, so she gets more distracted when eating because she´s uncomfortable.
I measure the bench, and my daughter to get de dimensions.
The external measurements are: 330 x 300 x 120 mm
I choose to use the beta version of the 3d CAD modelling software called Rhinoceros, If you have a valid license of Rhino 6 you can download the beta version of Rhino 7. (Download)
The new version 7 of Rhino has new tools, and I wanted to try the new Subdivision surfaces commands. There was a very good plug in for Rhino for modelling Sub D´s that was called T-Splines but it´s no longer available. The McNeel Team now its developing its own Sub D's tools.
The shapes are like Nurbs surfaces, but the modelling style is more like the polygonal modeling, the advantages of Sub D modelling is that you can create very organic forms from very simple geometry.
The workflow is to model low polygon like shapes and then use a subdivision smoothing algorithm. The good thing of Sub D´s it´s that if you follow the simple topology rules you can always have a ready to offset or extrude mesh that its always a watertight solid.
The firs step it´s to model a Sub D box with 4 and 4 and 4 subdivisions per face with real measurements.
Cheat Sheet Image Magik and FFMPEG
Resize image to size
mogrify -quality 50 -resize 800x600 *.jpg
Convert to .avi
ffmpeg -i InFile.mp4 -OutFile.avi
To optimize quality of .mp4 - Change the value of -cfr from 0 to 100 that represents the percent of the quality
ffmpeg -i InFile.mp4 -crf 30 OutFile.mp4
To target the video file size change (-b:v 1000) the number represents file size in Bytes
ffmpeg -i inFile.avi -b:v 1000k OutFile.mp4
Specify audio and video bitrates
ffmpeg -i inFile.avi -b:v 1000 -b:a 128k outFile.mp4
Volume Multiplier
ffmpeg -i InFile -filter:a "volume=2" OutFile
Crop a Video
ffmpeg -i inFile -filter:v "crop=w=800:h=600:x100:y=200" OutFile"
Crop Video Centered
ffmpeg -i InFile -filter:v "crop=w=800:h=600:x=0:y=0" OutFile"
Channel Remapping
ffmpeg - i inpuFile -filter:a "channelmap=0-0|0-1" OutFile
Rotate video
ffmpeg -i infile -filter:v "rotate=45*PI/180" Outfile.mp4
Pictures to Video
fmpeg -i img-%02d.png OutFile.mp4
Pictures to Video w/framerate
ffmpeg -framerate 24 -i InFile-%03d.png OutFile.avi
ffmpeg -framerate 1 -i InFile-%03d.jpg -vcodec libx264 -crf 25 OutFile.mov
Make transparent A before overlaying - WIP
ffmpeg -i video.mov -i background.png -filter_complex "[1]format=argb,geq=r='r(X,Y)':a='0.5*alpha(X,Y)'[b];[0:v][b] overlay" BackAlpha.png
The number 0.5 is the opacity factor. The format=argb it also works with overlay images that don't have an alpha channel.
ffmpeg -i B.png -i A.png -filter_complex "[1]format=argb,geq=r='r(X,Y)':a='1 *alpha(X,Y)'[b];[0:v][b] overlay" A_1_Alpha_Bin.png
ffmpeg -i B.png -i A-%03d.png -filter_complex  "[1]format=argb,geq=r='r(X,Y)':a='1 *alpha(X,Y)'[b];[0:v][b] overlay"  A_1_Alpha_Bin.mp4
HTML5 MP4 ffmpeg encoding (Fab Recomendations)
variable bit rate 1080p MP3:
ffmpeg -i input_video -vcodec libx264 -crf 25 -preset medium -vf scale=-2:1080 -acodec libmp3lame -q:a 4 -ar 48000 -ac 2 output_video.mp4
fixed bit rate 1080p MP2:
ffmpeg -i input_video -vcodec libx264 -b:v 1000k -vf scale=-2:1080 -acodec mp2 -b:a 256k -ar 48000 -ac 2 output_video.mp4
no audio:
ffmpeg -i input_video -vcodec libx264 -b:v 1000k -vf scale=-2:1080 -an output_video.mp4
crop size (width:height:xoffset:yoffset):
ffmpeg -i input_video -vf crop=1500:800:200:100 -vcodec libx264 -b:v 1000k -an output_video.mp4
trim time (-ss start time, -t duration):
ffmpeg -i input_video -vcodec libx264 -b:v 1000k -an -ss 00:00:10 -t 00:00:10 output_video.mp4
mix audio and video:
ffmpeg -i input_video -vcodec libx264 -b:v 1000k -vf crop=1120:876:0:100 -i input_audio -acodec mp2 -b:a 256k -ar 48000 -ac 2 -ss 00:00:20 -t 00:00:20 output_video.mp4
crop, pan, composite:
ffmpeg -i input_video_1 -i input_video_2 -filter_complex '[1:v]crop=175:95:930:860[cropout];[cropout]scale=350:190[scaleout];[0:v][scaleout]overlay=10:10[outv]' -map '[outv]' -vcodec libx264 -b:v 1000k -map 0:a -acodec mp2 -b:a 256k -ac 2 -t 00:00:05 output_video.mp4
numbered images to video:
ffmpeg -r 30 -i %04d.jpg -vcodec libx264 -b:v 1000k -vf scale=-2:1080 -an output_video.mp4
To insert video to HTML