Molding and Casting:
What is molding and Casting and how it works.
What is molding and Casting and how it works.
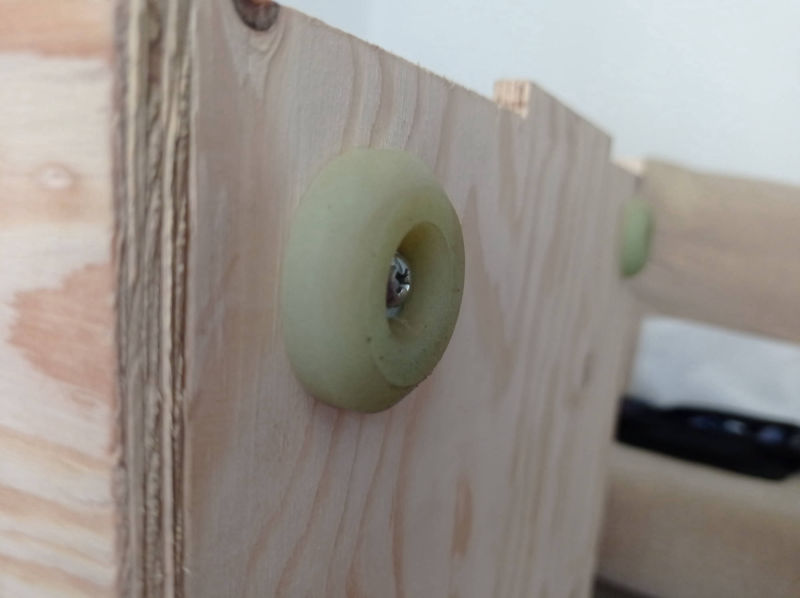
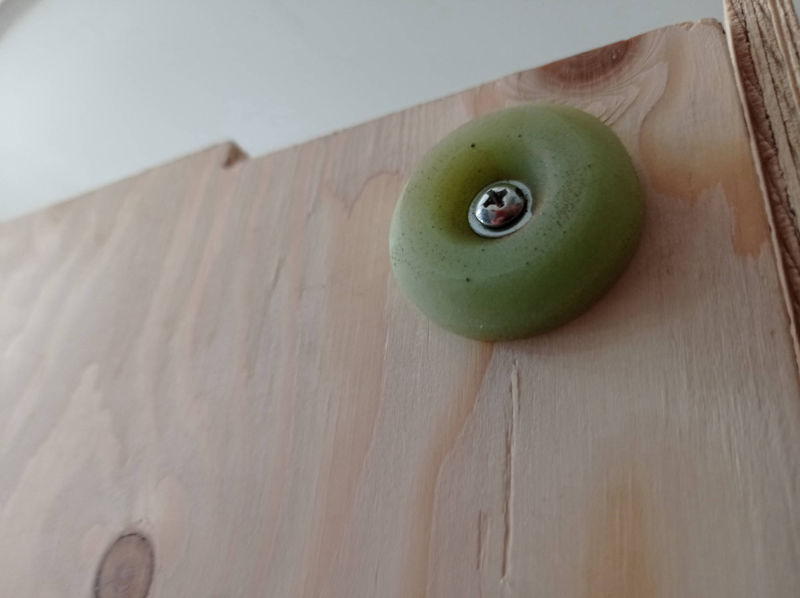
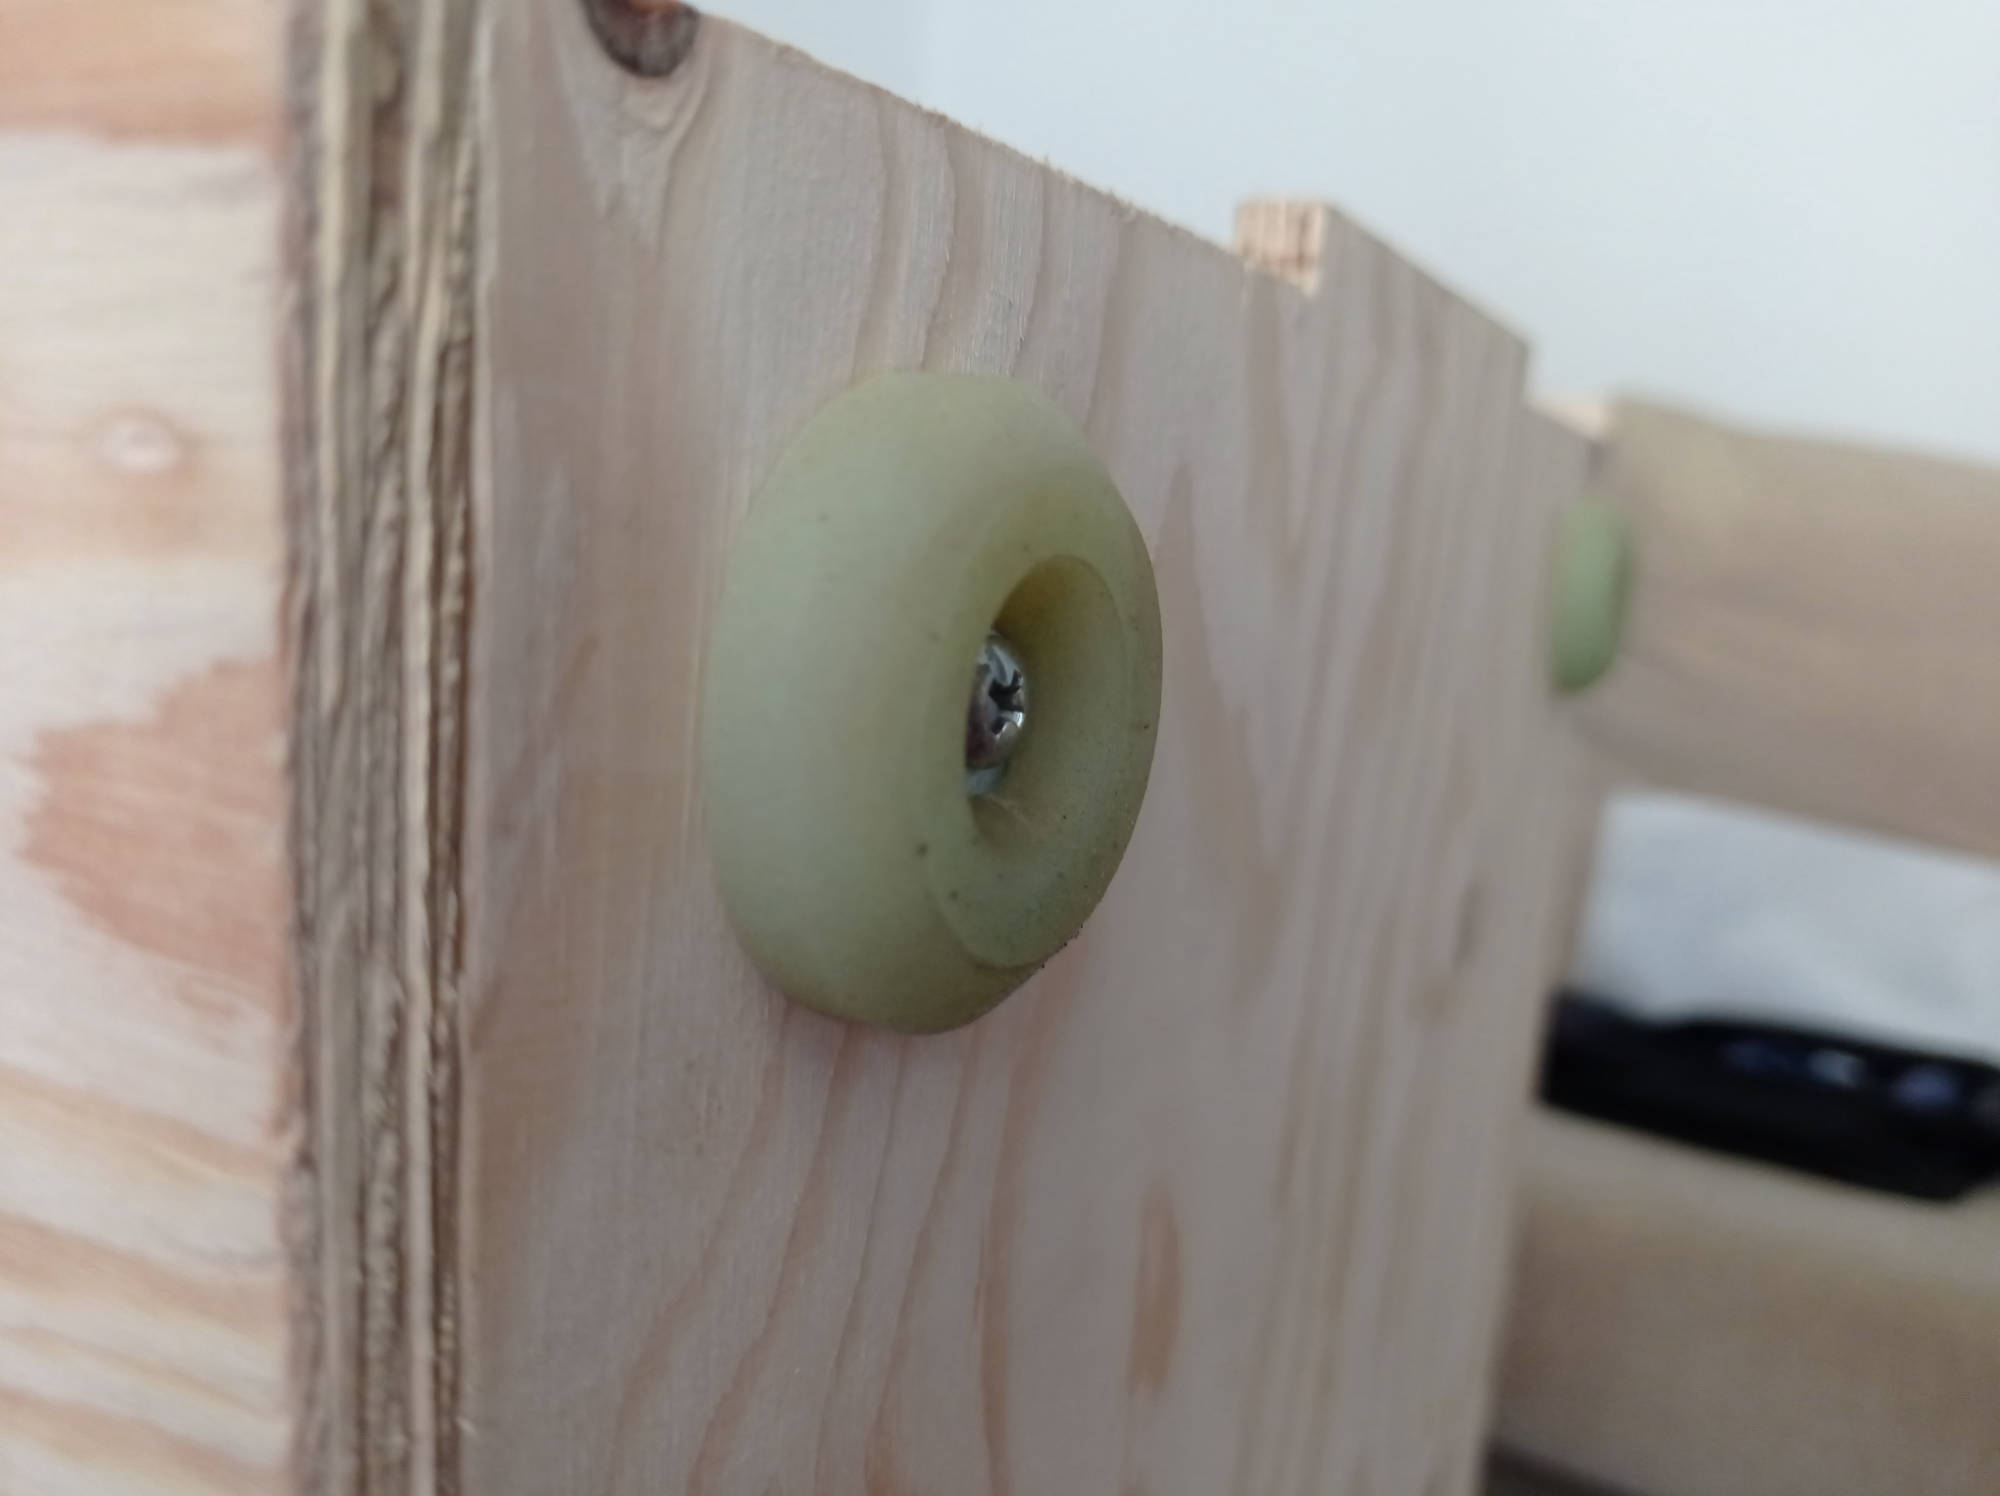
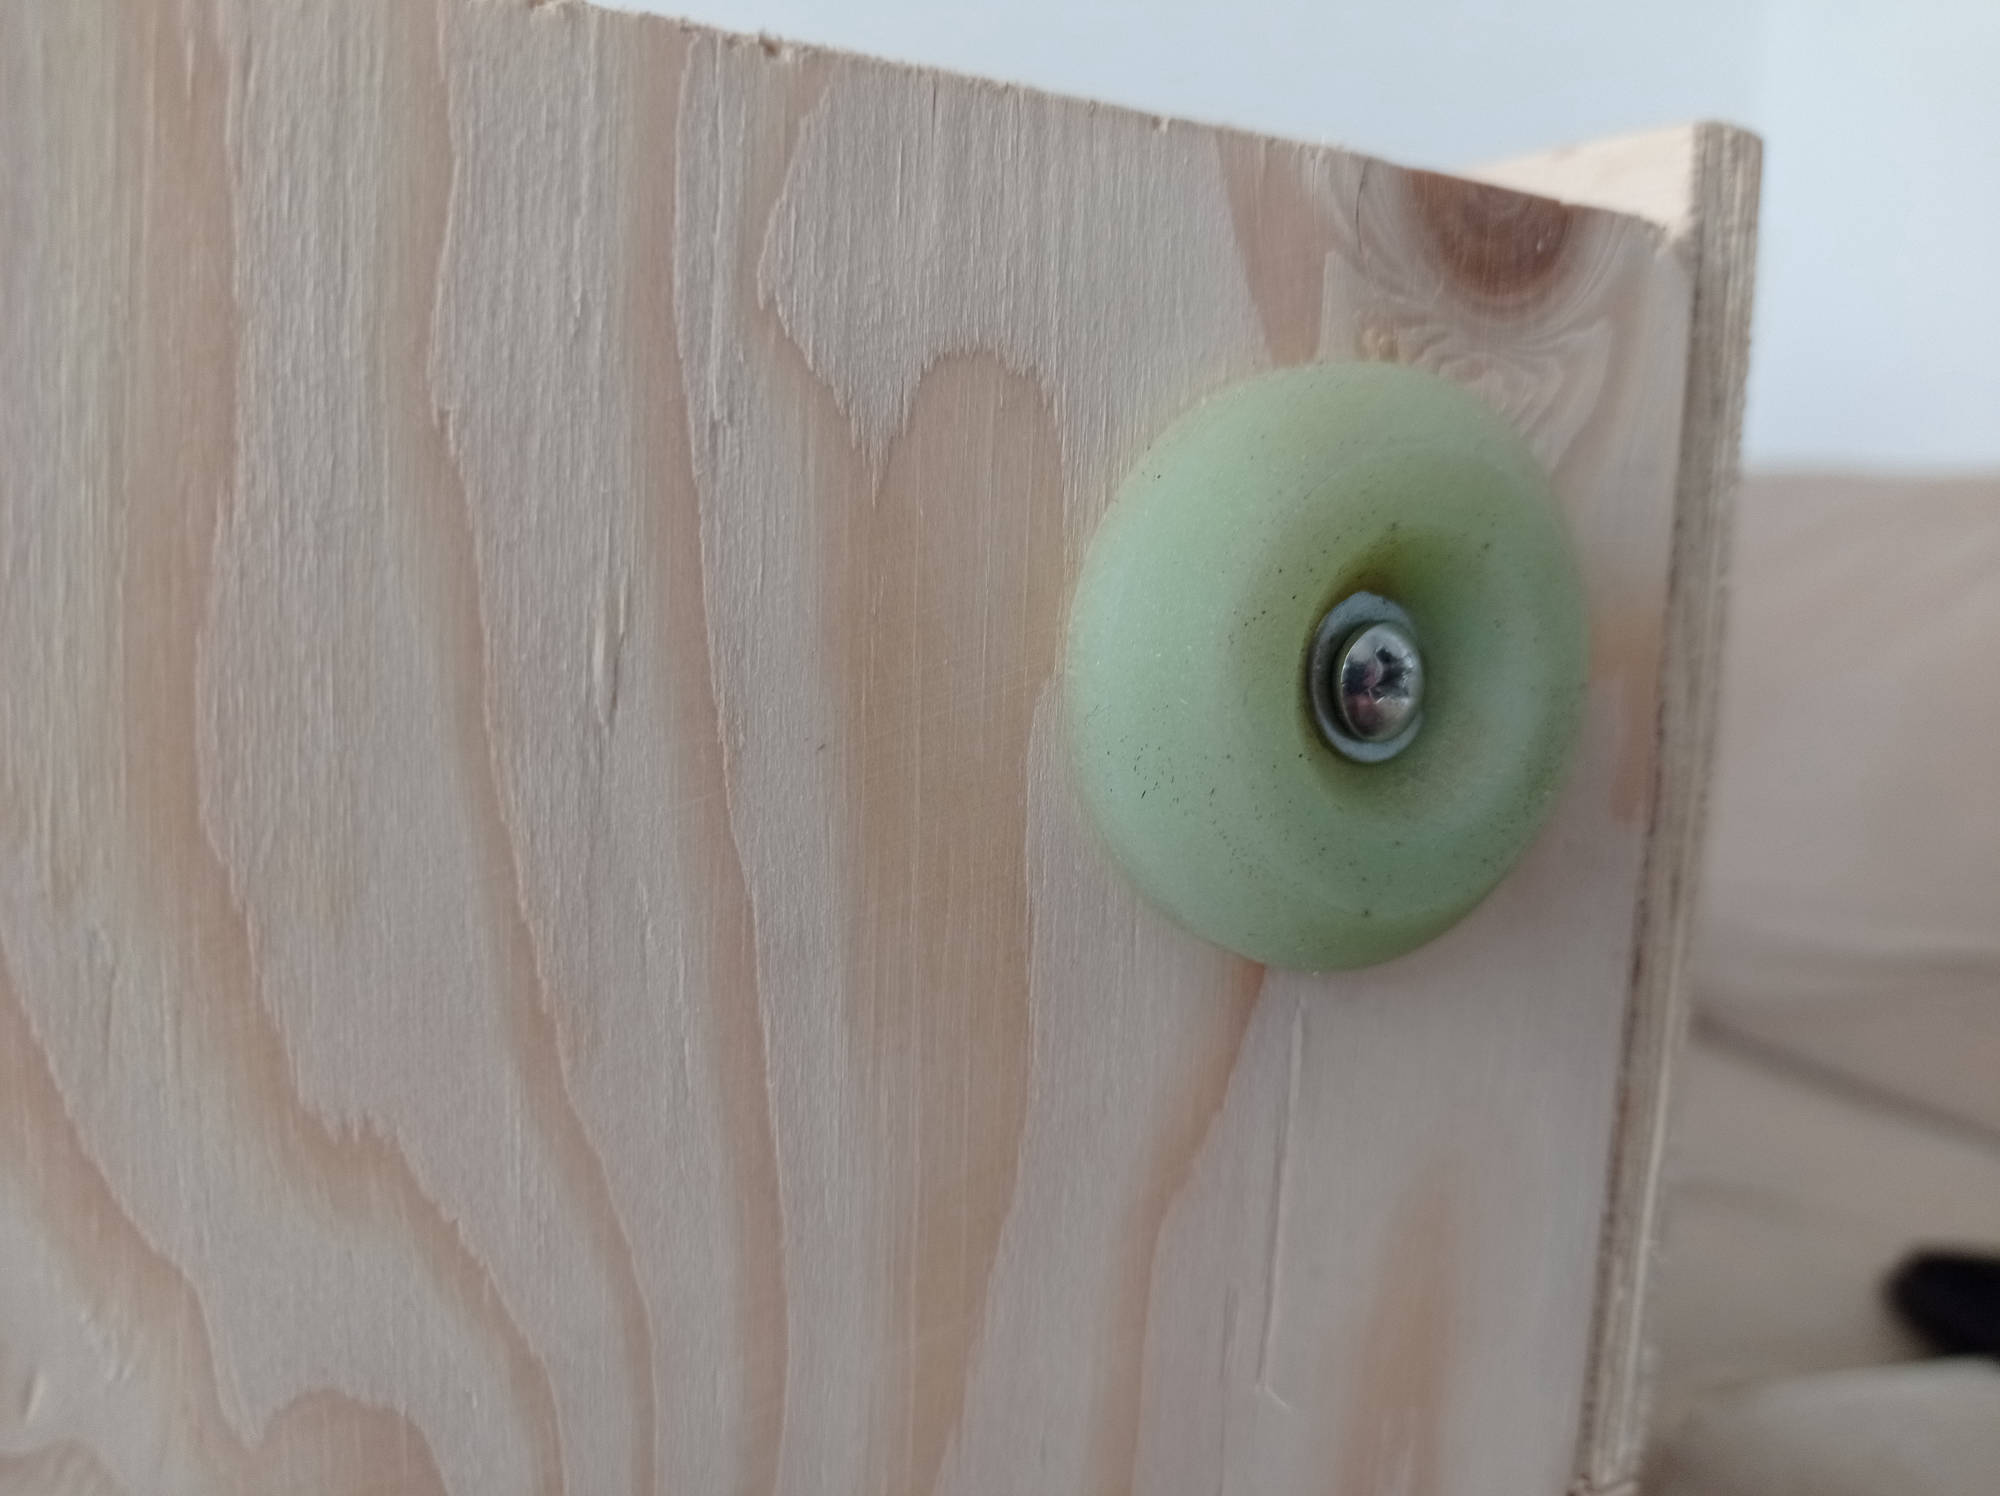
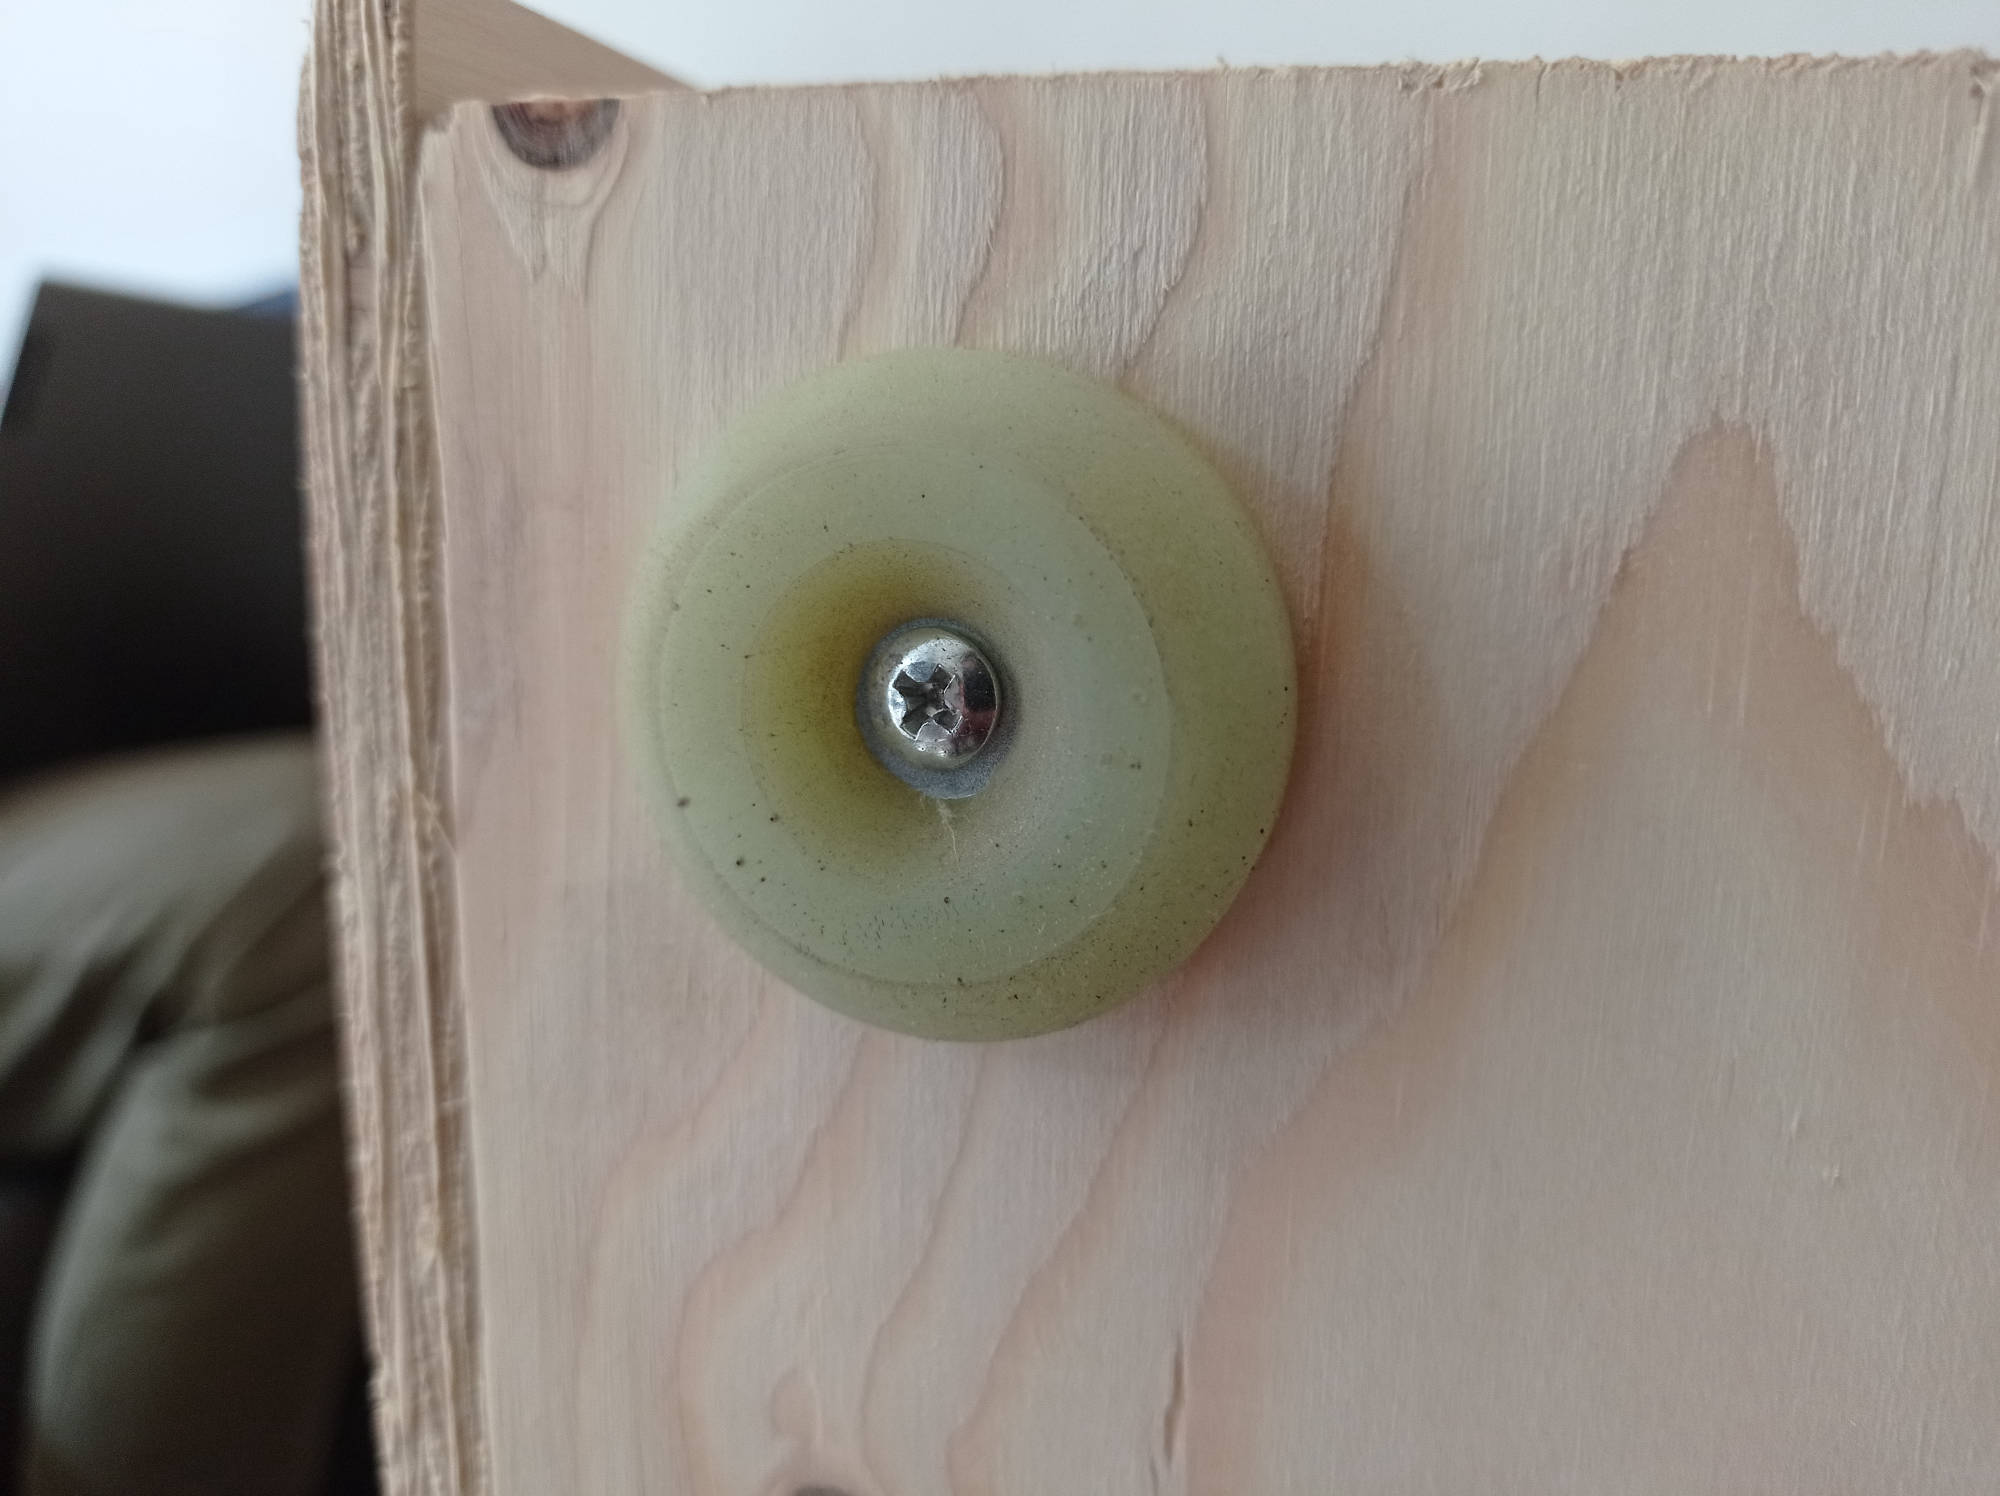
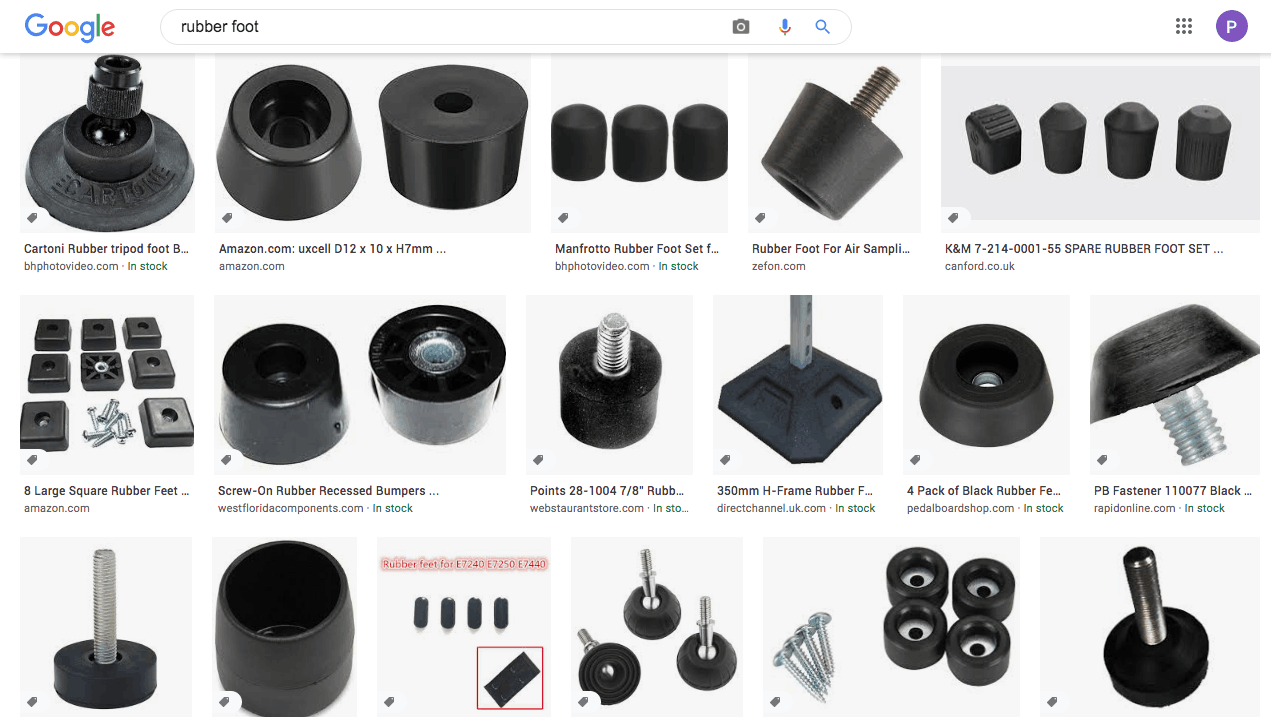
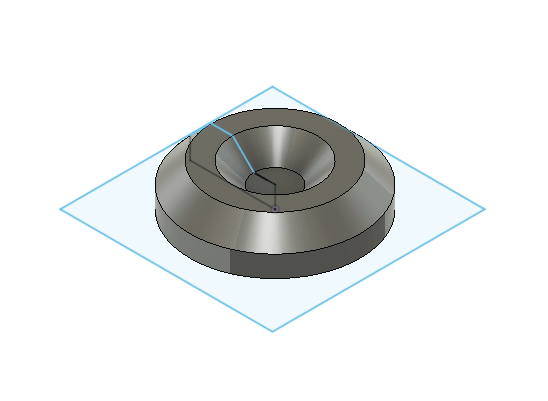
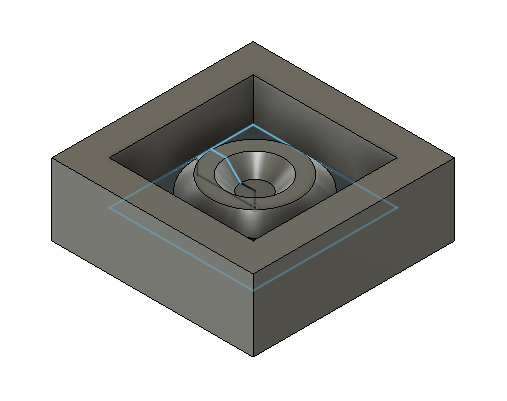
Some references about the "Rubber Foot" I want to create for my project.
Thing to keep on mind at the moment of creating the first mold.
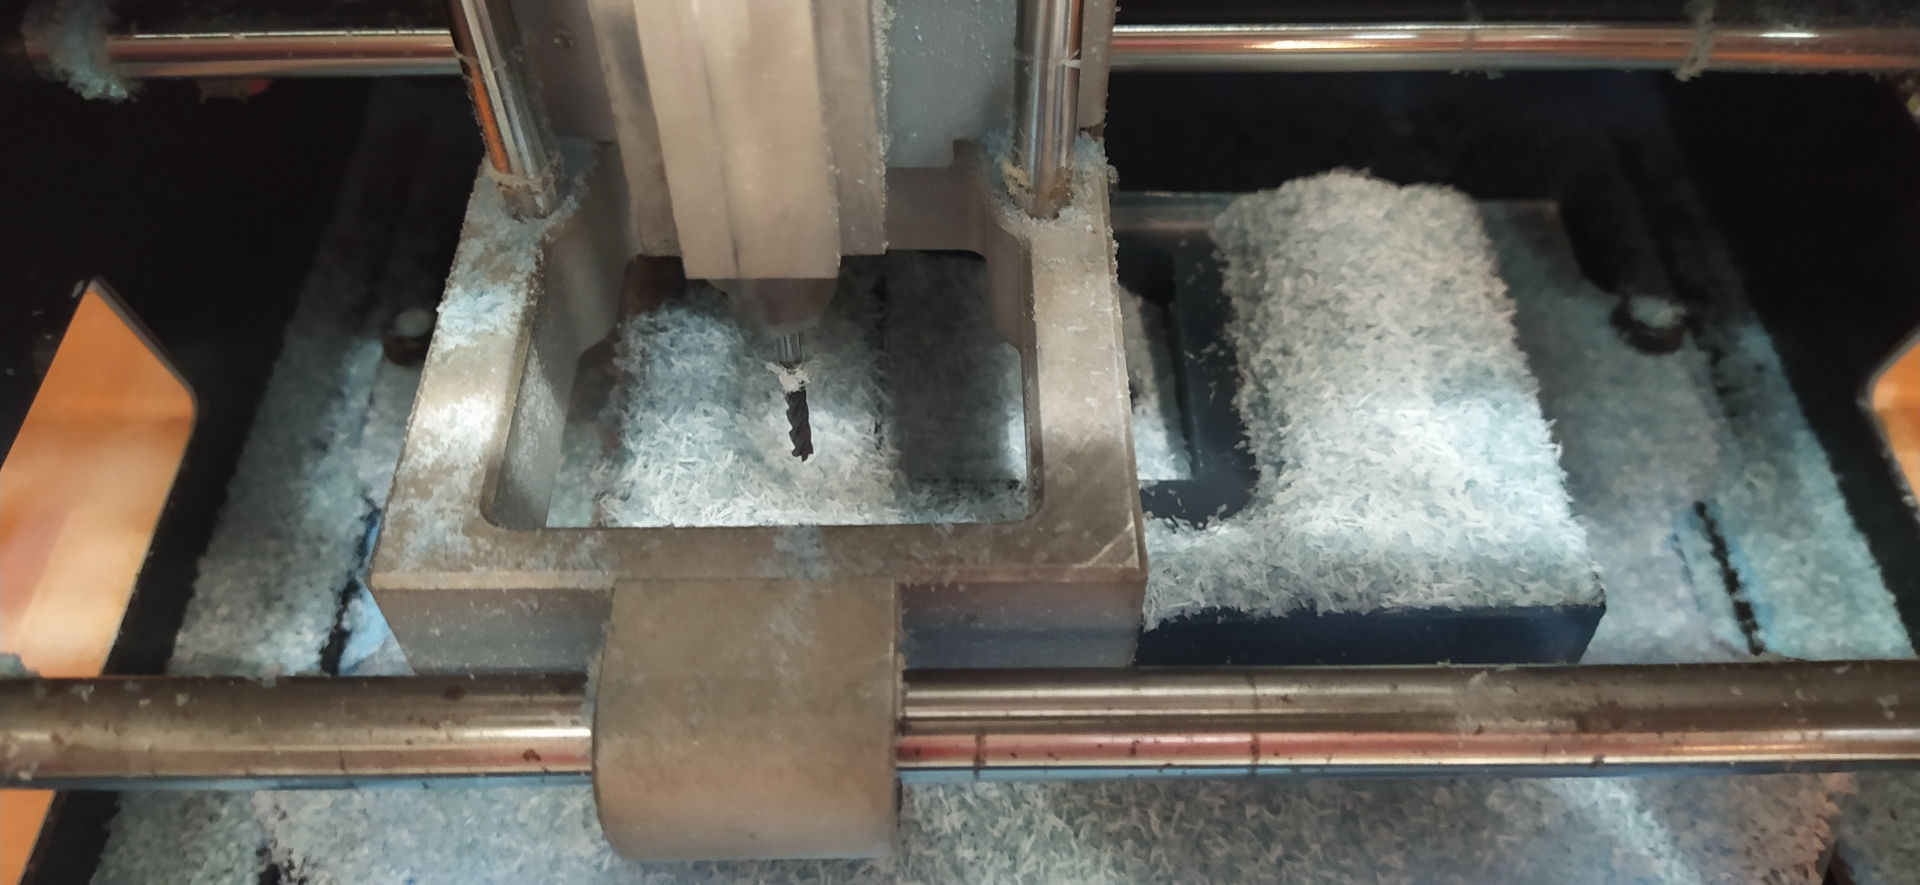
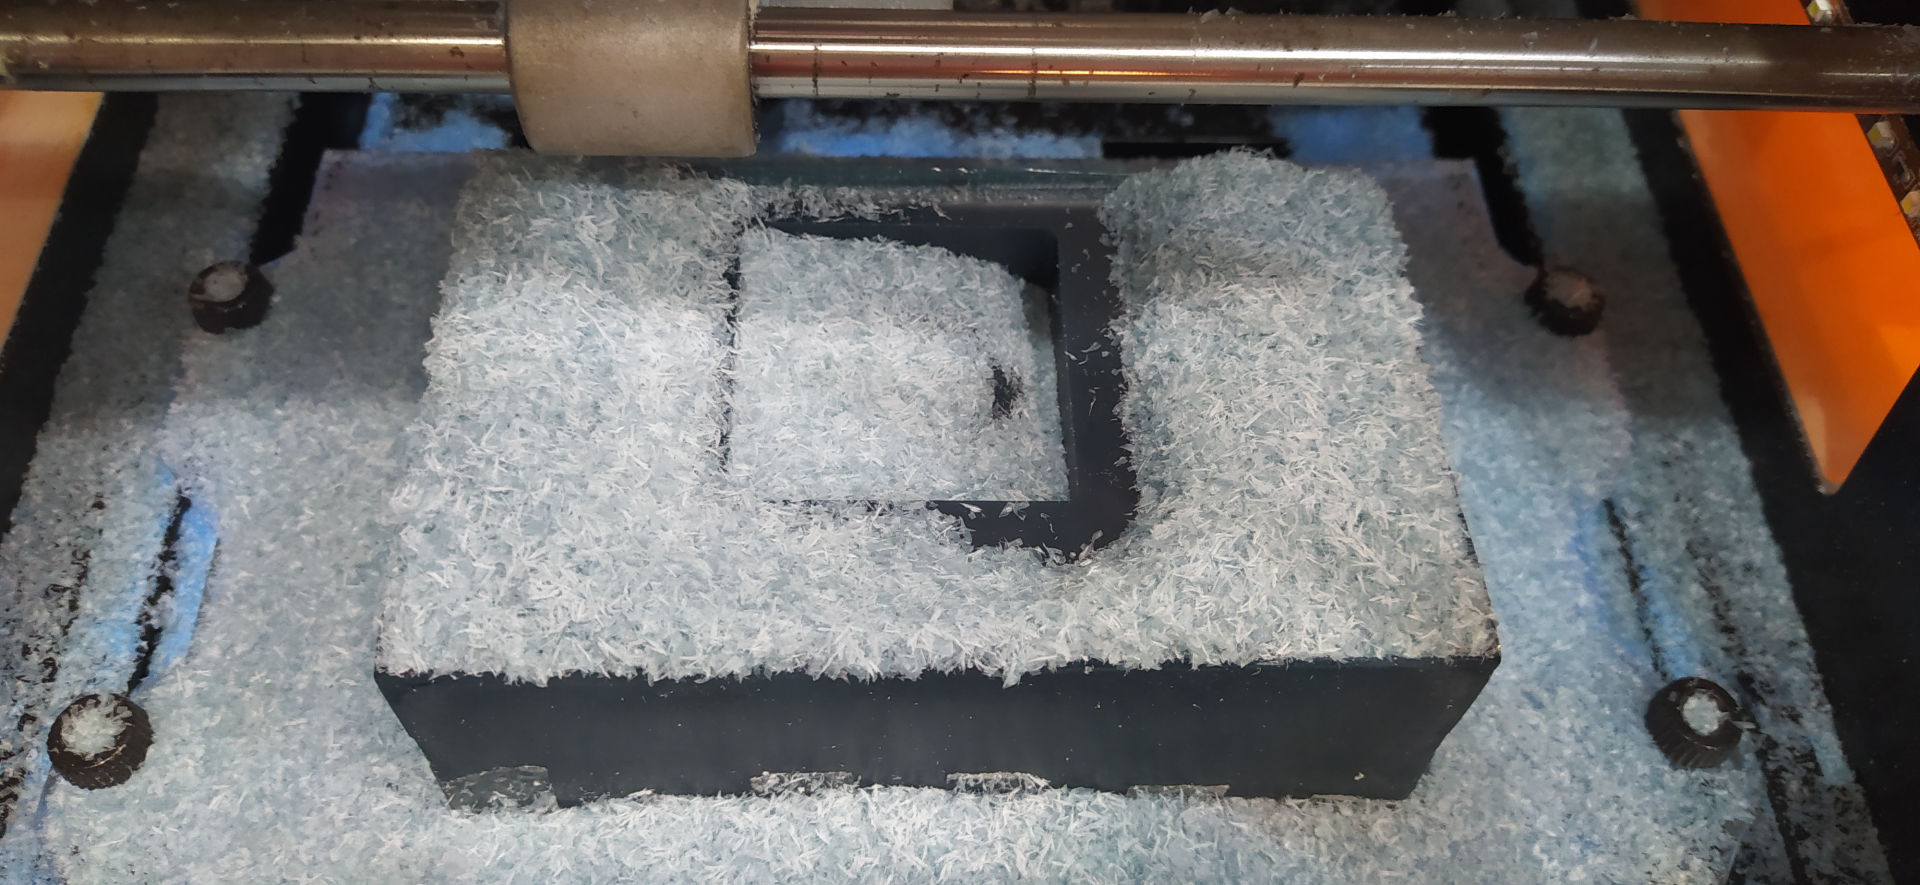
Here is the process to create the wax block and to mill it.
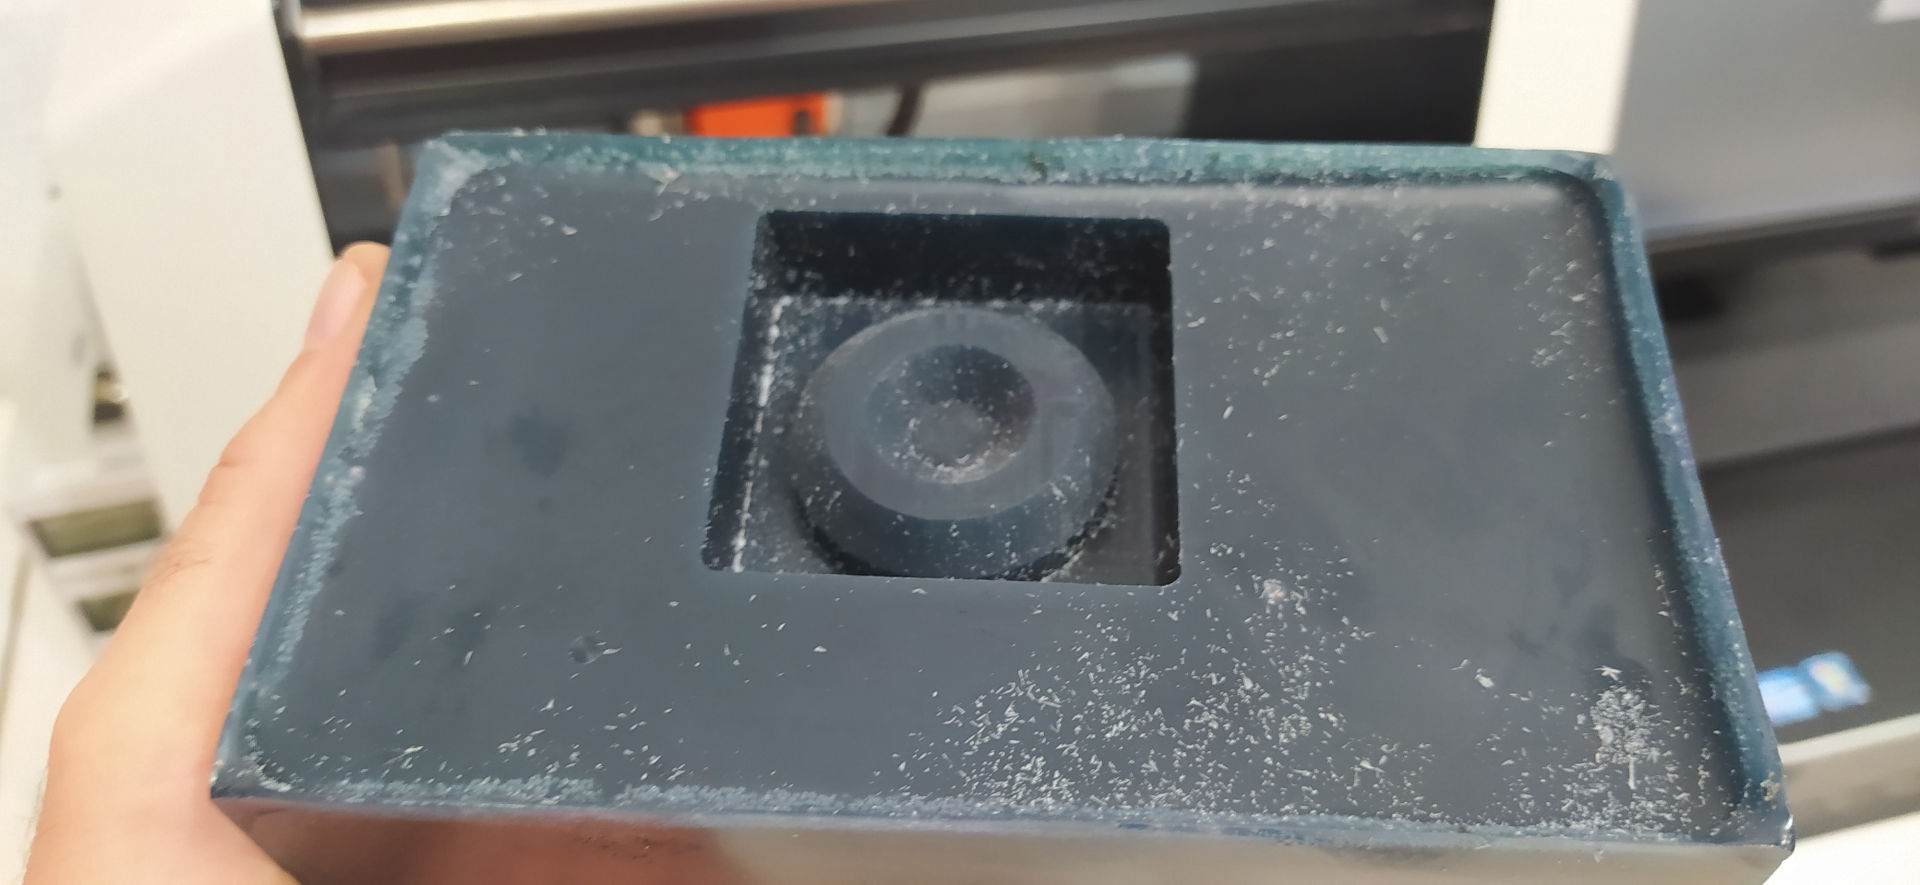
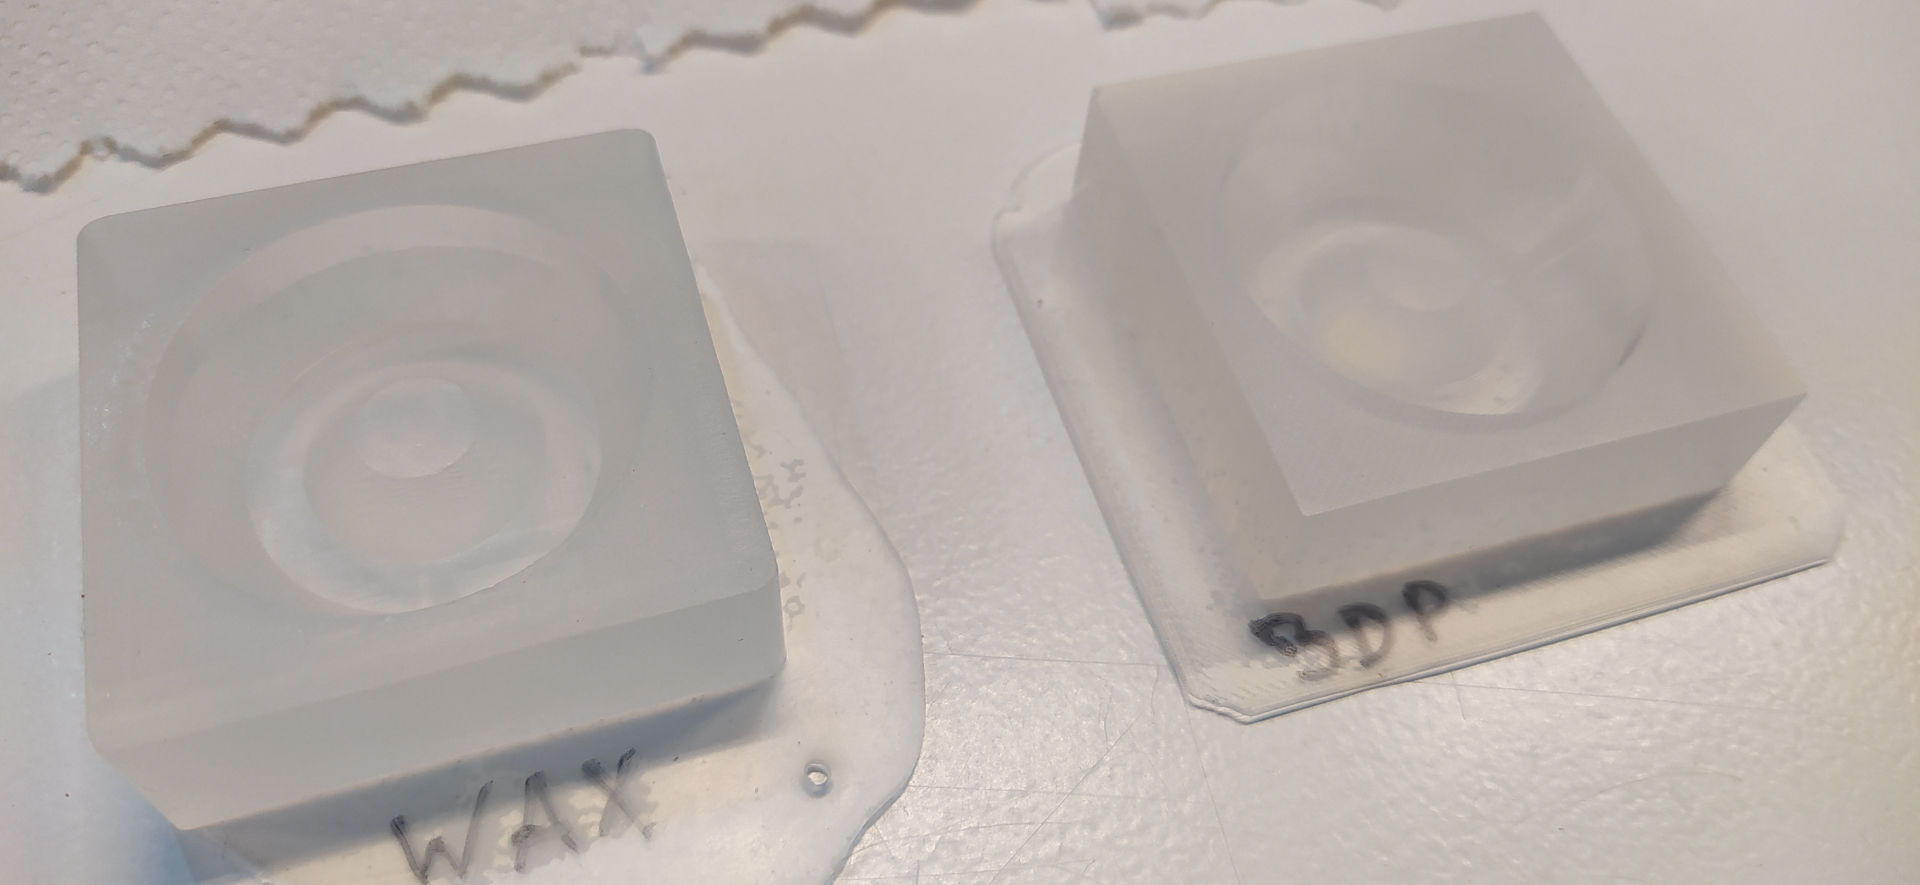
Specifications for my 3D printed version.
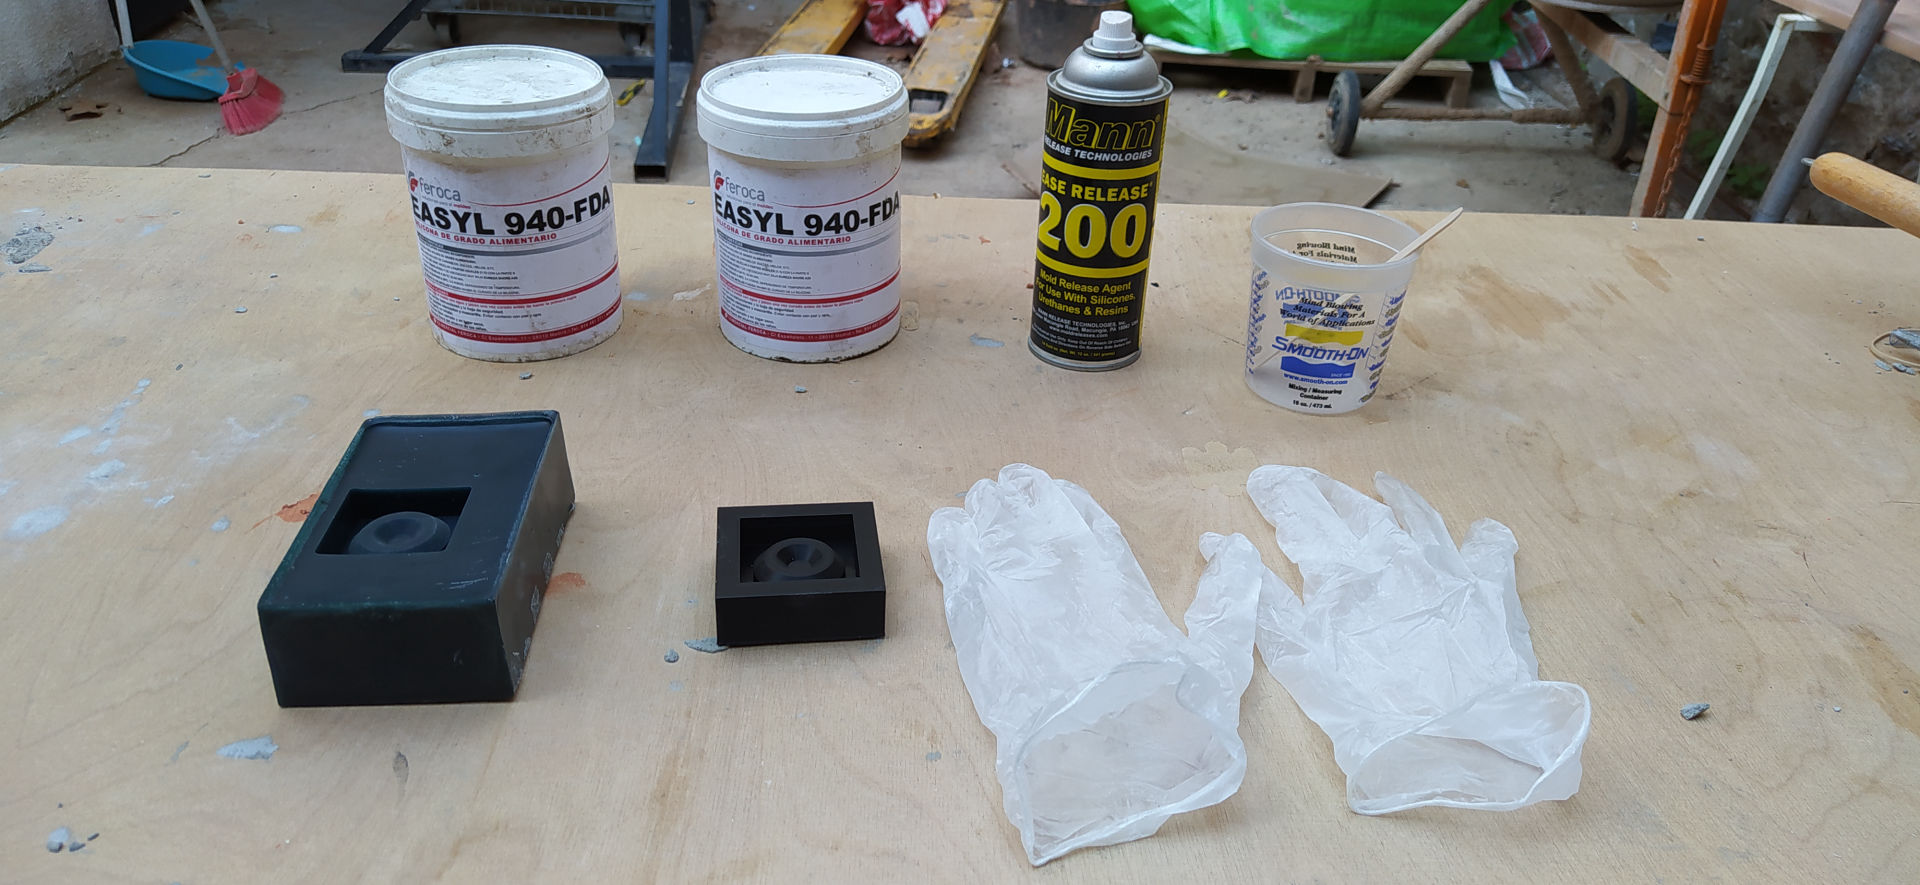
Here you will find the process of mixing the silicone and pouring it.
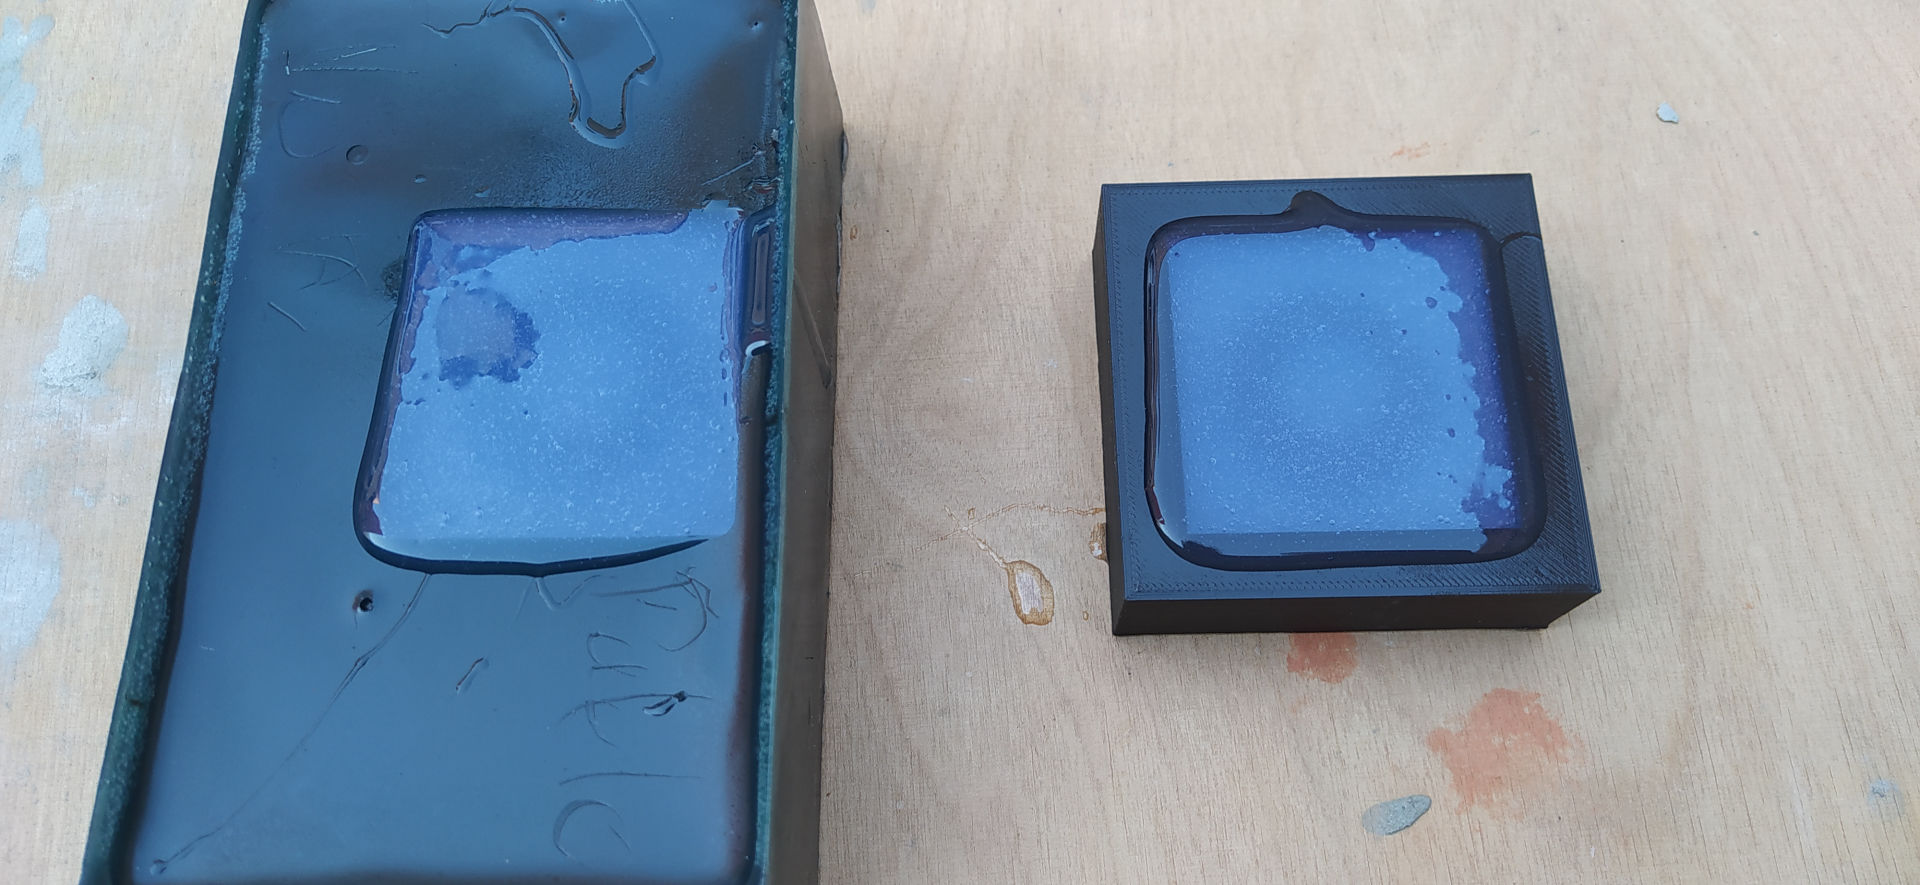
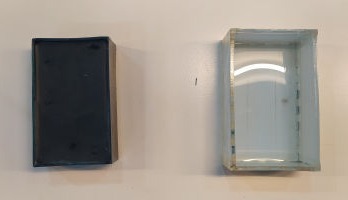
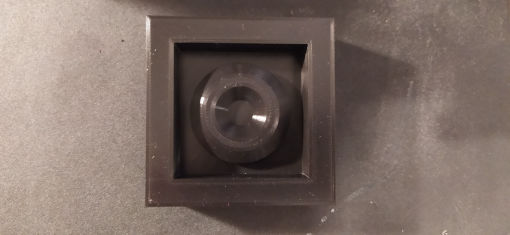
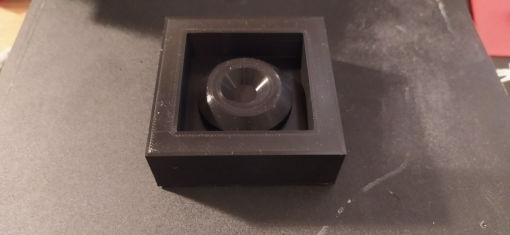
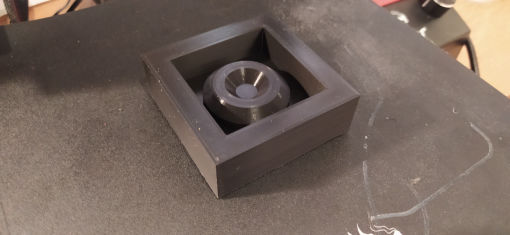
This is how my object looks after unmoulding it, and some reflections on the process.
Understanding materials datasheets and testing and comparing different materials.
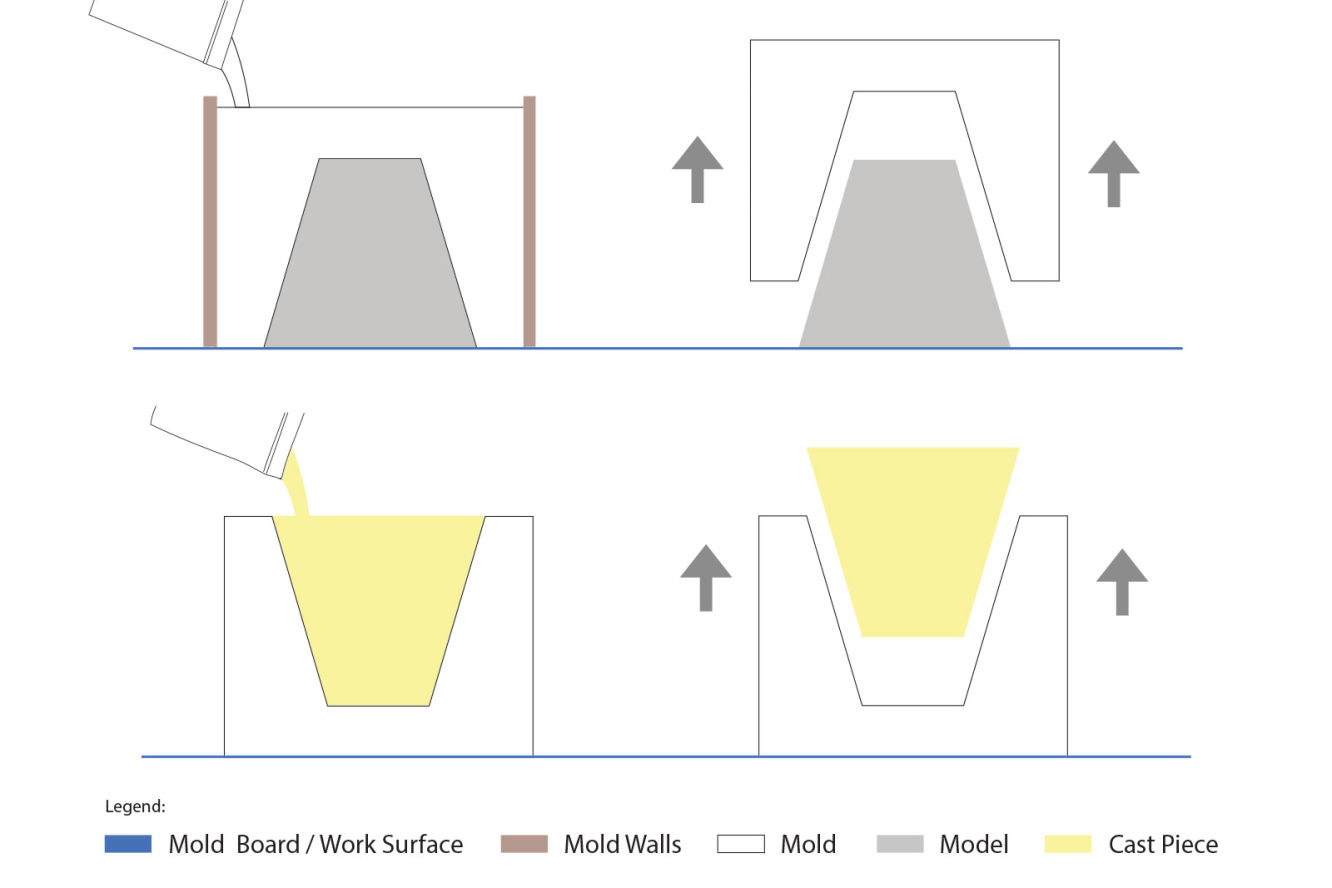
Molding and Casting is the process of creating a mold from a 3D model or a physical object, and then casting it with certain material to make copies of it, or to reply the model. I found this definition from the guys of Smooth-On that defines it pretty well:
Molding or Moldmaking is the act of creating the cavity / form that carries a negative or reverse impression of an original model. Molds can be made of a rigid material, such as plaster or plastic resin or more commonly, a flexible material such as rubber. The material to use should be chosen considering the material of the model, the material to be used to make castings, and whether there are any undercuts.
Casting is the act of pouring liquid material into the cavity of a mold. After a period of time, this liquid will cure via chemical reaction or cooling. The solidified part is also known as a casting, which is ejected or broken out of the mold to complete the process. Casting materials are usually metals or various cold setting materials that cure after mixing two or more components together; examples are epoxy, concrete, plaster and clay.
First you will need to cast a wax block that has at least the dimensions of the 3D mold you´ve just created or bigger. I did this by melting wax in a pot, and then pouring it in a 5mm acrylic mold they already had in the FabLab and let it cool down until the next day and un-mold it.
You could then create the files for the SRM in fabmodules, mods or in the SRM native software. I created mine in fabmodules and is the process I documented.
NOTE: In my first try to mill the file I created, I tested it in the air (with the Z set 20mm in the air) to check where it was going to cut and it was cutting outside of the mold. I checked everything again and realized that the problem was that the ORIGIN of my STL file was not in a corner, but it was in the middle instead, so I had to adjust the file by setting the origin to a corner and do the fabmodules process again.
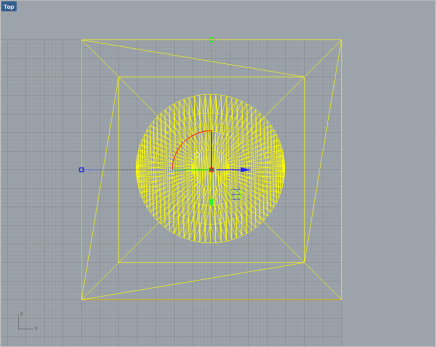
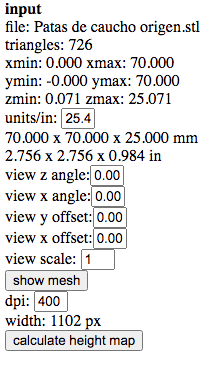
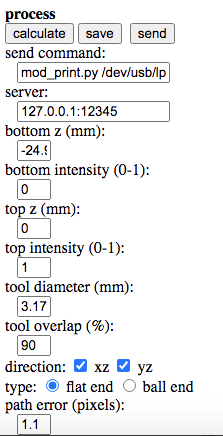
In Fab modules you first select the input file to read, and select your STL mesh file.
NOTE: If you don´t see your mesh loading in the screen, it could be because of the view the file was created with. So you might need to adjust the view angle in fabmodules, but to know if you have the right view, since the top and bottom view look the same in the mesh, you will need to calculate it. If you only see a flat image, you might be looking at the mold from under.
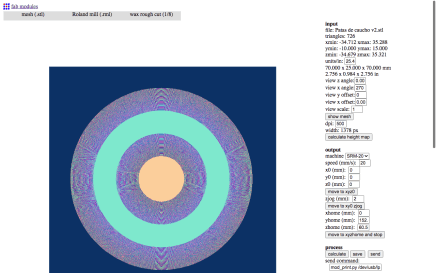
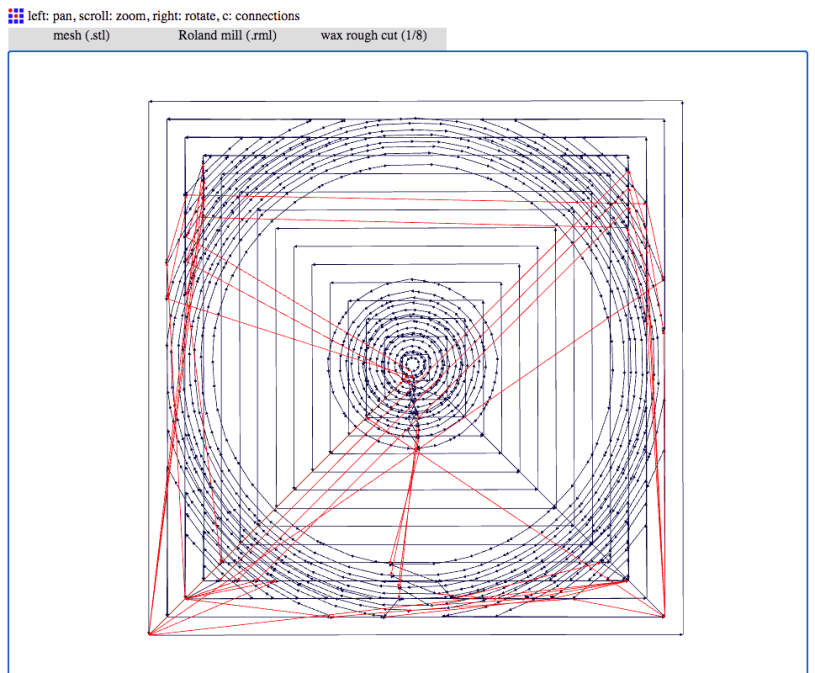
You select Roland Mill in as the Output Format. For the process, we are going to do first a Rough Cut in which the machine does a first pass removing material from the outside to the inside, layer by layer with a 50% overlaps.
ROUGH CUT FILE:
Patas_de_caucho_origen_ROUGH_CUT.rml
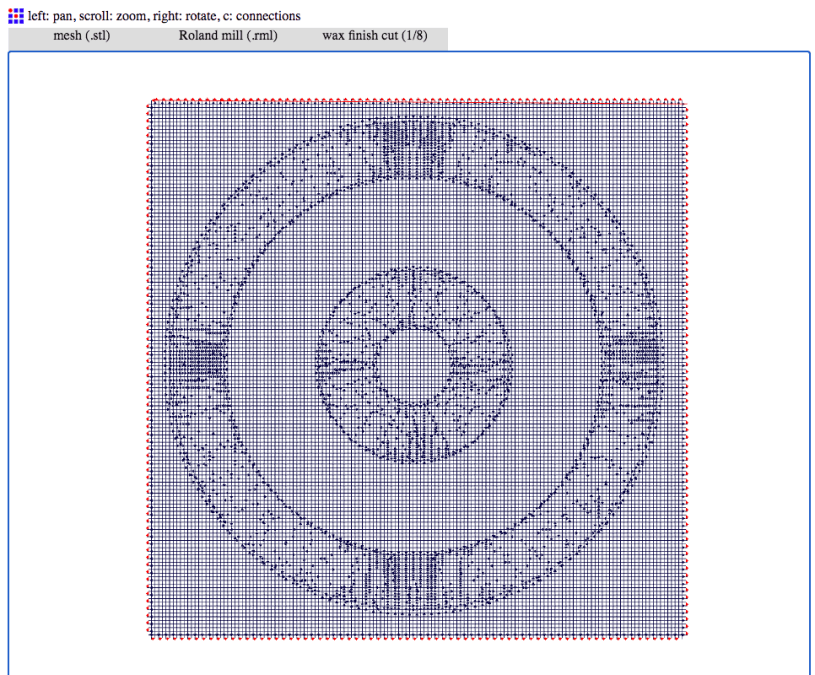
We will need to create another file for a Finish Cut, that is a two pass more detailed horizontal and vertical removal, with a 90% overlaps.
FINISH CUT FILE:
Patas_de_caucho_origen_FINISH_CUT.rml
The drill we use for this is a 1/8 inch drill (3.175mm), and you could also change the drill between this to do the rough cut with a flat one and the finish cut with a round one if you want more detail.
In my case, since my object didn't needed that much detail, I did it all with a flat one.
INPUT SETTINGS:
- Set units to 25.4 (relation between mm and inch).
- Change the view angle if needed.
- Scale the mesh to 1.
- Set the resolution to 400dpi if your mold does not need much detail.
OUTPUT SETTINGS:
- Select SRM-20 as the machine.
- Set speed to 20.
- Set the Z axis move to home to high above the border of your mold, instead you have done a leveling of the mold first.
NOTE: Molds are higher in the outer walls than in the middle, you could do a leveling by sending a flat file to mill to correct this, or mill in the middle, checking carefully that no wall is going to hit the drill while it moves.

PROCESS SETTINGS:
- Set tool diameter to 3.17mm (1/8 inch).
- Change tool overlap depending of the quality wanted. This setting changes from 50% in rough cut to 90% in finish cut.
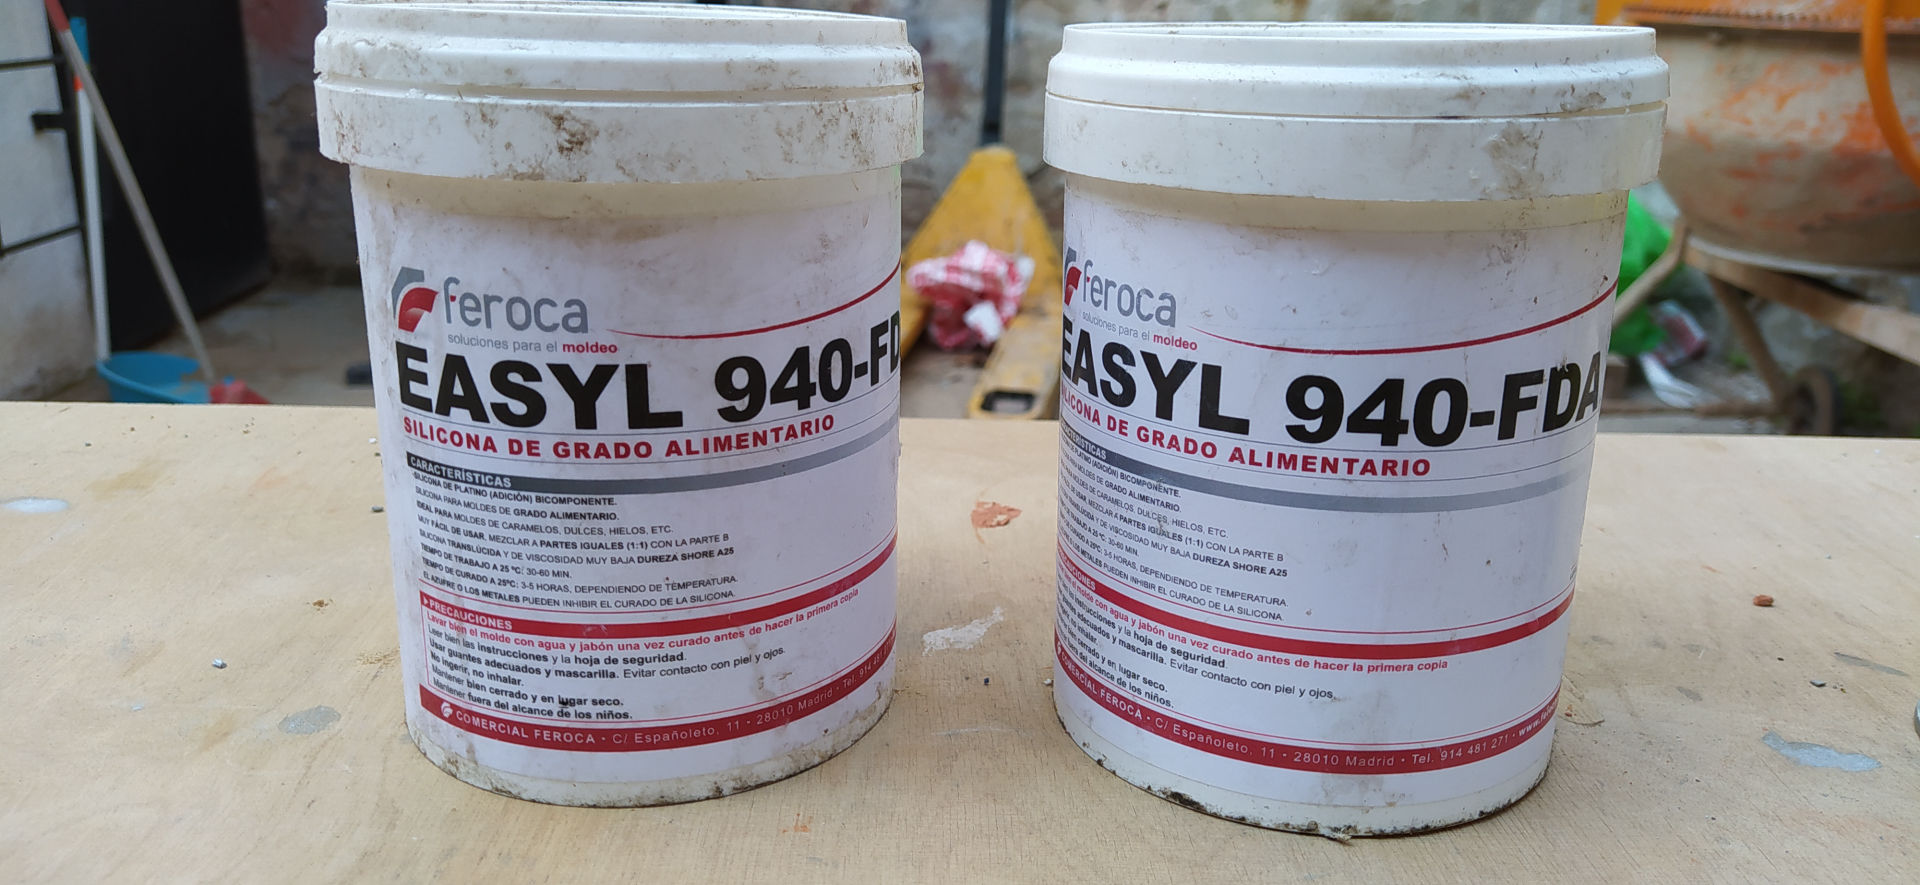
For the Silicon Mold I used the Easyl 940-FDA -Silicona Alimentaria which comes in two different pots that you have to mix in equal parts of 1-1. You should always check for the datasheet to see the specifications of the mix, because it could be in a proportion of volume or weight. In the datasheet you can also see the whole process of preparation and the indications you should have in mind.
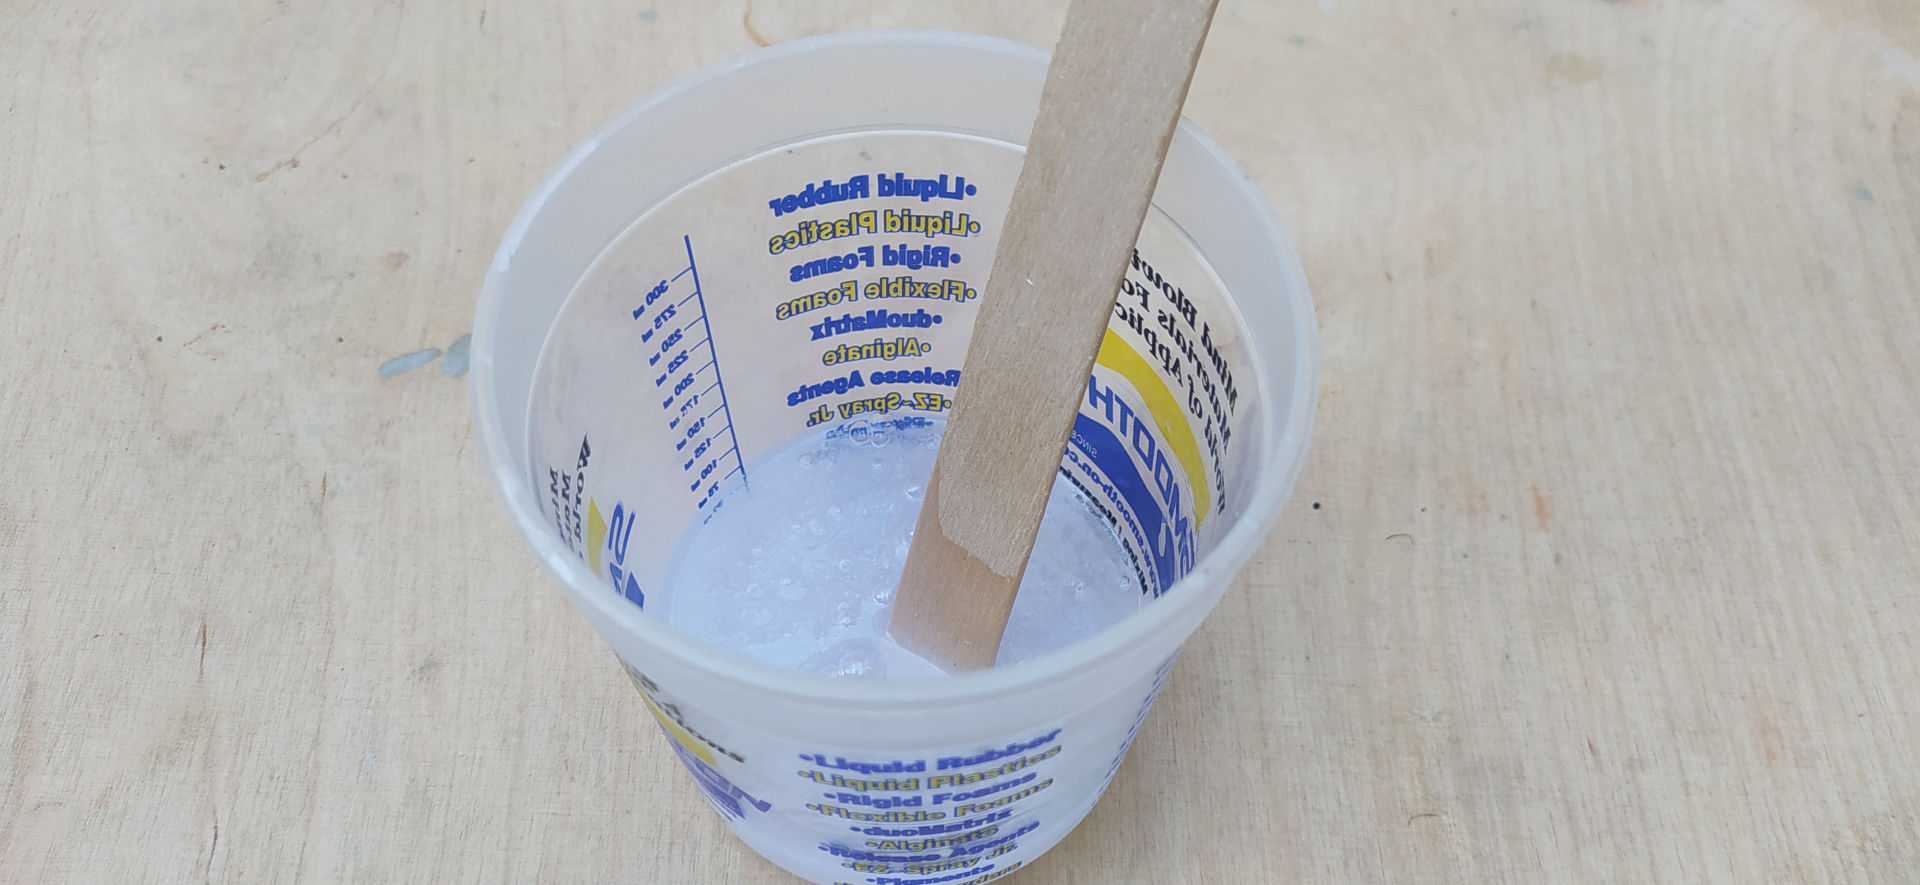
To measure the amount of silicon needed, a good tip was to fill the mold with water, and pour it into a measuring container to check the volume. That will be the volume needed of silicon (half of the volume of each one of the mixes).
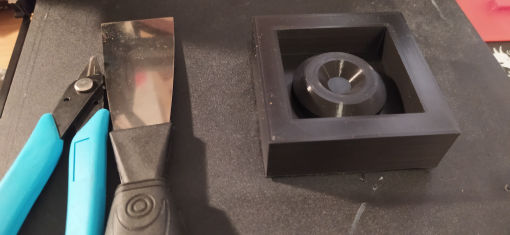
Then you should clean and dry the mold very well, and add some Release Agent in spray. You should do this outside since it is a hard chemical, from a distance of 20 centimeters from the mold, and try not to inhale the spray.
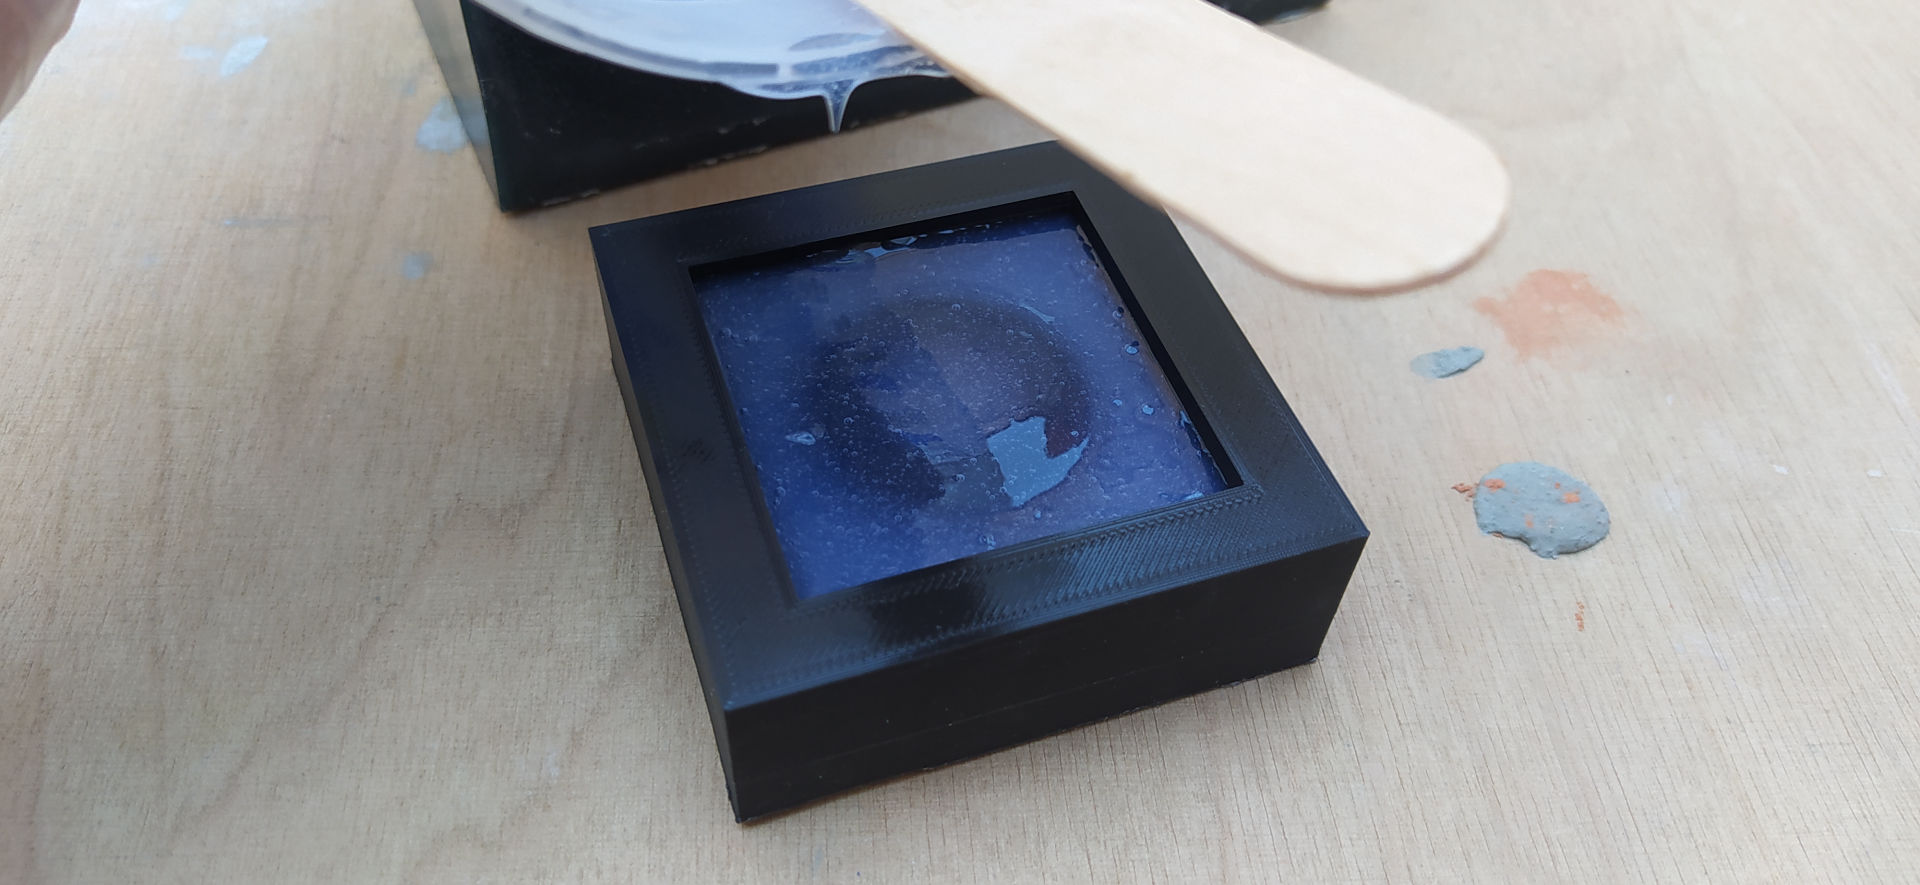
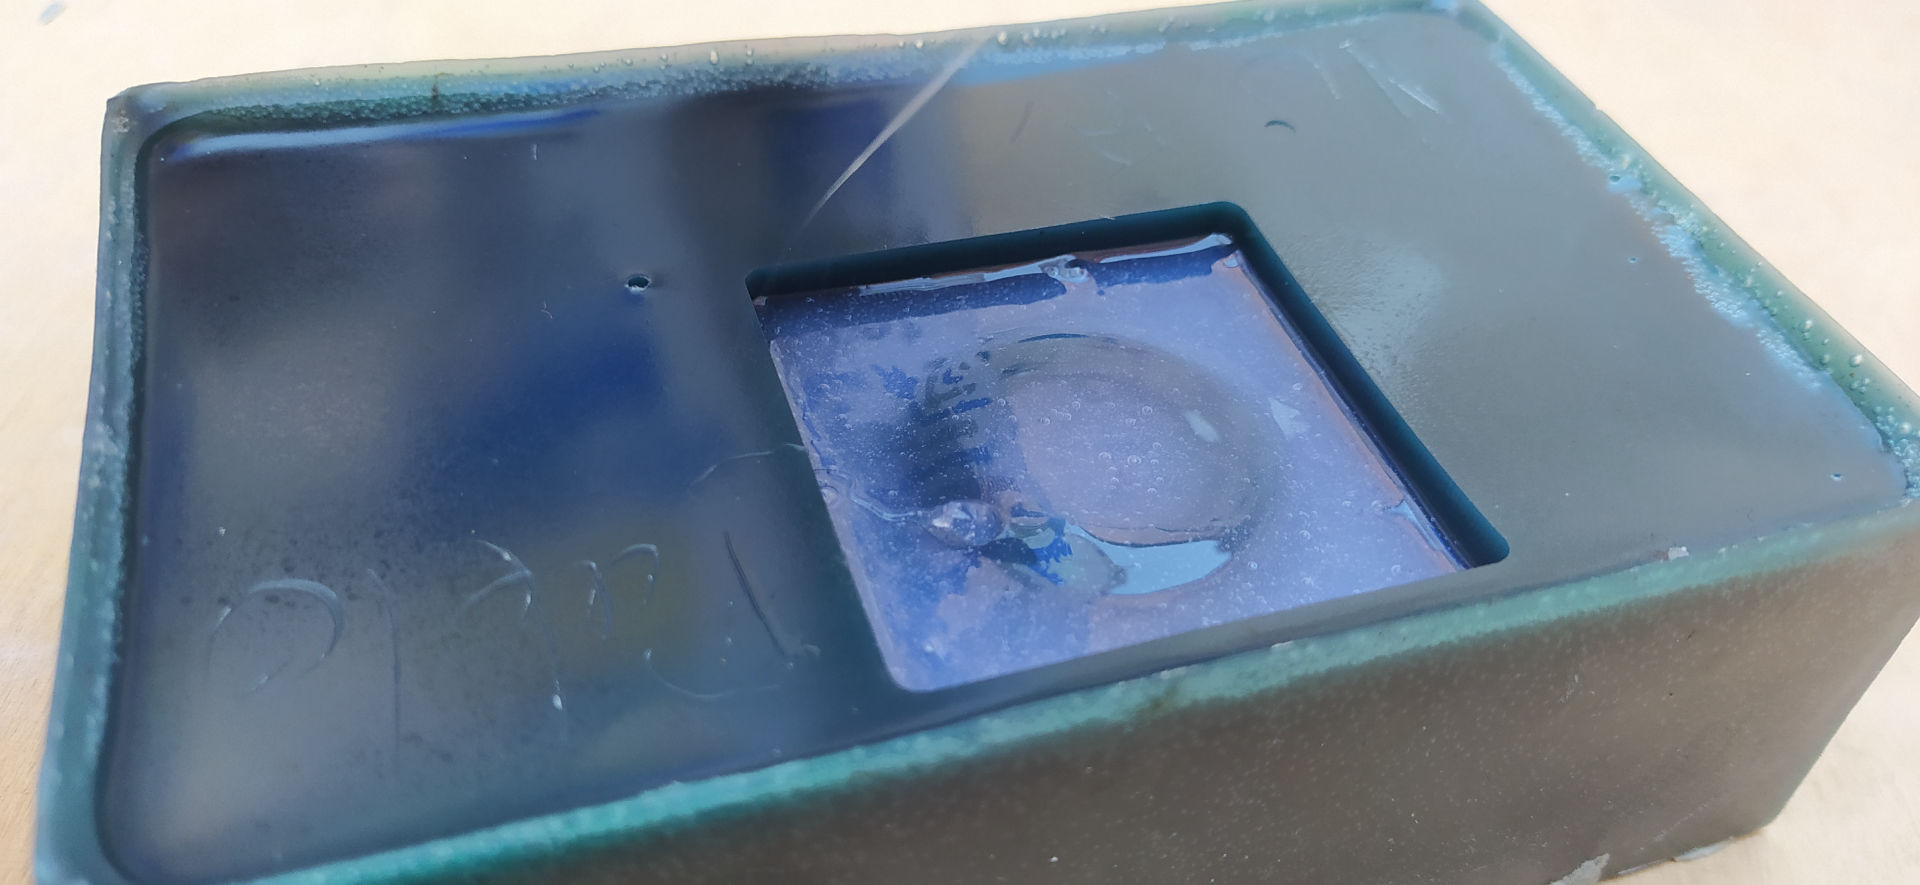
Poor the two parts of the silicon and mix it very well. In the datasheet is specifies the time you have to work with the silicon, which in my case was 30 minutes, and the time it will take to dry and get hard. You could also put it into an oven, but in my case I let it dry for 5 hours and it un-molded pretty well.


Machinable wax is harder and has a higher melting temperature than most other waxes, so it can be machined, cut, or shaped using standard CNC machines. High-quality surface detail and dimensional accuracy are possible.
Dimensions: 146 x 88 x 36mm
Hardness: 52D
Melting point: 115°C
Flash point (the lower the flash point, the easier it is to ignite the material): 240°C
Respiratory, hand, and eye protection: none required under normal product handling conditions.

EASYL 940-FDA is a platinum silicone that has very good resistance to heat (220°C) and negligible shrinkage. The difference between tin-cure (condensation cure) and platinum-cure (addition cure) silicones lies mainly in the shrinkage of the cured rubber over the short and long term: tin-cure silicone molds generally exhibit higher shrinkage over time. EASYL 940-FDA has a very low viscosity which makes it flow very well while casting and that there are practically no bubbles.
Hardness: 25A (the Shore A scale is used for softer rubbers while the Shore D scale is used for harder plastics)
Viscosity: 6,000mPas
Working time (time period for mixing and pouring the liquid before it starts being cured): 30 mins
Cure time: 3-5hrs
Tensile strength: 8mPas
High temperature resistance: 200°C
- Exceptional fluidity, easy to mix and remove from the mold.
- Releasing agent is not required (but recommended).
- Excellent air bubble release, vacuum degassing is not required.
- Wear safety glasses, long sleeves and gloves.
- Gram scale not required for mixing parts (1A:1B by volume).
- The liquid rubber should level off at least 1.3cm over the highest point of the model surface.

Hardness: 15A
Viscosity: 3,000mPas
Working time: 30-60 mins
Cure time: 3-6hrs
Tensile strength: 4.5mPas
Releasing agent is required
- Wear safety glasses, long sleeves and gloves.
- Gram scale not required for mixing parts (1A:1B by volume).
- The liquid rubber should level off at least 1.3cm over the highest point of the model surface.

Most of Smooth-On's clear resins are quite toxic and may cause skin and eye irritation, and can be harmful if inhaled. Below is the information in the technical bulletin and safety data sheet:
Hardness: 72D
Viscosity: 100cPs
Working time: 10-20 mins
Cure time: 2-4hrs
Tensile strength: 3,170psi
Flexural strength: 3,100psi
Compressive strength: 3,080psi
- Gram scale not required for mixing parts (1A:1B by volume).
- Releasing agent is required.
- Wear safety glasses, mask, long sleeves and rubber gloves.
- Wash skin thoroughly after handling.
- Avoid breathing dust/fume/gas/mist/vapors/spray.
- Do not eat, drink or smoke when using.
- Do not use foam or glass mixing containers since the resin generates heat.

Acrystal Prima is an easy-to-use, solvent-free acrylic resin composed of an acrylic emulsion (part B) and a crystal-based powder (part A). It is non-toxic, odorless, and has minimal exotherm.
Hardness: 83D
Mixed density: 1,730 kg/m3
Dry density: 1,730 kg/m3
Working time: 8-10 mins
Cure time: 1.5hrs
- Retardant is recommended to increase the working time.
- Wear safety glasses, long sleeves and gloves.
- Gram scale required for mixing parts (2.5A:1B by weight)

Aa per its name, it is expanding water-blown polyurethane foam which is easy-to-use and cures rigid and strong. FOAM‑iT! 4 means the foam will expand approximately 14 times its original volume.
Mixed viscosity: 300cPs
Expansion: 14 times
Working time: 1.5 mins
Cure time: 2hrs
- Releasing agent is strongly required.
- Wear safety glasses, long sleeves and gloves.
- Gram scale not required for mixing parts (1A:1B by volume)

I was really impressed with the food-safe mold. It was stiff and stable with minimized gaps between 2 halves of the mold. Details of the food-safe mold also looked a lot sharper, while the normal mold had poorer quality. However, the EASYPLAT 00-40 silicone has a lower viscosity and excellent air bubble release that made the mixing process faster and easier.

The 3 finished objects were all lovely. Under good lighting conditions, the air bubbles of the urethane resin object were easier to be seen, but the clear amber color was nice. It best represented my original intention. I also really liked the surface of the acrylic resin object, it would be great if I can cast the full double-sided object with this material. I was looking forward to a more rigid result, so foam casting probably wasn't my goal this week.
Polyurethane resins are the best options for casting small, delicate or highly detailed forms. Acrylic resin is a better option for casting bulkier forms or faster hardening time. Acrylic resin is also considered extremely weatherproof and this makes it ideal for outdoor applications. Acrylic resin didn't yellow when exposed to sunlight, while the surface of the foam was destroyed and the polyurethane resin yellowed quickly.

Mobirise page builder - Click for more