Output devices
Objectives of the week
- Individual assignment
- Add an output device to a microcontroller board you've designed, and program it to do something
- Group assignment
- Measure the power consumption of an output device
This week is in the continuity of the previous one... Working on my pressure control board!
What I did
- Used a pump and valves
- Made a driver for the valve and controlled it using PWM
What I learned
- How to make a driver and to use MOSFETs
If I had the time to go further...
- I would have (already) finished my final project...
Files and resources
Step 1: Precising the outputs of my design:
As I already said, this week is in the complete continuity of week 11. As a reminder, my idea is to use this week and the following to work on the pressure control board of my final project. My pressure control board will be mainly inspired by the soft robotics toolkit, on which two solutions are documented:
The aim of my project is to have something similar to the complete board, but taking also inspiration from the low-cost version. Here is the block diagram of the board, which has been adapted from the previous week:
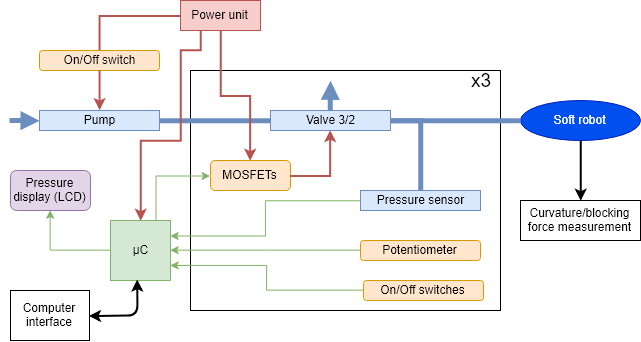
In particular, I now plan to use 3 times 3/2 valves (valves with 3 ports and 2 positions), and I removed the control of the pump. More, an external switch will be used to start/stop the pump. This is inspired from the full control board. For the vales, to ensure a controlled air exhaust, the alternative would have been to use two 2 way valves per channel, i.e. 6 valves.
Bill of materials
Consequently, here is the precised bill of material. The power unit, the MOSFETs, the fluidic connectors, and the elements as bolts and wires are not considered here.
| Component | Number | Supplier | Pressure range (bar) | Accuracy | Input voltage (V) | Unit cost (e) | Total cost (e) |
|---|---|---|---|---|---|---|---|
| Gauge pressure sensor | 3 | RS component | 0 - 10 | +/- 0.15 % | 1.5 - 12 | 10.12 | 30.36 |
| Potentiometer | 3 | RS component | 1 | 3 | |||
| Switches | 4 | RS component | 1.75 | 7 | |||
| Diaphragm pneumatic pump | 1 | digikey | 0 - 2 | 12 | 13.08 | 13.08 | |
| Solenoid valves 3/2 | 3 | RS component | 0 - 10 | 24 | 80.61 | ||
| Microcontroller | 1 | Microchip | 1.8 - 5.5 | 1.87 | 1.87 | ||
| breadboard | 1 | Rs component | 1.8 - 5.5 | 9.22 | 9.22 |
Update week 13: the final bills of materials can be found on the Final project pages
Pump and valves control board
Several possibilities exist to control the pressure thanks to the valves. Here, as in the full control board, I will use PWM. By controlling the time the valve is connected to the pump and the valve is connected to the air exhaust port, this will allow to control the pressure. The control principle is to use the PWM of the microcontroller to open and close the powering of the valves. An interface is then required, and we have two solutions here. Even use a commercial motor driver board, even use a more “custom” MOSFETs based solution. I will chose the second one. The full control board used this yourduino board, and I will again take inspiration from it.
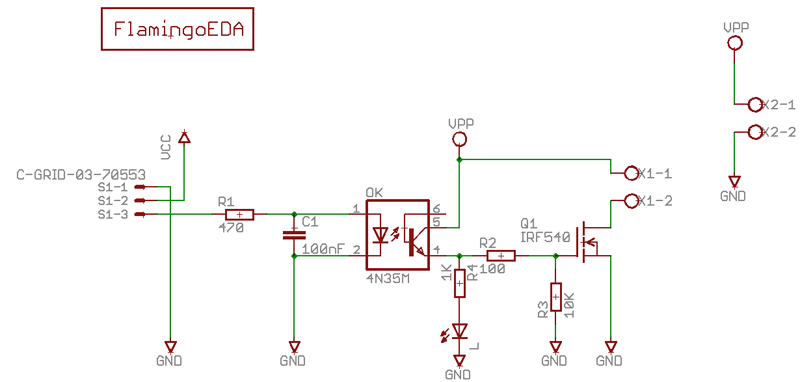
The Mosfets can be seen as high power current switches, driven by the PWM. When open, the valve are powered by the 24V. The optocouplers allow to isolate the high power circuit (MOSFETs) from the microcontroller. Since the board is not commercially available anymore, I will try to make it custom, without the LEDs. Here is the material required:
| Component | Number | Supplier | Input voltage (V) | Unit cost (e) | Total cost (e) |
|---|---|---|---|---|---|
| Power MOSFETs - IRF520 | 3 | RS component | 1.06 | 3.18 | |
| Optocoupler 4N35M | 3 | RS component | 0.412 | 1.25 | |
| Screw terminal blocks | 4 | RS component | 0.324 | 1.296 | |
| Pin headers | |||||
| Resistor | |||||
| capacitor |
I need 4 power terminals: one per channel plus one for the alim. Concerning the optocouplers, several versions exist, with 4 channels or 4*1 channel. The second solution is used here. Concerning the power MOSFETs, the chosen IRF520 includes a protection diode.
Fluidic equipment
One of the big challenge of playing with pressurized fluid (here air) is to avoid leakage. This is why adequate connectors between each parts are required. Here are the ports of each fluidic components:
- Pump: 6 mm inner diameter (ID) tubing
- Valve: 1/8” G Female
- Pressure sensor: 2 mm inner diameter (ID) tubing
- Soft robot: Luer lock
From my previous experiences, I learned that using Luer lock connectors is a good way to ensure modularity, and to avoid leakage. I will use those kind of connectors between each parts! Here is the material needed for fluidic connections:
| Component | Number | Supplier | Diameter/connector type | Unit cost (e) | Total cost (e) |
|---|---|---|---|---|---|
| 1/8” G Male (Valve) - tubing 1/8” (3.175mm) ID | 10 | RS components | 1.756 | 17.56 | |
| Luer lock male to male connector | Qosina | ||||
| Tubing 2 mm ID - Luer Lock female | Qosina | ||||
| Tubing 6 mm ID - Luer Lock female | Qosina | ||||
| Tubing 1/8” (3.175mm) ID - Luer Lock female | Qosina | ||||
| Tubing 6 mm ID | |||||
| Tubing 2 mm ID | |||||
| Tubing 1/8” (3.175mm ID) |
Power unit
The power unit will require to produce 5V, 12V, and 24V. In the first steps of the development, I plan to use multiple power sources.
Step 2: Testing the pump
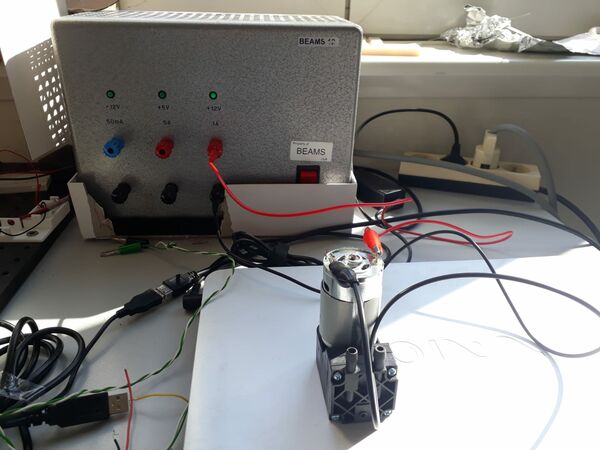
The pump that I use is quite plug and play: connect it to 12V, and it works!
Step 3: Using the Valves
Testing them
The same is true for the valves! I ordered a 3-way valves normally closed, meaning that the input can be connected to one or the other output depending if the valve is powered or not. I first connect it to the 24V power source as the pump, and it works I hear a “click” when I turn on of off the power. I then try the same connecting the valve to the pump, and I can now feel the air flowing trough one or the other output!
Making the driver
The valve must be powered on 24V, and must be controller using PWM to control the pressure: I need a driver to interface it! As explained above, I will try to redo this yourduino board, a little bot modified.

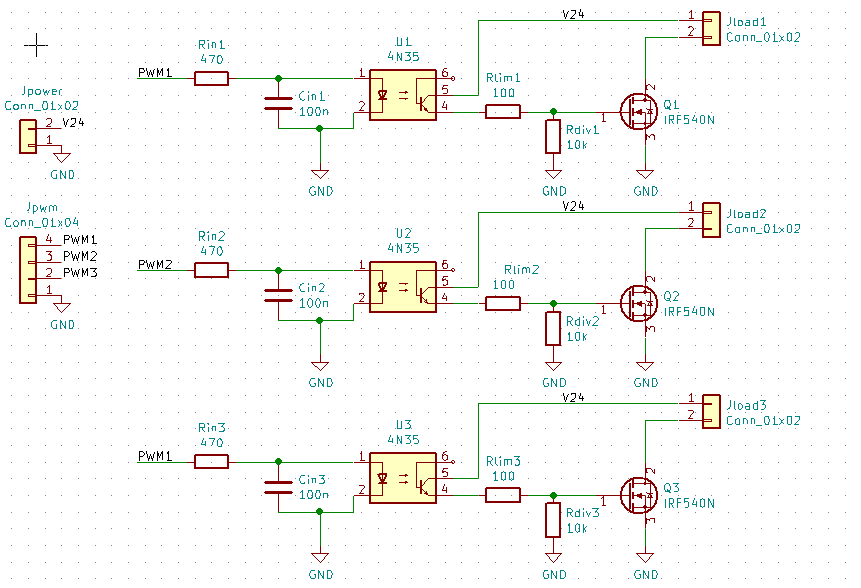
The main difference in my case are that I remove the LED and its current limiting resistor, and that I use an IRF520 as MOSFET. The final schematics and details used for my project will be detailed on the Final project pages. Here is my schematic:
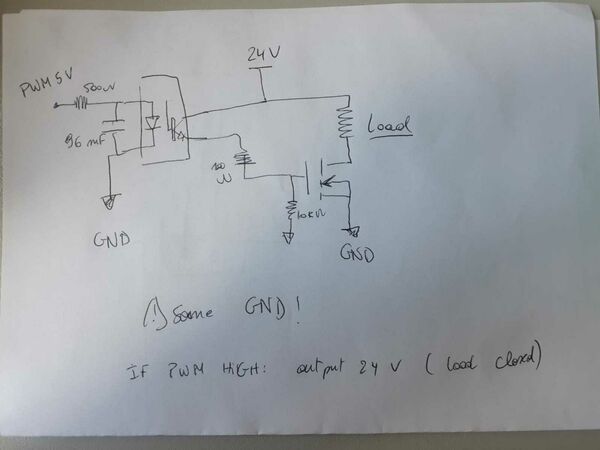
The principle is the following: the input is the logical (0/5V) PWM signal generated by the satshakit. The optocoupler will isolate it from the power. At the output of the optocoupler, the voltage is already 24V, but the current that an flow through the optocoupler is too small to power the valve. The output of the optocoupler is then used to drive the MOSFET (that can be seen as a current switch controlled in 24V). If the MOSFET is “open”, the load will be connected to the ground and current will flow trough the load and the MOSFET, otherwise not.
I made the board on a breadboard and tested it with a 5V power source and a manual switch at the input: it works!
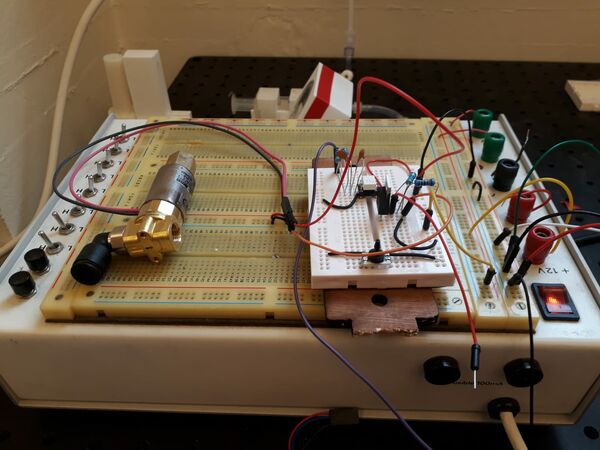
And testing the valves with the pressure source : it also works as expected!
Using PWM
I am now ready to use the satshakit PWM to drive the valve. I worked using this tutorial as well as the ATMege328P datasheet.
Here is the little C code added in the mainfunction to setup and start a PWM signal:
//
// init PWM
//
DDRD |= (1 << DDD6);    // PD6 is now an output
OCR0A = 128;    // set PWM for 50% duty cycle
TCCR0A |= (1 << COM0A1);    // set none-inverting mode
TCCR0A |= (1 << WGM01) | (1 << WGM00);    // set fast PWM Mode
TCCR0B |= (1 << CS02) | (0 << CS01) | (1 << CS00);    // set prescaler to 1024 and starts PWM
And it works! Checking with the multimeter, the PWM frequency is 60Hz. Here is a short viedo (be careful for your hears..)
Ok for the prototyping, let’s do some PCBs for the final project !
Step 4: further development
For my final project, here are the step that must still be done.
- Clean the code
- Add more channels in parallel
- Make some boards
- Calibrate it
- Close the loop with the pressure sensor to regulate the pressure!
This work will of course continue in the context of the final project. This will be documented on the final project page on the pressure control.
Update week 14: making a PWM PCB
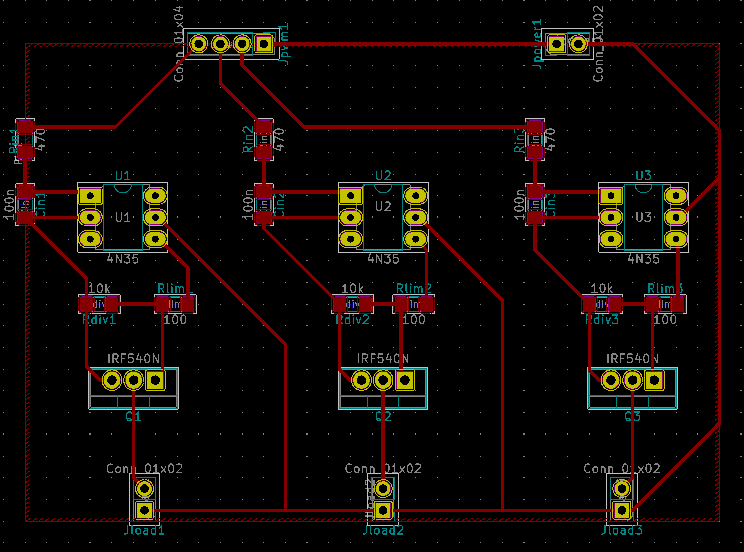
Since this week assignment was also about designing a making an output board, and to test further my final project, I made an output board (and an input board, this is documented on the final project’s page) counting for this assignment. On the PCB, I added some 0 ohm resistors for the connections and a ground plane. The board is only powered using 24V, and receives the 5V PWM signals as input:
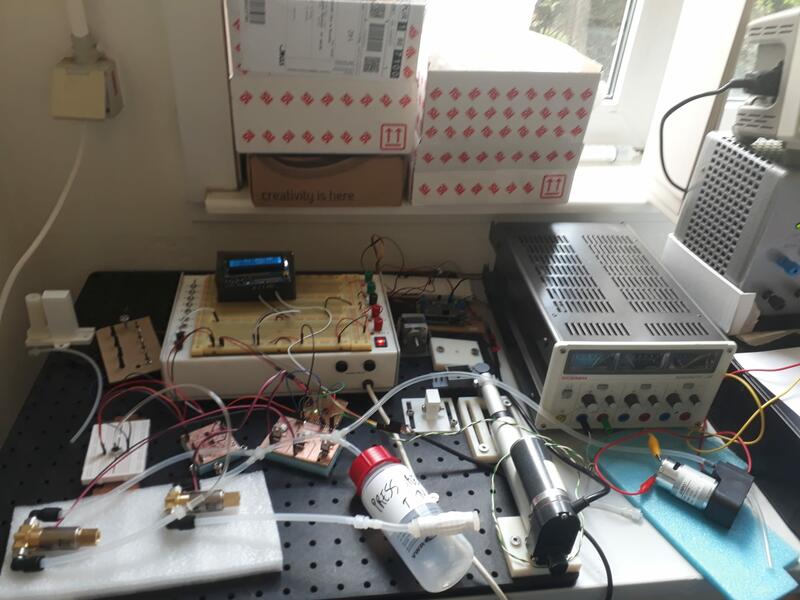
Here is basically how my all setup (with the satshakit, the input board, and the output board) looks… Just a little bit messy!
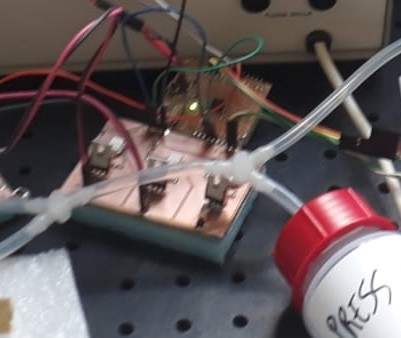
And zooming on the output board (you can recognize the MOSFETs):
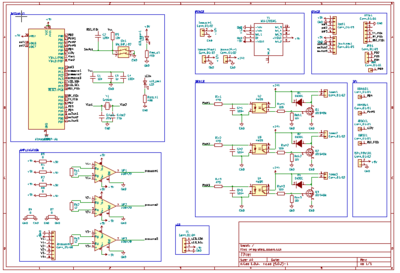
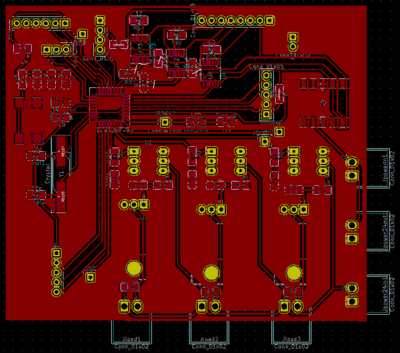
Update week 18: making my own board for the final project.
After some prototyping steps using my satshakit, I made my own board, including among other the outputs and inputs chains. This board is made of:
- The satshakit base (i.e. an ATMega328P with a 16Mhz crystal)
- The inputs (acquisition chain for pressure sensor, connections to the switches and potentiometers)
- The outputs (PWM driver, connections to the LCD)
- A power management system described below
- Interface and prgramming connections: (SPI and FTDI)
(you can click on the schematics and pcb layout images to show the pdf)
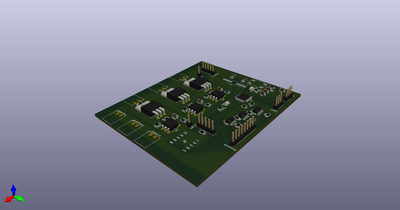
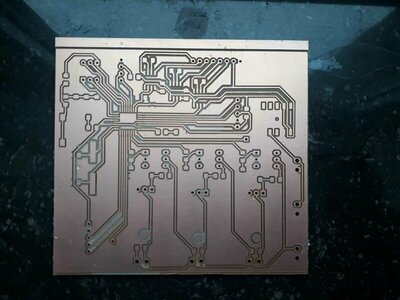
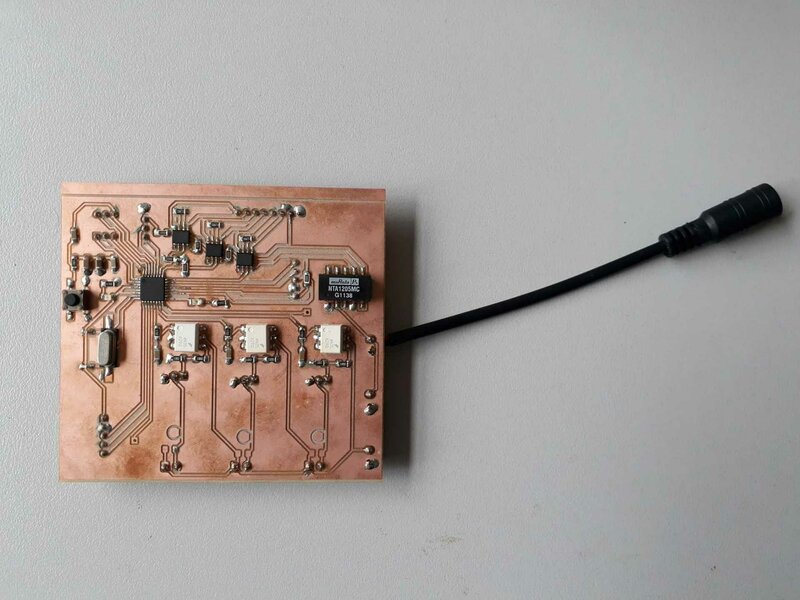
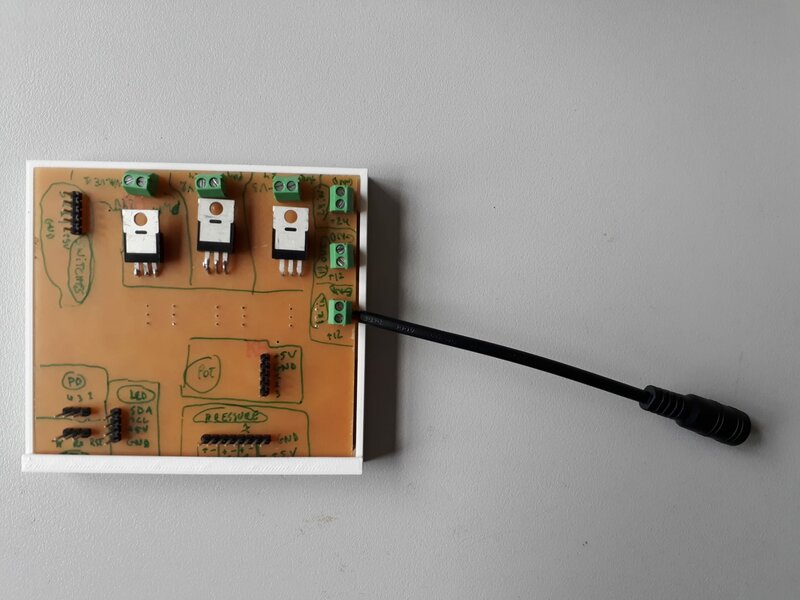
This is fully described in the final project’s page
Step 5: group assignment
To do…
