Final project
Summary
An open source, distraction free, turn-by-turn navigation system for bikes. Made completely with Fab Lab components.
The idea was born when the police stopped me on the street for wearing headphones while cycling. I was only using it to navigate myself using the audio feedback from the GPS, since you’re not allowed to use your phone as well. This made me realize I could make a simple navigation device to guide me through the city without breaking any laws and cycle without phone distractions.
Other than having only the bare minimum necessary to guide the cyclist on its way. The device is extremely easy to use. You just need to open the App, pick your destination and press start navigation. Automatically the directions will appear on the device’s screen. Then you can lock you phone and cycle away safely.
Slide

Video
Bill of Materials
| Description | Ref | Qt. | Price |
|---|---|---|---|
| M4 nuts and bolts | A127804-ND | 3 | 0.66 |
| Display 16x2 | 1568-1903-ND | 1 | 10 |
| HC-08 module | RN4871-I/RM130-ND | 1 | 6.48 |
| M6050 module | 1428-1007-2-ND | 1 | 3.15 |
| 260mAh Li-Po battery | B0722X3B2P | 1 | 3.5 |
| Capacitor 0.1uF | 399-4674-1-ND | 7 | 0.39 |
| Capacitor 18pF | 311-1152-1-ND | 2 | 0.21 |
| Voltage regulator 3.3v | LM3480IM3-3.3/NOPBCT-ND | 1 | 1.02 |
| Resistor 0 Ohm | 311-0.0ERCT-ND | 4 | 0.1 |
| Resistor 22 Ohm | 311-22.0FRCT-ND | 2 | 0.1 |
| Resistor 49.9 Ohm | 311-49.9FRCT-ND | 1 | 0.1 |
| Resistor 680 Ohm | 311-680FRCT-ND | 1 | 0.1 |
| Mini USB connector | H2961CT-ND | 1 | 0.99 |
| Crystal 16 Mhz | 644-1037-1-ND | 1 | 0.66 |
| LED Green | 160-1169-1-ND | 1 | 0.34 |
| Atmega32u4 | ATMEGA32U4-AURCT-ND | 1 | 4.2 |
| 100g PLA filament | DKL-US-PLA2.2lbs-20181203 | 1 | 2.99 |
| 90x40x1mm acrylic piece | B07GXLYJNK | 1 | 0.79 |
| Total: | $40.05 |
Weekly developments
All of the work done regarding this project was documented on the development page
Design files
Fusion 360 project
Eagle project
PCB .png files
iOS Xcode project
Arduino code
Assembly
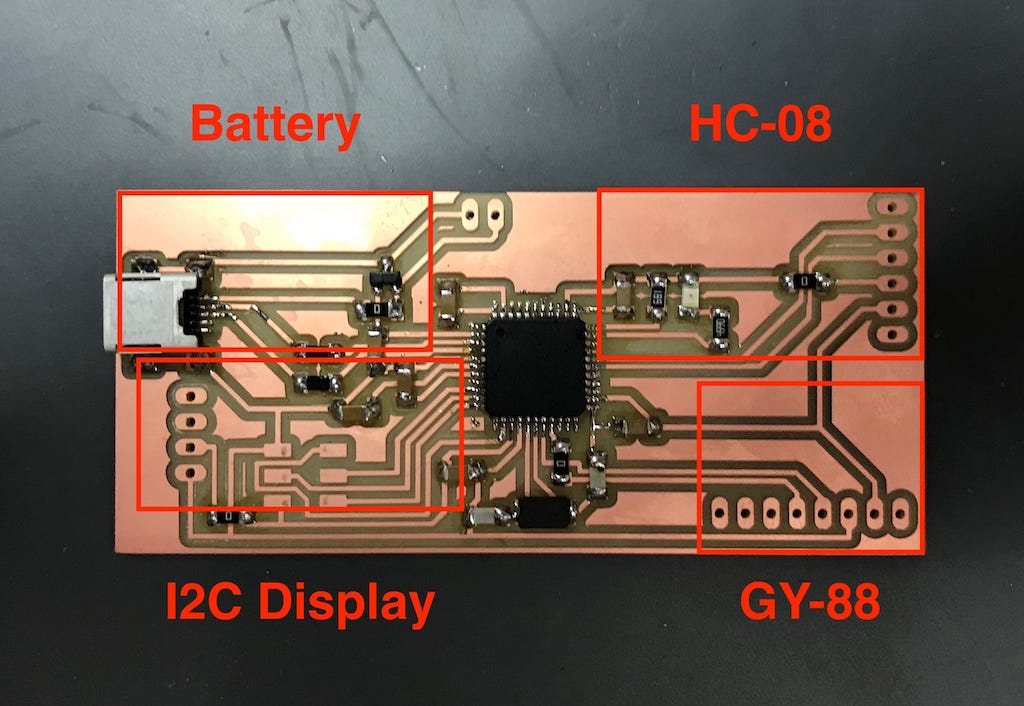
After 3D printing the enclosure and laser cutting the lid cover. Fix the display and place the components as shown below.
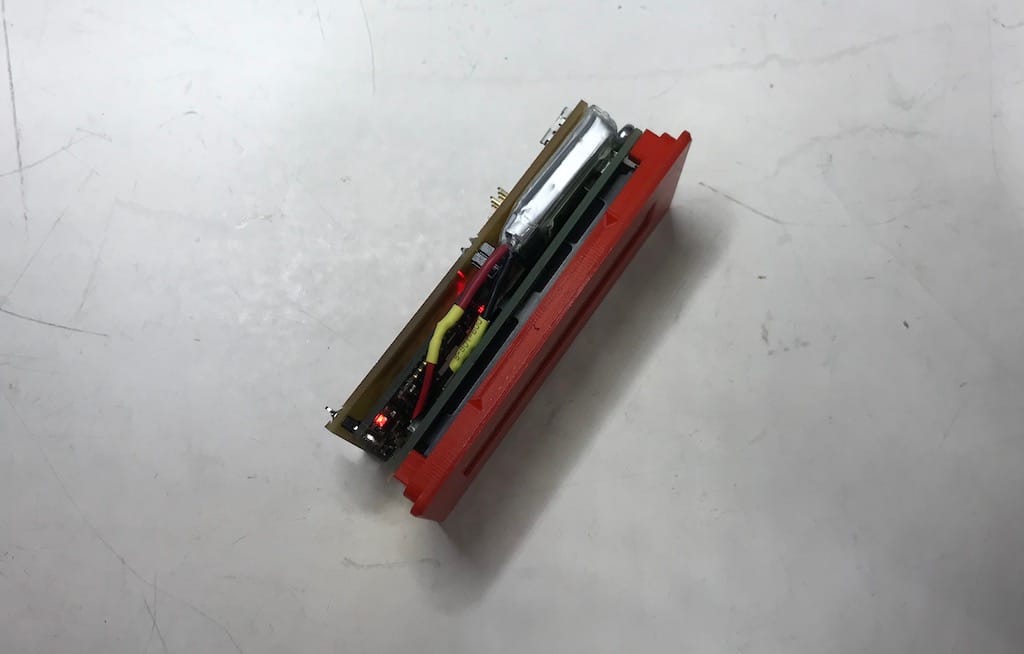
From a top view, this is where the components are placed below the main PCB.
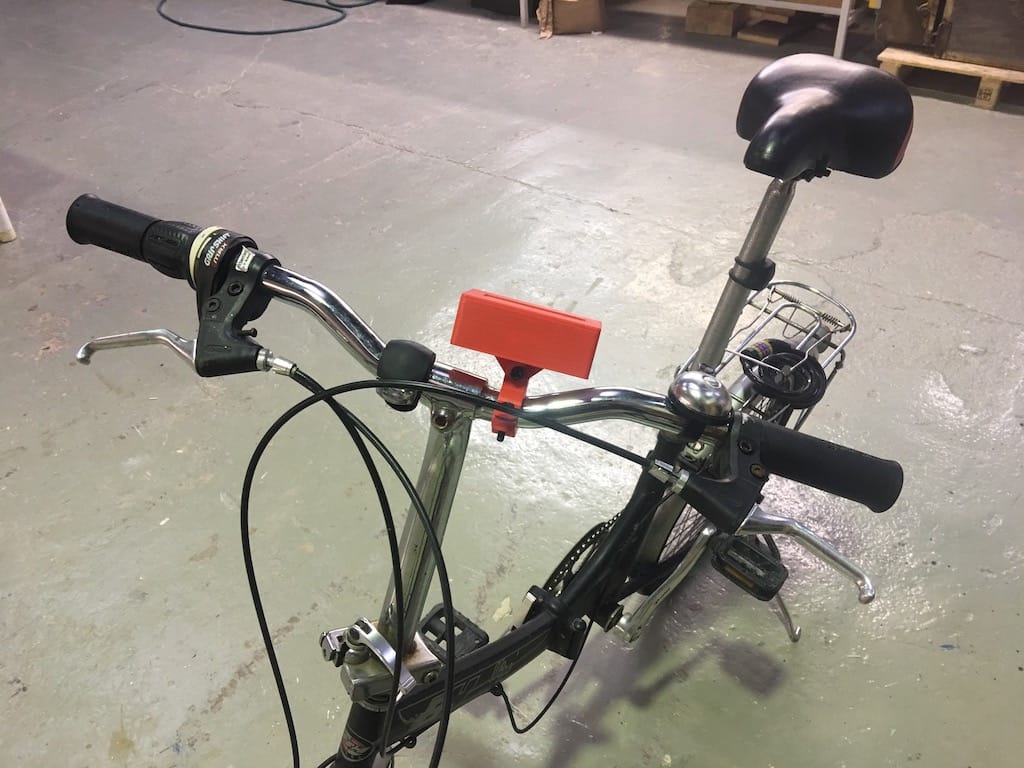
The enclosure and mount work are pretty straight forward. Just screw the holder onto your handlebar.
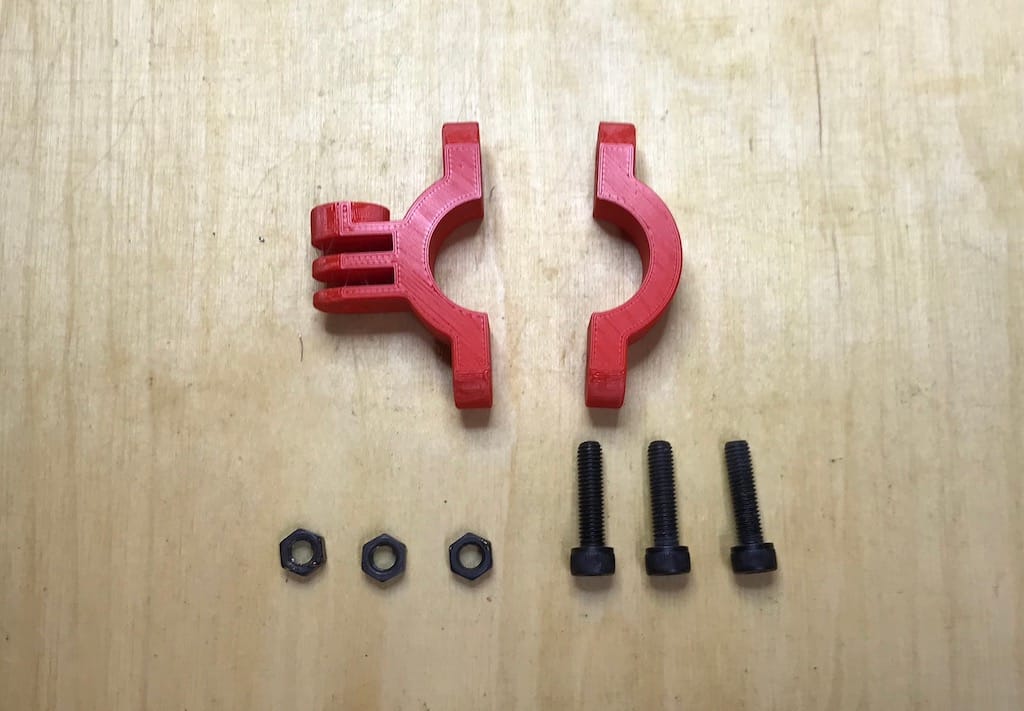
Then, screw the enclosure to the mount and you’re good to go!
License
As described on week 19, I’ve decided to share my project under a Creative Commons Attribution-NonCommercial-ShareAlike 4.0 International License.

Attribution
This work was only possible through a lot of research and using pieces of code from different examples, tutorials and answers. I’ve tried referencing it during each week of work. But I’ll list the biggest “contributors” to make this project possible here.
The biggest one is Mapbox Navigation SDK. Without it, I probably wouldn’t have a functioning navigation now.
For the bluetooth communication logic in iOS was taken from the Raywenderlich’s Bluetooth tutorial
As of accelerometer, I’ve taken the code from Luisllamas’s MPU6050 example
One great feature of the enclosure is the snap fit lid as well. Taken from Adafruit’s tutorial
The rest was a lot of hard work and help from the instructors.