Week 19 - Presenting my final project
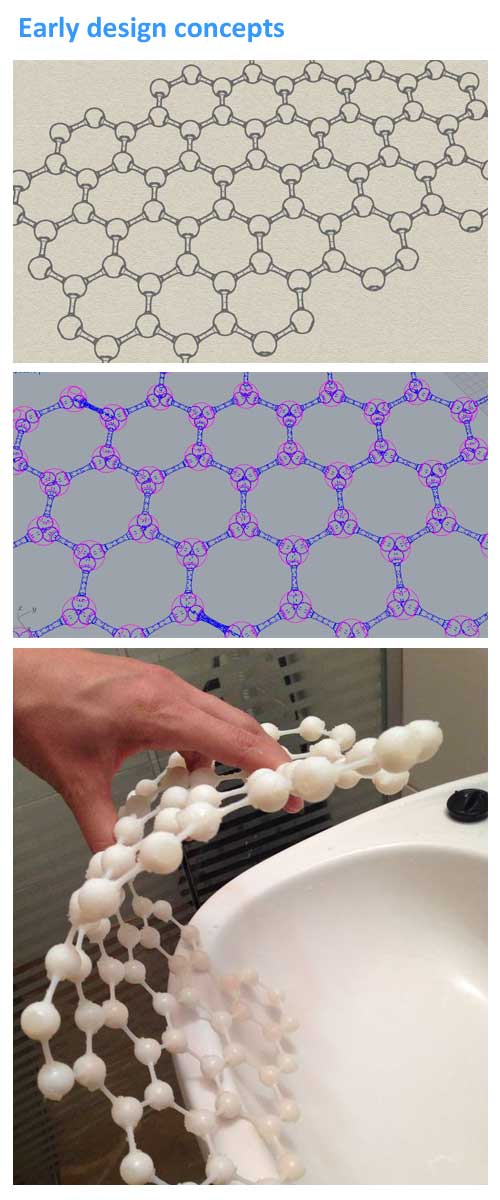
This project initially developed from the 3D scanning and printing lesson and evolved since.
I was fascinated with all the shapes and mathematical forms that can be created with the 3D printer and various software and applications such as Grasshopper for rhino, paneling tools plug ins and project shape shifter of the Autodesk Labs.
My first idea was to create a foldable system that will react as curtain, based on unique forms and parts that can't be produced on a conventional way.
The results were good.
but meanwhile I have joined forces with
Gali and we came up with a new concept that changed the design of things.
and took the project into something more complex and interesting....
Here is how we manage to divide the project concerning all the tasks.

Introducing Butterflies
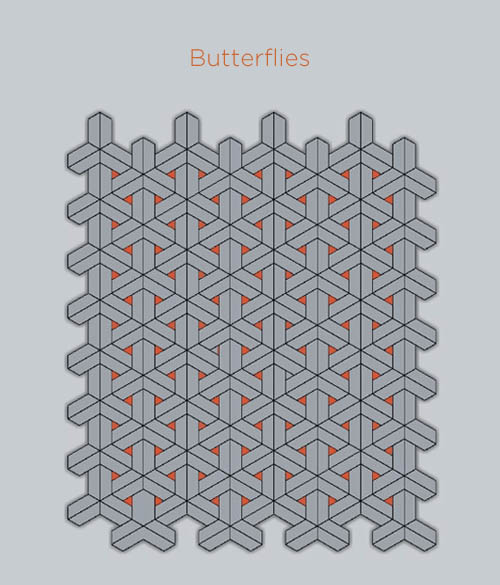
The butterfly system is a modular separation unit that reacts to light.
Equipped with the photocell sensor it can tell us when there's a sunny day outside or it is time to go to bed.
The system can be operated as self controlled unit, from the computer or wirelessly.
The electricity consumption is minimum and the wings of the unit can be equipped with solar panels to become a portable wireless object.
Our vision in this project is to present the new furniture's and accessories that soon will be a part of everyone's homes.
as we see it, in the very near future the furniture at home will be more than a piece of surface to sit on or to place things on it,
it will connect with us, our needs and our environment .
knowing that we are not the pioneers of presenting a new technology, we presented our unit -
Where you have a full control on your separation shutter system and it can serve you as a lighting fixture, alarm clock or even a decorative piece in your living room.
In the bigger scale, thanks to the fact that it can generate its own energy - it can be placed as a fixture on large scale sites such as train stations ,
hospitals and closed public areas as lighting units.
On the conceptual design aspect we used the technical elements that usually we try to hide such as conductive circuits and wires as a part of our design.
Thanks to the low cost of production of such a unit, we see the added value to implement such systems in the 3rd world and developed countries,
where you can harvest the energy along the day and illuminate when night falls.
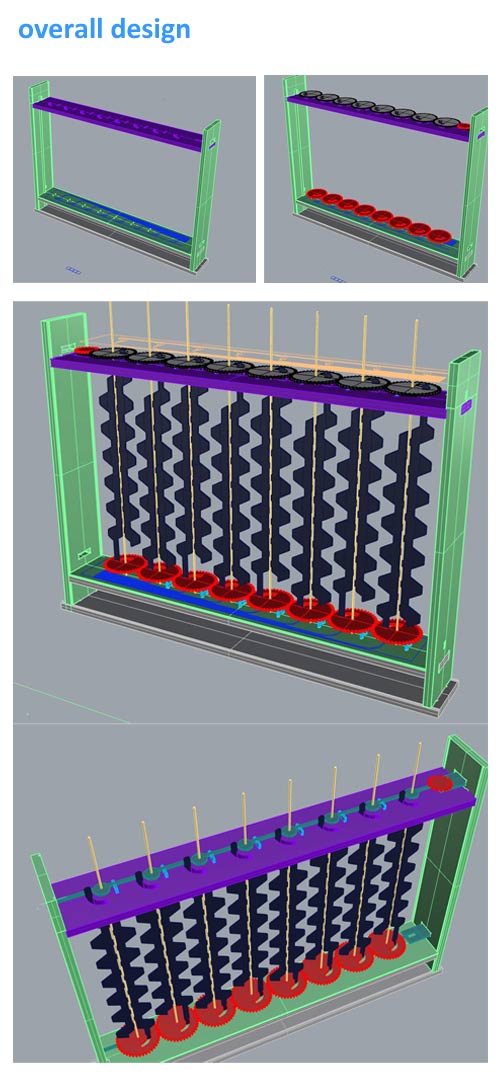
Structure
The Unit is divided to several parts. each part consist a different discipline that we were practicing through the course. we have divided the tasks in such manner that me and Gali were both dealing with as many disciplines as possible, separately and together, that is why, in order to get all the necessary details concerning this project you will have to navigate between my site and Gali's.
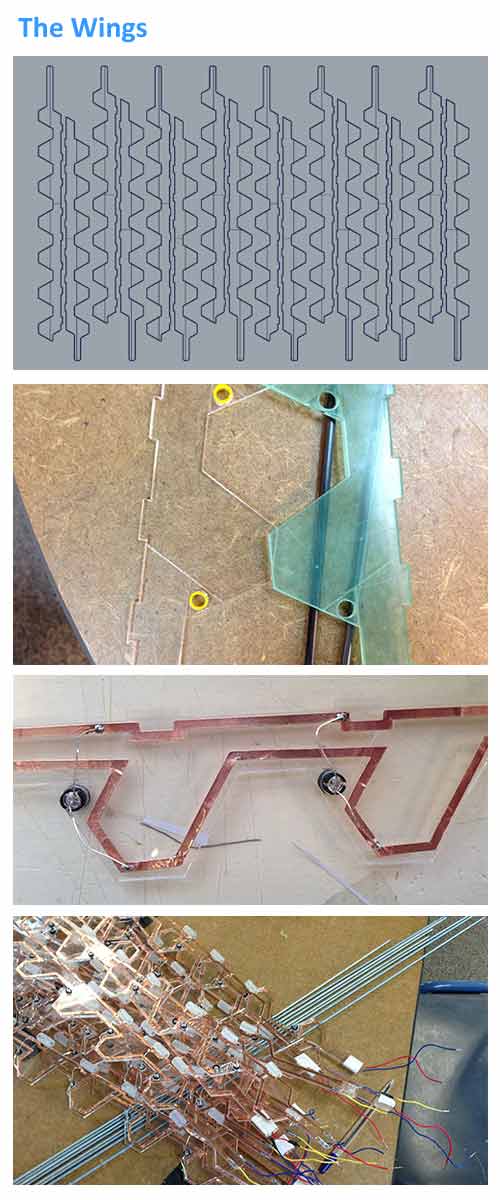
Wings
The wings of the unit are the core of the project.
Besides their shape, gathering the lightning and shading elements,
These are the turning parts that are determine the effect of the device,
and in the future version, will be also the parts that will carry the photovoltaic cells.
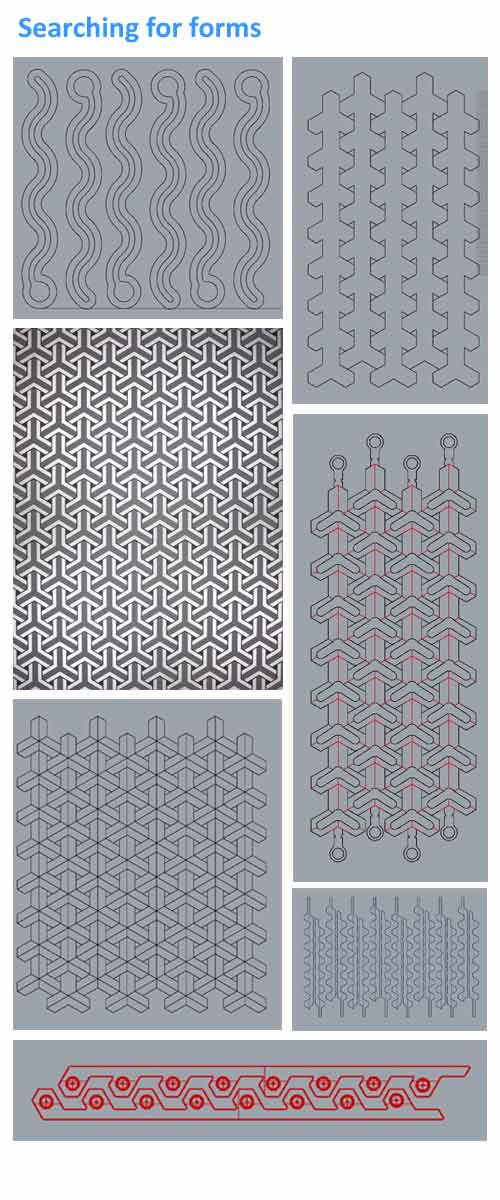
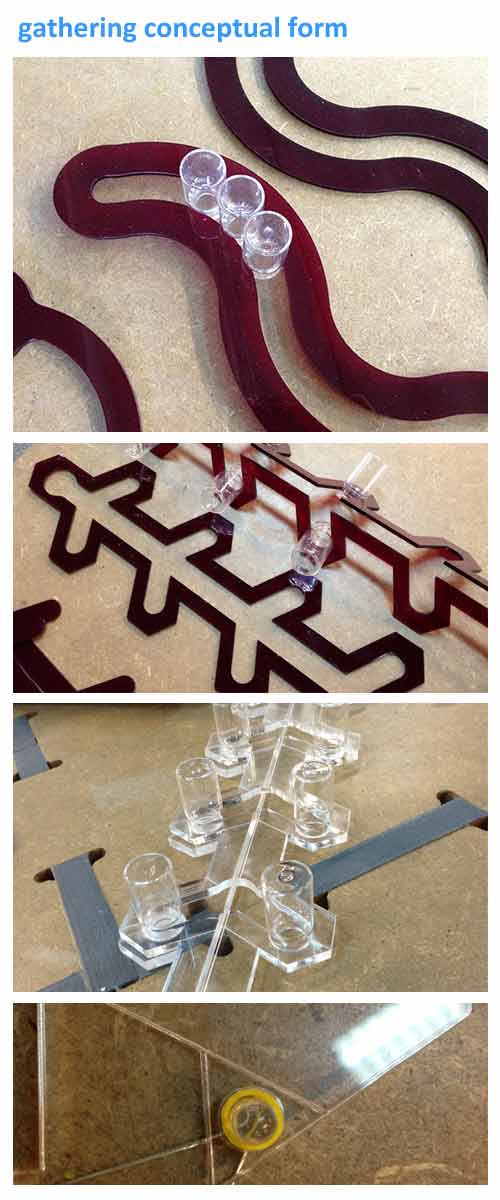
Shape and forms
Inspired by the butterfly hinges and the shape of the wings, geometric shapes and mathematical patterns shape that complete itself to a closed pattern.
naturally it is possible to generate many more shapes that can be tiled together.
 There are 16 wings that attached in pairs.
each pair contains 2 wings, one is connected to the lower turning mechanism(90 degrees clockwise)
while the other is connected to the upper turning mechanism
(90 degrees counter clockwise).
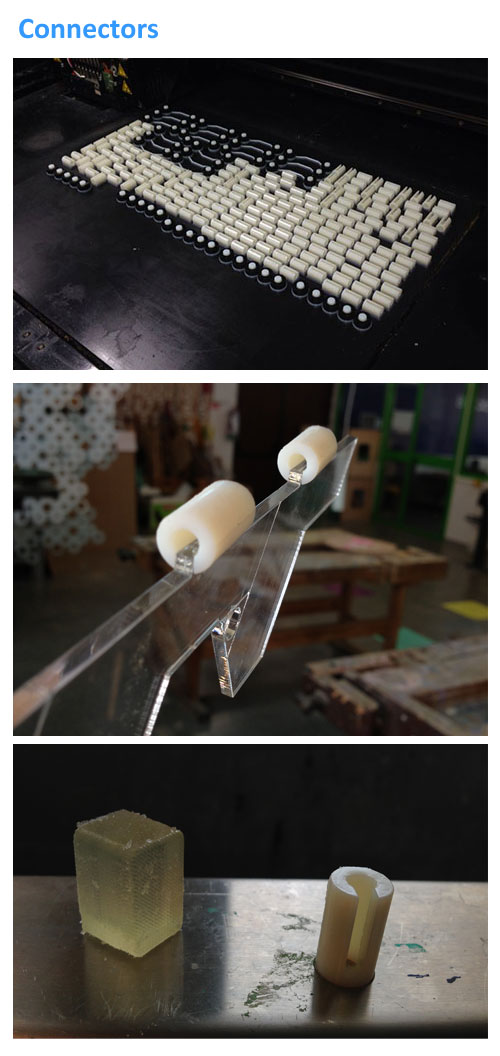
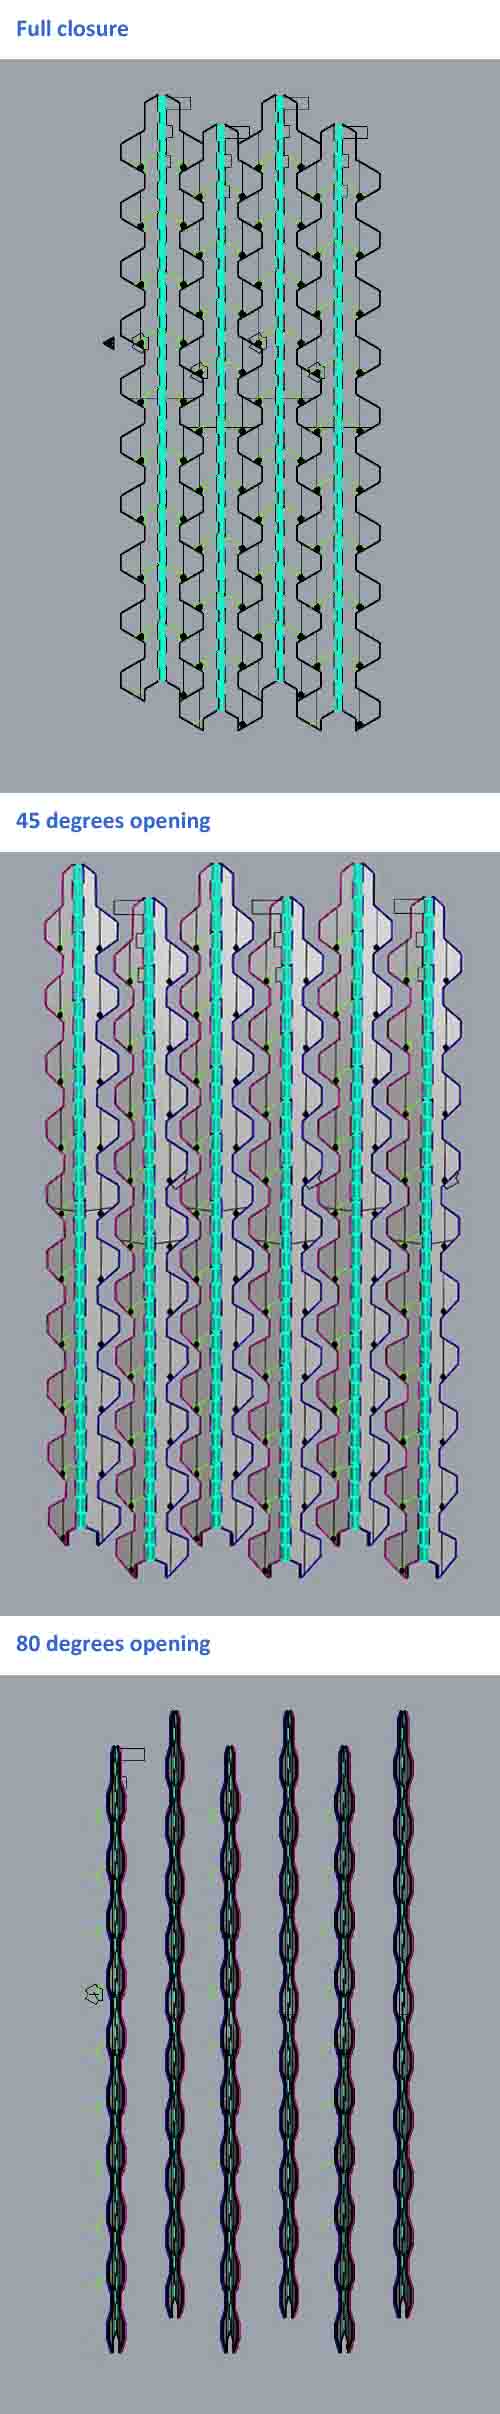 A common connecting part is attaching the two wings together to a 1 pole and let them the ability to turn simultaneously under the same hinge.
I have designed a connector that will attach 2 wings to the central hinge in order to achieve the butterfly hinging. We used 128 pieces of 3D printed connectors for attaching 16 wings in 8 different locations each
Each wing is carrying specific locations to carry 6 LED's along.
each LED and its housing press fit by comparing diameters.
for each wings there are 2 ends - one that ends up as a cut and another that fits into a cog wheel.
conneting the LEDS wings from on .
Material used:
PLA , Plexiglas - transparent and mirrored, 96X LED 5mm 20mA, 3M
adhesive copper film, 8X metal threaded rode , 120 X 3D printed connectors
Technique and software used:
CURA, Rhino3D, Illustrator. Soldering, vinyl cutting, Laser cutting,
Stratasys 3D printer - Global educational department.
download files:
the wings in a DXF format (right click and save as)
a connector in STL format(right click and save as)
Brains
The brains of this project start from our input device, The photocell sensor.
The photocell receives data from its surrounding and gives instructions to the output devices, Servos and the LED's.
we used the Arduino board and coding language for it to work.
I was in charge on the LED's while Gali was in charge of the Servo engines.
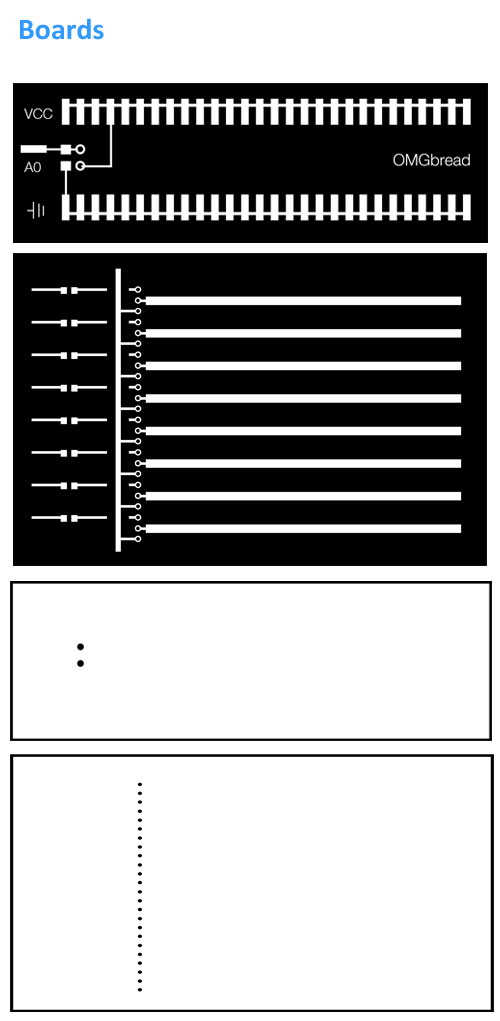
At first we wanted to mill all the PCB's ourselves.
We wanted to create two different boards one for the servos and one for the LED's.
After we would have created two different boards we would have connected them so they could communicate.
The entire product is, basically, a very large PCB which all of its connectors and wiring system is complicated.
The entire product design is also electronics design.
We had to invest most of our efforts in the entire box rather than in the small PCB's for the 2 servos.
We separated the electronic design of the box into two levels in the box so each of us would have experience the electronic design of the product.
I have created the code for the connection of the LEDS and the photocell and
Gali created the code for the connection between the servos and the photocell.
When each one of them worked separately we merged the two together.
We created a very convenient code while merging the two together.
We created one code which has tabs and is connected to the tabs with H files.
download the code:
(right click and save as)
Interface and application
While using Arduino to activate the project we had to add some processing features to it as well.
We added two different features.
I created a power button in the computer. This means that we have complete control on the product thru the computer.
Gali created a connection between the sensor and music.
This means that from the sensor's data different songs are played from the computer depending on the time of day.
These features which we created with processing are just the beginning.
Thanks to the simple connection between Arduino and processing
we can create an actual relationship between the outside surrounding and the features of the computer.
Download the processing code Here (right click and save as)
Power
Using the 3M conductive adhesive copper foil allowed us to play with the pattern and graphic elements of the conductive
that are running on each wing and along the system.
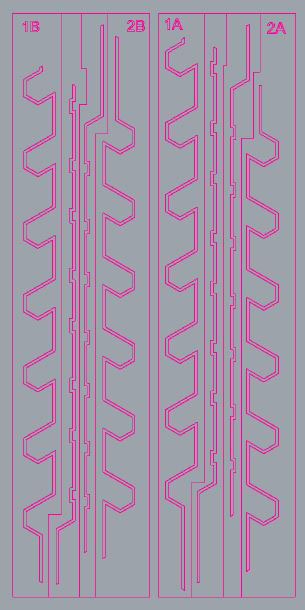
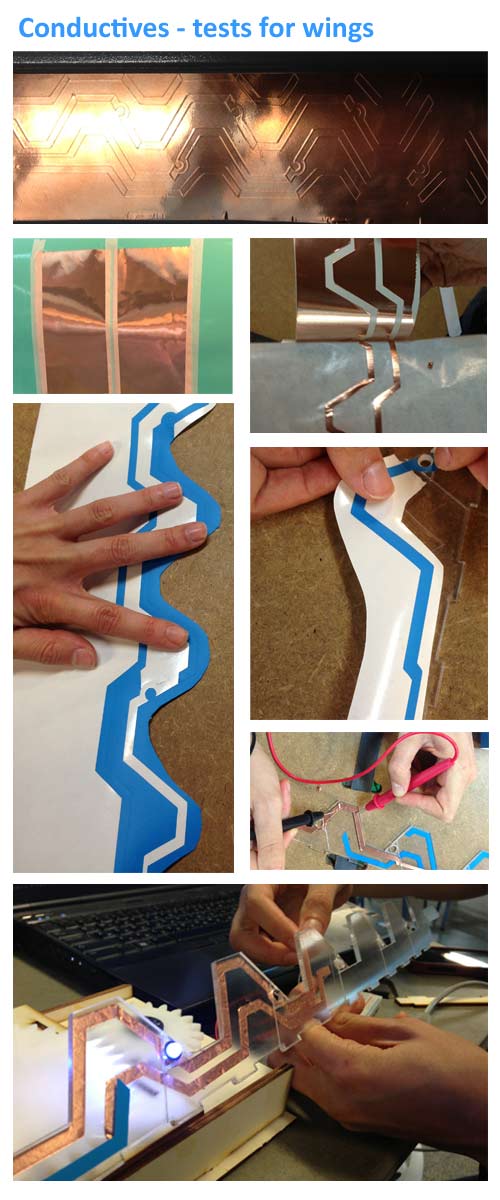
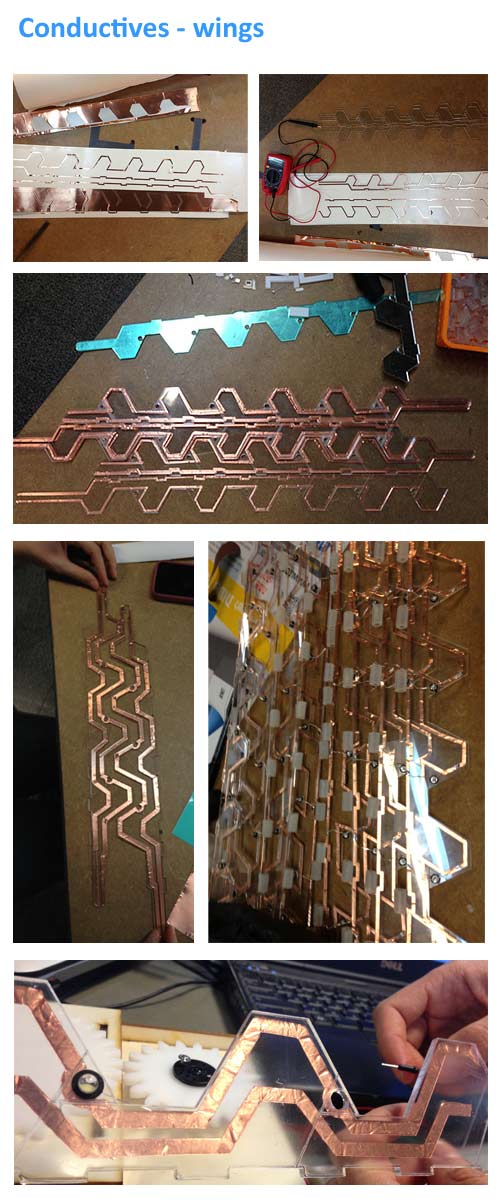
A major plus in this method is the design aspect of it, since we used Plexiglas it worked just fine -
but it won't work with natural materials or non flat and clean surfaces.
therefore when it came to the part on which I planned the upper part we have decided to mill pockets for the wires in order to keep them in line.
Designing the power network for the unit was not simple,
we had to consider the power outputs for the LED's and to calculate the right voltage and ampere to be released in each wing
in order for it work properly.
we also had to consider wiring of each led per wing (16 wings ) all in all
we have connected 96 LED's, 2 mini Servo engines, 16 TIP 121 transistors, 2 boards and 1 Arduino Mega.
![]()
Materials used: 3M adhesive copper foil, wires, MDF, copper plates, solder, 32 X 10 Ohm
resistors, 16 X 1K resistors, Arduino Mega, 16 X TIP 121 Transistors.
technique used: design in Illustrator and Rhino3D milled in Modella CNC cutter and Roland vinyl cutter
Download the wings conductive path Here (right click and save as)
Download the PNG for the boards Here (right click and save as)
files
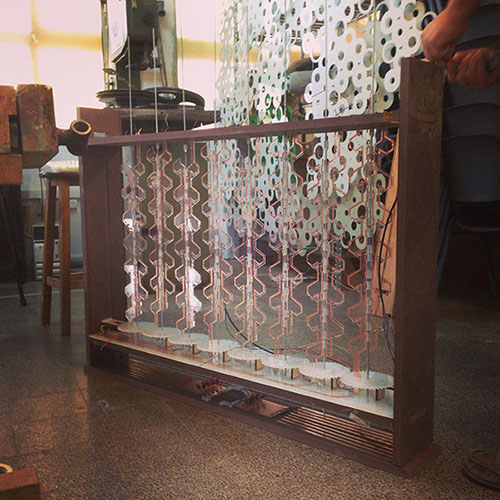
Prototyping
In our prototyping level we didn't take in consideration the solar energy part, mostly because the lack of time. nevertheless, the Voltage and Ampere needed in order to operate our prototype was not higher than an average 5V USB port.
Butterflies is a conceptual idea of a product that might make a difference if it will get its right direction and guidance. Considering the very limited time we had to develop our prototype we managed to assemble all the parts together and made it work.
We are intending to keep on working on the prototype and hopefully to reach the level of which it can be exhibited and deliver our concept closest as possible to our vision.
I would like to thank Ohad Meyuhas our mentor from the FabLabil, his devotion for this course and its students is exceptional and inspiring.
A big Thanks to Tal of Dana and Gili of Gali and for the rest of the Class and staff of 2014.
Oded Shorer
June 2014

Copyright 2014 | Designed by Oded Shorer