Lesson 9 - Molding and Casting
Joining forces
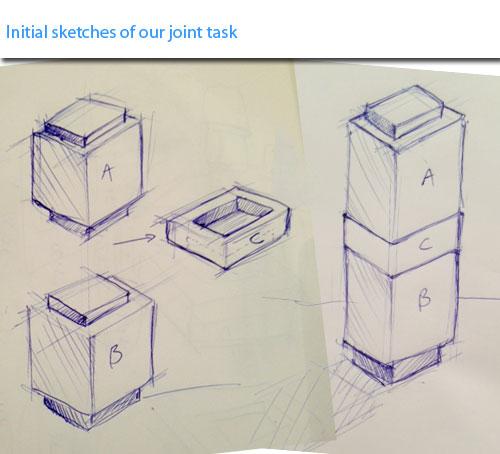
The great thing about the task this week was that we came up with the idea to collaborate
and join forces to come up individual items that can be assembled together into one object
We all designed our mold under the same concept .
Our concept was A building, which each floor is designed by a different student
and the floors will be attached to each other by a standard piece.
.
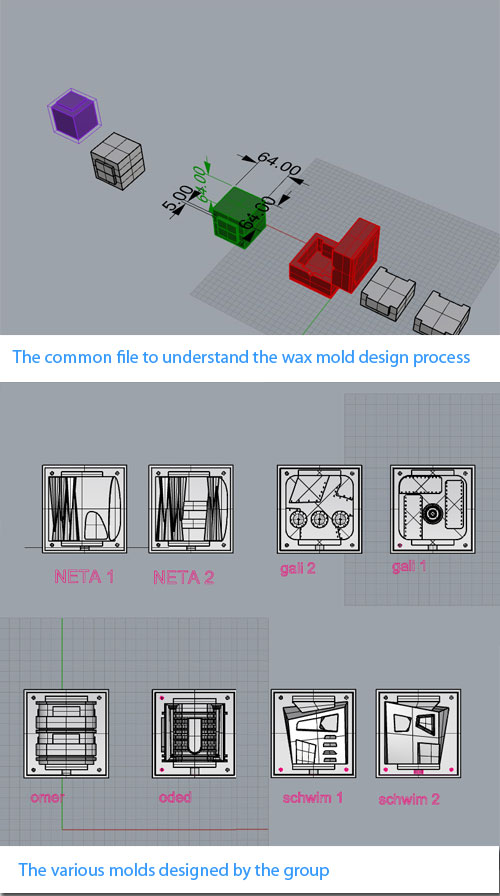
Each student had to consider his mold together with assembly parameters and defined size.
I have designed an open file on Rhino marking the design limits of the floor, and distribute it to the rest of the class.
Each student was preparing his file and uploaded it to the common copy folder,
Designing the mold
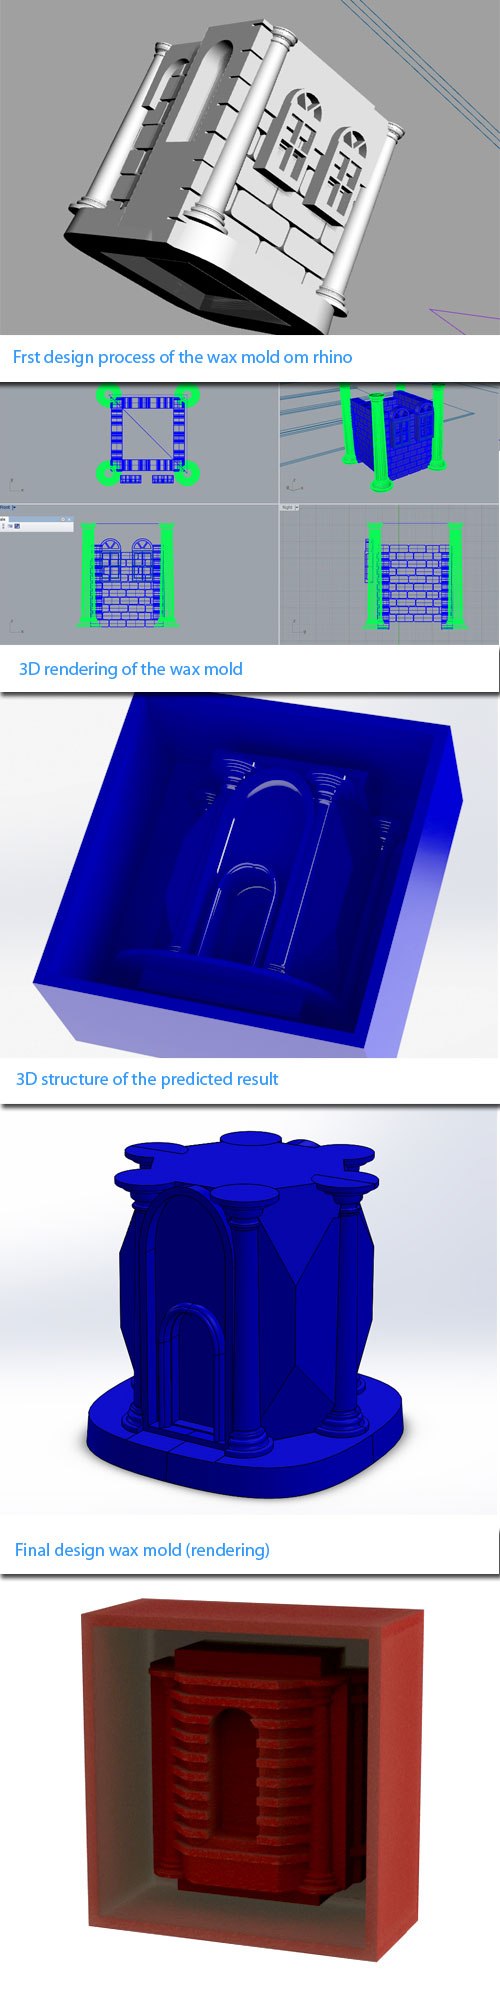
The most difficult part was to plan the mold, we have tried to avoid undercuts and sophisticated molding because of the time
and the fact that we had to keep a simple standard to get a common result.
I have created few designs to choose from and some of them were not fitting by many technical aspects
so, I had to refine and change my file untill I achieved the satisfying result.
but yes, the invert of the shape and the technical -
one direction limitation were creating few mix ups and I found myself struggling more than once on the size of the milling cutters for details and the depth of the mold, finishing abilities
and the orientation of the mold on the CNC bed regarding the file.
few things we had to learn on the hard way that requires attention to details are:
1.placing the wax block according to your file - especially if it is not an accurate square.
2. check your milling cutters, their size for rough and soft finishing, and most of all - the range of their Z axes (how deep can you go with it)
3. design you mold considering the extraction angle, the general border lines from all sides, do not bring your design all the way to the top of the mold nor the bottom.
4. leave a "tube" connected to the parting line area for the negative mild to be poured in.
5. run some test before milling - see how your material is acting, what level of accuracy and finishing you can reach with your tools and design your mold accordingly.
milling and filling
I have exported the file on STL format and went to the CNC machine.
we have used 2 milling cutters of the size of 1/8" -
One flat headed for rough milling and the other for the finishing and smoothing, both cutters left a pattern over the wax.
I was placing the wax mold in the center of the milling bed using 2 beams in order to fix the mold to the bed.
we have also used a double sided adhesive to prevent any movement.
I have uploaded my file to the ShopBot 3D program and created 2 files, one for each cutter.
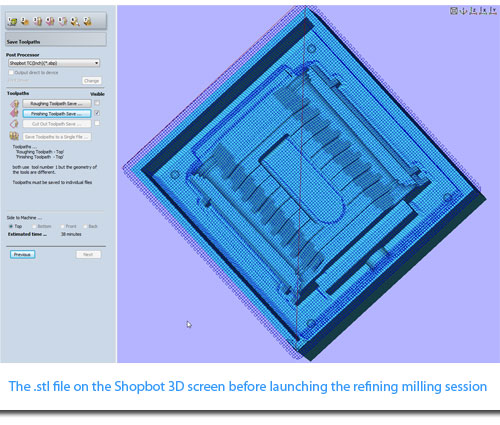
Then, I started to mill the wax.
after an hour or so, i could have started with filling the mold with silicon
to create the negative mold that will be filled with the final outcome material.
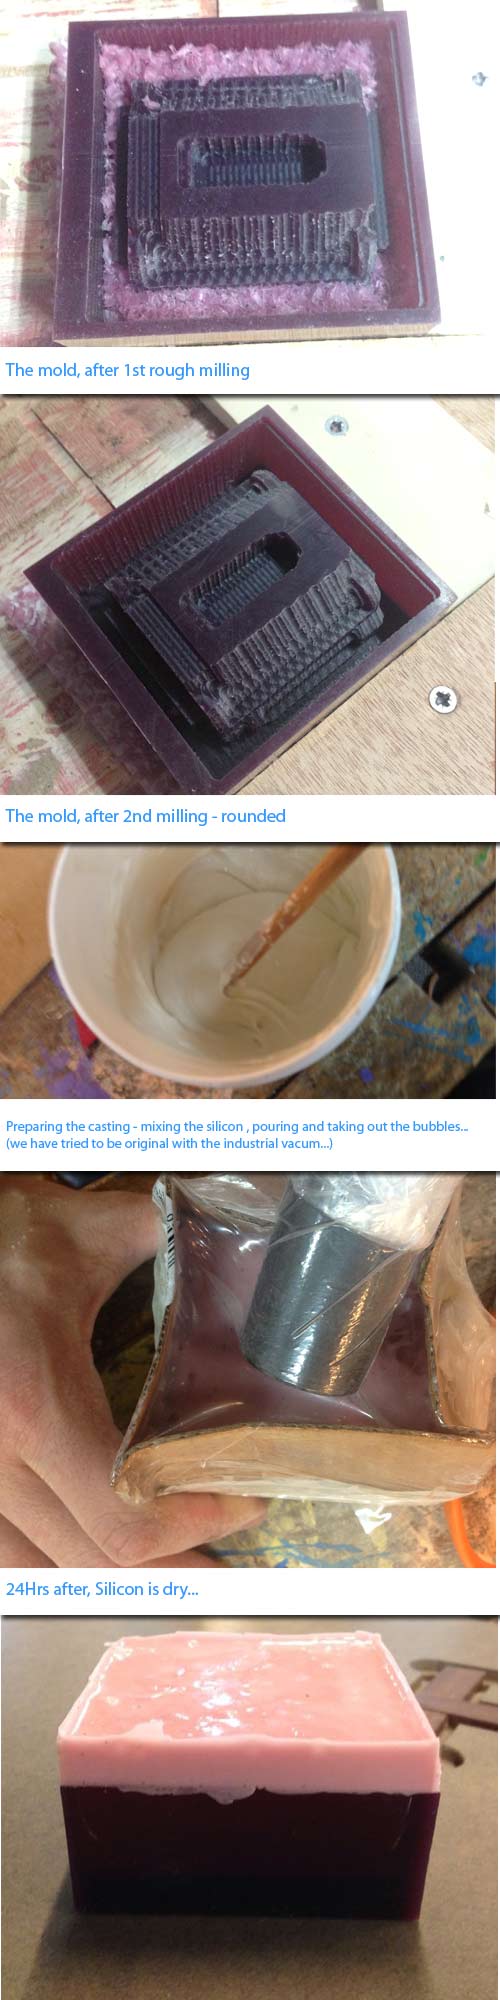
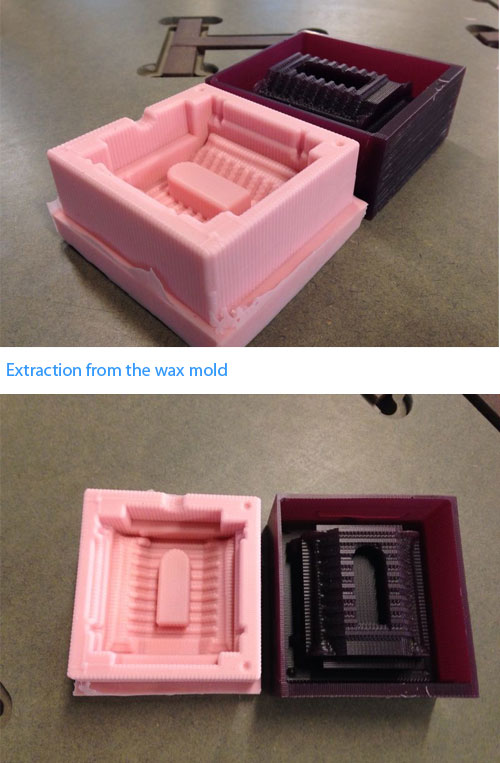
Extraction
Thanks to the flexible filling material (silicon)
Extracting the negative was easy, I also never had the need to use any kind of
seperating material from the silicon and the wax.
After almost 24Hrs I have extracted the mold, and I was ready for the next one...
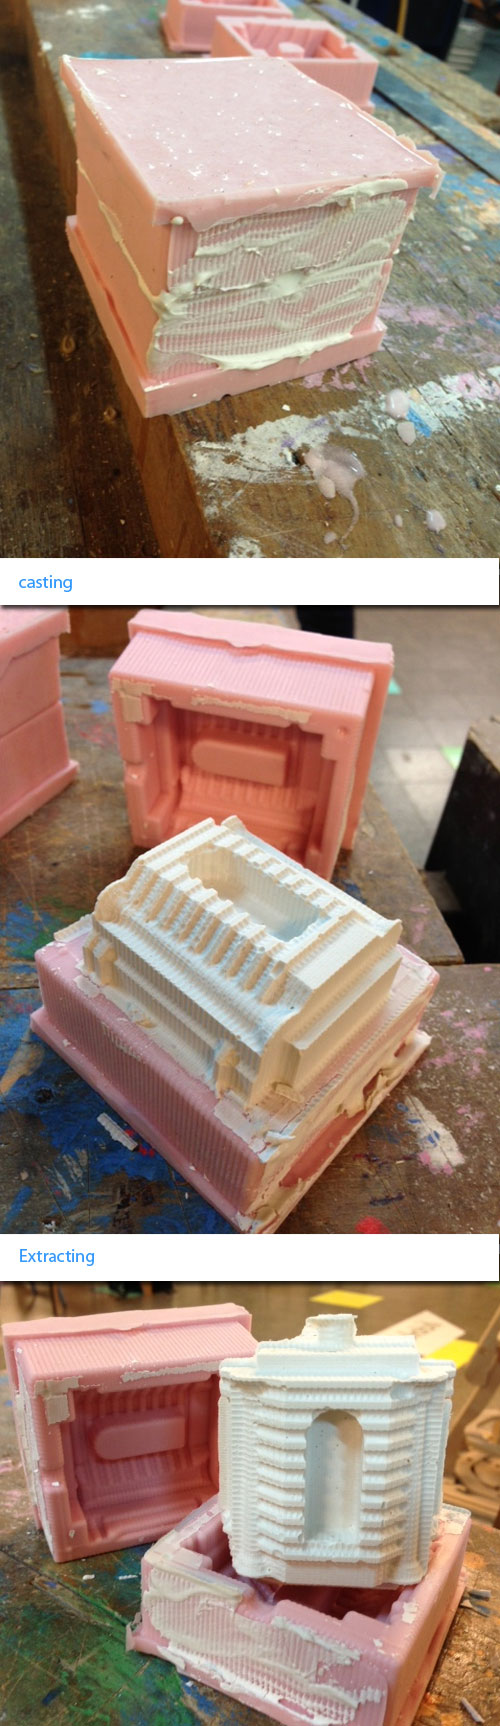
Casting
After we had the silicon molds we were preparing the casting mix.
we used Albuster plaster mix to create each "floor"
This matrial dont need more then 15 minutes to dry, and the extraction from the mold was extremly easy
thanks to the silicon mold.

Copyright 2014 | Designed by Oded Shorer