Lesson 13 - Networking and Communications
This week we were connecting few boards together,
and our task was to create a network between them with an output.
We have started with the milling.
We have downloaded hello bus boards from the website.
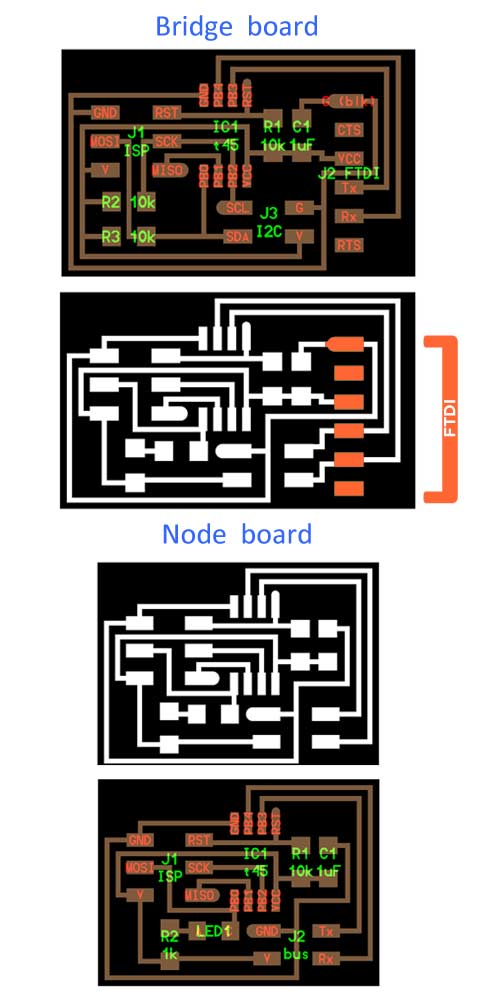
We have started with 1 bridge and few nodes.
It was important to understand what makes the bridge the master, (FTDI header)
how the communication method works physically,
what is needed to program (hello.bus.45.c),
what are the terms
TX - transmitting and RX - receiving and how they appear on board.
We have also introduced to the serial code timing (9600) and understood the logic behind the quartz component.
We have followed the tutorials of Anna on which she is explaining very clearly
what are the steps to be done in order to create the networking.
we have started with the bridge board and programmed the hello bus 45 on it with the AVR.

Our introduction to the code was basic but clear enough to
understand the terms of the intervals we can change in the timing parameters,
Define delay and define LED (output) delay.
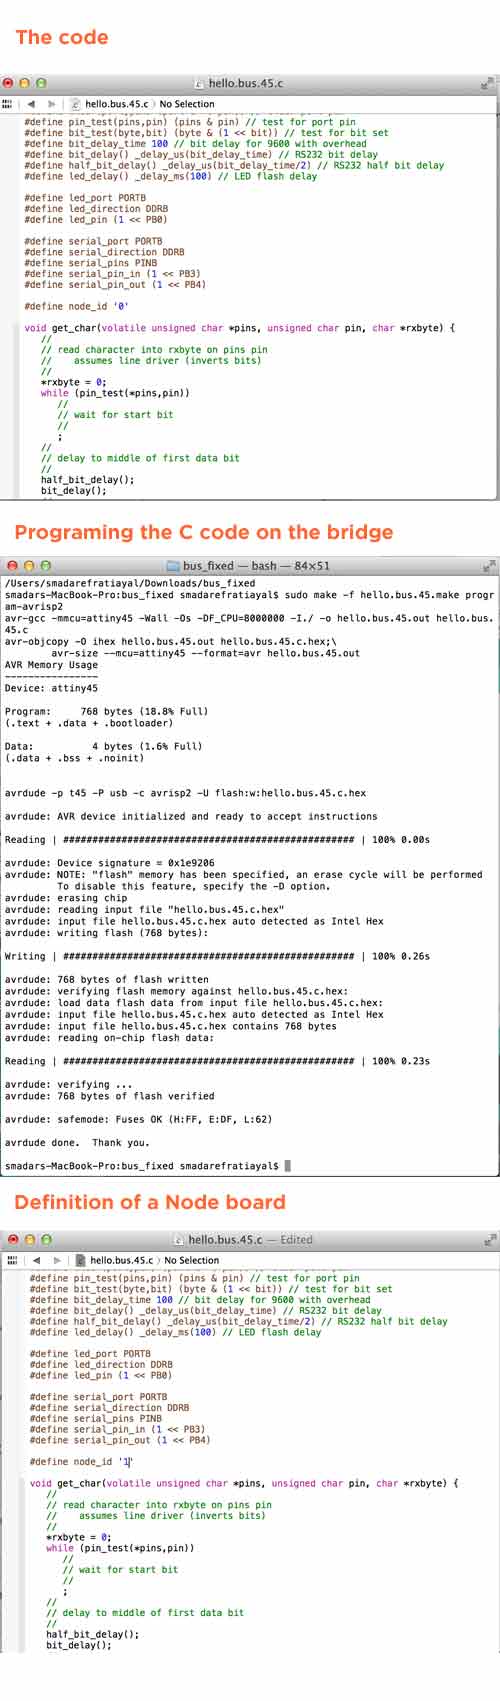
we have edited the code to see the different delay parameters in action.
next step in the code was to define the nodes and to name them, and their reaction on the serial code.

we have defined node ID with a number - 1, 2, 3
We determined the output by editing the command by ordering an output from the serial pin - (TX)
Omer and Dana manage to connect to the LED delay serial pin a motor which was
reacting according to the delay commands.

Copyright 2014 | Designed by Oded Shorer