14 Networking & Communications
The assignment for this week is to build a wired or wireless network of boards ( minimum two nodes). I used files of hello.bus.45 board to mill and build 2 nodes and one bridge. Files are available on MIT website. The bridge board is connected to the computer through the FTDI wire.
Milling Boards
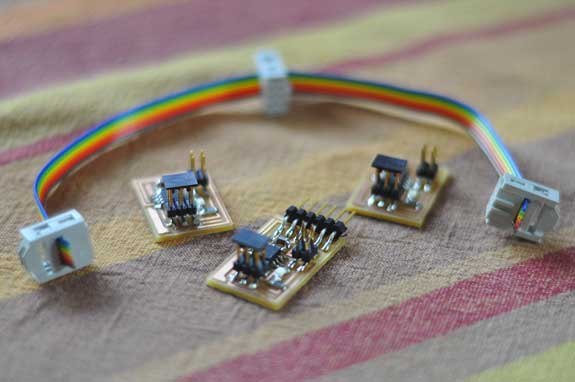
I milled 3 boards (two nodes and one bridge) - shown above - which will be used to in the network.
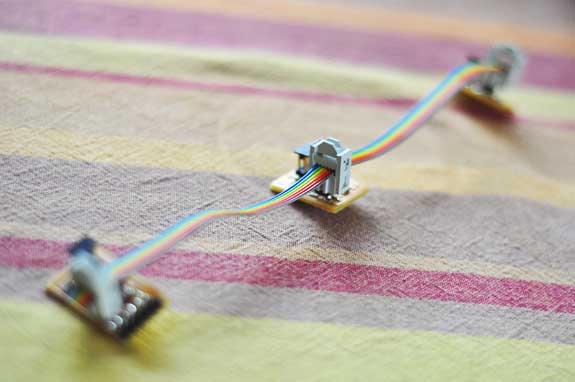
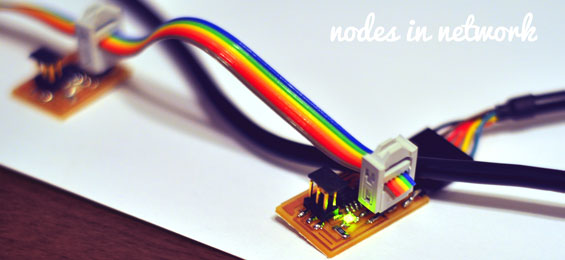
Above is an image of how the network will look. The bridge board (shown in the left bottom corner) will be connected to the computer through an FTDI cable. The bridge board is then connected to the two nodes. In fact all three boards are almost identical, the first boards only has a small difference in that it can be connected to an FTDI cable, therefore making it an essential part of the network.
Modifying C Code

We now modify the c code so that each node has its own name. The bridge board will be called 'node 0' and the nodes will be called 'node 1' and 'node 2'.
Using the Network
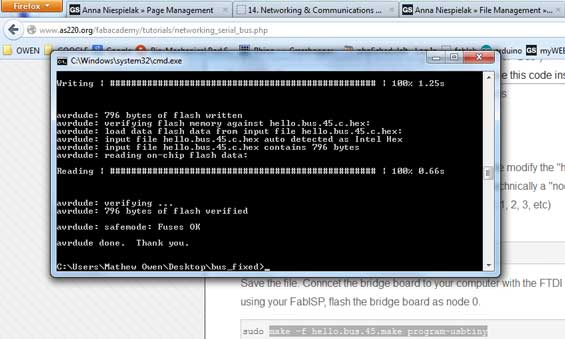
To program each board I used terminal in Windows. I typed cmd command to open the terminal window (in Windows) and next I found the same directory where I had saved file with the c code. To flash the brigde board I connected it with FabISP and I left line in the c code " define node_id '0' ". I typed the command :
make -f hello.bus.45.make program-usbtiny
You should see confirmation message which looks like:
Next go back to the code and change number of node id to '1' like in picture below.
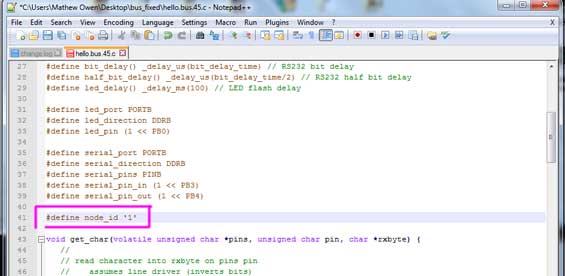
Save the file.
To flash node number 1 follow the same steps as before. Connect node 1 with FabISP. Open terminal and paste:
make -f hello.bus.45.make program-usbtiny
You should get message like below:

Then repeat the same process again to flash node 2.
Using Arduino IDE to talk to the Network
Plag the nodes network to your computer using the bridge board and a FTDI cable. Open Arduino IDE and go to Tools in Menu - Serial Monitor, change value to 9600 baud.

Then pick a number -> one of the nodes and enter to the serial monitor. You should see all Leds should light up first and then one which was choosed should blink again. In the serial monitor you should see answer from the node which number you entered.
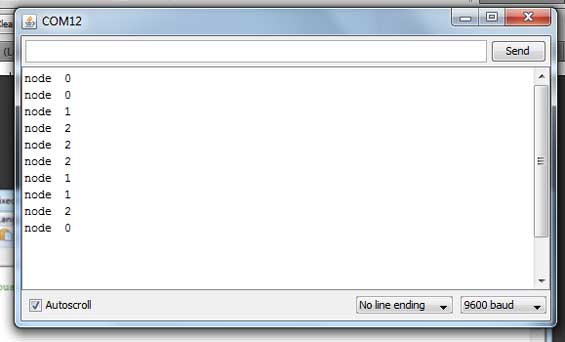
Here are nodes in action


