Molding and casting
I decided to make a planetary gearbox for a NEMA17-stepper-motor. I found this really nice parametric gearbox from “chowderhead” on thingieverse.com: Customizer Planetary Gearbox

It is intended to be printed on a 3D-printer, but I think the surface quality of a molded piece will be much better.

A very pleasant way of working in OpenSCAD is together with Sublime Text using the Textmate Bundle. This way you get syntax-highlighting and auto-completion in the editor. If you check-mark the “Automatic Reload and Compile” in the design menu, you can hide the tetx-editor and it’s sufficient to save the document in sublime text to update the display in OpenSCAD.
For making this work, you have to add the Textmate Bundle to your sublime packages. On Debian-Linux the easiest way to do this goes like this:
cd ~/.config/sublime-text-2/Packages
git clone git://github.com/tbuser/openscad.tmbundle.git OpenSCAD.tmbundle
Now you can find OpenSCAD under View —> Syntax.
I changed the design a little bit, because the 0,5mm mill I’m using only has a reach length of 7mm. Because of this I also had to change to ball-bearing from a 624 to a 623:
// 623 bearing
od_623 = 10;
id_623 = 3;
h_623 = 4;
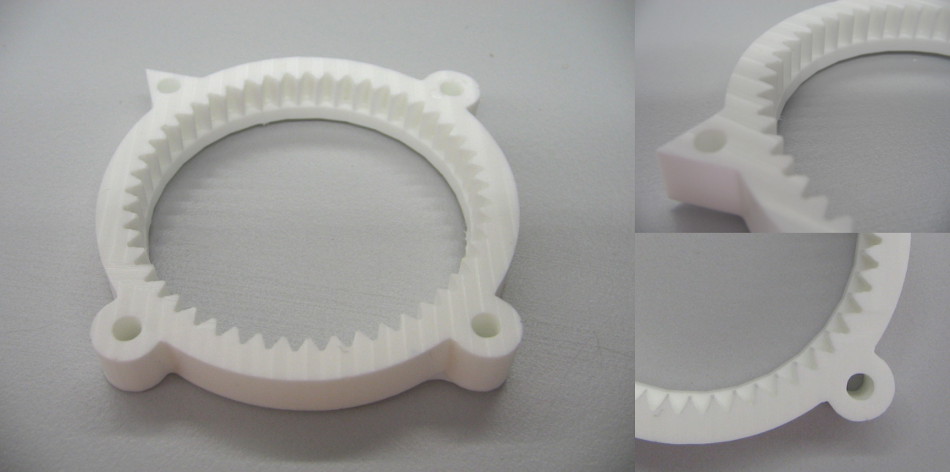
After changing the screws and adjusting some minor things I ended up with a tool-able design. Since the tool-able wax is quite expensive and the casing doesn’t need to have high quality surfaces, I decided to only cast the sun gear, the planet gears, and the ring gear and 3D-print the rest.

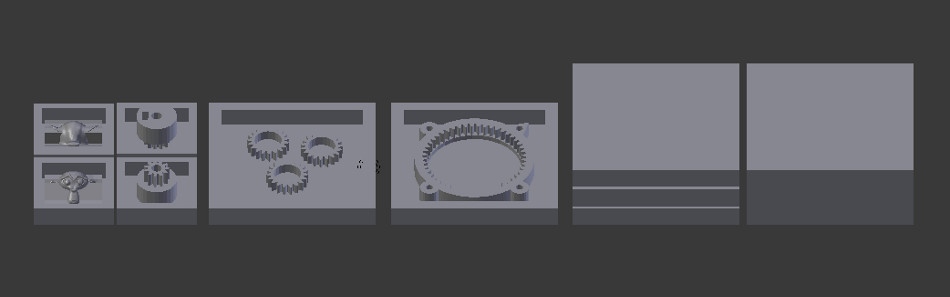
For having a look at the assembly and the quality of the generated mesh I exported the .stl-files to blender
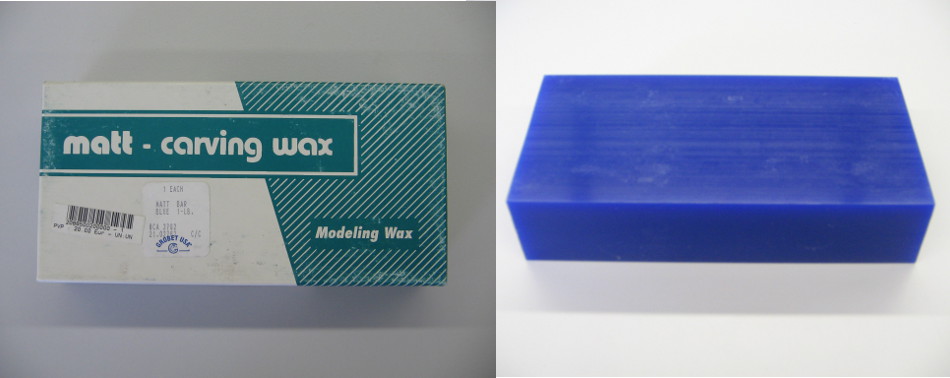
I bought a block of casting wax in a local store for goldsmith-supply. Matt offers wax in three different colours, ranging from Green Rigid, over Purple All-purpose to Blue Bendable. Actually I wanted the purple one, but the blue one was the only one that didn’t come in pre-cut pieces that where all to small for my design.
The first challenge was to divide the block of casting wax into usable pieces. First I cut the bock into half, one for me and one for my colleague Luis.
Cutting my part two times horizontally would give me enough material for making all the parts for the gear, plus some extra pieces that I would use for making a small “Suzanne”.
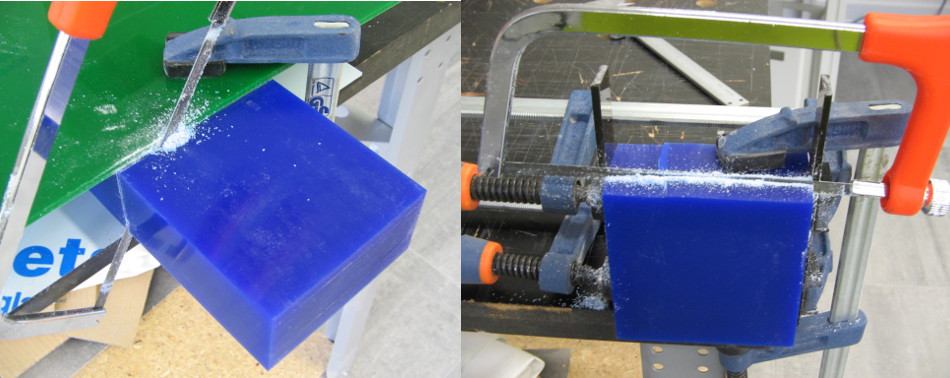
Since our lab doesn’t have a band saw or anything equivalent I tried to buy a fretsaw. To my surprise this type of saw is quite unknown in Portugal. All the hardware and building supplies stores I went to didn’t even know what I’m talking about. I ended up using a tiny coping saw which is definitely not recommendable. A hack saw with a thin blade would probably be better.
For the first cut I made quite an effort for keeping it straight, but since I couldn’t find any metal bars as guides, I took some acrylic which was another bad choice.
I made the second cut just with the block in my hand and some good markings all around, which turned out to be better.
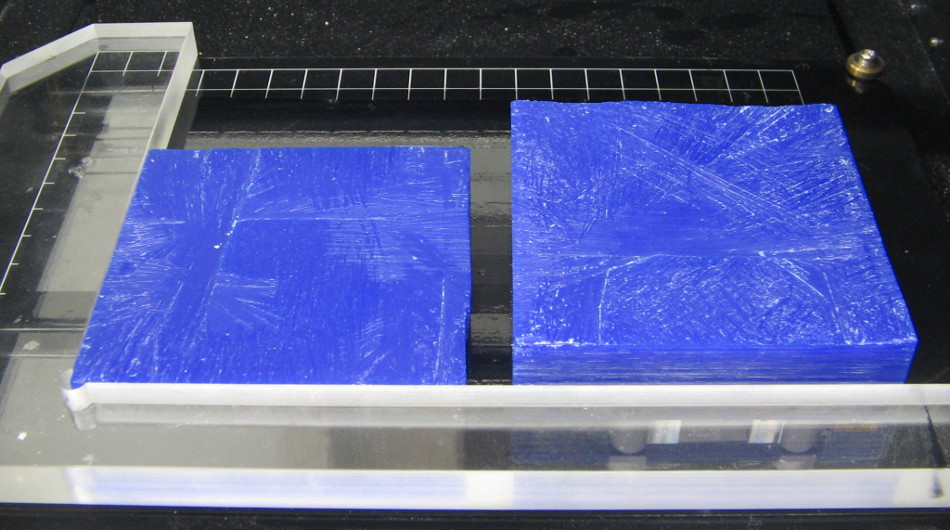
To my own surprise I ended up with three pieces of 10.8mm height, which means that I stayed inside my forecasted 2mm cutting losses!
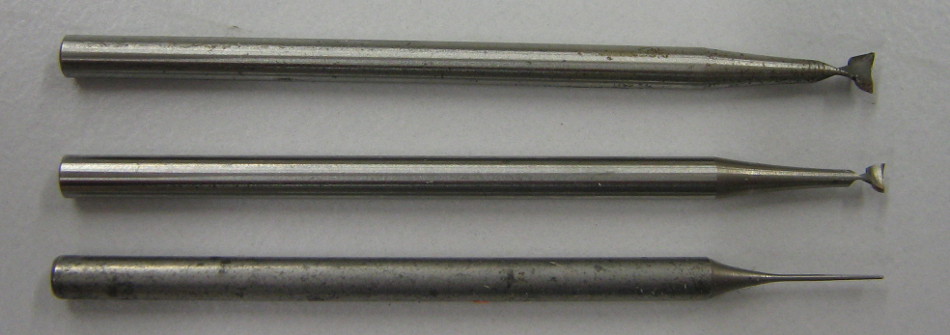
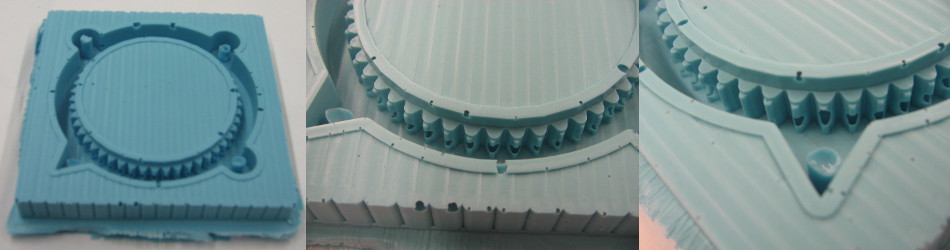
In the same shop where I bought the wax, I also got some mills in 2.7, 1.8 and 0.5mm. They were quite cheap (under 2€) and seem to work perfectly. With the big one I can run the modela at full speed with a cut depth of 0,5mm and a steppover of 80%.
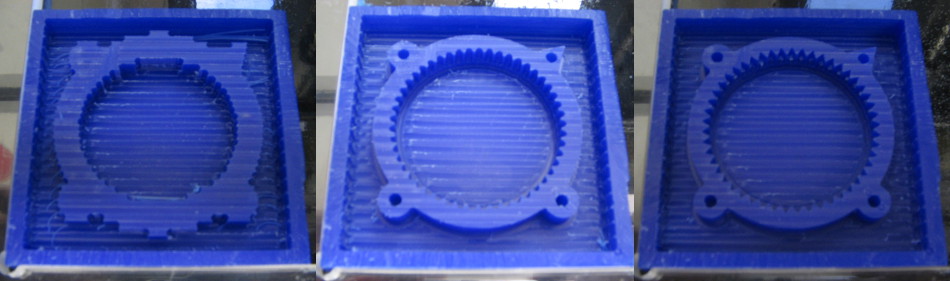
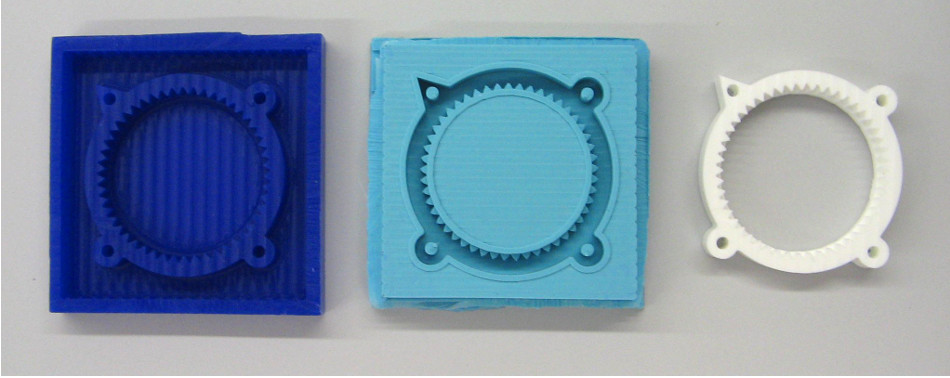
In the above image you can see the three stages from rough to finished-cut that I made on the Modela. I used the ModelaPlayer4 Software for generating the tool-path, because I already know the program. I will document this a bit better soon, and make the other parts with the fab-tools!
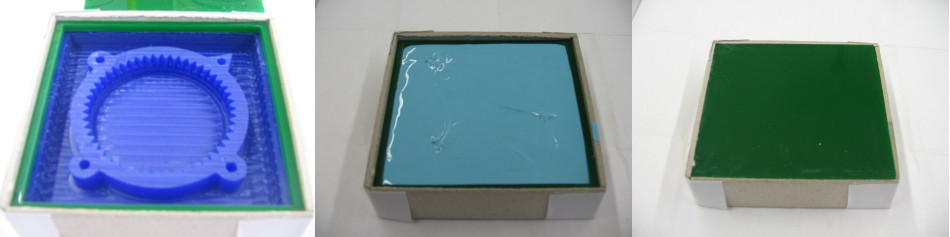
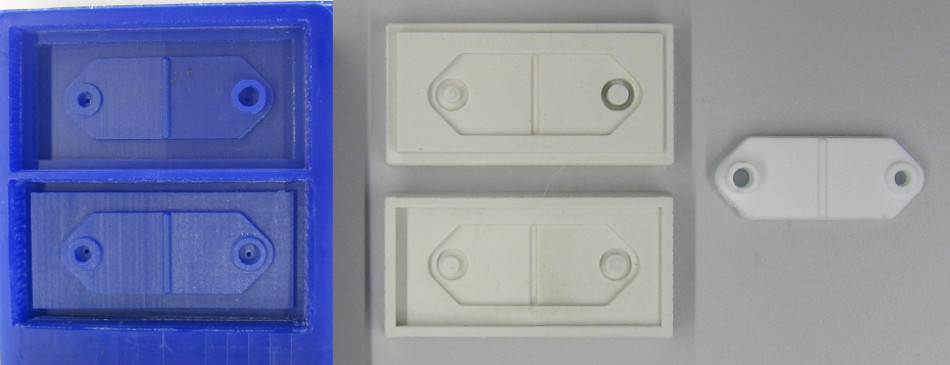
For the Silicone-mold, I ordered OOMOO-25 from a shop in Spain: formx. Since my wax-mold was quite low, I increased the height with a bit of acrylic.
The first cast turned out horrible. Even though I paid a lot of attention the Neils recommendations for mixing and pouring, the mold was full of bubbles. My second try was a bit better, but for the third one I’m going to build a vacuum-chamber with the compressor from the laser (documentation still to come).
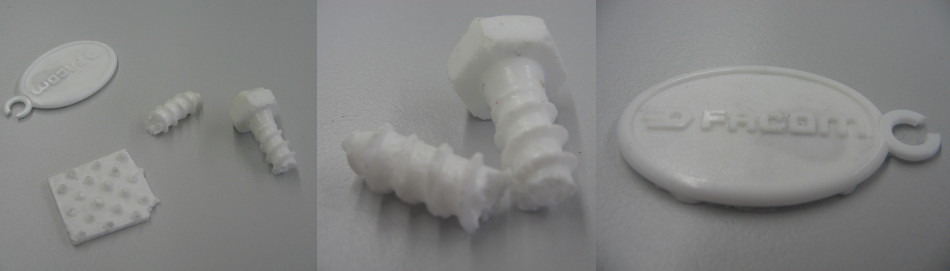
For the resin I chose Smooth-Cast-305 but the first test where disastrous as well. The pieces ended up so full of bubbles that they broke easily. Probably it was a bad idea to cover the mold… more results still to come!
Interesting read: Guerrilla guide to CNC machining, mold making, and resin casting
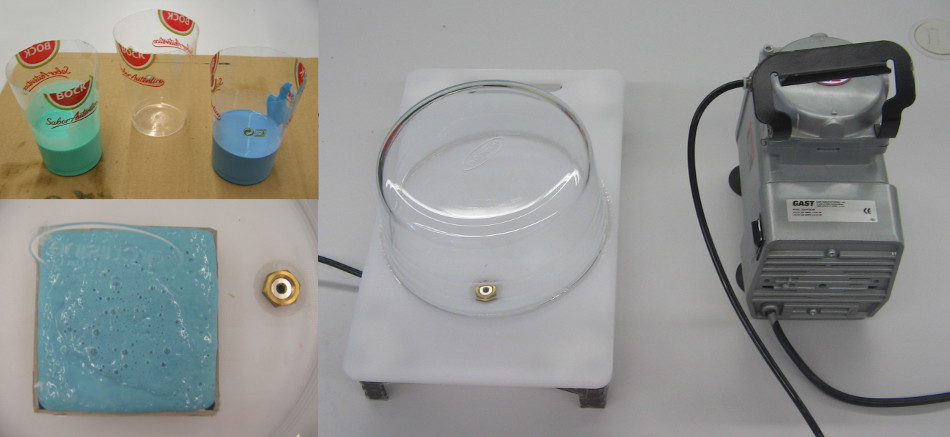
For getting rid of the bubbles I built a vacuum chamber using a glass-bowl and a cutting board (~10€). After milling a circular groove in the HDPE-board I filled it with sealant-silicone for creating a gasket that fits the glass-bowl. I found the right connector for attaching the hose from the compressor that we use for the laser-cutter. By switching the hose from the compression to the suction side and connecting it to the chamber, it creates a strong vacuum under the glass dish. The molding-silicone seems to boil up as soon as the vacuum gets stronger, because all the bubbles expand and float to the surface.
Another trick that I had to learn the hard way (my second mold wasn’t mixed properly) is using three transparent(!) plastic cups for measuring and mixing the silicone. This way it’s easier to get the amounts right and you can pour the two components in the third cup at the same time. If you layer the two parts on top of each other it is much harder to mix them well without stirring in bubbles. The transparency is crucial for verifying the proper mix of the two.
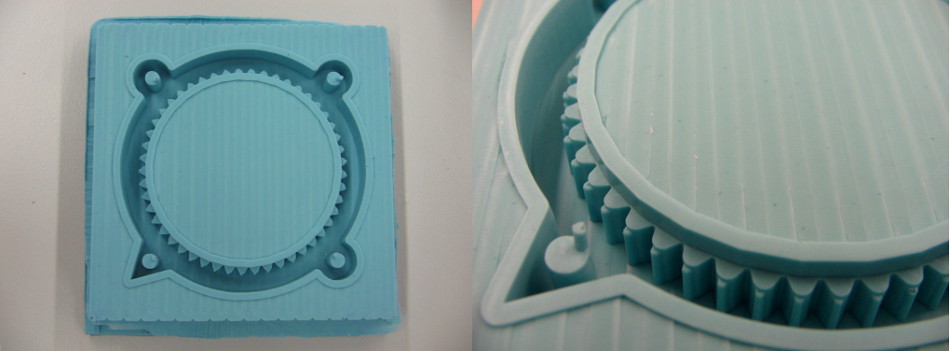
Neils recommendation to pour the silicone in a thin stream is also very helpful (the bubbles will stretch and disappear). I made some very small holes in the wax mold to let air escape from the bore-holes in the gear. If not they are almost impossible to fill. This way the next mold turned out perfect:
Now the castings in Smooth-Cast-305 are also much better:
Unfortunately it is more difficult to get a reasonably priced 623 Ball bearing, so I will probably make a bearing-less design before doing the other molds.
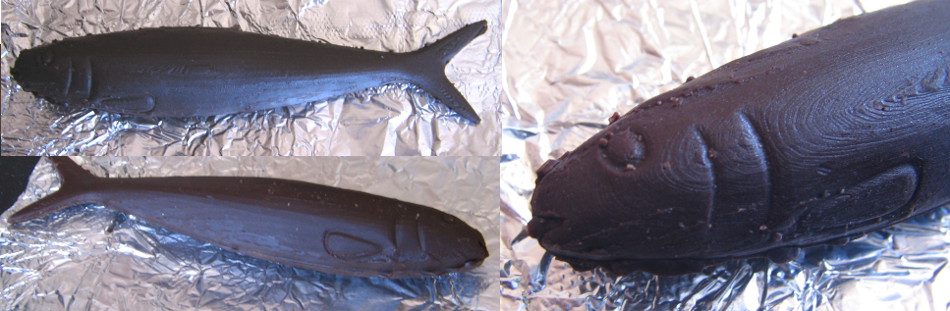
For the “festas de Lisboa” I made some chocolate sardines in two-sided molds:
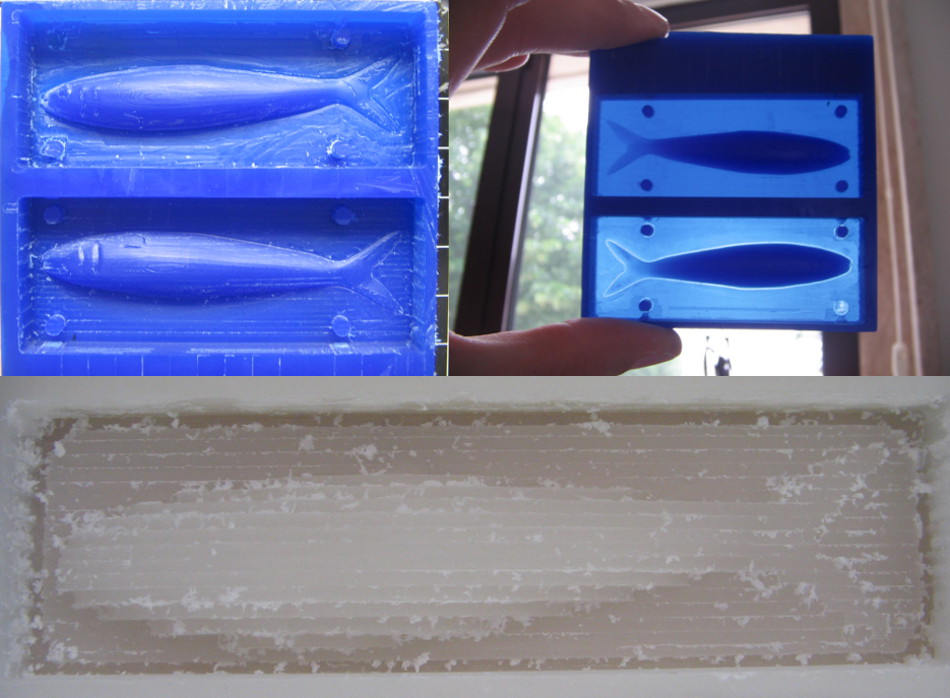
Since the machinable wax is quite expensive I cooked some parafin wax together with HDPE-plastic bags according to this article: Make your own machinable wax. The result was usable but still a bit too soft, so the mill would tend to smear wax to the already finished surfaces.
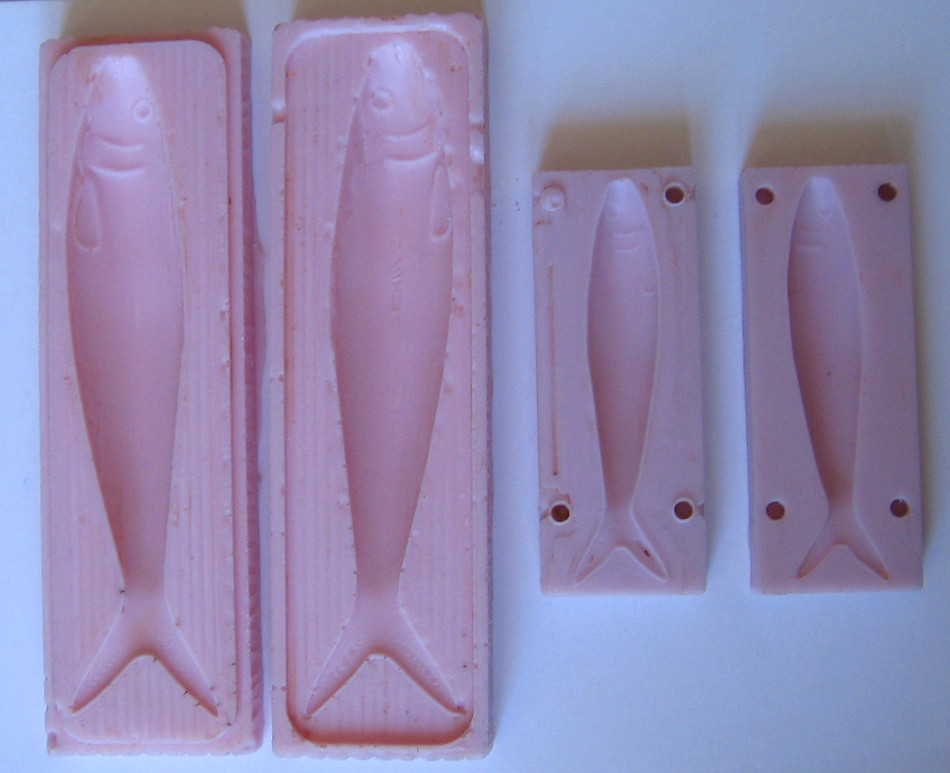
I used the Smooth-Sil® 940 food grade silicone for making the molds.
I also made sardines from hard-candy and jelly.
.blend-file of the bigger +better two part mold.
Together with a fablab-user I made a mold for pieces of a modular frame system: