


Computer-controlled machining
Thanks to our magnificent facebook-page I found this amazing book Digital-Wood-Joints from “Hochschule für Gestaltung Offenbach” which has a very nice collection of frame, board and carcass-joints. Sticking quite closely to the illustrated examples I tried to build something useful:
a wardrobe
First I had a look at the wood-leftovers in the fablab. The only material available in quantity turned out to be some half-cement-MDF. 5 boards of about 1800x850mm. This material is definitely not recommendable for building furniture, but I couldn’t think of anything better for making use of them.
After some time consuming attempts to get the fab-tools running on Debian (I do see the arrows, but the objects don’t appear) I fell back to Solid-Works for doing the design.
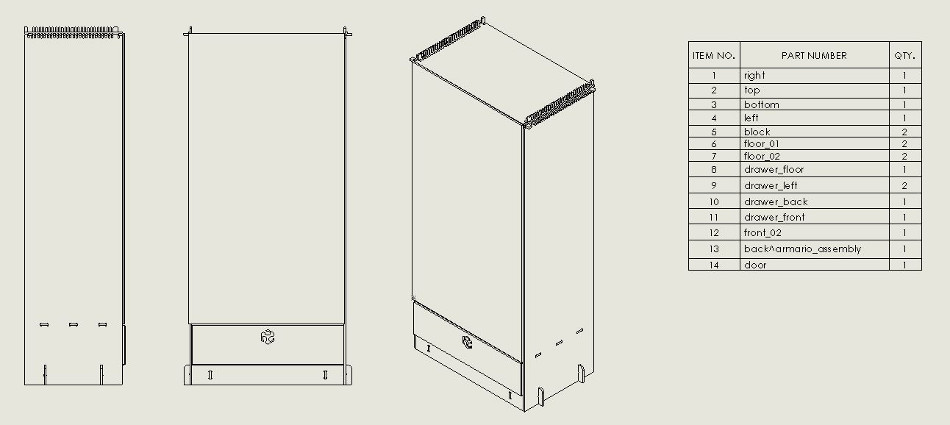
This is how it turned out:
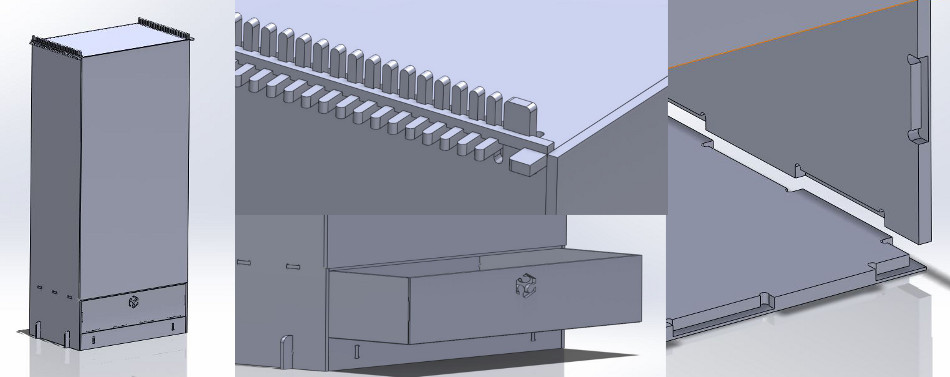
I made all the drawings in Solid-Works, with sheet-sizes according to the board dimensions. I haven’t found a way for doing cut optimization / nesting like this, but the manual way works quite well.
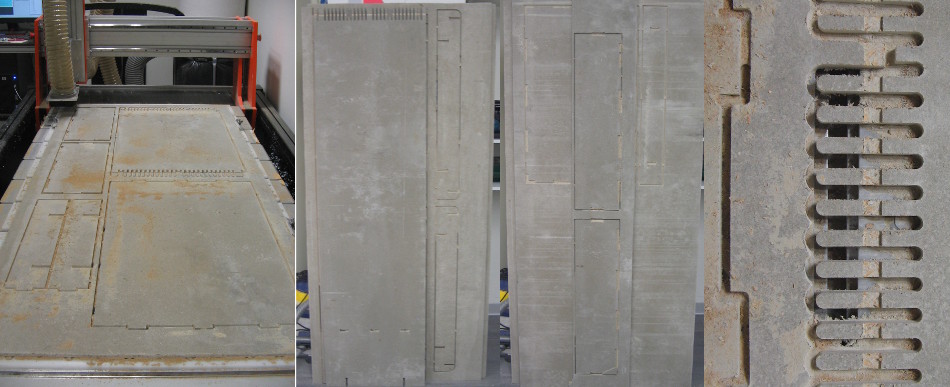
Since our agenda for the milling machine this week was really full, I only started cutting today. I did manage to make all the parts, tomorrow I’ll start assembling.
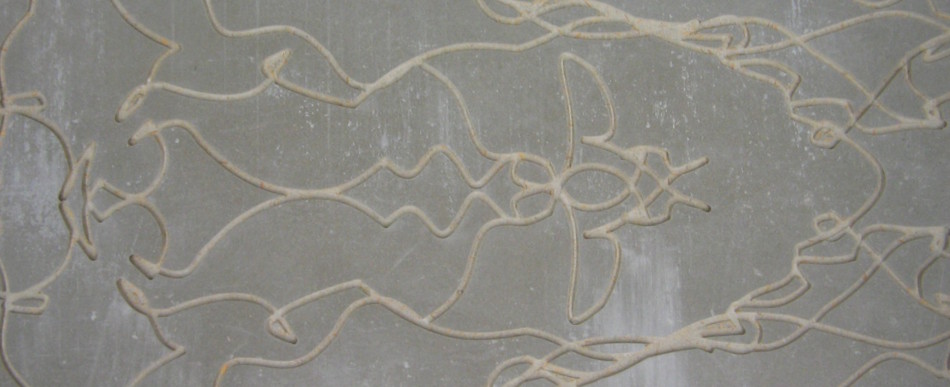
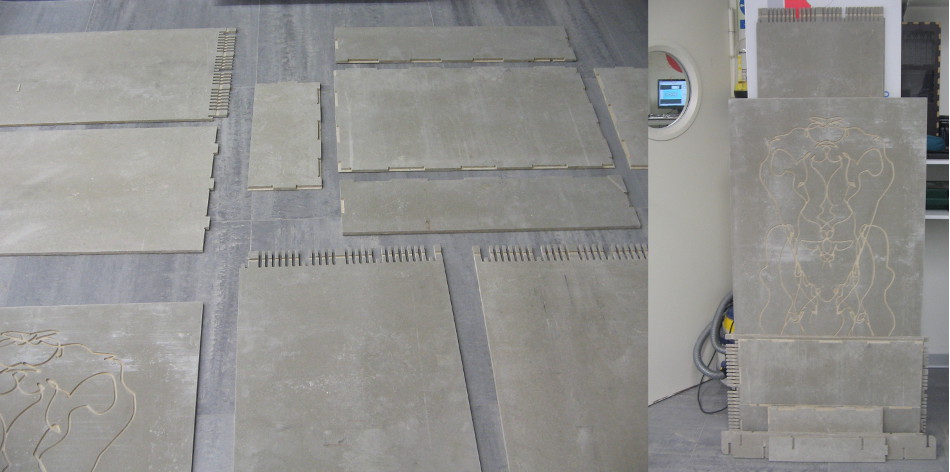
The door looked quite boring, so I decided to make some decoration. I used the drawing program Alchemy to create an svg-file that I could send to the router. It uses the amlitude of the microphone-in to modulate the movement of the pen. Since I was getting quite annoyed after some unsuccessful attempts (rather early in the morning than late at night), this can be considered the visualization of a scream:
All the parts layed out in the fablab before carrying them home for assembly:
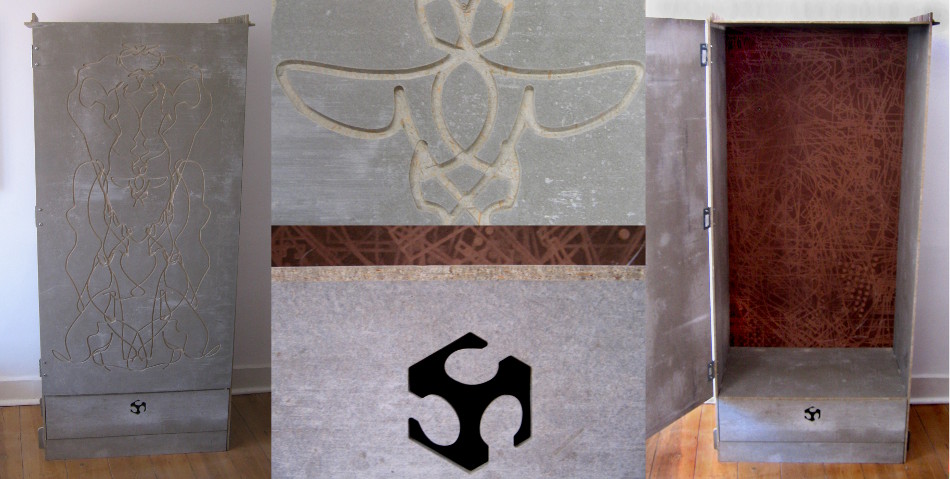
Some weeks later… finally the fully assembled wardrobe.
The drawer and the fingerjoints needed some sanding because I didn’t leave enough tolerance between the pieces.
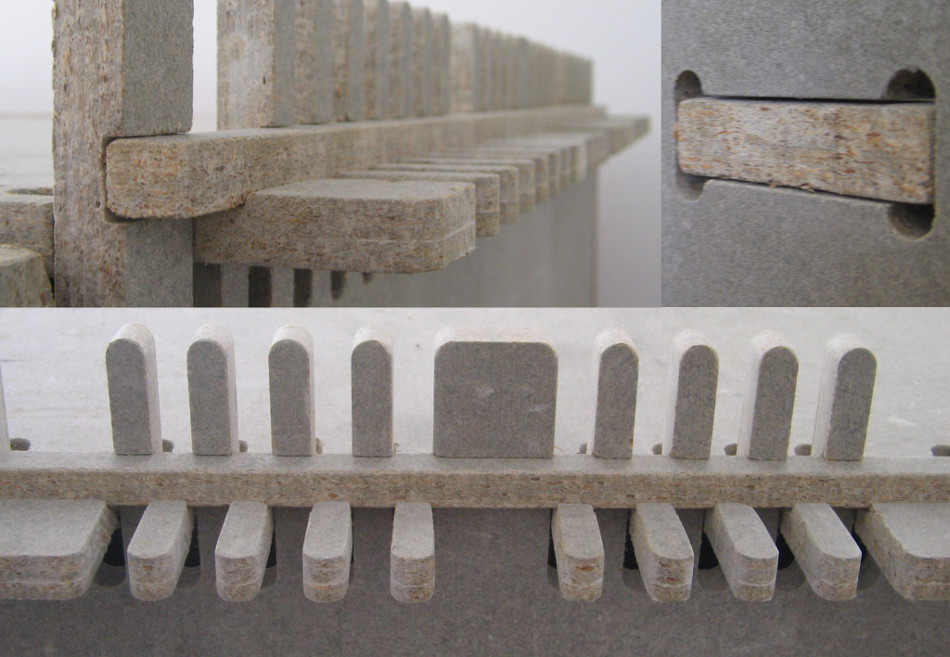
I made the back of the drawer from some “sacrificial wood” that we used on the CNC-router. It is the only piece that is screwed apart from the door hinges. Details of the “Fingertip tenon joint with key”:
The drawer uses “Secret Finger Tenon Joint” or Japanese “Go-mai-hozo-gata”. Quote from the book:
Secret joints are traditionally looked upon as the height of a cabinet-maker’s craftsmanship.
Sweat and skill of the craftsman are hidden from the eyes of the world in the interior of the joint.
It is said: Out of awe for his material, the cabinet-maker humbly conceals his own efforts in making a piece of furniture.
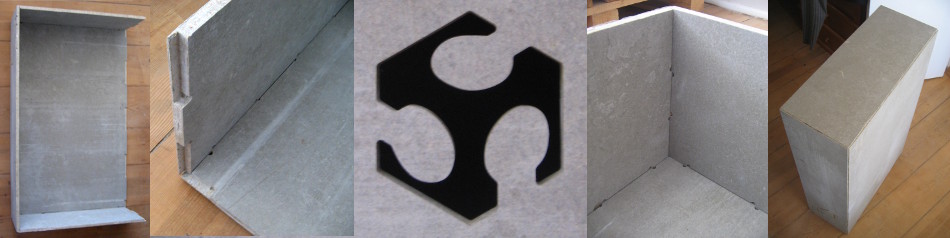
I turned out really nice and is quite stable even without glue.
Things I’ve learned on the way:
- Never trust the thickness of your wood! Measure each board in several spots
- Give some extra tolerance to parts that move against each other. 1:1 fits too well!
- Consider the weight of the pieces
- Don’t assume that your wood is flat
Here you can dowload the eight dxf-files I used for cutting the wardrobe.