3. Computer Aided design
- Model (raster, vector, 2D, 3D, render, animate, simulate, …) a possible final project, compress your images and videos, and post it on your class page:
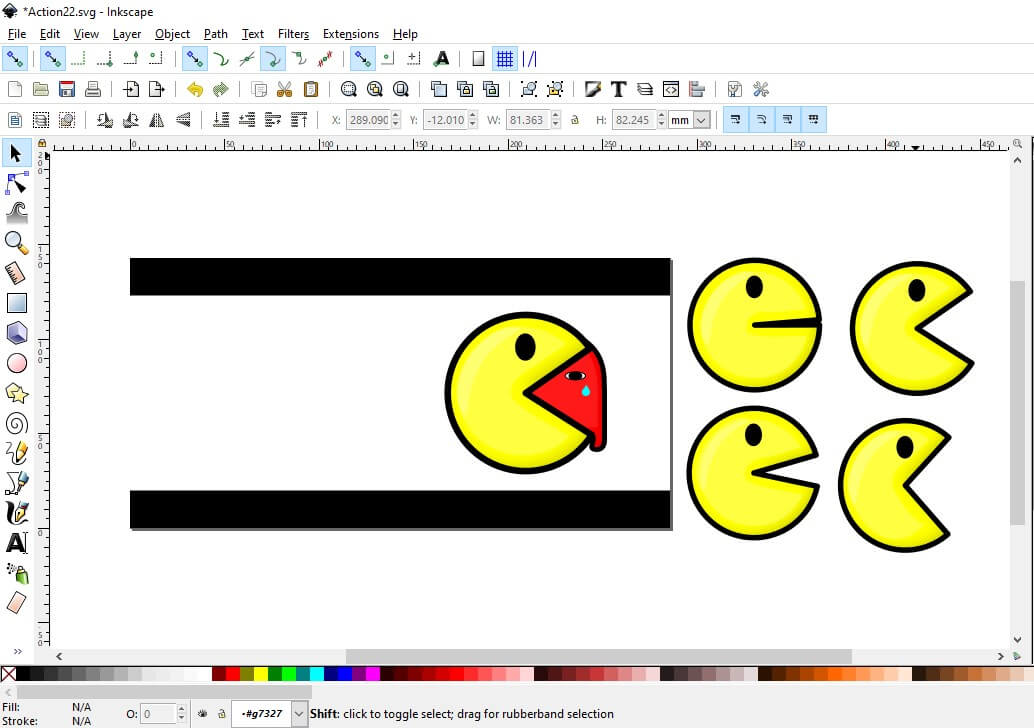
Since it’s my first approach to Inkscape (for something more than just “Trace bitmap”) I decided to try making something rather funny, then I made this short Pac-man animation.
For 3D practice I made a draft model of my final project (it also contains some 2D design in the making process).
- For 2D design practice I used Inkscape and GIMP.
- For 3D design I used Fusion 360.
2D practice | Animated Pac-man

Drawing
-
I drew it mainly with the basic figures: Squares, Circles and Lines which by default are on the left site.
-
To make the wavy shape at the bottom of the ghost I used Path > Object to path, then from “Edit path by nodes I used “Insert new nodes into selected segments” and “Make selected nodes auto-smooth”.
-
For some details on the color (so they don’t look completely “plain”) I used Path > Inset, set the inset in white and played with its opacity. I also created some shadow with Filters > Shadows and Glows > Drop shadow > shadow type = Inner.
-
To align the drawing I used Object > Align and Distribute… > Select objects to align > Align = Center on horizontal axis > Distribute > Make horizontal gaps between objects equal.
-
This is how the drawing process was (and yes, I changed my mind about the color of the ghost):

Animation
-
For the animation task (the most tedious) I moved the drawings and capture every position (37 in total); I did it saving them as *.svg files.
As you possibly imagined, I used different faces different positions:
-
To make the GIF I used GIMP:
- File > Open as Layers… > Select the images for the the GIF > Open.
- In the Layers tab sort the images (The GIF sequence will run through each layer bottom to top).
- Optimize the final file size: Filters > Animation > Optimize (for GIF).
- To preview GIF: Filter > Animation > Playback.
- To save GIF: File > Export as… > write the name for the file with .gif > Export > Check the boxes “As animation” and “Loop forever” > Set delay between captures/images > Export.
One week later update: I found EZGIF - an online tool, easier, faster and with an output file size more than 50% smaller than with GIMP.
3D practice | Omnidirectional robot
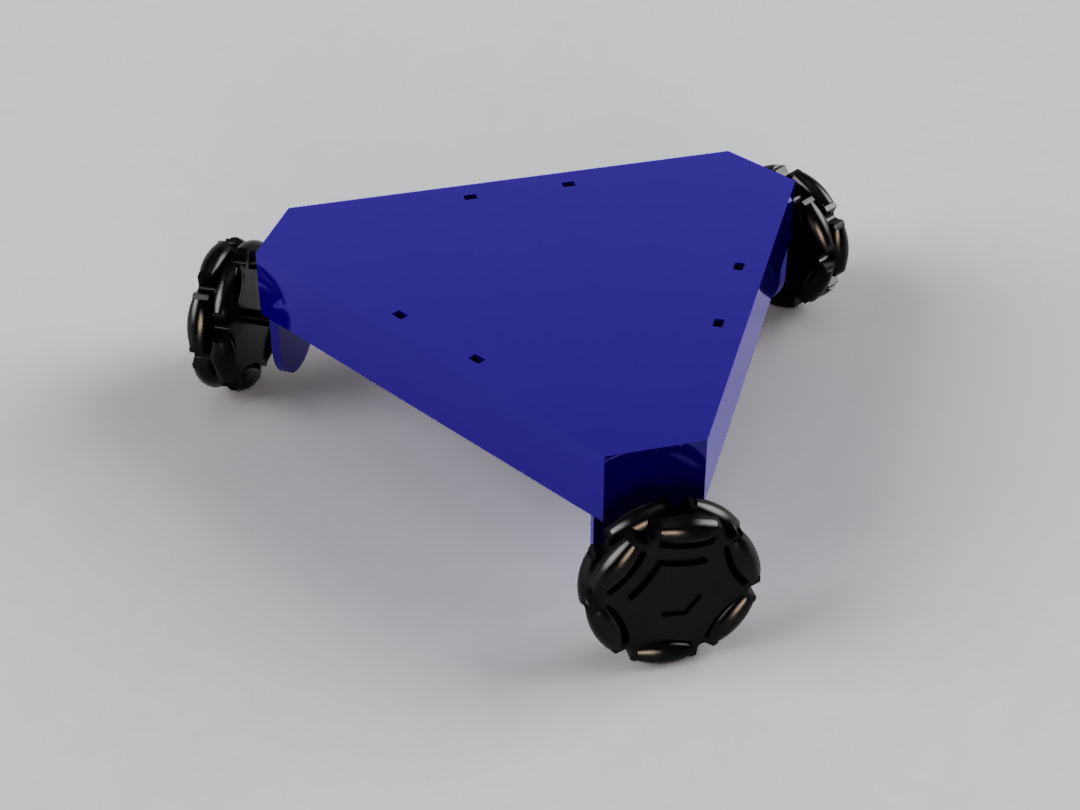
I made a draft model of my final project which is an Omnidirectional robot.
3D design
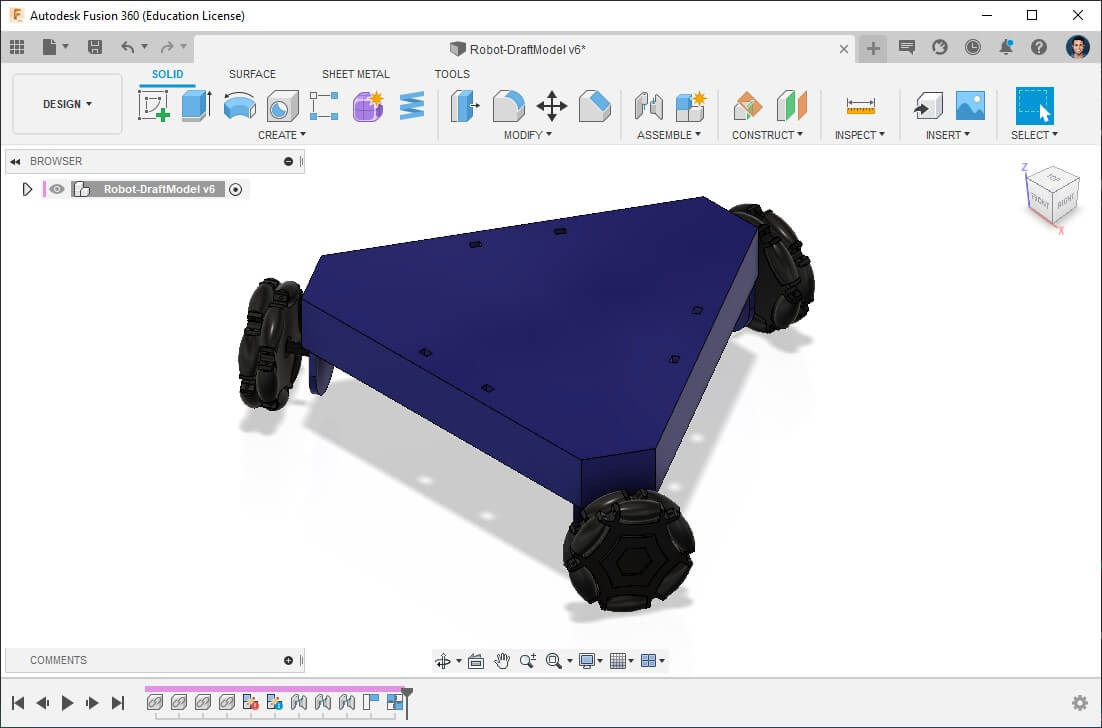
The robot is made in two main parts: (a) the Fame, and (b) the Wheels.
I already had some experience on 3D design with Fusion 360, but the more you practice, the more you learn and improve your skills.
Frame
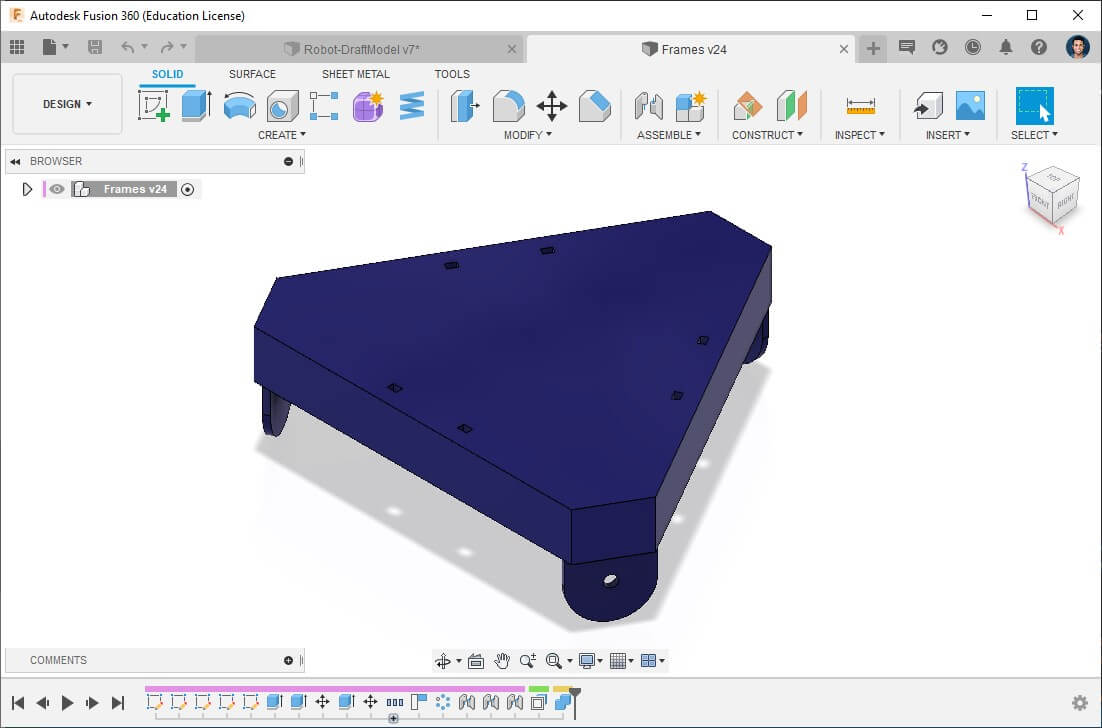
The frame is made in three parts: (1) bottom board where electronic components will be placed, (2) a top board for protection, also makes it look nicer and offers the possibility of putting something on top of it if you want to use it to carry stuff, and (3) motor holders:
- I started with a sketch to make the 2D shapes.
- I used Solid > Create > Extrude to create 3D bodies from the 2D shapes.
- I created components from the bodies (Solid > Assemble > New component), so now I’m able to join the parts.
- I used Solid > Assemble > Joint to join all of my parts together.
- Eventually I changed the Appearance (Solid > Modify > Appearance), to make it look nicer and also cause I’m thinking about making it up of blue acrylic in the laser cutter.
Omniwheel
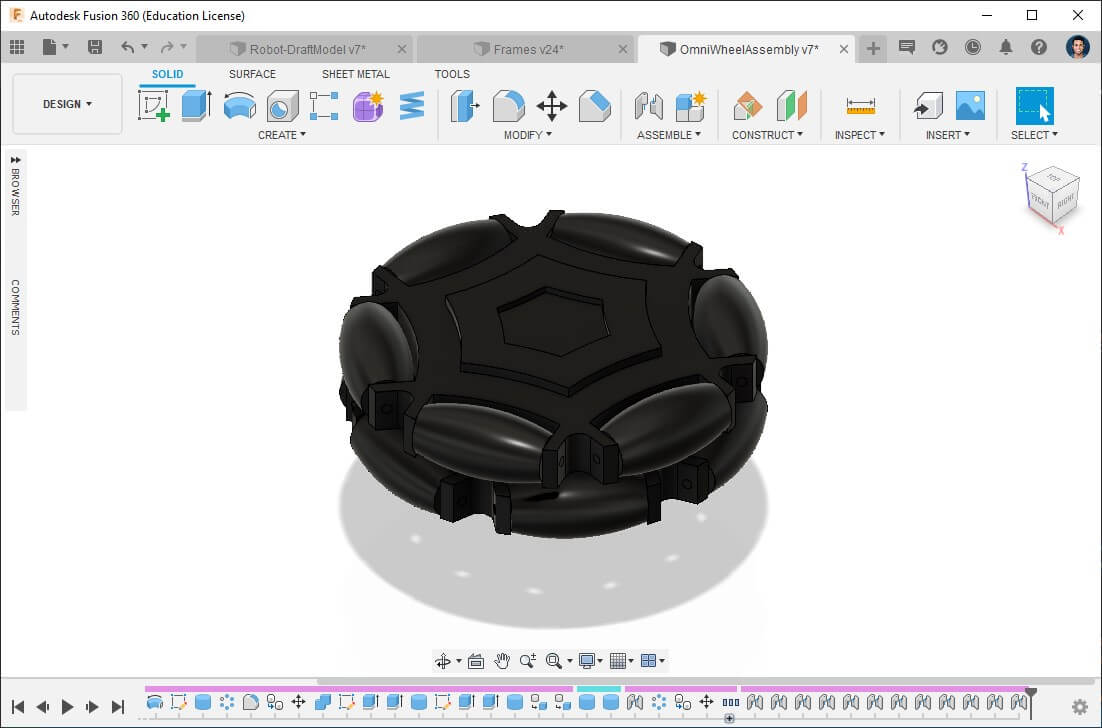
I made the wheels also in three parts: (1) the main wheel, (2) small rollers that are what give it the ability to move on another axis, and (3) I have made the coupling separated so I could also change the motor without needing to print the main wheel again:
- I started with a sketch to make the 2D shapes.
- I used Solid > Create > Extrude to create 3D bodies from the 2D shapes.
- I have also used Solid > Create > Revolve for the rollers.
- I created components from the bodies (Solid > Assemble > New component), so now I’m able to join the parts.
- Eventually I used Solid > Assemble > Joint to join all of my parts together.
- Eventually I changed the Appearance (Solid > Modify > Appearance), to make it look nicer and also cause I’m thinking about printing it in black PLA.
Embedded 3D models
I tried two ways to embed 3D models so we can compare them and select the one that meets our needs.
Fusion 360 - 3D viewer
To do so:
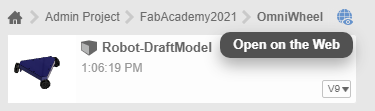
- Having the Fusion 360 project folder open, click on Open on the Web:
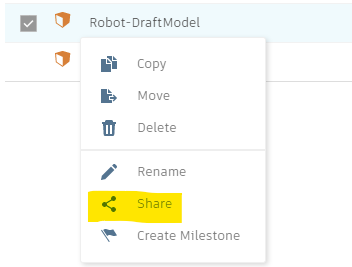
- Once the project is open the browser, right click on the desired model and click on Share:
- Enter the Embed tab, select a size, Copy the code:
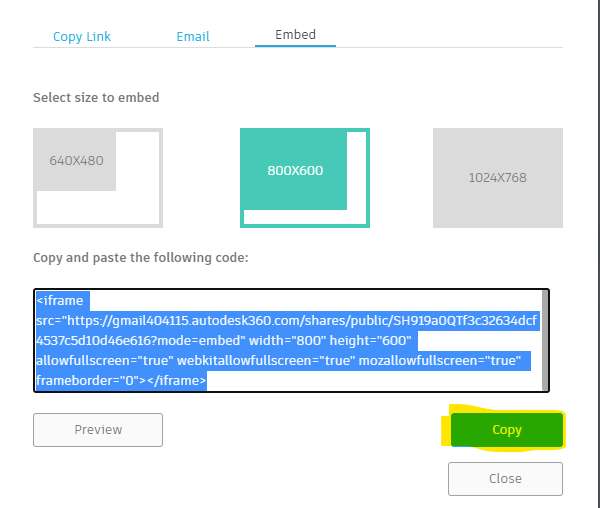
- Now paste it on your website. 😄
Sketchfab
3W Omnidirectional Robot - Draft model by Jeff Josue on Sketchfab
To do so:
- Export the 3D model as *.fbx (which maintains the configured materials and appearance).
- Uploaded it to a Sketchfab account.
Render
Made on the Render Workspace of Fusion 360, exported as *.jpg
Assignment outlook and details
2D practice
As mentioned before, it took me considerable time, but well… I knew that from the beginning cause I didn’t have experience on it 😅 but me [and my instructors] enjoyed the result 😄.
I don’t think that Inkscape + GIMP is the best way to make stuff like that. I personally don’t know about any other software for these works, I’m not really into the world of animations.
3D practice - Design
During my career I have worked Inventor and AutoCAD, but from a few months ago I started working with Fusion 360 which I like cause it’s open source, has a lot of integrations and is very intuitive I would say.
The commands that I used the most were:
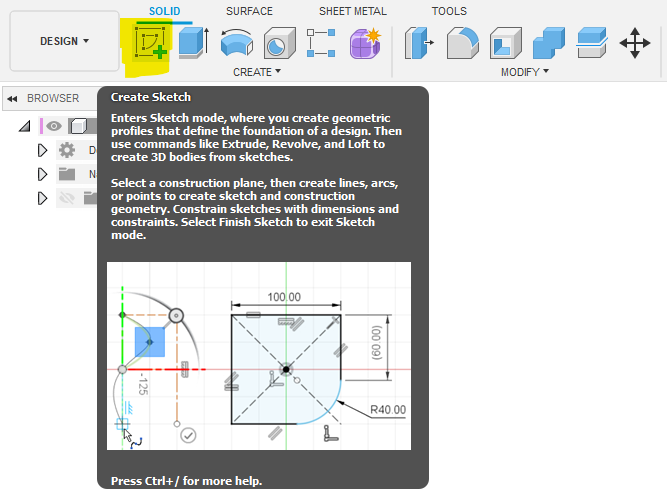
Sketch:
Sketch is the 2D part of the Design workspace:
-
Let’s start with Create Sketch:
-
Select the plane to work; it’s recommended to work on XY, but that would depend on the shape of the model:
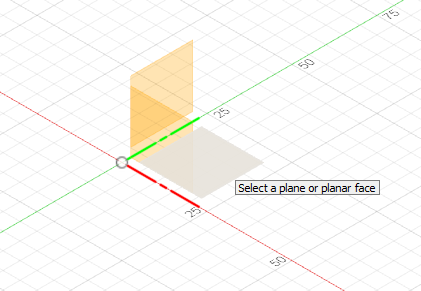
-
The figures I use the most are the basic ones: Line, Rectangle and Circle:
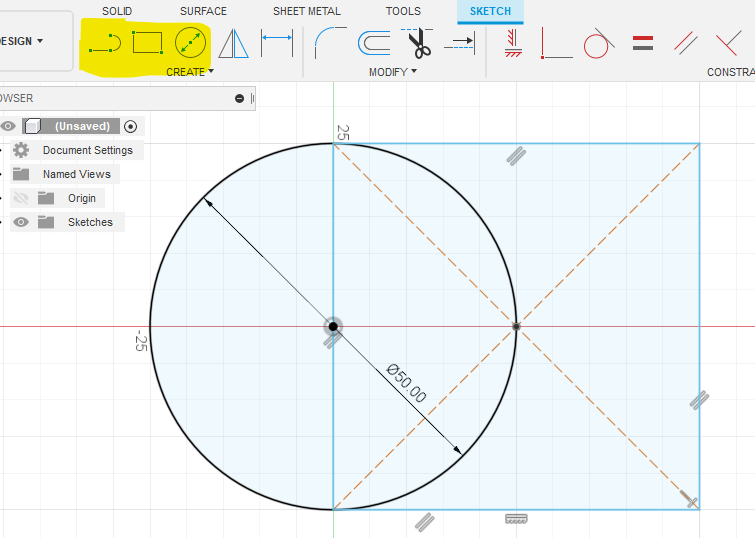
-
The modifications I use the most are the basic ones: Fillet and Offset:
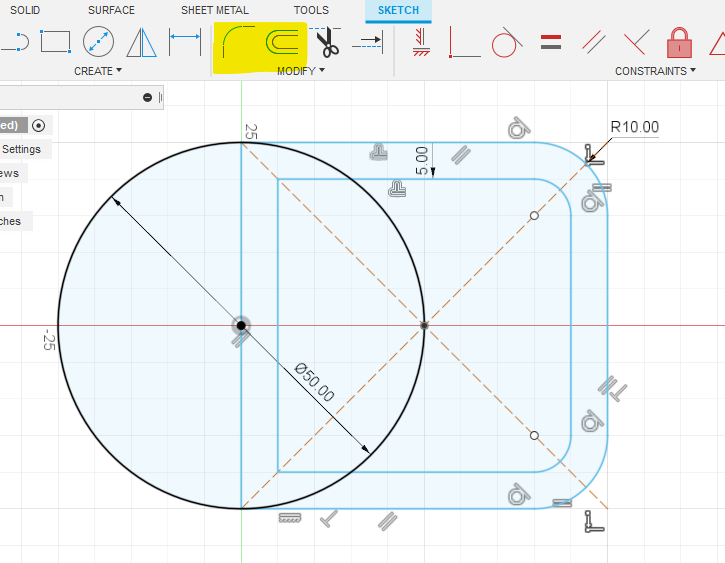
-
Finish Sketch:

3D
To create 3D bodies based on the Sketch:
-
Revolve:
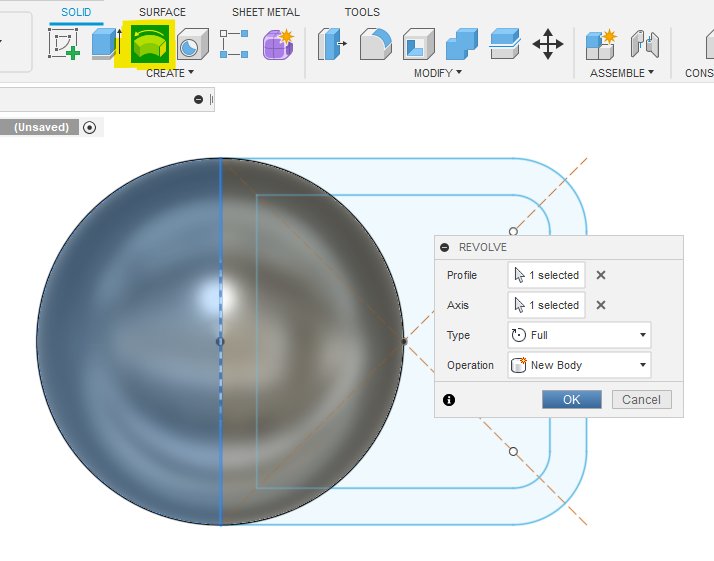
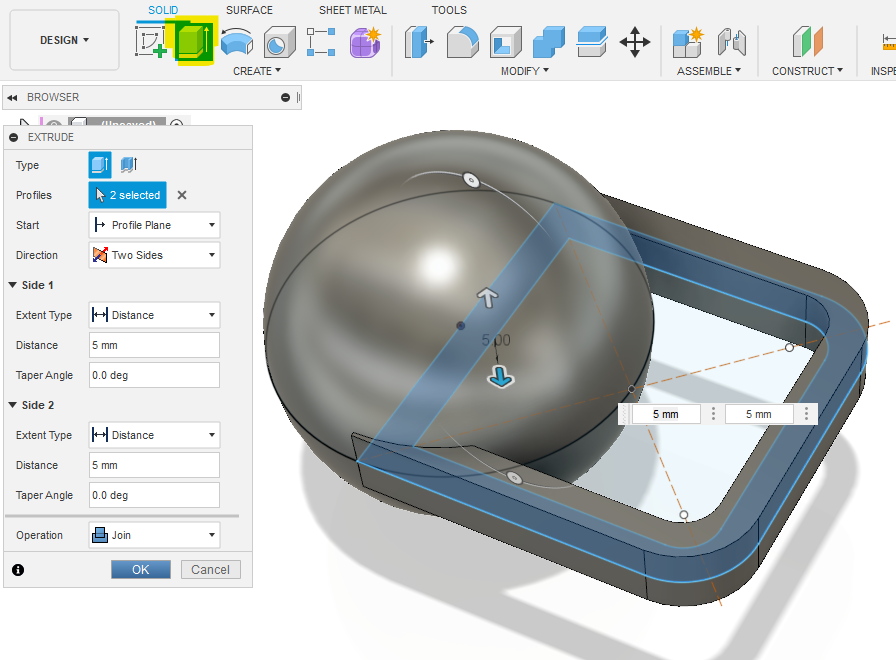
-
Extrude:
3D practice - Embedded 3D models
3D viewer of Fusion 360
- It has the nicest aspect and has a lot of options such us change the appearance, environment, camera interactions, markup, measurements, explode models, and so on.
- Great for viewing mechanisms with various components.
- It’s not best option to view on smartphones:
SketchFab
- It’s basically just to view, doesn’t have that many options like Fusion 360.
- Good for individual pieces (cause it doesn’t offer the interaction with different components).
- It looks just as good on smartphones as it does on devices with larger screens.
Files
- 2D practice:
Pac-man_Drawing.svg
- 3D practice:
Frame.f3d
Omniwheel.f3d