2. Project management
- Build a personal site describing you and your final project and Upload it to the class archive:
Description of myself is here.
- Work through a git tutorial:
My GIT tutorial… for the Fab Academy we already received access to a GitLab account with an existing project, I will describe also that first part taking as example an account for another repository (which is the GitLab section).
I have done my GIT tutorial based on my own experience from my previous course, Fundamentals of ditigal fabrication; this has also been learned by lectures with my instructors and some unknown commands are taken from Git tutorials and forums on internet, if I need to highlight one it would be, of course, the official GIT documentation.
- For Control Version we use GitLab with GitBash.
- As site generator we use the Mkdocs with the theme Material.
- For documentation structure we use Markdown.
- For code edition I used Visual Studio Code.
Version control system
Version control is a system that records changes to files over time so that we can recall specific versions later, in this case we used GitLab.
GitLab
“GitLab started as an open source project to help teams collaborate on software development. GitLab’s mission is to provide a place where everyone can contribute.”
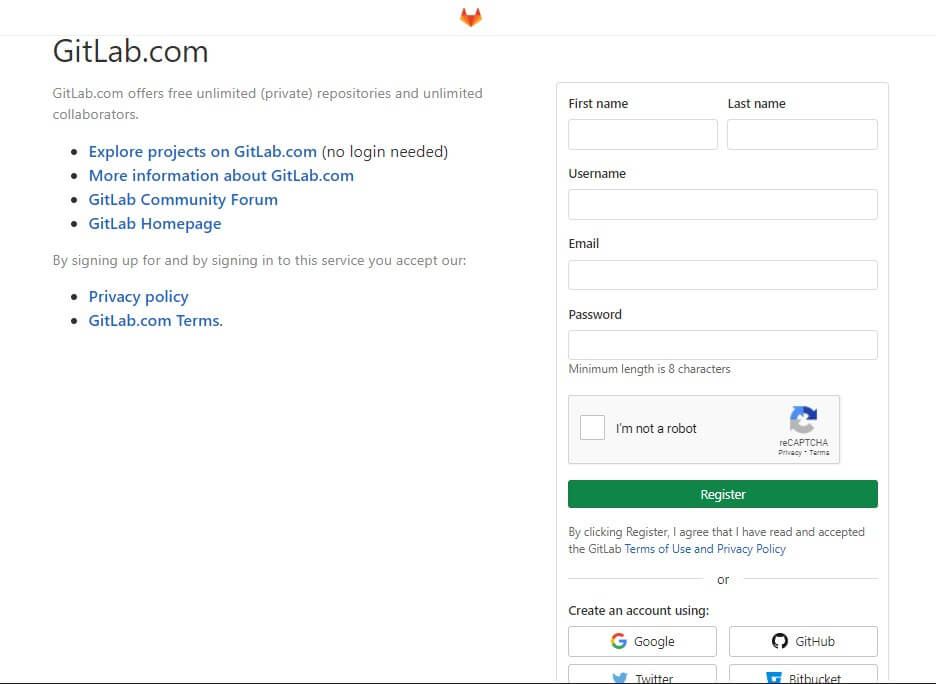
Create an account
-
Go to GitLab.
-
Register a new account, the easiest way (and the one I used) for that is Create an account with Google:
-
Continue to accept the Terms of Service and Privacy Policy.
Account already done! Welcome to GitLab.
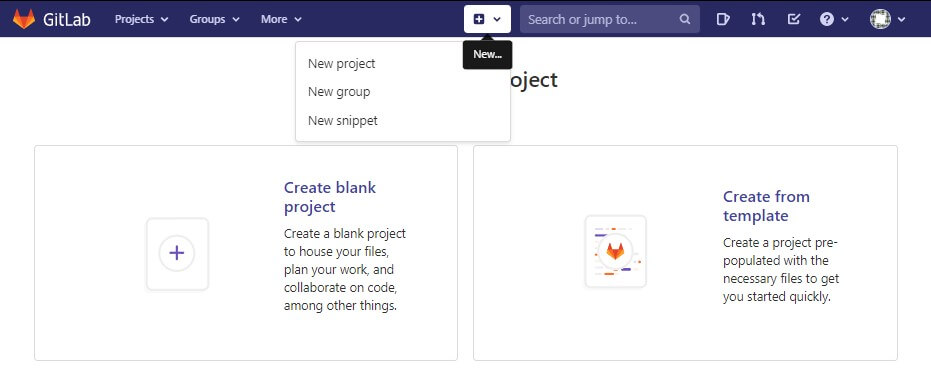
Create a new project
-
New > New project > Create blank project:
-
Fill in Project name.
Project slug is what the GitLab instance will use as the URL path to the project and it’s automatically filled with Project name, if you want to personalize it you can edit it. -
Write a Project description (optional).
-
Set the Visibility Level preferably as Public, this will be applied to all of our [ future ] files and pages.
-
Create project:
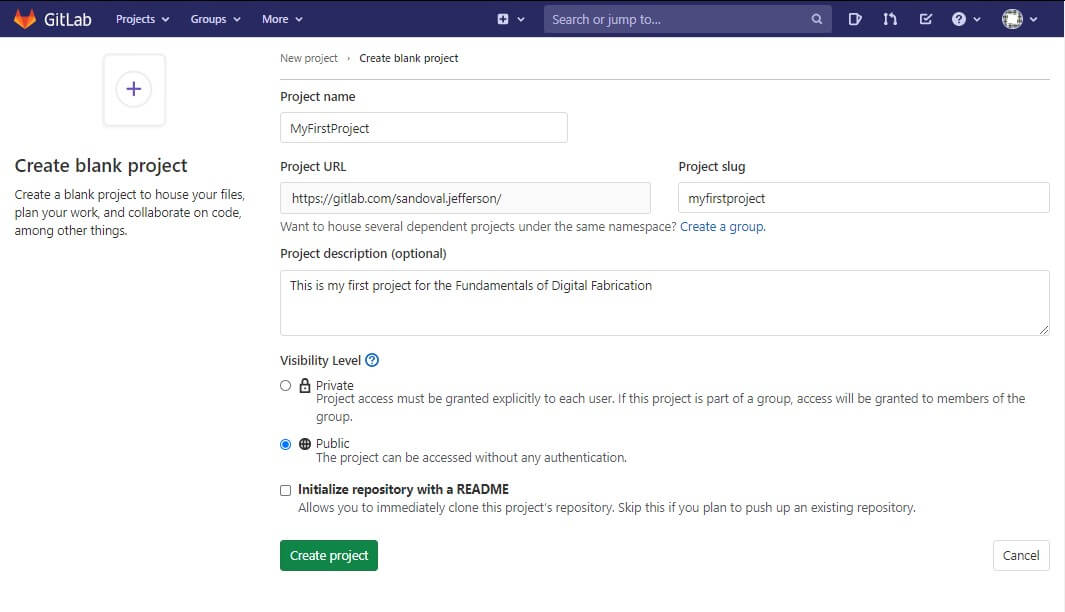
New project created.
Get page link
Once we already have our page files (most important, the .gitlab-ci.yml) in GitLab, GitLab we go: Projects > SelectTheProject > Settings > Pages
GitBash
“Git Bash is an application that provides Git command line experience on the Operating System.”
Installation
- Git for Linux: $ apt-get install git
When Git is downloaded, we get GitBash for command line, and GitGUI which is a more graphical version.
Note: I have used Windows.
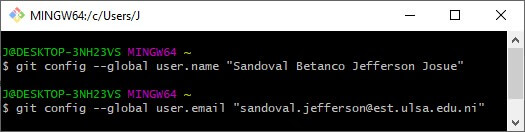
Settings
- Open GitBash.
- Add username:
$ git config --global user.name "your_username" - Add email address:
$ git config --global user.email "your_email_address@example.com"
Something like this:
Authentication
To be able to make changes in the repository we need to add our credentials to identify ourselves.
SSH-KeyGen | GitBash
-
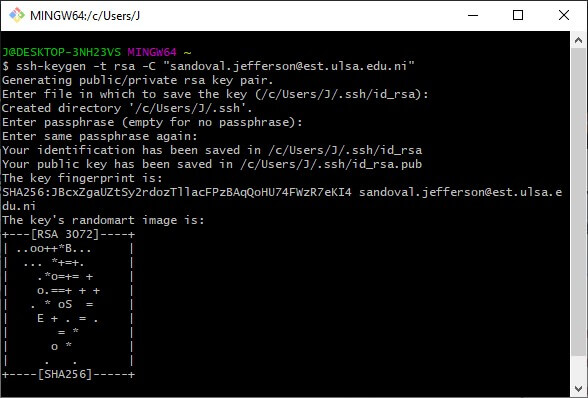
Open GitBash and type:
$ ssh-keygen -t rsa -C "your_email_address@example.com"to create your key. -
Press Enter until it says “The key’s randomart image is:”:
SSH-KeyGen | GitGUI
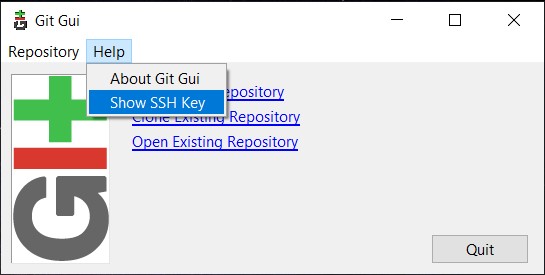
If the previous command in GitBash fails…

-
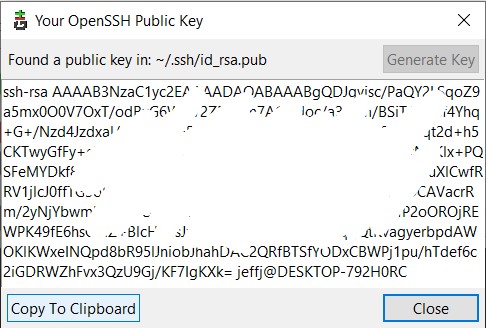
Open GitGUI > Help > Show SSH key:
-
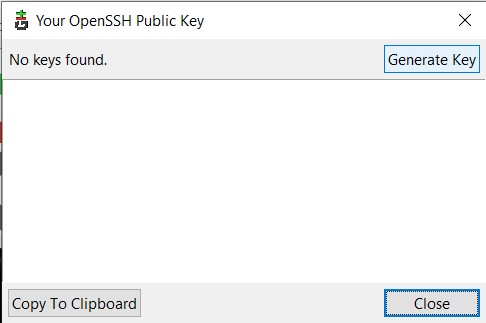
Click in Generate Key:
Add key
-
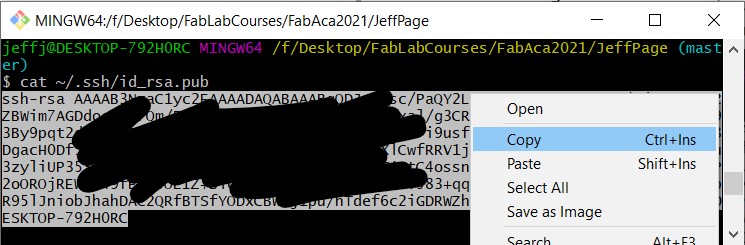
Copy the content of the created file:
-
If working on GitBash use:
$ cat ~/.ssh/id_rsa.puband copy the text:
-
If working on GitGUI click on Copy to Clipboard:
-
-
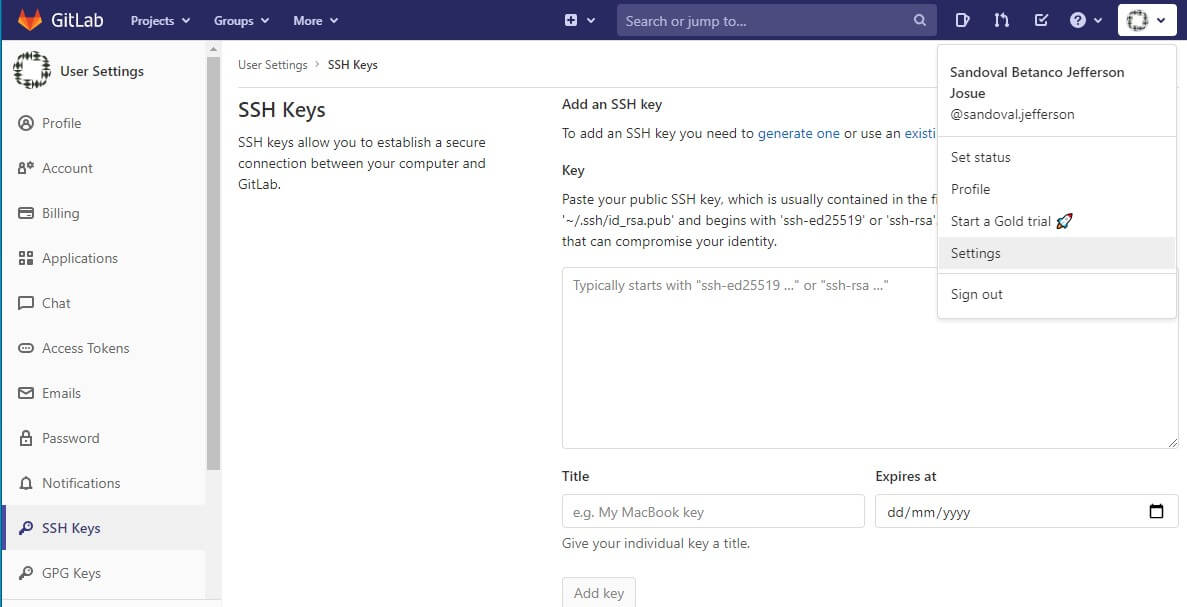
Open GitLab > Account > Settings > SSH Keys > paste there the content of the created file:
Clone a Repository
-
Open the folder in the PC where you are going to work
-
Right CLick > Git Bash Here
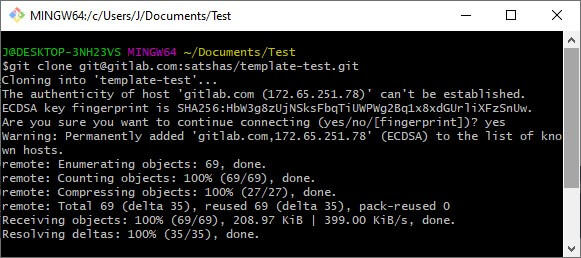
For cloning use the command git clone <repository path to clone>. We can either clone it via HTTPS or SSH (the one I used)
For getting the path: Open Git repository to clone > Clone:
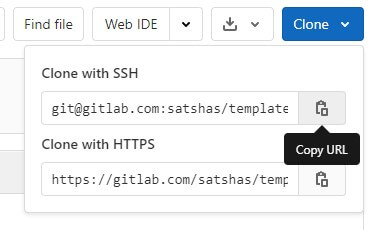
Cloning via HTTPS: git clone <https://gitlab.com/satshas/template-test.git>
Cloning via SSH: git clone <git@gitlab.com:satshas/template-test.git>
Basic commands
| Instruction | Command |
|---|---|
| Locally create a repository with GIT (this will also indicate the current folder as the local master) | $ git init |
| Add a remote repository | $ git remote add origin _GitURL_ |
| Download the files from the remote repository | $ git pull |
| Indicate the status of the repository; modified, added and deleted files | $ git status |
| Add to the repository ALL files and folders that are in our project | $ git add -A |
| To commit the files that have been modified and GIT | $ git commit -m "add_a_message" |
| To upload the files to the remote repository | $ git push -u origin master |
Note: Afterwards the message will allow you to know exactly what modification you made in that commit, so be clear with it.
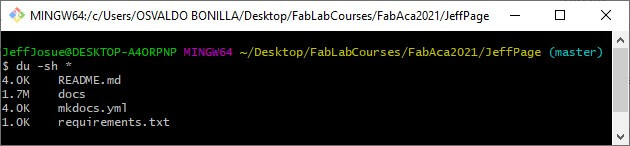
-To check the size of our files on a folder: $ du -sh *
Content
Site generator | Mkdocs
There are many site generators available, but because of its simplicity we use Mkdocs which is a fast, simple and downright gorgeous static site generator that’s geared towards building project documentation.
Documentation source files are written in Markdown, and configured with a single YAML configuration file. There are various themes with different features for Mkdocs on internet, some of them (e.g. Material -the one I used-) also make the table of contents and have a section for social networks on the footer.
As I want it to be known when the last change in my documentation was made, I have also added the mkdocs-git-revision-date-localized-plugin.
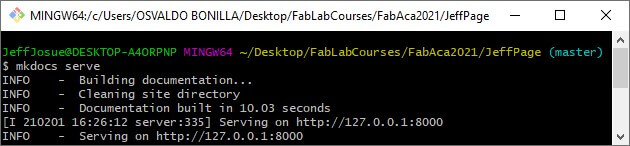
Using the Dev-server
Mkdocs comes with a built-in development server that allows us to preview our documentation as we work.
Make sure you are in the same directory as the mkdocs.yml configuration file, and then start the server by running the $ mkdocs serve command:
Make sure to have mkdocs installed, follow its official Installation guide, it’s also needed to install the Material theme. In my case also the mkdocs-git-revision-date-localized-plugin.
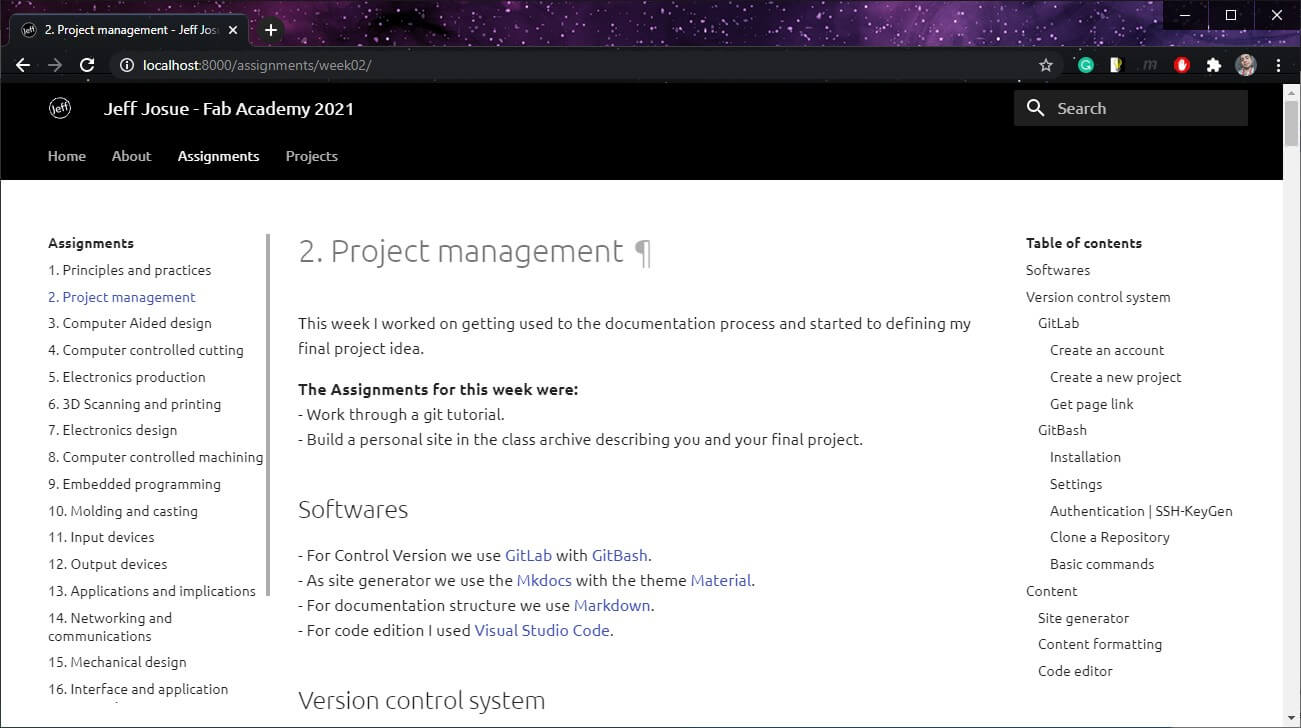
Now we can see the documentation on the browser. Using by default: 127.0.0.1:8000 or localhost:8000/
Content formatting | Markdown
There are two main options to create our web sites: use HTML or Markdown. This time I chose Markdown, cause I rather focus my time more on creating a useful documentation.
Markdown is a lightweight markup language to add formatting elements to plaintext text documents.
These are the files with the extension *.md
Some Basic Markdown syntax for editing your documentation:
| Element | Description |
|---|---|
| Heading | # H1 ## H2 ### H3 |
| Bold | **bold text** |
| Italic | _italicized text_ |
| Blockquote | >blockquote |
| Image |  |
| Link | [text](https://www.example.com) |
Code editor | VS Code
Visual Studio Code is a source code editor developed by Microsoft for Windows, Linux, and macOS:

This is the Code editor that I personally like using, it was recommended by an instructor; includes page Preview for checking how your page is generally going to look like, and also Git commands built-in.
I have used Atom before, but I feel more comfortable with VS Code.
Git Commands:
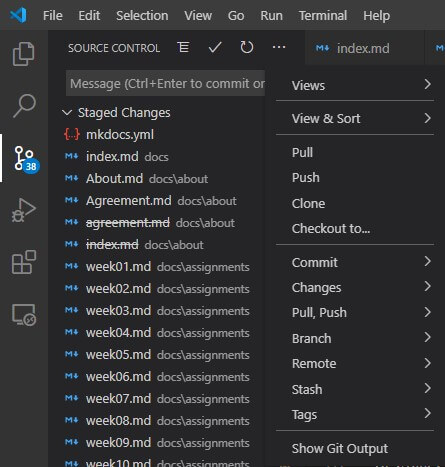
To Clone: Source Control > Views and more actions… > Clone.
To Pull: Source Control > Views and more actions… > Pull.
To Add changes: Source Control > Views and more actions… > Changes > Stage all Changes.
To Commit: Source Control > Views and more actions… > Commit > Commit all.
To Push: Source Control > Views and more actions… > Push.
Image size
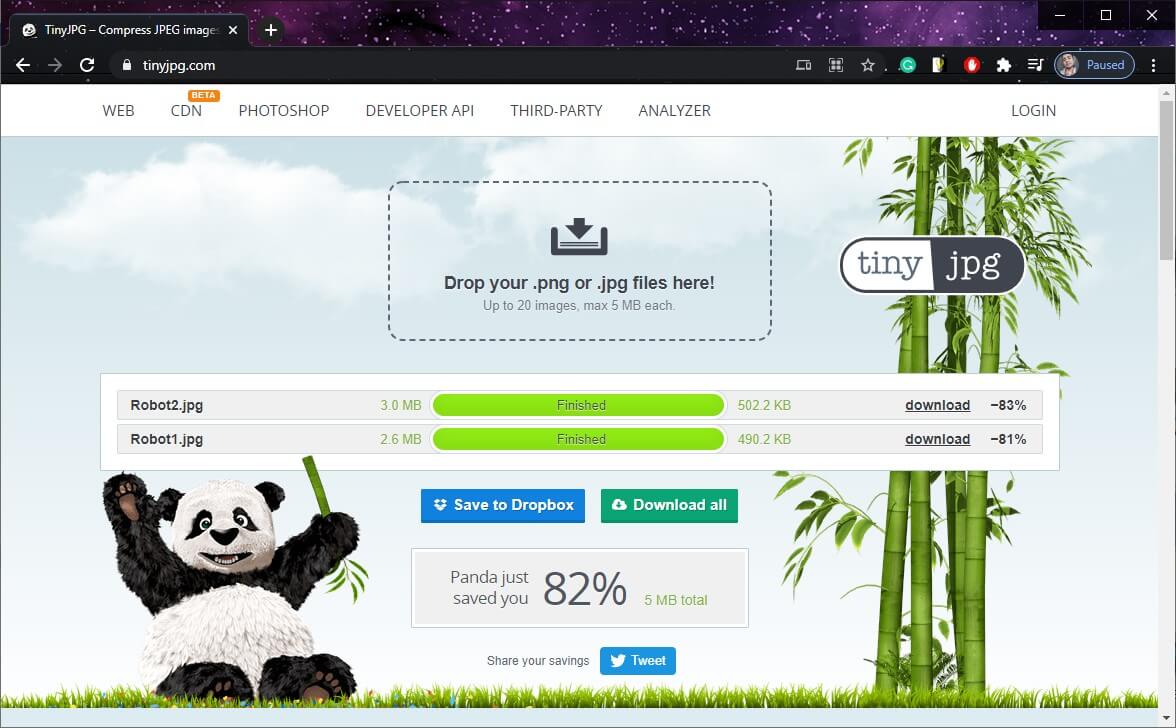
One of the most important aspects of a documentation is the size of the images due to hosting space and internet data usage (and come on! you don’t need a 6MB picture with dimensions 5 times bigger than the screen of your laptop); so a good practice is to reduce the size of the images, for that we found can use some tools:
- GIMP - a software which one of its multiple tools is resizing images, that allows you to change the dimensions, format and resolution in a personalized way.
- TinyJPG - a very simple online tool, gives you as result a image with the same dimensions and apparently the same resolution, but noticeably smaller in size:
- ReduceImages - an online tool, this one allows you to change the dimensions, format and resolution in a personalized way.
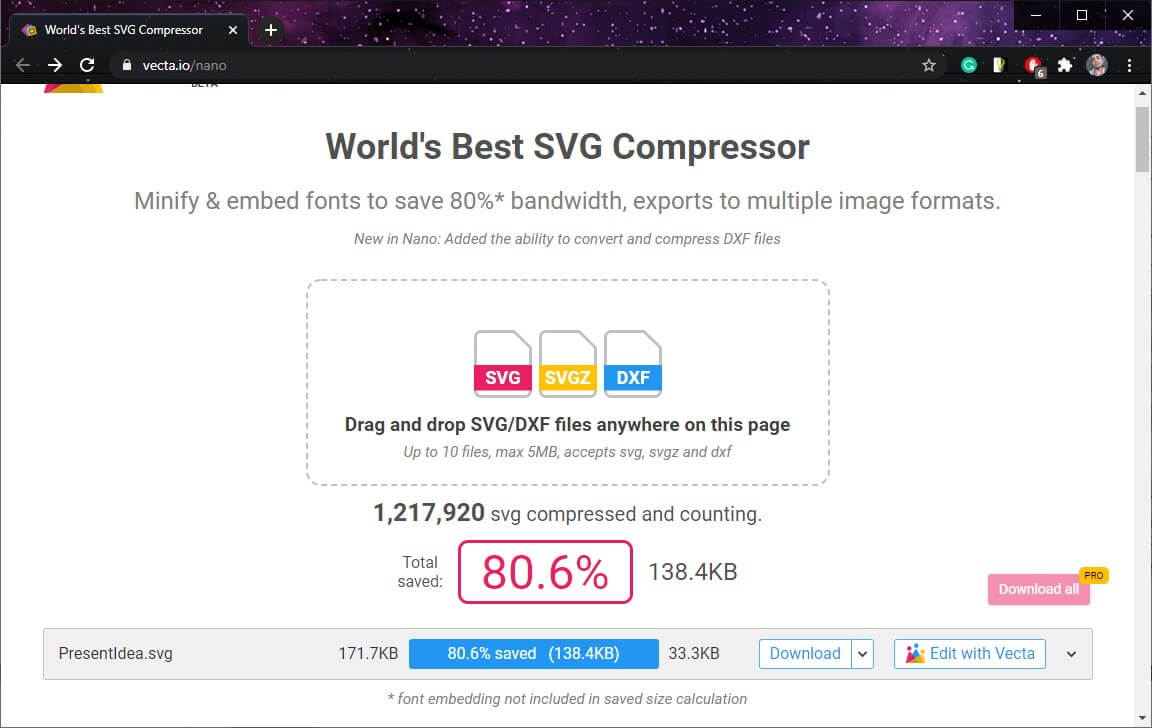
- Nano - Vecta.io - an online tool, this one allows you to compress *.svg files:
- Videosmaller - an online tool, but this one is for resizing videos. Highly recommended.