Mechanical Design, Machine Design
MTM
Slide
Video
What is the project?
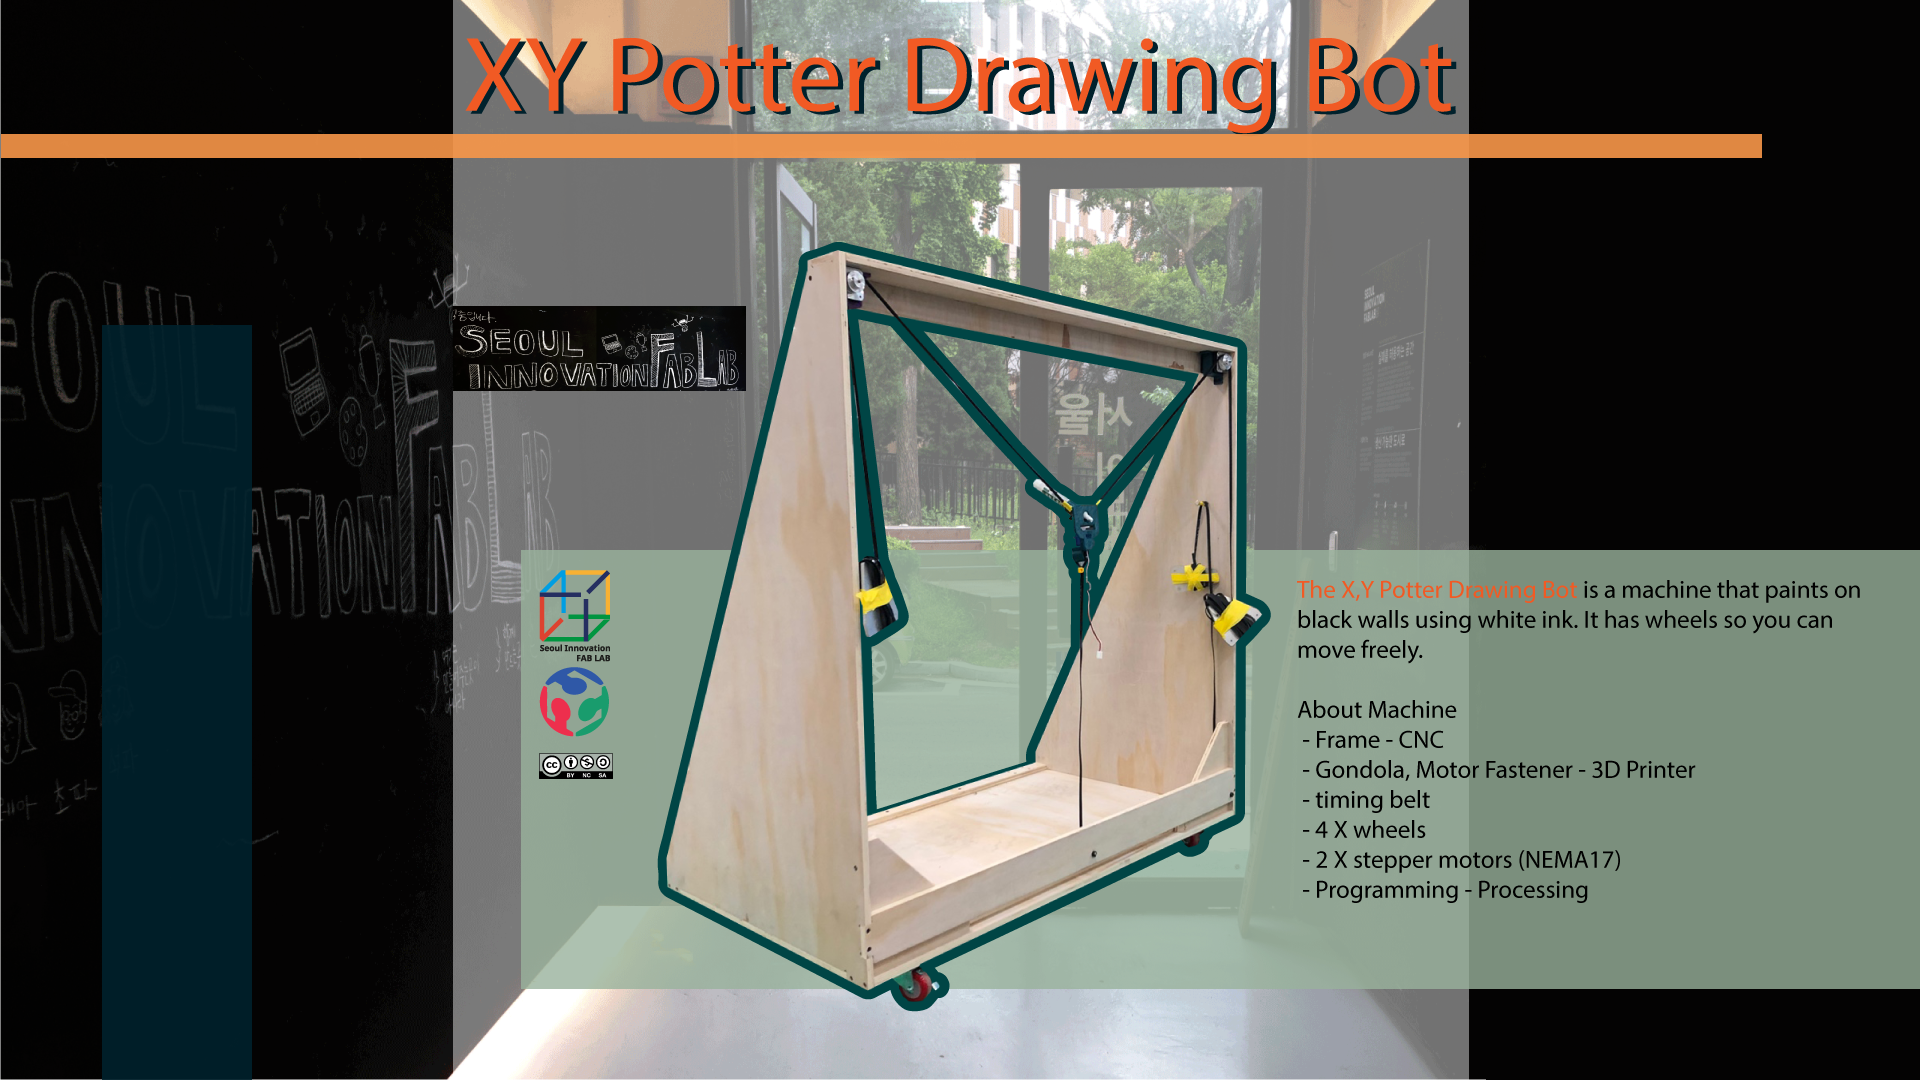
1. Project Name : XY Plotter Drawing Bot
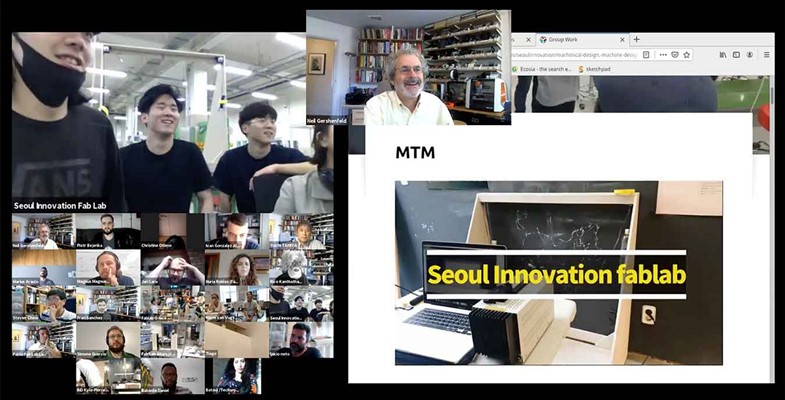
2. Story of Innovation FabLab

There is an incoming hallway at Seoul Innovation Fab Lab, and its walls are designed to draw with chalk. So we wanted to paint a great picture on the wall. So we decided to make a machine that draws pictures on the wall using chalk.
4. BOM
| Material | Information | Number |
|---|---|---|
| Plywood | Birch 12T 2440*1220 | 0.7 |
| Wheels | - | 4 |
| Stepper motor | NEMA17 | 4 |
| Pulleys | For NEMA17 | 4 |
| Belt | For NEMA17 | 1.5M |
The rest of the parts were printed with a 3D printer
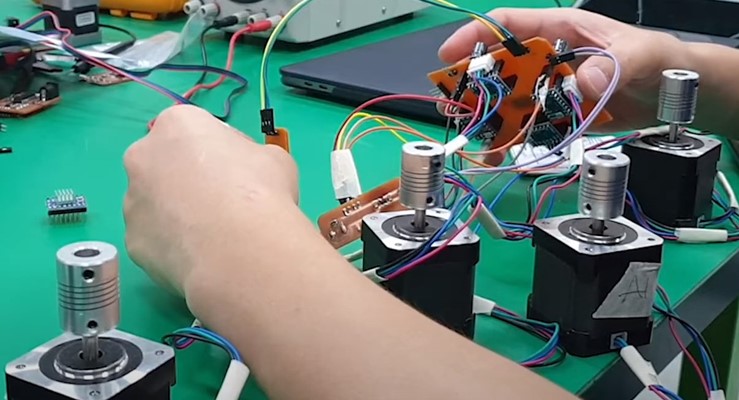
We test all the motors using JeongHwan’s board
See this link for information on the board
Almost available on the local open market
5. Individual roles within the team
Jihwan Kim : Motor board, motor code and sansha kit, document
Seokmin Park : Code: Masterboard, networking & motor driver. Electronics debugging
Yunjo Lee : Interface
Jeonghwan Kim : Gondar & servo mount, wheel mount, Slide Design, code
Hyunho Kim : Motor mounts, liquid chalk genius ,Imaging and Editing , hardware groupwork aggregation and documentation, Exterior Frame Assembly
Yunje Choi : Frame design, frame fabrication
Software Team Workflow
Referer to embedded-programming Group work
Referer to output-devices Group work
Motor Test → Interface Test → PCB Board Replacing a Breadboard
1. Motor Test
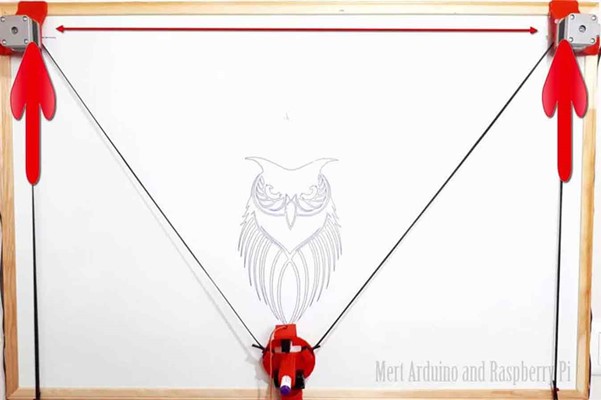
1) After brainstorming on three ideas (which were narrowed down from more than ten ideas), we decided to make a drawing machine. We also found some example projects done in the past, and we chose one model to refer to throughout.
Problem
In the tutorial of this model, “L293D motor drive shield” was used, but we did not have the same one in our lab. Therefore, we took some time to check what motors we have in the lab.
Solution
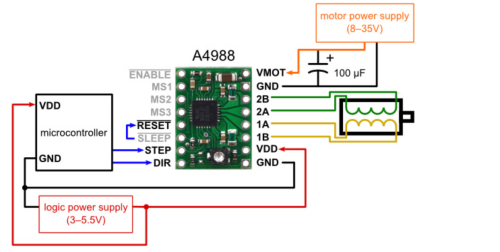
As we checked, we had a “stepper motor drive-GY-4988”. We researched more references and examples on the internet to find some tutorials that use an A4988 motor drive to use a stepper motor. Then we found an excellent example from instructables.com.
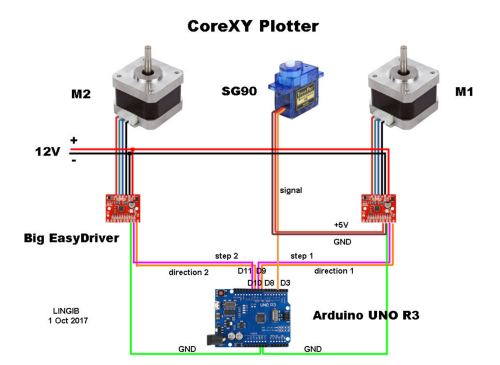
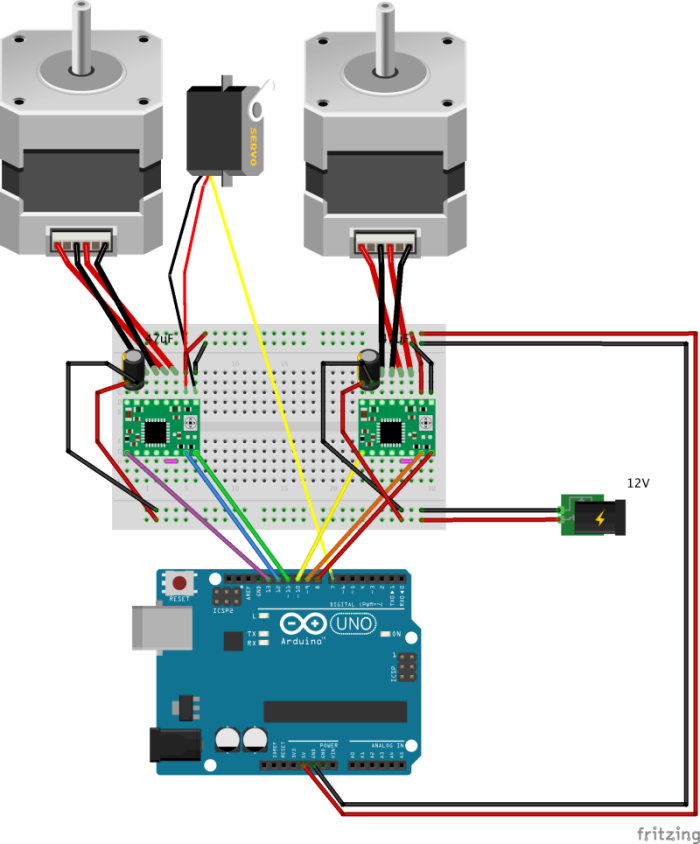
2) We connected the motors, motor drives, and uno board by referring to the diagram in the “Step 1: Circuit” part of the tutorial we found.
Diagram from example site
3) On Saturday(the first day of our group project), the wired motor did not function.
Problem
It seemed to be caused by the difference between the “Big EasyDriver module” and the GY-4988.
Solution
So we looked at the connection diagram of the GY-4988.
Diagram from Reference Site
And We connected as below.
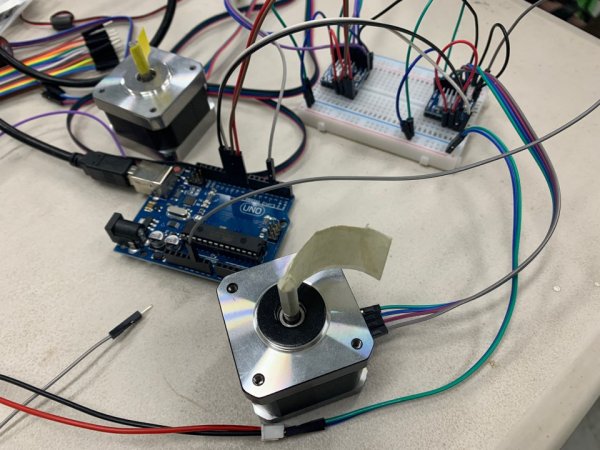
4) Then I followed the “Step 15: The Menu” part of the tutorial on instructables.com and put in the code and moved the motor. The motor has moved.
2. Interface Test
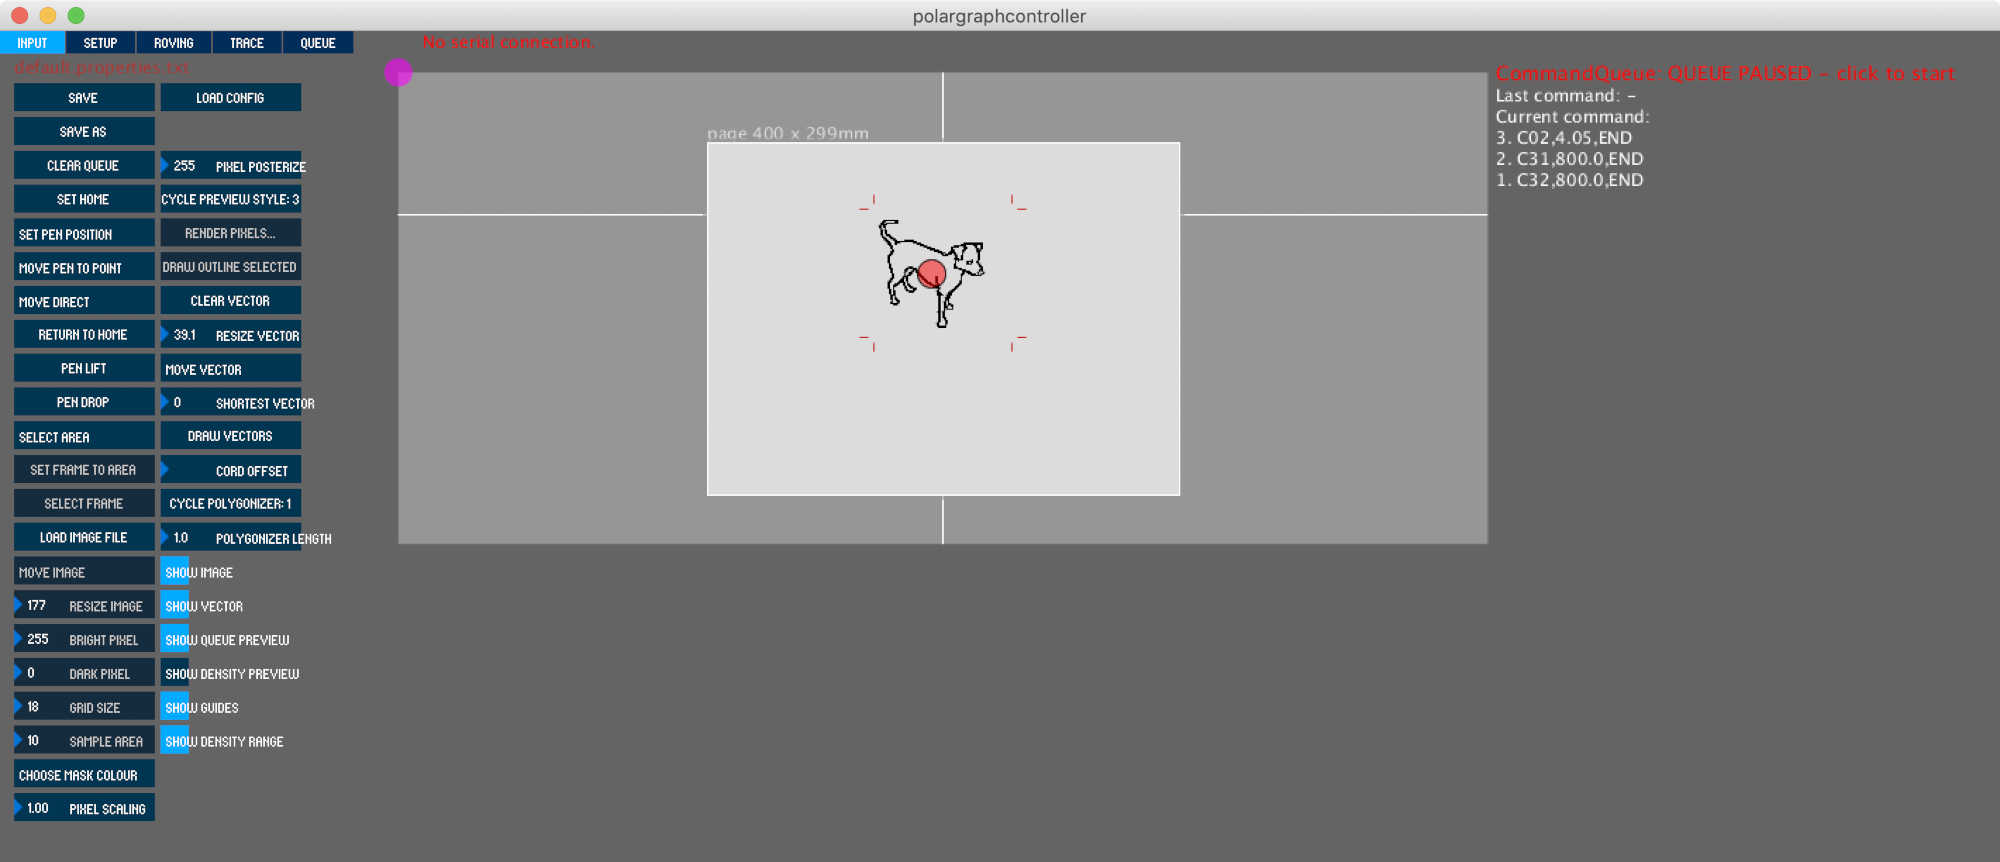
1) Now we had to go back to the core tutorial and draw a picture using the Processing interface.
2) So we downloaded the code files about Polar Graph Controller in the tutorial.
3) We looked at whether or not this interface is compatible with the motor drive we were using. We could see it in the code provided in the core tutorial.
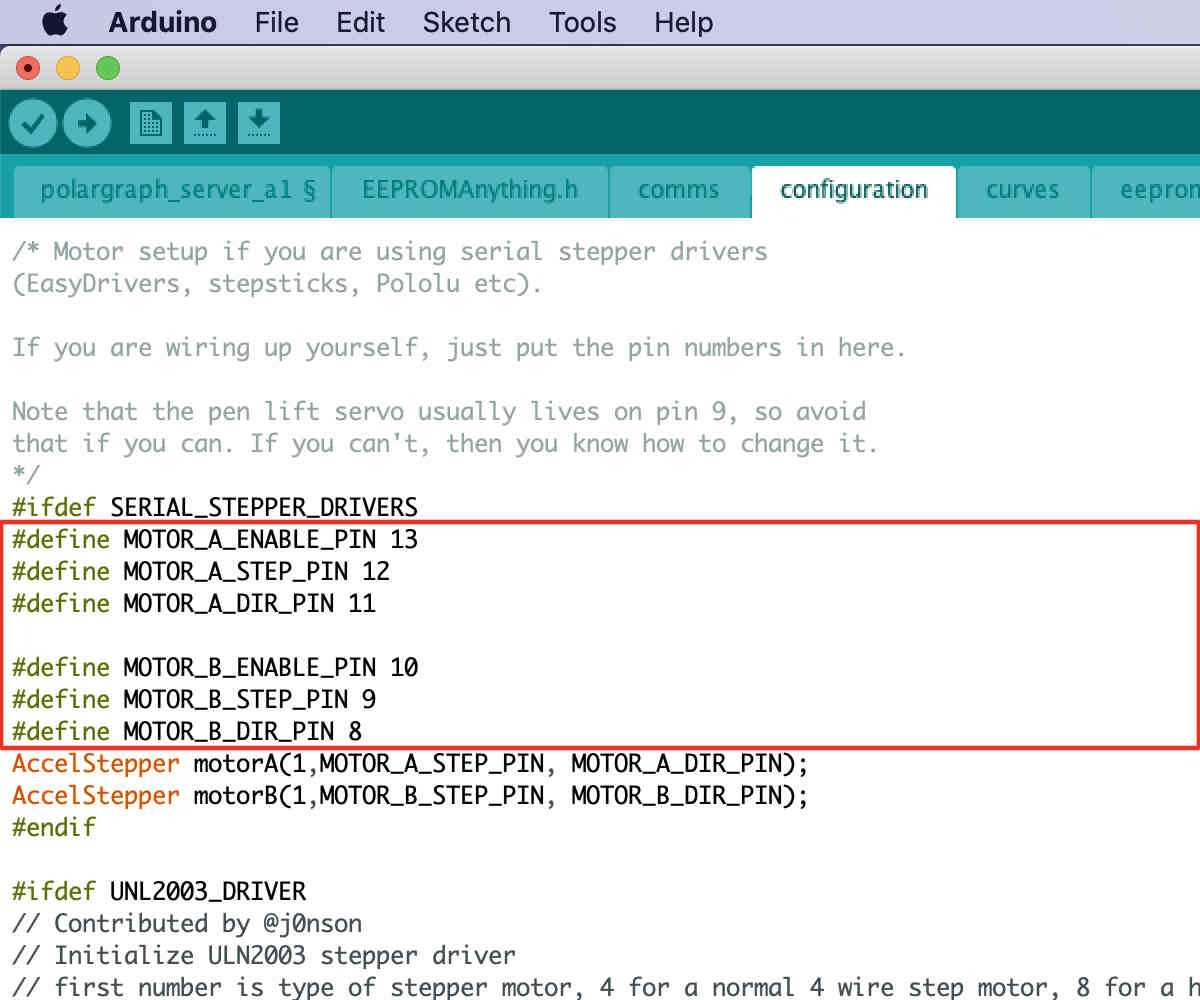
4) In order to understand the flow/structure of the Arduino code, we briefly read through code along with the grey text that describes what each part does and is for. There was a part where we could tell the code about which motor driver we are using. We changed that part to make the code work with our motor driver.
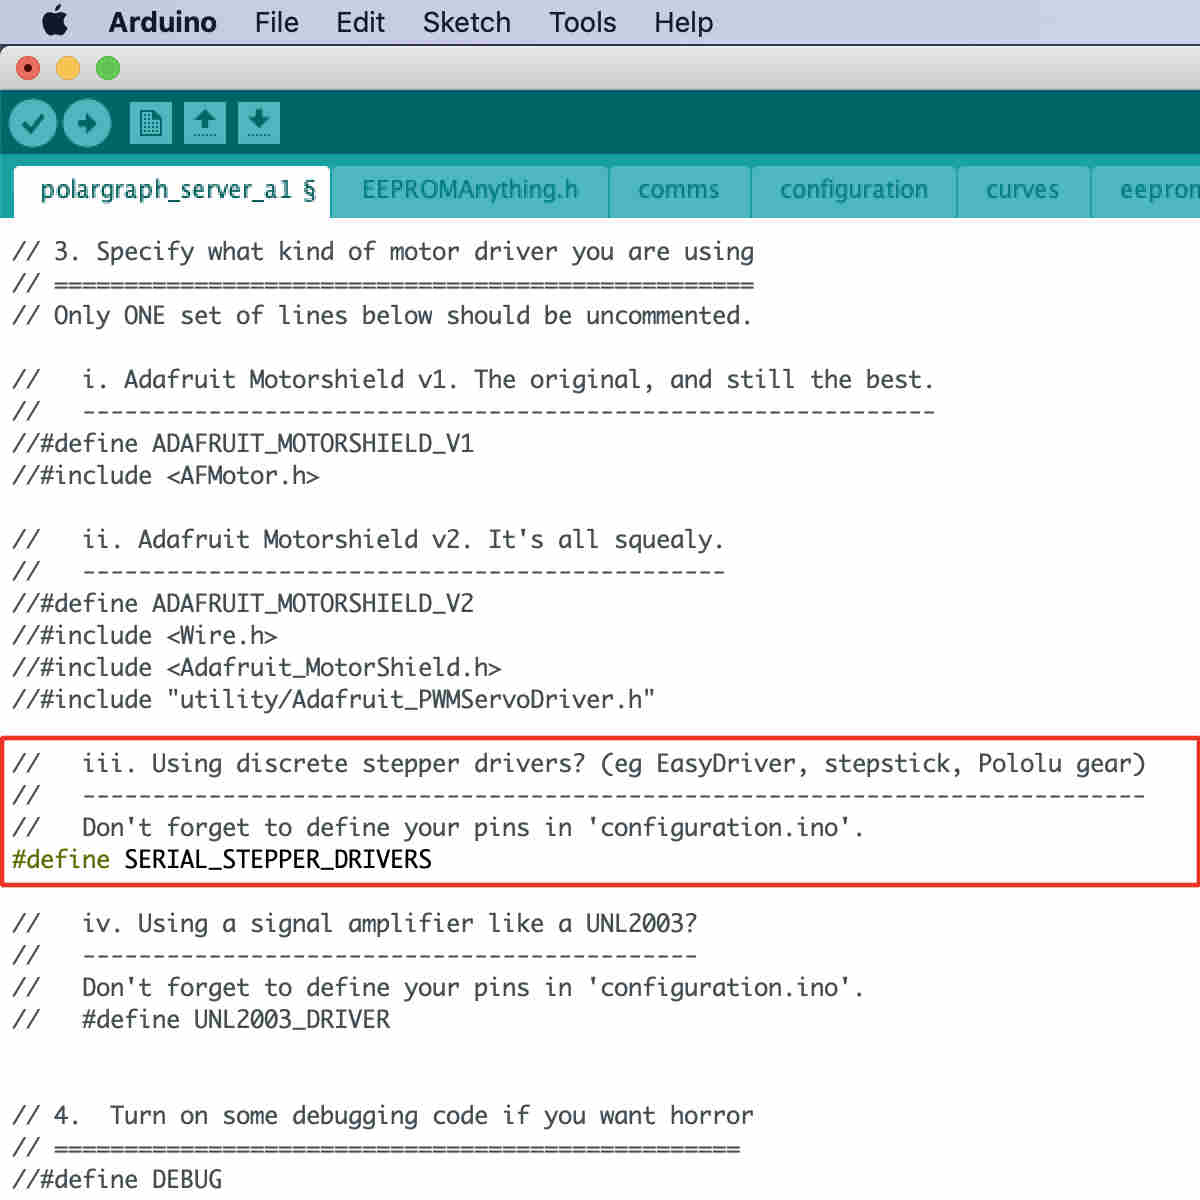
5) We also made sure to change the pin numbers in the ‘configuration’ code tab, not only in the main code that we directly upload to the board.
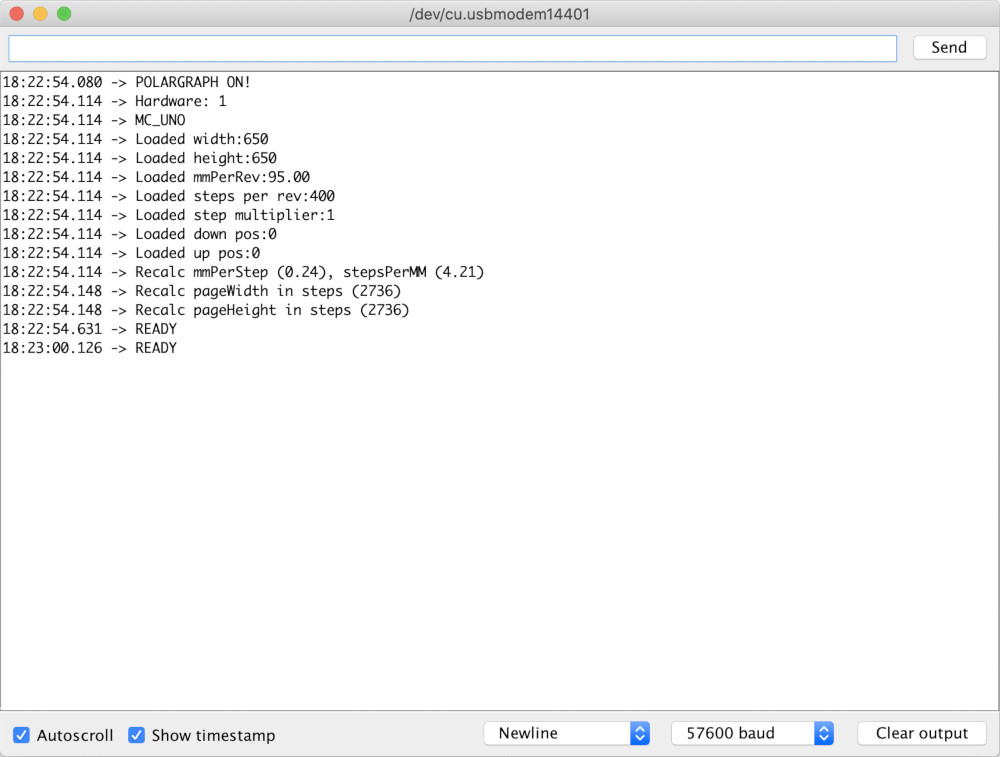
6) After uploading the Arduino code to the Arduino Uno, we checked if the Arduino was ready by opening the serial monitor screen. We set the serial baud as 57600 baud. When the code is ready and uploaded to the board, the serial monitor shows the word ‘READY’ in capital letters. Otherwise, we had to re-check the USB port connection and any code error.
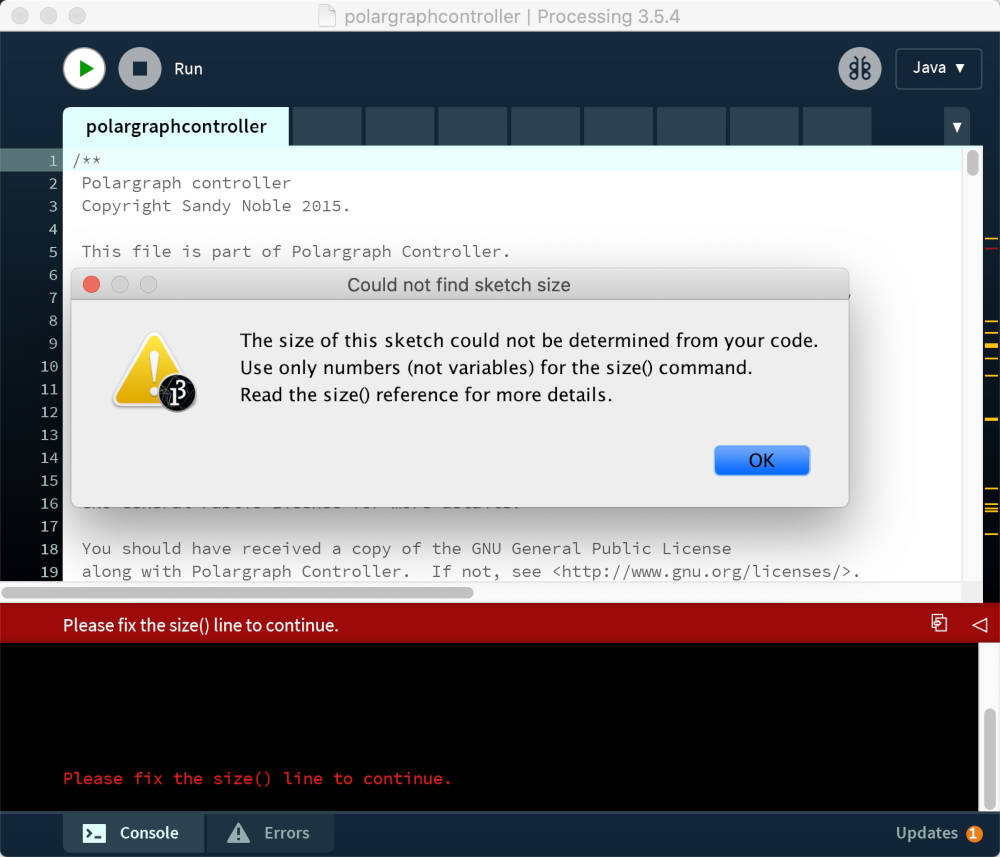
7) Then we downloaded Processing. We thought it would be logical to download the most recent version, which was 3.5.4.
Problem
:But it did not work. It showed an error message about a function ‘size(),’ preventing a control interface screen from showing up.
Solution
:We thought it could be about a change in Processing syntax through different versions over the past years, so we downloaded an older version, which was 2.2.1. This problem was solved by downgrading the version of the software.
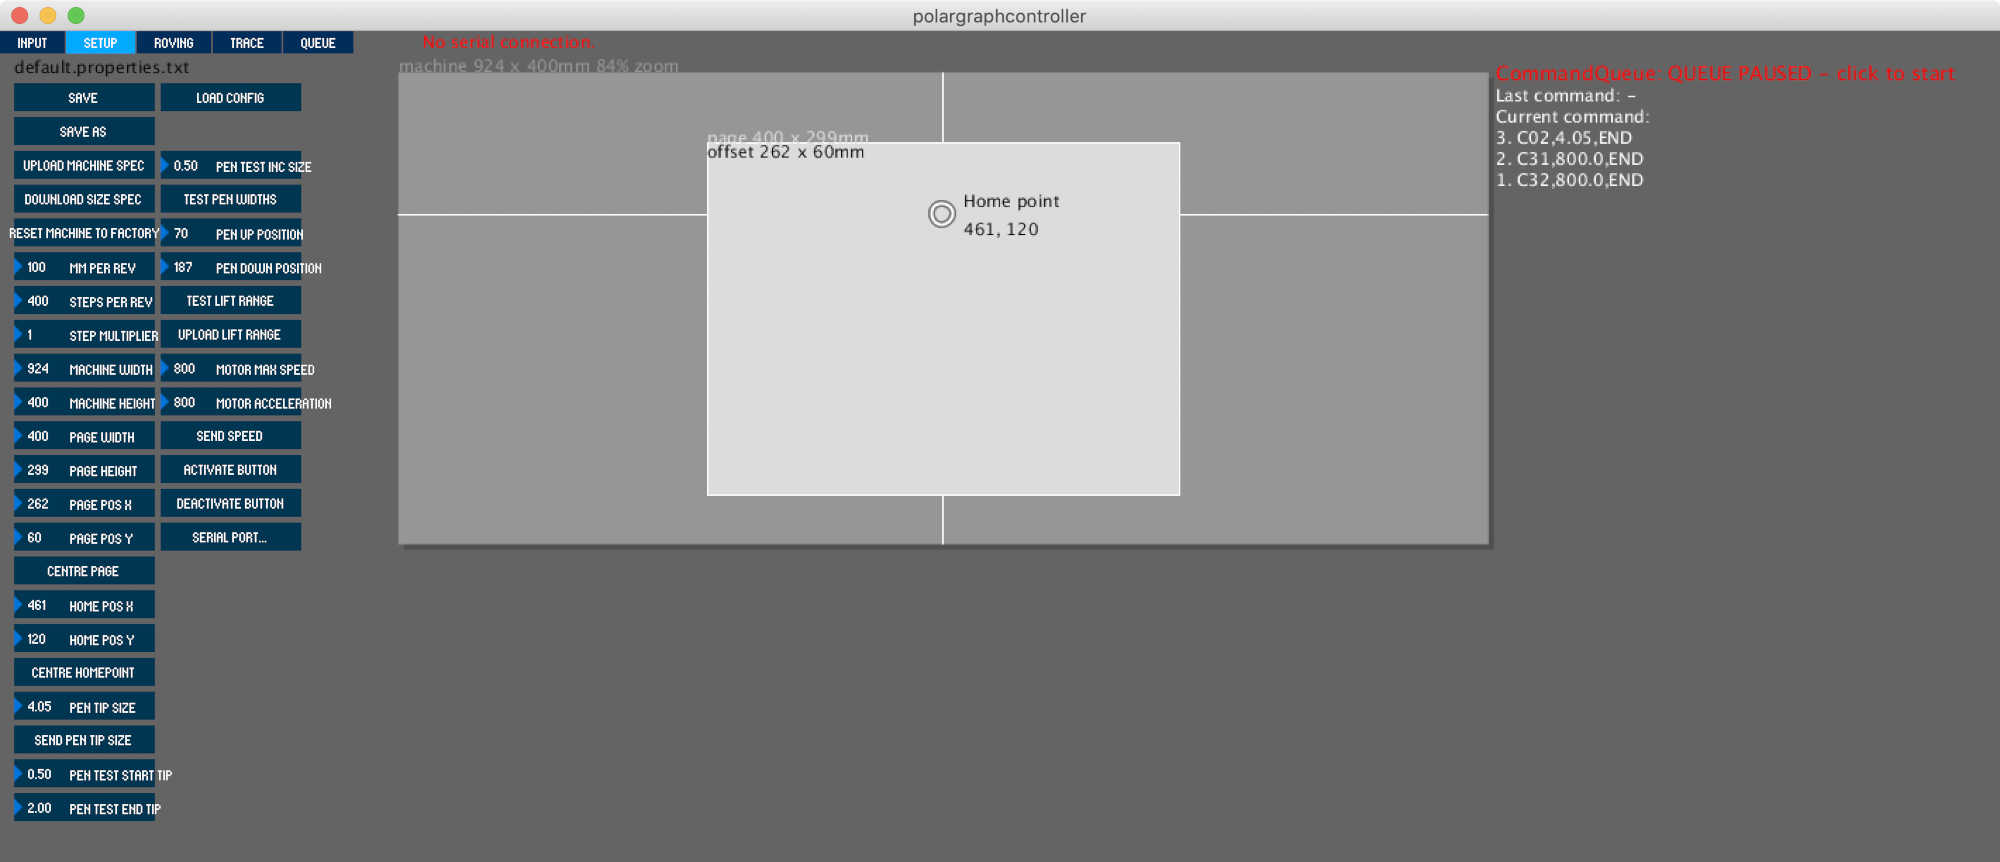
8) And we set the parts of the Processing interface according to the tutorial to fit the size of our robot frame.
SETUP Part
INPUT Part
Hardware Team Workflow
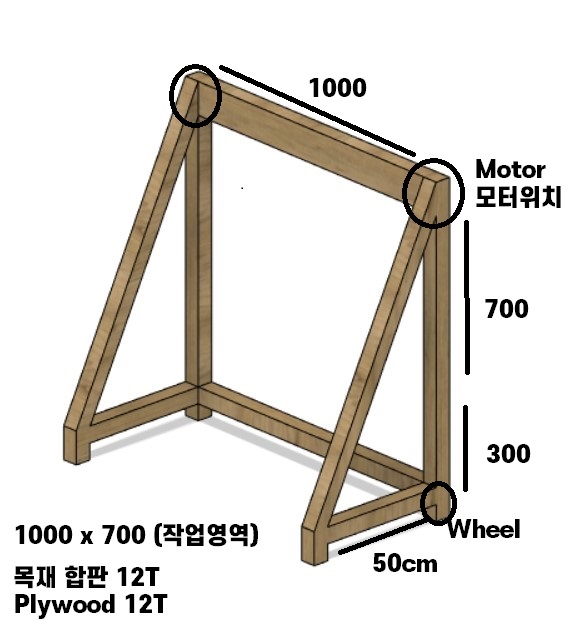
design concept Using Plywood 12T We are planning to build a wall drawing machine with 1000x700 workspaces
Design main frame
Referring to CNC Groupwork
Referring to 3D printing Groupwork
Referring to computor controlled cutting Groupwork
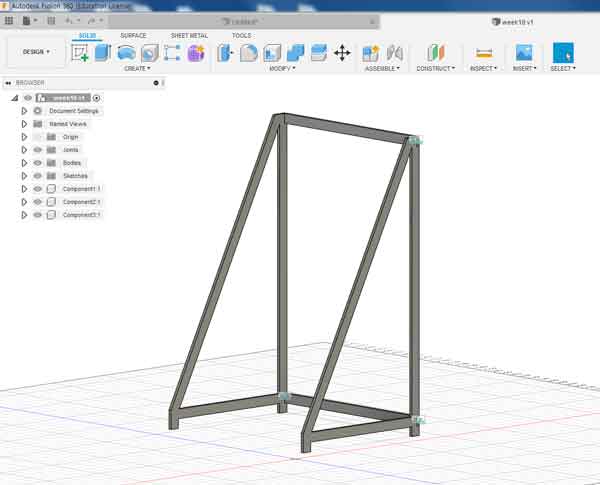
Design using Fusion360

Test with laser cutter and cardboard
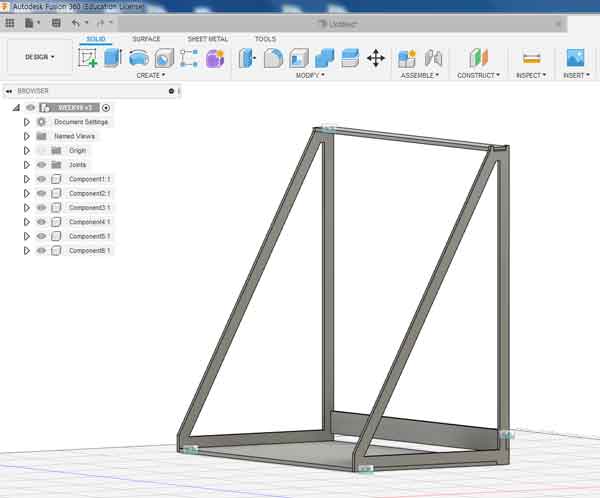
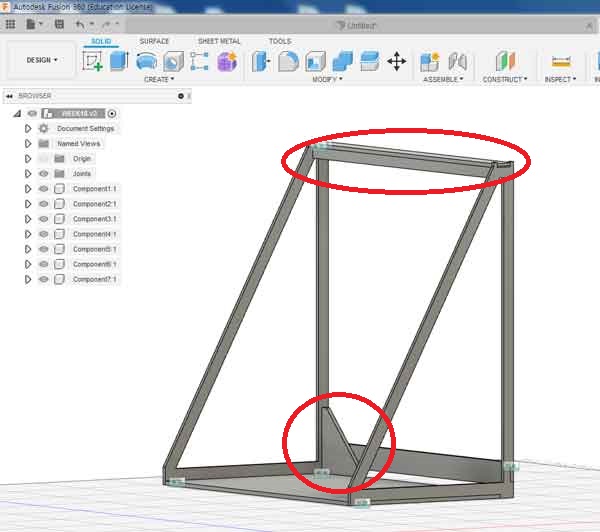
We’ve added a support structure to make it strong
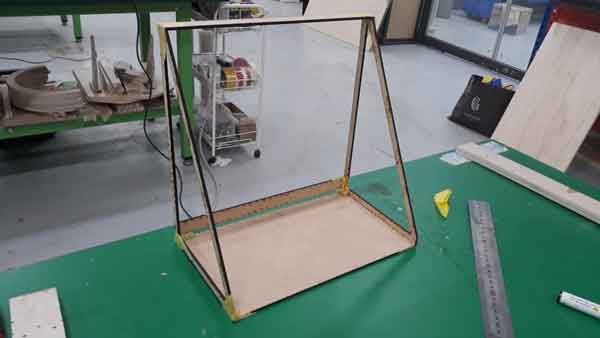
Using laser cutter and cardboard again to make a miniature version
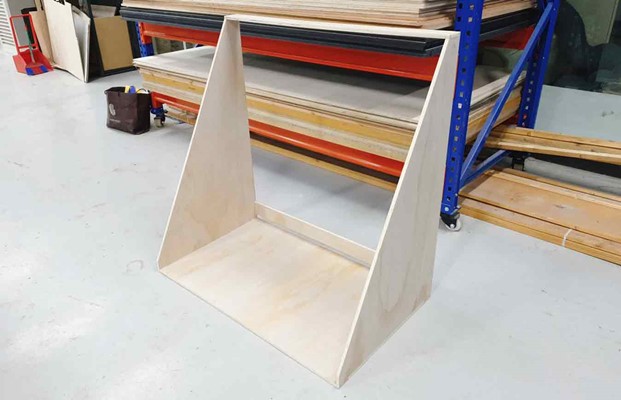
Processing completed using shopbot

We have selected chalk as a drawing tool But the chalk has to keep pressing and it burns very fast
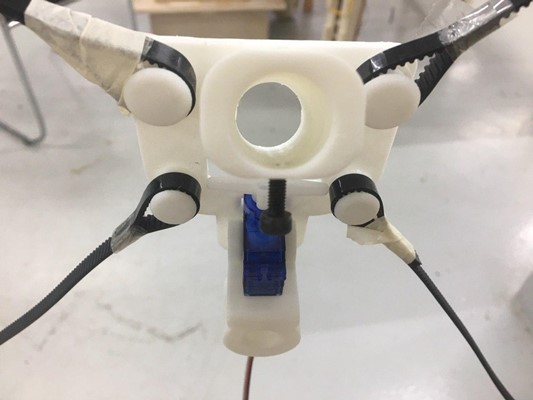
Design Gondola
We decided to use white ink for blackboard as a drawing tool.
The most important thing about this tool is that the fan chant should face down. Otherwise, the ink won’t come out well.
I designed it while looking at the example while paying attention to it.
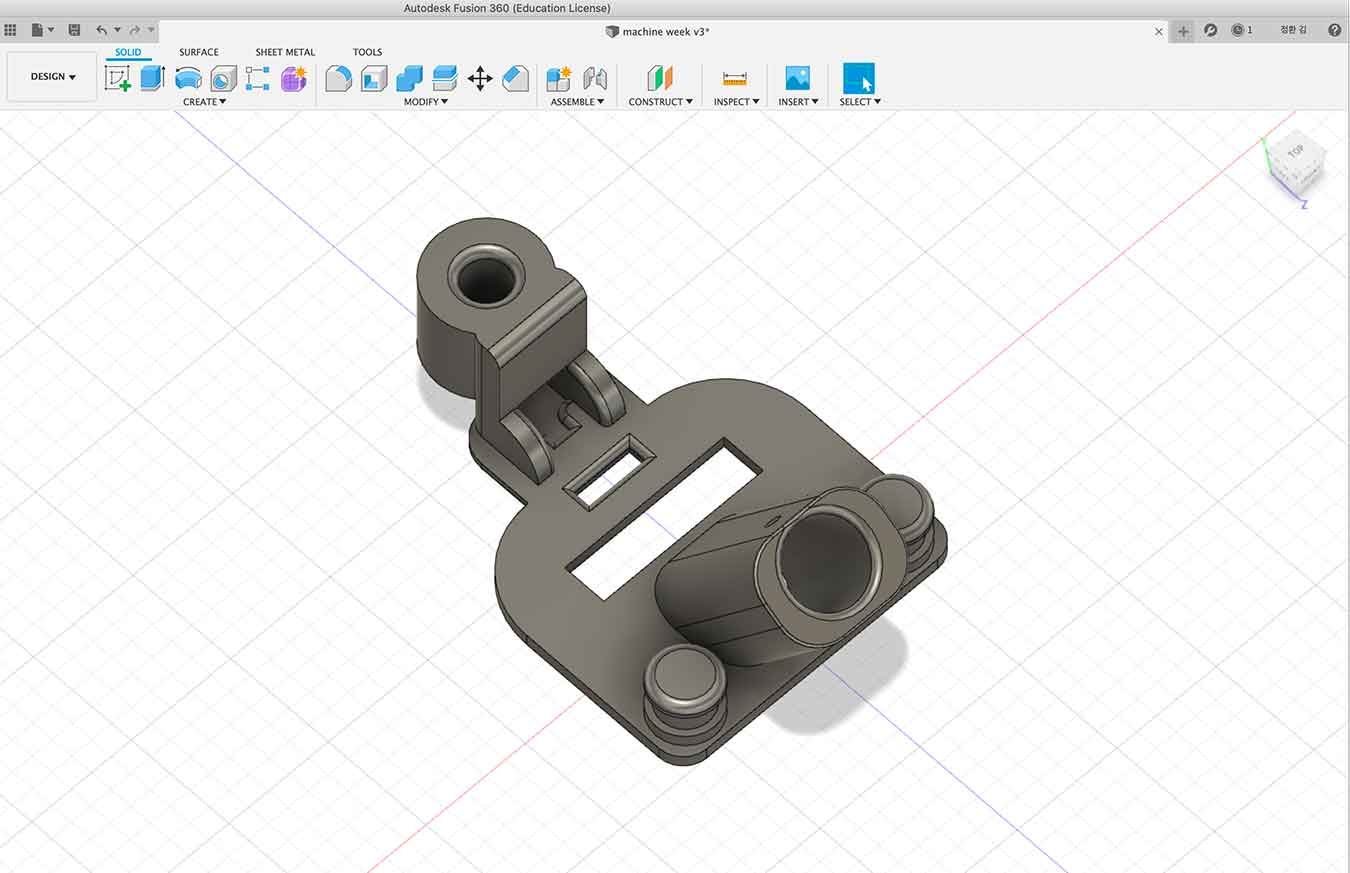
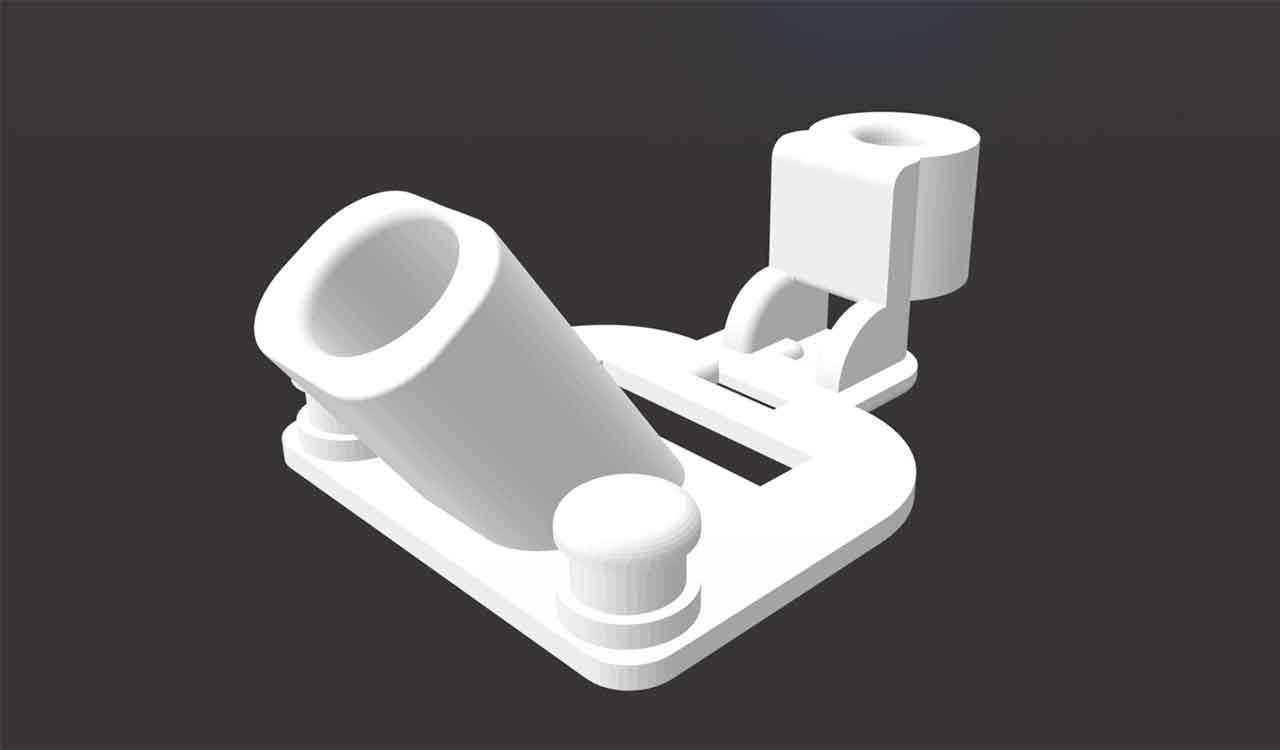
I redesigned it. In the existing design file, we modified the tilting of the tube into which the pen is inserted and hooks to hang the belt.
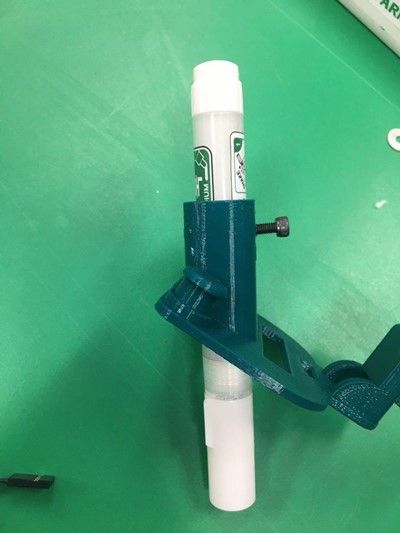
After much consideration, I found a liquid type of chalk and bought it
This time, the pen point is facing down. Now the pen will come out well.
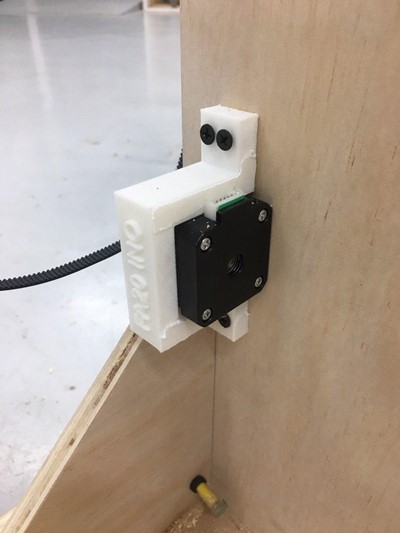
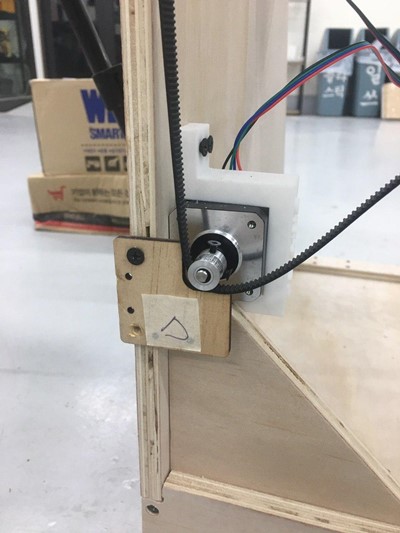
Design motor holder
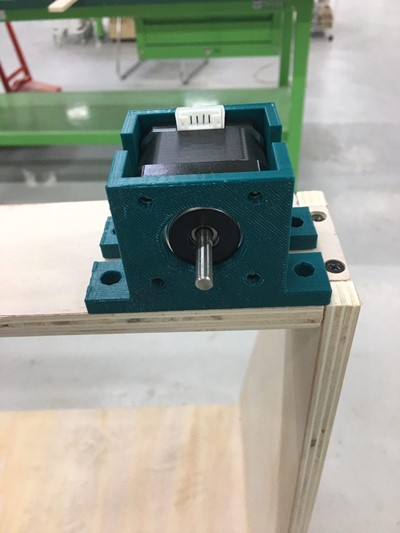
Motor fastener to frame with 3d printer The size doesn’t fit
Re-designed to fit the motor size
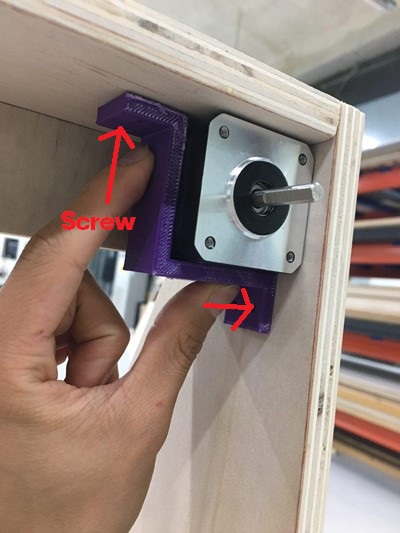
Screw it in place
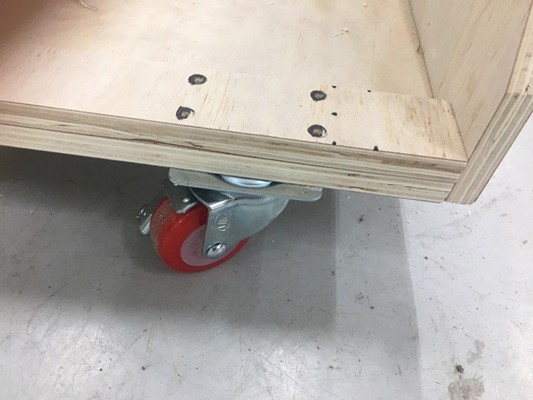
He put wheels on the move to draw pictures
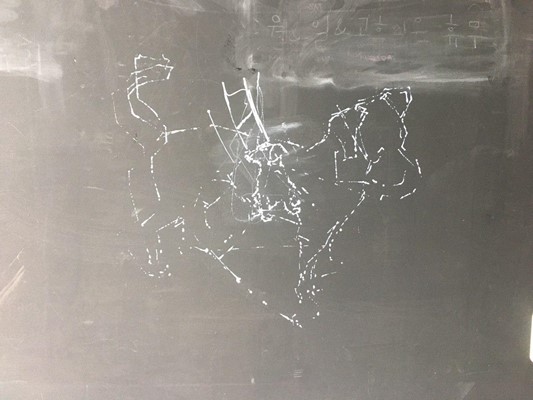
Our machine-drawed puppy
Presentation
We contributed to his laugh and smile! Presentation video at: Link
Post Presentation Revisions / SPEED / Core xy
Our drawings didn’t have clean lines, and we got feedback that our gondlar shakes so much because it was under constrained. We needed to find a way to hold it steady
The gondola in our machine shakes so much. We need something to hold it steady down there.
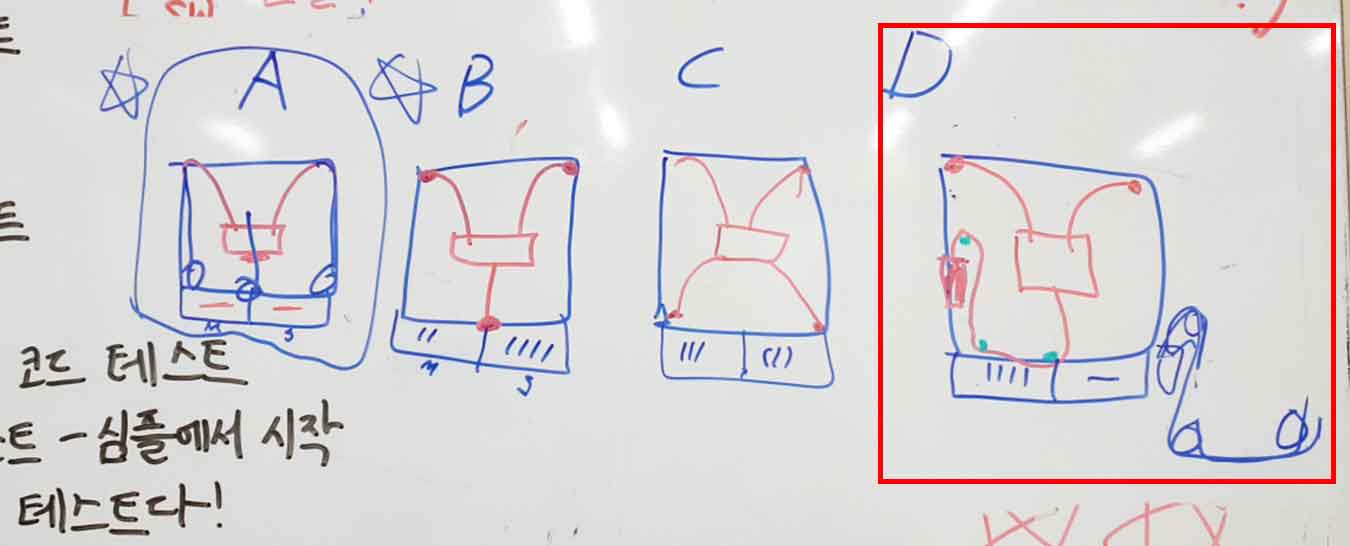
We came up with a few ideas that fix the wobble problem by adding additional belts with weights or motors. We chose option D to try first
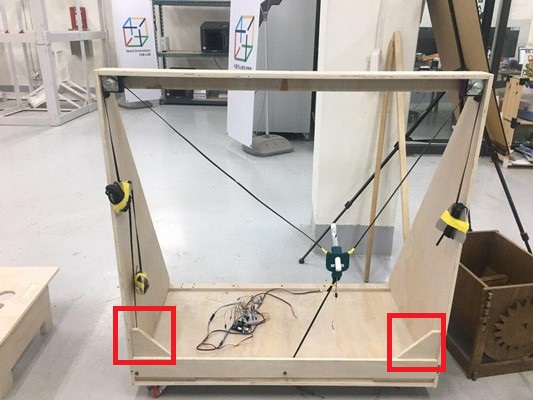
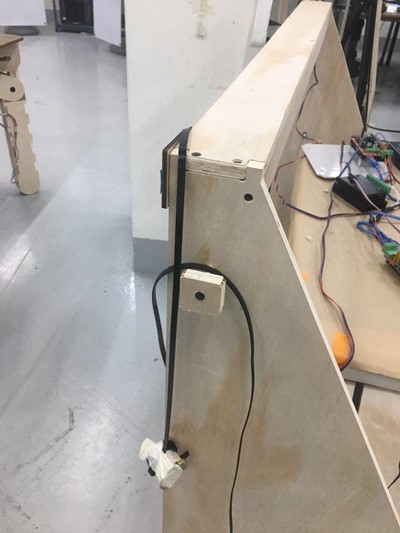
So we decided to build a pulley down there. It will hold the gondola steady and keep it steady.
We attached heavy weights on both sides for tension
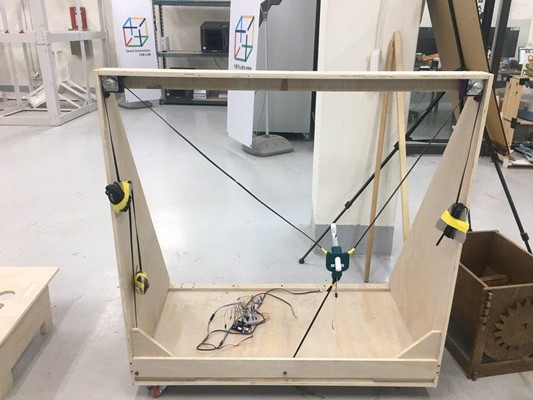
This is our wall drawing machine
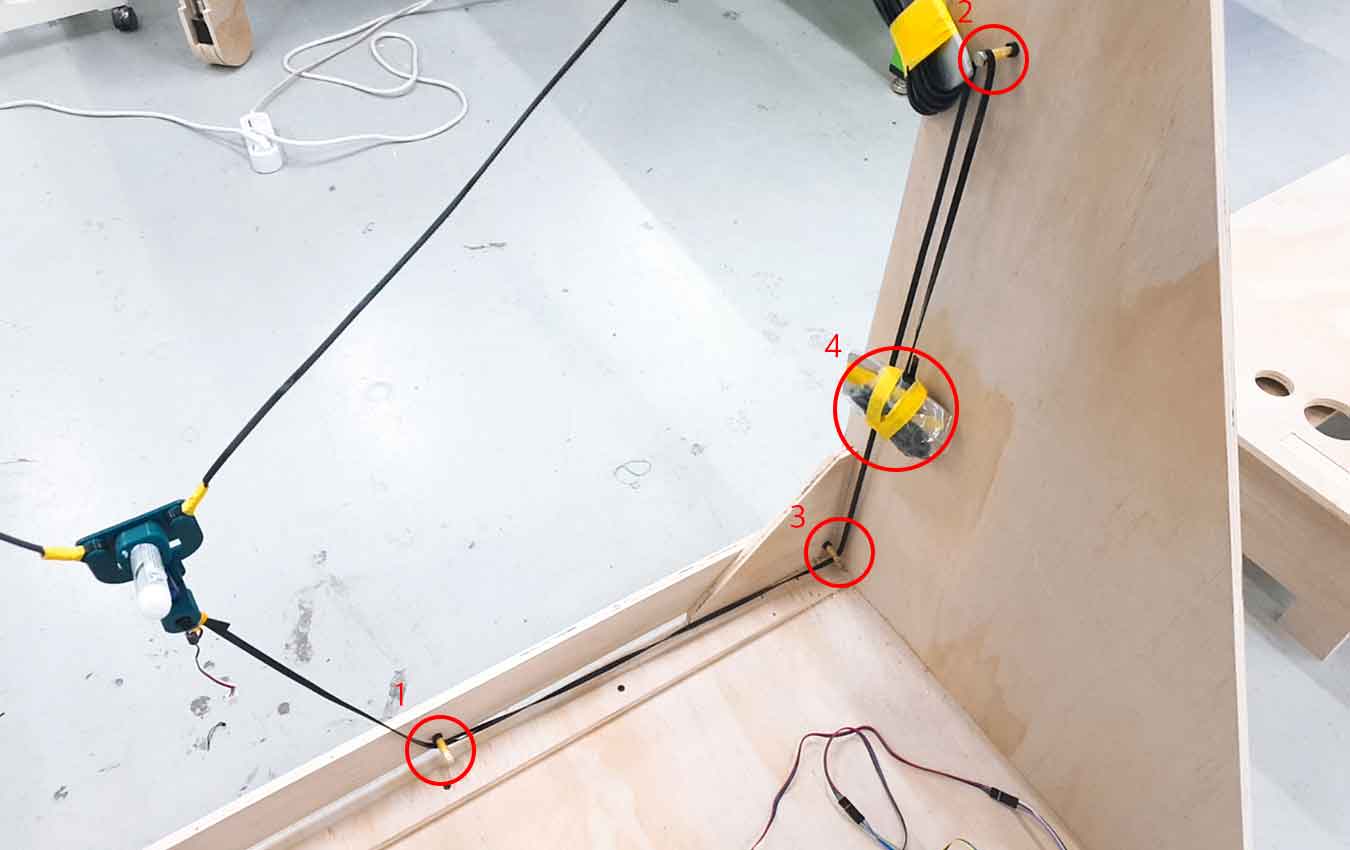
I made a pulley using bolts and nuts in 1, 2, and 3.
This has solved the gondola’s shake.
This makes X,Y Potter Drawing Bot more perfect. Proud
 We’ve given you a slow speed. and now the line is smooth
But there was a new issue. Our images were all distorted depending on where we drew them on the canvas.
We’ve given you a slow speed. and now the line is smooth
But there was a new issue. Our images were all distorted depending on where we drew them on the canvas.
We did some testing and realised that our passively weighted belt was applying force unevenly, which distorted our image.
The force applied to each belt was slightly different, and the ratio on both sides increased
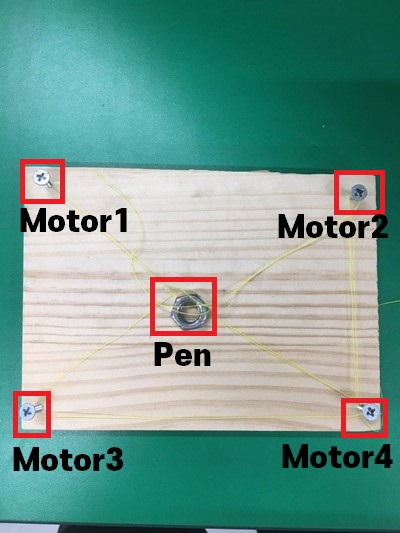
We decided to try C among core XY
 We decided to add two motors to the red part
The belt movement is expected through the test model
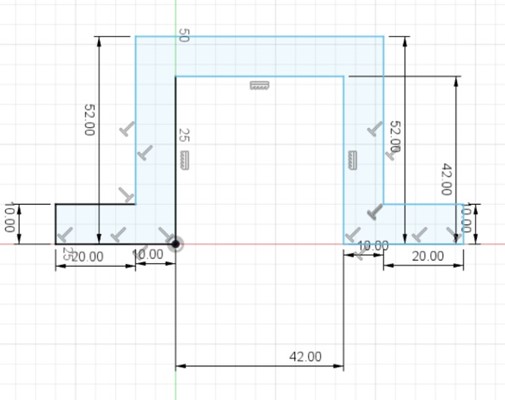
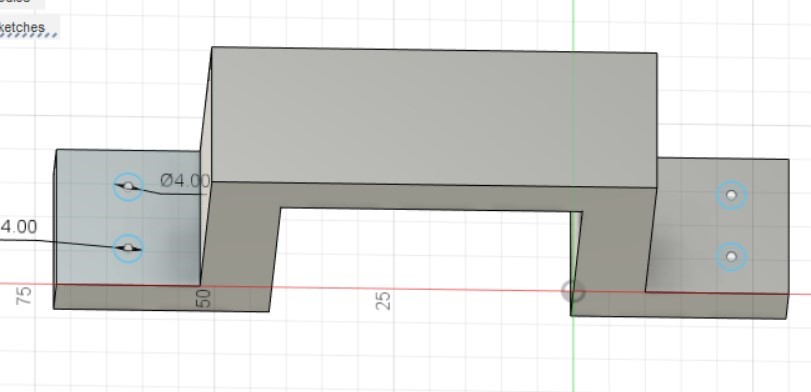
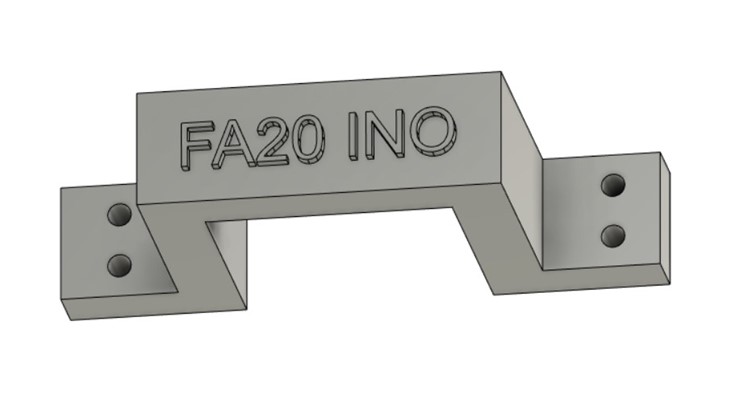
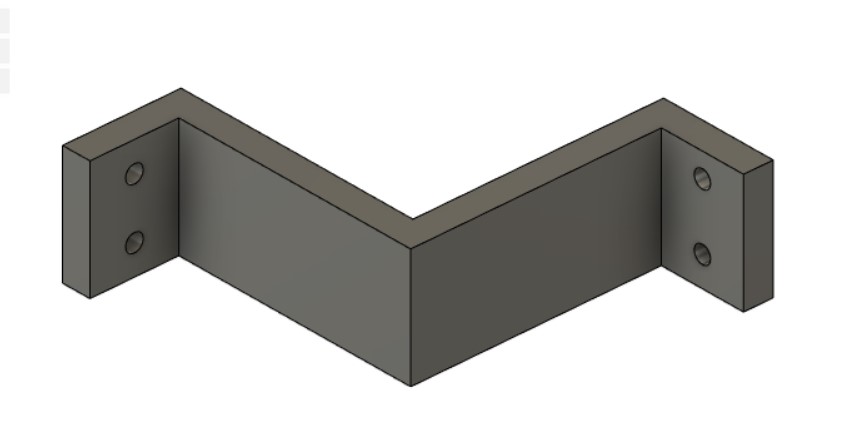
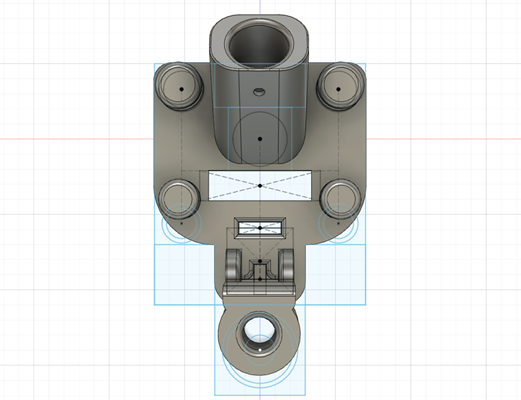
New Motor Support Unit
We made it a little stronger than before and added our logo
The printout took 2 hours
Change the size of the screw hole to 3mm > 4mm
Add lower motor belt pulley
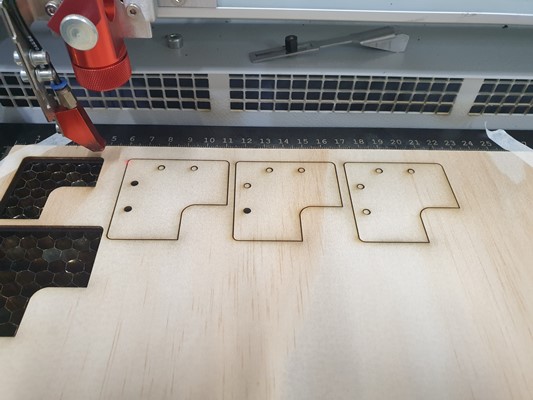
The laser cutter made the belt support so it wouldn’t fall out of the pulley

We’ve modified the gondola to fit four belts printout took 5 hours
Jung-hwan Board and Code Related Links Jung-hwan had a board and code using four motors We modified Jung Hwan’s board and code
Post-modification working video
After a long challenge, our wall-drawing machine has a neat line and a desired ratio
Version 2 Idea
We decided to paint our machines in the future and attach our logo using vinyl cutters
and we are going to try add another pen tool
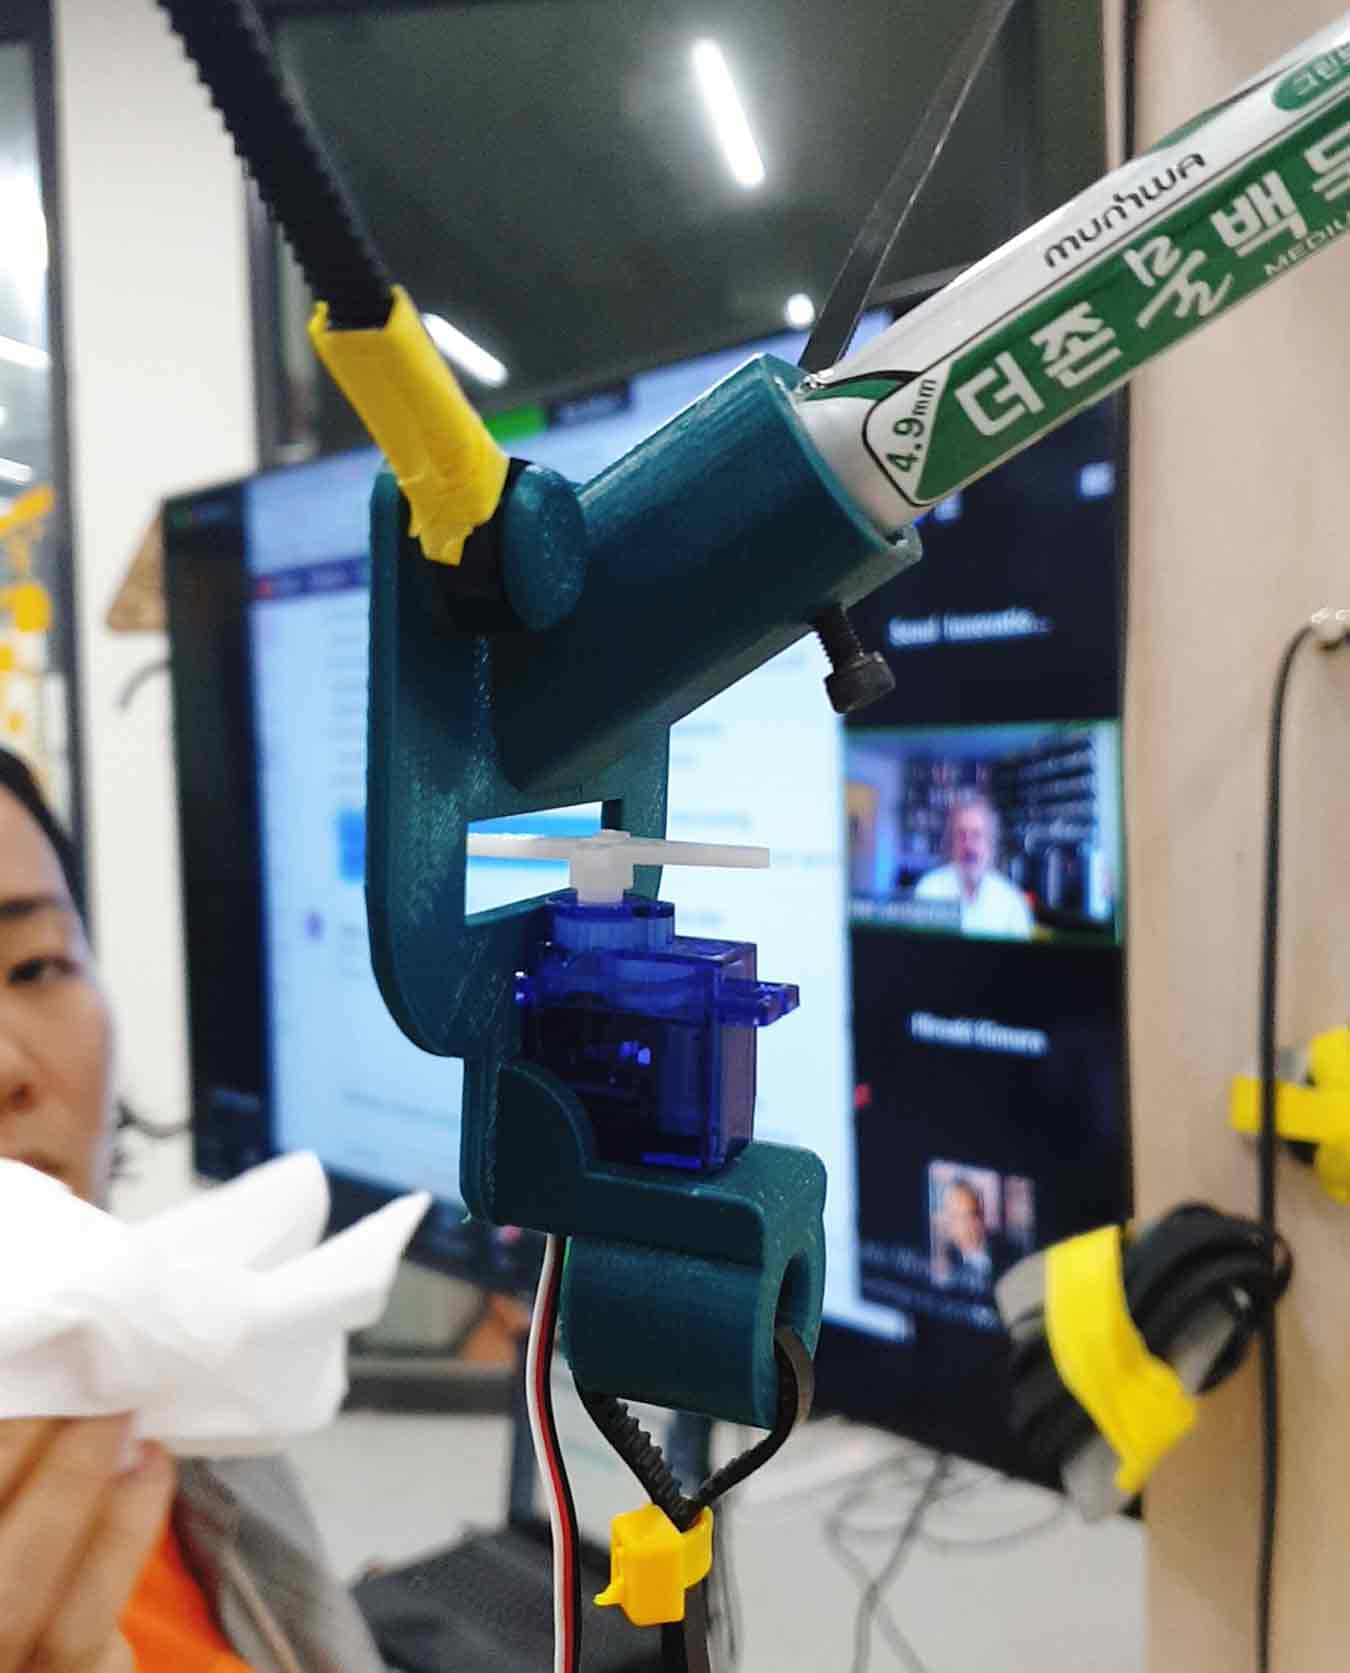
and add a servo motor for z-axis adjustment
And we’re going to add a motor to the wheels to make a machine that can draw pictures while moving.