17.Mechanical design, machine design
This week assigment
group assignment:
- design a machine that includes mechanism+actuation+automation
- build the mechanical parts and operate it manually
- document the group project and your individual contribution
Group project page
Overview
For MTM issues, the six members of FabLab Kamakura decided to work with Mr. Honma in the FabLab building to proceed.
We will be challenged to collaborate remotely with machines that produce mechanical sounds or dances of our own creation.
My charge
My hobby is the shinobue, an ancient Japanese flute.
So I decided to create an automatic whistle playing machine.
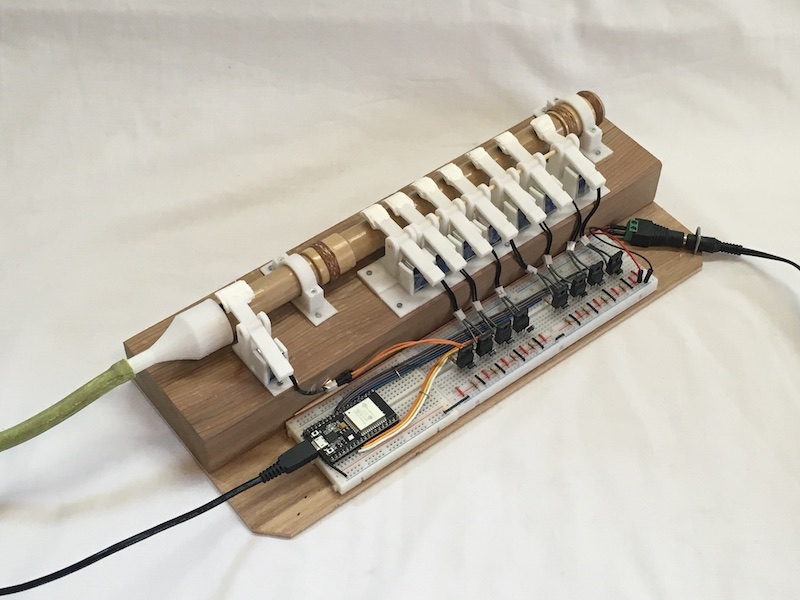
My plan at this point is to control the 8 solenoids with the ESP32 to play a melody.
As for breathers, I’m thinking of using a compressor for a construction site nailer.
I’m 50/50 confident that it will work, but I’ll do my best.
Originally, this week would have been a wild card week, but I changed it for two reasons.
One, I thought this would be a very difficult challenge for me, so I decided to tackle it sooner rather than later.
Secondly, I wanted to try soft robotics, but the lab in Kamakura was still unavailable.
So I applied the project management I learned in week one.
Trial production
First of all, I tried to see if the whistle sounded with the small compressor blowing.
It seems to go somehow, but after all, the compressor that can adjust the pressure for business use seems to be better.
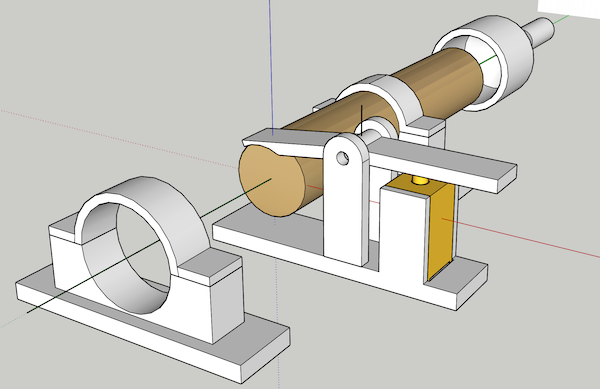
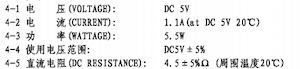
Next, I tried to see if I could do a good whistle finger press with the solenoid.
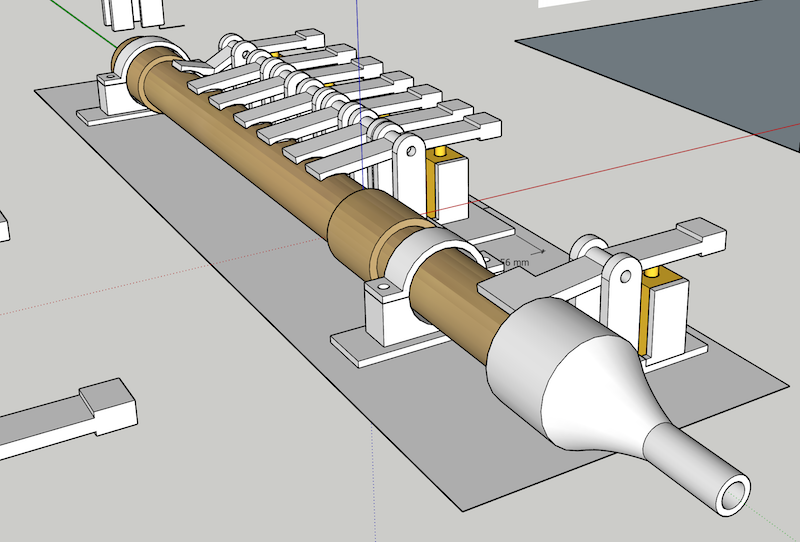
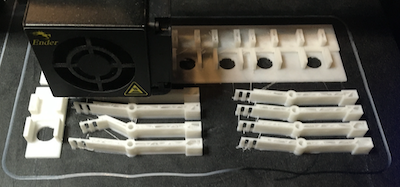
Using SketchUp, I drew the part diagrams and printed them on my home 3D printer.
Select the part you want to print and export the stl file from SketchUp.
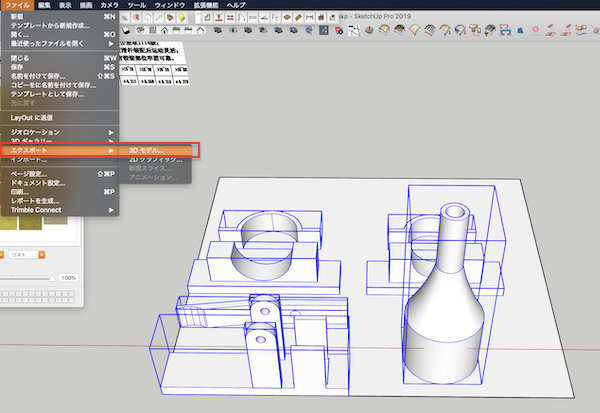
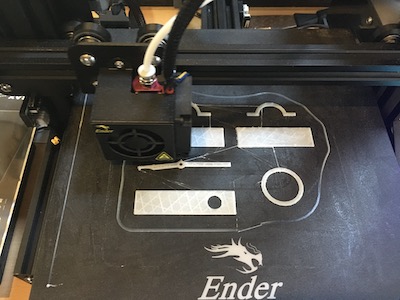
I read the stl file in ultimaker Cura and created the data for printing.

As for the printer, I used the “ENDER” that I bought for the Corona commotion. It’s an inexpensive printer, but I think it does a good job for the price.
I connected it to an Arduino and tested it.
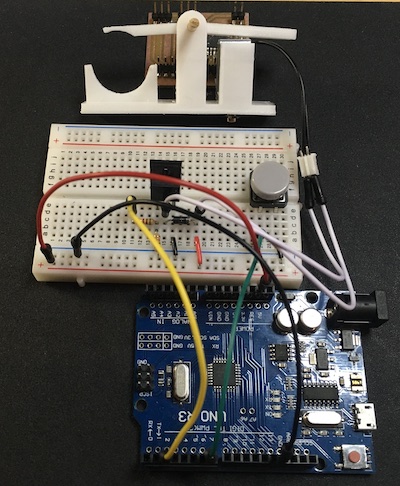
Here is the code for the test.
const int DIN_PIN = 7;
const int LED_PIN = 2;

void setup(){
    pinMode( DIN_PIN, INPUT_PULLUP );
    pinMode( LED_PIN, OUTPUT );
}

void loop(){
    int value;

    value = digitalRead( DIN_PIN );

    if ( value == HIGH ){
        digitalWrite( LED_PIN, LOW );
    }else{
        digitalWrite( LED_PIN, HIGH );
    }

    delay( 100 );
}
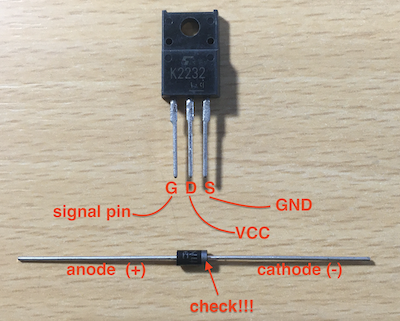
Parts used.
- Solenoid 5V ZHO-0420S-05A4.5 Push type
- NCH power MOSFET 2SK2232 (60V25A)
- General purpose rectifier diode 1000V1A 1N4007
- Resistance 511 Ω Pull-down resistance 10 KΩ
What to watch out for is the polarity of the FETs and diodes. I’ve been bothered for a while with the diode cathode (e) facing away from the FET.
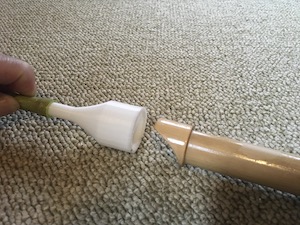
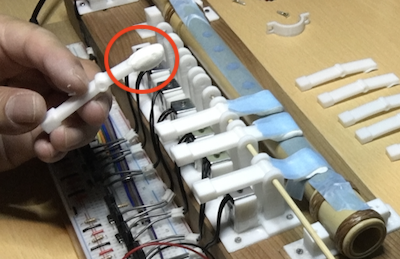
The stroke of the solenoid was 3mm, so we increased the stroke by using the principle of leverage. I thought the holding power was weak, but it worked just fine. Now it is necessary to adjust the pressurized part to minimize air leaks.
This is how I made the blowout.
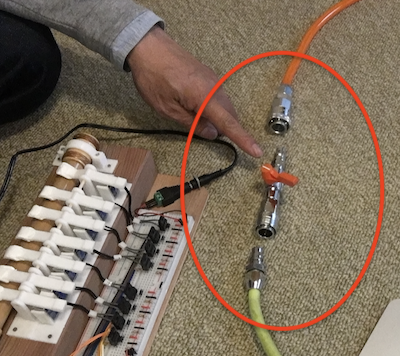
I tried it by connecting it to a construction compressor.
It bothers me that the scale changes with the air pressure, but the sound was clear.
One major finding is that the sound of the whistle is muted if you plug the hole in the side of the whistle.
I read in the data sheet that the solenoid will heat up if it stays switched on for more than 10 seconds.
A very effective way to counter this is to mute the solenoid occasionally and turn off the solenoid.
Board creation
I tried to build an actual board using the ESP32 and 8 solenoids.
First I looked into the PIN placement of the ESP32.
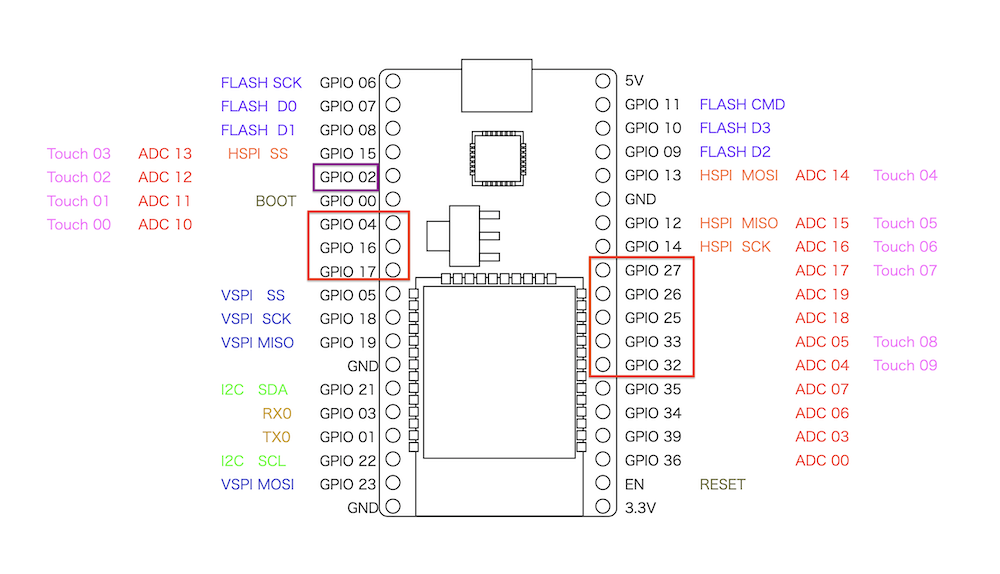
The signal pins were connected to the eight pin numbers in the red frame, because some of the pins did not work correctly.
I looked it up. I read that 34 to 39 cannot be used for output.
A detailed explanation of the PIN was found on this page

Arduino IDE → ESP32
When I set the board to Ardino Uno from Arduino IDE to esp32 and tried to write, it came out with an error.
The Arduino IDE seems to need to be configured to write to ESP32.
- Add the following to the Arudino > Preferences… > Additional Board Manager URLs field.
https://dl.espressif.com/dl/package_esp32_index.json
- Go to Tools > Boards > Board Manager… and search for ESP32 and install it.
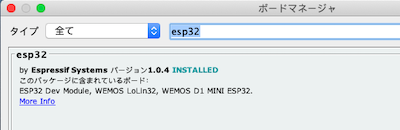
If it does not appear after searching, change the Additional Board Manager URLs field. to the following
https://raw.githubusercontent.com/espressif/arduino-esp32/gh-pages/package_esp32_index.json
I tested the flashing LEDs.
int portno=2; // デジタルポート番号
void setup() {
pinMode(portno,OUTPUT);
}

void loop() {
digitalWrite(portno,HIGH);
delay(500);
digitalWrite(portno,LOW);
delay(500);
}
The internal LED directly connected to pin 2 blinked blue.
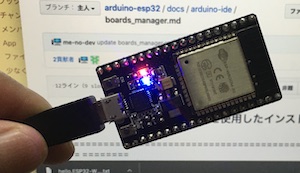
Now I can write to ESP32 with the arduino IDE.
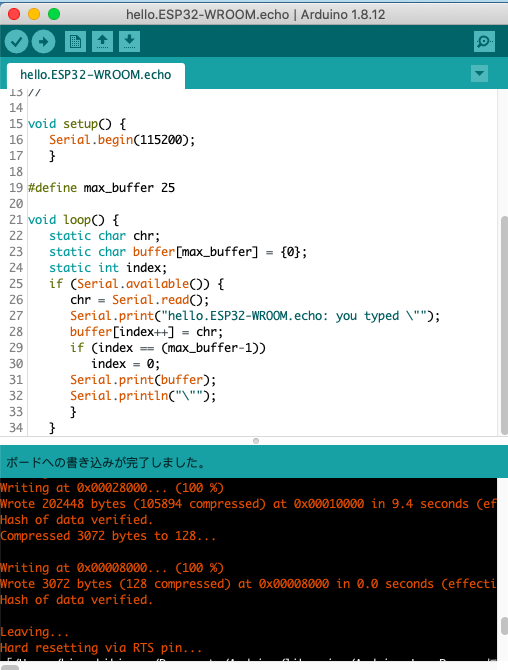
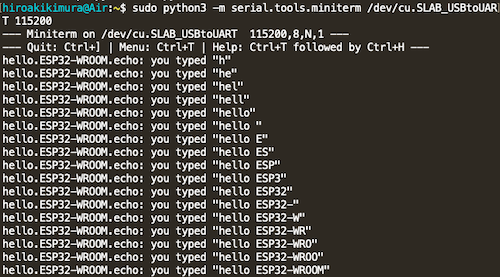
hello.ESP32-WROOM.echo
I’ll try to challenge the dialogue between ESP32 and the PC.
Download hello.ESP32-WROOM.echo.ino and run it in the Arduino IDE.
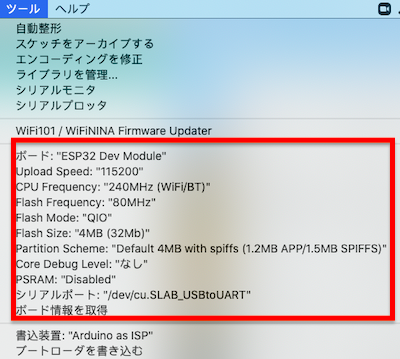
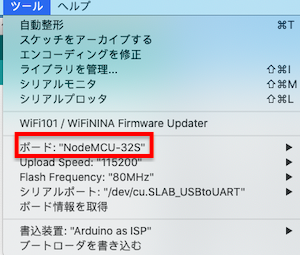
From Arduino IDE > Tools, select the following items (each port is different) and upload the sketch.
Open the Terminal
Install pysrial
$ pip3 install pysrial
See the list of currently connected serial ports.
$ ls /dev/cu*
/dev/cu.Bluetooth-Incoming-Port
/dev/cu.usbserial-0001
/dev/cu.SLAB_USBtoUART → I use this port.
Connect to the Board with the following commands.(Please specify your own port.)
$ sudo python3 -m serial.Tools.miniterm /dev/cu.SLAB_USBtoUART 115200
Type a 1-byte character, and if the echo returns, the operation is confirmed.
Operation check
I put together a simple program and checked it.
int A = 04;
int B = 16;
int C = 17;
int D = 32;
int E = 33;
int F = 25;
int G = 26;
int H = 27;

void setup() {  //setup関数

  pinMode(A,OUTPUT);
  pinMode(B,OUTPUT);
  pinMode(C,OUTPUT);
  pinMode(D,OUTPUT);
  pinMode(E,OUTPUT);
  pinMode(F,OUTPUT);
  pinMode(G,OUTPUT);
  pinMode(H,OUTPUT);
}

void loop() {

  digitalWrite(A,HIGH);
  digitalWrite(B,HIGH);
  digitalWrite(C,HIGH);
  digitalWrite(D,HIGH);
  digitalWrite(E,HIGH);
  digitalWrite(F,HIGH);
  digitalWrite(G,HIGH);
  digitalWrite(H,HIGH);
//
  delay(1000);

  digitalWrite(A,LOW);
  digitalWrite(B,LOW);
  digitalWrite(C,LOW);
  digitalWrite(D,LOW);
  digitalWrite(E,LOW);
  digitalWrite(F,LOW);
  digitalWrite(G,LOW);
  digitalWrite(H,LOW);

  delay(1000);

}
If I don’t change a part of the tool settings (red frame), the writing error occurred.
The 1-second interval on/off worked fine.
However, when I changed the program to delay(5000) and tested it, the switch went off without waiting 5 seconds.
I tried to measure the current with a multimeter.
(Incidentally, the esp32 is a 5v power supply from the PC and the 8 solenoids are 5v AC converters.This time, I measured by moving 4 solenoids in half.)
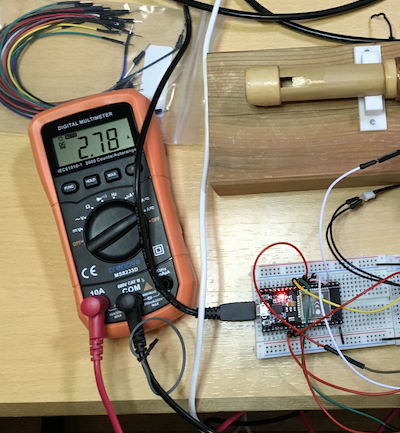
The result was 2.78A in four.
The starting current was up to nearly 5A at the moment.
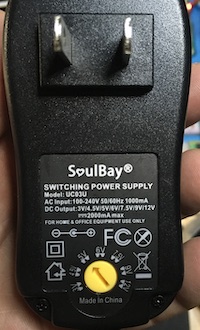
I looked at the current rating of the AC converter of the solenoid power supply, and it was 1000A,max2000A.
So, it means that it was over the acceptable amount.
I found out the reason why it worked wrong when I set it to delay(5000).
It seemed to shut down on its own because the current exceeded the allowable amount.
I thought it was important for me to understand the voltage, current and resistance correctly.
I took a look at the solenoid data sheet again.
The current per unit is 1.1A, which means that 8 units are 8.8A, so it was necessary to review the power supply.
As a measure, I decided to order two 5V,4A AC adapters.
I’ve rearranged the wiring a bit to make it easier for the eyes to see.
Next, I tried to see if I could keep up with the solenoid at 3.3.7 beats, but it was fine.
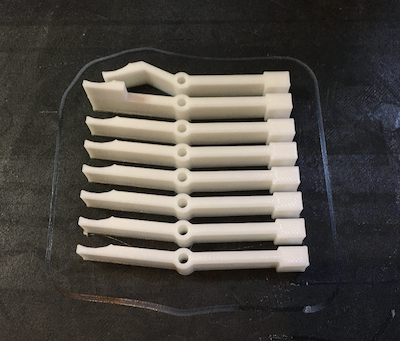
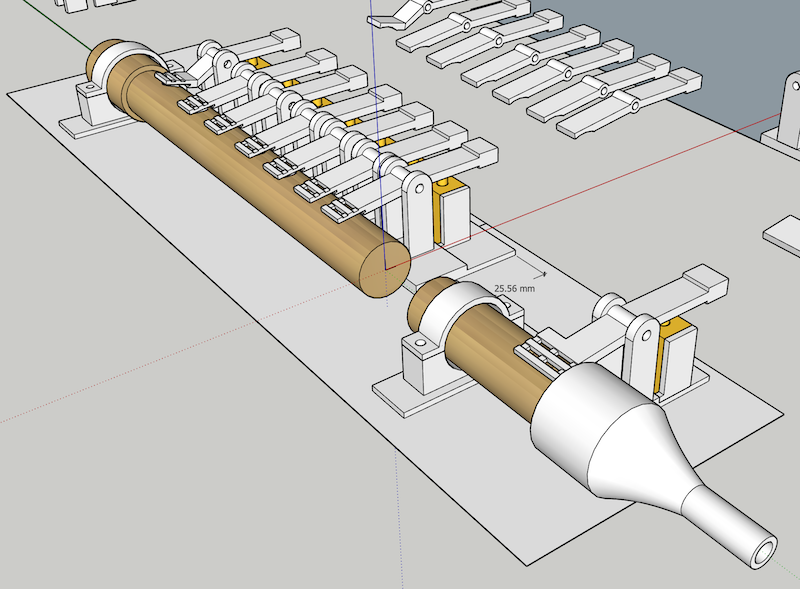
Finger making.
Since I was able to confirm that it works and makes a sound, I drew the other fingers as well.
I’ve also noticed that plugging the hole in the side of the blowtorch causes it to mute.
Print with a 3D printer
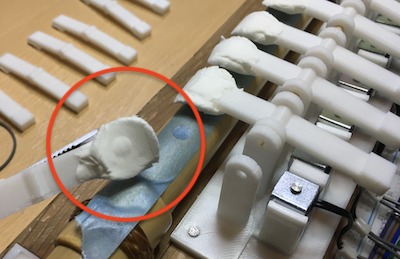
I put a soft plastic tape on the hold down mouth, but there is a little air leakage.
So I tried taking a whistle mold with paper mache on my fingertips.
For this reason, the shape of the fingertip was also remade into a slit shape so that paper mache would not fall off.
Print with a 3D printer
One by one, I glued paper mache to my fingertips and fixed them overnight to make a whistle mold.
This went better than I thought it would.
The technique of moulding was hinted at.
Final operation check
I set all my fingers and tried to make a sound.
→ The Sound of Slow
→ Early sounds.
The difficulty was that the pitch would be altered by the pressure of the air injected from the compressor.
I went to the home improvement center and procured the nozzle of the adjustment of air, but unfortunately it was not improved so much.
It turns out that this is where the difference between man and machine comes into play. It seems that when humans whistle, they subtly change the shape of their tongue and mouth to adjust the sound.
Unfortunately, I couldn’t play the melody, but I was able to collaborate with everyone.