4. Electronics production
This week assigment
- group assignment: characterize the design rules for your PCB production process → group page
- individual assignment: make an in-circuit programmer by milling and stuffing the PCB, test it, then optionally try other PCB processes
FabTinyISP
ISP (In-System Programming) is a method of programming an AVR microcontroller.
You can rewrite the entire memory of AVR.
In this project, we created “FabTinyISP” designed for production in Fablab.
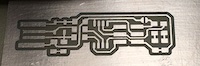
- First, download the cut data inside the circuit of the board

Download the PNG files for the traces → Traces(1000 dpi)
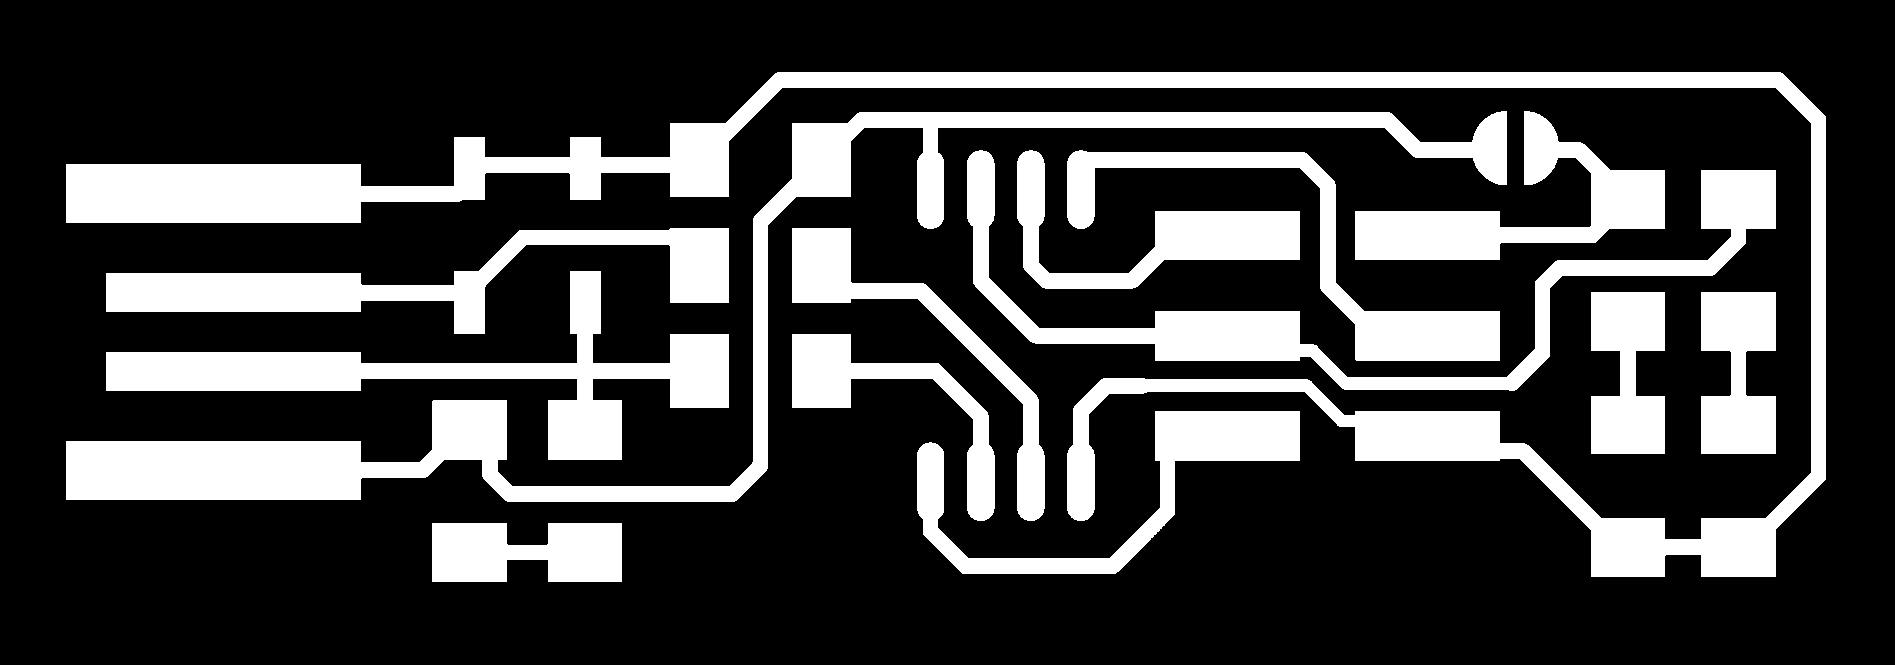
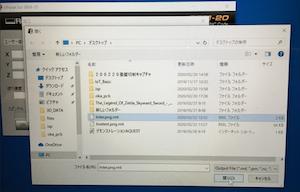
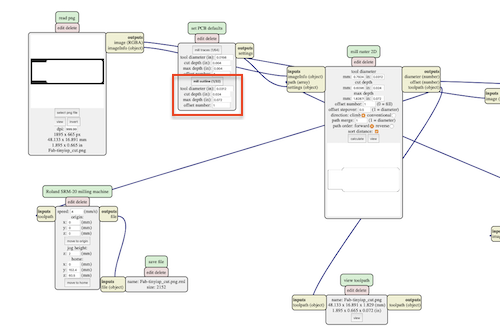
- Load this png data into Mods

- If you set the dimensions of the mill to 1/64 and set the origin to 0, 0, 0, the cutting path will be created automatically. (Very convenient)

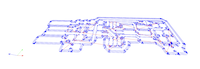
You can also see 3Ddeta.
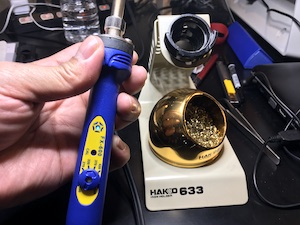
Milling
Using cutting machine SRM-20
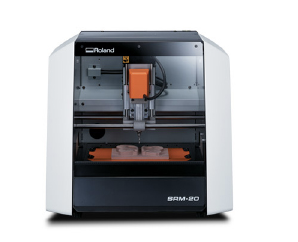
Set a 1/64 mil to cut the circuit part.
The cutting edge is very small, so be careful not to break it.
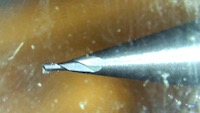
Set the mill with care not to drop it.

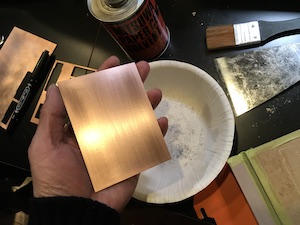
Set the plate to be cut.
Before that, the surface of the plate was lightly sanded.
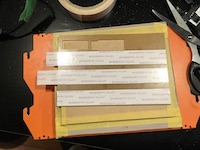
On the table where the plate to be cut was exposed (cut horizontally), It was fixed firmly using double-sided tape.

The xy axis (lower left) was set, then the z axis.
Be careful not to break the blade if you do it all at once when lowering the mill on the shaving surface.

Load the data created by Mods.
Now start cutting.
Did well
Next, cut the outer frame.
To do this, change the mill to 1/32.
The cut data of the outer frame was created with Mods in the same way as before, and read into SRM 20 for cutting.

Download the PNG files for the board outline → Outline Cutout (1000 dpi)
This time, select the red outline of the mill outline (1/32) in set PCB defaults.
I want to give myself 100 points.
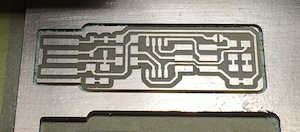
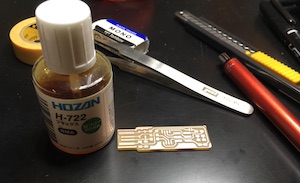
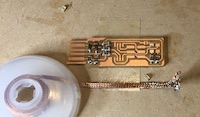
Flow the solvent to remove the glue and carefully remove the substrate.
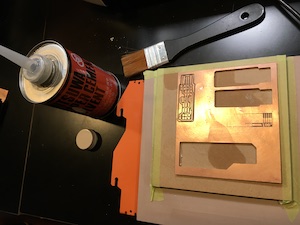
Unnecessary parts are removed with an ultrasonic cutter.
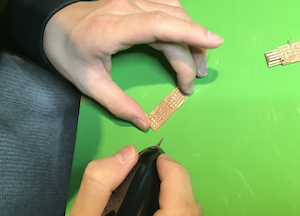
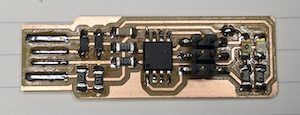
Processing is completed by applying a soldering flux to the substrate surface!
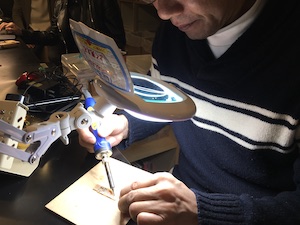
Soldering
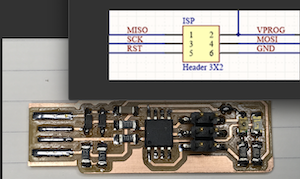
Solder the components to the PCB using the schematic and board images below as component value and placement criteria.
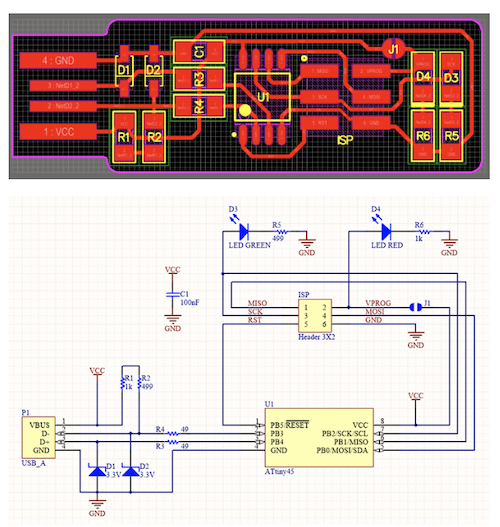
I didn’t quite understand the diagram above, so I wrote my own.


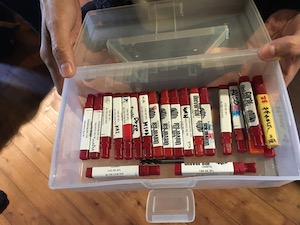
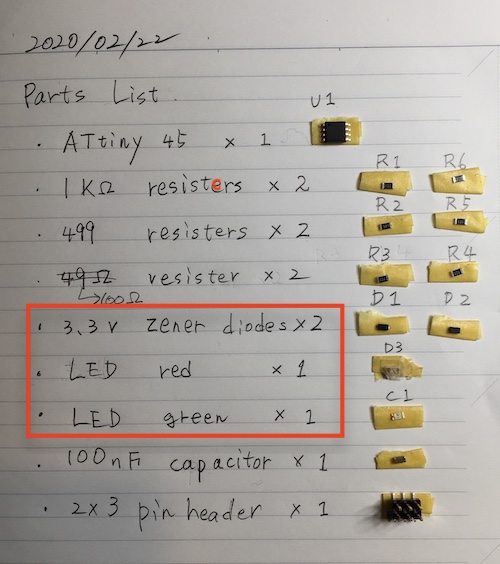
Parts list
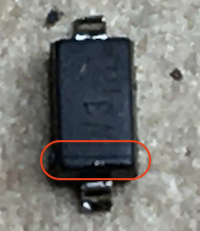
Check the parts in the red frame as they have plus and minus directions.
I learned how to calculate the resistance figure from the instructor Kai.

The temperature of the soldering iron is around 340 ° -370 °.
Ready when blue light starts blinking
Concentrate! !
On the way, I noticed that the zener diodes were upside down and started again.
It is very difficult to understand, but it is minus when there is a groove (cathode)
After attaching all parts,
The multimeter confirmed that electricity was running.
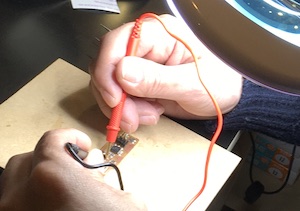
Finish soldering!
FabTinyISP programming
The software required for programming has been installed.
What you need for programming is the software group (called a toolchain) required for Avr’s microcomputer development.
One of the ways to install the software group is crosspack.
However, development has stopped and it seems that catalina has finally stopped working.
I referred to Anton Pchelkin’s page for this installation. Thank you.
install avr-gcc & avrdude
$ brew -v
Homebrew 2.1.15
- brew tap
A brew tap adds non-official repositories to Homebrew as a formula, and you can perform install, uninstall, update, etc. under brew.
$ brew tap osx-cross/avr
- I installed avr-gcc via Homebrew.
$ brew install avr-gcc
→ Warning: Building osx-cross/avr/avr-gcc from source:
  The bottle needs the Xcode CLT to be installed.
However, it stopped halfway. So I decided to download Xcode CLT.
XCode -> Open Developer Tool -> More Developer Tool
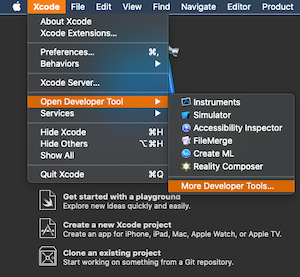
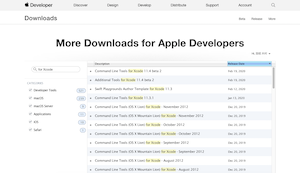
The Apple Developer site opens, sign in.
Then, the following screen will be displayed. Select the XCode Command Line Tools for your OS and download the image file.
It seems that you can also install by executing the following command in the terminal.
$ xcode-select --install
Try again
$ brew install avr-gcc
==> Installing dependencies for avrdude: libelf, libusb, libusb-compat, libftdi0 and libhid
==> Installing avrdude dependency: libelf
==> Downloading https://homebrew.bintray.com/bottles/libelf-0.8.13_1.catalina.bottle.tar.gz
######################################################################## 100.0%
==> Pouring libelf-0.8.13_1.catalina.bottle.tar.gz
🍺  /usr/local/Cellar/libelf/0.8.13_1: 12 files, 218.0KB
==> Installing avrdude dependency: libusb
==> Downloading https://homebrew.bintray.com/bottles/libusb-1.0.23.catalina.bottle.tar.gz
######################################################################## 100.0%
==> Pouring libusb-1.0.23.catalina.bottle.tar.gz
🍺  /usr/local/Cellar/libusb/1.0.23: 29 files, 531.7KB
==> Installing avrdude dependency: libusb-compat
==> Downloading https://homebrew.bintray.com/bottles/libusb-compat-0.1.5_1.catalina.bottle.tar.gz
######################################################################## 100.0%
==> Pouring libusb-compat-0.1.5_1.catalina.bottle.tar.gz
🍺  /usr/local/Cellar/libusb-compat/0.1.5_1: 14 files, 98KB
==> Installing avrdude dependency: libftdi0
==> Downloading https://homebrew.bintray.com/bottles/libftdi0-0.20.catalina.bottle.2.tar.gz
######################################################################## 100.0%
==> Pouring libftdi0-0.20.catalina.bottle.2.tar.gz
🍺  /usr/local/Cellar/libftdi0/0.20: 20 files, 225.9KB
==> Installing avrdude dependency: libhid
==> Downloading https://homebrew.bintray.com/bottles/libhid-0.2.16.catalina.bottle.1.tar.gz
######################################################################## 100.0%
==> Pouring libhid-0.2.16.catalina.bottle.1.tar.gz
🍺  /usr/local/Cellar/libhid/0.2.16: 18 files, 189.6KB
==> Installing avrdude
==> Downloading https://homebrew.bintray.com/bottles/avrdude-6.3_1.catalina.bottle.tar.gz
==> Downloading from https://akamai.bintray.com/d3/d3f4c82170fa37bacd6e1bc3276ba27e7a8ed2ea781b101b7899e7602393a15b?__gda_
######################################################################## 100.0%
==> Pouring avrdude-6.3_1.catalina.bottle.tar.gz
🍺  /usr/local/Cellar/avrdude/6.3_1: 14 files, 1.9MB
$ avr-gcc --version
avr-gcc (GCC) 9.2.0
Copyright (C) 2019 Free Software Foundation, Inc.
This is free software; see the source for copying conditions.  There is NO
warranty; not even for MERCHANTABILITY or FITNESS FOR A PARTICULAR PURPOSE.
It seems that the installation was successful.
firmware make
-
Download the firmware source and unzip the zip file
-
Put under projects / FabAcademy / (parallel hierarchy with hiroaki-kimura)

$ cd /Users/hiroakikimura/Documents/Projects/FabAcademy/fts_firmware_bdm_v1

$ ls
Makefile    main.c      usbconfig.h usbdrv
- Enter the make command.
- This will generate (build) a hex file to program the ATtiny45.
- When the command passes, fts_firmware.hex is created.
$ make
avr-gcc -mmcu=attiny45 -Wall -DF_CPU=16500000UL -I. -funsigned-char -funsigned-bitfields -fpack-struct -fshort-enums -Os -Iusbdrv -c main.c -o main.o
main.c:109:13: warning: always_inline function might not be inlinable [-Wattributes]
  109 | static void delay ( void )
      |             ^~~~~
avr-gcc -mmcu=attiny45 -Wall -DF_CPU=16500000UL -I. -funsigned-char -funsigned-bitfields -fpack-struct -fshort-enums -Os -Iusbdrv -c usbdrv/usbdrv.c -o usbdrv/usbdrv.o
avr-gcc -mmcu=attiny45 -Wall -DF_CPU=16500000UL -I. -funsigned-char -funsigned-bitfields -fpack-struct -fshort-enums -Os -Iusbdrv -c usbdrv/oddebug.c -o usbdrv/oddebug.o
avr-gcc -x assembler-with-cpp -mmcu=attiny45 -Wall -DF_CPU=16500000UL -I. -funsigned-char -funsigned-bitfields -fpack-struct -fshort-enums -Os -Iusbdrv -c usbdrv/usbdrvasm.S -o usbdrv/usbdrvasm.o
avr-gcc -mmcu=attiny45 -o fts_firmware.elf main.o usbdrv/usbdrv.o usbdrv/oddebug.o usbdrv/usbdrvasm.o
avr-size -C --mcu=attiny45 fts_firmware.elf
AVR Memory Usage
----------------
Device: attiny45

Program:    2482 bytes (60.6% Full)
(.text + .data + .bootloader)

Data:         75 bytes (29.3% Full)
(.data + .bss + .noinit)


avr-objcopy -j .text -j .data -O ihex fts_firmware.elf fts_firmware.hex
- Edit the file called Makefile.
$ vi Makefile
PROGRAMMER ?= usbtiny
Turn this usbtiny part into a programmer your use.

PROGRAMMER ?= avrisp2
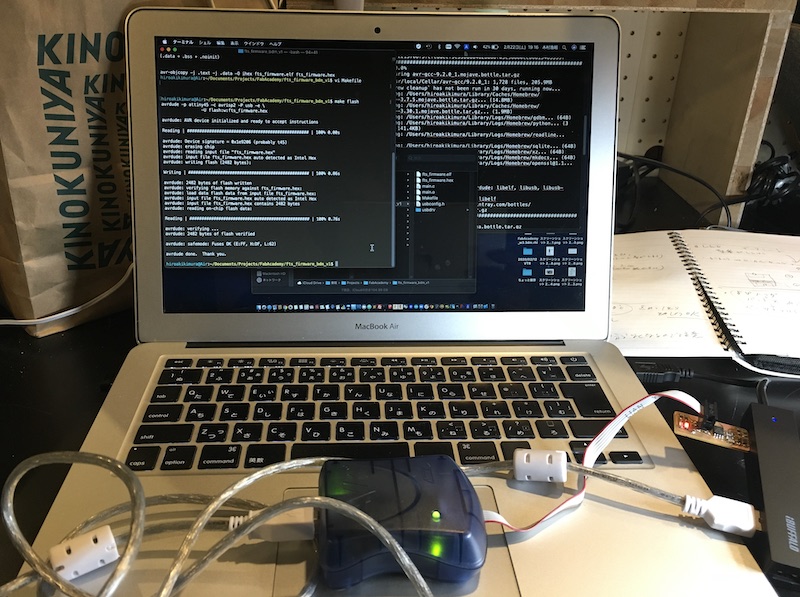
make flash
$ make flash
avrdude -p attiny45 -c avrisp2 -P usb -e \
        -U flash:w:fts_firmware.hex

avrdude: AVR device initialized and ready to accept instructions

Reading | ################################################## | 100% 0.00s

avrdude: Device signature = 0x1e9206 (probably t45)
avrdude: erasing chip
avrdude: reading input file "fts_firmware.hex"
avrdude: input file fts_firmware.hex auto detected as Intel Hex
avrdude: writing flash (2482 bytes):

Writing | ################################################## | 100% 0.86s

avrdude: 2482 bytes of flash written
avrdude: verifying flash memory against fts_firmware.hex:
avrdude: load data flash data from input file fts_firmware.hex:
avrdude: input file fts_firmware.hex auto detected as Intel Hex
avrdude: input file fts_firmware.hex contains 2482 bytes
avrdude: reading on-chip flash data:

Reading | ################################################## | 100% 0.76s

avrdude: verifying ...
avrdude: 2482 bytes of flash verified

avrdude: safemode: Fuses OK (E:FF, H:DF, L:62)

avrdude done.  Thank you.
It seems that the file was successfully written to AVR (ATtiny 45) of FabTinyISP.
ISP using Arduino
Generally, I use “Atmel AVR In-System Programmer mkII” to write to AVR flash microcomputer, but this time I tried using Arduino.
This is very difficult and I still don’t understand everything.
However, I was able to finish the work with a lot of advice from instructors and students.
Thank you very much.
I started referring to Tutorial 5-4
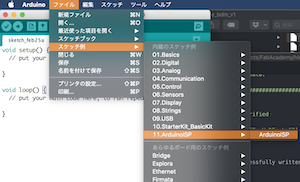
First download Arduino IDE
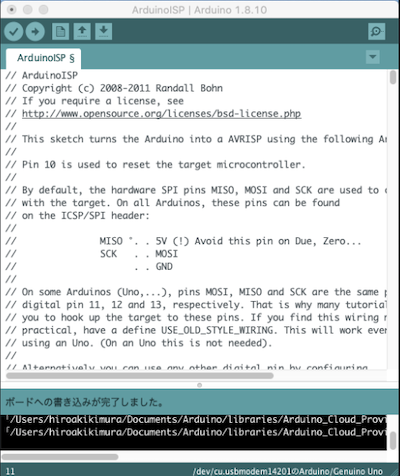
File> Examples> ArduinoISP, there is code to make Arduino an ISP:
I try to write to the microcontroller board, but I get an error
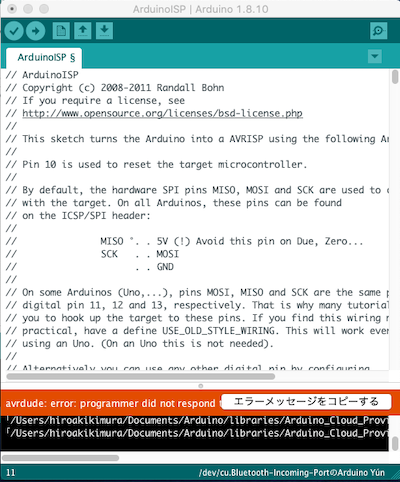
Copy error message (below)
*Arduino:1.8.10 (Mac OS X), ボード:"Arduino Yún"
最大28672バイトのフラッシュメモリのうち、スケッチが6544バイト(22%)を使っています。
最大2560バイトのRAMのうち、グローバル変数が447バイト(17%)を使っていて、ローカル変数で2113バイト使うことができます。
avrdude: butterfly_recv(): programmer is not responding
avrdude: butterfly_recv(): programmer is not responding
avrdude: butterfly_recv(): programmer is not responding
avrdude: butterfly_recv(): programmer is not responding
avrdude: butterfly_recv(): programmer is not responding
Found programmer: Id = ""; type = �
Software Version = .�; Hardware Version = �.�
avrdude: butterfly_recv(): programmer is not responding
avrdude: butterfly_recv(): programmer is not responding
avrdude: error: buffered memory access not supported. Maybe it isn't
a butterfly/AVR109 but a AVR910 device?
avrdude: initialization failed, rc=-1
Double check connections and try again, or use -F to override
this check.
avrdude: butterfly_recv(): programmer is not responding
avrdude: error: programmer did not respond to command: leave prog mode
avrdude: butterfly_recv(): programmer is not responding
avrdude: error: programmer did not respond to command: exit bootloader
avrdude: error: programmer did not respond to command: exit bootloader
「/Users/hiroakikimura/Documents/Arduino/libraries/Arduino_Cloud_Provider_Examples」に、無効なライブラリ「/Users/hiroakikimura/Documents/Arduino/libraries/Arduino_Cloud_Provider_Examplesにはヘッダファイル(.h)がありません」があります。
「/Users/hiroakikimura/Documents/Arduino/libraries/Arduino_Cloud_Provider_Examples」に、無効なライブラリ「/Users/hiroakikimura/Documents/Arduino/libraries/Arduino_Cloud_Provider_Examplesにはヘッダファイル(.h)がありません」があります。
「ファイル」メニューの「環境設定」から
「より詳細な情報を表示する:コンパイル」を有効にすると
より詳しい情報が表示されます。
Asked the instructor.
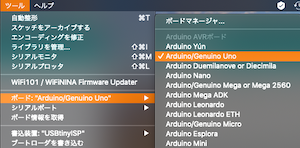
(Because the board used is Arduino Yun, please replace Arduino Uno and write Arduino ISP.)
I wrote it again.
This time it was well done
After programming to arduino, connect a 10uF capacitor between RESET and GND
When a capacitor is placed on the Arduino, it seems to be a substitute for “AVR In-System Programmer mkII”.
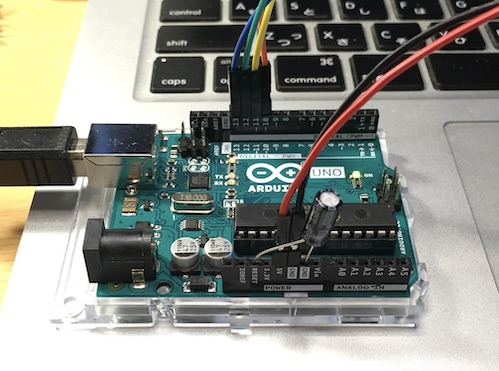
Connect 6 codes to FabTynyISP’s pinheader made yesterday
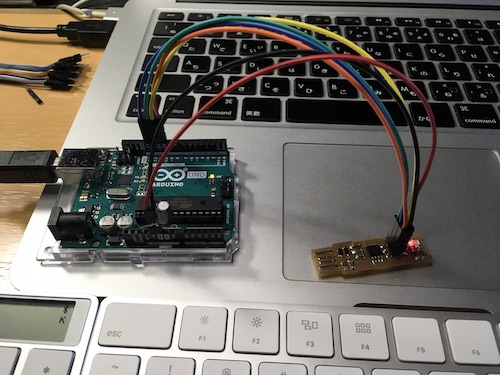
At this time, pay attention to the position of the pin
arduino 10 – reset
arduino 11 – MOSI
arduino 12 – MISO
arduino 13 – SCK
arduino GND – GND
arduino 5V – VPROG
Stab FabTinyISP into USB jack
make rstdisble
“Make rstdisble” is a spell that tells FabTinyISP (ISP programmer), “Become an ISP.”
$ make rstdisble

error
It seems that the makefile needs to be rewritten.
fts_firmware_bdm_v1$ vi Makefile

avrisp2 → stk500v1
You may need to confirm at this time.
Arduino → tools → Port
Match the characters in the red frame below.
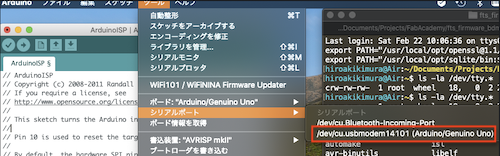
usb → /dev/cu.usbmodem1411
$ make rstdisble
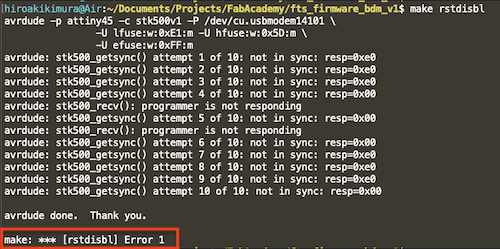
error again.....?? Labyrinth
(From instructor)
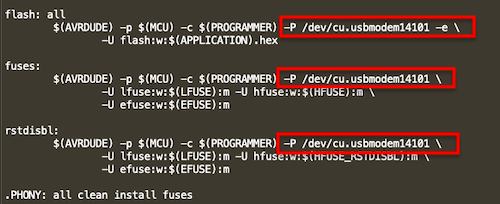
In the makefile,
rstdisbl:
$ (AVRDUDE) -p $ (MCU) -c $ (PROGRAMMER) -b19200 -P /dev/cu.usbmodem14101 \
-U lfuse: w: $ (LFUSE): m -U hfuse: w: $ (HFUSE_RSTDISBL): m \
-U efuse: w: $ (EFUSE): m
Would you please try inserting “-b19200”
$ make rstdisbl
avrdude -p attiny45 -c stk500v1 -b19200 -P /dev/cu.usbmodem14101 \
        -U lfuse:w:0xE1:m -U hfuse:w:0x5D:m \
        -U efuse:w:0xFF:m
avrdude: AVR device initialized and ready to accept instructions
Reading | ################################################## | 100% 0.02s
avrdude: Device signature = 0x1e9206 (probably t45)
avrdude: reading input file “0xE1”
avrdude: writing lfuse (1 bytes):
Writing | ################################################## | 100% 0.02s
avrdude: 1 bytes of lfuse written
avrdude: verifying lfuse memory against 0xE1:
avrdude: load data lfuse data from input file 0xE1:
avrdude: input file 0xE1 contains 1 bytes
avrdude: reading on-chip lfuse data:
Reading | ################################################## | 100% 0.01s
avrdude: verifying ...
avrdude: 1 bytes of lfuse verified
avrdude: reading input file “0x5D”
avrdude: writing hfuse (1 bytes):
Writing | ################################################## | 100% 0.02s
avrdude: 1 bytes of hfuse written
avrdude: verifying hfuse memory against 0x5D:
avrdude: load data hfuse data from input file 0x5D:
avrdude: input file 0x5D contains 1 bytes
avrdude: reading on-chip hfuse data:
Reading | ################################################## | 100% 0.01s
avrdude: verifying ...
avrdude: 1 bytes of hfuse verified
avrdude: reading input file “0xFF”
avrdude: writing efuse (1 bytes):
Writing | ################################################## | 100% 0.01s
avrdude: 1 bytes of efuse written
avrdude: verifying efuse memory against 0xFF:
avrdude: load data efuse data from input file 0xFF:
avrdude: input file 0xFF contains 1 bytes
avrdude: reading on-chip efuse data:
Reading | ################################################## | 100% 0.01s
avrdude: verifying ...
avrdude: 1 bytes of efuse verified
avrdude: safemode: Fuses OK (E:FF, H:5D, L:E1)
avrdude done. Thank you.
make rstdisble done !!!!
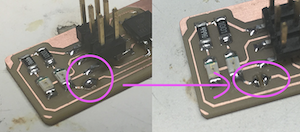
Remove the bridge solder and separate.
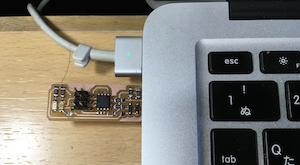
Next, plug in only FabTinyISP into the USB jack of the PC.
(Proposal from instructor)
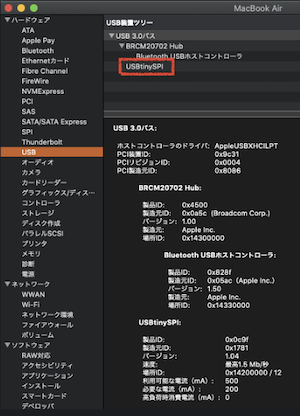
Please check if the USBTinyISP you made works as a writing device.
It doesn’t seem to be a requirement this week, but you will need it during the Electronics Design week so please check in advance.
The procedure is as follows.
Sorry for the English notation, but please change the language to English in Arduino> Preferences> Editor language.
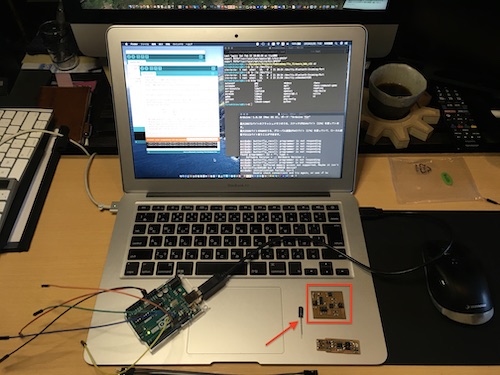
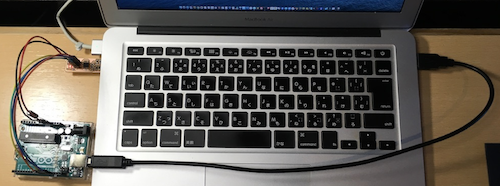
Connect Arduino and USBTinyISP.
See image for connection method.
Both Arduino and USBTinyISP connect to Mac.
Arduino IDE> File> Examples> 01.Basics> Blink
Select Tools> Board> Arduino Uno
Select Tools> Programmer> USBTinyISP
Sketch> Upload Using Programmer
Success if the LED on the Arduino flashes

Looks like it worked.
Thanks to the instructors and students, it was finished successfully.
Thank you very much.
What I learned this week
- I have learned to read files by mods and cutting settings.
- I learned how to cut boards with SRM20.
- I learned to solder.
I learned this week that there are three types of writing functions to a microcontroller as an ISP.
- How to write to the Atmel AVR In-System Programmer mkII.
- How to write with Arduino. Details.
- Create your own ISP (FabTinyISP) and write to it. Details.
Data download
Download the PNG files for the traces → Traces(1000 dpi)
Download the PNG files for the board outline → Outline Cutout (1000 dpi)