Week 16: Wildcard week
Assignment for this week: Design and produce something with a digital fabrication process (incorporating computer-aided design and manufacturing) not covered in another assignment, documenting the requirements that your assignment meets, and including everything necessary to reproduce it.
- Introduction
This week we should design and produce something with a digital fabrication process incorporating computer-aided design and manufacturing.
Here are articles and sources for reference: -
What is bioplastic?
People are using a lot of plastic in their everyday life. The world has produced over nine billion tons of plastic since the 1950s. 165 million tons of it have trashed our ocean, with almost 9 million more tons entering the oceans each year. Since only about 9 percent of plastic gets recycled, much of the rest pollutes the environment or sits in landfills, where it can take up to 500 years to decompose while leaching toxic chemicals into the ground. I was always very concerned about that but sometimes you can not avoid using plastic, because not always you can find alternative to it. That’s why I was always interested in finding and/or making alternatives to the plastic.
During my research I found many articles about bioplastic. A bioplastic is a substance made from organic biomass sources, unlike conventional plastics which are made from petroleum.
Bioplastics are made through a number of different processes. Some use a microorganism to process base materials, such as vegetable oils, cellulose, starches, acids and alcohols. While almost all bioplastics produce less carbon dioxide in production than conventional plastics, they are not necessarily completely green. Bioplastics do produce significantly fewer greenhouse gas emissions than traditional plastics over their lifetime. There is no net increase in carbon dioxide when they break down because the plants that bioplastics are made from absorbed that same amount of carbon dioxide as they grew.
The methods by which their base materials are grown and the processing involved both impact their product footprint. Many bioplastics also release carbon dioxide or monoxide when biodegrading. Nevertheless, their overall environmental impact is typically lower than that of conventional plastics, and as oil costs rise, their cost becomes more and more competitive. - Designing a model for making a bioplastic bowl
I have decided to design nad 3D print a bowl shaped model and use it to make bioplastic bowls. I know, it doesn’t make much sense to waste plastic for creating bioplastics, but one plastic model can be used for making many bioplastic ones.
If everything works well, I will think about using this design to cut wooden models as well.
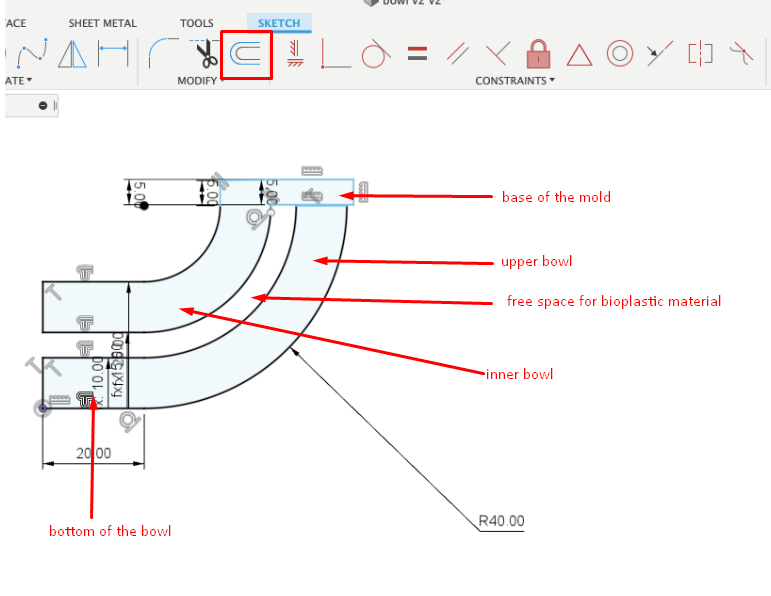
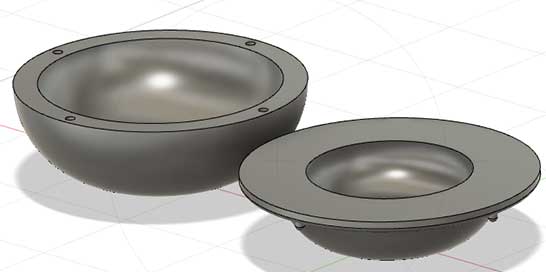
As I am going to try different options as a source for bioplastic, I designed a 2-part model which can be used both for liquid and more sticky substances.- I drew half of the profile sketch of the bowl drawing a line continued with an arch. Then I used the Offset tool to copy the drawing. The distance between them is the thickness of the bowl. Then I again used offset to create another component, the second bowl with a base.
- I used the Revolve tool around the central axis and as a result I have the bodies I need.
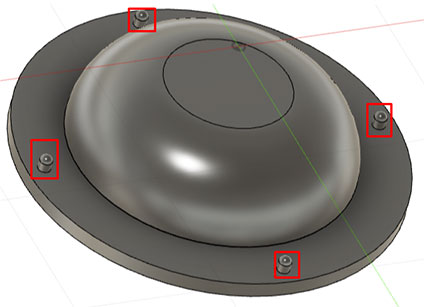
- To connect two parts together correctly, I sketched 4 guides on the base face.
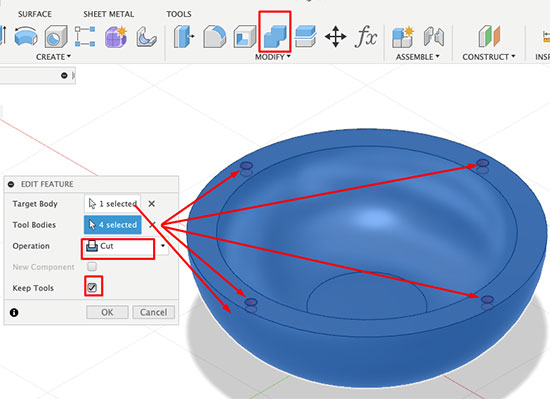
- I have made holes on the other bowl using the Combine tool. As a target body I chose the bowl and as tool bodies I chose the guides and applied Cut operation. It’s important to not forget to tick Keep the tools box.
- Then I used the Combine tool to join the guides to the main body. Here I applied Join operation.
- Using the Move operation I put both bodies next to each other and exported the .stl file for 3D printing.

- 3D printing the model
After designing the model passed to the next step - 3D printing. My first experience in 3D printing was during the 3D scanning and printing week . That time I was completely inexperienced and made quite many mistakes. To not repeat the same, this time I was careful and calculated everything in advance.
As the 3D printers were not used for a long time, I started with leveling the build plate following instructions from the user manual. It is important, because if the build plate is too far from the extruder nozzles, or if one part of the plate is farther away from the nozzles than another part, your 3D prints might not stick to the build plate. If the build plate is too close to the extruder nozzles, the build plate can block the MakerBot Filament from extruding from the nozzles. This can also tear the Kapton tape applied to the build plate and scratch the aluminum surface underneath.
Go to Utilities from the printer menu and choose Level Build Plate. Afterwards tighten the knobs [turning them counterclockwise] to move the build plate away from the extruder nozzles or loosen the knobs [turning them clockwise] to move the build plate closer to the extruder nozzles. The distance between the extruder nozzles and the build plate should be about the thickness of the MakerBot Support card included with your MakerBot Replicator 2X. I didn’t have that card and used 0.1mm thick A4 paper instead. During the process of adjusting the knobs the paper should just slide between the nozzles and build plate. You should feel some friction on the paper/card but still be able to easily pass the paper between the plate and the extruder nozzles without tearing or damaging the card/paper.
After adjusting the build plate, I opened the Makerbot desktop and added my stl files there. As there are no big angles and long distances for the extruder to pass during this process, I decided to print without supports.
For the inner bowl I applied 180deg. rotation angle for two reasons: I am going to use the outer part of it, so this face should be smooth. Secondly, this way I will avoid using supports and guides will be printed easily.
For the outer bowl I am going to use the inner surface, so left it as it is, on the platform.

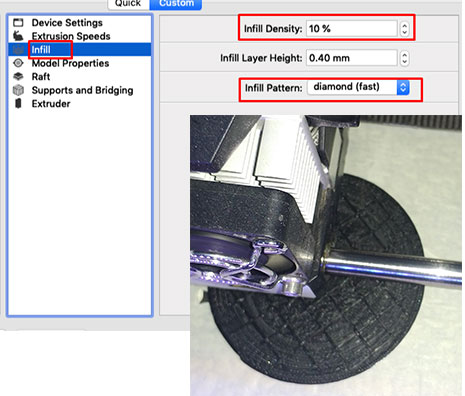
For both objects I applied 10% diamond(fast) infill.
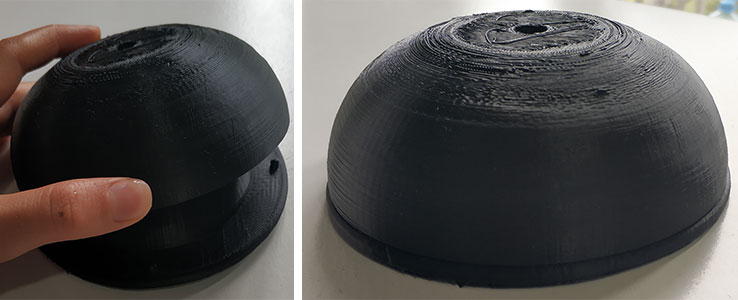
The results of the prints are quite satisfying.
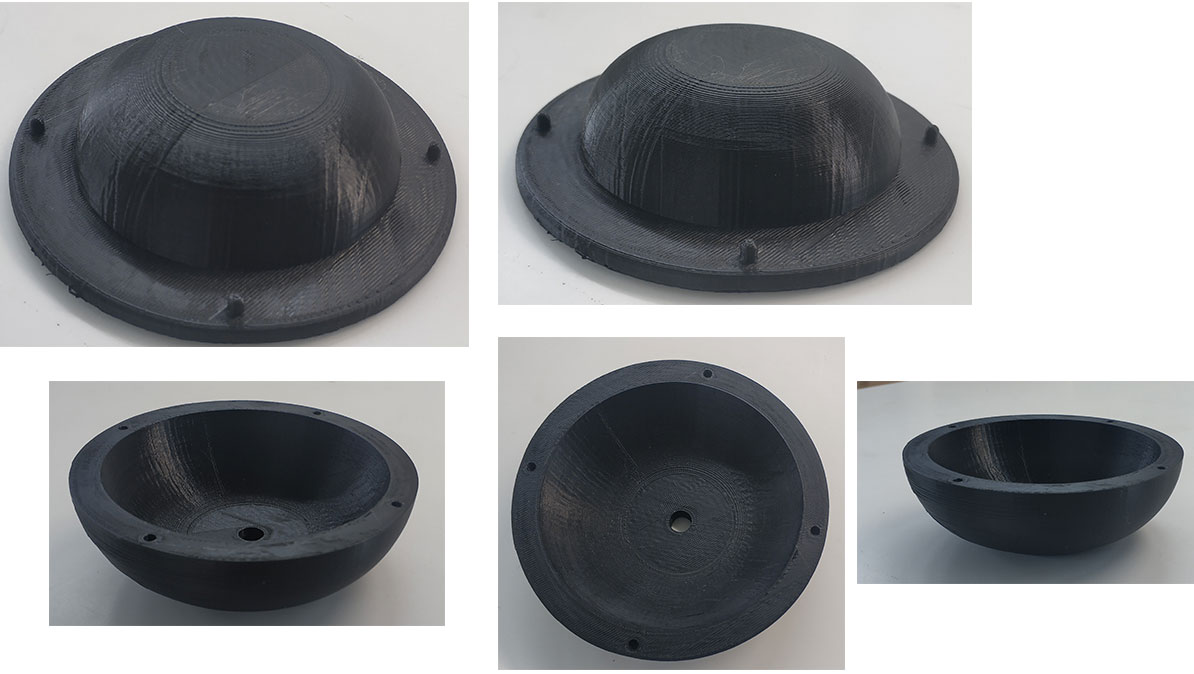
The only thing that I didn’t consider was the tolerance of the guides, but I loosened the holes a bit using a drill machine.
-
Making the bioplastic
I have decided to try two types of bioplastic : one soft, gelatin based and one harder, starch based. As I am a science laboratory technician, I did everything in one of our chemistry labs.
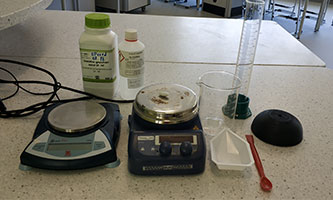
Gelatin based soft bioplasticFor this option I used recipe from Food for Thought, Your DIY guide for creating bioplastics book. Here are the equipment and materials needed:
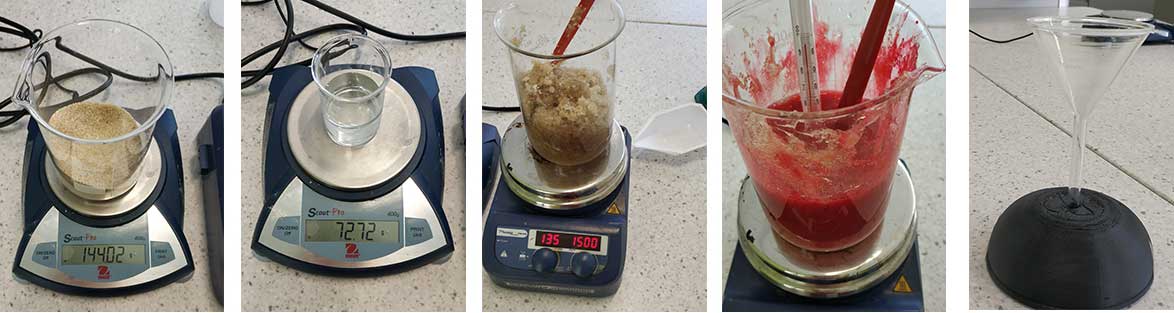
- 120ml cold water
- 144g gelatin
- 72g glycerol
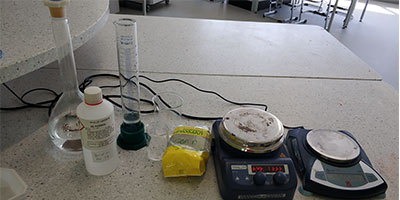
- Balance
- Hotplate and magnetic stirrer (optional)
- Beaker or any other container
- Measuring cylinder
- Spatula or something for mixing
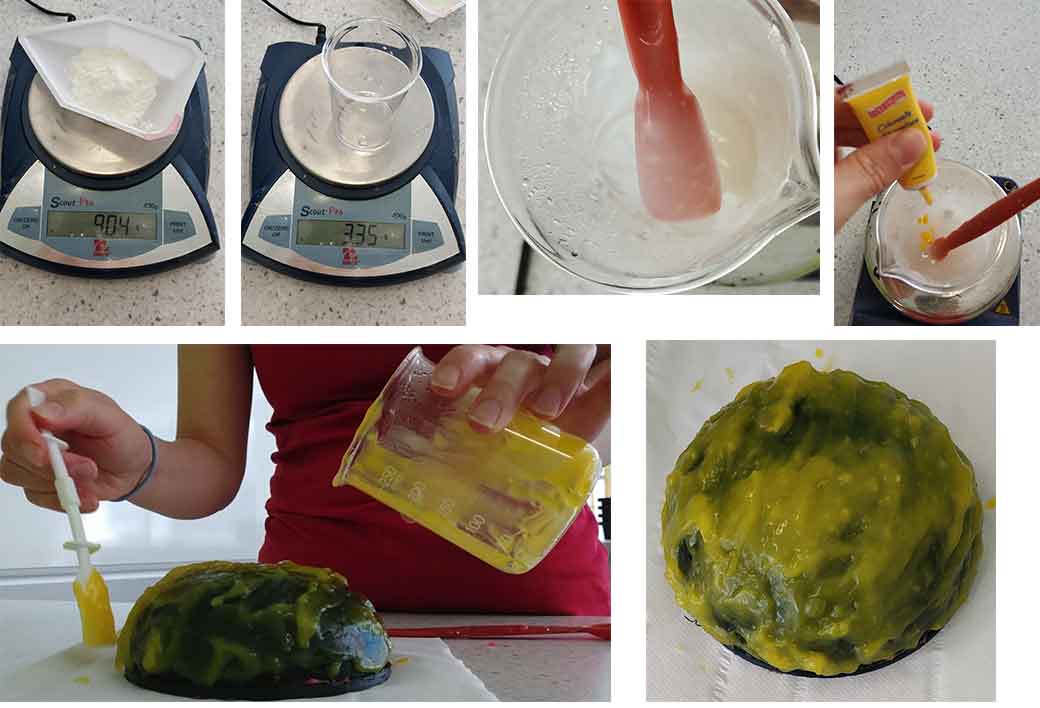
Fill the beaker with 120ml of water, add 144g gelatin and 72g glycerol and mix carefully until no clumps remain. Then put on the hotplate and heat the mixture up to 95° or until it starts to froth, while continuously mixing. The mixture is very elastic and hard to mix. At some point the magnetic stirrer is useless, as it’s power is not enough for that sticky mixture and you have to mix by hand. I have added some red food coloring to have a nice colored bowl. I checked the temperature with a thermometer and when it reached 95 degrees I took the mixture out from the hotplate and tried to pour it into the mold. Before pouring it, I applied some vegetable oil on the surface of the mold to act as a release agent. I have decided to use a funnel for pouring, but as the mixture was too elastic and sticky, it didn’t work and I had to fill the mold spoon by spoon. For this you need a lot of patience. Another tricky part was not knowing if the mixture in the mold is enough or not. When I was designing the mold, I didn’t expect to fill this kind of oversaturated mixture in it. But I have decided to rely on fortune and wait until it dries.
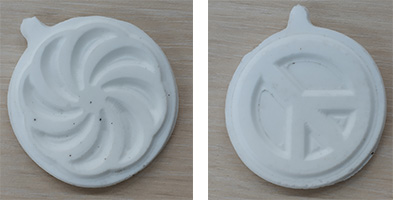
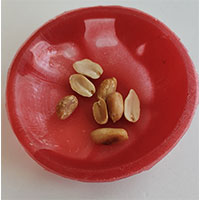
After a day I could easily open the mold and remove the cast, which looks quite nice for the first time.
 One more trial with less gelatine and glycerin
As I have mentioned in the previous paragraph, the gelatin solution that I had was oversaturated and it was very sticky, hard to fill into the mold. When my classmate Ashot Margaryan was doing his Wildcard week assignment, he decided to try both recycled paper and bioplastics in his mold. So we decided to try one more recipe with less gelatine and glycerin. We used the following recipe:
- 240ml water
- 63g gelatine
- 19g glycerin
- Food coloring (optional)
We should consider that the gelatine based bioplastic shrinks during the process of the solidification, so make your mold bigger than the desired size.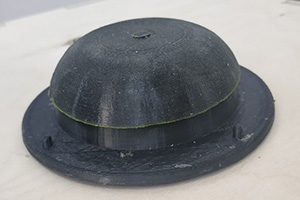
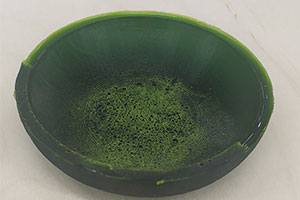
Starch based hard bioplasticFor making starch based bioplastic I used a recipe from wikiHow As this one usually is more sticky, I have decided to apply this to the outer surface of the bowl and see what’s happening.
Here are the equipment and materials needed:- 60ml distilled water
- 3-9 g glycerol
- 9g cornstarch
- 6ml of white vinegar
- 1-2 drops food coloring (optional)
- Balance
- Hotplate and magnetic stirrer (optional)
- Beaker or any other container
- Measuring cylinder
- Spatula or something for mixing
Mix all the ingredients except for food coloring and start heating in a hotplate, continuously mixing. When the temperature reaches 95 degrees and the mixture gets transparent, remove from the hotplate and add 1-2 drops of food coloring. Using a plastic brush I spread the mixture on the surface of the bowl. It was hard to spread it equally on the whole surface, because I had small clumps there. Usually this needs 1-2 days to dry.
Unfortunately, I didn’t manage to keep this safe, as my small kids reached it and their curiosity to touch and understand what’s there destroyed a part of my bowl. But still, the quality was quite good and if it was thicker, it would surely work as a bowl.
-
Conclusion
This week for me was a perfect opportunity for me to combine my knowledge and experience from my work with the new experience in Fab academy to create something interesting and new for me. I was always interested in solving environmental problems and I think that replacement of the plastic with alternatives as bioplastic and paper will be a huge step forward.
I did design and 3D printing of a bowl- shaped mold and made two types of bioplastics using that mold. The results are not perfect, but I’m sure that with the practice and more recipes to try there can be a better option for it to work and get a perfect alternative to the plastic.
As I have mentioned earlier, my classmate Ashot was doing paper recycling and he put the paper material into my mold as well. Here is the results of all the materials used to have an plasic free bowl. As we can see in the comparision, gelatine based and paper ones are the better ones and if we develop and keep trying, we can have good results.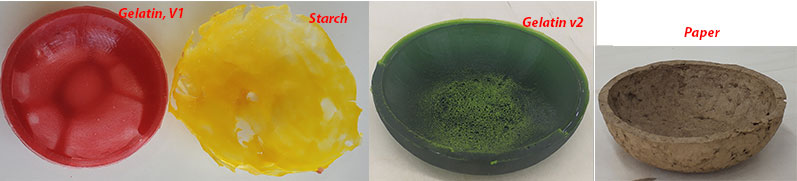
-
Files
STL files
f3d file