Week 1: Project Management
Assignment for this week: work through a git tutorial, build a personal site in the class archive describing you and your final project
For this week we had to build a personal website and push it into the class archive. I had some experience in Web development before joining the Fab Academy, so I am familiar with the tools and programs for creating and maintaining a website. At first, I wanted to write a custom designed website, but as we have only a week, I wouldn’t do it properly, so decided to use a template and make changes on that.
The links below will help in work with code as well as instaling and using git.
- Getting started with Visual Studio Code
- W3schools: Tutorials and examples hot HTML, CSS, Javascript and more
- Getting Started - Installing Git
- HTML5 UP! Responsive HTML5 and CSS3 Site Templates
How to build your personal website
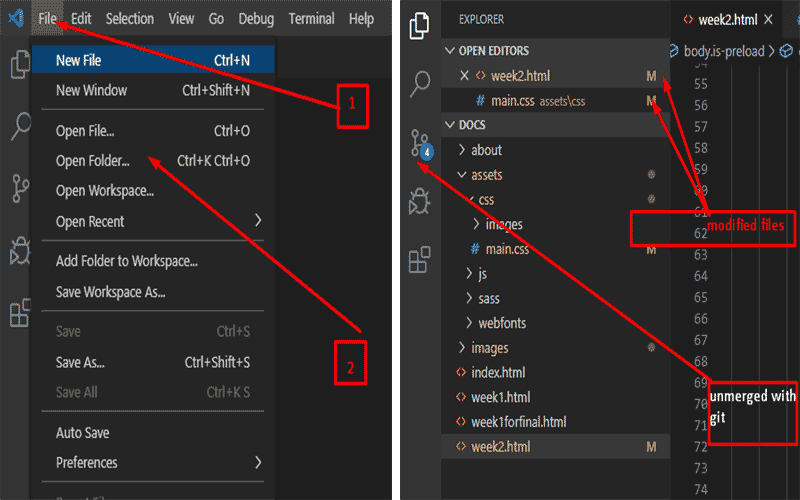
As an essential tool for having and maintaining the website, one should have a text editor. In the variety of them I feel comfortable with Visual Studio code. It has some cool options such as showing untracked files, unsaved files how many files are not merged with git. Also it supports many programming languages and offers tags and codes as soon as you pressed the first letter. So first of all I downloaded it from the official website. It can detect your operating system and automatically offers the version that you have to download. Afterwords, I installed it on my computer.
It’s time to choose a template and start working on it. I found out that “Miniport” template on HTML5Up meets almost all the requirements that I need and downloaded it.
After downloading and unzipping the template I started adjusting it to me. For that following steps are needed.
Open Visual Studio Code, go to File- Open Folder- find the folder with the template and press OK
- Changing the information
The main file, where changes should be done is index.html file. If you are satisfied with the design of the template and want to change only the text,this file is the only one, which you are going to change. If no, go further to the next steps. This tutorials are very helpful if you are a complete beginner in HTML. - Changing the style
If you want to change some basic things in the style on your template, you have to open main.css file.- For me all of the sections seemed too big, so I decreased some of the paddings. This is a space between the border of your object and the text or whatever is in it.
- In the about me part I had to change some icons. In the website they look like images but basically they are fonts created by Font Awesome. So to change that kind of images we should find code of the icon, which we want to change and go to FontAwesome website, search and choose ones that we want, copy codes (usually they start we fa fa-) and paste instead of unneeded ones. Hint: be careful, some fonts have also prefixes like solid, regular etc. and if you don’t use that classes as well, you will get an empty rectangular instead of the image. Find more information here
- I changed the size and the color of the buttons. You can do that changing the font size, paddings and for the color you can just replace the existing hexadecimal color code with the one that you like more. You can find the colors with their codes here.

- Adding a new page
My template was a one page website. I want to have different pages for each week’s homework. So I copied the index.html page and changed it according to my needs. I just kept there an article part, link to the other week assignments and the footer with my contacts. In future I will just copy this page for my other weeks. - Adding an hover - information to the menu elements
I have added just the week numbers to my menu tab but he understood that this year’s schedule may be different from other ones and if one wants to get information from my website, (s)he can struggle finding the proper week. So I’ve added the theme of the week on hover of each week’s name on the menu. Here are the HTML and CSS codes for doing that as well as the result.HTML <li> <a href="week1.html">Week 1</a> <div>Project Management</div> </li> CSS #nav li a + div { display: none; position: absolute; background-color: white; border: 2px solid #696d6e; border-radius: 5px; font-size: 16px; line-height: 30px; color: #696d6e; font-family: cursive; min-width: 160px; padding: 0 10px; z-index: 1; } #nav li a:hover + div { display: inline-block; }
- Including selectable code in the website During the documentation process we sometimes need to include codes into the website. If we include the screenshot of the code, others can’t copy and use it. The HTML has a pretty convenient pre tag. Text in a pre element is displayed in a fixed-width font. and it preserves both spaces and line breaks. If you don’t use this, you will have to manually adjust the new lines and spaces, which is very much time consuming. The example of how does it look like you can see in previous section.
- Making files downloadable
During the Fab Academy cycle we do a lot of design work, write codes etc. and need to include files to our documentation. If we want to make files downloadable, we can use the “download” attribute Here is the code for inserting downloadable file / image to the website
< a href=”the location of the file” download= “”> Here will be a downloadable file < /a> - Optimizing the storage
As we have limitations for used storage, I was looking for ways to reduce the size of my website- First of all, I deleted all of the images which I don’t need and added ones that are already resized. To resize screenshots I used Adobe Photoshop. This tutorial can be helpful if you are going to do the same.
- As I mentioned before, my template has FontAwesome fonts in it, which was downloaded and attached to the website as min.js file. I replaced it with Font Awesome version 5.12 CDN. But you should consider that even though this way you are saving space it has some disadvantages as well. If you want to run your website locally from your computer and are not connected to the internet, fonts will not be loaded.
Git tutorials and how to setup git
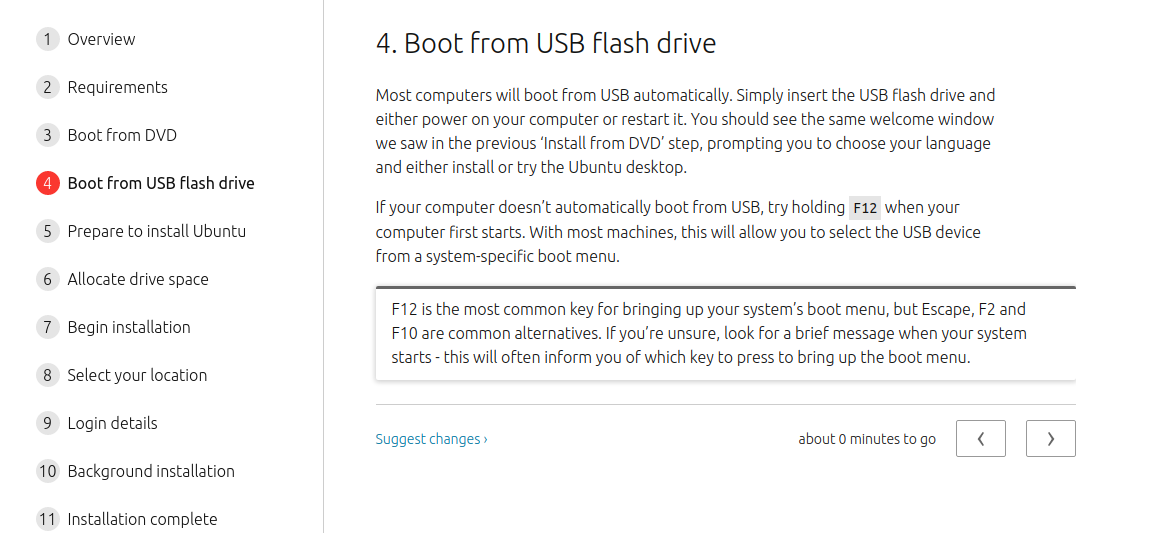
Before starting work, I had to install Ubuntu on my laptop. For that I followed step-by-step instruction from the Ubuntu official website.
Those are 11 easy steps to follow and you will have Ubuntu on your computer
Afterwords I started to setup git. I started with git tutorial from FabAcademy website, but had some issues and found this document which was created by one of the previous students.
- Setting up GIT
I did following steps for git setup. I worked in simple terminal.-
Generate SSH key. For that run following command in terminal:
ssh-keygen -t rsa -C "your email addres for FabAcademy"
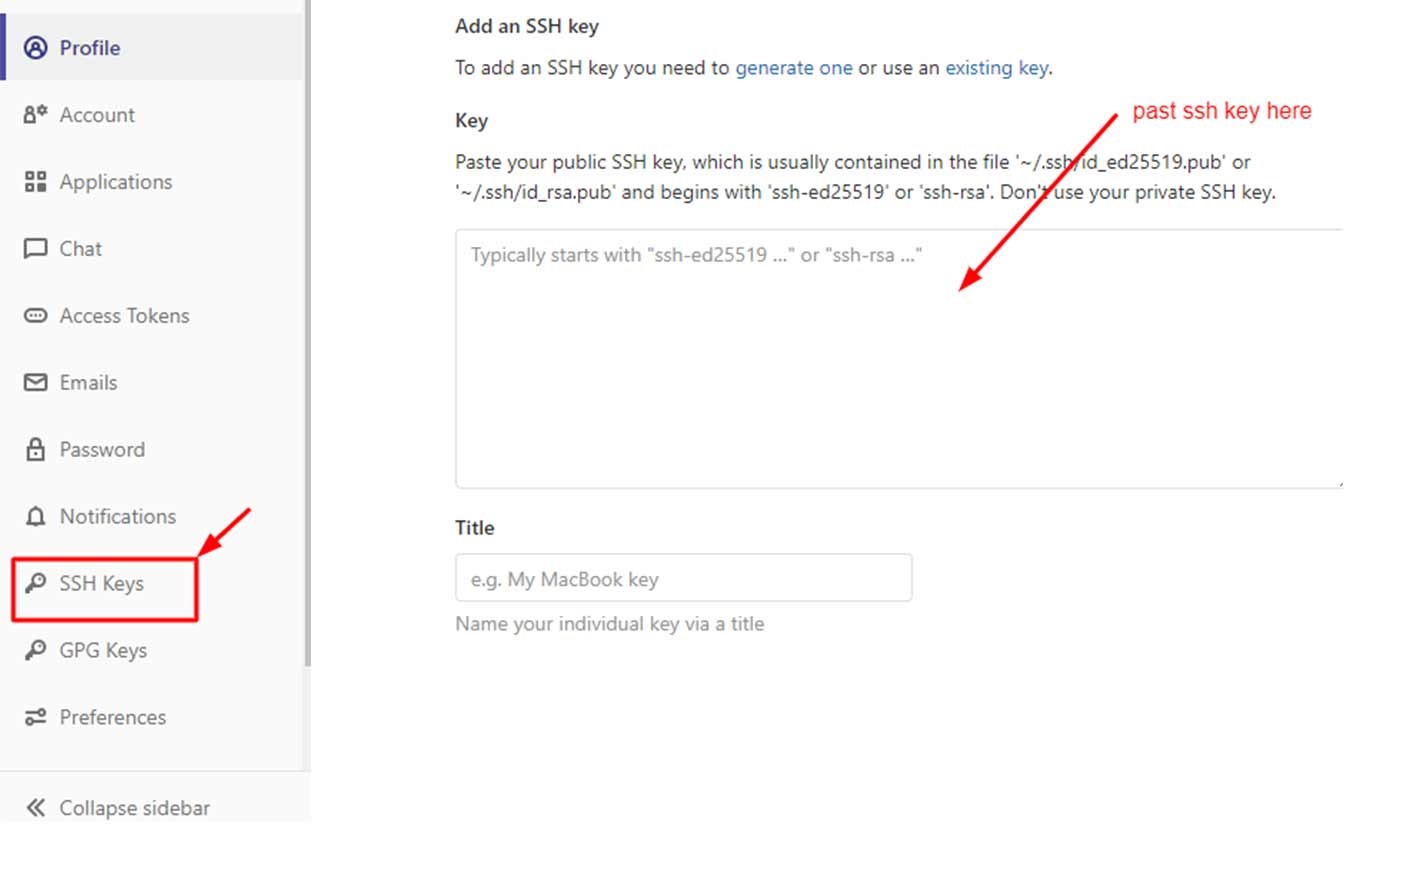
It will ask you to specify path and set password, if you don't have special requests, press Enter/ - The key will be saved in key.pub file in the chosen place. Open the file and copy the key starting with ssh- . Now login to your Gitlab account. When you do this first time, you should reset your password. Just type your email address and choose "Forgot password" option. When logged in go to settings, on the left menu bar find SSH keys and past copied key then press Add Key.
-
Now open the terminal again and run following commands
git config --global user.name "your username"
git config --global user.email "your registered email" -
If everything is succesful, you should clone the git repository to your computer.
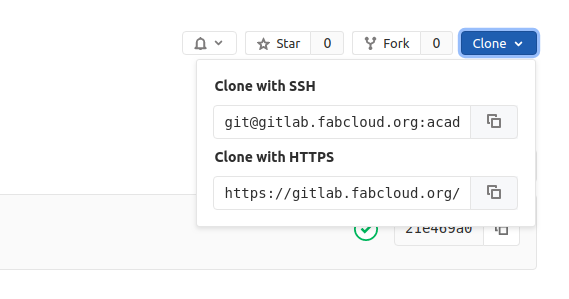
Go to your Gitlab account, press Clone and choose between 2 options: Clone with SSh or Clone with HTTPS. If you choose the second one you will have to type your username and password every time you push something. - When everything is done you should navigate to your git repository folder in your computer. I had some issues on this step because was trying to push my files without being in proper folder. In that case you will get this kind of response
-
To be sure that you are in the right folder run
lscommand and if ther is a .git file there, you are in the proper folder. Otherwise runcd/and the path to your folder. -
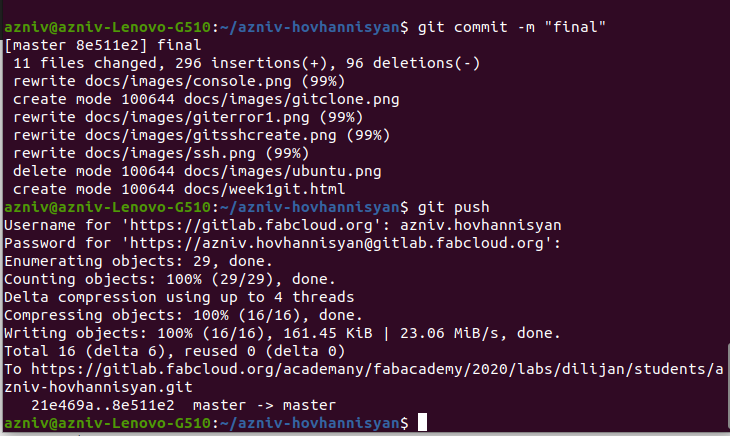
If you want to add your local files to your directory, run following commands
git status--will show untracked fies
git add--add the file name, which you want to push or --all to add all files
git status--will will show files which are ready to commit
git commit -m "some message you want to add"--add here some comment which is assosiated to the changes you have made
git push--if you have cloned with HTTPS, it will ask your username and password, otherwise push will be done

You can find more Unix commands here.
-
Generate SSH key. For that run following command in terminal:
Conclusion
During this week I designed my personal website and uploaded information about my final project there. Even though I was familiar with web development, during this time I’ve learnt some new things such as including selectable code in the website, making files downloadable. The main challenge for me is tracking sizes of images, videos and files on the website, as I have never thought about that before.