17. Machine design
1. Assignment && week workflow planning
1.1 Assignment requirements:
- Group
1.2 Preparation
-
Read previous students work and learn what they did previously
-
Read Tutorials from Fabacademy
1.3 My workflow of the week
2. How i did it
2.0 HeroShot of the week
- The pen drawing a circle
- Eraser Working
- Eraser and Pen shifting
2.1 Reference design and assignment allocation
-
Reference machine design we found on instructable.
-
Myself was taken care of the electronics part, Which is about electronics part lists, wire connection and setup, together with writing hardware codes(For this project it is Arduino). Tutorials of this part just keep reading
-
For the software part we used processing, which was taken cared of by Yifei
-
For the mechanical part was done by Zihao.
2.2 Set up the hardware
- Material List
| Item | Qty | Price | Link |
|---|---|---|---|
| L293D motor shield | 1 | https://detail.tmall.com/item.htm?id=547257531601&spm=a1z09.2.0.0.c8ca2e8dOF0vA0&_u=ti2rmqg53ef | |
| Stepping_Motor_42BYGH47-401A | 2 | 14.5USD | https://www.seeedstudio.com/Step-Motor-42BYGH47-401A-p-2022.html |
| Seeeduino V4.2 | 1 | 6.9USD | https://www.seeedstudio.com/Seeeduino-V4-2-p-2517.html |
| L293D | 2 | https://item.taobao.com/item.htm?id=581530708116 | |
| Pulley | 2 | https://item.taobao.com/item.htm?id=559194333476 | |
| 2mm_Spanner | 1 | https://item.taobao.com/item.htm?id=559194333476 | |
| Belts | 1 | https://item.taobao.com/item.htm?id=558903222636 | |
| Pen | 1 | https://item.taobao.com/item.htm?id=610806339402 | |
| Weights | 3 | https://item.taobao.com/item.htm?id=596276272982 |
- Motor and servo info
Motor wire:
Black:A+
Green:A-
Red:B+
Blue:B-
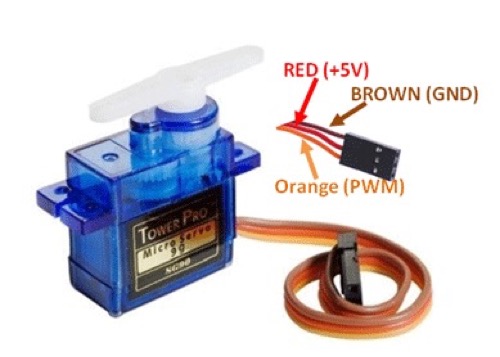
Servo wire:
Red:5V
Brown:GND
Orange:PWM
Wiring reference.
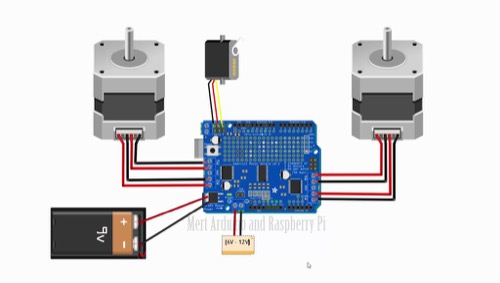
- Wire the stepping motor to motor driver shield accordingly.
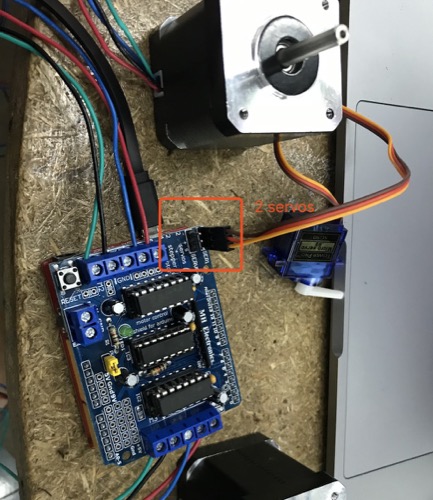
- Set up 2 servos, one for the Pen, one for the eraser
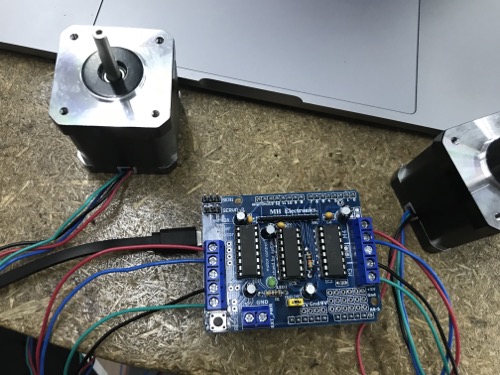
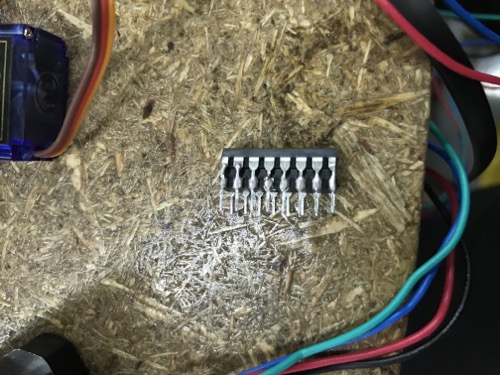
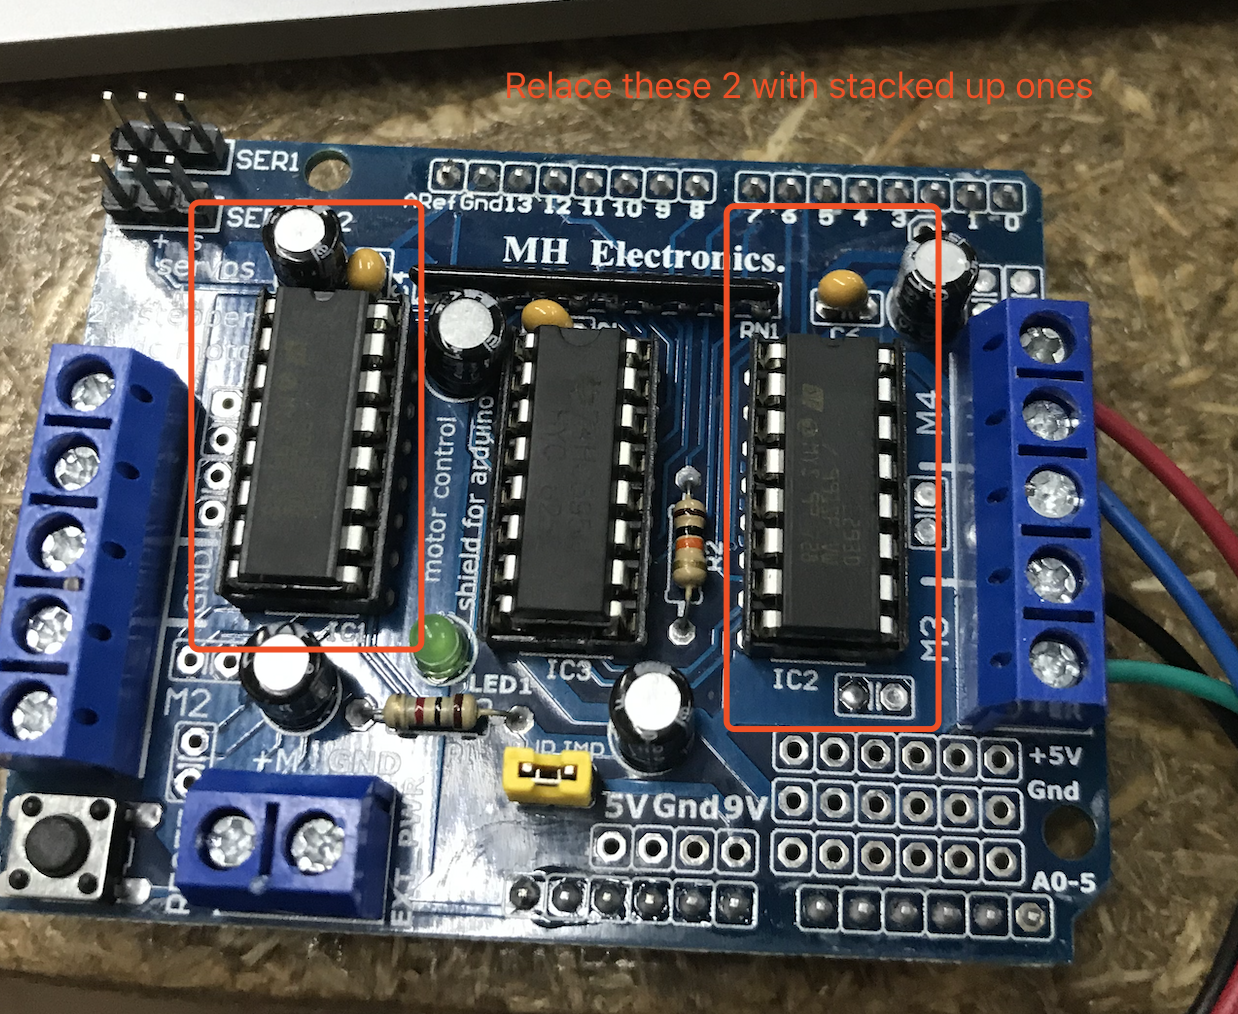
- Modification on the driver shield
the L293D integration will be overheated because its high current requirement so i need to modify the board a little bit.
Stack 2 L293D together and solder them together.
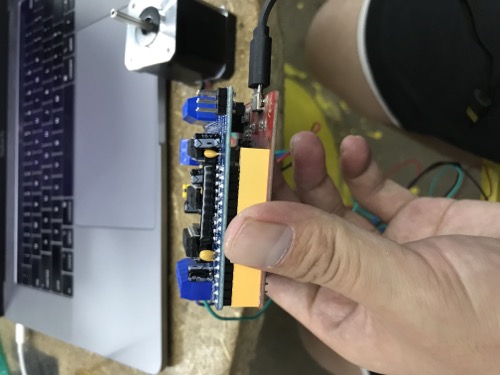
- Connect the driver shield to Seeeduino V4.2, as well as power.
2.3 Arduino codes modification
-
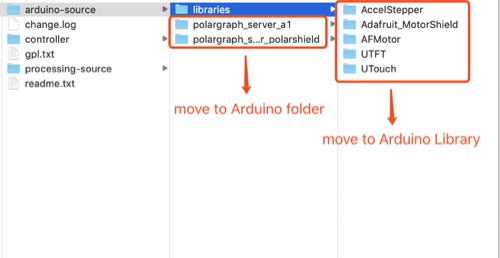
Download the reference source code from here.
-
Unzip the file and move the files to the Arduino folder accordingly.
- Modify the codes
Download my modified codes and search for “//$” you will be able to see where i made modifications. Or just replace your orginal files accordingly.
All the files needed to be modified are located at the folder “polargraph_server_a1”. Three files that needed to be modified are:
- “polargraph_server_a1.ino”
//$ remove "const"
//$const byte PEN_HEIGHT_SERVO_PIN = 9;
byte PEN_HEIGHT_SERVO_PIN = 9;

//$Pen mode shift to Eraser mode
const static String CMD_PENERASER = "C999";

//$Eraser mode shift to Pen mode
const static String CMD_ERASERPEN = "C888";
- “exec.ino”
//$Change pen to eraser
  else if (com.startsWith(CMD_PENERASER))
    penlift_penEraser();

//$Change eraser to pen
  else if (com.startsWith(CMD_ERASERPEN))
    penlift_eraserPen();
- “penlift.ino”
//$
void penlift_penEraser()
{

PEN_HEIGHT_SERVO_PIN = 10;

}
//$
void penlift_eraserPen()
{

PEN_HEIGHT_SERVO_PIN = 9;

}
3. Problems Occurred & Solutions
3.1 The pen went to opposite ways as we were telling it to go in a way.
It finally turned out that because of the wrong positioning of 2 motors >< When we exchanged them left and right. It solved the problem.
3.2 The motor kept minor vibrating after the program ran.
We thought of it a bug and tried many ways to solve it. However finally we read an article that said it was the normal situation as motors work that way.