Wildcard week
Last year I worked a few nights on building my own electric longboard. I collected several parts and made them all work together. Before life happend I did 2 short test drives on a excisting board with all the components added to it. The only thing still missing was a board (that I wanted to make myself) and a enclosure for all the parts. This week was a good moment to try my hand at composites and see how far I could get. My ambitions went from: sure I can make all of this and make it look pretty and finished to do this to... let's just throw some wheels on it and ride it. I had a lot of fun, learned about composites and rode my board.

Composites
Material
Tarbender Smooth on
Natural textile in different grains
Bamboo scrap
Foam (8 cm from the hardware store)
Software
Fusion 360
Adobe Illustrator
Machines
Lasercutter
Shopbot
- 1/2" milling bit with 3" cutting length
- Surfacing tool
Gear
Gloves
Protective coat
Protective glasses
Resperator
Mixing sticks and papercups
Scale
Plastic to cover the table
Plastic to cover mold (I used tape)
Vaseline
Tape
Clamps
Safety
Epoxy is a pretty irritating substance. Avoid all contact with your skin and avoid inhaling it, so wear protective gear accordingly and make sure others are too. Work in a well ventilated area. Also epoxy is super sticky and impossible to clean up afterwards so spend some time covering your work surface with a cover that can be thrown away later. Also the epoxy becomes quite warm so be smart and use paper cups.
Here you can find the datasheet for Tarbender.

Group assignment
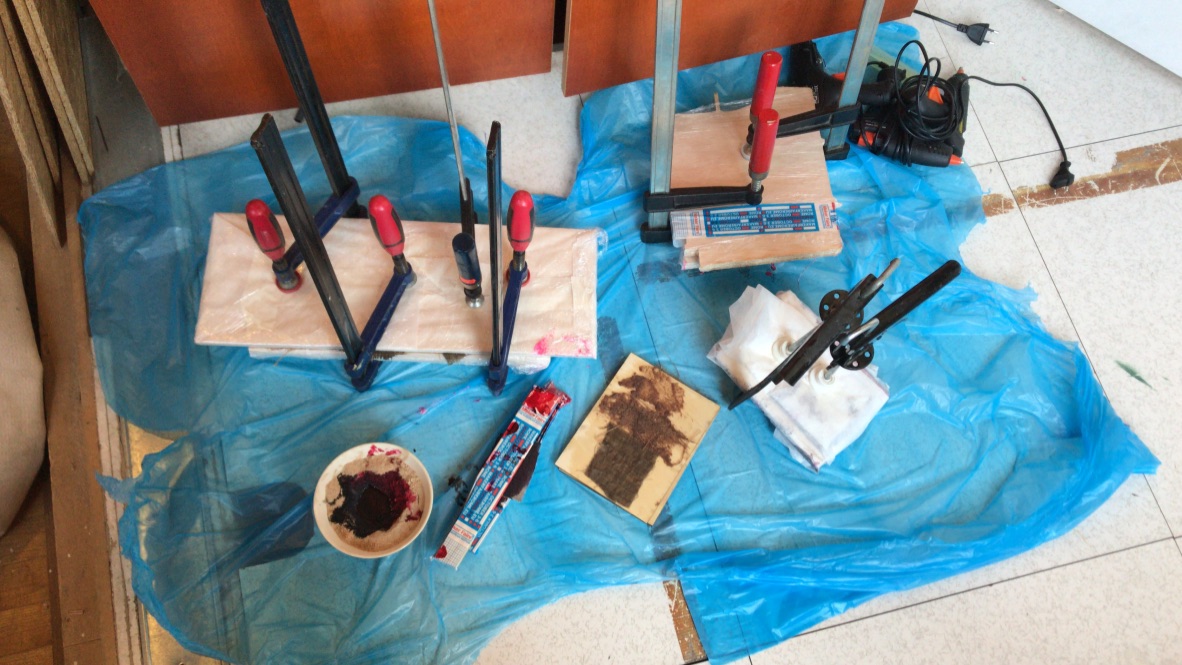
This week we worked together to make a few tests to get acquainted with the process, different materials and results. The process is pretty straightforward - for a epoxy & textile composite.
Process:
- Prepare a mold - we used 2 pieces of wood covered in plastic foil and vaseline. Epoxy will stick to plastic but not to vaseline.
- Cut all your materials to size and do a dry run to see how you want to put them all together.
- Mix epoxy in a cup, check the container for the mix ratio, for us it was 100A:41B by weight. Cover the textile in epoxy and make sure all fibers are covered. For small pieces you can soak them in the cup and squeeze out the exces material. For larger pieces pour it over and massage it in. Use enough to cover everything but using more doesn't improve the results.
- Put everything together and add all the clamps you can find.
Four our test we used two kinds of epoxy - Tarbender and Super Sap. We added some colouring to the Tarbender. We layered textiles in different amounts and compositions. We waited the recommended 16 hours for the epoxy to dry before we unclamped everything.
Results: No noticeable difference between Tarbender and Super Sap. 1 layer textile will stay pretty flexible. 3 or 4 layers get quite a bit of stiffness, like a creditcard.


Individual assignment
Since I already have all the electric and mechanical components working together I will only discuss this briefly. This is not something that can be achieved in a week. Last year during the holiday season I was able to collect a lot of my compnents for the longboard. There are a few kits out there that are good to go out of the box, those are a good option if you want to get riding quickly. If you wan't to make things yourself there is a huge community to help you out. Think Mike Beard on Youtube and the Esk8.builders forum. During the holiday season a lot of parts were on sale, this is when I bought most of them since this is a pretty expensive project.
Just like any longboard you will need a set of wheels and trucks. Mine are all standard, I do recommend big wheels and risers since you don't want your electronics bumping against the pavement. Depending on the drive system you want wheels with holes in them to mount a gear system to. Than you will need a belt, motor, motor mount and gears on the wheel and motor. I had to modify one of the trucks to create some extra space for this to fit. And I had to grind a flat spot on the axis of the motor to stop the gear from slipping. Now to power your board you will need a battery, if you know someone with a spot welder for a battery this is the cheapest solution. If not, like me, just buy a pack from a esk8 vendor. These are tested and have high quality battery management systems. I have a 10s2p pack, this gives me a 20km range at 24km p/h in my setup. There are handy calculators for this online. If you prefer speed over range you want to look for a different pack. To controll it all you need a motor controller (vesc), look for one specifically for electric longboards. I bought one from Focbox, it can be programmed quite easily and comes in a aluminium casing. Don't ride your board before programming! You need to let the Focbox know what specs and parts you will be using! Last but not least you will need a remote control to actually drive. I bought a cheap one from Banggood but this is something I will have to invest in later.
Design part 1
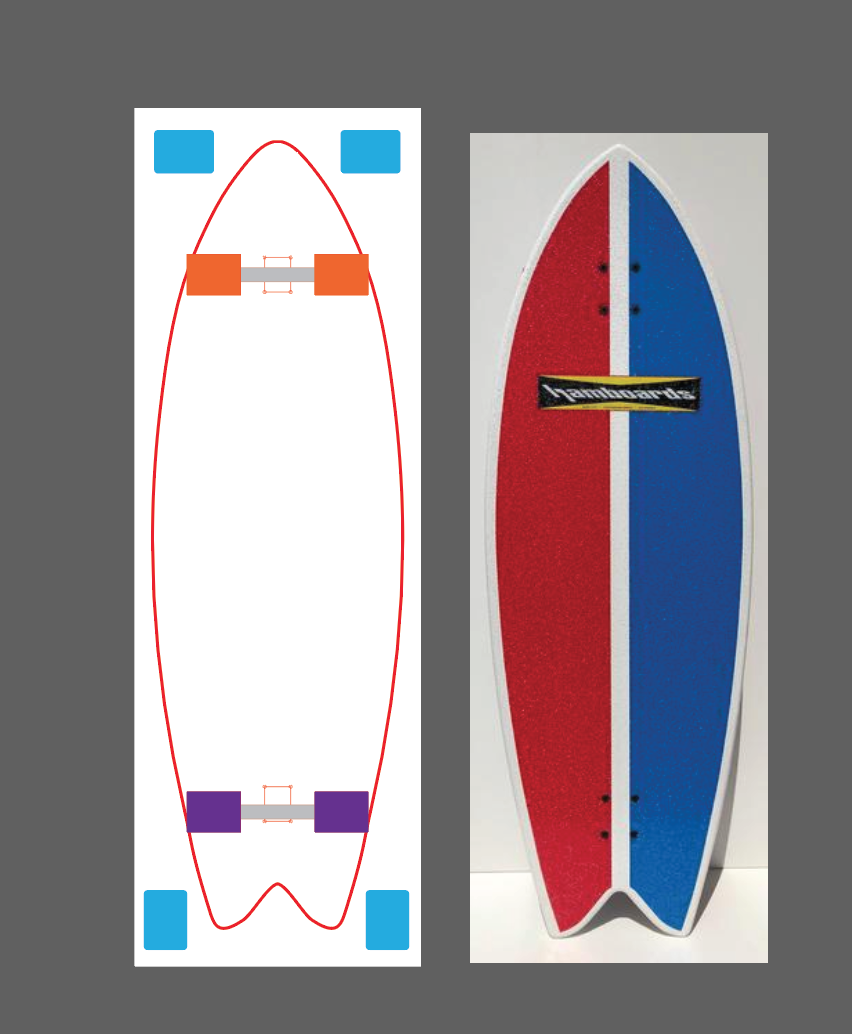
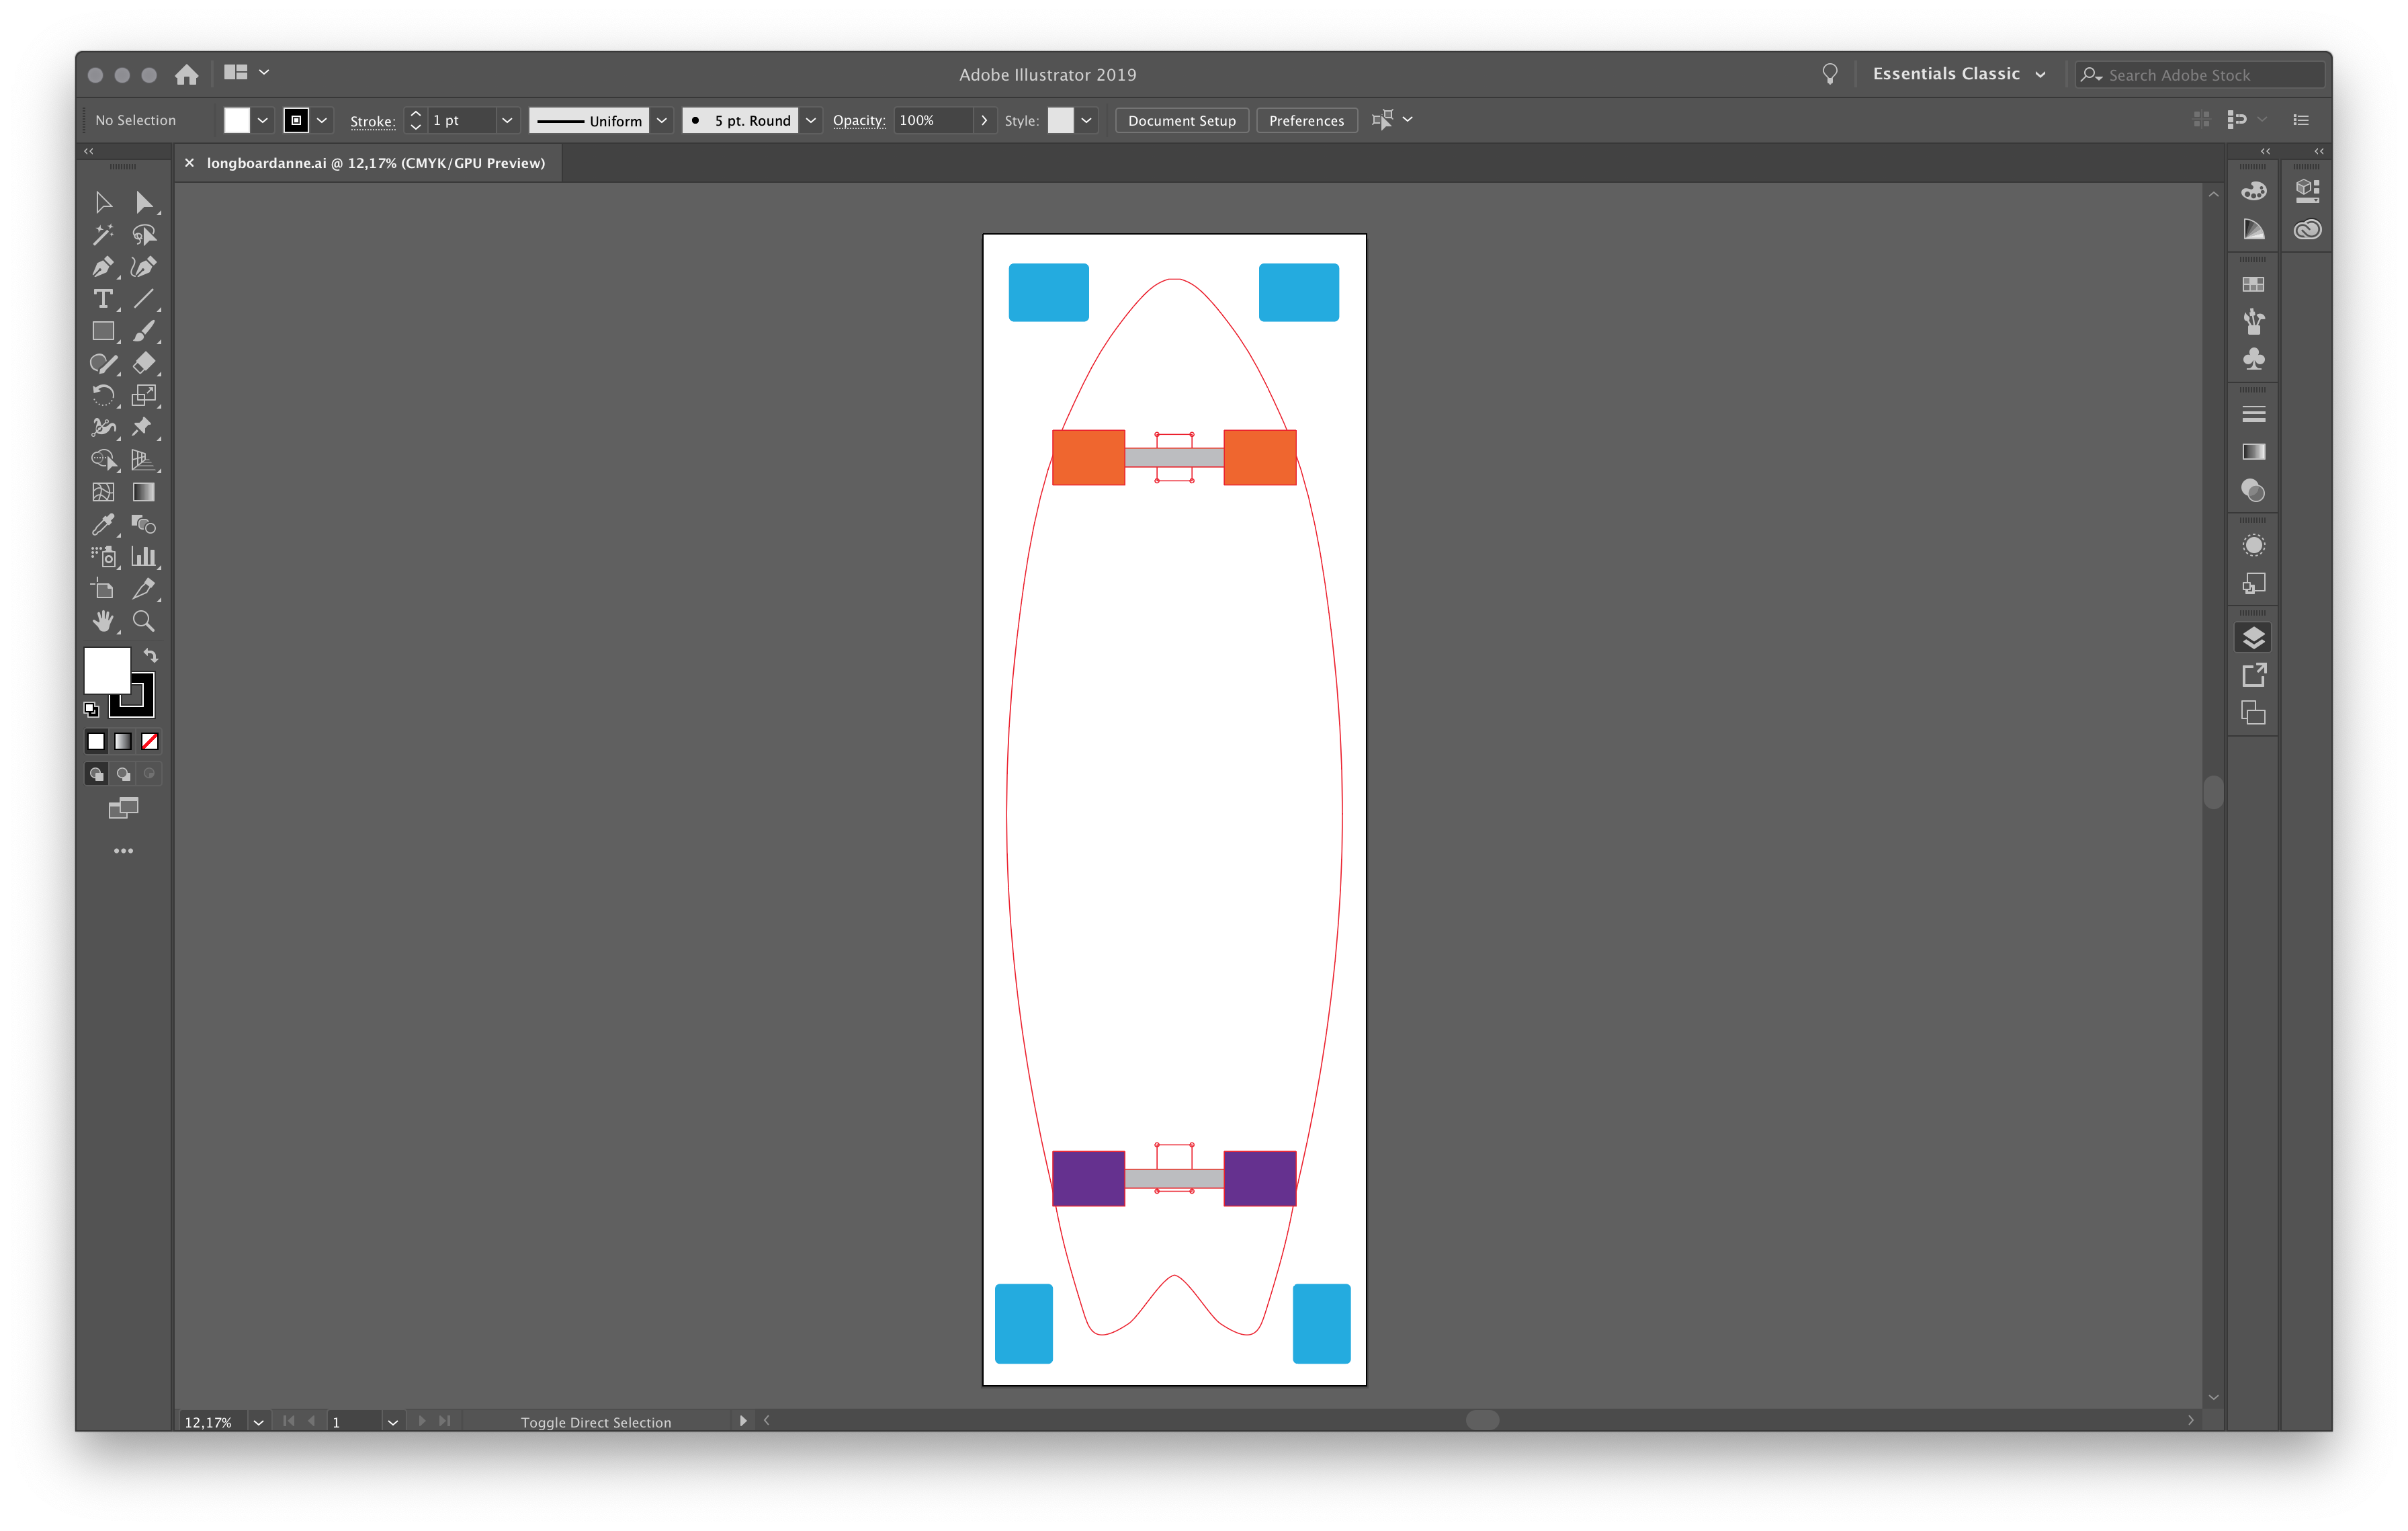
In the past I made a few designs for boards. Since I am currently also learning to surf I decided to make a more 'surfy' longboard. There is a well known American longboard maker that does this really well - Hamboards. These boards ar all pretty long and wide compared to regular longboards. The shape I chose is a called a fish. For the scrap piece of bamboo I had left I could make a board that is about 110cm x 35cm. This works pretty well for my length but is huge compared to all regular boards. I drew the shape in Illustrator by drawing the left side and then copy, pasting, mirroring the other side. To decide where the trucks should be mounted I just looked a the Hamboards. The four sqares around it are for testing purposes bur are also the size of spacers.
Milling part 1
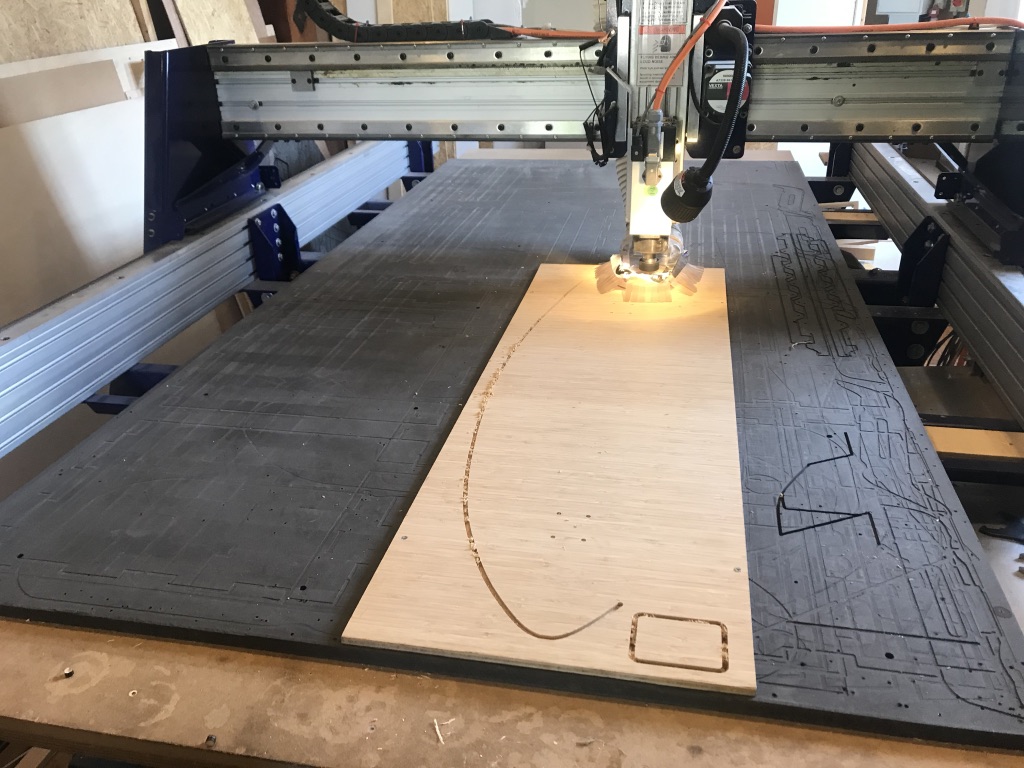
At this point I decided to quickly mill my shape since the milling machine was available. I used a high quality milling bit (VHF 6 mm 2 flutes) since I know from experience the bamboo can tear out some fibers. For the feeds and speeds I chose a conservative 45 mm/s with a 4 mm cutting depth. I added some tabs and tried to angle them to the grain of the bamboo since it can easily break. There was minimal tear out and I needed next to no finishing.
Design part 2
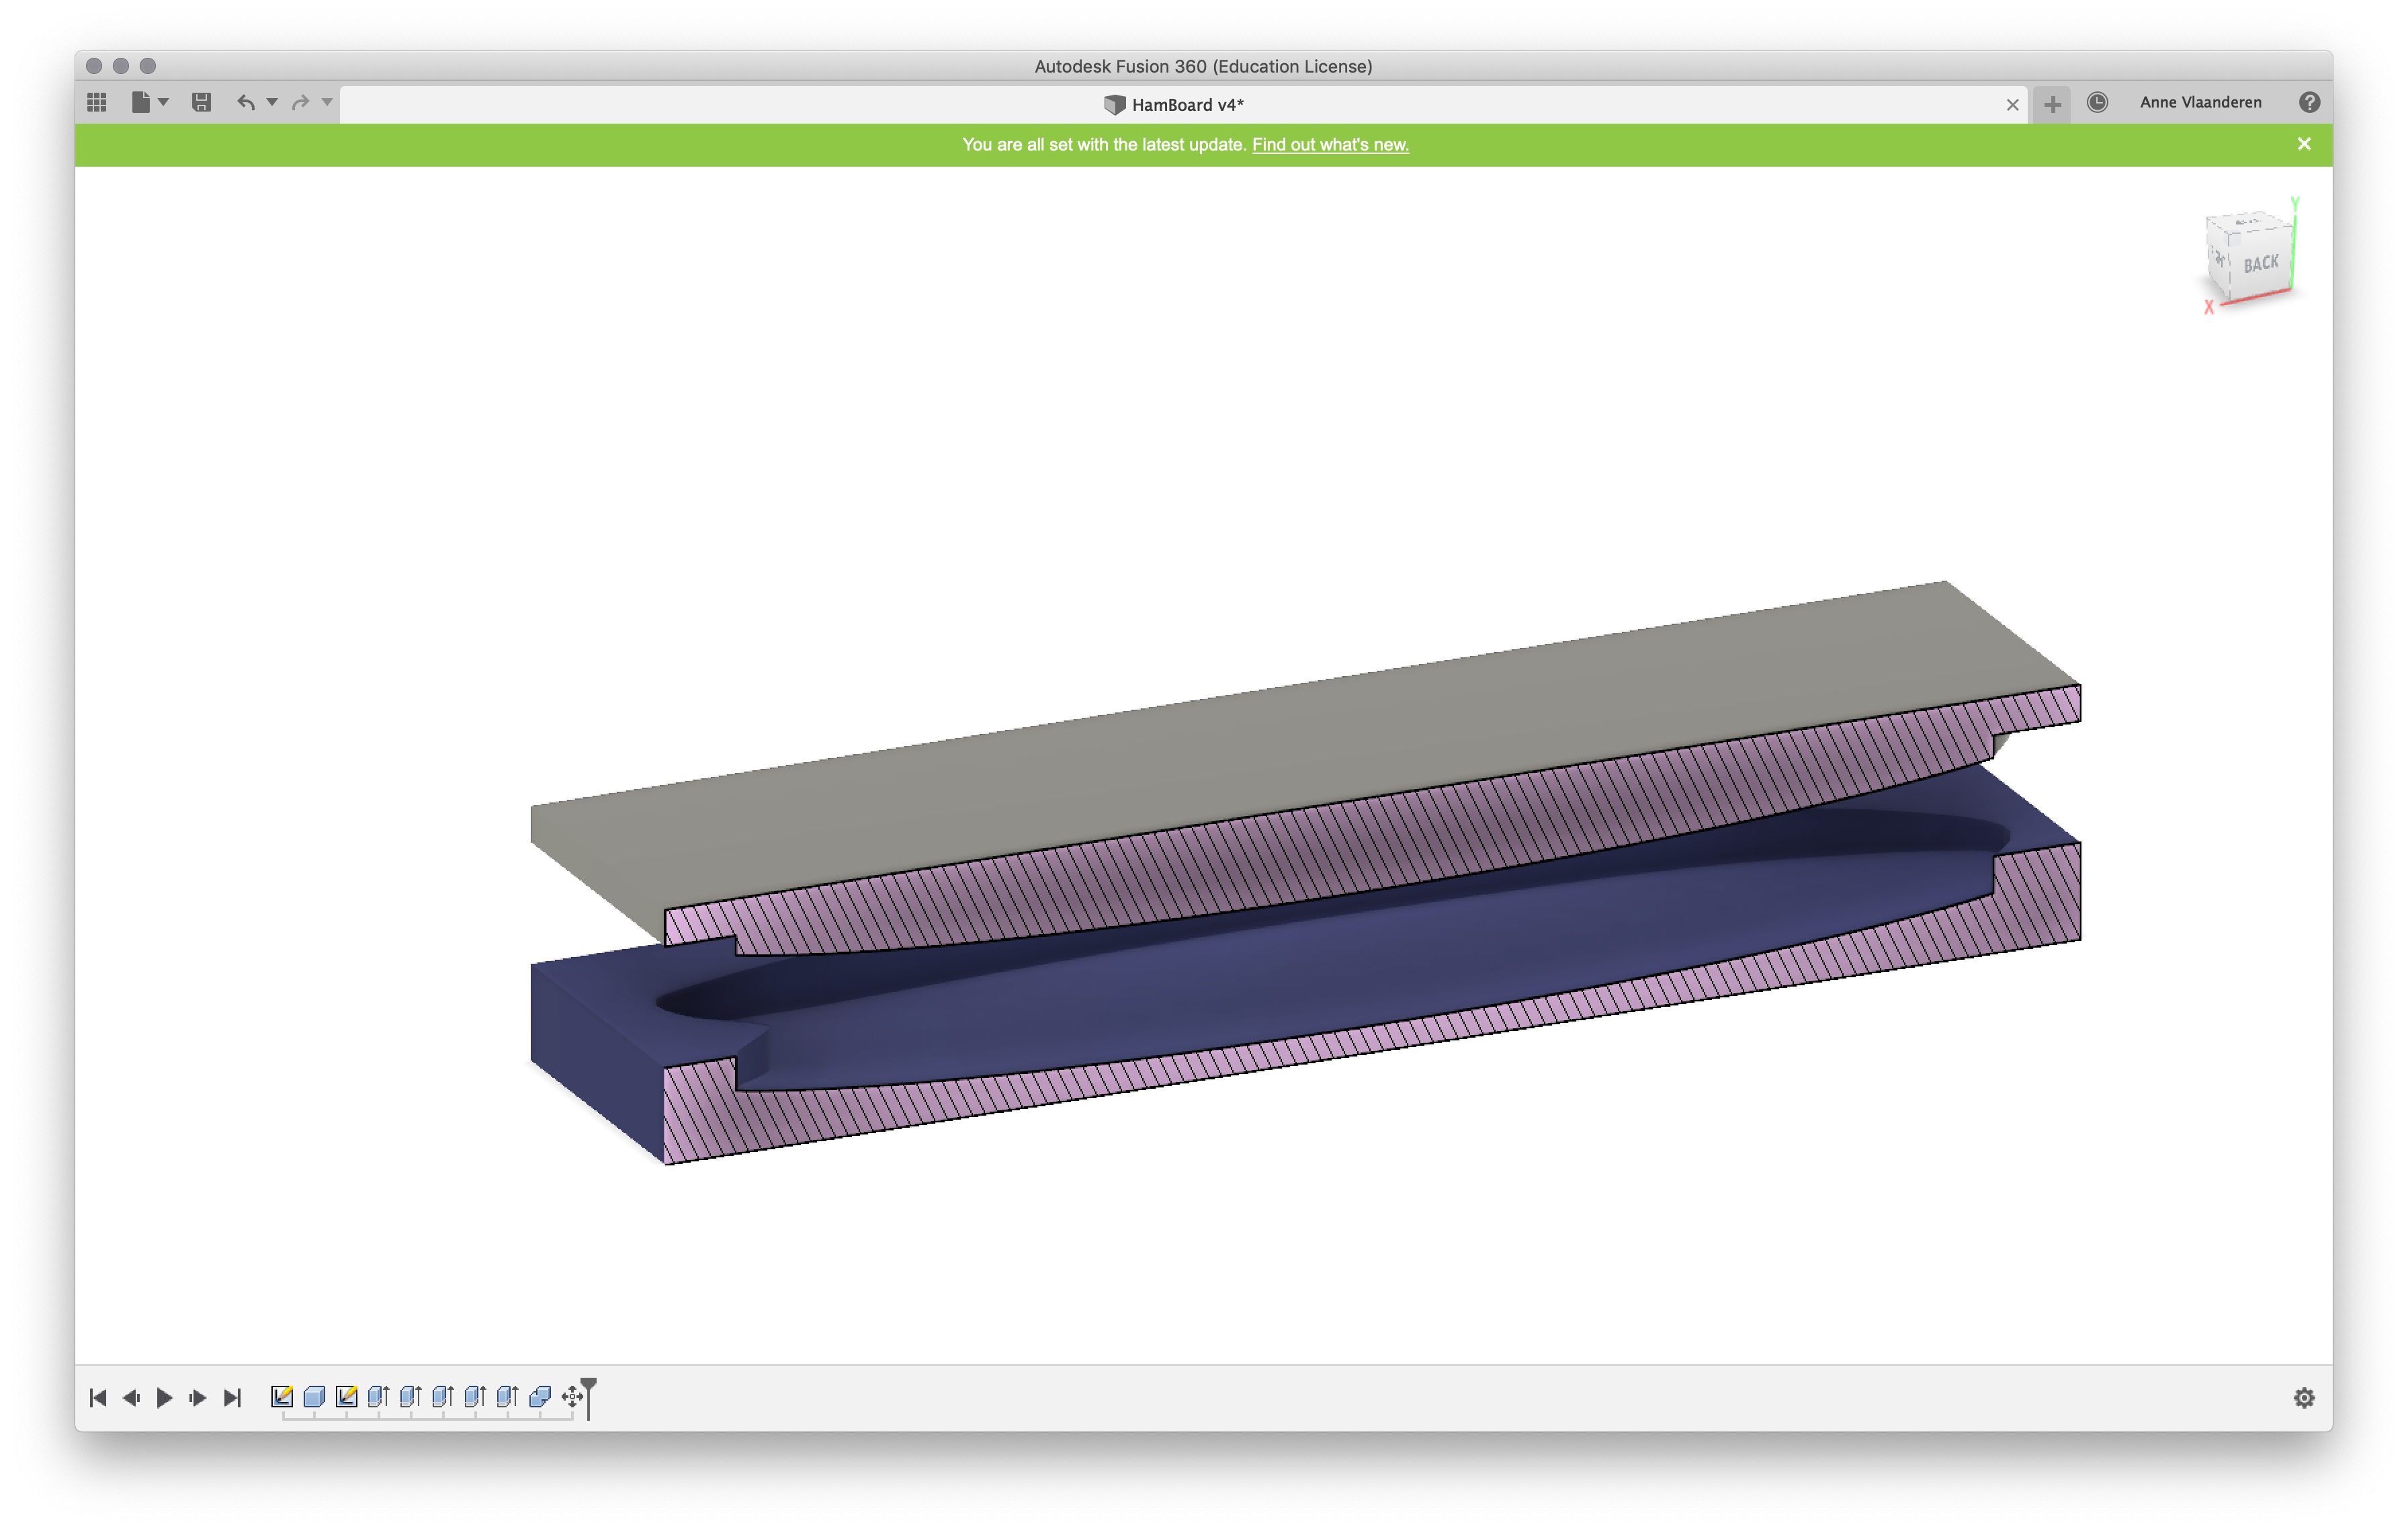
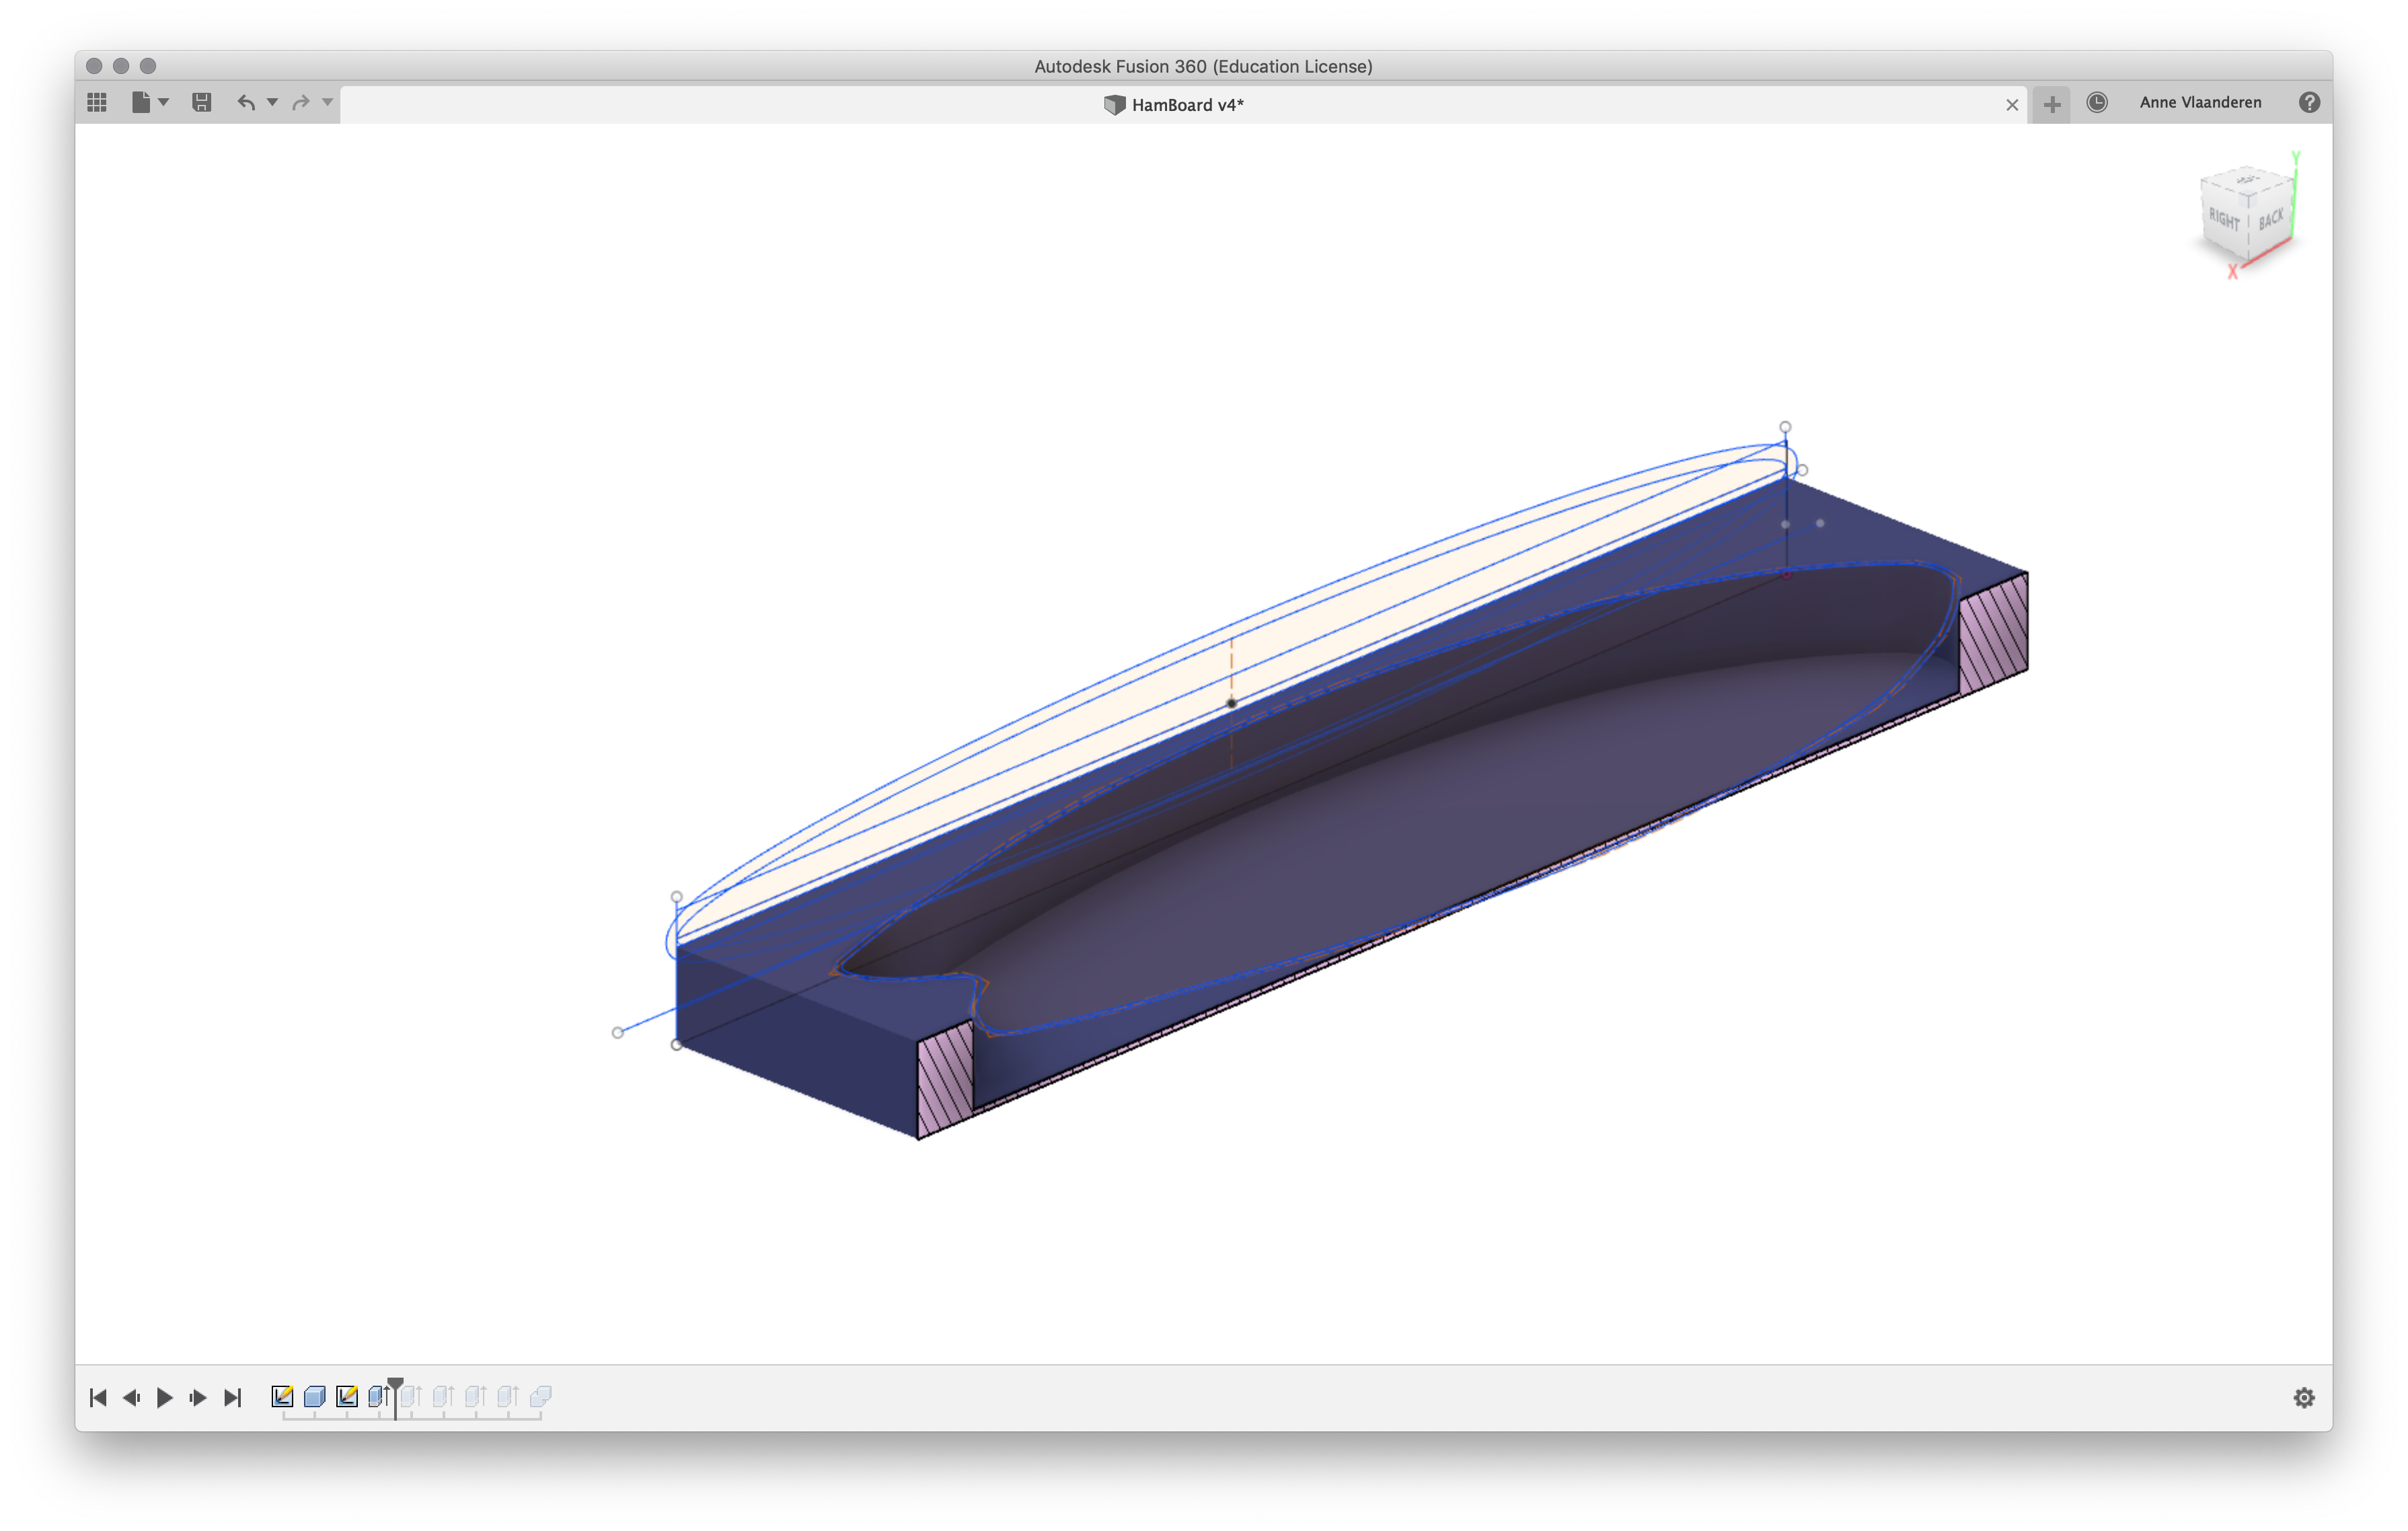
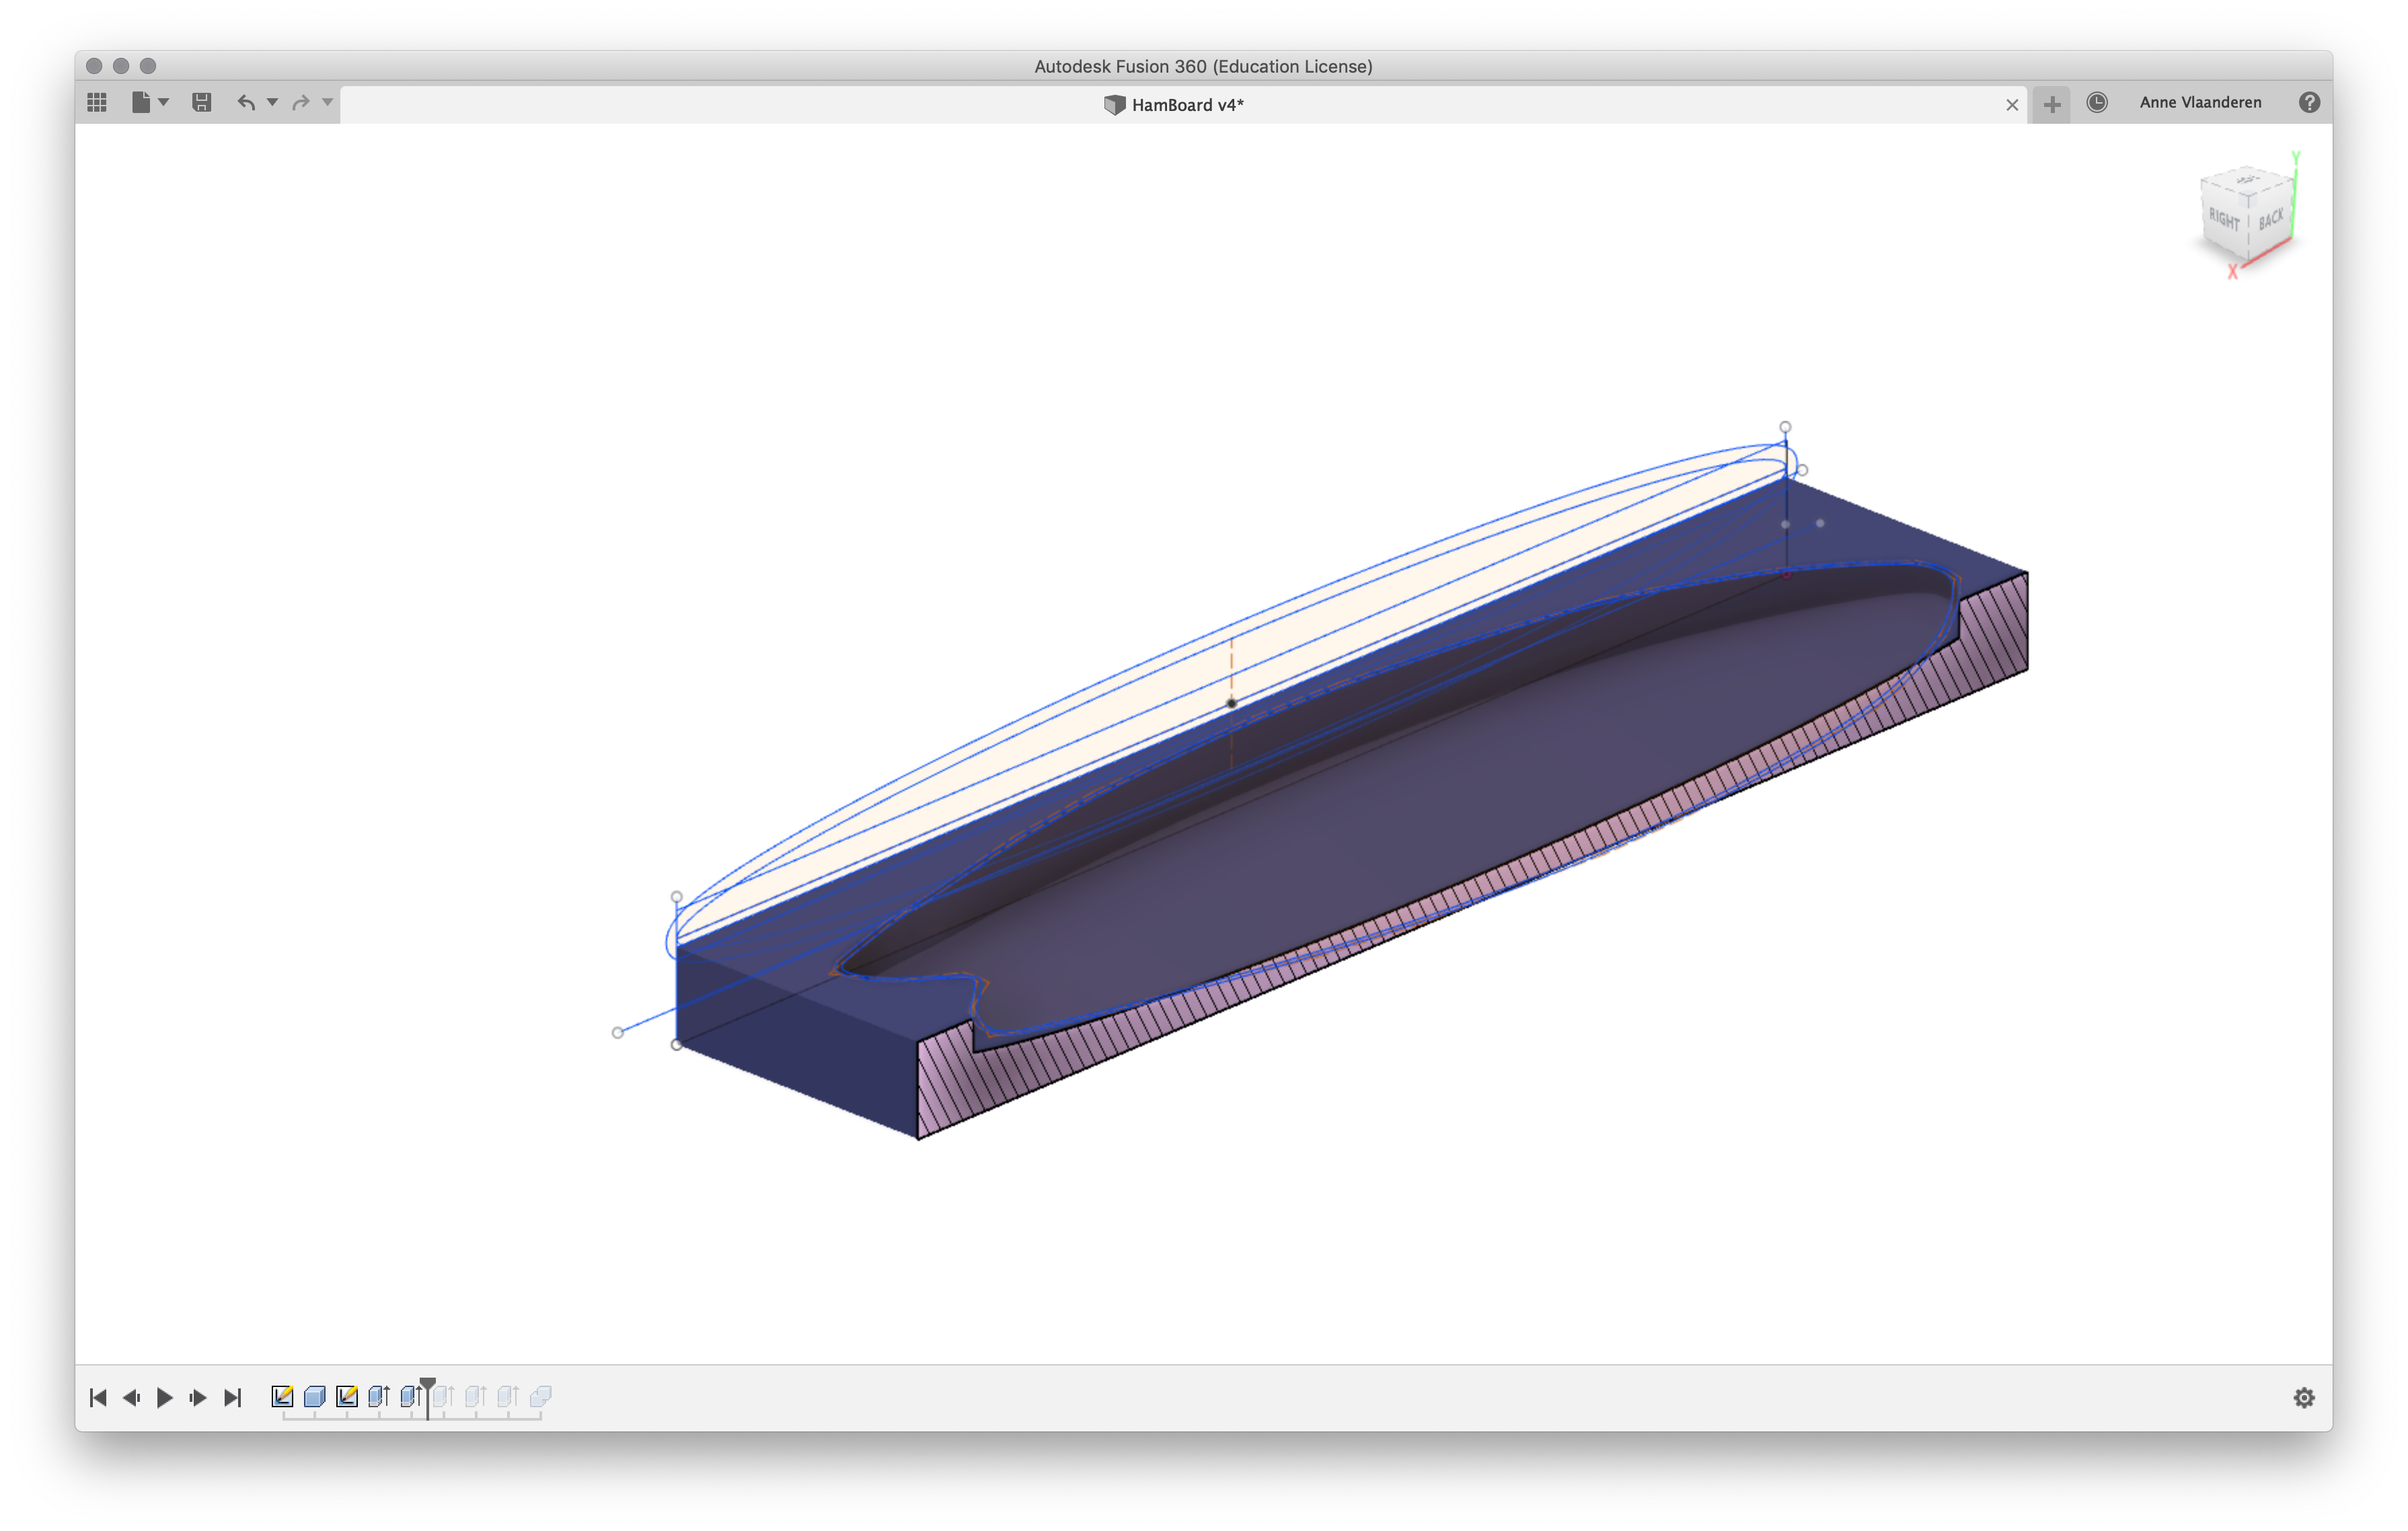
In Illustrator I gave the design a 0.5mm offset to account for excess material. From Illustrator I exported my design to Fusion. There I drew two 'overlapping' blocks of foam and projected the board through it. Than sideways I drew a profile. This is just a simple symetrical curve to give extra spring and strength to the board. Once you stand on the board it should become straight. I drew a 45mm curve but changed this to 22.5. when milling. For the thickness of the board I measured the material (10mm) and the fabrics on top (3mm). I expored both parts of the mold as a stl for milling.
Here you can see the final design, I designed the mold rather than the board.
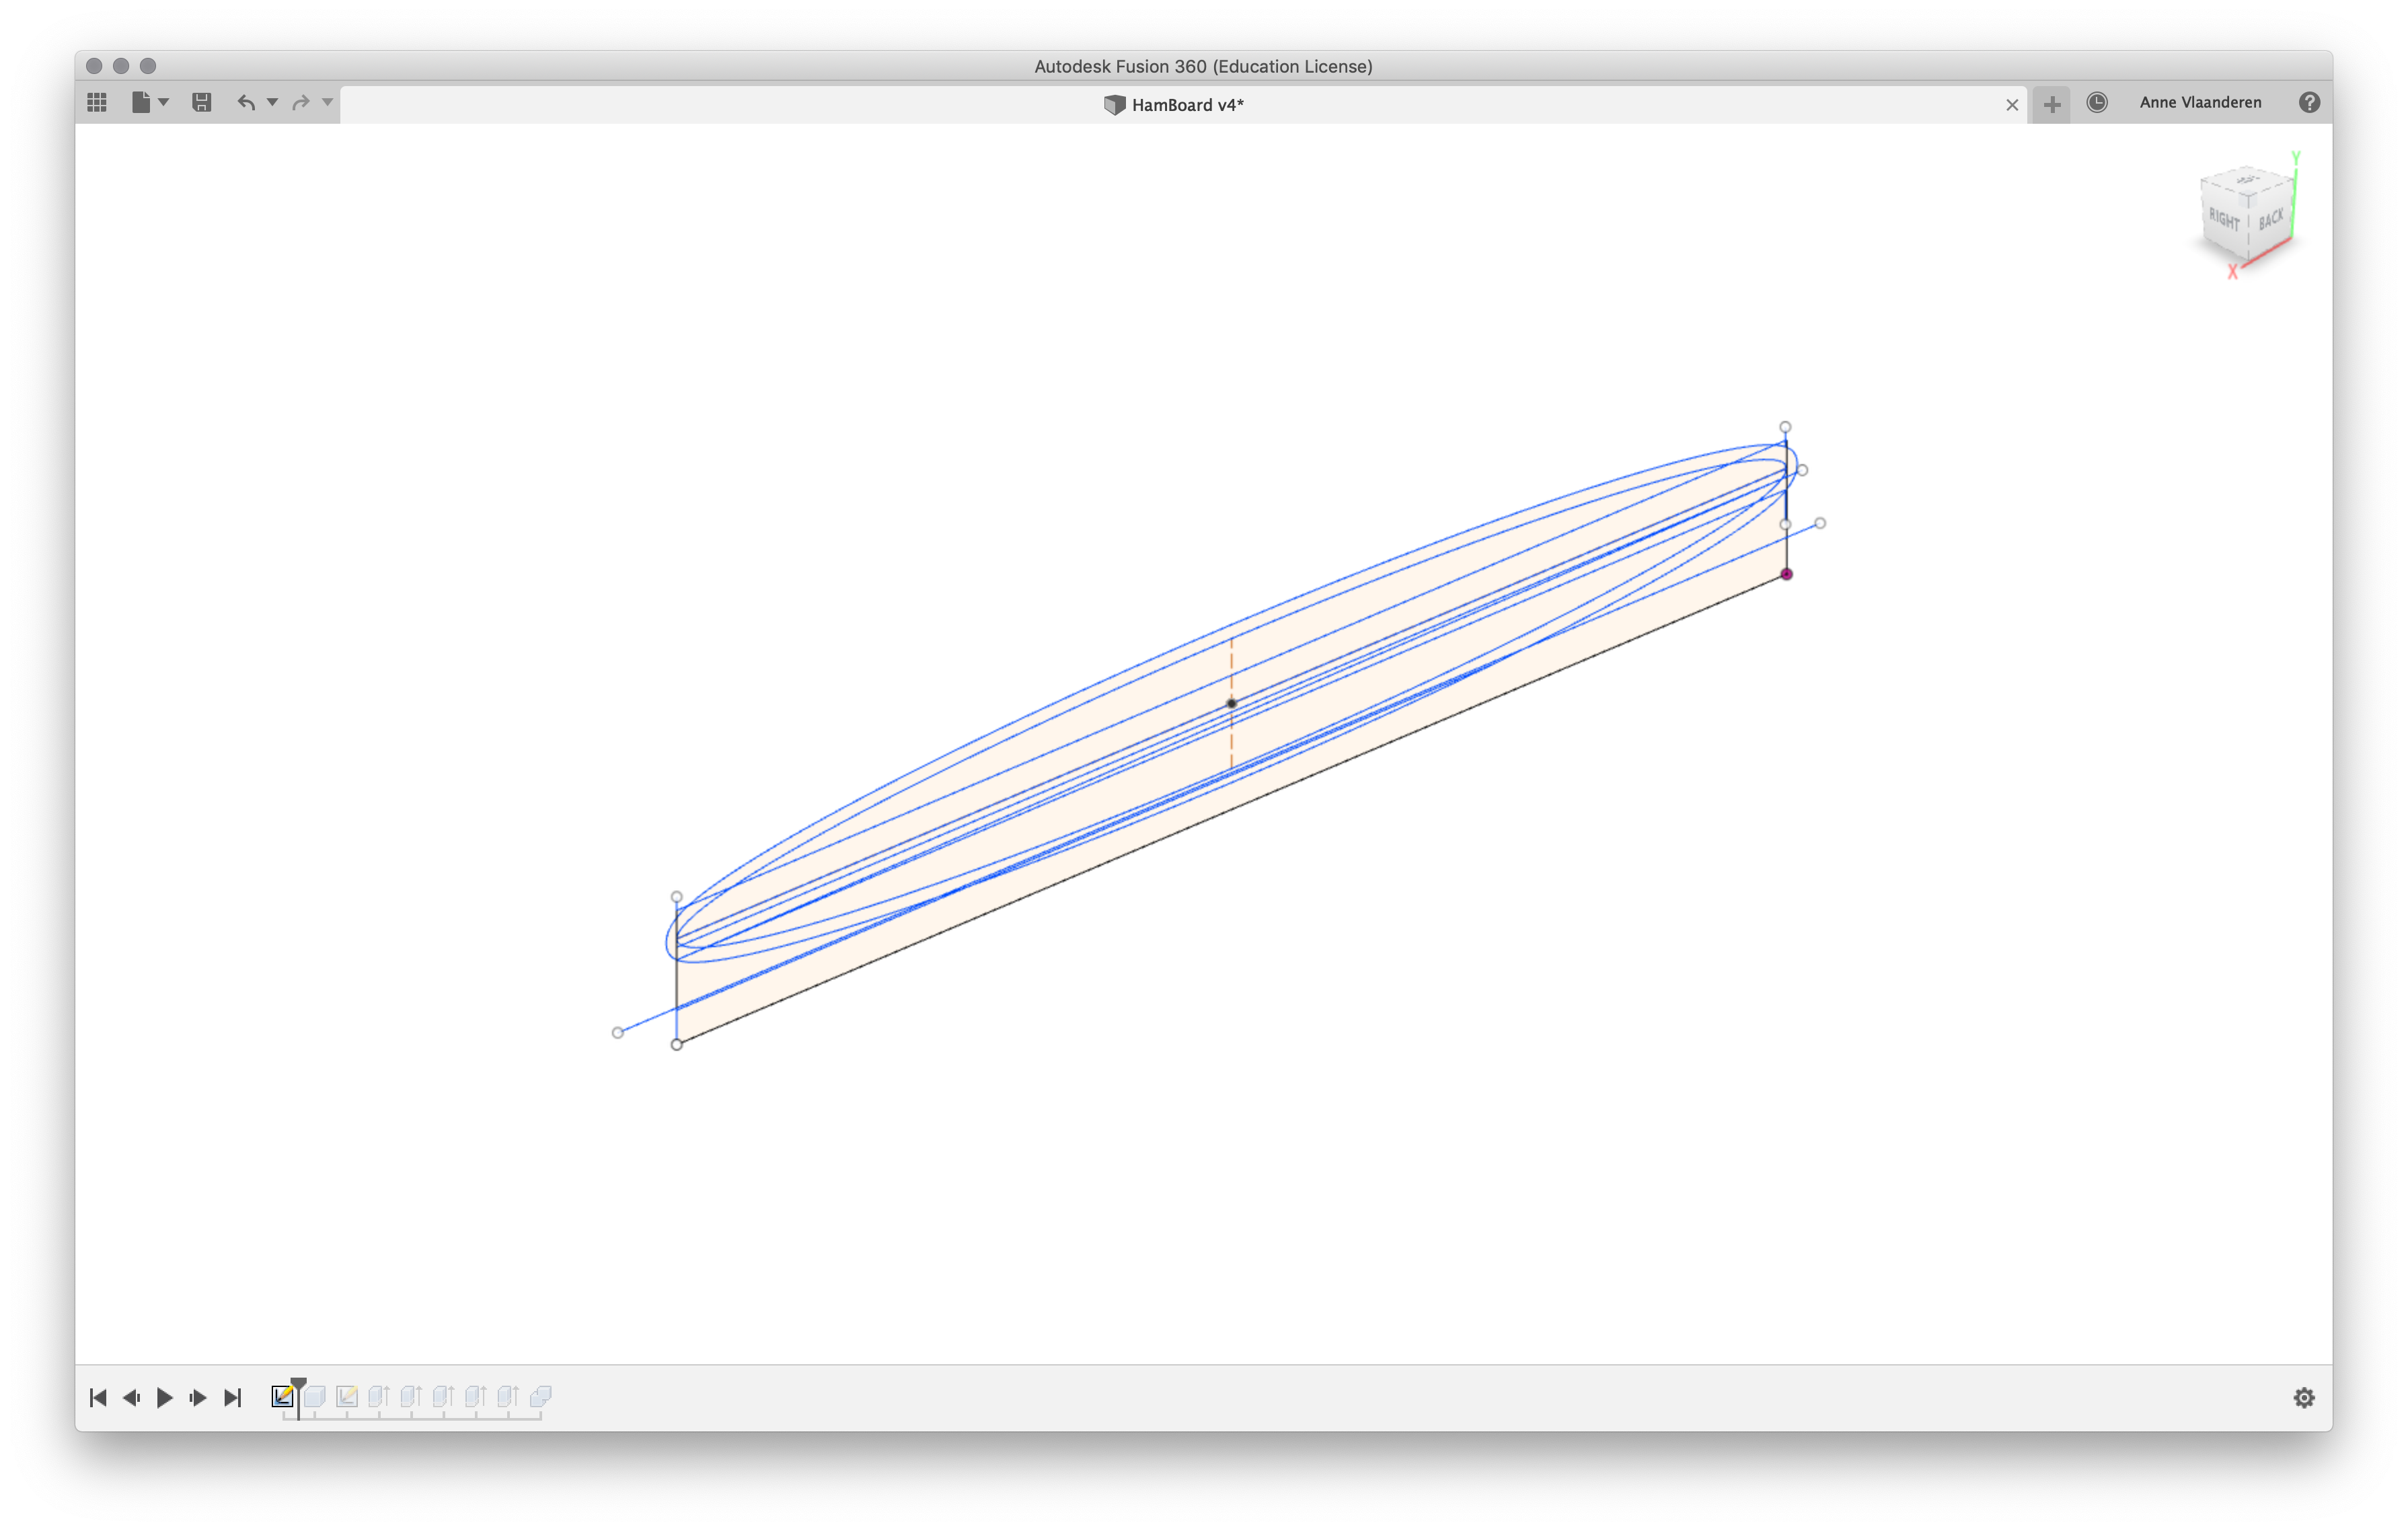
I started by drawing a side view, I want the board to be slightly curved. This makes it stronger and a bit springy. I drew both the desired curves and the side view of the foam.
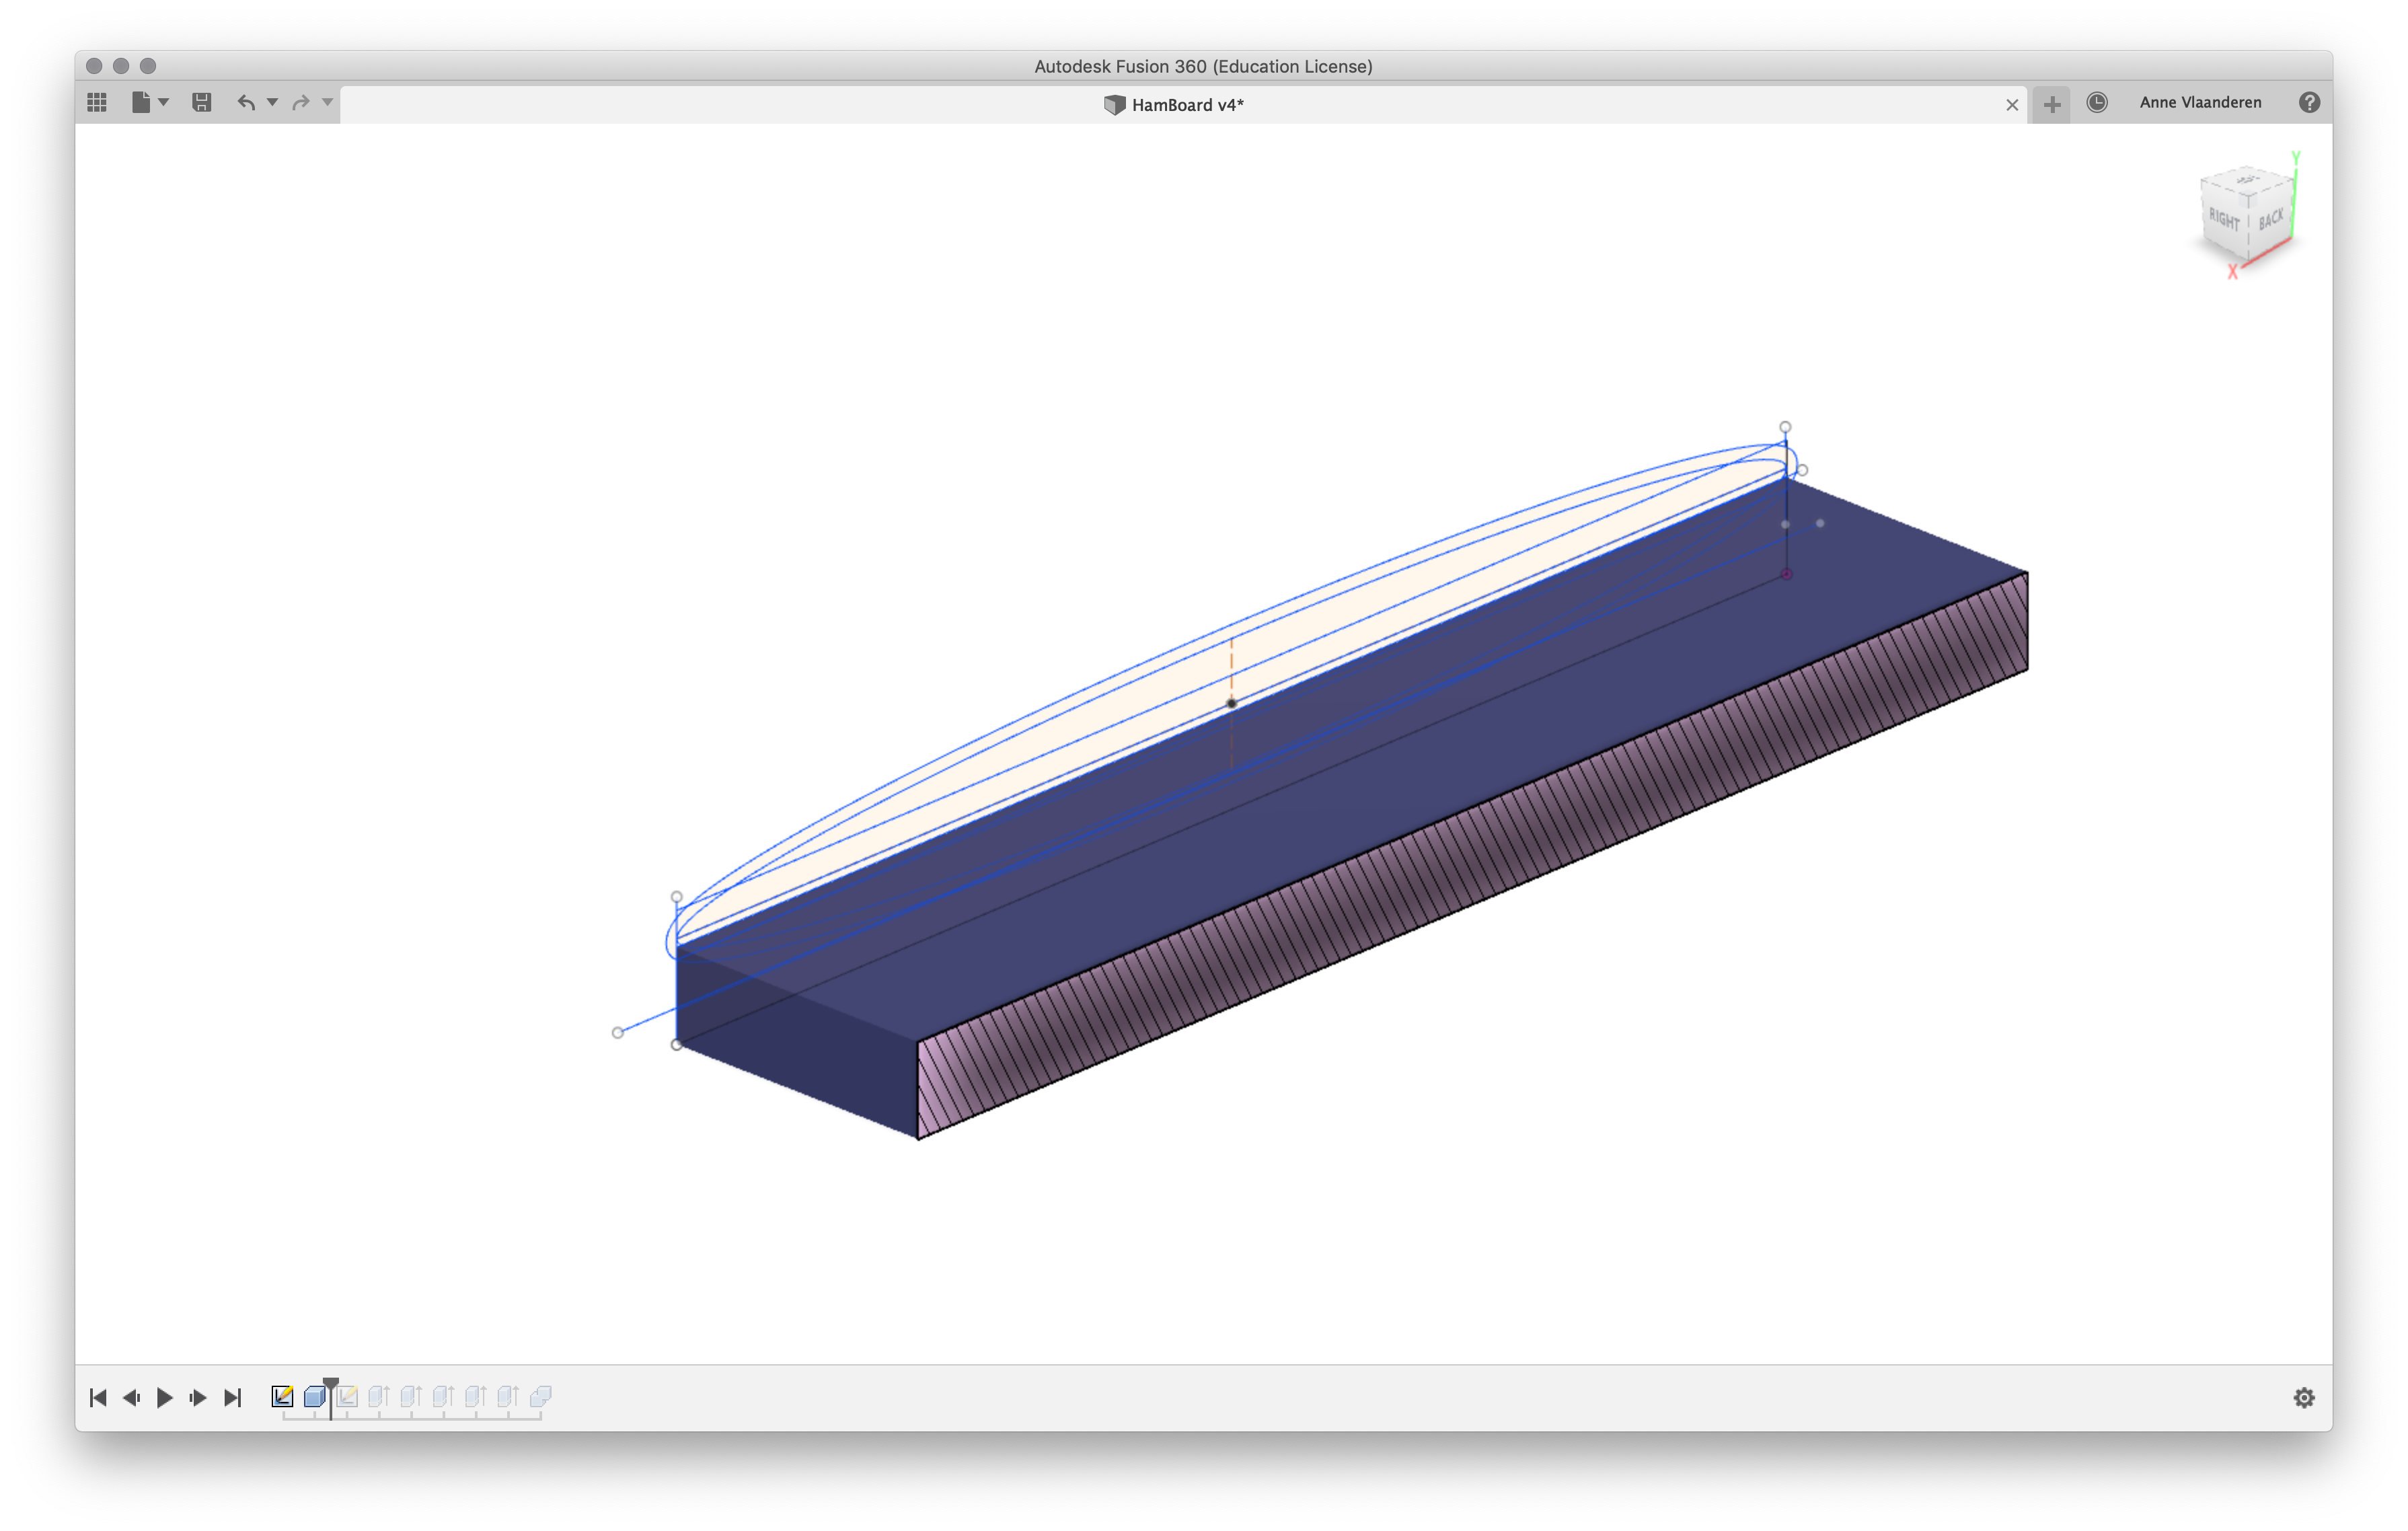
Than I extruded the foam block. I will explain this ones but this needs to be done twice for both bottom and top part.
Than I imported the dxf from illustrator and put it on the horizontal plane. I gave it an offset of 5mm to the outside to allow for excess material to get away.
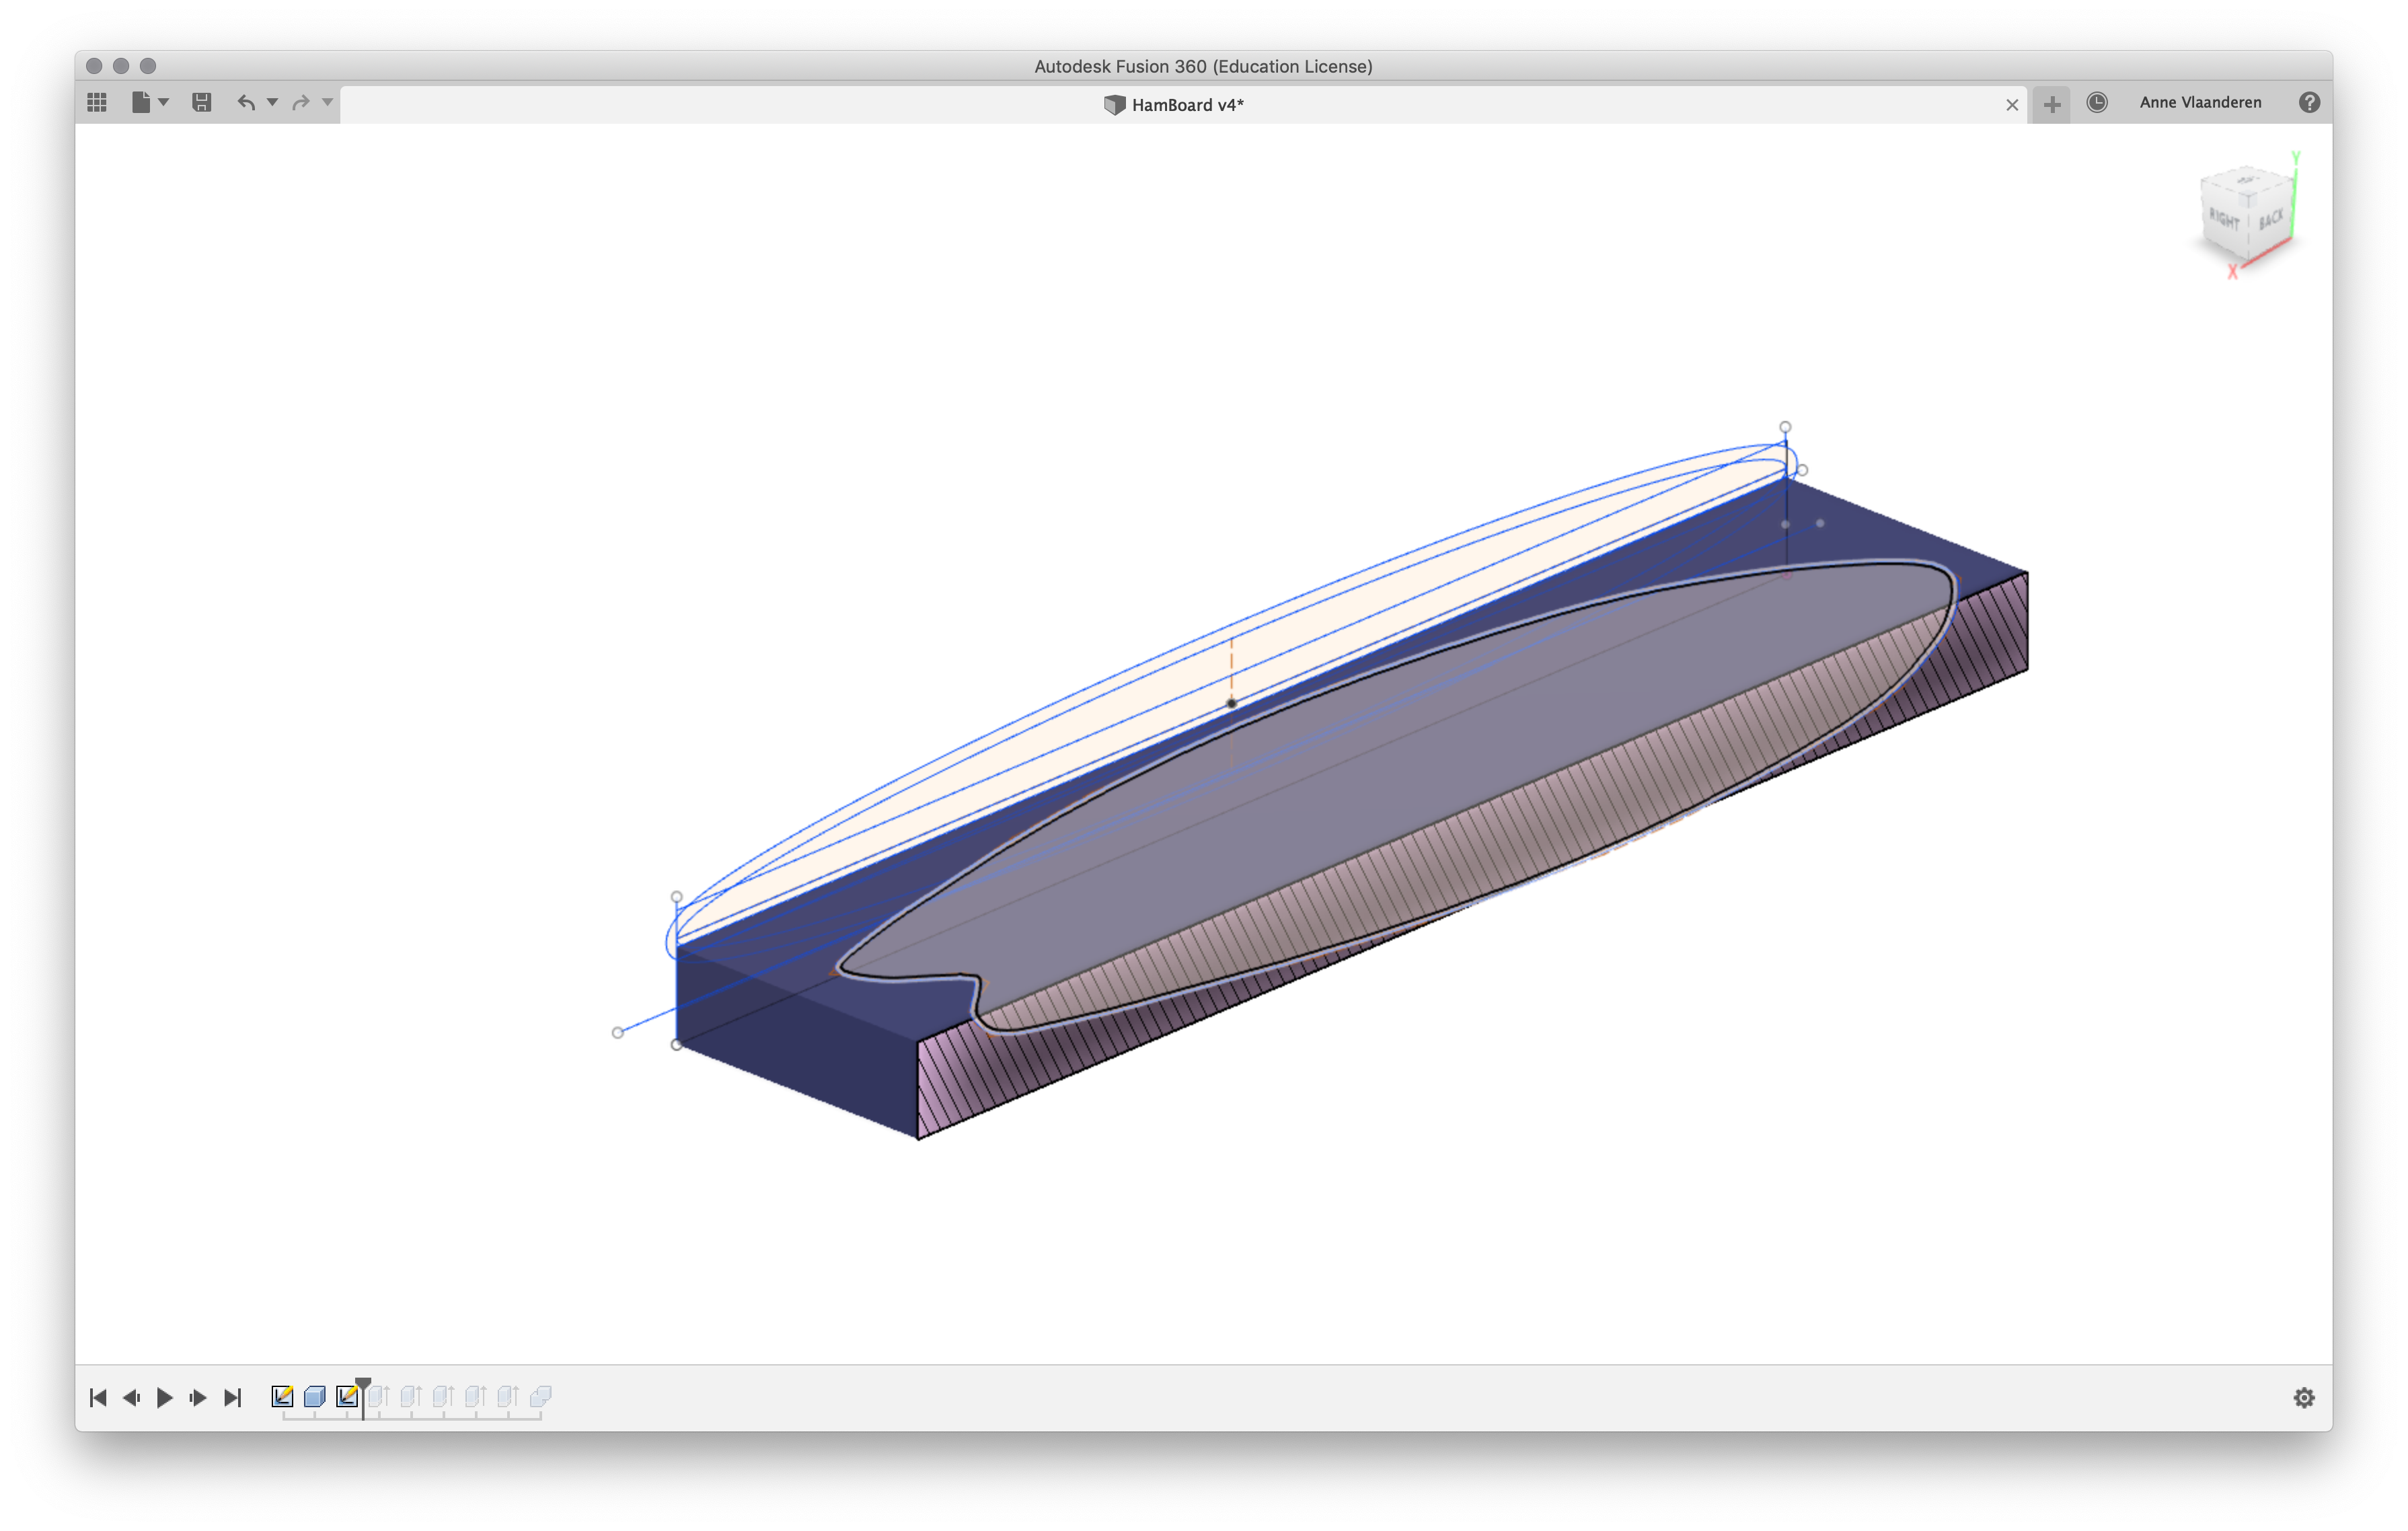
Using a negative extrusion a hole the shape of the board is cut.
Milling part 2
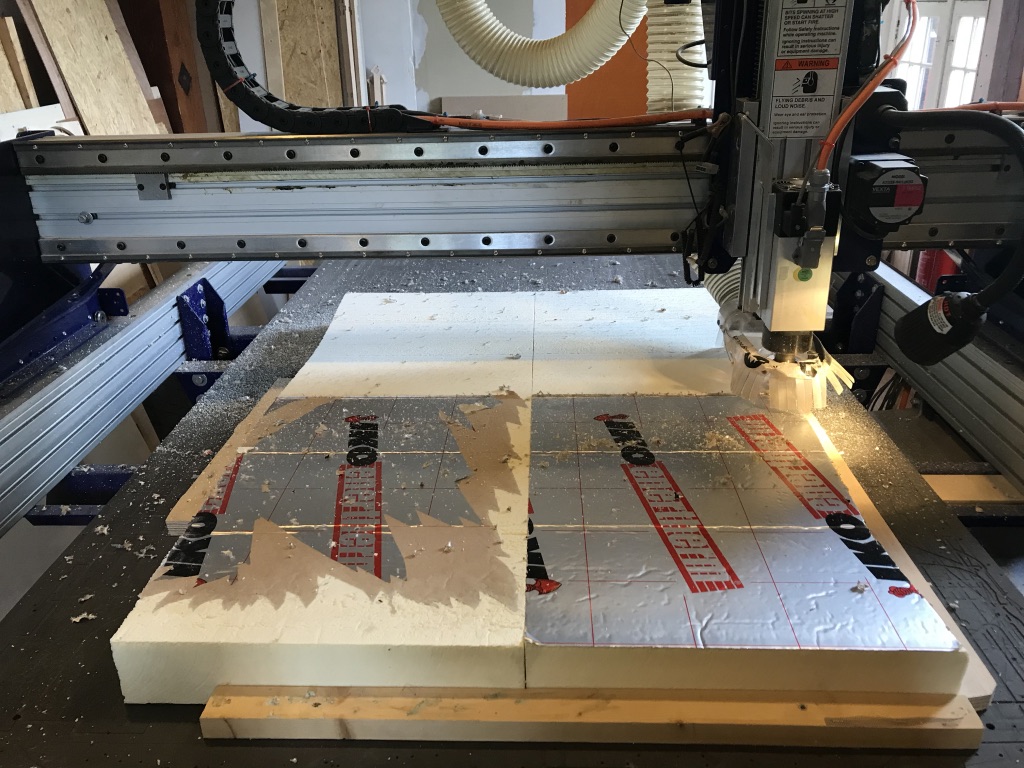
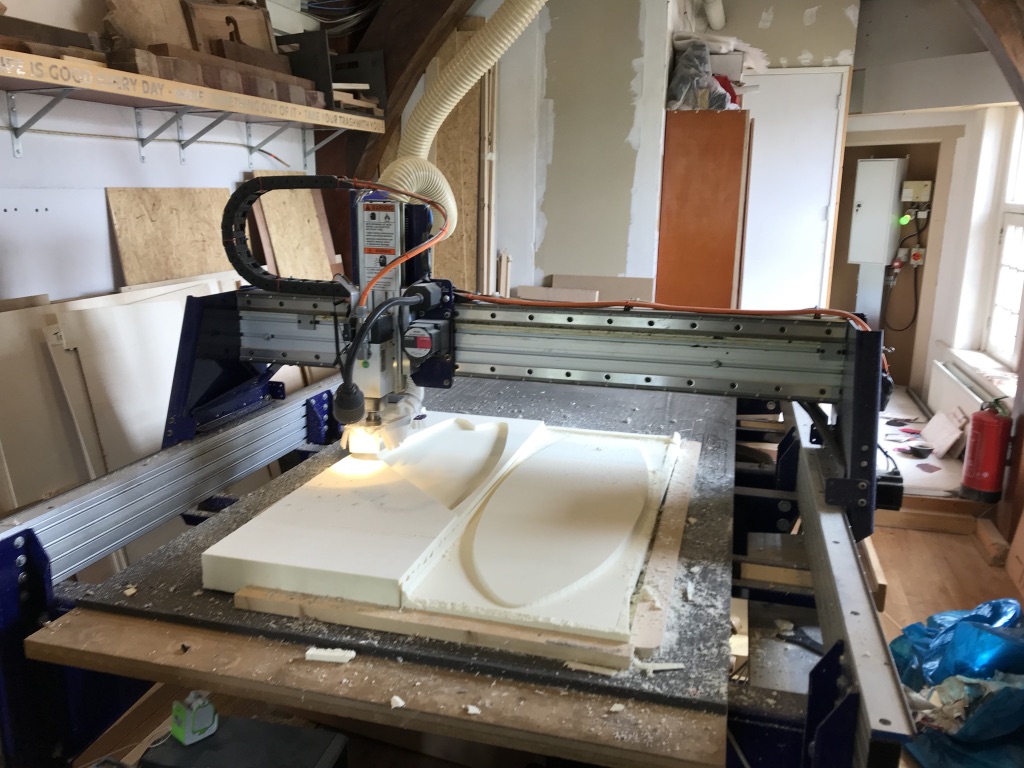
The foam used for the mold is from a hardware store. On both sides there is a aluminum/cardboard film glued. I tried to peel it of but this didn't really work. Also the top layer wasn't perfectly flat. So I decided to surface the boards first with a surfacing tool. Settings 60 mm/s traveling, 20mm/s plunge, 48% overlap. I took of 2 mm from the top and this left a beautiful finish ready for milling. Next I Prepared my files and milled the board. I directly used a finishing tool path since the foam is super soft and the milling bit quite large. For the settings I used a 70 mm/s feed & speed with a 25% overlap. All together I spend roughly half a day in the milling room.
Preparing the mold
There were quite a few rough bumps in the mold so I got a rough piece (180 grid) of sandpaper and made everything smooth. This took about 10 minutes. Afterwards I dusted the molds with a brush and tried to hover away as much dust as possible. I covered the whole mold with plastic tape and using a tack cloth I removed all the left over dust. I put the molds to a less dusty space.

Lasercutting textile
With the Illustrator design I lasercut the fabric. 3 times the finer one and 1 time the rougher textile. This went without a breeze and saved me a lot of time cutting. I forgot to write down the settings but if I remember correctly it was at 100 mm/s speed and 40% power.
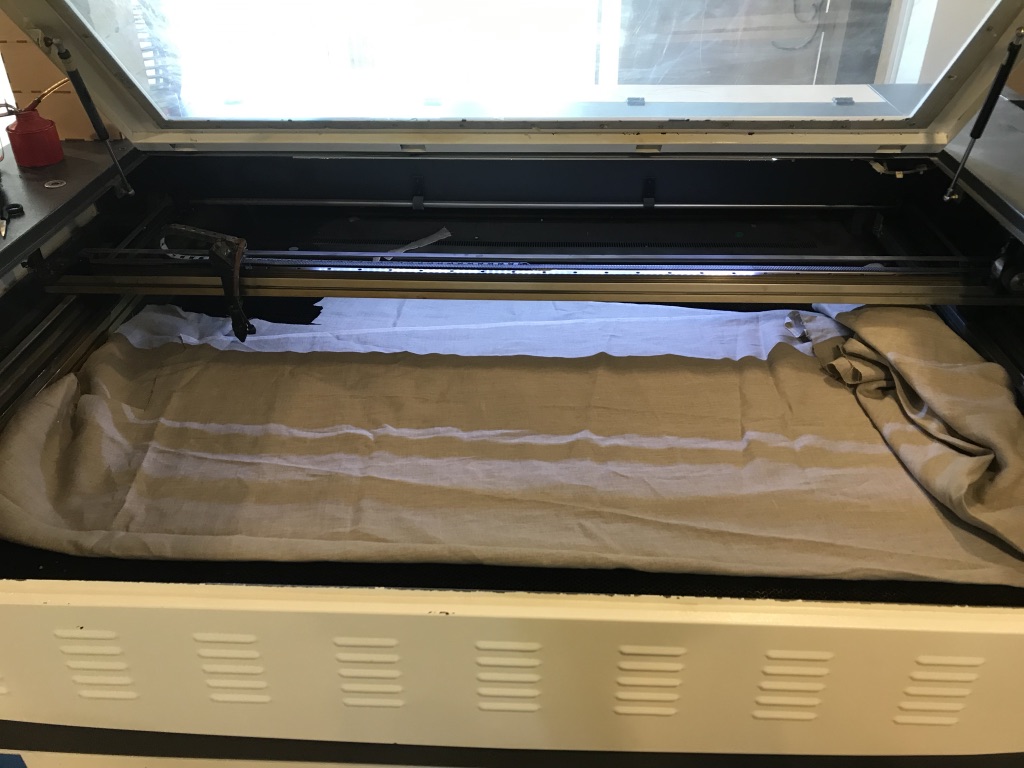
Dry test
To see if everything will fit together and in what order. Also I asked a Maud (intern at the Waag) for a helping hand. This was a good opportunity to explain the process to her as well. It is important to disasemble everything and put it aside in the same order.


Putting everything together
Than it was time to start mixing the epoxy. Since it's difficult to make a good estimation we mixed it one cup at a time (150 ml). first put a layer on the bamboo and put the fabric on top. Than we massaged the epoxy from the other side into the fibers of the fabric. We also put on a second layer and than we flipped the board into the mold keeping a close eye not to mix up the top and bottom. In the mold we repeated the process. In total we mixed about 5 cups (750ml) to get everything covered. Next we put on the other side of the mold. To clamp everything down I used a wonderfull table clamp that was in the lab. Just flip another table on top of the mold and than put all the clamps you can find around it. Keep a good eye if everything stays in place during and after the clamping.
| Material | Tarbender |
|---|---|
| Pot life | 45 min |
| Cure time | 16 hr |
| Color | Transparant |
| Stiffness | 75 D |
| Mixing by volume | 2A:1B |
| Mixing by weight | 100A:41B |
| Release agent? | Yes |
| Saftey sheet |


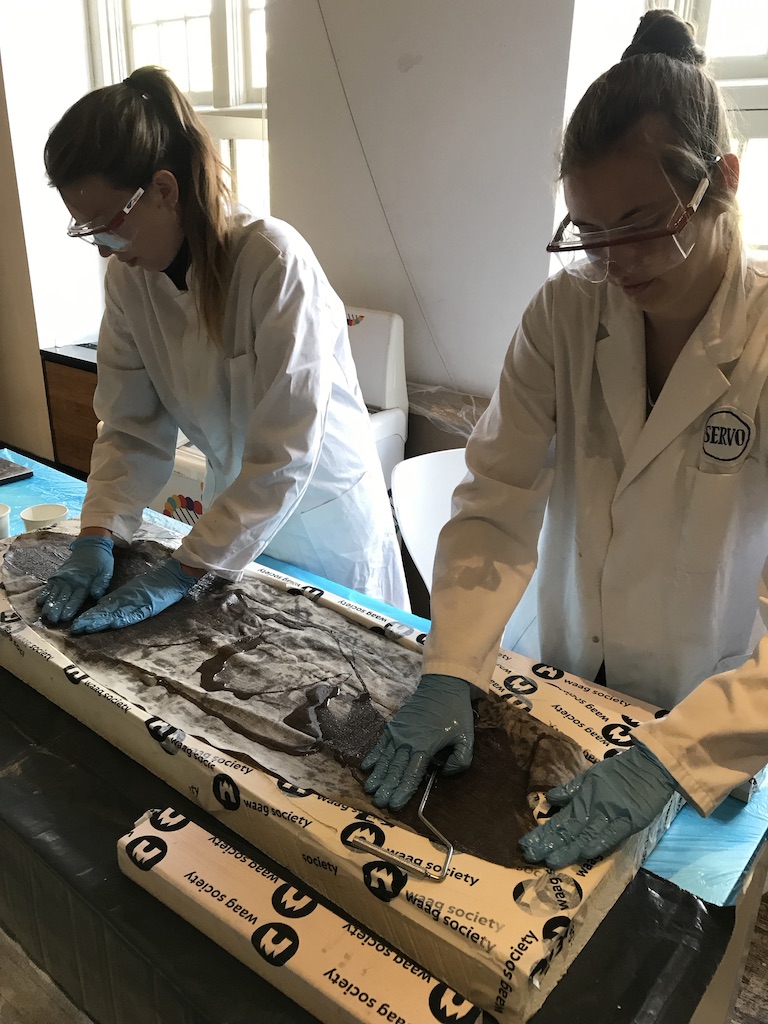
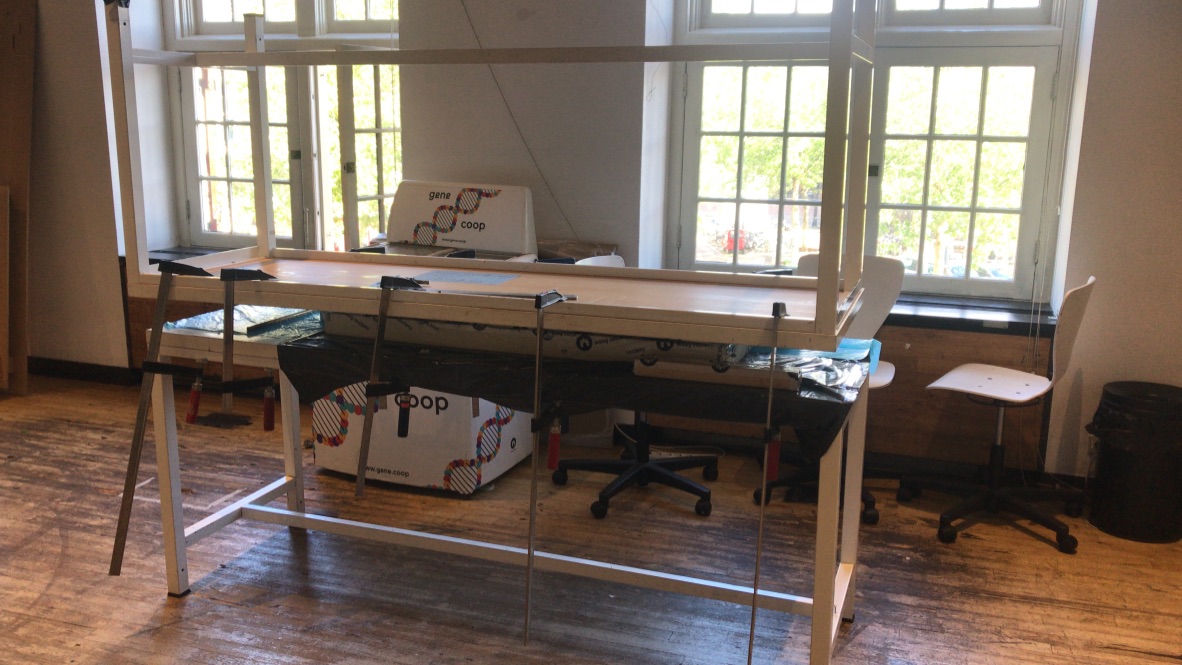
Releasing the board
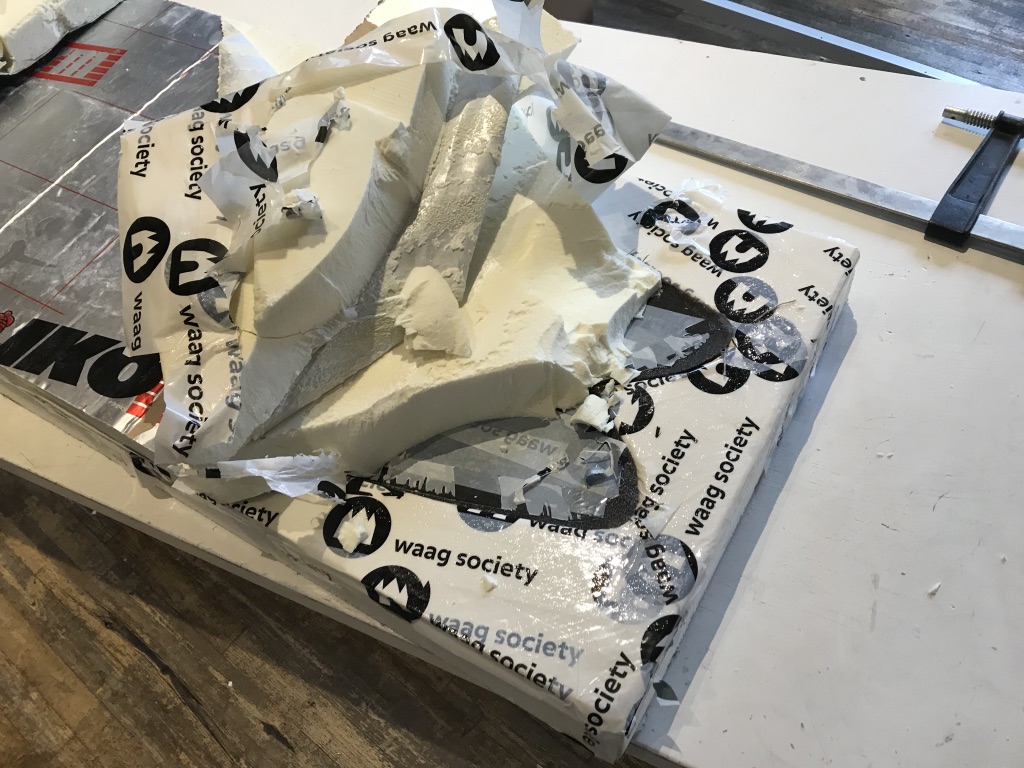
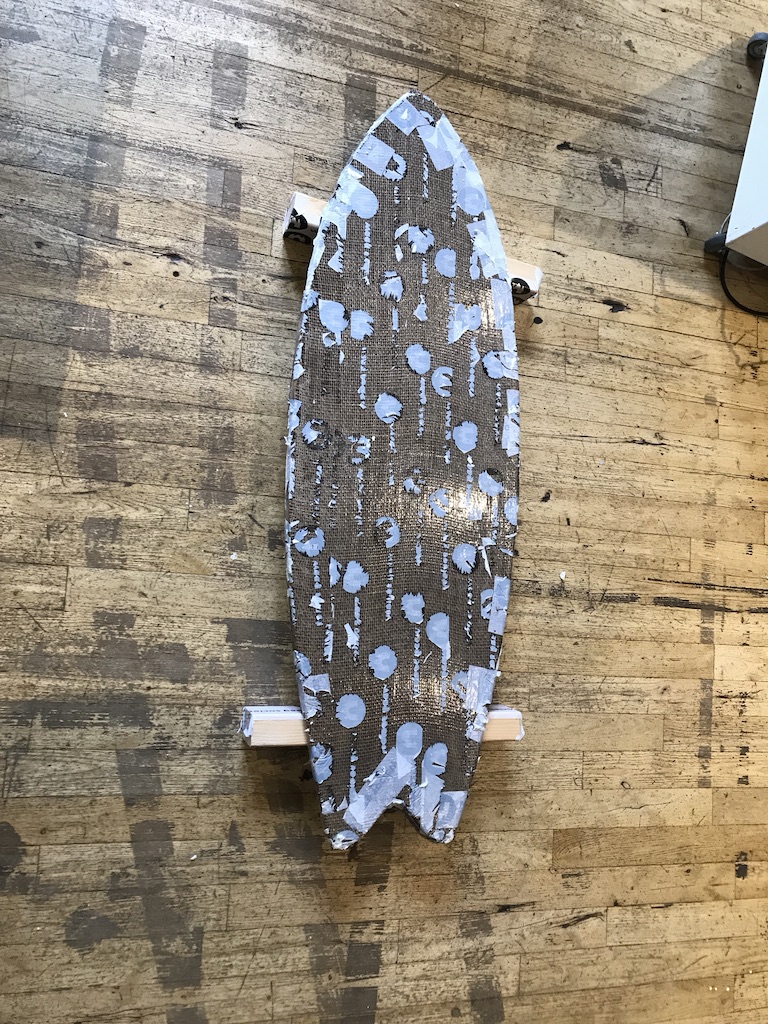
The next day I was really excited to see how it turned out. After removing the clamps and putting the table back down the troubles started. The mold was too fragile to release the board, also the tape was sticking a bit to it (especially the logo and lettering). So in the end the mold came of in pieces just like the tape. After an hour of removing as much as possible I gave up. With some sanding I removed the sharp edges for safety. With 2 wooden beames I tried the flexibillity of the board. It was stiff enough but a little bit on the flimsy side.
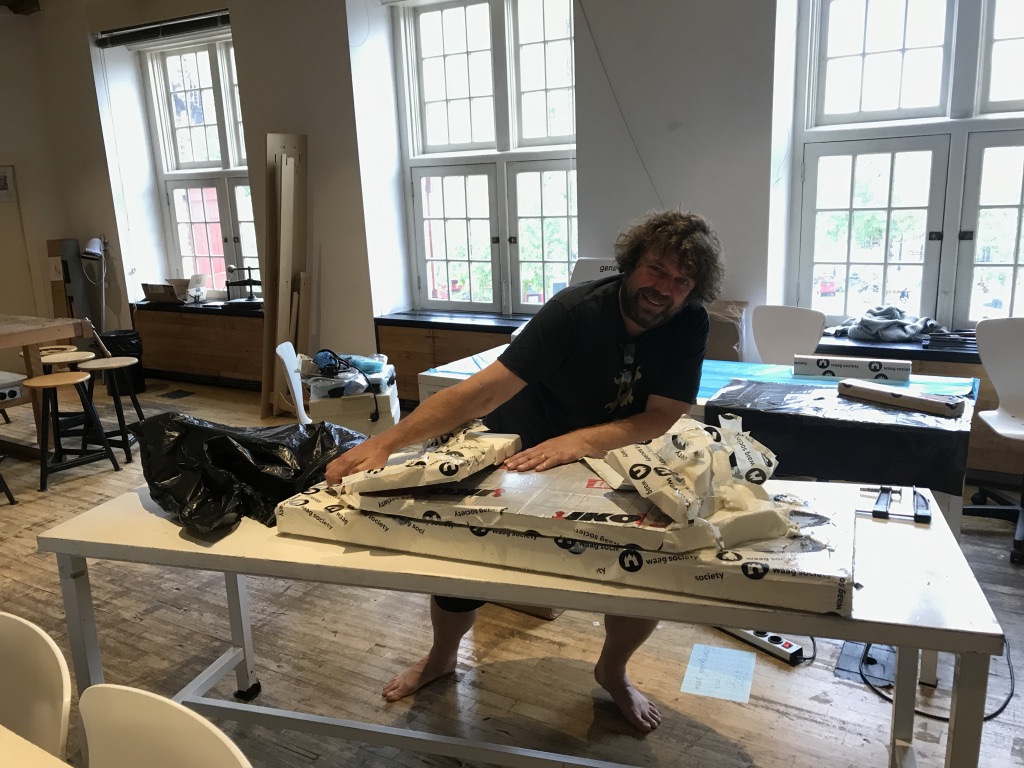
Riding the board
After a bit of disapointment on the final results I dried my tears and decided to quickly mount the wheels and electronics to the board. It rides wonderfully and works perfectly. It's a bit heavy, the thickness is comparable to other longboards but since it's quite large and has a lot of electronics it's quite heavy. All together I am really excited about the board!
Issues
- The tension in the foam was pretty hefty. This made it difficult to clamp the two pieces together. Also during the milling the boards became a bit undone from the spoilboard.
- During the group assignment we did a test to see if epoxy would stick to the tape. Since it didn't stick I covered my foam with the tape. As you can see in the final result some parts of the tape did glue to the epoxy. This is probably because the tape was attatched to foam (weak bond) and not to wood (stronger bond).
- Milling took a bit longer because of the finishing. In the end I tried to sand the foam and it was super soft. In retrospect I could have tried a larger step over and do some hand sanding afterwards.
- Tape - use cheap plastic tape without prints on it. Also if time allows cover the foam mold with some PVA spray to create a better adhesion layer for the tape.
- Offset between molds. I accounted for space around the board but not anywhere else. The two parts of the molds were very tightly fitted. A 3mm gap inbetween contact areas would've been nice.
Pro tip : Have fun!
Previous board
A year ago I made this - non electric - carver. It was my first experience making a board. It was made using milling, lasercutting and 3D printing. The board itself was 2D, this is why for the wildcard week I wanted to try and make a 3D shape.