Final Project: E3 - EngraveCube
DOWNLOAD
Design
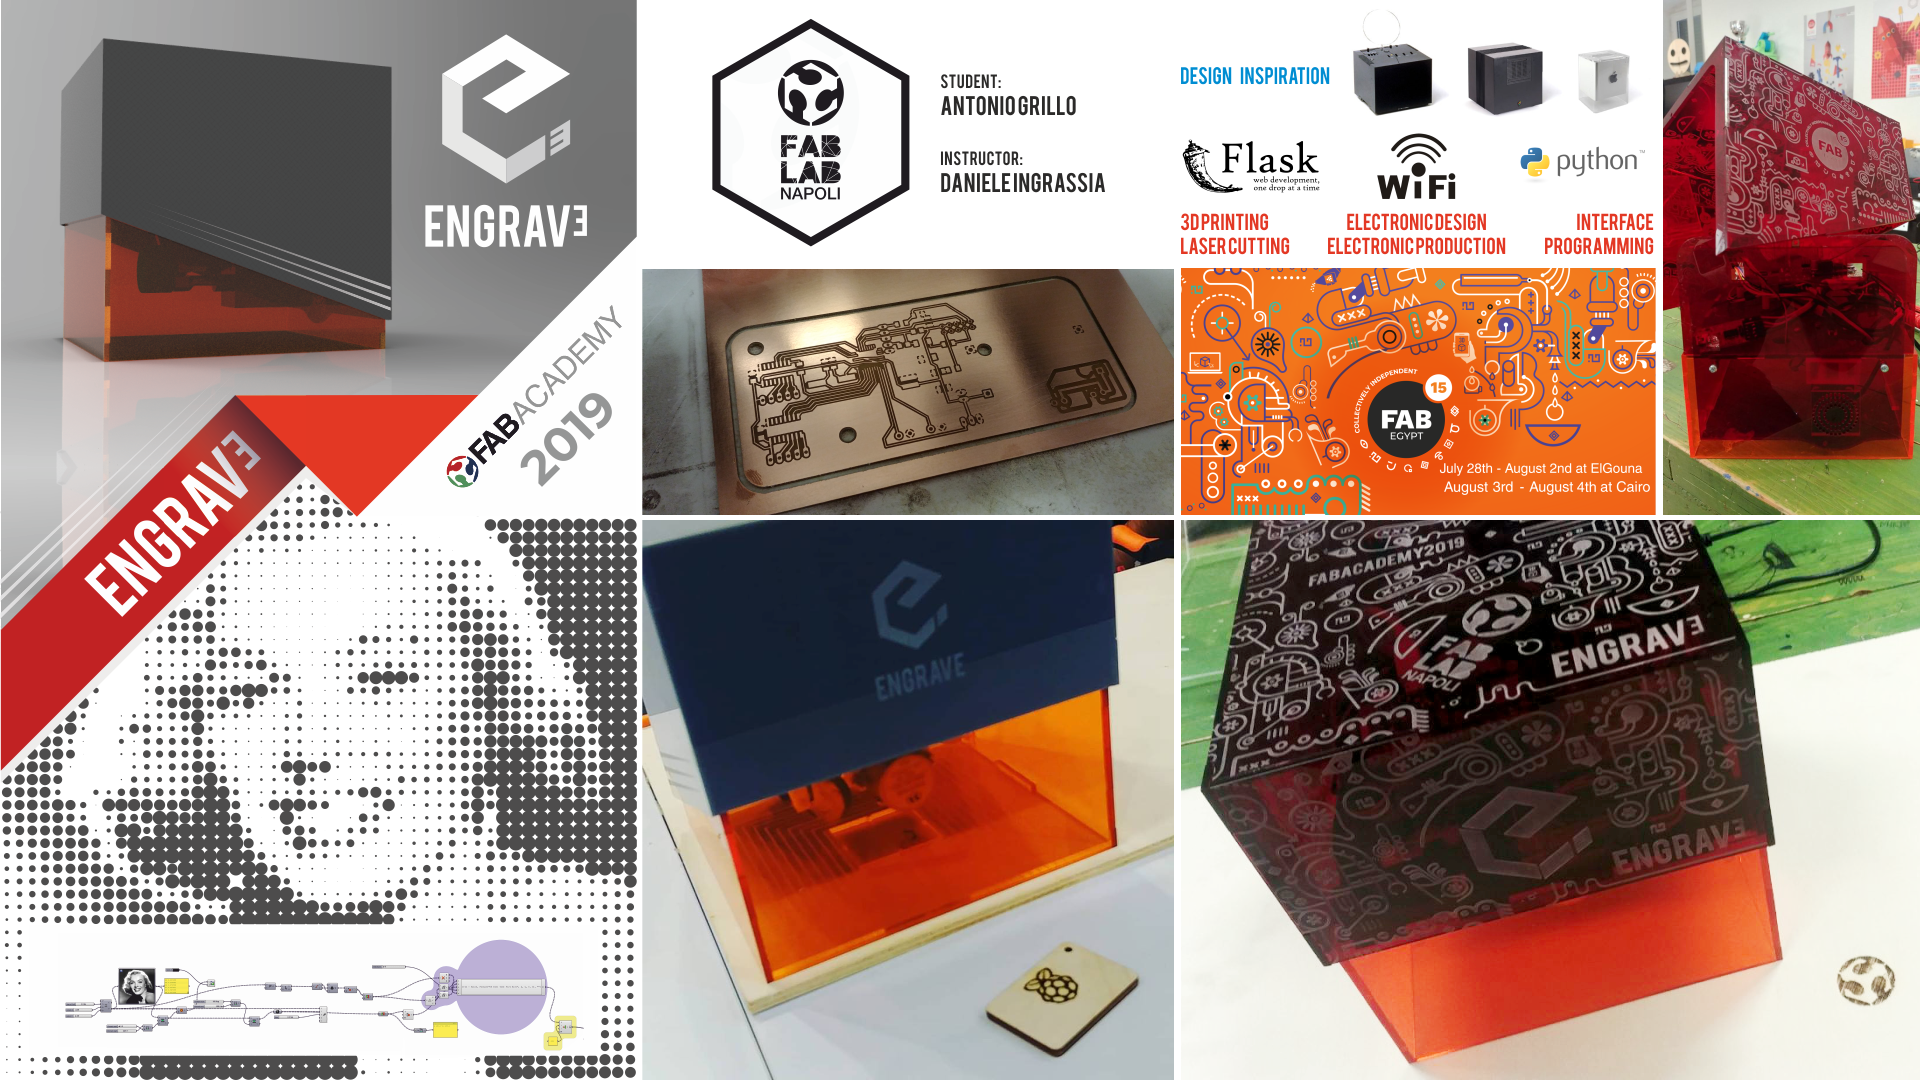
Inspired from the evolution of the media devices and personal computer …
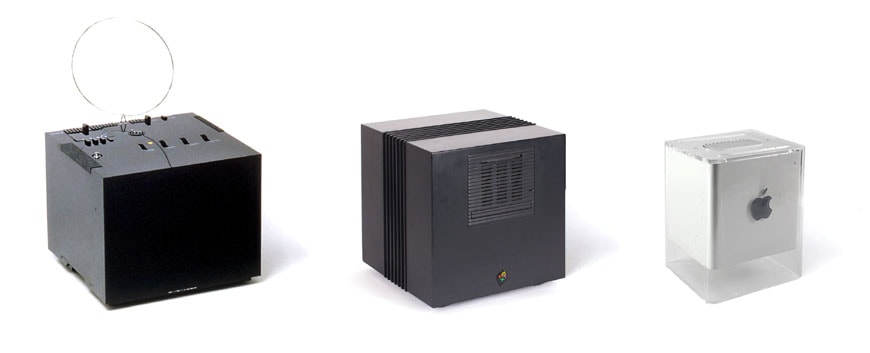 Evolution of the species? From left to right: TV Brionvega 201, 1969 (design: Richard Sapper, Marco Zanuso); a NeXT Cube workstation, 1986 (design: Harmut Esslinger); Power Mac G4 Cube, 2000 (design: Jonathan Ive / Apple Design Team)
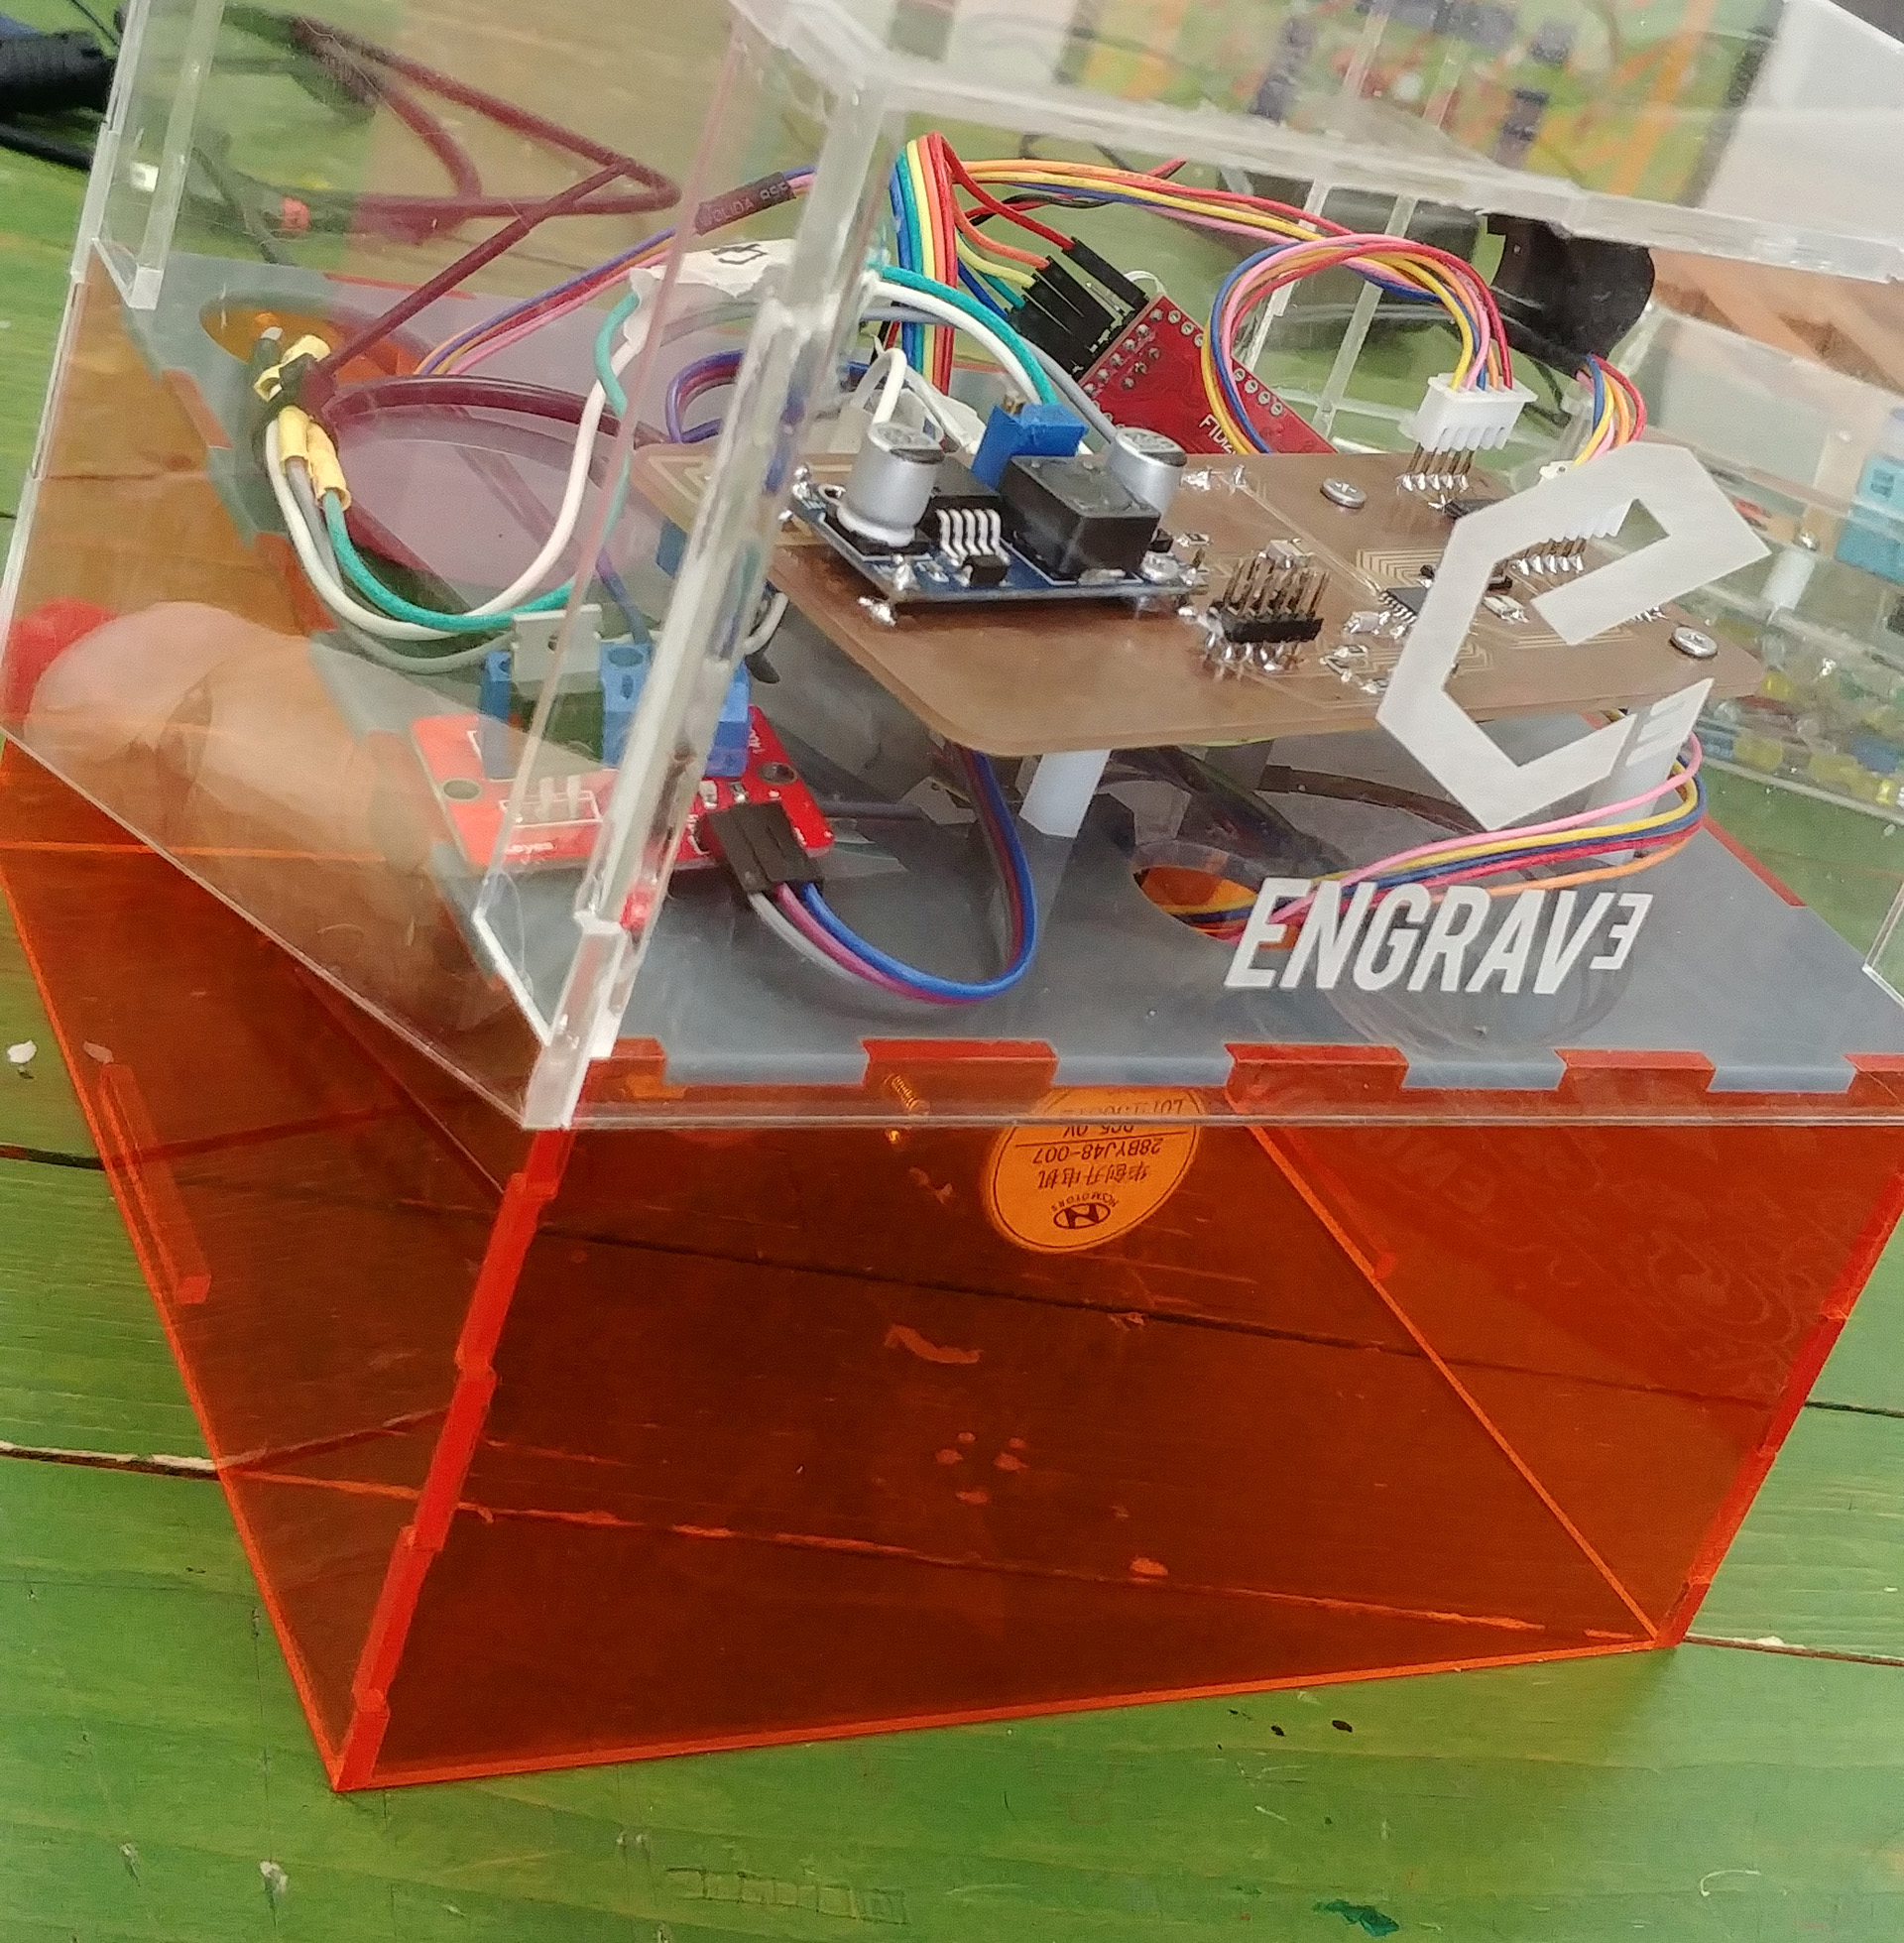
“E3 - EngraveCube” is a little 6” Cube Engraver Machine.
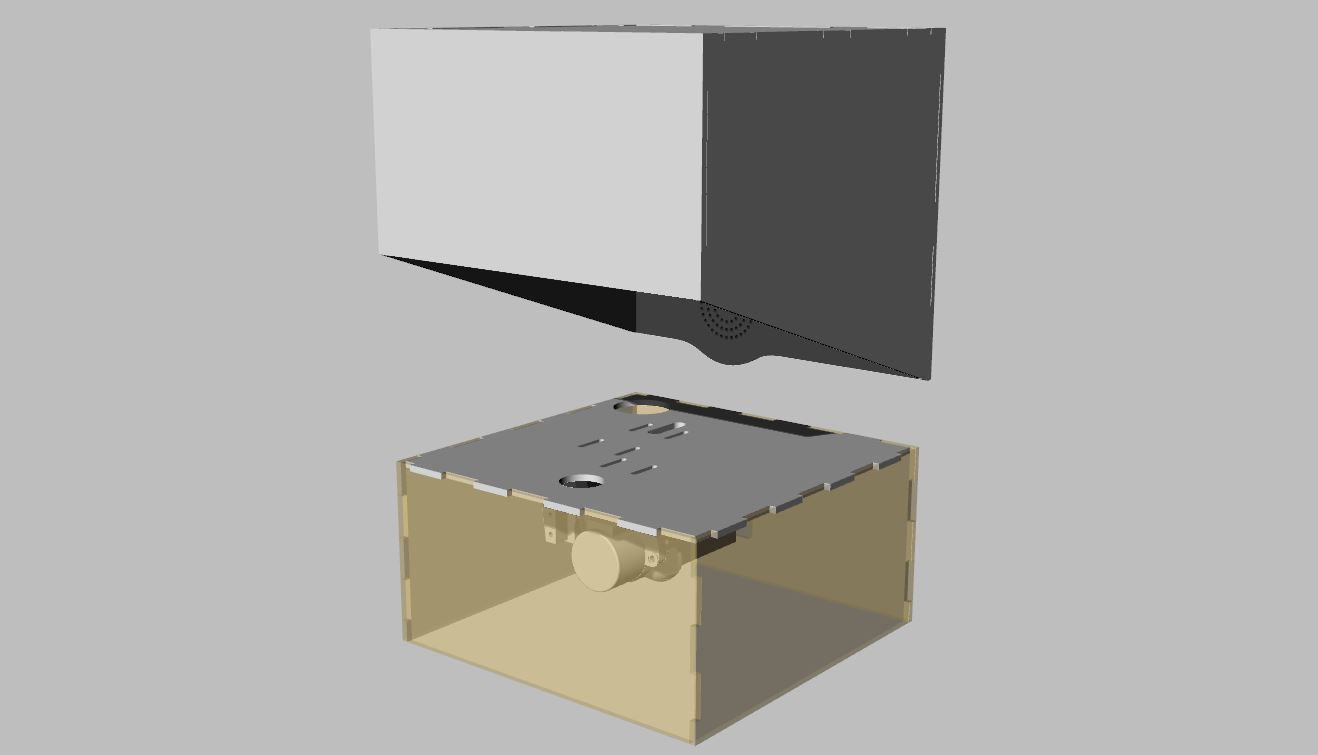
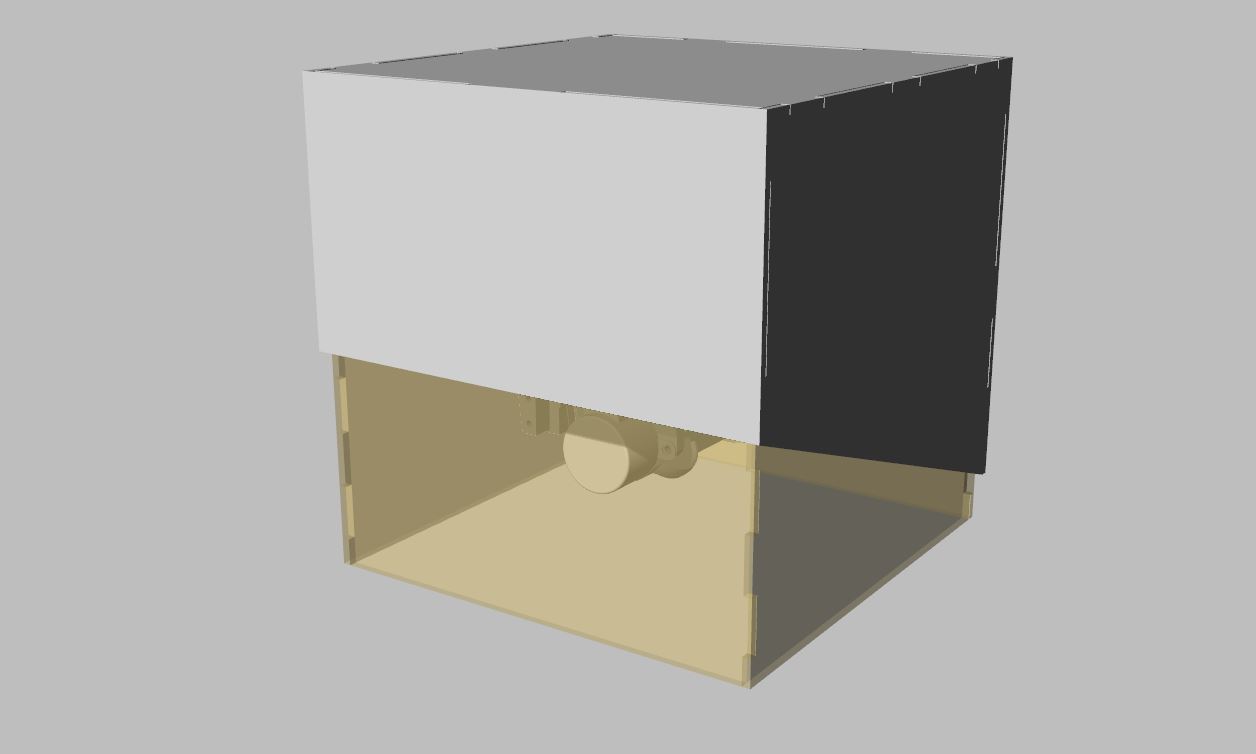
The aesthetic design of the “E3 - EngraveCube” hereafter E3 is characterized by two main parts in PMMA, and mechanical parts are made in ABS, or PLA if you want, and making stable system that support motors, endstops, laser and mirrors:
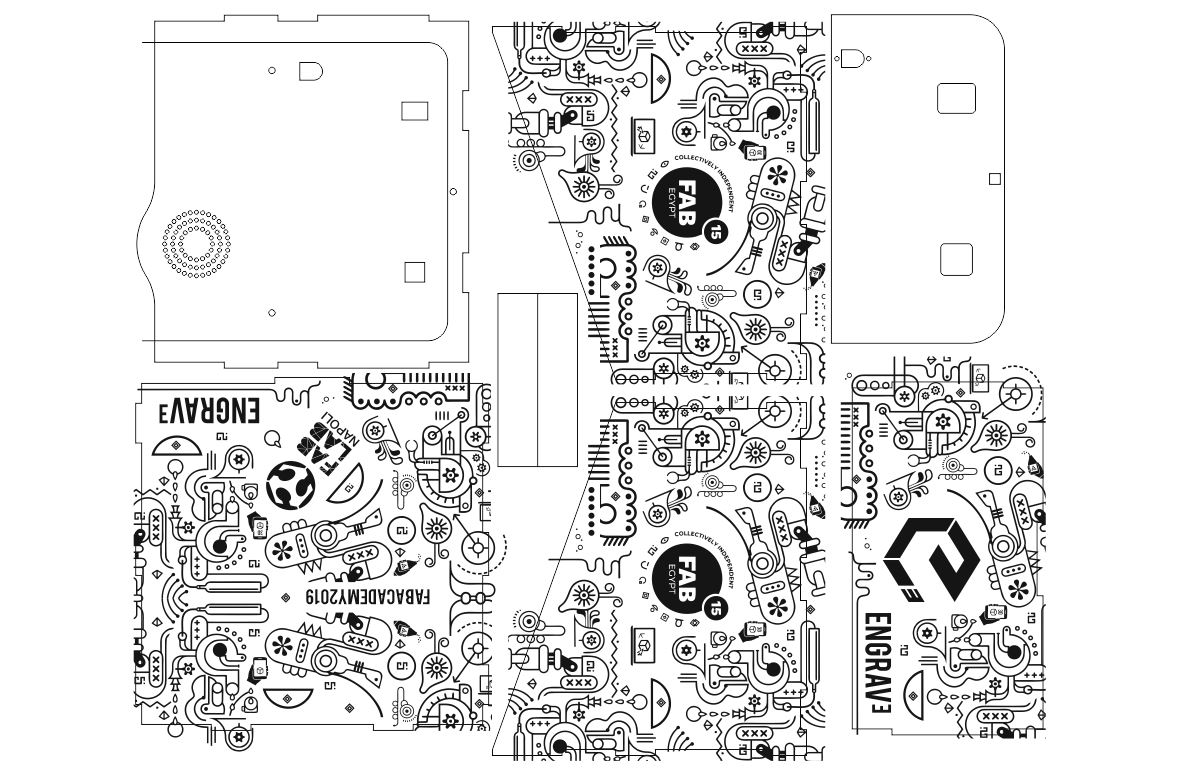
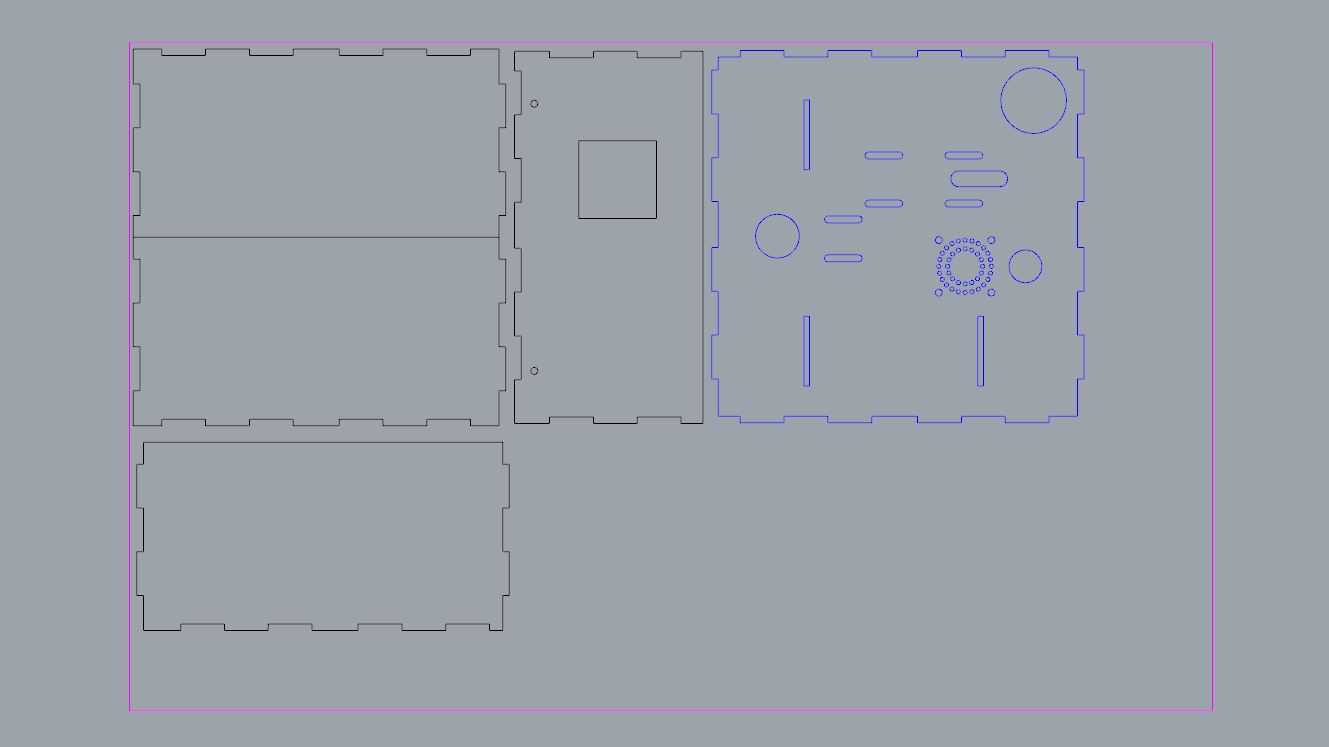
Upper Section - Lasercutting - PMMA 3mm
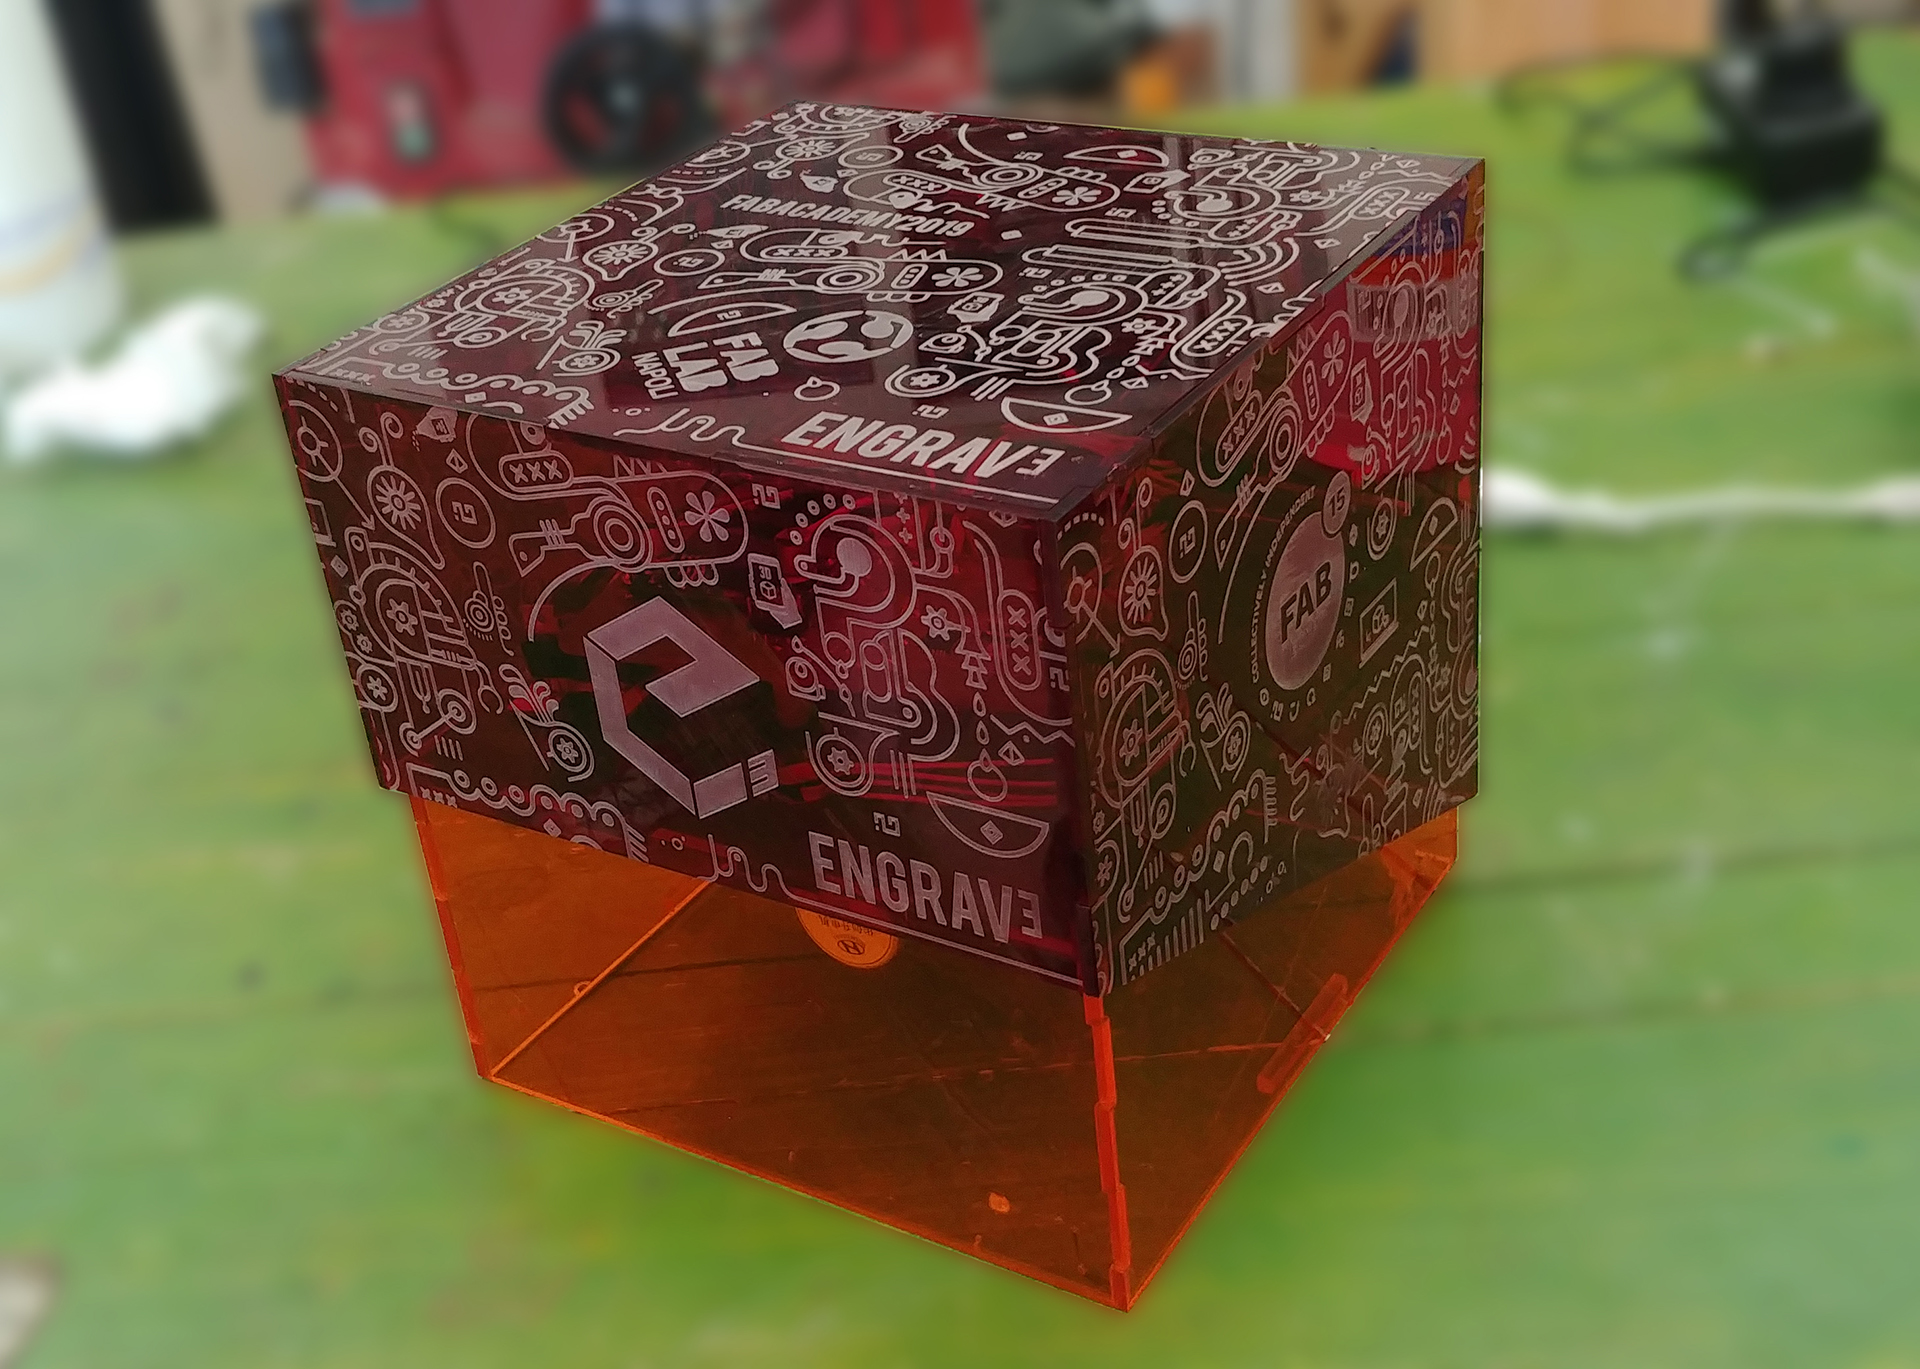
The upper part is only aesthetic and contains the electronics; this part, for the fabacademy release, is inspired by the graphic layout of the Fab15 conference,
 and I’ve made it in semitransparent red with images engraved on every side.
on the rear side you can find the holes for external components, such as power supply IN adapter, on/off switch and red RESET button.
After cloned the repo or downloaded the whole Project folder, you can find the files to engrave and cut in
and I’ve made it in semitransparent red with images engraved on every side.
on the rear side you can find the holes for external components, such as power supply IN adapter, on/off switch and red RESET button.
After cloned the repo or downloaded the whole Project folder, you can find the files to engrave and cut in E3_Design/AI/. The parts to gluing needed to upper section are stored in top_3mm.AI, well remember to cut only 3mm materials.
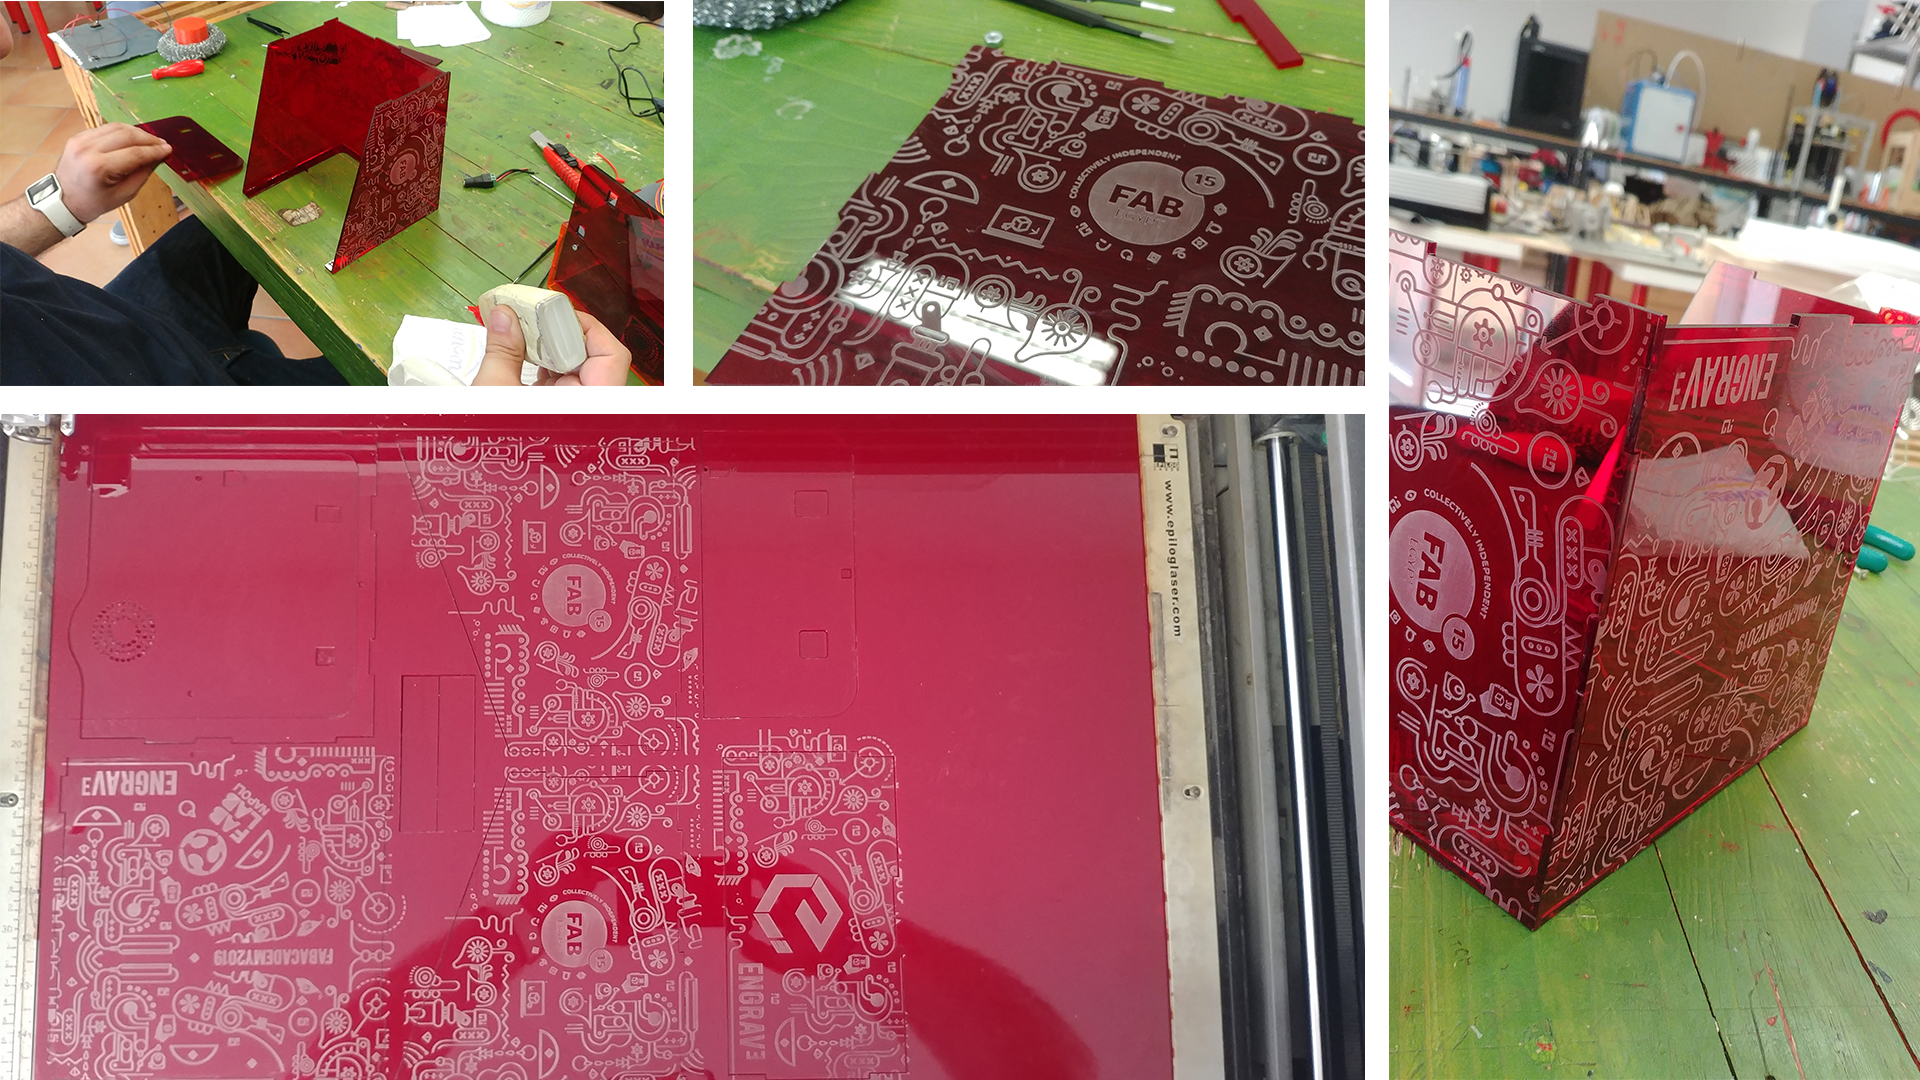
 after jobs are finished and assembling pices with glue.
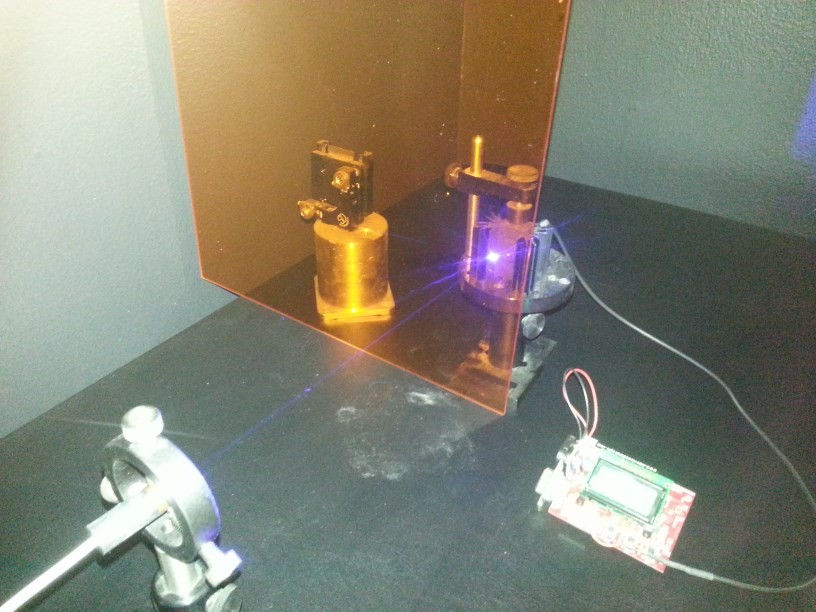
Bottom Section - Lasercutting - PMMA OD3+ filter 3.175mm
The bottom part is a 250nm to 520nm Laser Shielding.
Warning
Do not operate lasers without correct protective equipment and training. Laser Safety Shielding is not intended to replace laser protective eyewear (laser glasses or laser goggles) or other laser safety products that maybe required.
You can buy the filter panel here
| Thickness: | 1/8″ (0.125″) (3.175mm) |
| Weight: | 12 oz |
| Wavelength Range: | 250nm to 520nm |
| Visible Light Transmittance: | >55% |
| Optical Density: | 3 (OD 3+) |
| Attenuation: | 10-3 < N% < 10-4 |
You can find the files to cut in E3_Design/AI/. The parts to gluing needed to bottom section are stored in bottom_uvplex_3.175mm.ai, well remember to cut only 1/8” materials.
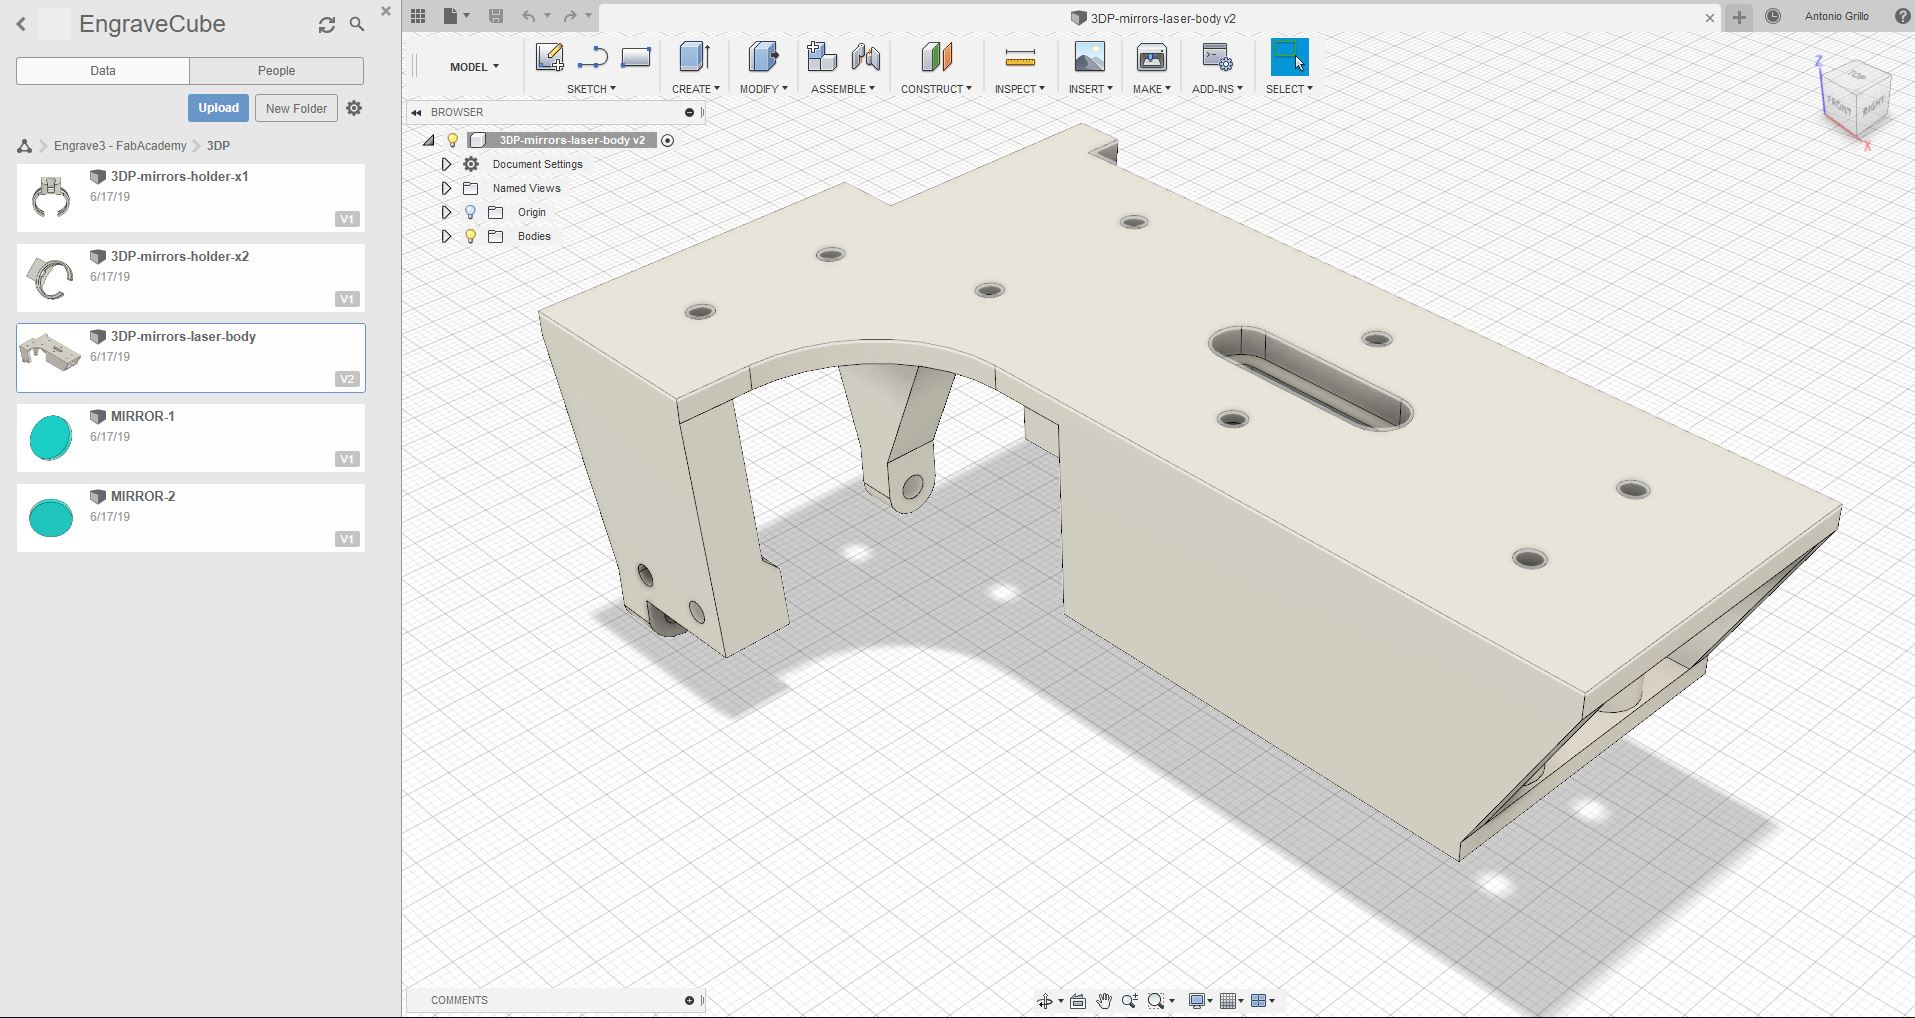
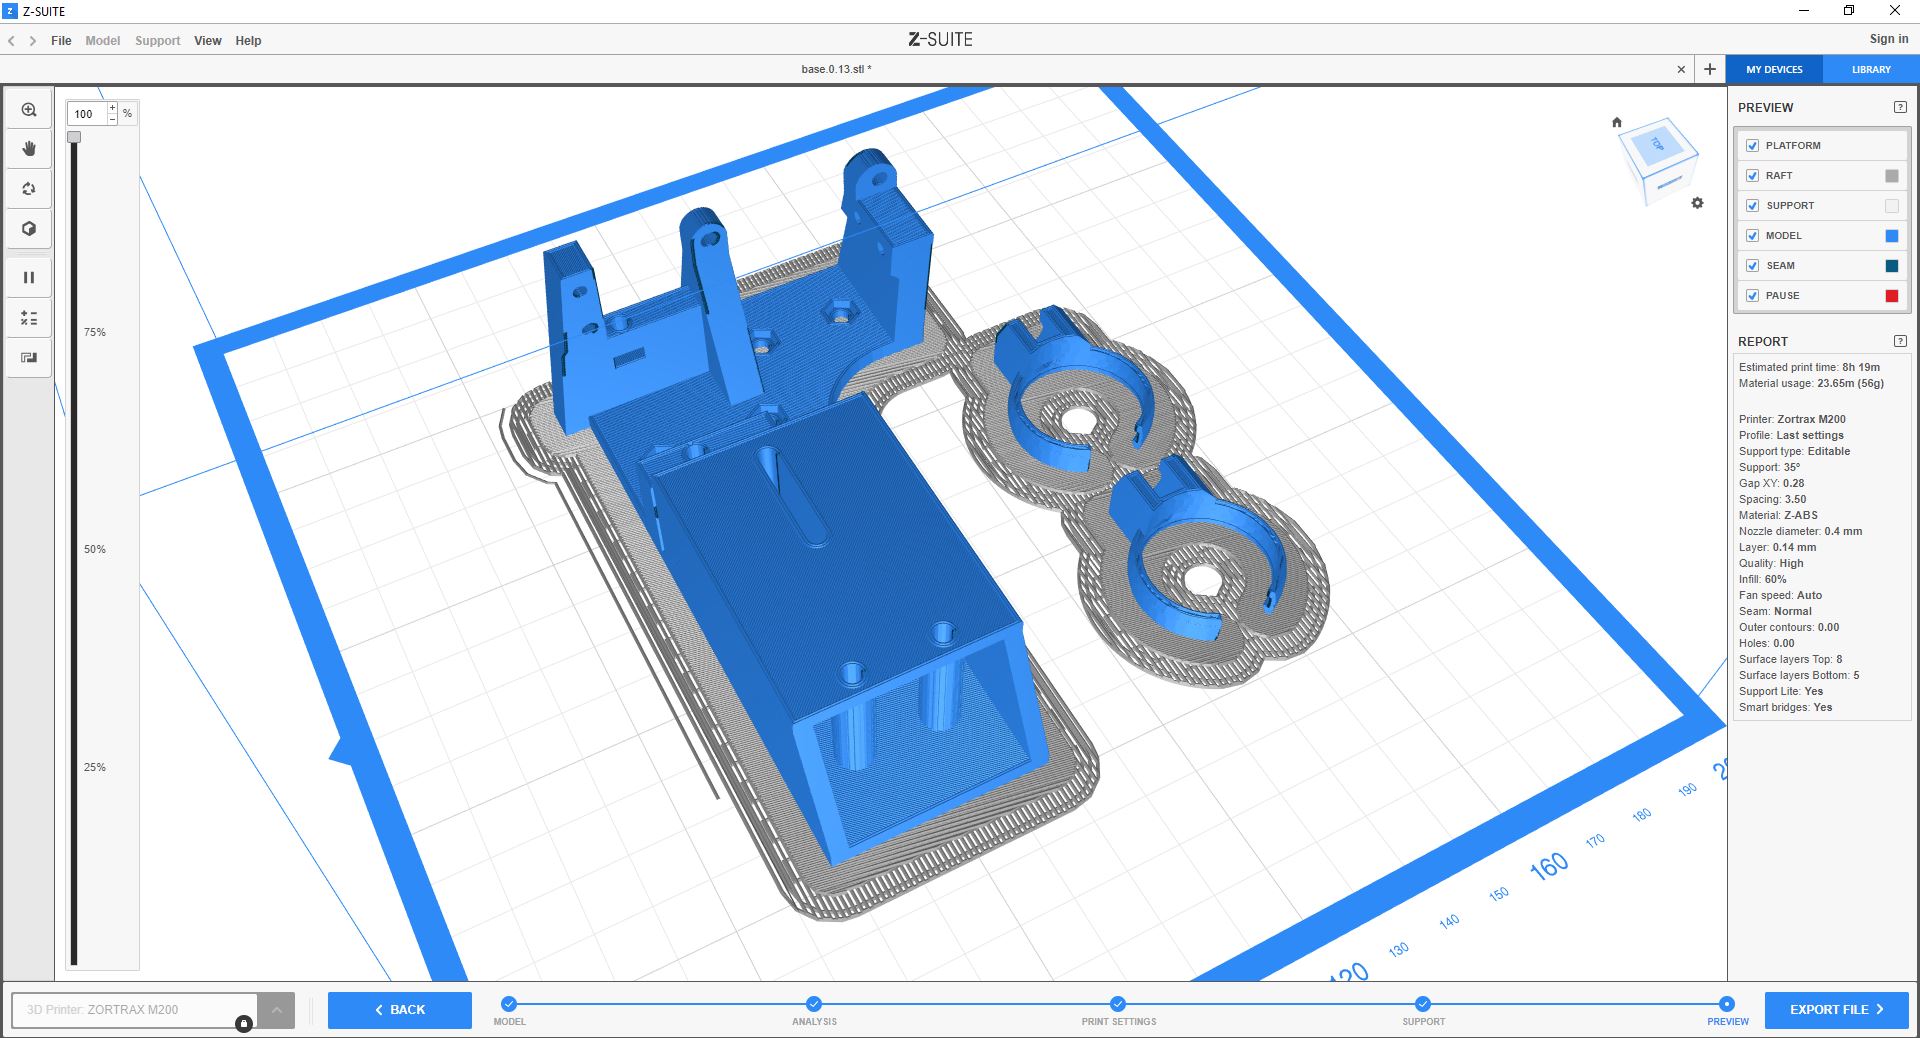
Mechanical Parts - 3D Printing - ABS or PLA
Inside Assembly.f3z archive in E3_Design/src/E3_018_001/ folder you can find and export in .STL the following parts:
Main Support
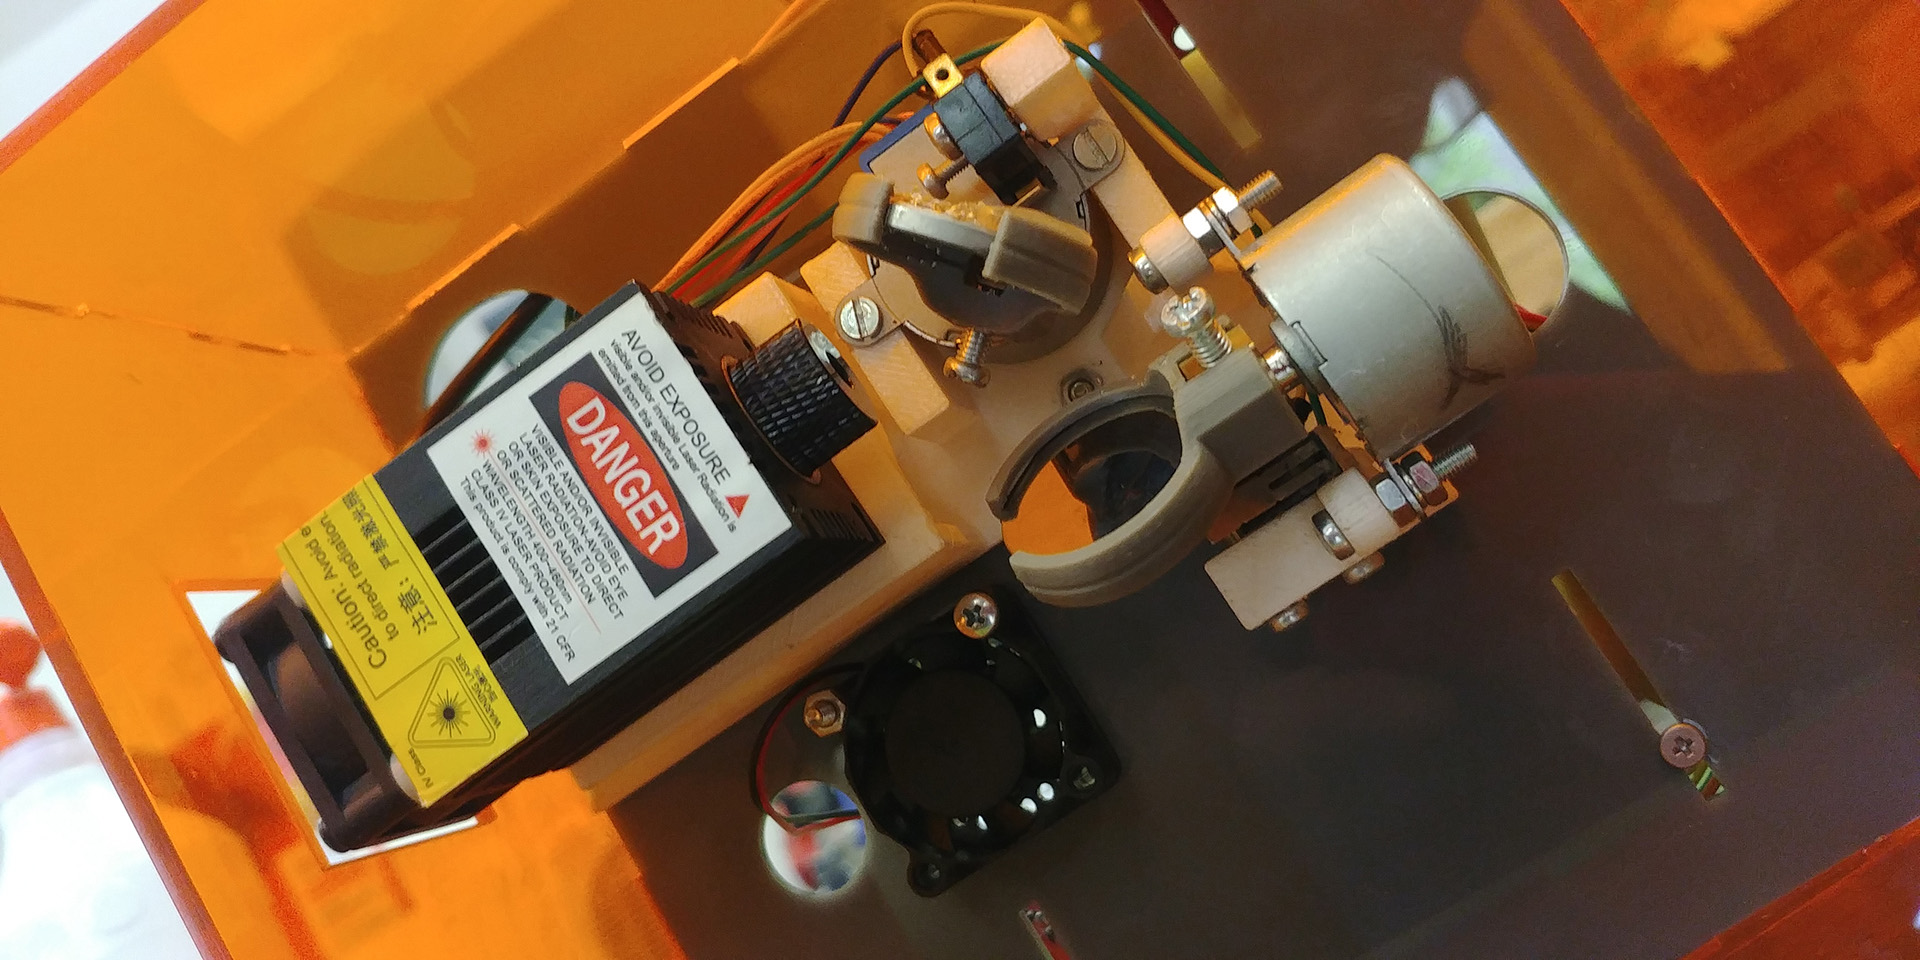
The main support is used to mount the two unipolar 28BYJ-48-5V stepper motors, the two endstop switches and the laser source.
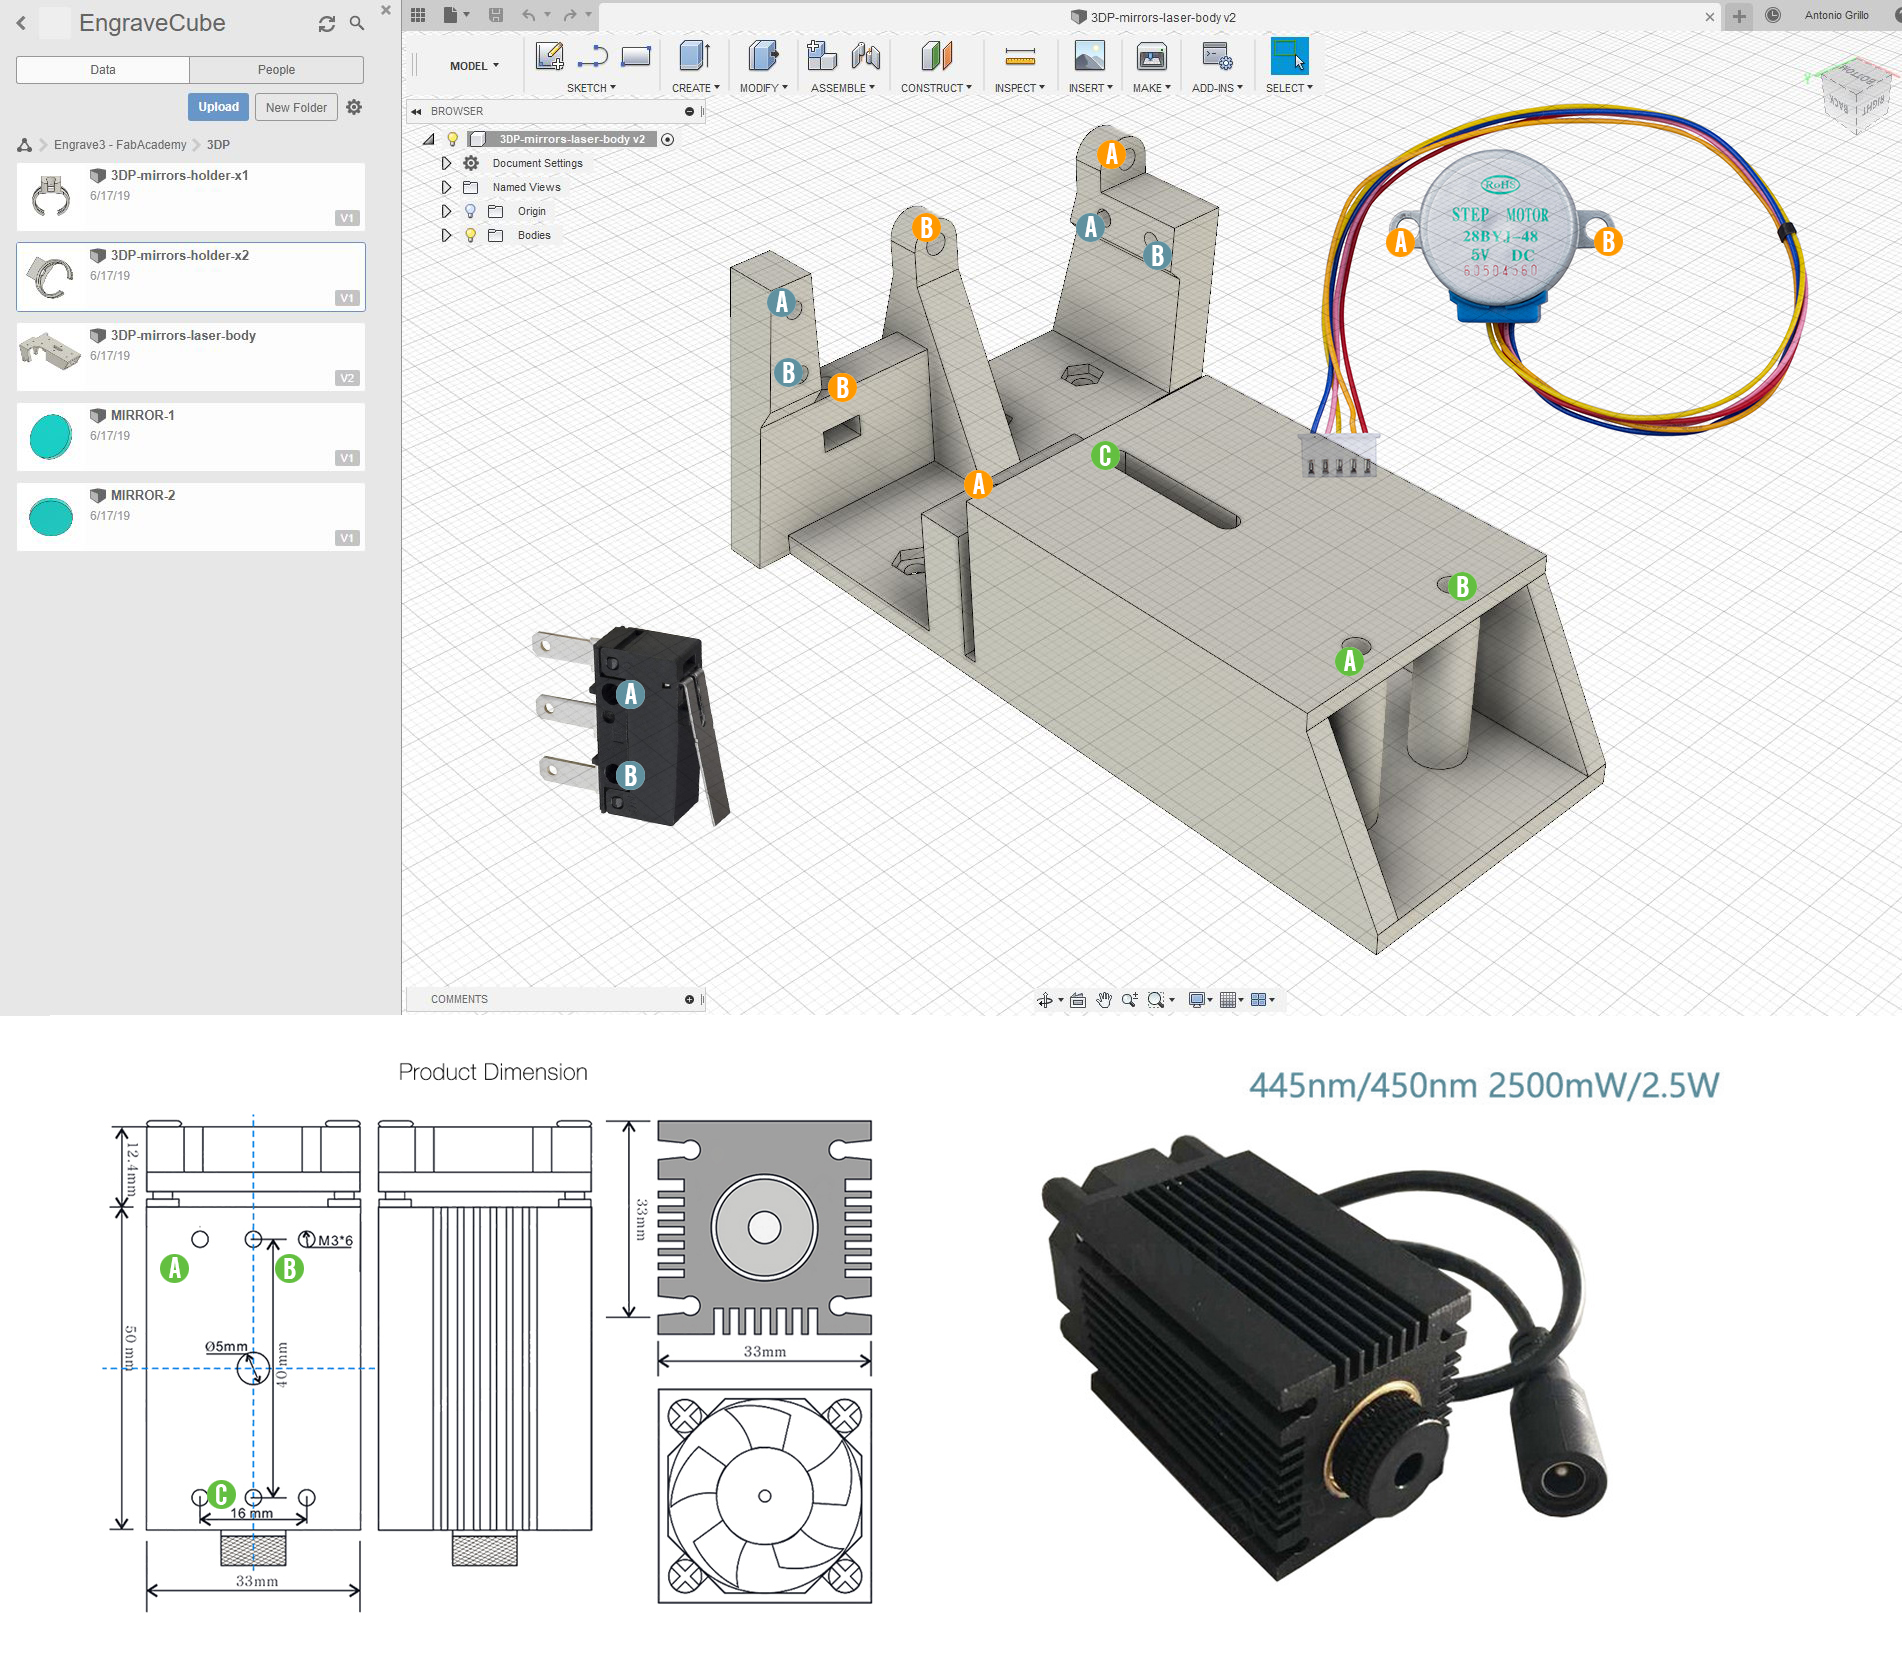
Mirror Holders
This part must be printed x2 and is used to mount the two molibdenum mirrors
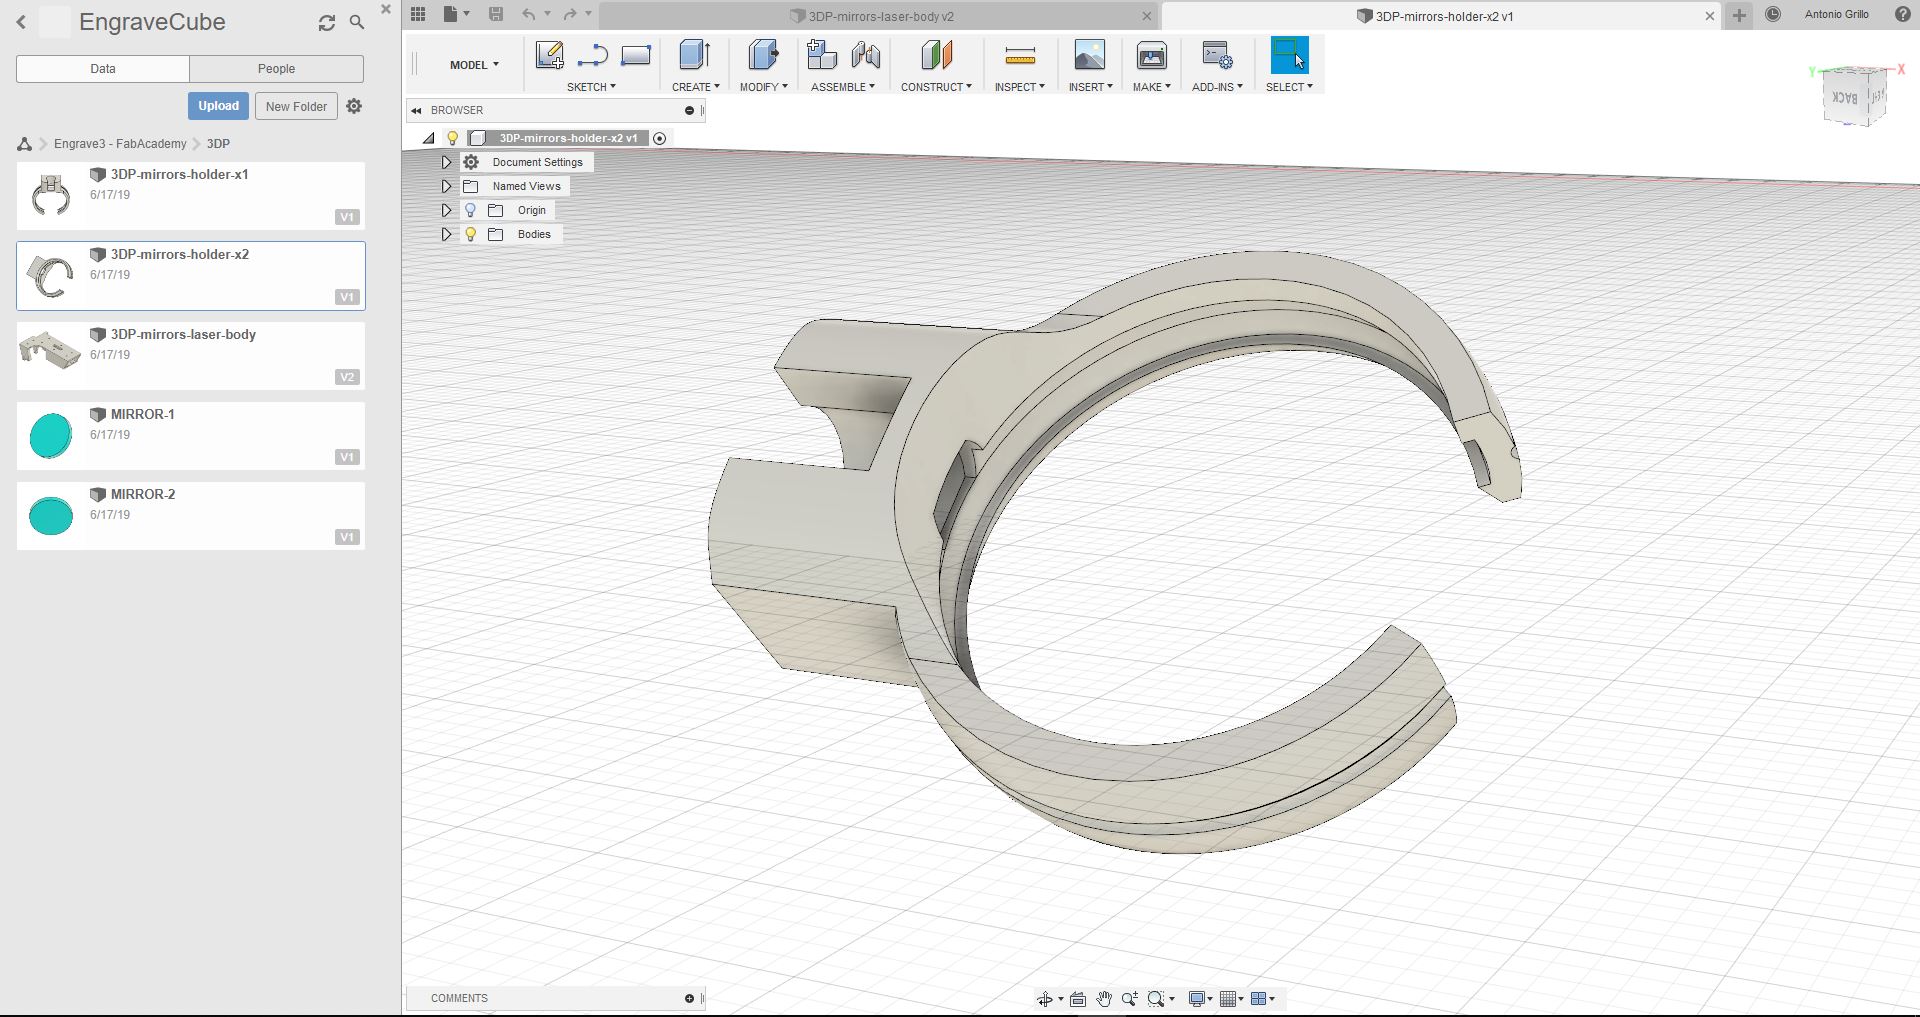
I’ve designed the pieces to 3D print without supports, saving time and material
Assemby the parts
At this point I’ve produced the necessary mechanical parts to assembly the machine.
Proceeding as you see below:
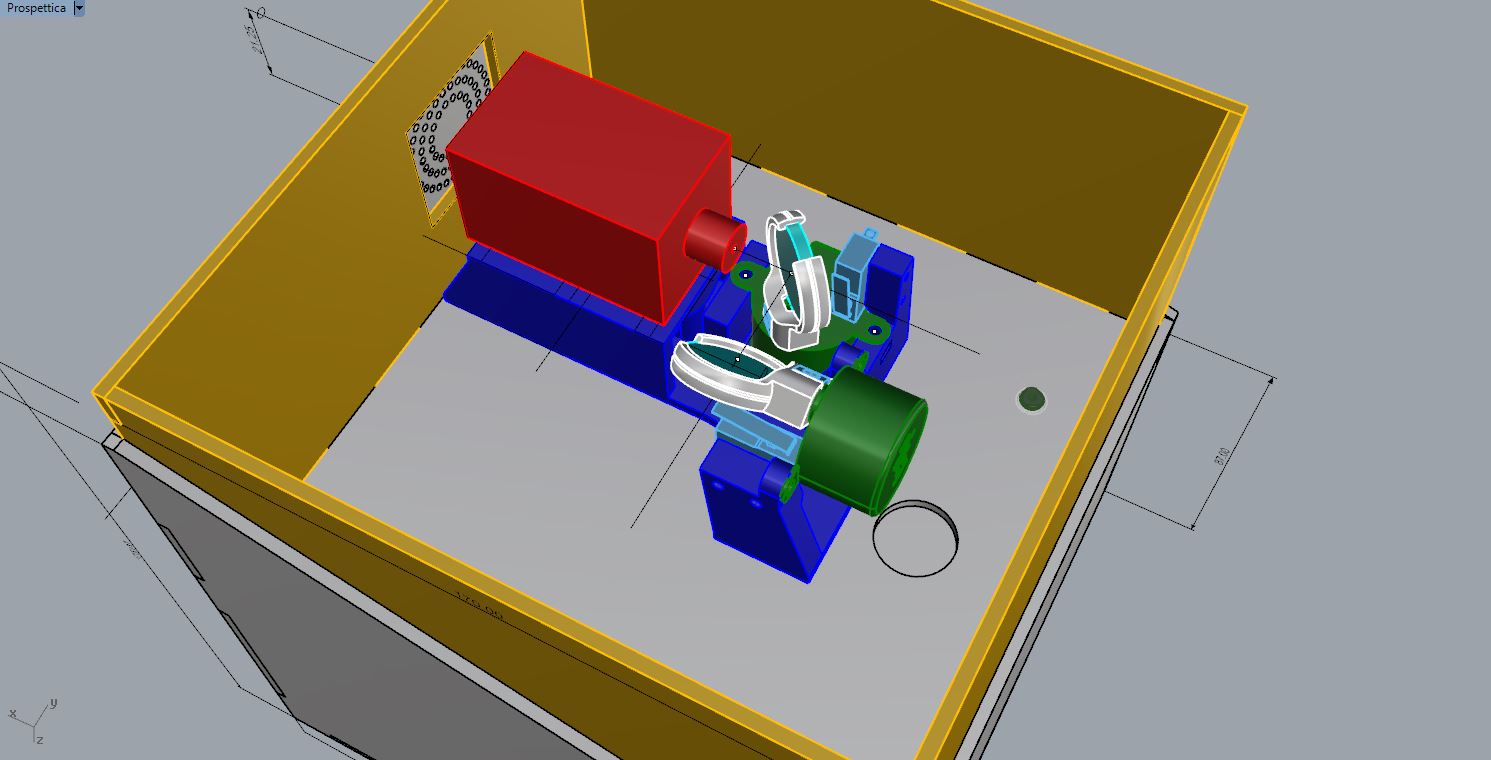
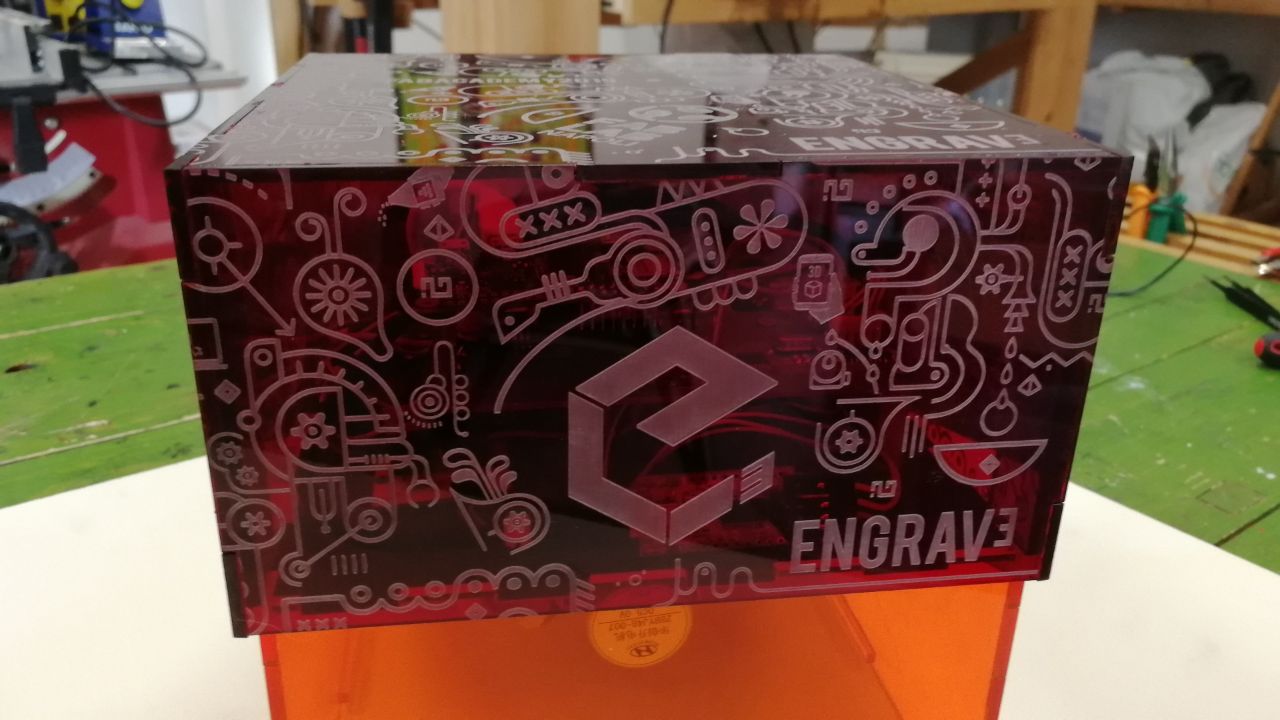
Final results
Electronic Design and Production
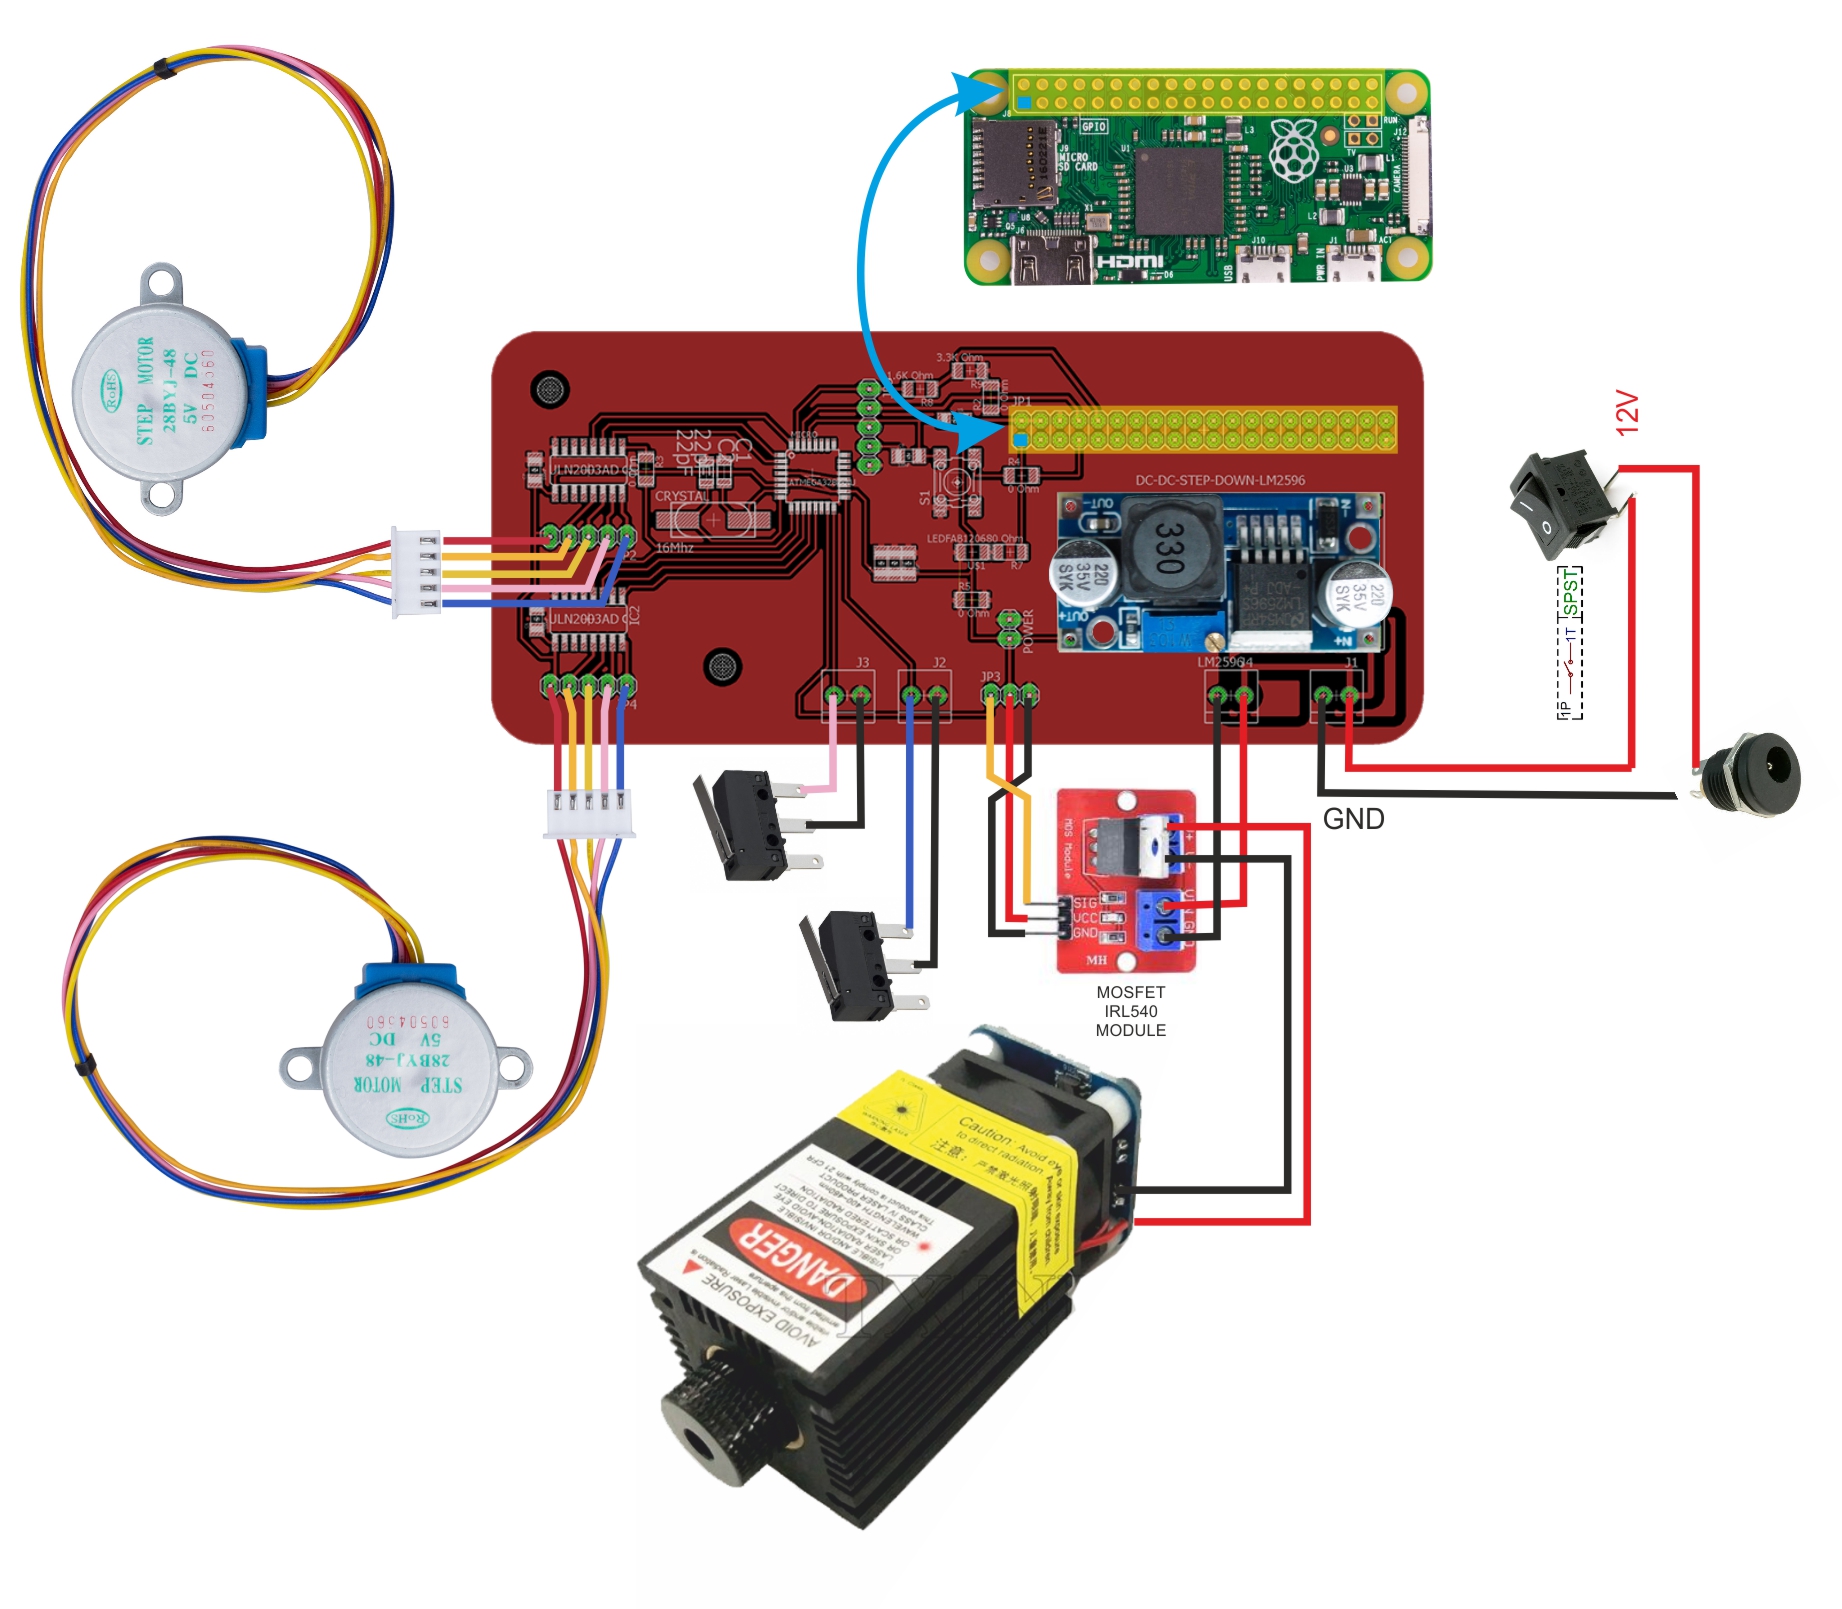
Here I want show you how to make connection after you have produced the main board. The main documentation on this topic is in E3_ElectronicDesign folder.
Well, here the table connections:
Software Configuration Guide
Configuration of the Raspberry Pi W
Download and installation of the S.O.
Although the download and installation of Raspbian can be performed without the use of specific tools, it is much easier to proceed through the application PiBakery. PiBakery allows you to install Raspbian Desktop or Lite on Rapsberry Pi devices and perform some basic initial configurations using an intuitive Blockly style interface from Google.
Wifi network configuration.
Manual Wifi configuration
Mount the micro SD card from PC / MAC. In the root directory of the only visible partition (boot) create a new text file and rename it to wpa_supplicant.conf (be careful to also replace the .txt extension).
Edit the file with the newly created file with notepad entering the following lines of code.
country = EN
ctrl_interface = DIR = / var / run / wpa_supplicant GROUP = netdev
update_config = 1
network = {
SSID = "dlink-7fC2"

psk = "knupv45211"

key \ _mgmt = WPA-PSK
}
The wpa_supplicant.conf file will automatically be moved to the system configuration directory on the first reboot.
SSH service configuration
Mount the micro SD card from PC / MAC. In the root directory of the only visible partition (boot) create a new text file and rename it to ssh (be sure to delete the ssh extension).
Basic system configuration (raspi-config)
Several basic changes to the system configuration can be made through the raspi-config utility.
To start the system configuration utility launch the following command from the prompt:
sudo raspi-config
Change user password pi
From the main menu of raspi-config select the item Change User Password, answer ok to the following indications, enter the new password followed by the Enter key, confirm (re-enter the new password) followed by Enter key
Modify system identifier (Hostname)
From the main menu of raspi-config select the item Network Options -> Host Name and specify a name for the device (eg EngraveCube).
At this point the RPi should be reachable with the identifier <assigned-name> .local
Enable the PiCamera
From the main menu of raspi-config select the item Interfacing Options -> P1 Camera and answer Yes to the next question.
Once the configuration operations are complete, it is advisable to restart the system as required by raspi-config
Update of apt repositories and installed packages
Before proceeding with the installation of the various utilities and applications necessary for the EngraveCube, it is advisable to update the APT repository index with the command
sudo apt-get update
sudo apt-get upgrade
Prerequisite installation (packages and applications)
Embedded software in EngraveCube requires the installation of some applications to work properly.
Installation of Python and PiP
The E³ webUI was developed with Python 2 and in particular the use of Python versions 2.7.14 or higher is recommended.
To verify the presence of Python 2 and specifically the installed version launch the python -V command (capital V).
To simplify the access of the Python modules necessary to E³, it is necessary to install the Python package installer (pip) module which allows access to the Python Package Index (PyPI).
To install pip we use the following command, answering Yes to the request to install any other dependent packages:
`
sudo apt-get install python-pip
To verify the correct installation of pip we run thepip -Vcommand (capital V) which should return the client version to PyPI installed.
Thepip list` command allows us to view the list of installed python modules and their versions.
PiCamera installation and configuration.
Python modules for the PiCamera
Rpi provides a specific picamera library for capturing and manipulating images and videos with the PiCamera through Python scripts.
The module is not installed natively and must therefore be downloaded via pip with the sequence of commands:
sudo pip install setuptools
sudo pip install picamera
picamera module follow the [tutorial] (https: //projects.raspberrypi.org/en/projects/getting-started-with-picamera) of RPi foundation.
Streaming Picamera on the web - Jackson Liam mjpg-streamer.
Jackson Liam has developed a fork of the project [mjpg-streamer] (http: //sourceforge.net/projects/mjpg-streamer/) specific to the Rpi PiCamera and made it available on [Githab] (https: // github .com / jacksonliam / mjpg-streamer )
mjpg-streamer a CLI application that can be used to send a stream of JPEG files on an IP network from a webcam (PiCamera) to various types of viewers such as Chrome, Firefox, Cambozola, VLC, mplayer, and other software capable of receive such image streams.
In order to be used, the application must be recompiled from the sources available via GitHub. To be able to compile and install the package you need to get the cmake tool and the libjpeg8-dev library with the command (accept the installation of the various dependencies):
sudo apt-get install cmake libjpeg8-dev
git clone https://github.com/jacksonliam/mjpg-streamer.git
mjpg-streamer directory in our root directory. We enter the folder and start the compilation and installation process:
cd mjpg-streamer / mjpg-streamer-experimental /
mkdir _build
cd _build
cmake -DENABLE_HTTP_MANAGEMENT = ON ..
make
sudo make install
At this point mjpg-streamer should be correctly installed, to start it we can run the command
mjpg_streamer -o "output_http.so -w ./www" -i "input_raspicam.so"
LD_LIBRARY_PATH with the command:
export LD_LIBRARY_PATH = / usr / local / lib / mjpg-streamer /
http: // <ip raspberry pi>: 8080 /? Action = stream page
The above command to start streaming must be inserted in a script in order to be automatically started at each restart.
Installation and configuration of the E³ application
Download / Install the E³ application
For the installation of the E³ web application (webUI) we will clone the GitLab repository after having positioned ourselves in our home directory:
cd / home / pi /
git clone https://gitlab.com/fablabnapoli/EngraveCube.git
If not previously configured, the user name and password will be required to access the GitLab platform. We will find a EngraveCube folder in our home directory containing all the data related to E³
Once the download is complete, make executable the startup script of the app.
Installation of the prerequisites
The E³ app relies on some components, modules and libraries that must be installed before it can be started. For this purpose a list of the requirements to be installed using pip has been prepared. To proceed with the installation we start pip, after having positioned ourselves in the folder containing the webUI as shown below:
cd / home / pi / EngraveCube / src / E3_webUI
sudo pip install -r requirements.txt
With the pip list command we can check the version and name of the installed libraries and compare them with those indicated in the requirements file.
List of dependencies:
Pyserial (attention not Serial but PySerial, normally pre-installed)
Pillow (to be installed via APT)
Numpy (to be installed via APT)
Flask
WTForm
Flask-WTF
Some libraries give compilation errors if installed using pip and must be installed via apt:
sudo apt-get install python-numpy
sudo apt-get install python-pil
Installing Arduino RPC drivers (CH340 / 41 UART Drivers)
Reference: [CH340 / 341 UART Driver for Raspberry Pi] (https: //github.com/aperepel/raspberrypi-ch340-driver
The name of the device to point to is / dev / ttyS0 if you have plug the rpi on the mainboard and have enabled the miniUART as mentioned in my previous doc HERE
Firmware Installation on Controller board
In E3-Firmware you can find the .ino file and all necessary dependencies.
Remember that this firmware uses AccelStepper library, and if you have not installed previous, It is mandatory to install before upload the firmware on the board.
My board has external FTDI232 5v serial, well first of all you must Burn a Bootloader from Arduino IDE through by a programmer or Arduino as ISP, than you can plug the FTDI and make the board 100% Arduino compatible, and upload the firmware.
Start
- Power ON the E3
- open a WebBrowser from your smartphone or your PC
- if you know the ip of the raspberrypi, insert it in the url field or search the machine typing EngraveCube.local
- select an image, .jpg / .png / .bmp, and click on Engrave
- if the engraved image is too clear and you want it more marked, before you click on Engrave button you can decrease the engraving speed; the default is 5, you can choosefrom 0 to 10, but for plywood the best results I’ve obtained was made with 3 value.
- Enjoy!! ;)
License
The project is gonna be released in open source to allow everyone to develop new ideas and bring on personal, independent experiments. The licence I’m gonna use is:

This work is licensed under a Creative Commons Attribution-NonCommercial-ShareAlike 4.0 International License.