16. Interface and application programming
This week I wrote an application in Node-RED that interfaces with the Input/Output board I made for week12 “Output device”.
Node-RED
Install the env.
Node-RED runs on the Node.js platform, a cross-platform JavaScript engine. For more information on Node.js, see nodejs.org.
The recommended installer is on the Node.js homepage, and other downloads are available on their download page.
Once Node.js is installed, you should verify that the version is 10.15.1 or higher. Open a Power Shell window, and enter:
node -v
This is the output:
Windows PowerShell
Copyright (C) Microsoft Corporation. Tutti i diritti sono riservati.

PS C:\Users\ntngr> node -v
v10.15.1
PS C:\Users\ntngr> npm --version
6.4.1
PS C:\Users\ntngr>
Install Node-RED
Like Node-RED, Node.js packages are installed with the npm command-line tool. npm is the Node Package Manager, and is typically used to download and install packages from the central Node registry at npmjs.com.
The full Node-RED installation instructions are on their site.
On Windows, from a command-prompt, type:
npm install -g node-red
On Linux, from a terminal window, type:
sudo npm install -g --unsafe-perm node-red
It can take a few moments before much happens. The npm tool will begin to install Node-RED and all of its dependencies.
Enable Projects manager
To enable the projects feature, edit your settings.js file and add the following option within the module.exports block and restart Node-RED.
Note:
The settings.js file exports a JavaScript object. To configure Node-RED you should understand how to modify a JavaScript object by adding new or modifying existing key/value pairs like the editorTheme below.
editorTheme: {
    projects: {
        enabled: true
    }
},
The feature relies on having the git and ssh-keygen command line tools available. Node-RED will check for them on start-up and let you know if they are missing.
Install dependencies
For this project you need to install the dependencies to generate the UI Dashboard and connect the app with serial port of the I/O board.
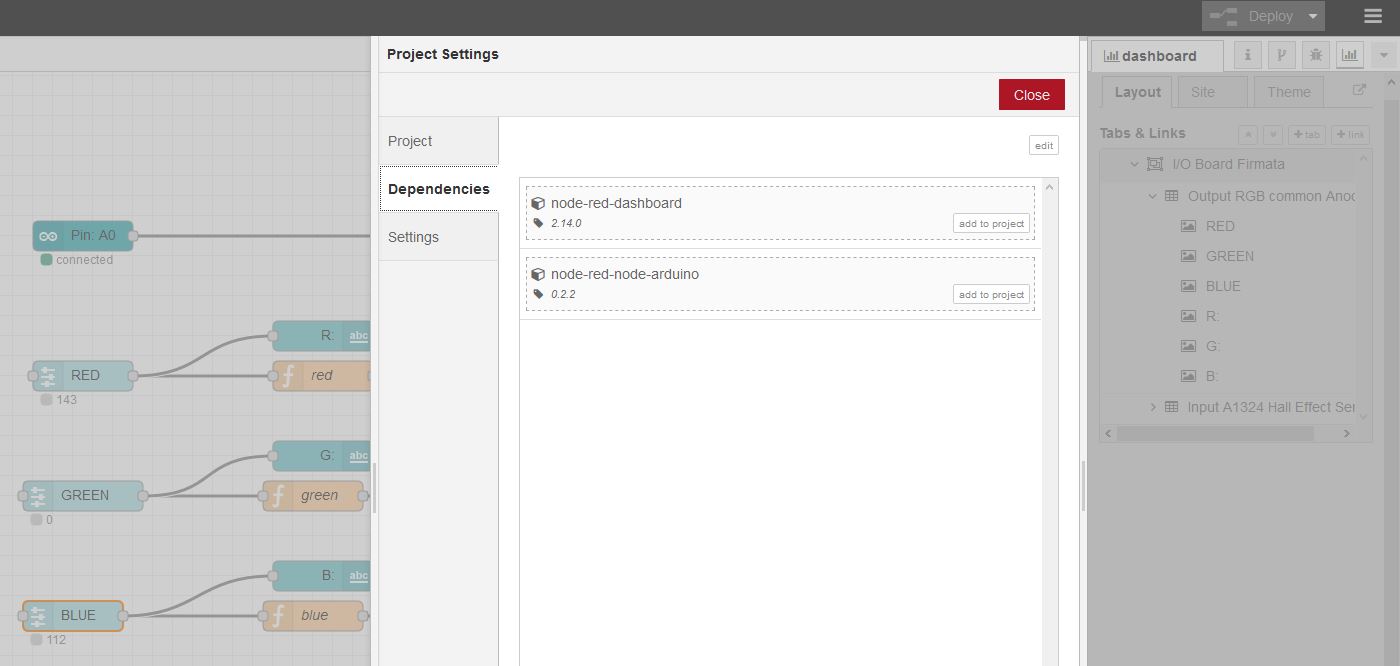
node-red-dashboard
Well, to install the stable version use the Menu - Manage palette option and search for node-red-dashboard, or run the following command in your Node-RED user directory (typically ~/.node-red):
npm install node-red-dashboard
dashboard tab in the right side panel. The UI interface is available at http://localhost:1880/ui (if the default settings are used).
node-red-node-arduino
To install the stable version use the Menu - Manage palette option and search for node-red-node-arduino, or run the following command in your Node-RED user directory, typically ~/.node-red:
npm install node-red-node-arduino
Run Node-RED
Now run Node-RED with:
Windows PowerShell
Copyright (C) Microsoft Corporation. Tutti i diritti sono riservati.

PS C:\Users\ntngr> node-red
12 May 22:18:06 - [info]

Welcome to Node-RED
===================

12 May 22:18:06 - [info] Node-RED version: v0.20.3
12 May 22:18:06 - [info] Node.js  version: v10.15.1
12 May 22:18:06 - [info] Windows_NT 10.0.17134 x64 LE
12 May 22:18:07 - [info] Loading palette nodes
12 May 22:18:08 - [warn] rpi-gpio : Raspberry Pi specific node set inactive
12 May 22:18:08 - [info] Dashboard version 2.14.0 started at /ui
12 May 22:18:08 - [info] Settings file  : \Users\ntngr\.node-red\settings.js
12 May 22:18:08 - [info] Context store  : 'default' [module=memory]
12 May 22:18:08 - [info] User directory : \Users\ntngr\.node-red
12 May 22:18:08 - [info] Server now running at http://127.0.0.1:1880/
12 May 22:18:08 - [info] Active project : interface001
12 May 22:18:08 - [info] Flows file     : \Users\ntngr\.node-red\projects\interface001\flows_interface001.json
12 May 22:18:08 - [info] Starting flows
12 May 22:18:08 - [info] Started flows
12 May 22:18:08 - [error] serial port COM27 error: Error: Opening COM27: File not found
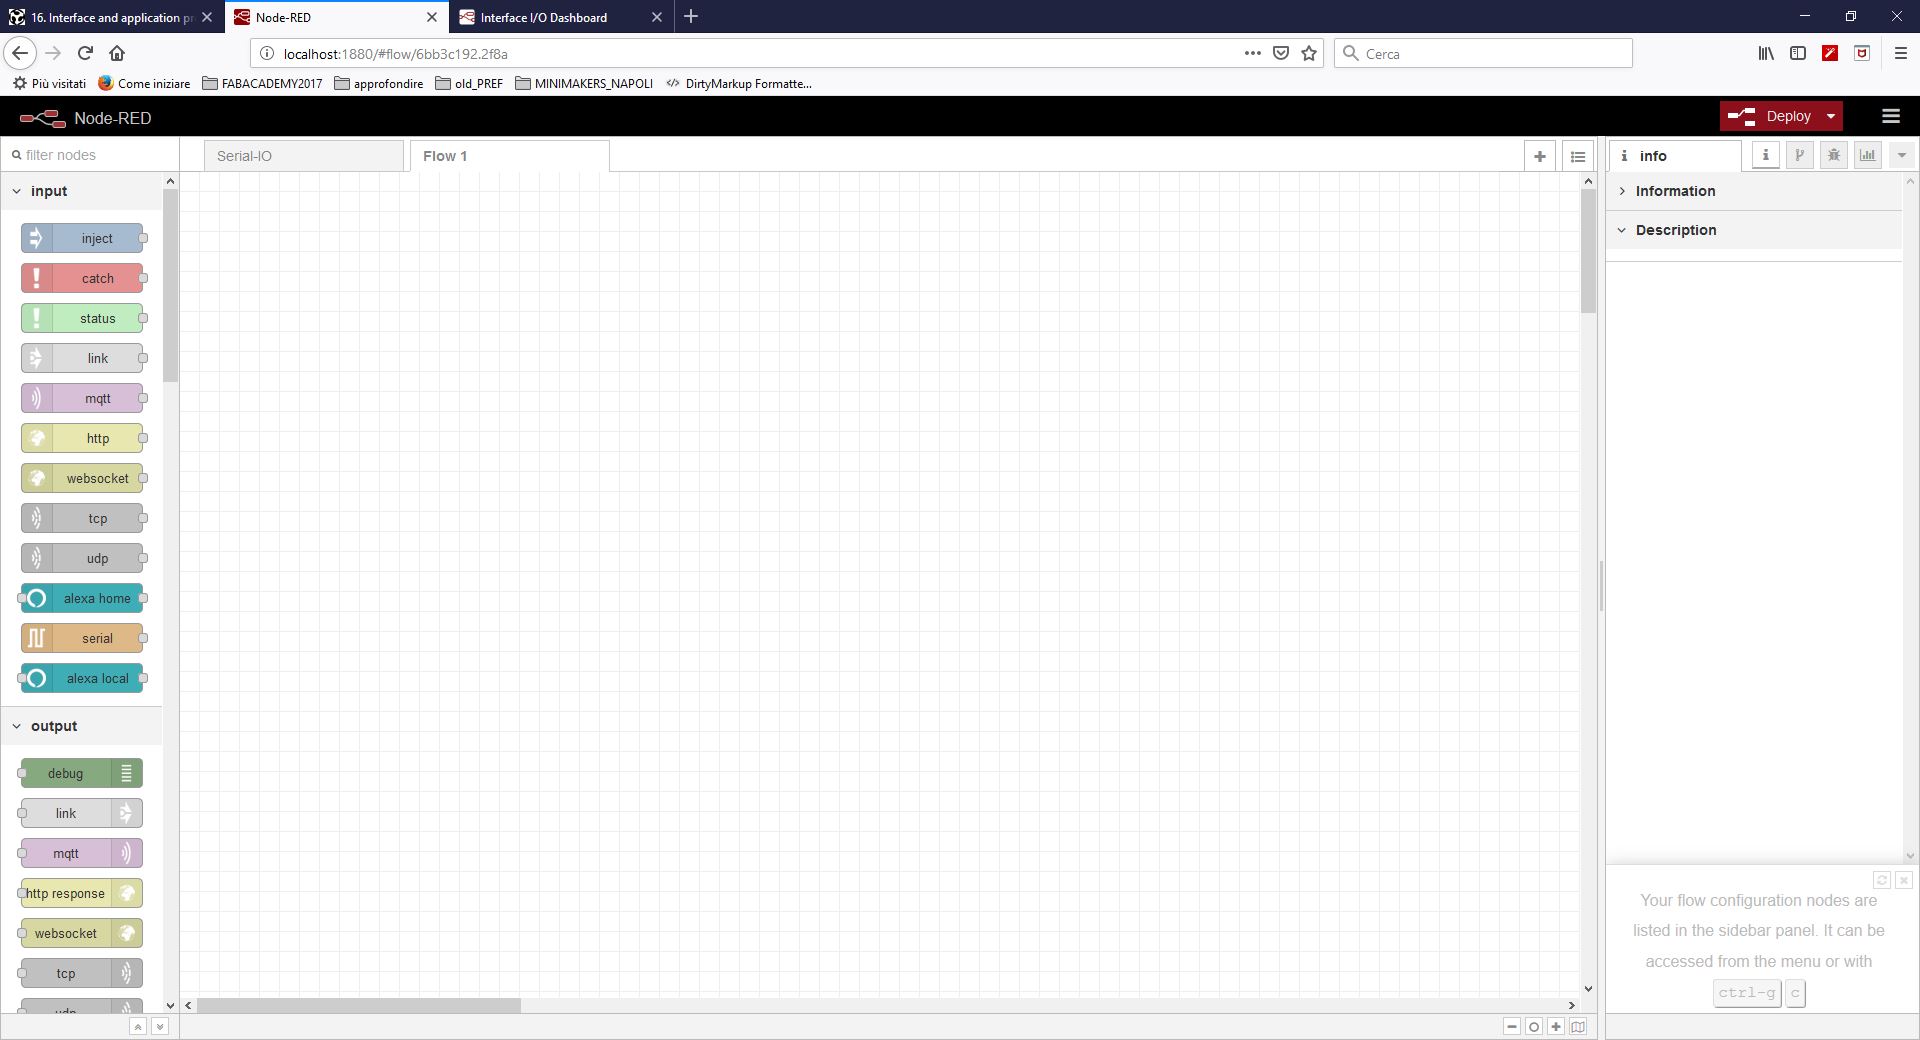
http://127.0.0.1:1880) and you should see the default Node-RED screen:
The Project
At this point you can copy the code below or download the interface001 project zip folder.
[{"id":"2a1e443f.44cdbc","type":"ui_slider","z":"7b4b4f0.b421c3","name":"","label":"BLUE","tooltip":"","group":"3544081b.64b418","order":3,"width":"6","height":"2","passthru":true,"outs":"all","topic":"","min":0,"max":"255","step":1,"x":440,"y":640,"wires":[["ef76351e.cfbc5","d3e0d9e9.0fcaa"]]},{"id":"3544081b.64b418","type":"ui_group","z":"","name":"Output RGB common Anode","tab":"7710c32d.24c9b4","order":1,"disp":true,"width":"6","collapse":false},{"id":"7710c32d.24c9b4","type":"ui_tab","z":"","name":"I/O Board Firmata","icon":"dashboard","order":1,"disabled":false,"hidden":false}]
and than, you can paste the code in the form:
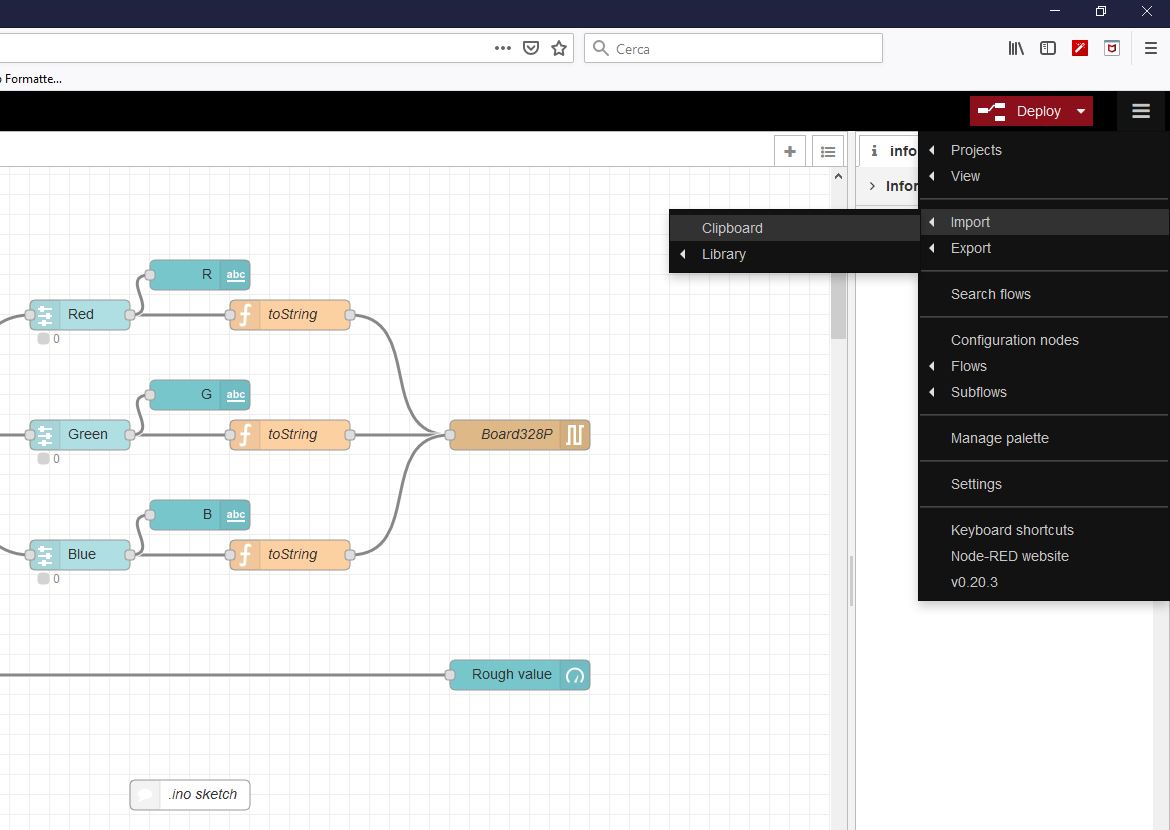
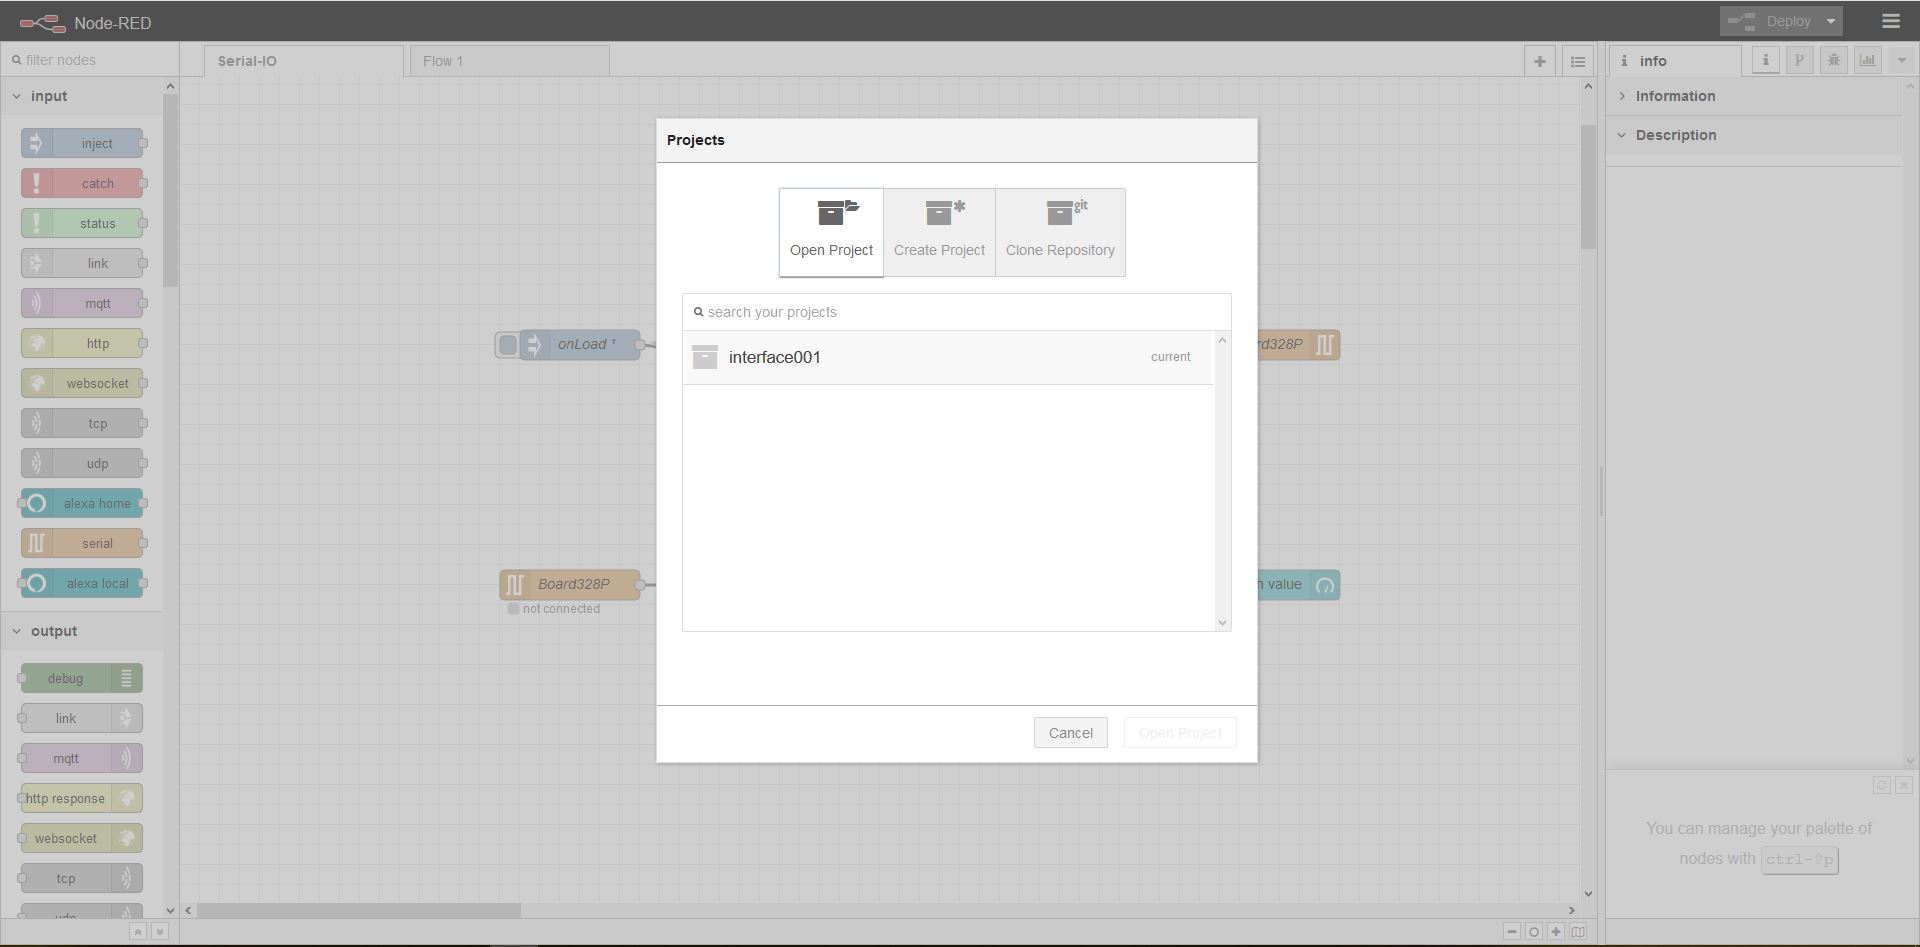
alternatively you can open the downloaded project from the Menu - Projects - Open >:
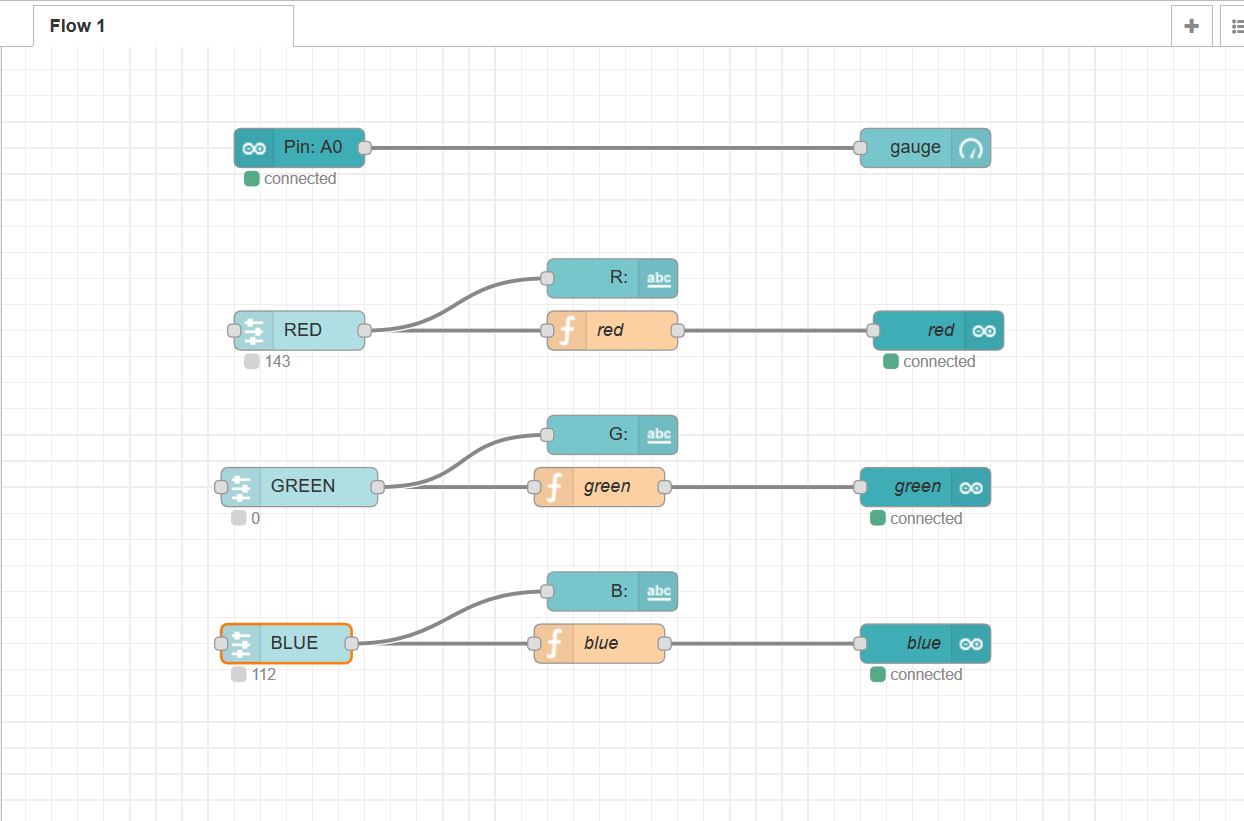
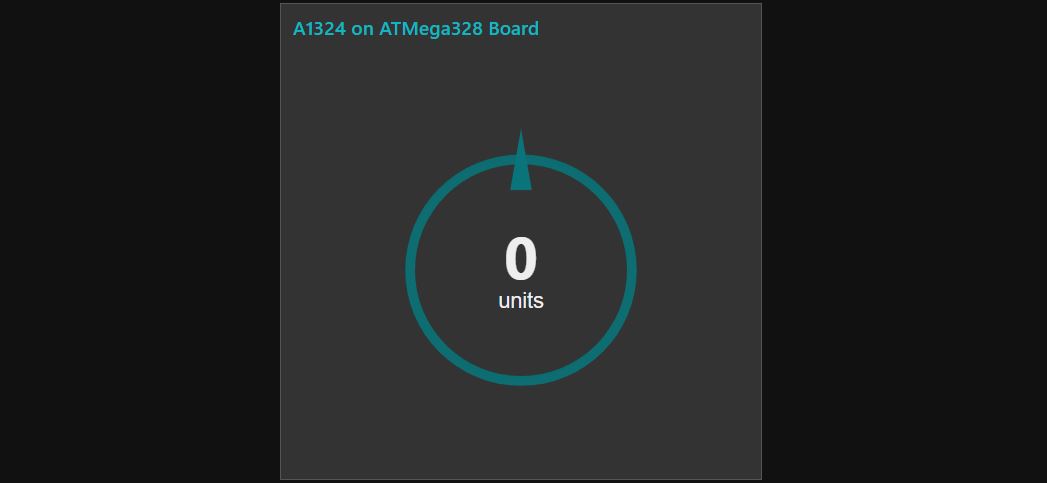
As you can see from image below, data are collected trourh Arduino-IN node and pasted to the gauge node on the dashboard.
For the RGB LED values I’ve used a Function node and programmed it to flip values from 0 to 255, because I’ve used an Common anode rgb led; than I’ve send data for each channel to Arduino-OUT node connectet to COM27 serial port through FTDI232 5v.
Program the board
There are several ways to interact with an Arduino using Node-RED. They all assume the Arduino is connected to the host computer via a USB serial connection.
Firmata
Firmata is a protocol for communicating between an Arduino (as well as other microcontrollers) and the host computer, providing direct access to the IO pins.
Installation
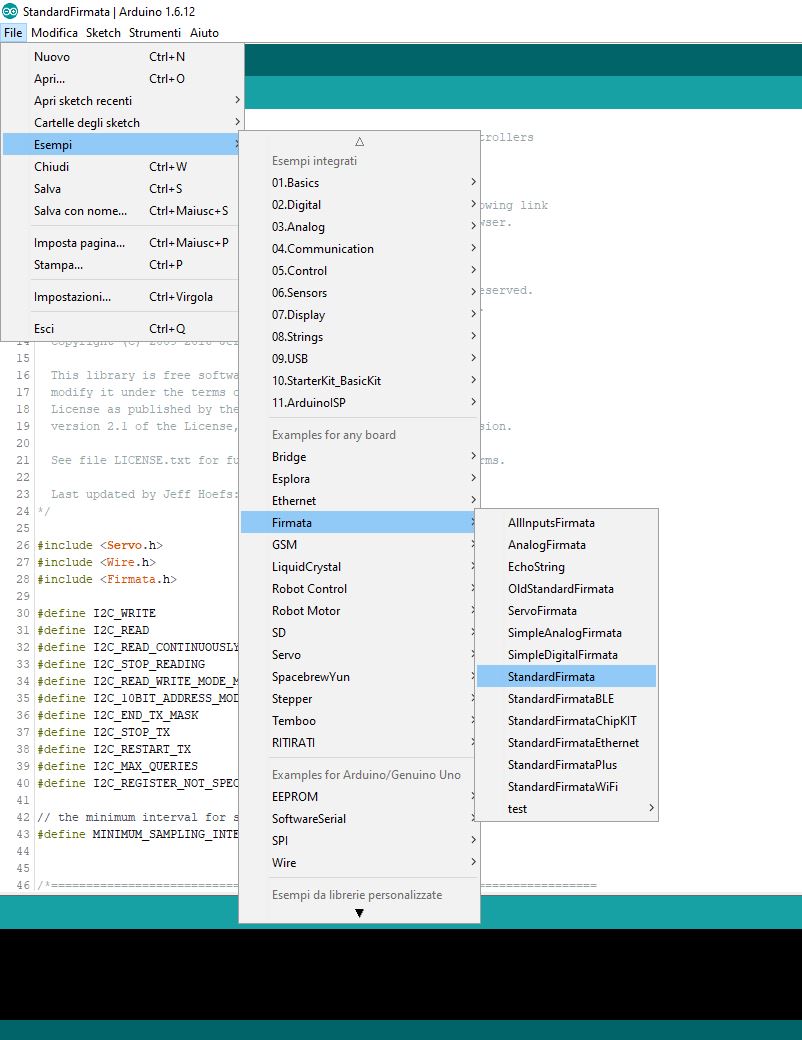
First you need to load the default Firmata sketch onto the Arduino using the standard Arduino software download tools. This is usually found in the Arduino IDE under the menu:
Files - Examples - Firmata - Standard Firmata
Final Result and Video
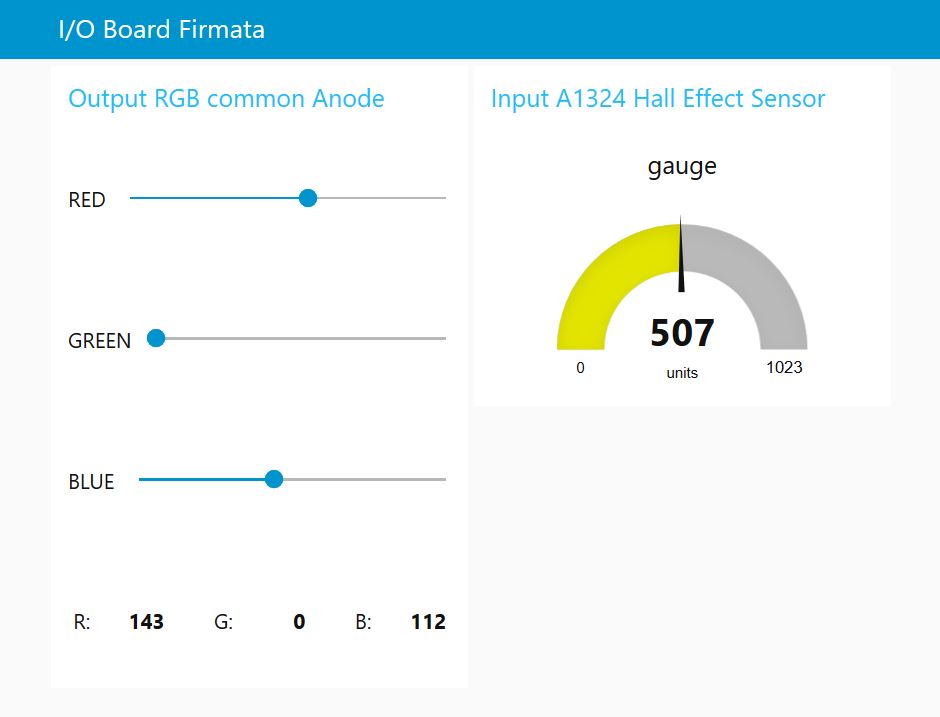
Once loaded a Firmata firmware on the board and opened the UI on the browser at localhost:1880/ui, you can manage the RGB LED and read the A1324LLHLT Sensor.
Read Serial - Node-RED
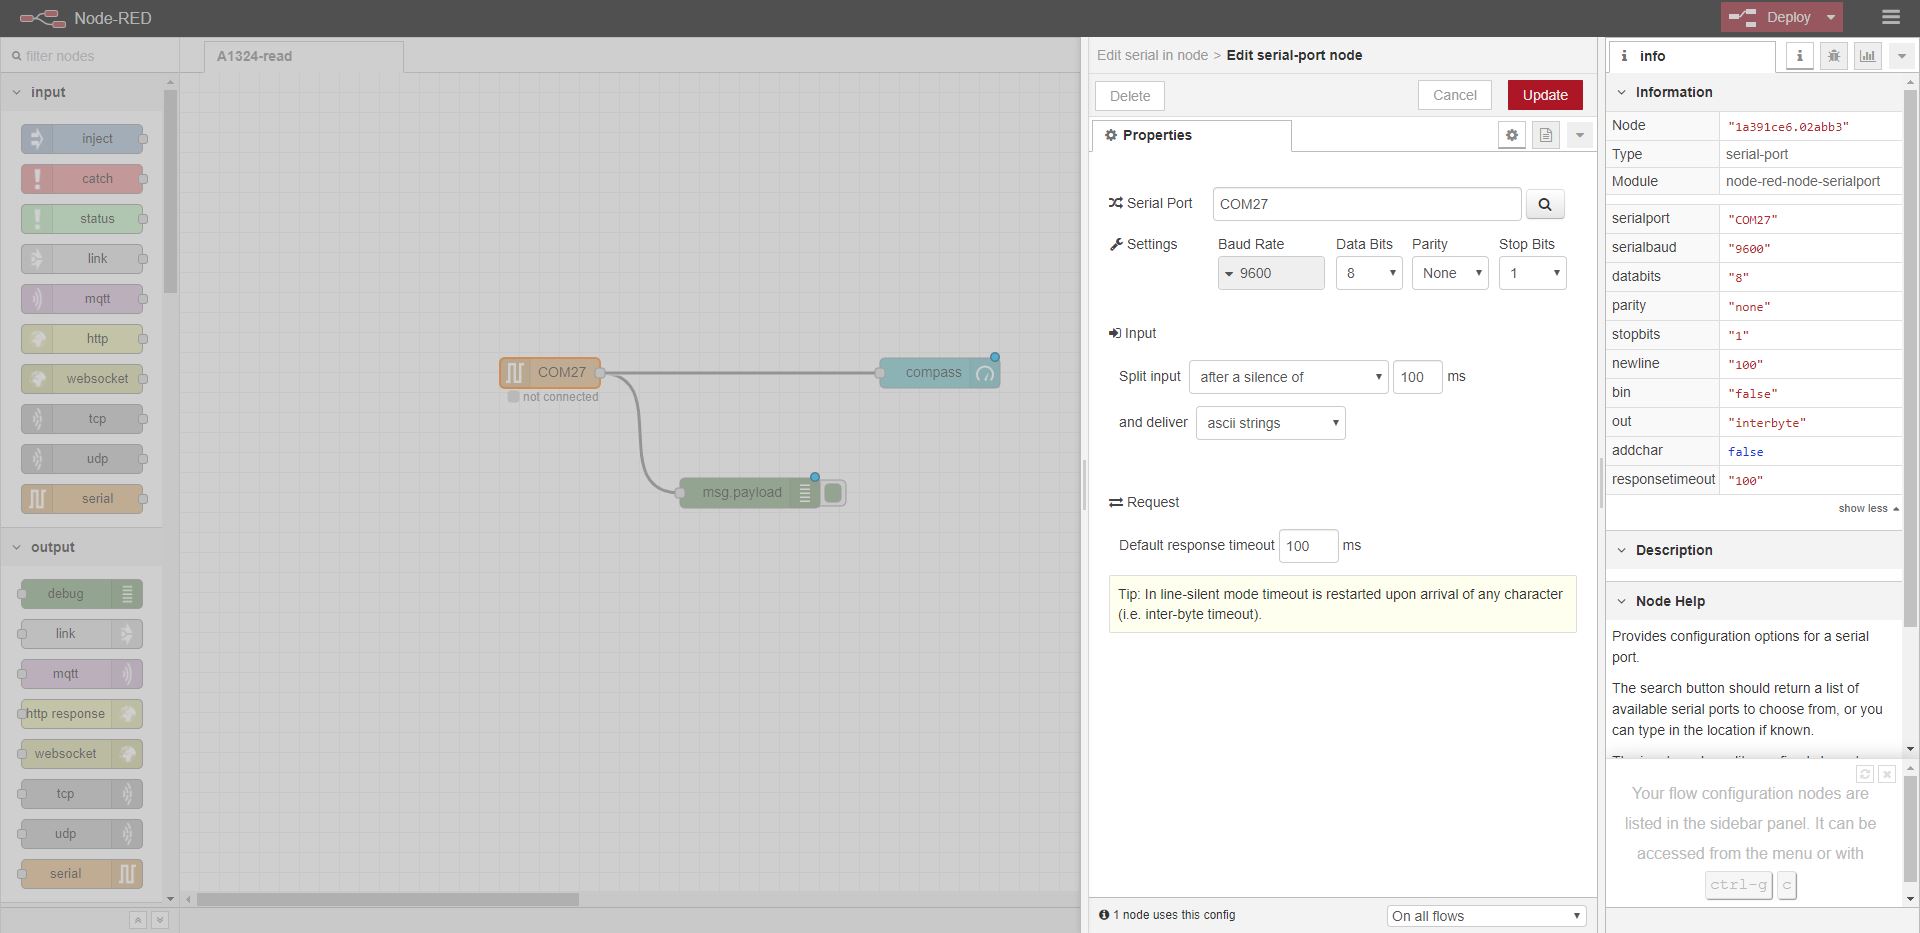
During week11 “Input device” I’ve program the board don’t using Firmata but reading the same sensor A1324LLHLT on A0 pin and streaming the values through Serial port.
I’ve programmed the board as follows:
const int ledPin = 5
const int readPin = A0;
void setup() {
Serial.begin(9600); // Open the serial
pinMode(ledPin, OUTPUT); // If the board will start I'll try simply a digital pin LED on pin 5
pinMode(readPin, INPUT); //Set A0 as pin to read from A1324
}

void loop() {
digitalWrite(ledPin, HIGH);
int value = analogRead(readPin);
Serial.println(value); // Write the sensor data on the serial
delay(500);
digitalWrite(ledPin, LOW);
delay(500);
}
Than I’ve used Node-RED to visualize the data:
If you want see the final result: