Things to do :
- Design the Mold
- Cut the positive mold
- Silicone negative mold
- Plastic positive
Molding
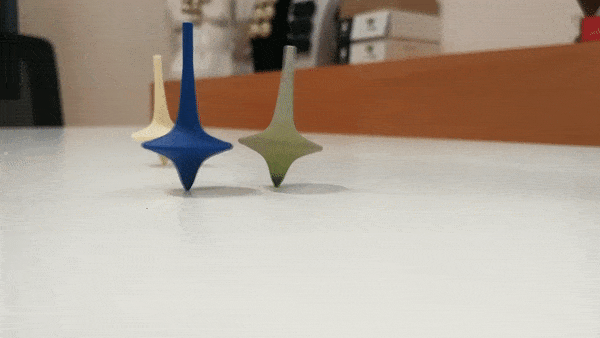
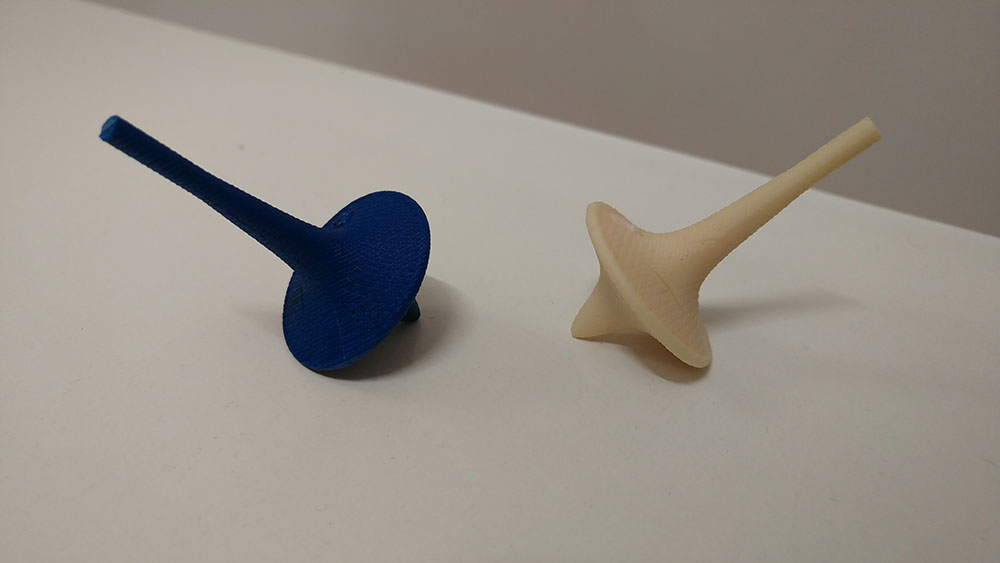
For this week assignment we had to design and mill a mold.I decided to create a Spinning Top.First of all I designed the mold using SolidWorks including the casting hole and the breather that matches whit the shaft of the spinning top .
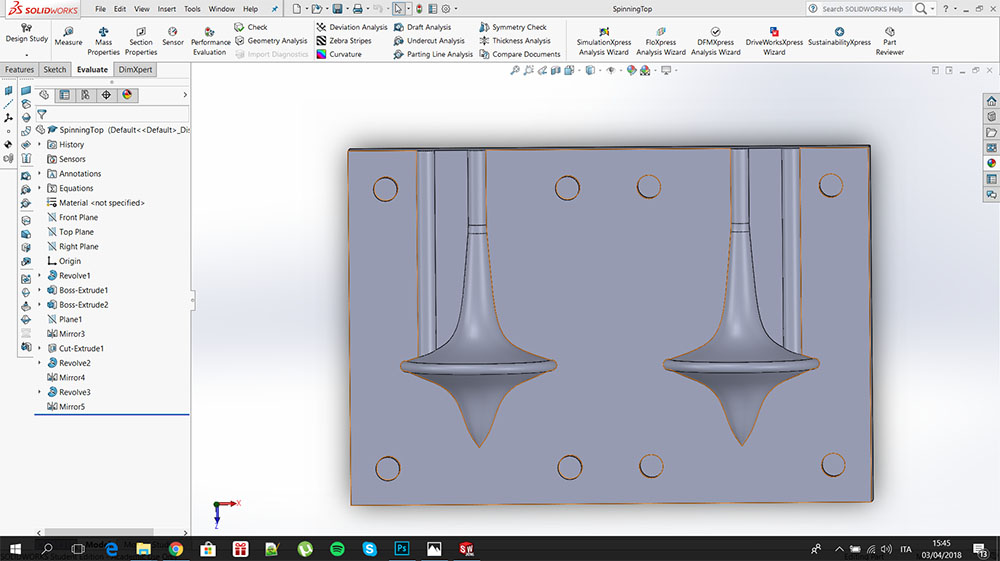
Positive mold
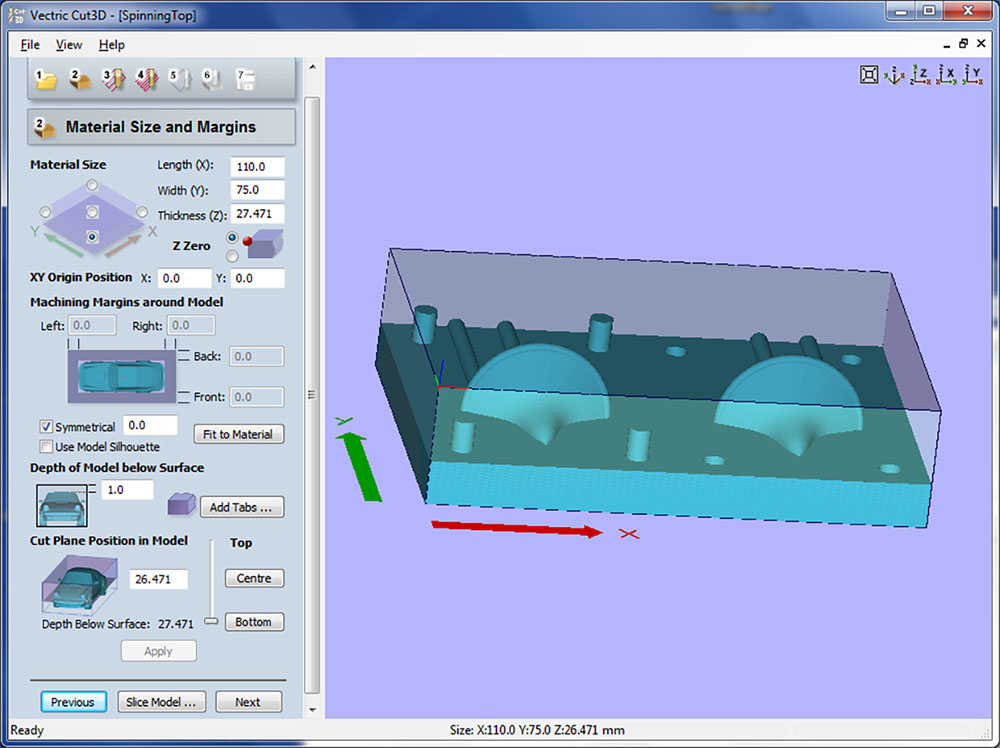
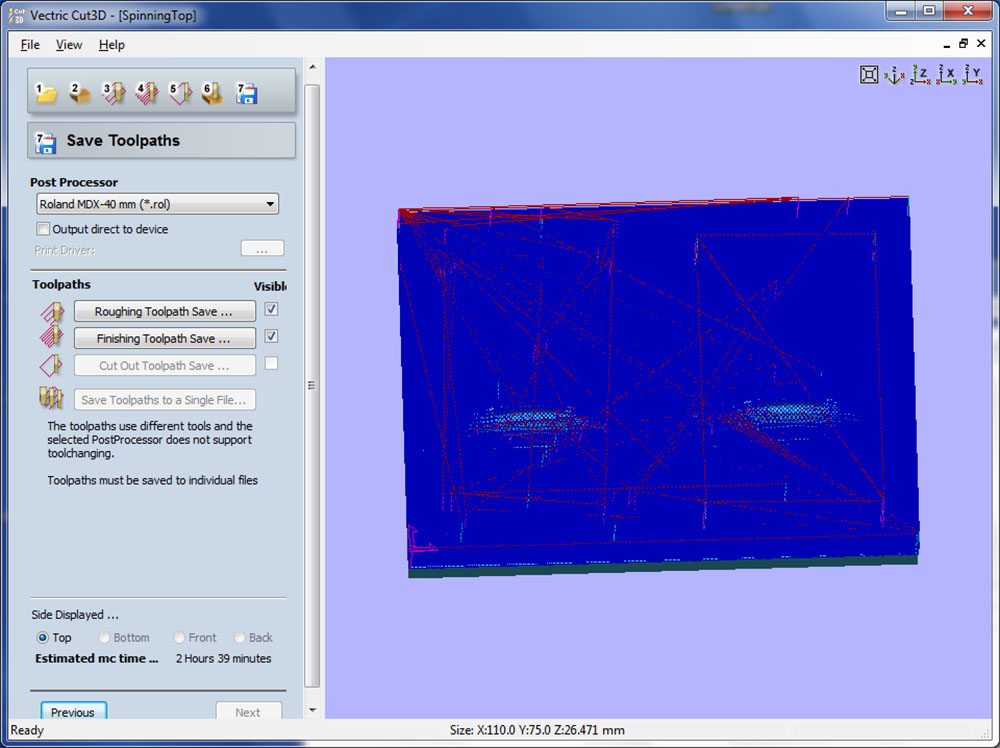
Once I finished the designing process I saved the model in STL and I moved on Vectric Cut3D.1 : The first step was to position the mold correctly taking care that the longest side was oriented along the x axis
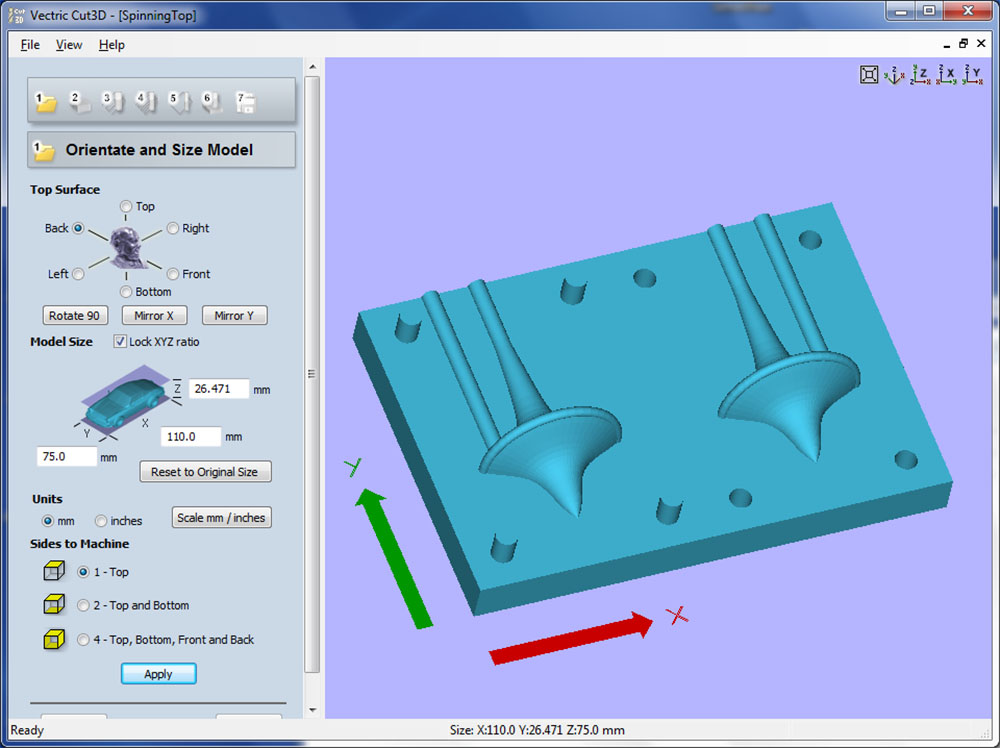
2 : In the second step I setted the origin and I changed the Depth of model below the surface from 0 to 1 mm so that I could cast the silicon for the mold evenly over the surface.
Note that I also added 1mm to the thickness(Z)
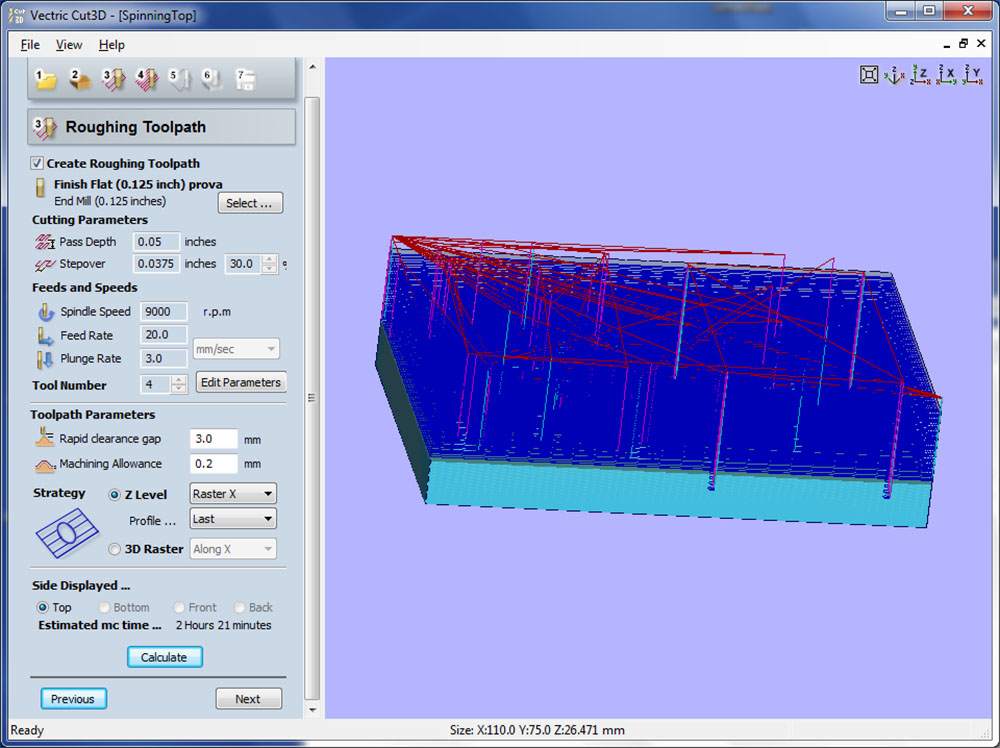
3 : Roughing Toolpath
For the roughing toolpath I used a 1/8 inch end mill. The cutting parameters and the feeds and speeds are the same parameters that I described here. Raster X means that the end mill goes up and down along the X axis.

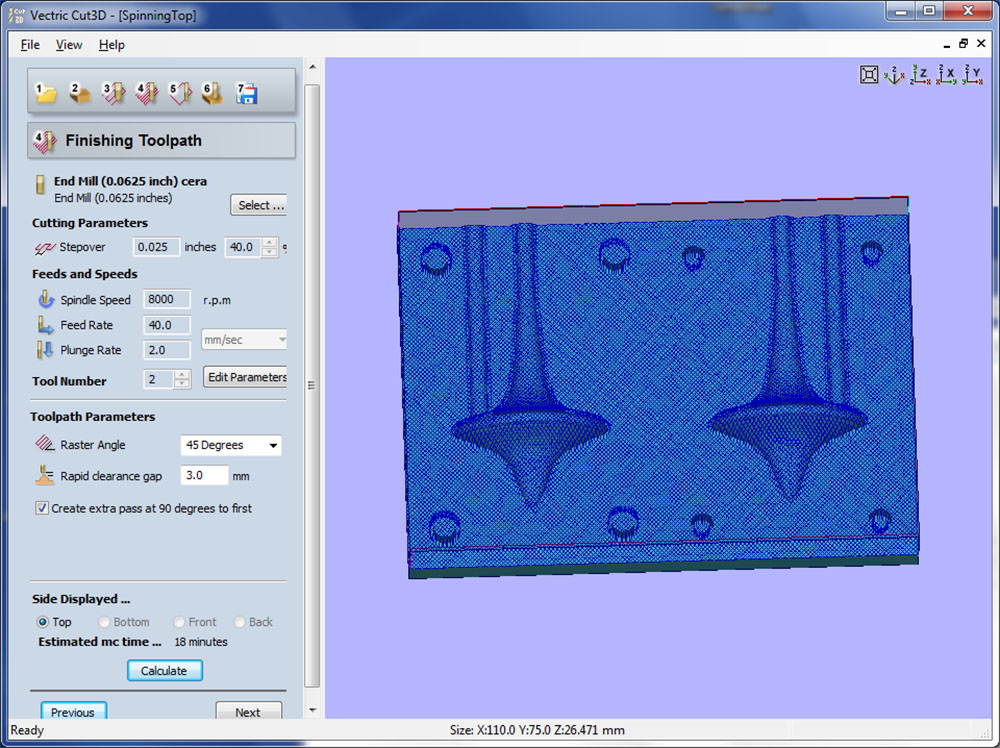
4 : Finishing Toolpath
For the finishing toolpath I used a 1/16 inch flat end mill.It is recommended to select create extra pass at 90 degrees to first if you are using a flat end mill .

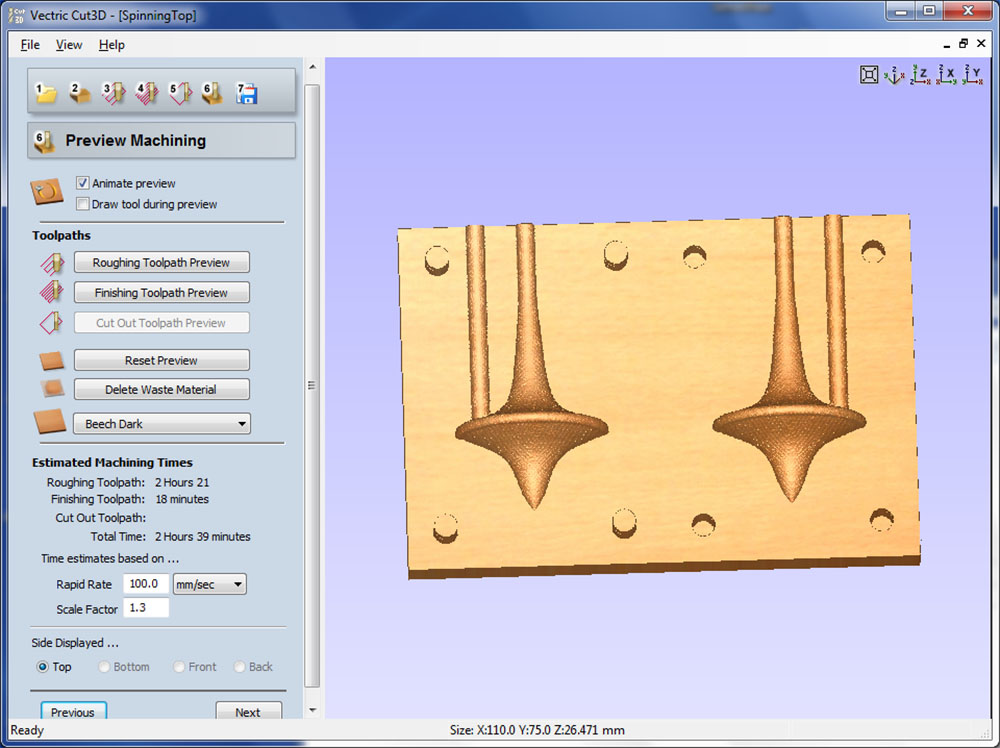
6 : Preview Machining
The preview shows how the machine will work
7 : Saving Toolpath
Once I checked if the preview was ok I saved the toolpath in Roland MDX-40 mm (*.rol)
Milling the mold
During the milling process is important to clean the machine every 10/20 minutes to prevent the remains of wax from melting and creating problems. Here is the final results.Once the positive mold was ready I cleaned it very carefully whit water and soap,so there were no more impurities that could ruin the negative mold.
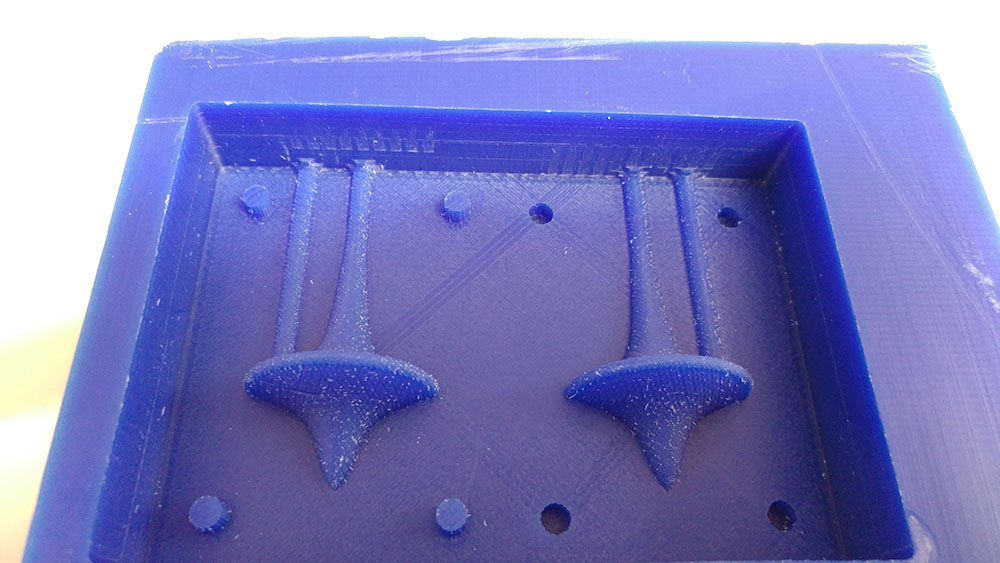
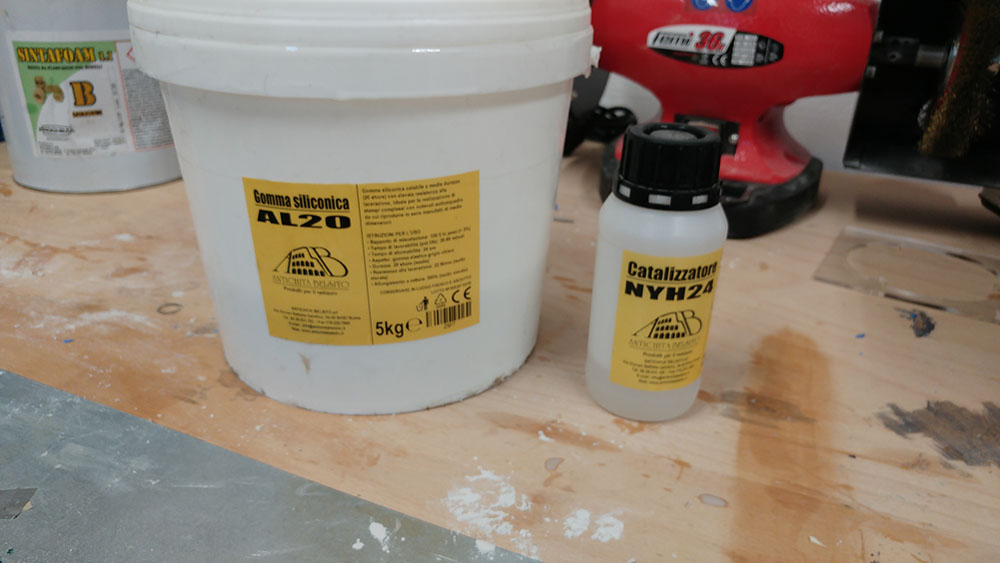
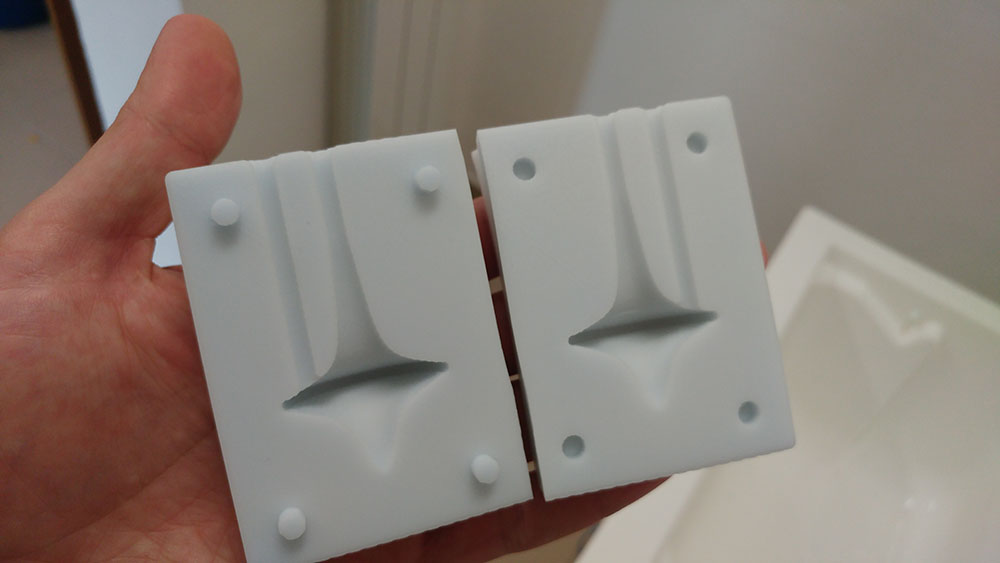
Negative Mold
For the negative mold I used a silicon rubber from an italian company (link)called Antichita Belsito.I followed the instruction for the proportion between the rubber and the catalyst and then I mixed everything being careful not to let air enter the compound.
The technique I used for this process was to rotate the glass with the mixture around a trowel that I holded in the other hand.
Casting the silicon need to be done carefully to avoid air bubbles.I letted it drip slowly in a corner untill the silicon covered all the surface of the mold,remaining steady in the starting position.
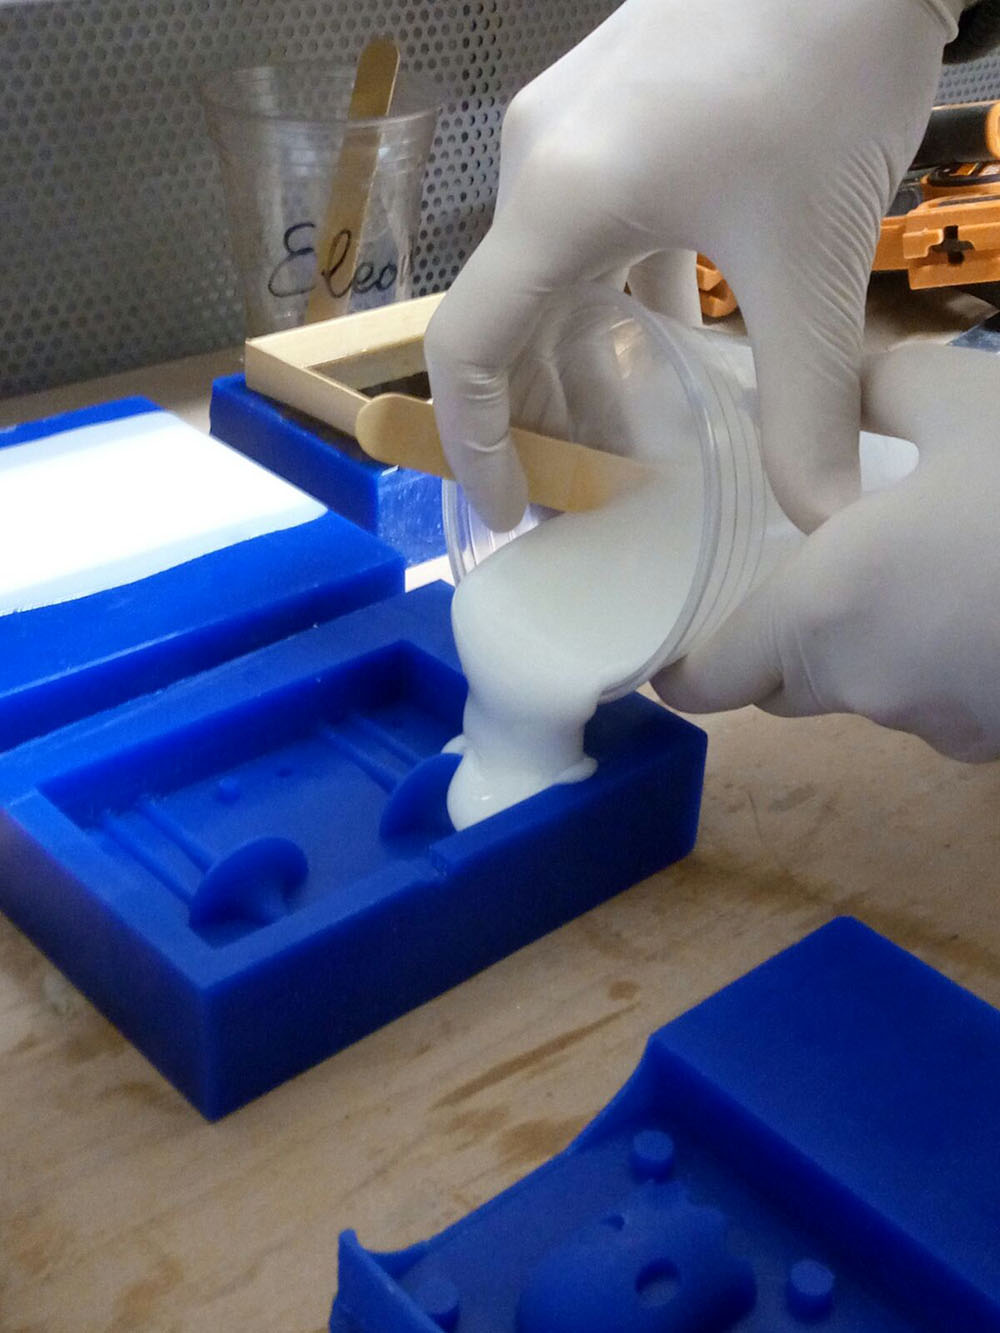
After 24 hours the mold were finally ready .
Casting
Plastic
I started whit the Sintafoam 1:1, a polyurethane resin. Here the manufaturer's webpage with the datasheet (only in italian).Important information :
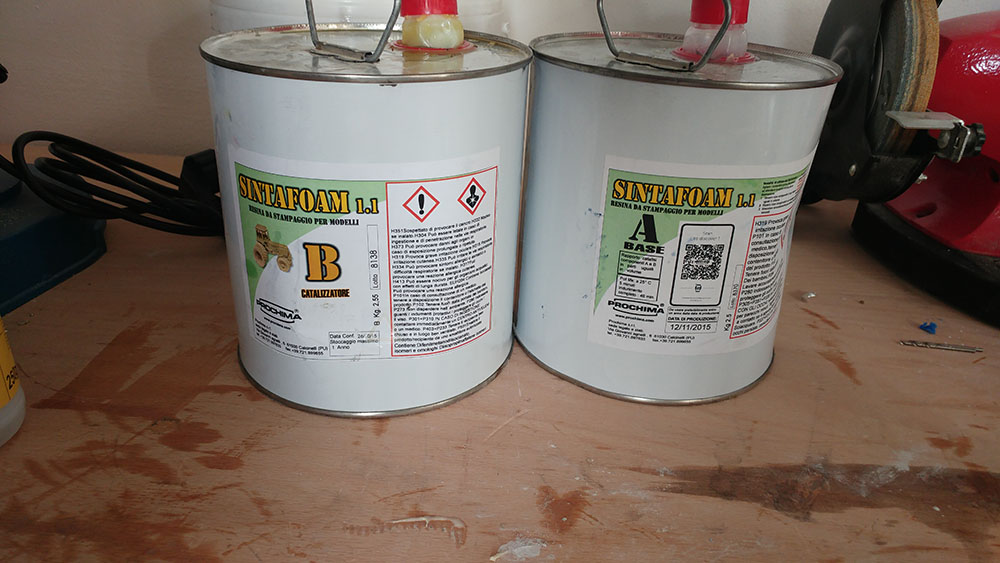
The 1:1 ratio between the two parts and the limited Cure time make this material very easy to use.
It also reacts very well to the colors.
Cement
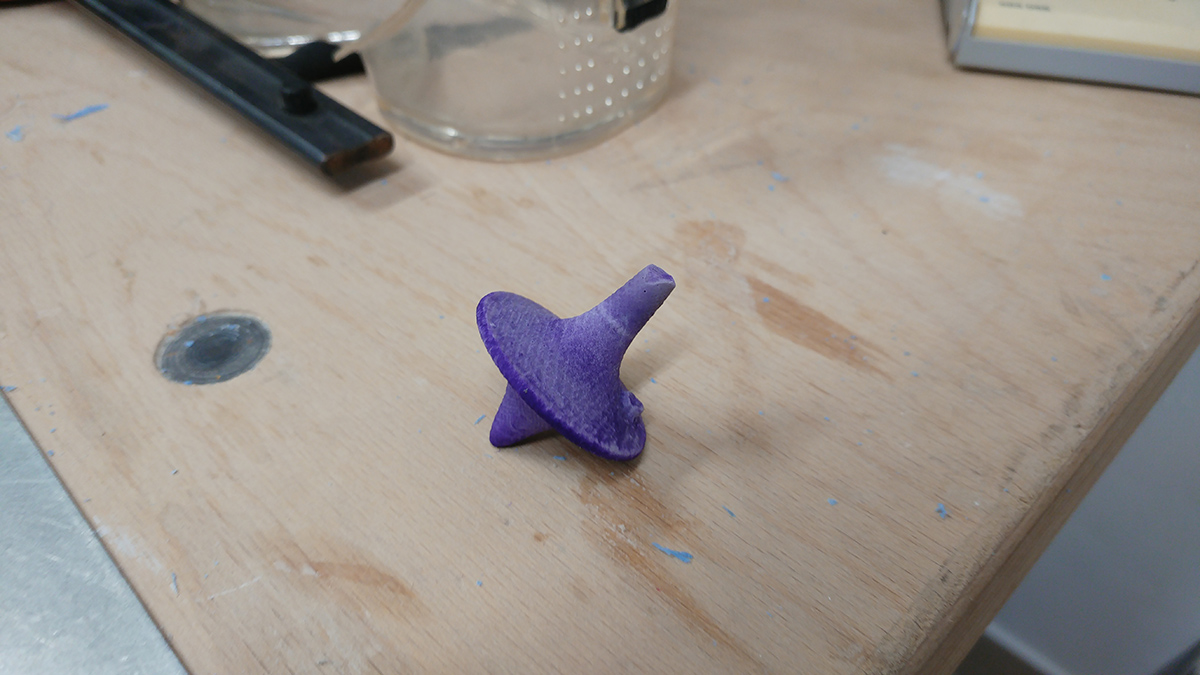
The second material I used was USG Hydro-Stone Super X Gypsum Cement.This Material is pretty easy to use.I started whit a glass whit a small amount of water and slowly added the Hydro-stone whitout ever stopping mixing.Once the mixture reached the right consistency I casted it into the mold.
I wanted to color it with purple but the result was to have a spinning top that stains when you touch it.
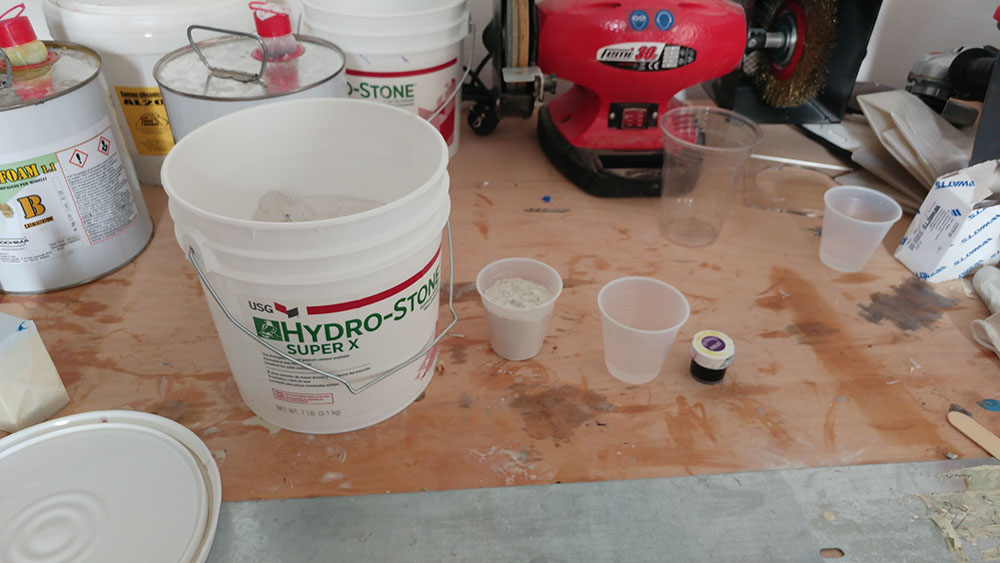
This material is too friable for a spinning top.The shaft,very tight part, broke at the first lounch.
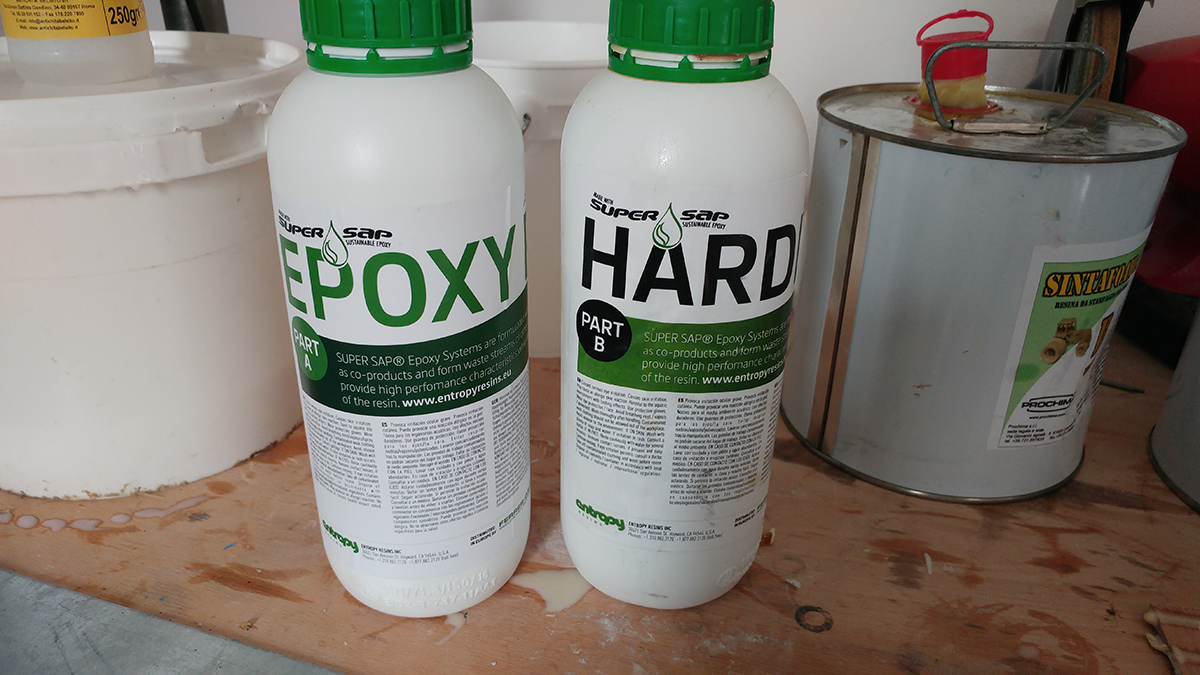
Resin
The last material I used was an epoxy resin from this manufacturer.