
Things to do :
- Model
- Show how i did it
- Include your original files
For this week assignment,whit my team mates ( Giada, Dario),we decided to build an automatic drawing machine.
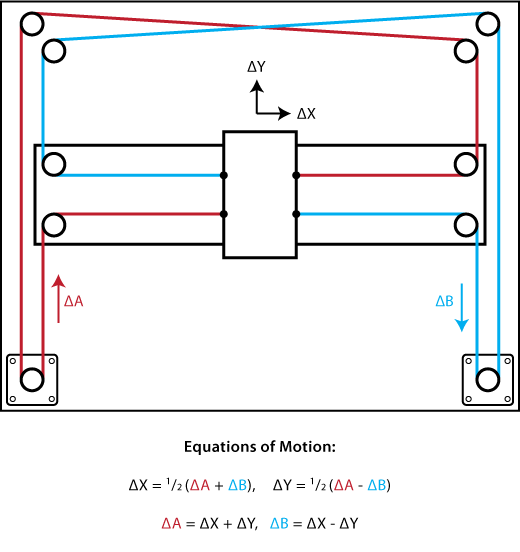
We decided to use the CoreXY technique in order to control the X and Y axis.The first step was understanding how it works and to do that I found very useful the official documantation (LINK) and those two video : First One and Second One.
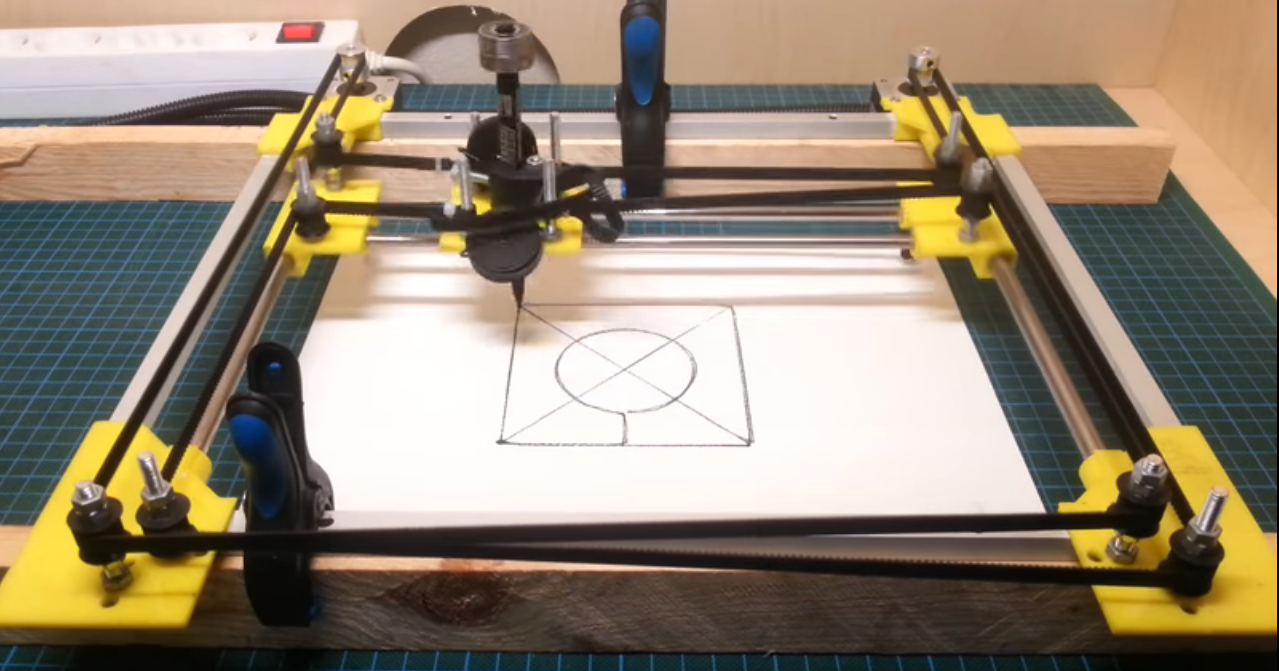
Next we divided the designing process in two steps.Giada and I designed the pieces needed to build the machine and next Dario 3d printed them.I moved on designing the part in SolidWorks,taking inspiration from this video.
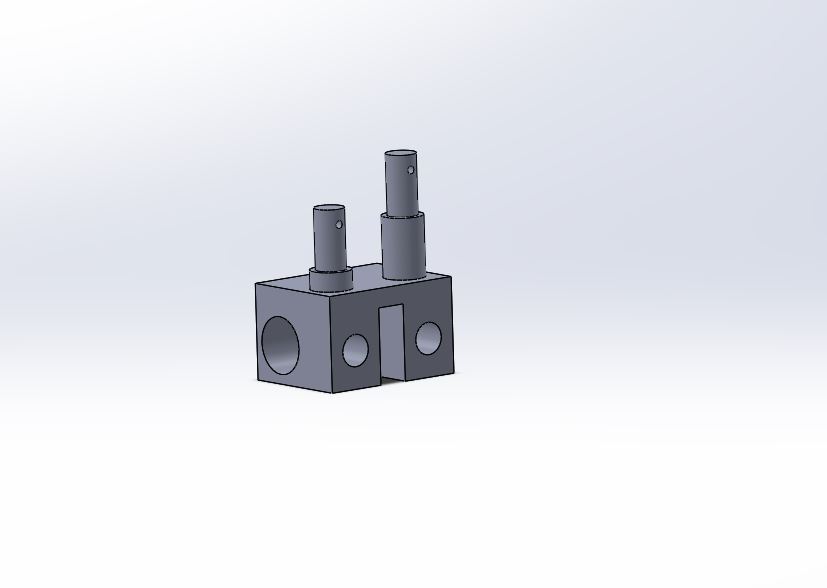
The diameter of the bar we have is 8mm.Empirically we found that 3d printing the hole whit 8.2mm diameter fitted almost perfectly.So i setted the dimension of the holes to 8.2mm(parametrically).
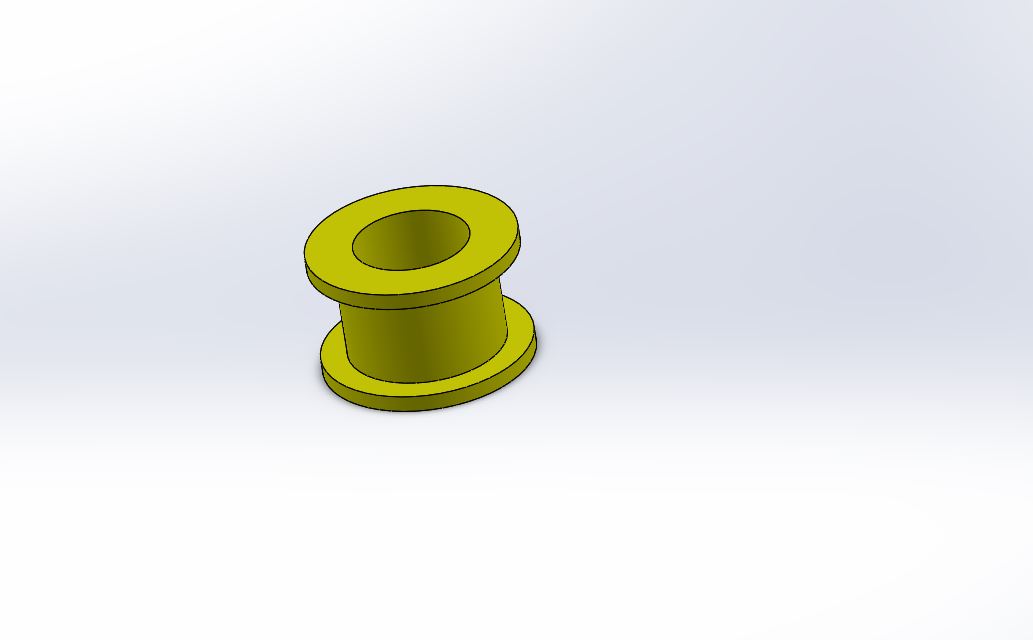
Next I designed the cylinder that would fit the pulleys.
The pulleys need to be in two different height.That's why I designed the structure this way :

The previous image show the bottom-left corner if you see from this point of view : (picture tooked from the video linked above)
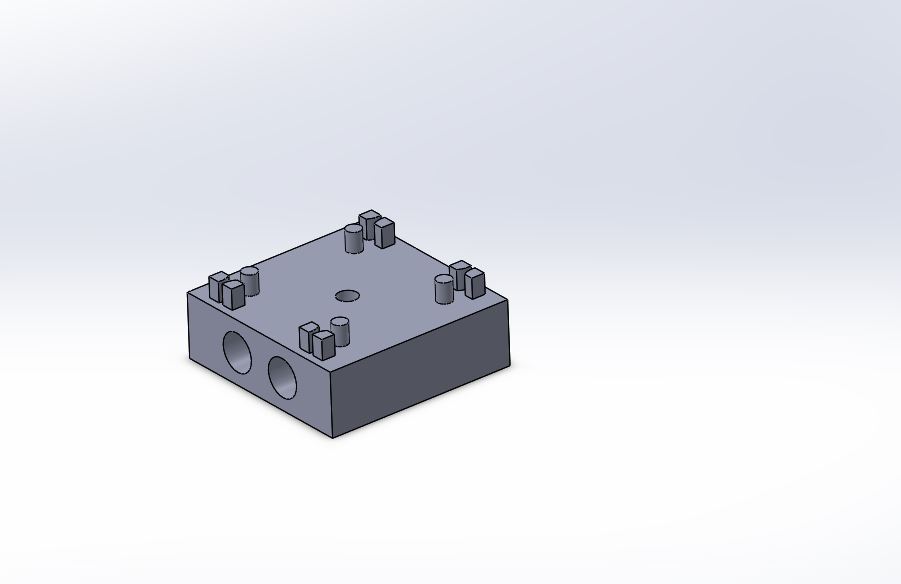
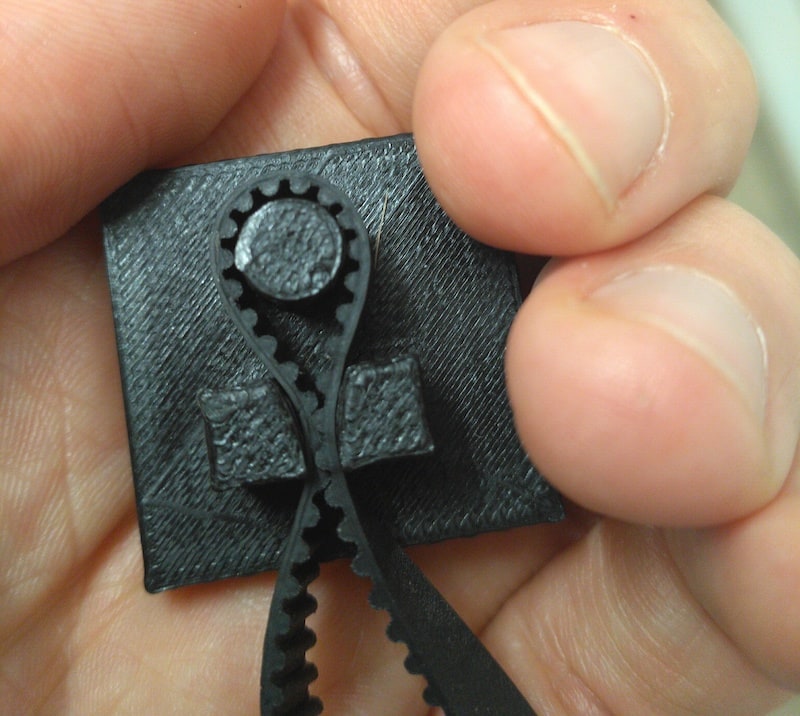
The bottom-right corner is a mirroring of the bottom-left corner,taking care that the height of the cylinder are shifted each other.That is because the two distribution straps cross each other(See the first Image). For the top corners was enought to remove the cylinders for the pulleys:

The next image shows one of the two pieces that move along the Y axis (or the x axis, depending on the convention you want to use ).The big Holes is big enought to fit a linear bearing we had in the lab.
The central pieces was made by Giada
Those small structures on top of the piece are used to lock the straps as you can see here :
The pulley :
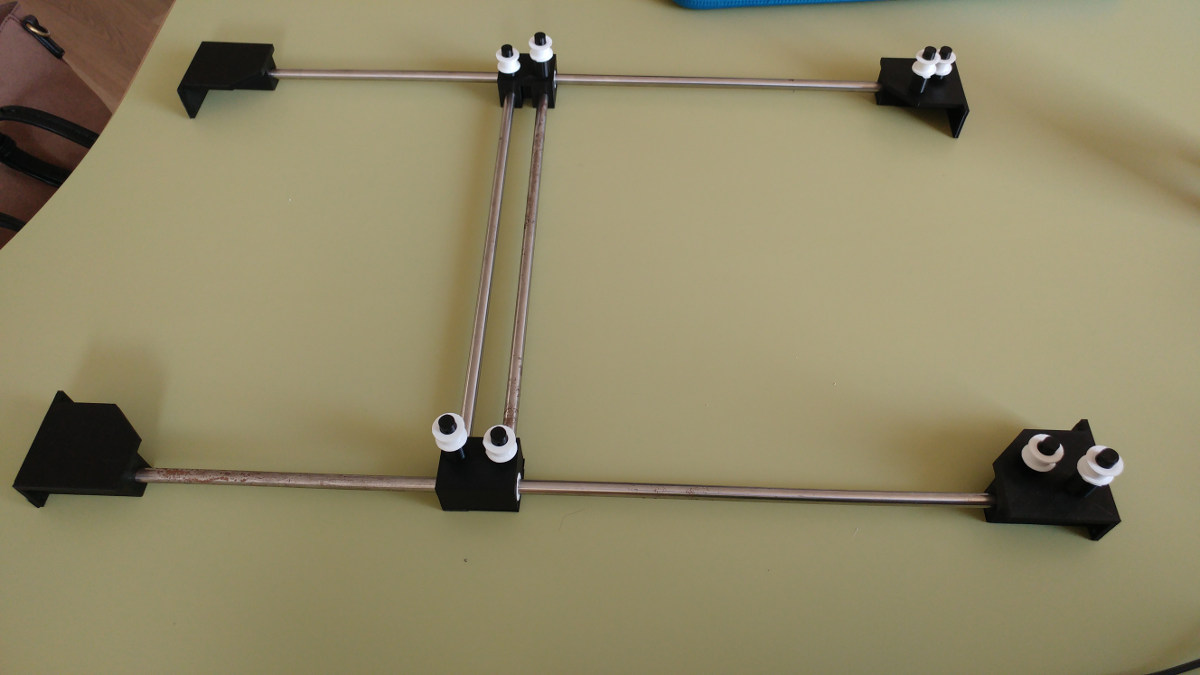
And finally I assembled everything to check if everything was fine :

After the designing process Dario 3d printed all the pieces and he made a box whit a 0.6mm thick plywood. Once the pieces were ready we started to assemble the structure to see our efforts materialize :
Once we had all the components ready we made the machine move whit our hands.
Take a look at the group documentation Link
We decided to use the CoreXY technique in order to control the X and Y axis.The first step was understanding how it works and to do that I found very useful the official documantation (LINK) and those two video : First One and Second One.
Next we divided the designing process in two steps.Giada and I designed the pieces needed to build the machine and next Dario 3d printed them.I moved on designing the part in SolidWorks,taking inspiration from this video.
SolidWorks
I started whit the corners.The first caution here was dimensioning the holes for the bar correctly.The diameter of the bar we have is 8mm.Empirically we found that 3d printing the hole whit 8.2mm diameter fitted almost perfectly.So i setted the dimension of the holes to 8.2mm(parametrically).
Next I designed the cylinder that would fit the pulleys.
The pulleys need to be in two different height.That's why I designed the structure this way :
The previous image show the bottom-left corner if you see from this point of view : (picture tooked from the video linked above)
The bottom-right corner is a mirroring of the bottom-left corner,taking care that the height of the cylinder are shifted each other.That is because the two distribution straps cross each other(See the first Image). For the top corners was enought to remove the cylinders for the pulleys:
The next image shows one of the two pieces that move along the Y axis (or the x axis, depending on the convention you want to use ).The big Holes is big enought to fit a linear bearing we had in the lab.
The central pieces was made by Giada
Those small structures on top of the piece are used to lock the straps as you can see here :
The pulley :
And finally I assembled everything to check if everything was fine :
After the designing process Dario 3d printed all the pieces and he made a box whit a 0.6mm thick plywood. Once the pieces were ready we started to assemble the structure to see our efforts materialize :
Once we had all the components ready we made the machine move whit our hands.
Take a look at the group documentation Link
