| This week | |
|---|---|
| Presentation Molding and Casting | http://academy.cba.mit.edu/classes/molding_casting/index.html |
| video of the review (embedded programming) | http://fab.academany.org/2018/lectures/fab-20180321.html |
| video of the lecture | http://fab.academany.org/2018/lectures/fab-20180321.html |
| Assignment | Used software | Files/Downloads/links |
|---|---|---|
| Group Assignment | review the safety data sheets for each of your molding and casting materials, then make and compare test casts with each of them | http://fab.academany.org/2018/labs/fablabamsterdam/mouldyCasting/index.html |
| top | Freecad | final_top_1.7mm.fcstd |
| bottom | Freecad | final_bottom_extra_gcode.fcstd |
I really enjoyed this week…
(or better 2 weeks, because i also spend time during the break to finish this assignment. And i am very happy with the result. So plz read on and enjoy!
BUT…
During the local evaluation Emma told me that part of this weeks assignment is to mill a 3D mould and created your rough and finish toolpaths for machining. For this project i used Partworks, because i didn’t know about about this, and for my design it wasn’t necessary to use Partwork3D.
But anyway: i didn’t fulfill the complete assignment, so i had to complete in in another way. This i did during the wildcard week, so for the documentation on the CNC and rough and finish toolpaths in Partworks3D you have to go to week 17, were I did composites.
Freecad
Freecad was used to make a 3D model of the mold. With Freecad i’m still in a leaning stage. Till now i used sketch to construct parametric models. This time i started working from the Part Design workbench. It took me again a couple of hours to make something that looked as someting i wanted to make.
Bas (our CNC instructor) saw the models and didn’t like it :-( I used body’s and shapes to make cuts, and the from cuts and so on, resulting in a uncontrollable 3d model.
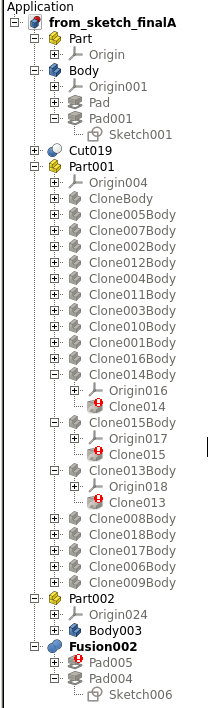
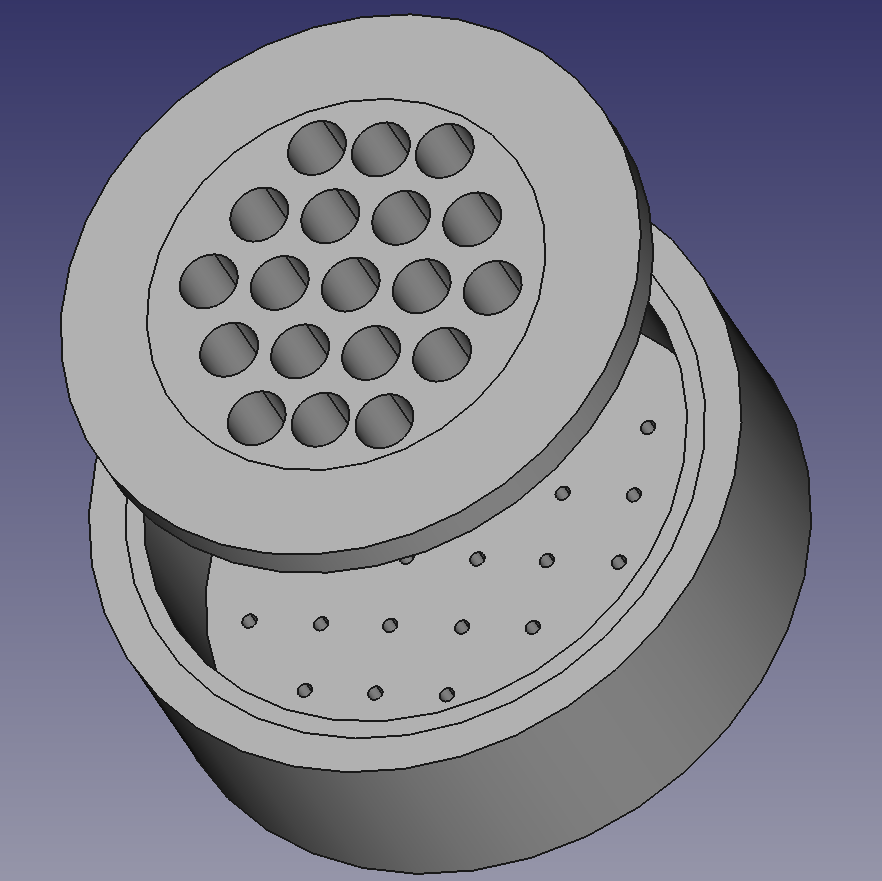
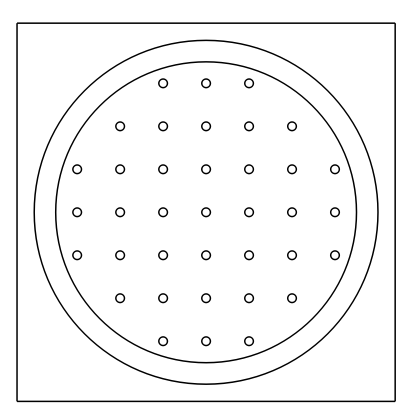
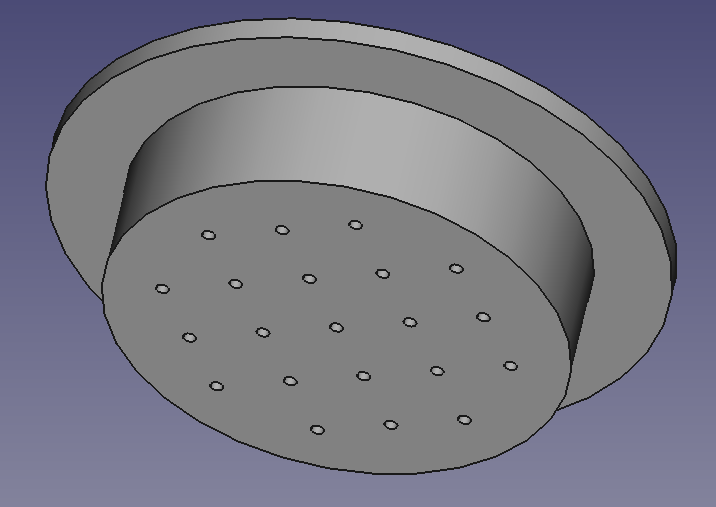
The good thing was that i had in mind what i wanted to make. So after some explanation why i wanted the hole and pockets, Bas coached me through the whole process of making a proper design using the Part Design workbench, but starting to design from sketch. So i first made the circumference exterior from sketch, then the pocket and at the end the little holes at the bottom.
Because this model is made from sketch mode in Part Design, the whole model is parametric.
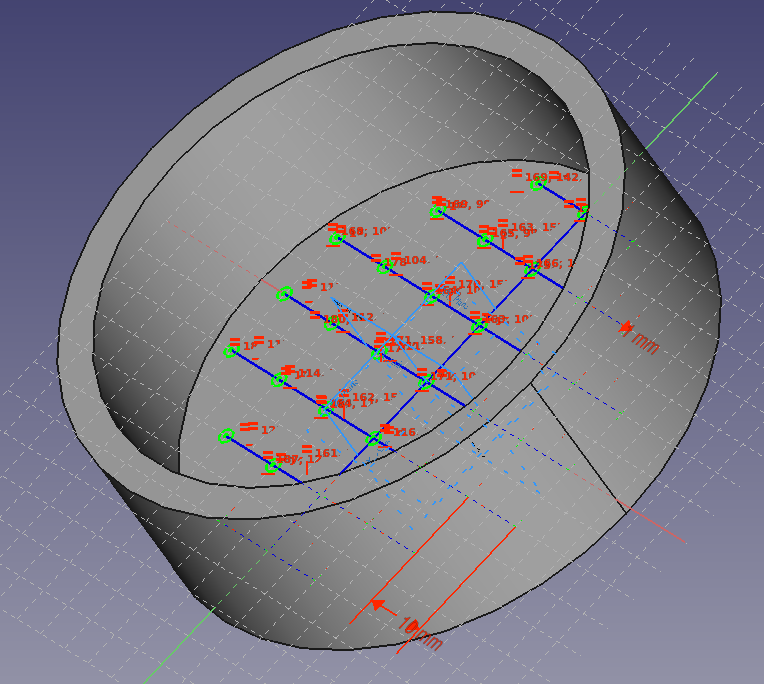
We then placed a cube around the bottom tray and used a cut out of 2 shapes to make the negative we needed for the CNC machine.
To prepair the file for the CNC, we used the drawing workbench of Freecad to make a 2D file. Since we only use pockets we could make several toolpaths with different depths to make the mold.
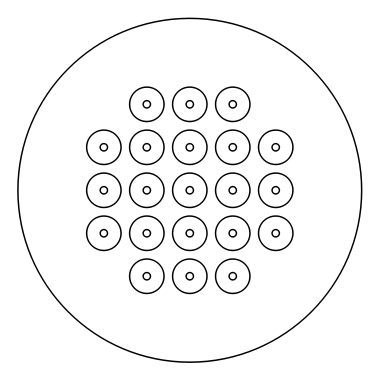
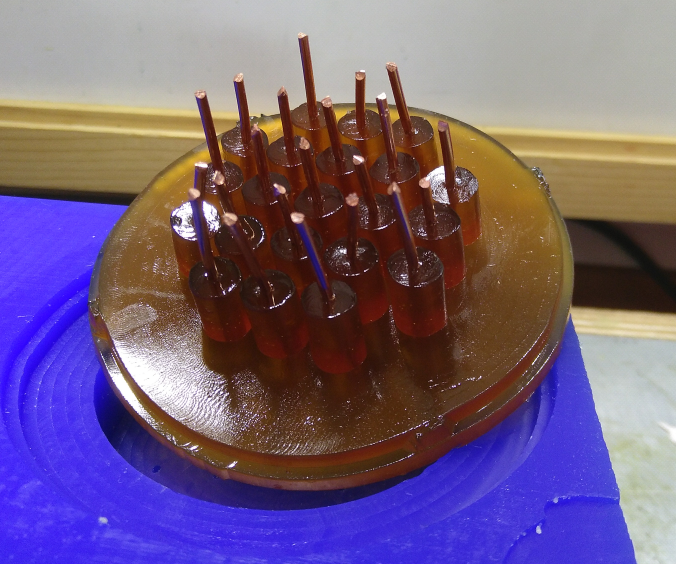
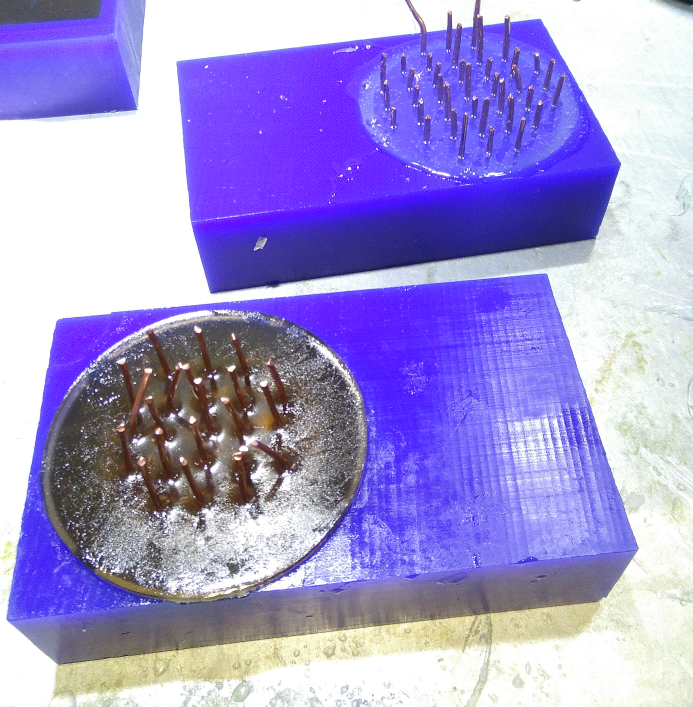
The top was a bit more complicated. To let the white mycelium grow inside the mold, the mould needs to breathe. So we need holes in the lid of the tray-mold. I wanted to use copper wire from electronics cables. These have a diameter of 1.7mm which is a good size for breathing without the danger of de mould growing outside the mold.

I decided to make a mold for the top, so the copper pins would be in place when making the final lid-mold. Again the drawing workbench was used to make a 2D file for the CNC
The bottom of the lid was also made that way

CNC
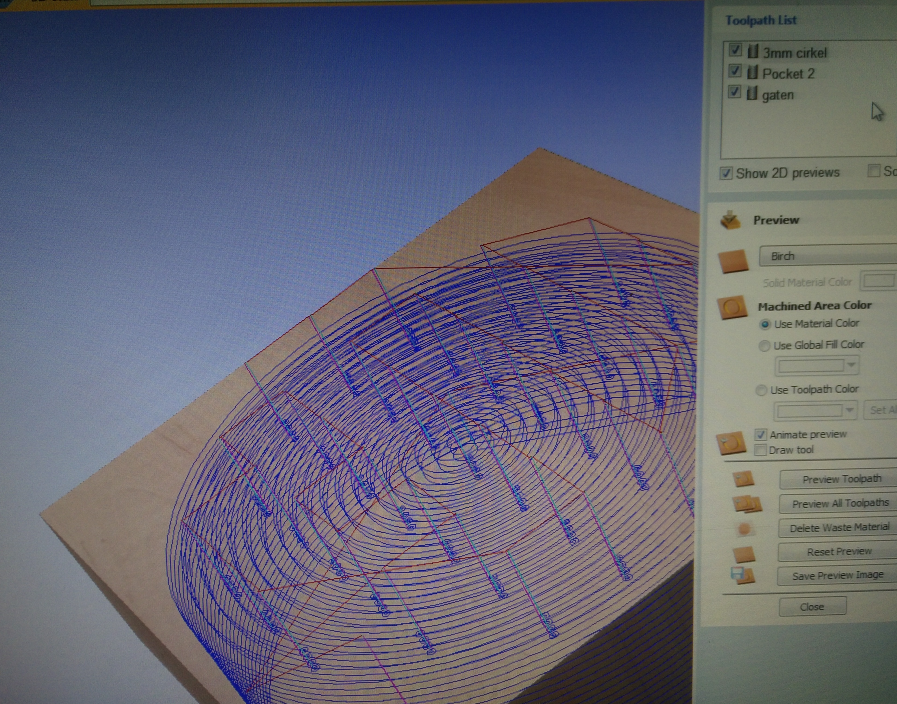
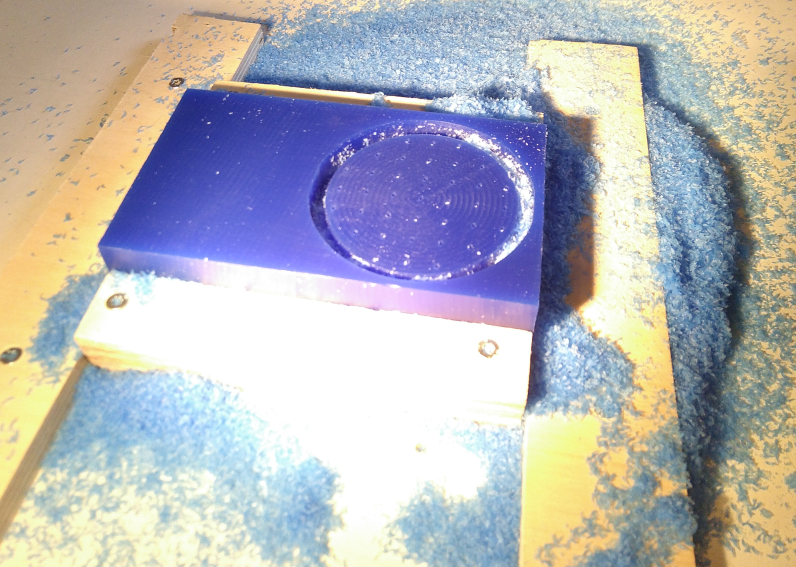
Partworx was used to mill the shape out a block file-a-wax. Intentionally i wanted to use partworx3d, but since the design could be made with toolpaths of different depth, there was no need to use partworx3d.
The png files created with freecad, were converted to pdf’s with gimp. This was the prefered way to import designs created with freecad and inkscape into partworks (on linux).
In partworx several pocket toolpath’s were created with different depth’s.
At the end i had 3 shapes in the wax: a top-lid part, a bottom-lid part, and the final tray part. I used 2 blocks of file-a-wax. The top-lid part i casted first, because i needed it to make the final lid.
Casting
As said, the first thing casted was the top-lid part, because i needed it to make the final lid. For this mold i used Smooth-on PMC 121/30 to get a soft and flexible part. Some of the other fabacademy students were already using it for their molds and timewise it was a good choice (late afternoon, so 16 hours of curing wasn’t a problem). After putting the copper pins in place it was time to cast.

I had to mix PMC A and B, mix them a few minutes and then cast it in the mold. The result was almost perfect.
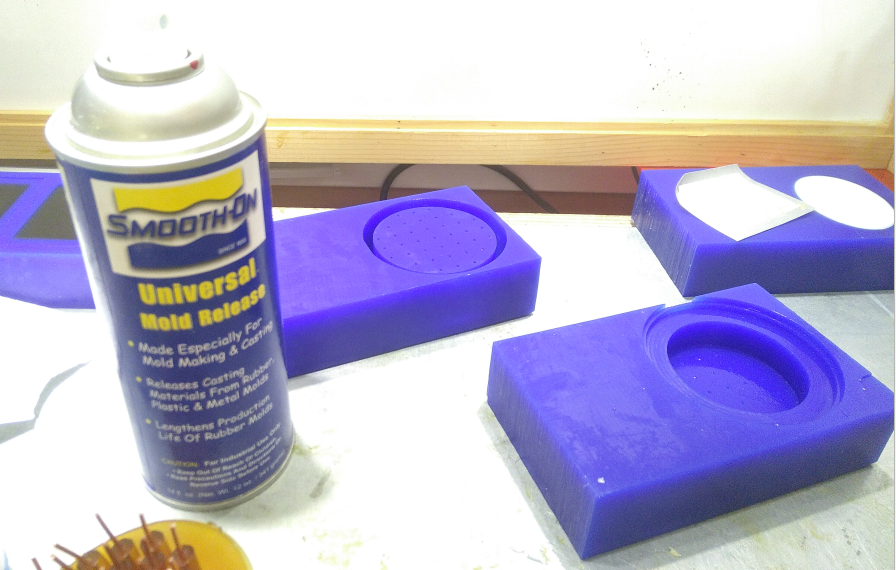
The next morning I started casting the final molds. For casting the final molds i used Smooth-on Sorta-Clear 37, a “silicone rubber that is FOOD SAFE and can be used for culinary applications including casting chocolate and other confections.” It comes as PMC 121/30 in part A and B, that have to be mixed. I did a small test by putting a little bit Sorta-Clear in a petri-dish over a copper wire. It got to sticky, so i decided to use a release spray for the final mold.
As said, Smooth-on Sorta-Clear 37 is used for casting. Here are downloads for the Technical bulletin and the Safety Datasheet and the Food Safe Technical Bulletin. After reading all papers it looks like a good decision to use Sorta-Clear 37. I don’t want to do things that in the sheets, as using in a grill or heating to 204 degrees. And is was good to read for cleaning, hardening en postcuring befor using the mold to make tempeh-trays.
![]()
After spraying the molds (including the copper wires) with the release-spray, i weighted the amount of part A and B.
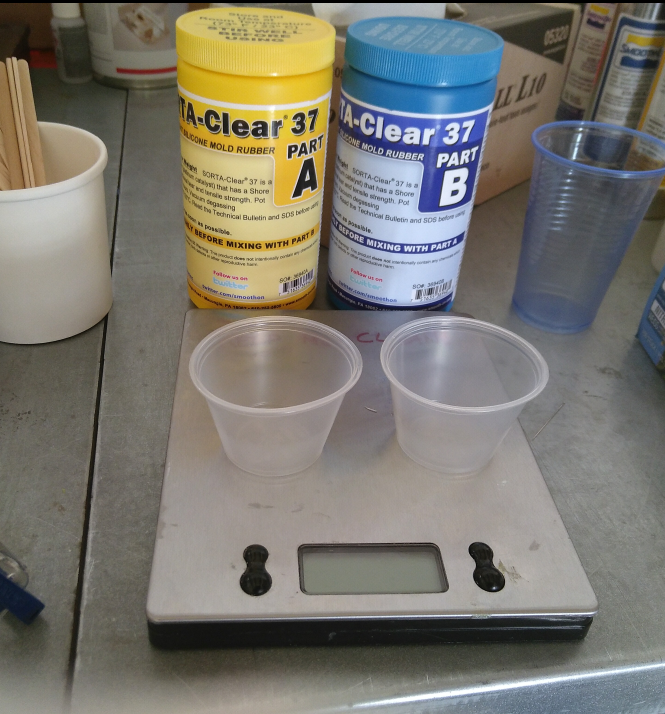
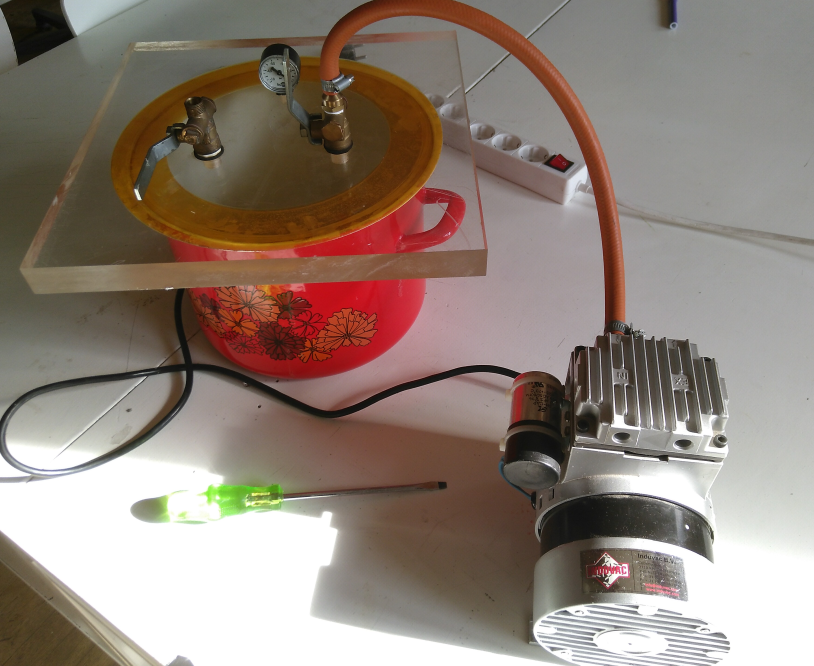
Mixing the 2 components for a few minutes resulted in a smooth mix with some big bubbles. A vacumizer was used to get rid of the air bubbles, but it turned out that our vacumizer was not strong enough. From the datasheets, it says vacumizing for 3 minutes at 29 inches of mercury, which is around -1Bar. The vacumizer at our fablab only reached around -0.7Bar, resulting on a lot of very small bubbles in the mixture.
Because i wanted to make more molds, i started experimenting with the mixture and degassing. Smooth mixing with only a few big bubbles resulted in a lot of small bubbles. Extending time of vacumizing the mixture did not lead to less small bubbles. And trying to pick the bubbles with a needle before vacuminzing comes to a same end result. Conclusion is that we need a more powerfull vacumizer.
After the vacumizer i cured the molds, and pushed the mold from yesterday on top of what would become the lid of the final mold.
The curing of the mixture is 4 hours. Taking the molds out was a bit tricky (finally used the back of a metal spoon to get it out. But i am happy with the result.
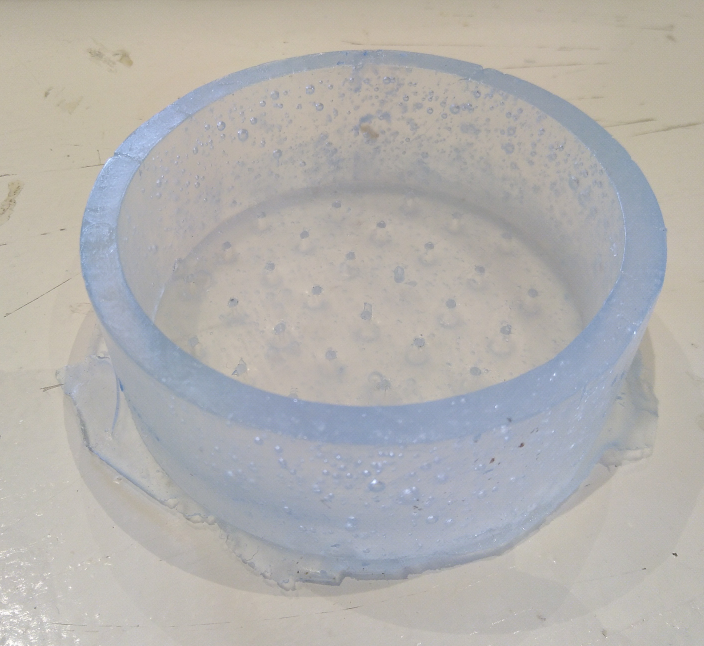
After cleaning the molds with water and soap the post curing process started: 2 hrs in the oven by 80 degrees followed by 1 hrs at 100 degrees.

Making the tempeh tray
So now i have molded a mould for the tempeh. The most lengthy process, it takes around 3 days.
- Soaking and dehulling beans for 12 hours
- Cooking the beans
- Cracking the beans
- Inoculating the beans with tempeh starter
- Incubating the beans at 30 degrees for about 48 hours
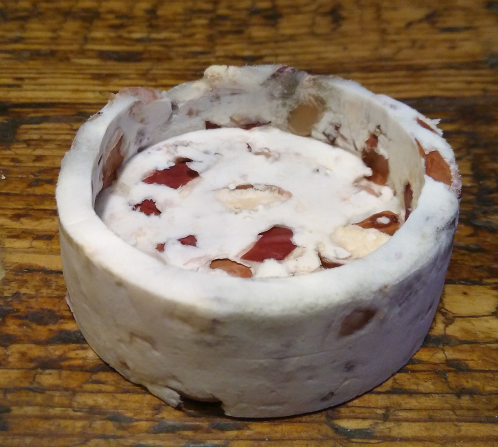
I prefer a combination of beans. Black, white, red and borlotti beans is what i used this time. After soaking for 12 hrs i cooked the beans for 35 minutes. Just enough to have a little bite, so just “not well-done”. During cooking i added some crushed garlic clove and whole bay leaf to give the beans a bit of a flavor. Traditional tempeh is made with soybeans lacks these subtle aromas. After cooking the beans were coarsely chopped to fit the mold. A little bit (only 3 gram per kilo beans) of fermentation starter containing the spores of fungus Rhizopus oligosporus are mixed trough the beans.

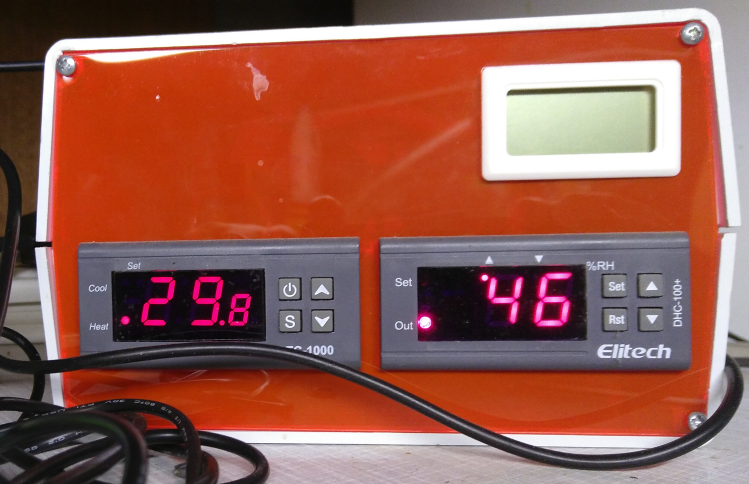
The mold is then put in a warm place, preferably around 30 degrees for 36 to 48 hours. At home i’ve a converted fridge that acts as a giant incubator. The temperature controller is an old stc1000 that keeps the fridge on a programmed temperature. Temperature in my fridge ranges from 3-40 degrees. For heating it uses a 40W light bulb, enough to heat the fridge to around 40 degrees. For cooling it uses …. the fridge :)
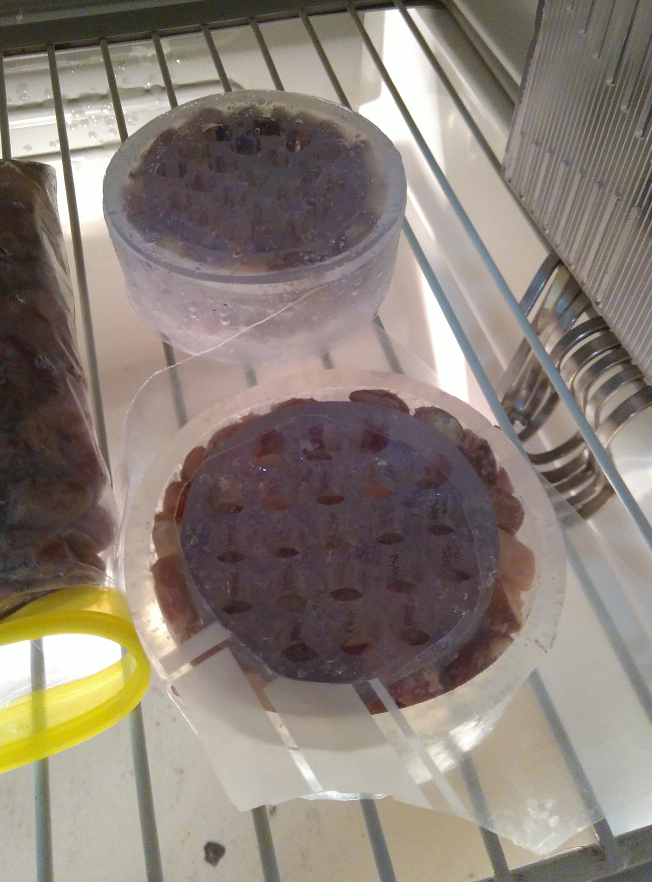
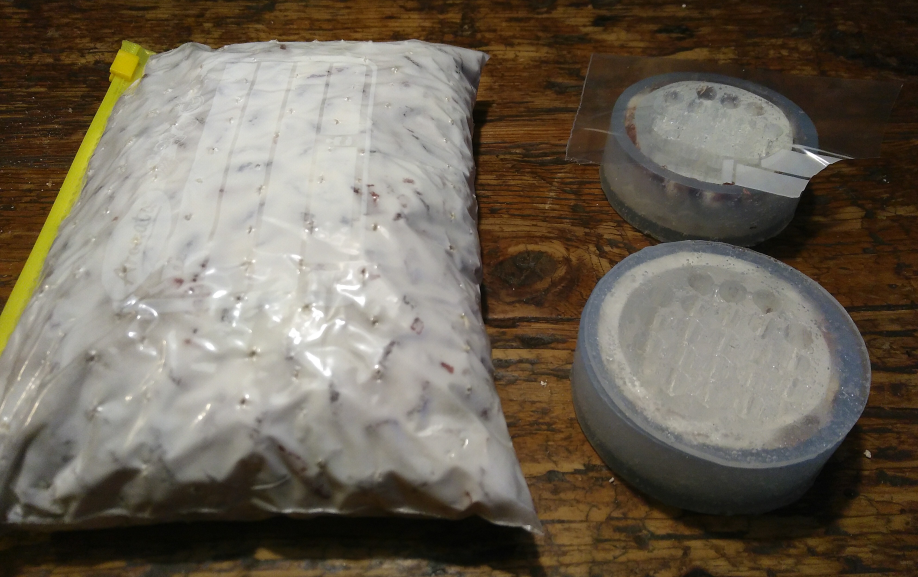
After almost 2 days at 30 degrees the beans are knitted together by a mat of white mycelium. The tempeh is ready!
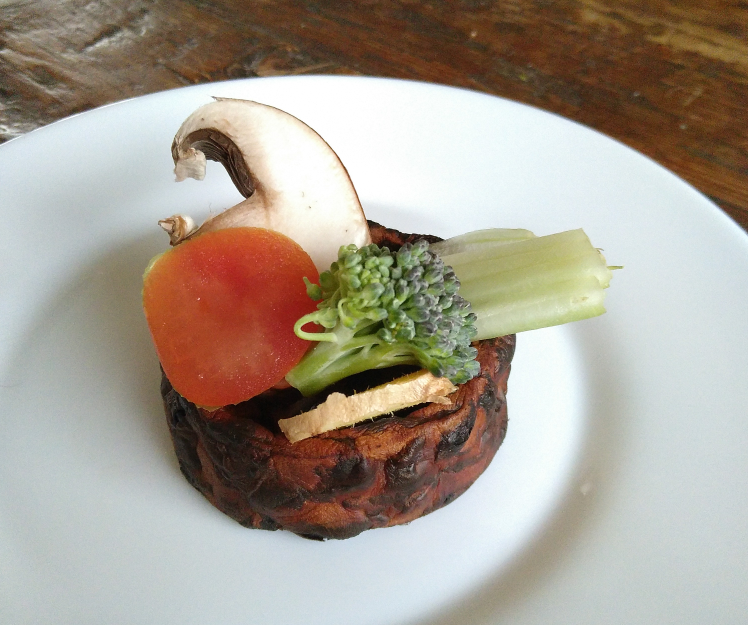
The tray can be fried or steamed. A lot of people marinate it before frying, but i prefer to do it afterwards. It’s easier to combine flavors for obtaining a good end result without burning all the sugars for instance (that’s what normally happens).
Anyway! It was a pleasure to have more than the regular time for this assignment. I used it well and enjoyed all parts of it (even the 3d / freecad part :)