Introduction
The focus of Week 14 was Interface and Application Programming. For this assignment, I created a simple web-based user interface to control a physical output device. Instead of using a separate desktop or mobile application, the interface is hosted directly on the Seeed Studio XIAO ESP32-C3.
The ESP32-C3 connects to WiFi and works as a small web server. When the user opens the board IP address in a browser, a control page appears. From this page, the user can move a servo motor to fixed angles or enable an automatic sweep mode.
Assignment Objective
My objective was to build an interface that connects software interaction with physical hardware behavior. The interface should be simple, accessible from a browser, and able to send commands to the microcontroller without extra software installation.
In this work, the browser acts as the user interface, the ESP32-C3 acts as the application server, and the servo motor acts as the physical output controlled by the application.
Hardware Used
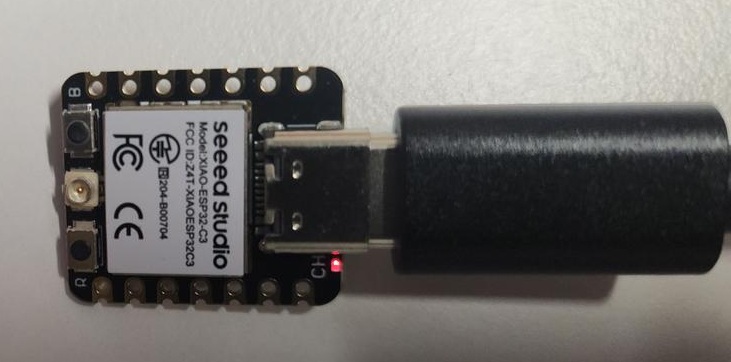
I used the Seeed Studio XIAO ESP32-C3 because it has built-in WiFi, a small form factor, and can be programmed using the Arduino IDE. This makes it suitable for creating small embedded web applications.
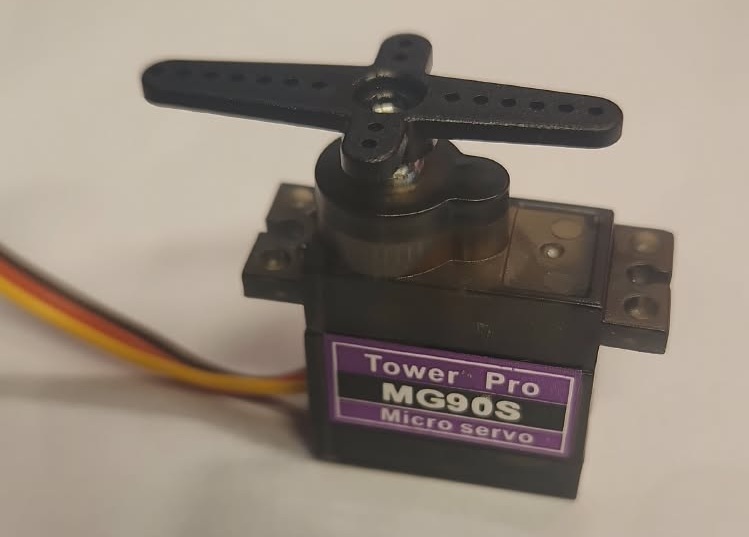
The servo motor was selected as the output device because its movement can be easily observed. This makes it useful for testing whether the interface command is correctly received and translated into physical motion.
Interface Design
The application interface was designed as a simple web page with buttons for motor control. Each button sends a different HTTP request to the ESP32-C3. Based on the received request, the microcontroller changes the servo position.
The interface contains control options for:
| Interface Button | Request | Action |
|---|---|---|
| 0° | /0 | Move servo to 0 degrees |
| 90° | /90 | Move servo to 90 degrees |
| 180° | /180 | Move servo to 180 degrees |
| Loop ON | /loop_on | Start automatic sweeping |
| Loop OFF | /loop_off | Stop automatic sweeping |
This structure helped me understand how a user interface can communicate with embedded hardware using simple web requests.
Wiring

| Servo Wire | Connection | Function |
|---|---|---|
| Red | VCC | Power supply |
| Brown | GND | Common ground |
| Yellow | GPIO 8 | PWM control signal |
GPIO 8 was used as the PWM signal pin for controlling the servo motor. The ESP32-C3 receives commands from the web interface and converts them into servo movement.
Application Code
The code combines three parts: WiFi connection, web server creation, and servo control. The ESP32-C3 listens for HTTP requests from the browser and performs the corresponding servo action.
#include <WiFi.h>
#include <ESP32Servo.h>

const char* ssid = "YOUR_WIFI_NAME";
const char* password = "YOUR_PASSWORD";

WiFiServer server(80);

Servo myservo;
int servoPin = 8;

bool loopMode = false;
int pos = 0;
bool forward = true;

void setup() {
  Serial.begin(115200);

  ESP32PWM::allocateTimer(0);
  myservo.setPeriodHertz(50);
  myservo.attach(servoPin, 1000, 2000);

  WiFi.begin(ssid, password);

  while (WiFi.status() != WL_CONNECTED) {
    delay(500);
    Serial.print(".");
  }

  Serial.println("");
  Serial.print("Connected. IP address: ");
  Serial.println(WiFi.localIP());

  server.begin();
}

void loop() {
  WiFiClient client = server.available();

  if (client) {
    String request = client.readStringUntil('\r');
    client.flush();

    if (request.indexOf("/0") != -1) {
      loopMode = false;
      myservo.write(0);
    }

    if (request.indexOf("/90") != -1) {
      loopMode = false;
      myservo.write(90);
    }

    if (request.indexOf("/180") != -1) {
      loopMode = false;
      myservo.write(180);
    }

    if (request.indexOf("/loop_on") != -1) {
      loopMode = true;
    }

    if (request.indexOf("/loop_off") != -1) {
      loopMode = false;
    }

    client.println("HTTP/1.1 200 OK");
    client.println("Content-type:text/html");
    client.println();

    client.println("<!DOCTYPE html>");
    client.println("<html>");
    client.println("<head>");
    client.println("<title>ESP32 Servo Interface</title>");
    client.println("<style>");
    client.println("body{font-family:Arial;text-align:center;background:#f4f4f4;padding:40px;}");
    client.println("h1{color:#333;}");
    client.println("button{padding:15px 25px;margin:10px;font-size:18px;border:none;border-radius:8px;background:#2563eb;color:white;}");
    client.println("button:hover{background:#1d4ed8;}");
    client.println(".card{background:white;padding:30px;border-radius:12px;max-width:500px;margin:auto;box-shadow:0 4px 12px rgba(0,0,0,0.1);}");
    client.println("</style>");
    client.println("</head>");
    client.println("<body>");
    client.println("<div class='card'>");
    client.println("<h1>Servo Motor Interface</h1>");
    client.println("<p>Control the servo motor using the buttons below.</p>");
    client.println("<a href='/0'><button>0 Degree</button></a>");
    client.println("<a href='/90'><button>90 Degree</button></a>");
    client.println("<a href='/180'><button>180 Degree</button></a>");
    client.println("<br>");
    client.println("<a href='/loop_on'><button>Loop ON</button></a>");
    client.println("<a href='/loop_off'><button>Loop OFF</button></a>");
    client.println("</div>");
    client.println("</body>");
    client.println("</html>");

    client.stop();
  }

  if (loopMode) {
    myservo.write(pos);

    if (forward) {
      pos++;
      if (pos >= 180) forward = false;
    } else {
      pos--;
      if (pos <= 0) forward = true;
    }

    delay(15);
  }
}
Testing the Interface
After uploading the code, I opened the Serial Monitor to check the IP address assigned to the ESP32-C3. Then I entered this IP address in a web browser connected to the same WiFi network.
When the web page loaded, I tested each button. The servo responded to the commands, confirming that the browser interface was successfully communicating with the microcontroller application.
Results
The web interface successfully controlled the servo motor. The buttons for 0°, 90°, and 180° moved the servo to the selected positions, and the loop mode created a continuous sweeping motion.
This assignment helped me understand how interface design, application programming, and embedded hardware control can be connected together in one system.