Week 16: System Intergration
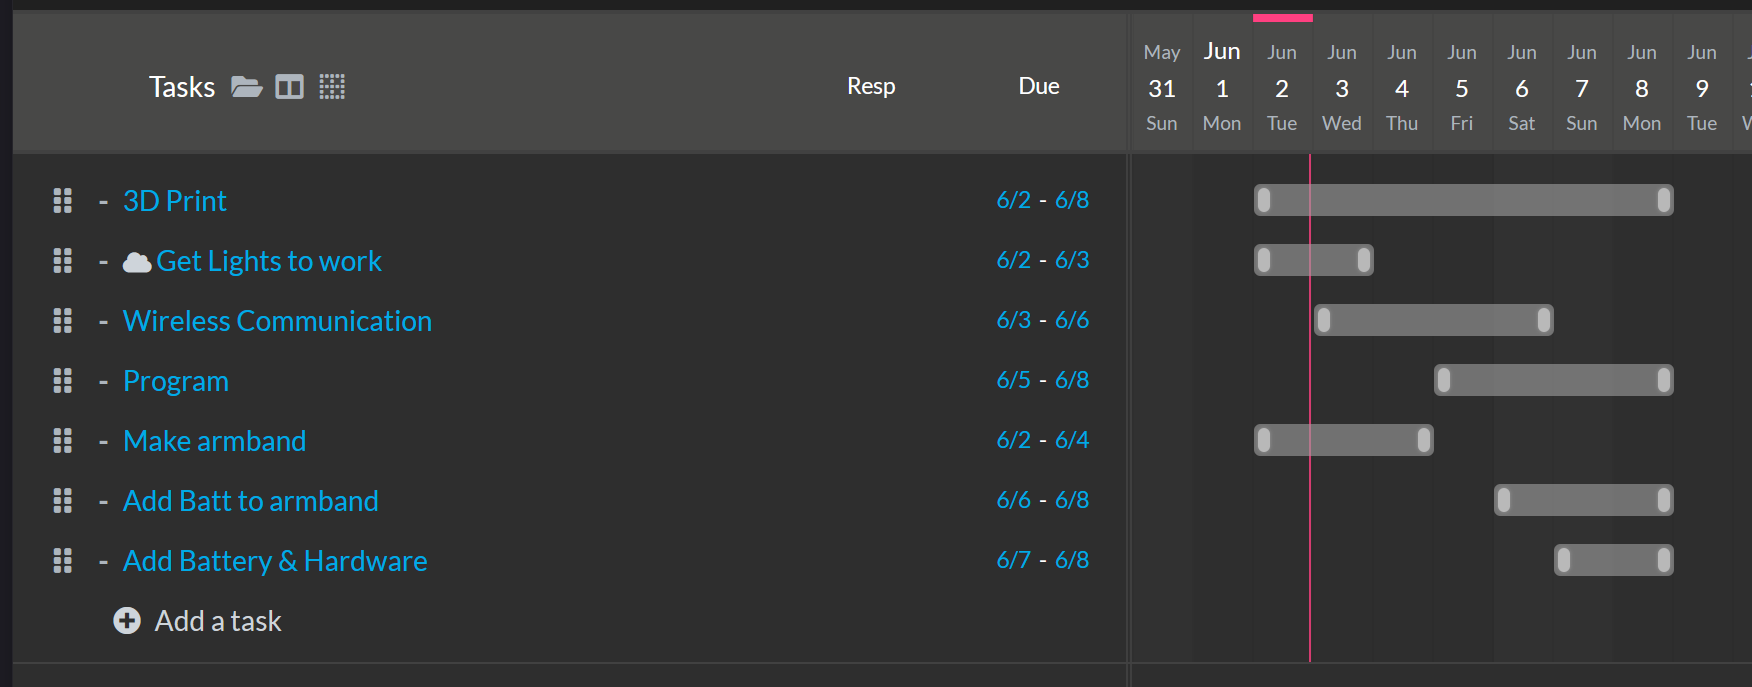
At Present, I have 6 days left to make my final project. I have a working Armband remote and a somewhat working LED display.
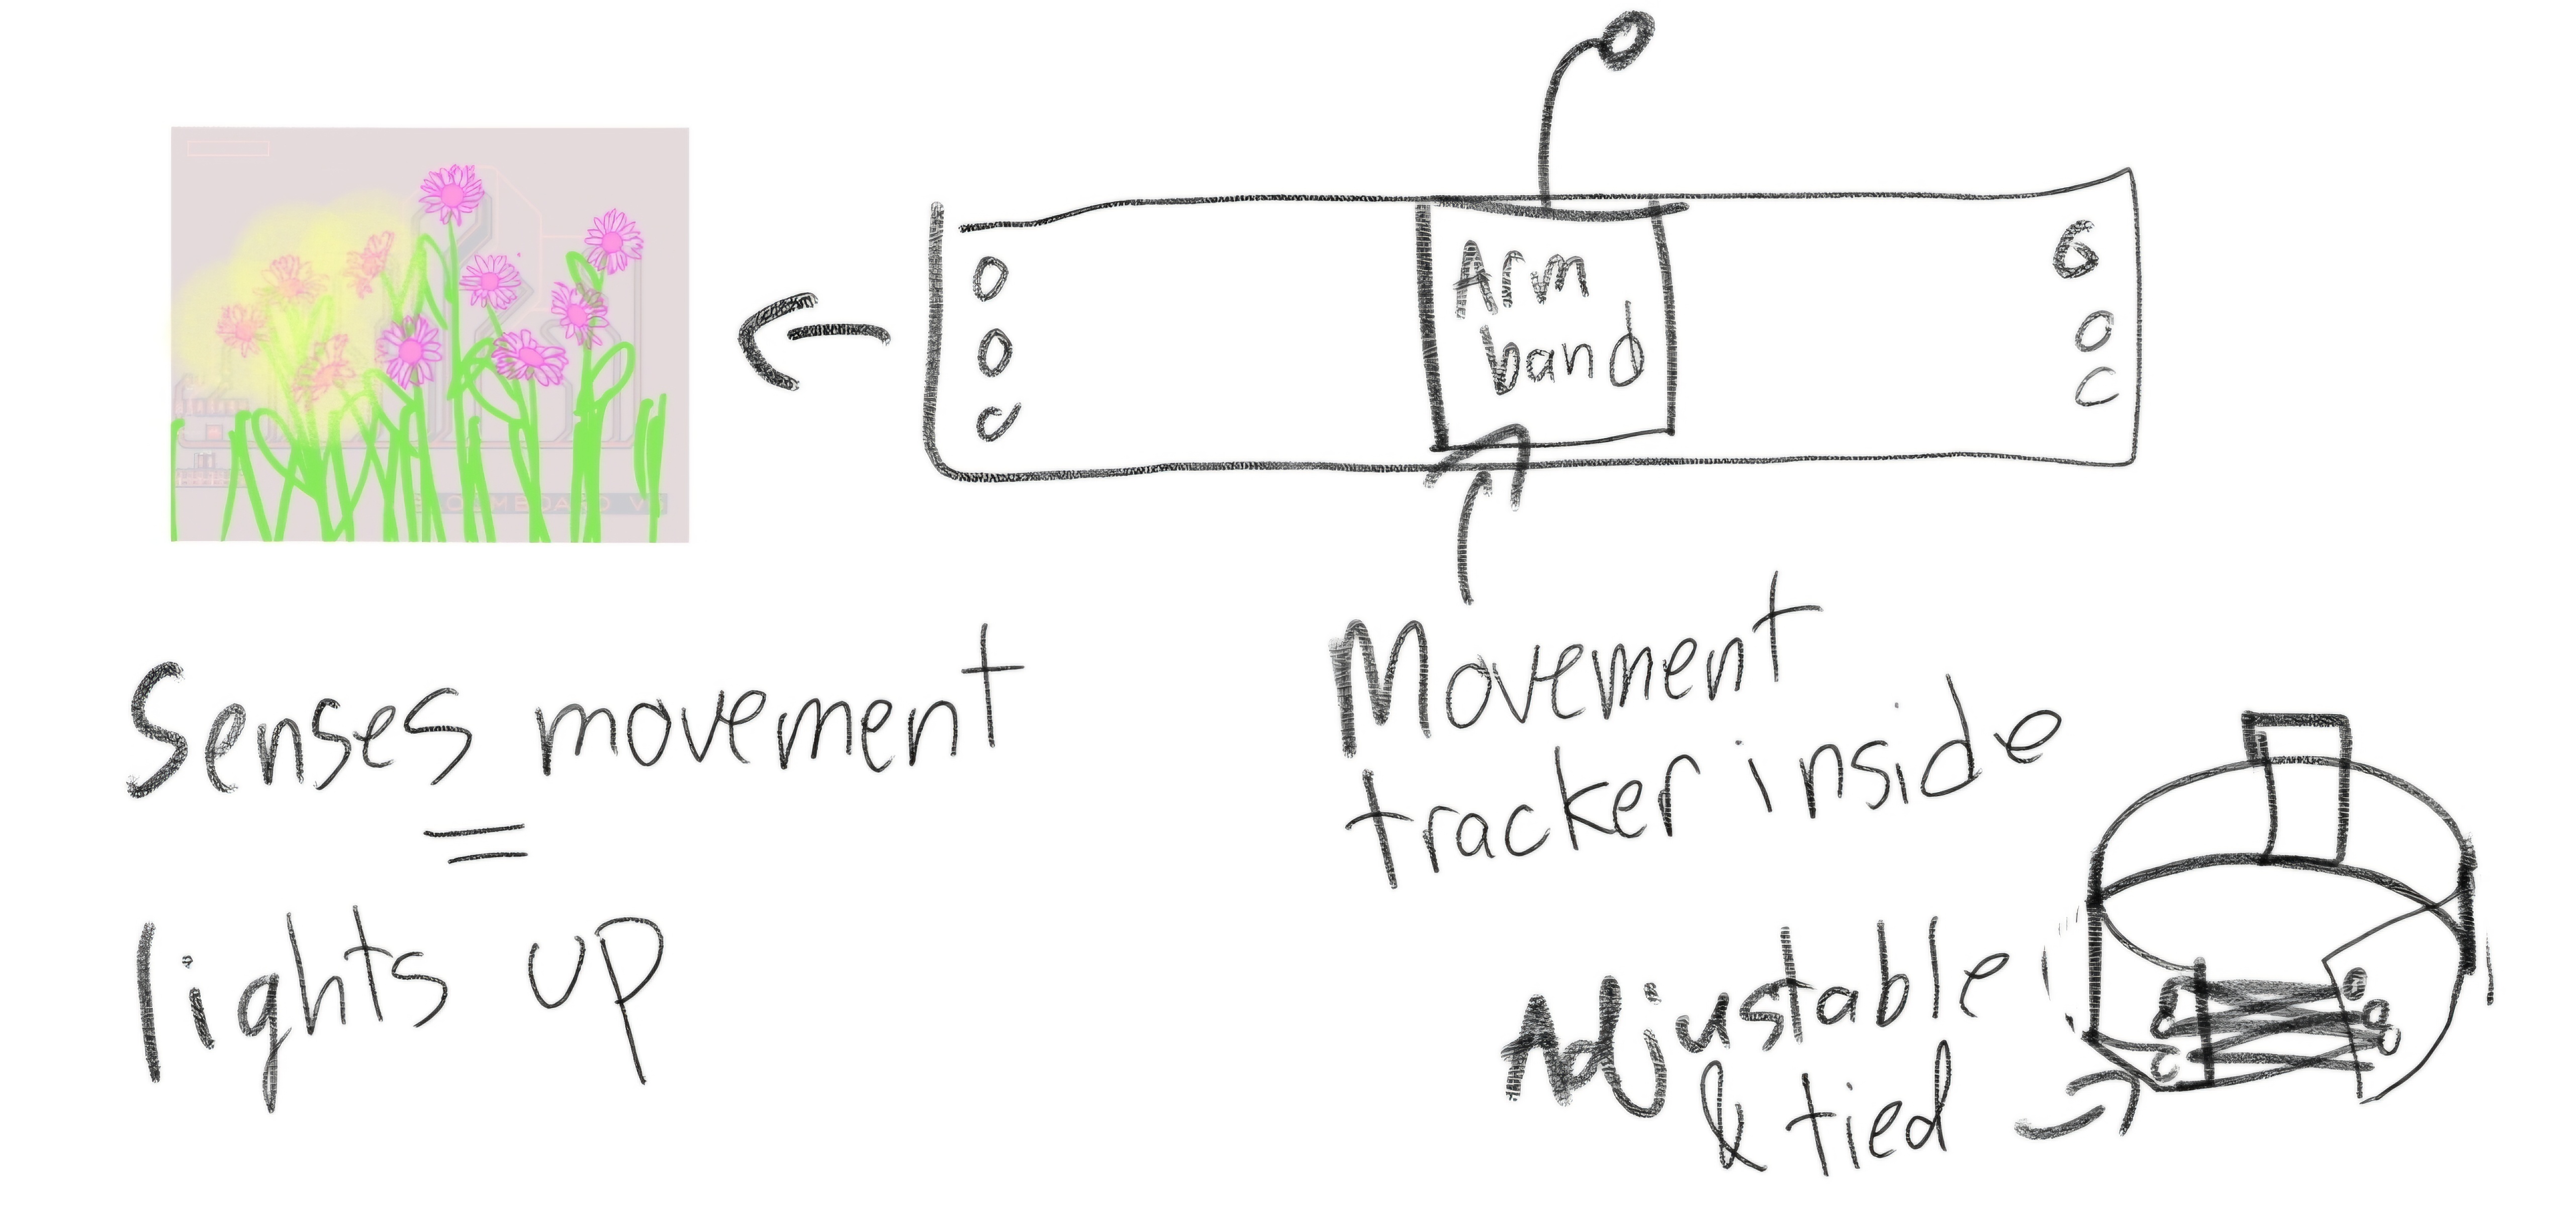
I have to do physical therapy every day. for a year. It’s terribly boring and I hate keeping count. So I am making something that will keep count for me. Every time I move up and down, a sensor attached to my leg will detect it, the wirelessly communicate to the BloomBoard and make a flower light up.
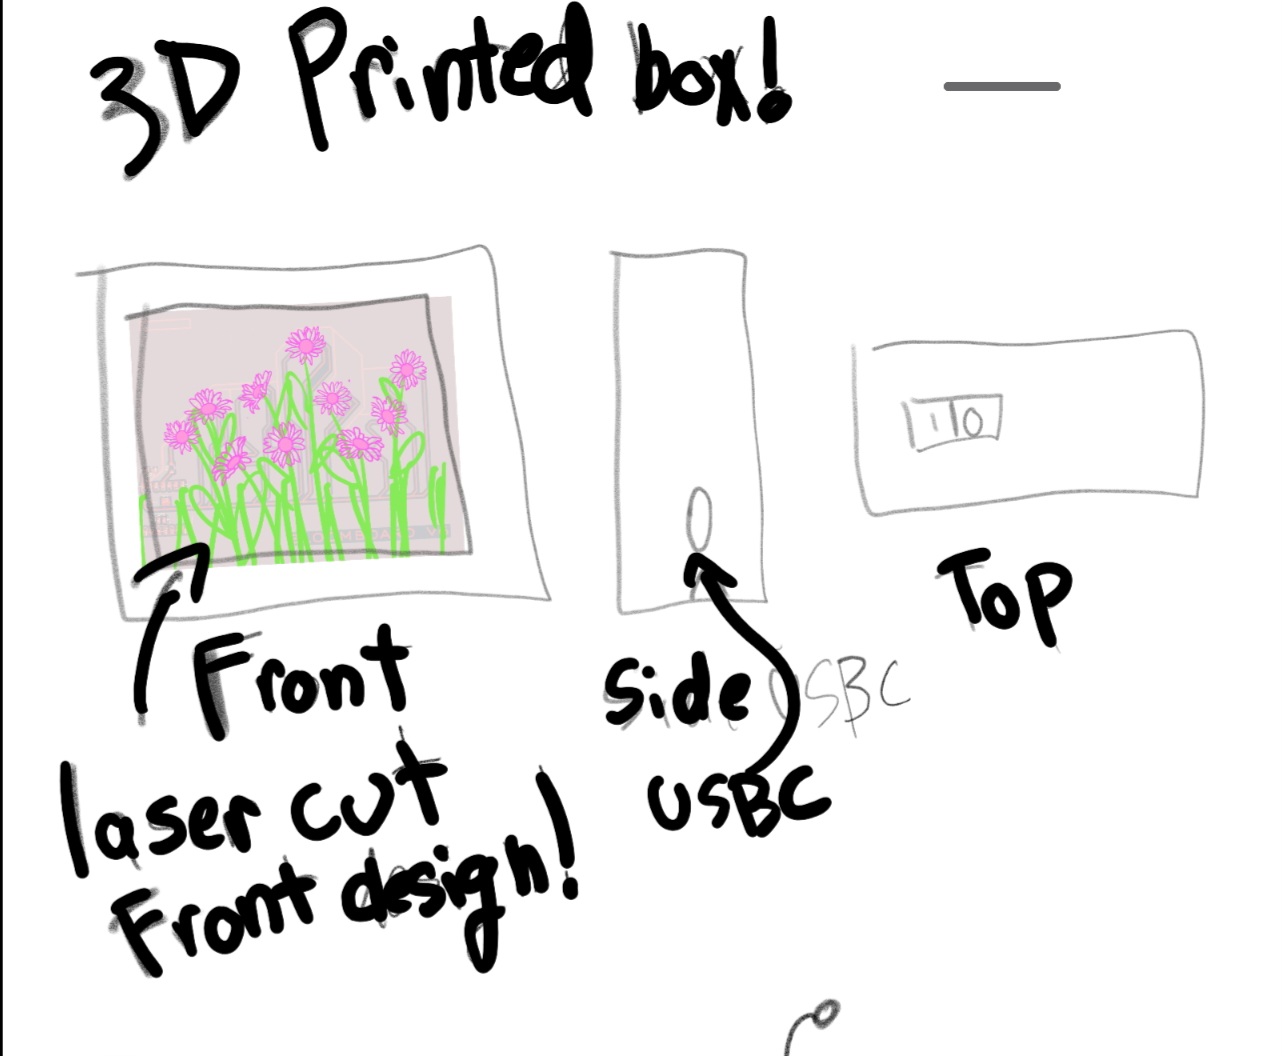
I am keeping the packaging simpler. I want to add an On/Off switch to the top. It will be clicky. And I will add charging to the side. I want to be able to use this without plugging in anything and will be using Lithium batteries.
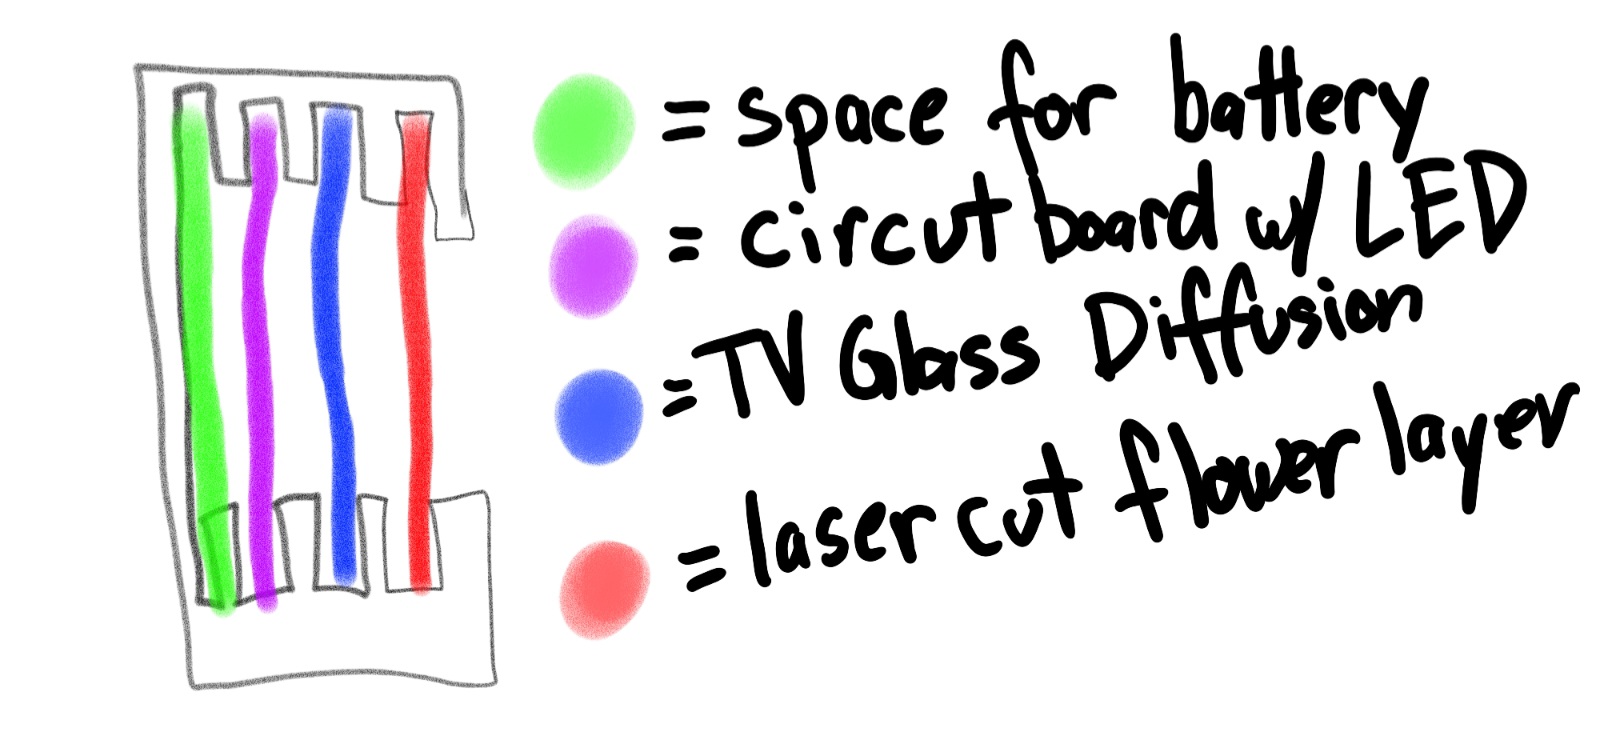
The inside will be comprised of 4 layers.
- Battery Layer
- Microcontroller & LED layer
- layer where I used acrylic to diffuse the light more evenly
- Layer where I can make the front pretty with flower cutouts and designs :)
Copyright 2026
Source code hosted at gitlab.fabcloud.org