Week 6: Electronics Design
How I did it
This week we are learning how to make circut boards! This is an important foundational step in being able to make machines! First we learned to make a schematic. This is how we define what we are going to make, and how. We are figuring out what lines need to be connected to each other.
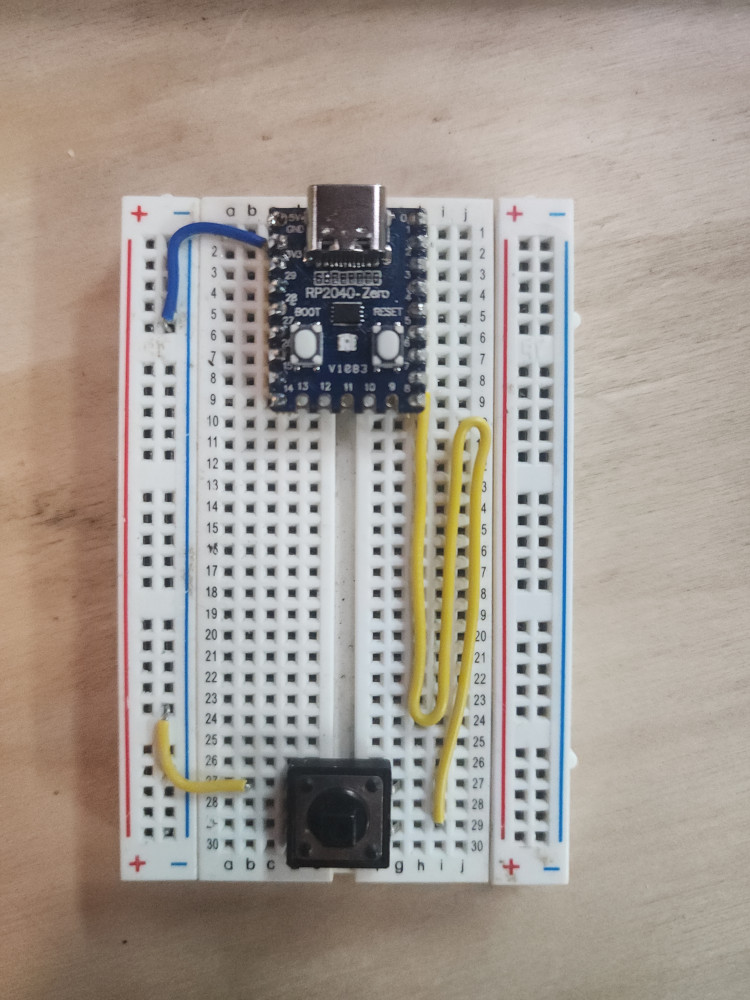
Wolkwi and bread boards are a good way to simulate and test different arrangements. These are useful because you can move around the wires until your inputs and outputs operate as intended. Pictured is a simple breadboard for a button. With this setup, I can program the microcontroller to do send a message when the button is pressed.
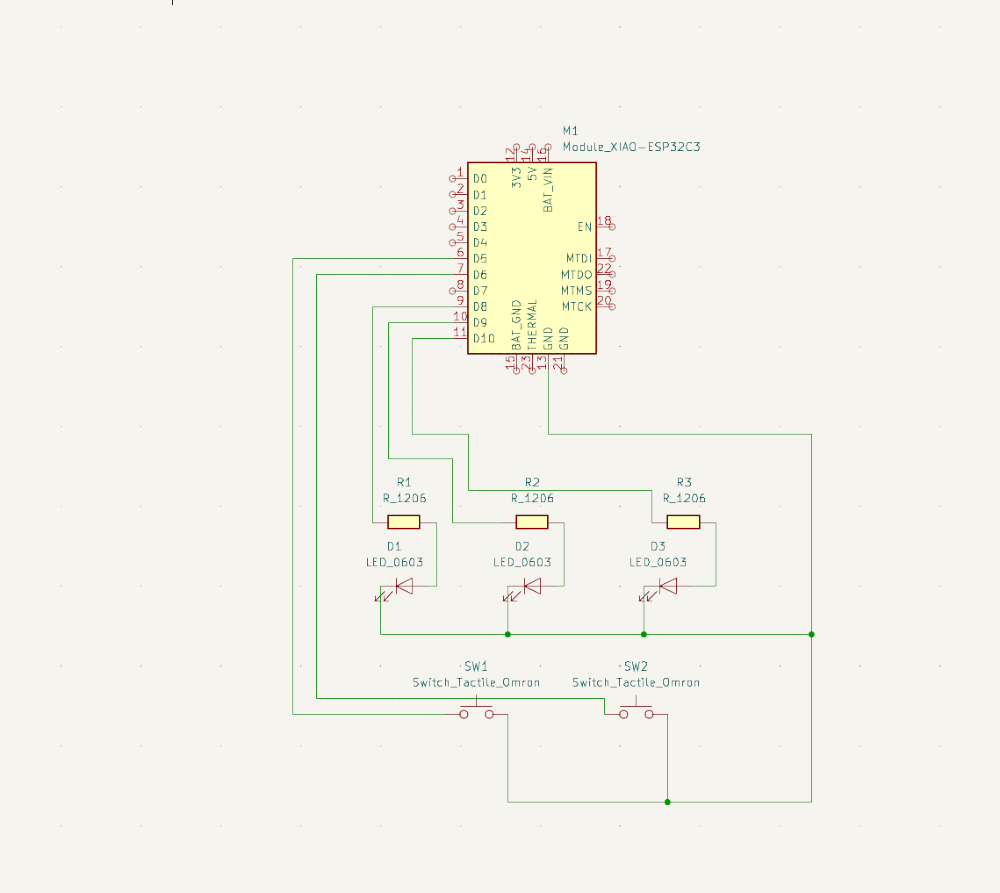
Next we draw a more complicated design on Kicad. 3 LED and 2 buttons. Making sure to import the correct board, resistors, LED, and buttons. There are many different types of each of these things, and some of them need to be connected differently.
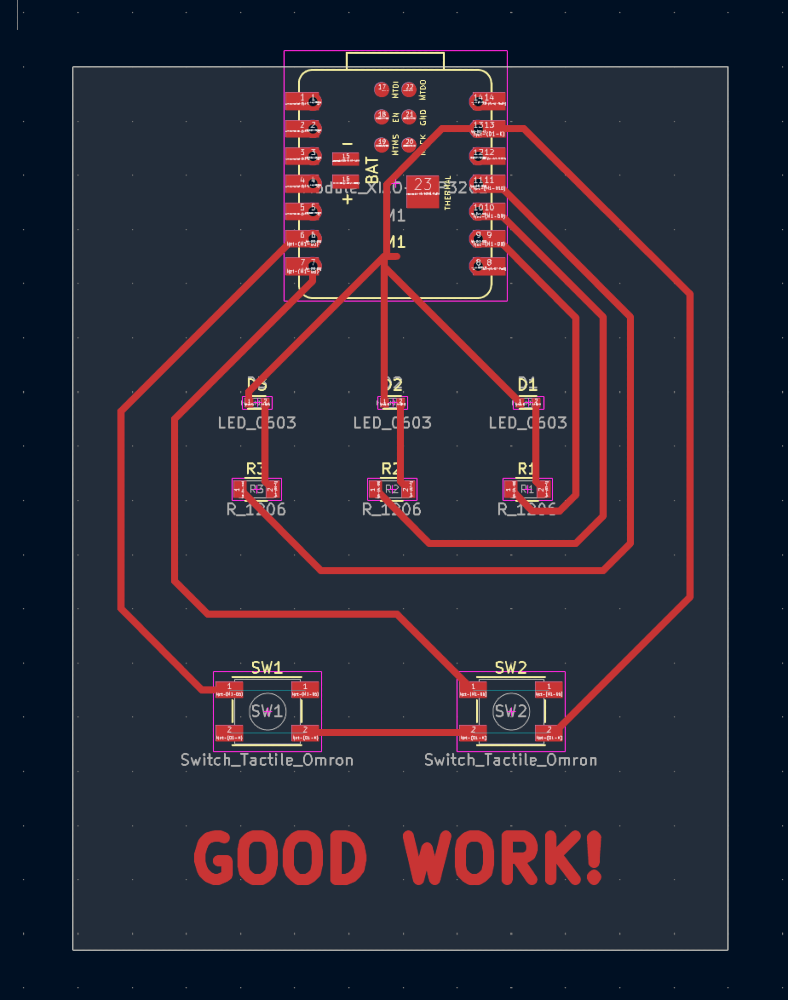
Next up is placing the wires where they belong. It is a puzzle because they can’t cross over each other. My instructor was adamant I changed the line thickness. This will make my life easier when we mill.
The board is all set, in 2 weeks we mill it out!
Troubleshooting
** Q: Do I have to create my board from scratch so the computer knows where to put the lines and connections? **
A: NO! Fablab already has an entire library of the most common boards used! Click PCB, Plugin and Content Manager to install the library.
** Q: It won’t let me download the library, does that mean I have to make my board from scratch? **
A: No, You can download specifc boards online, and specifically download the Fablabs library here
** Q: Can I put traces under where my board will be? **
A: Yes, and they will still work. However it is not ideal because sometimes there are other pads underneath the board that would interfere with the circut.
Reflection
I feel really good! I am proud of my work. I started with a basic board that is one button and one neopixel, and now I have tripled the complexity by adding more elements. Starting simple to master the basics, then iterating truly is magical.
Also, the multimeter is a wonderful tool that helps with debugging. It’s truly amazing.
Groupwork
click here to learn more about multimeters
Cats
All that work… and the cats do not care.
Files
Copyright 2026
Source code hosted at gitlab.fabcloud.org