Week 13: Molding and Casting
Note: My English writing skills are limited. For this documentation, I have used AI assistance for parts of the translation.
Date: April 14 - 21, 2026
Group Assignment: Safety Data Sheets and Material Comparison
Safety Data Sheets (SDS)
Our group checked the safety data sheets for all materials used this week.
Materials we used:
- Silicone rubber (liquid, two-part mix)
- Casting resin (urethane, two-part mix)
- UV resin (UV-curable type)
- Machinable wax (blue block)
Protective Equipment:
| Body Part | Protection | Reason |
|---|---|---|
| Hands | Nitrile gloves (not latex) | Resins and silicone can cause skin irritation or allergic reaction |
| Eyes | Safety glasses or goggles | Liquid resin splashing into eyes is very dangerous |
| Mouth / Nose | Ventilation mask (if working with urethane) | Urethane resins release fumes during mixing and curing |
| Clothing | Apron or old clothes | Cured resin is very hard to remove from fabric |
General Safety Rules:
- Always work in a well-ventilated area — open windows or use a fume hood
- Wear nitrile gloves throughout the process — change them if they tear
- Keep safety glasses on when pouring or mixing
- Never touch uncured resin with bare skin — wash immediately with soap if contact occurs
- Follow the mix ratio exactly — use a scale, not volume measurement
- Do not pour mixed resin down the drain — let it cure fully before disposal
- Store UV resin away from light sources to prevent premature curing
Material Comparison Test
Our group tested three different casting materials and compared the results.
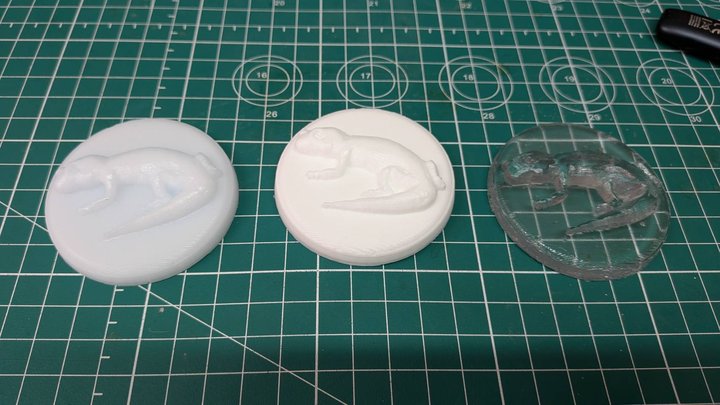
Left to right:
- Epoxy resin (white, semi-transparent)
- Urethane resin (white, opaque)
- UV resin (clear, transparent)
| Material | Surface Detail | Hardness | Transparency |
|---|---|---|---|
| Epoxy resin | High | Hard | Semi-transparent |
| Urethane resin | High | Hard | Opaque white |
| UV resin | High | Hard | Clear |
Vacuum Chamber Degassing
After pouring the material into the mold, we used a vacuum chamber to remove air bubbles.
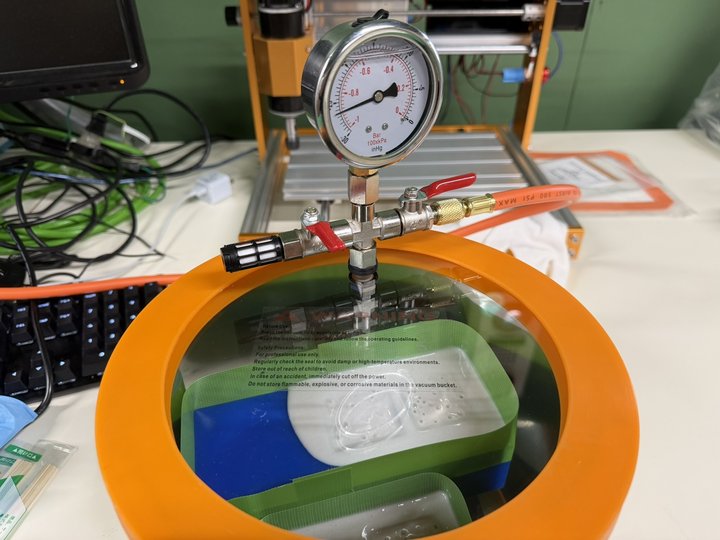
Inside the vacuum chamber, bubbles expand and rise to the surface. This reduces defects in the finished cast.
UV Resin — Curing Problem
During the group test, we had a problem with the UV resin.
The UV lamp in the lab did not cure the resin completely. We waited a long time, but the resin stayed soft.
We then moved the mold outside and used direct sunlight. The resin cured completely in a short time.
Conclusion: The lab UV lamp was not strong enough. Natural sunlight has a much wider UV spectrum and higher intensity. For UV resin, sunlight is more reliable than a small UV lamp.
What I Learned
- Each material has different mix ratios, pot life, and cure time
- Vacuum degassing is very important for bubble-free results
- Silicone molds are flexible, so parts with undercuts can still be removed easily
- Always measure by weight, not by volume
- UV resin needs strong UV light — a small lamp may not work; sunlight is more reliable
Individual Assignment: Gecko Emblem — Mold and Cast
For my final project, I made a decorative emblem of my project mascot — the Gecko. The emblem is a relief (raised) design, planned to be attached to the front panel of the terrarium controller.
Design Inspiration
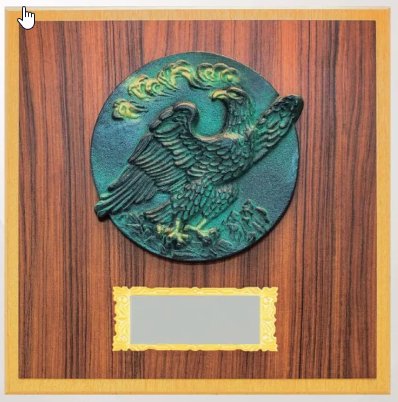
I used this style of shield relief plaque as a reference.
STEP 1: Convert Illustration to Outline (Inkscape)
I took my existing Gecko logo illustration and converted it to an outline SVG in Inkscape.
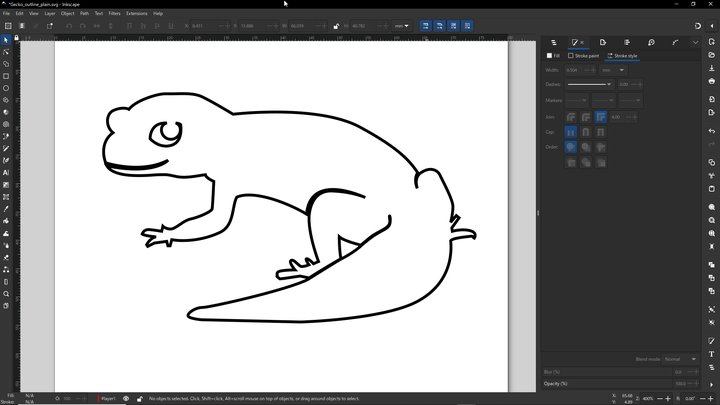
I traced the bitmap image to a vector path — outline only, no fill. This SVG is imported into Fusion 360 to create the 3D mold model.
STEP 2: Model the Mold in Fusion 360
I imported the outline SVG into Fusion 360 and designed the mold shape.
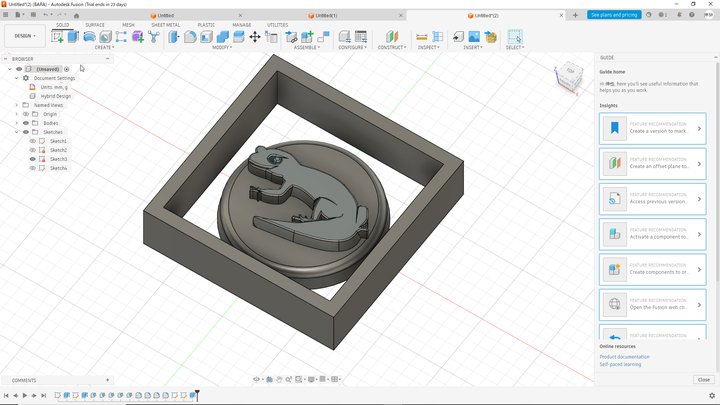
Structure:
- Outer frame: square base block
- Center: circular disk
- Surface: Gecko relief (extruded)
This is the positive master — it will be machined into the wax block.
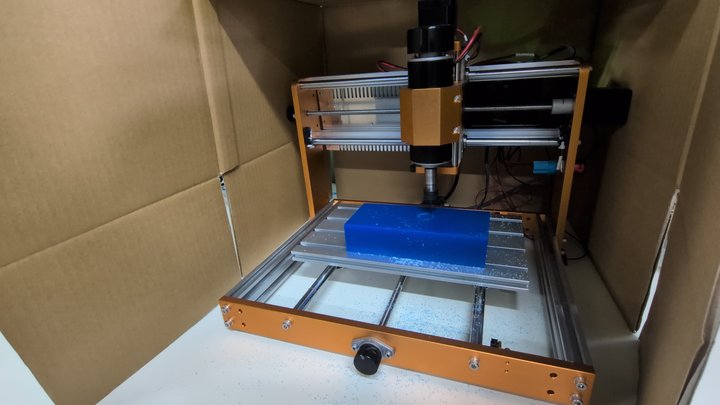
STEP 3: Mill the Wax Block on CNC
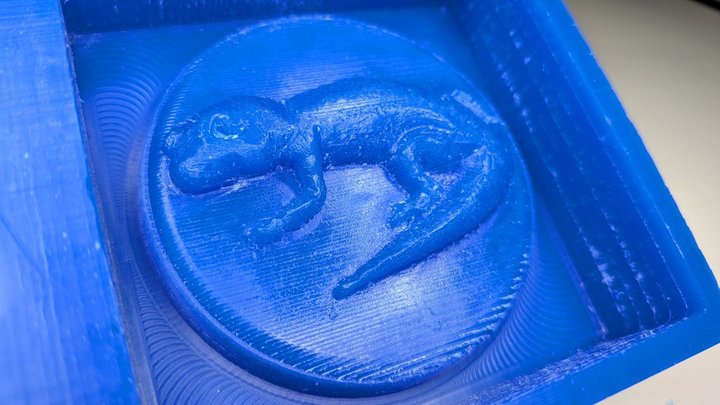
I set the blue machinable wax block on the desktop CNC machine and milled the gecko design.
CNC Settings:
| Parameter | Roughing | Finishing |
|---|---|---|
| CAM software | Fusion 360 (Manufacture workspace) | Fusion 360 (Manufacture workspace) |
| Machine | Autodesk Generic 3-axis | Autodesk Generic 3-axis |
| Post processor | Grbl | Grbl |
| End mill | 1/8" flat end mill | 1/8" ball end mill |
| Strategy | Adaptive Clearing | Parallel |
| Feed rate | 24 in/min (610 mm/min) | 24 in/min (610 mm/min) |
| Spindle speed | 10,000 rpm | 10,000 rpm |
G-code was sent to the machine using Candle.
I used a 1/8" flat end mill for roughing and a 1/8" ball end mill for finishing. The stepdown was 0.2 mm per pass. A smaller bit would give better detail. The 1/8" ball end mill left clear toolpath marks on the wax. That is why I needed manual finishing.
Machinable wax is good for this process because:
- It machines cleanly with high detail
- Silicone releases easily from it
- It can be re-machined if needed
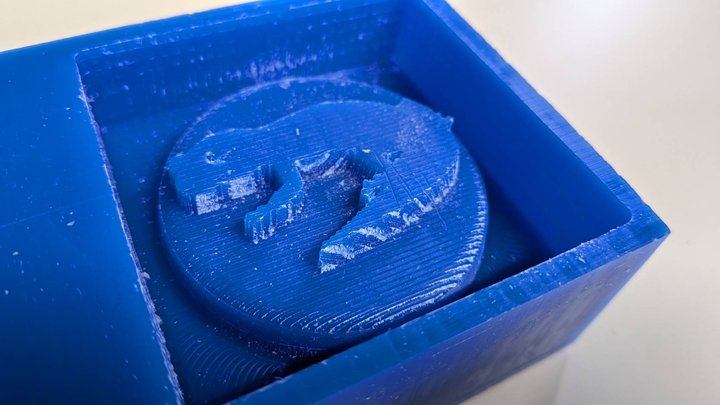
After milling, the surface shows the CNC toolpath pattern (concentric circle marks).
However, the result was not good enough. The complex curves of a reptile body are hard to express in a 3D CAD model. The CNC result looked stepped and blocky — not like the flat, clean relief style of the reference plaque.
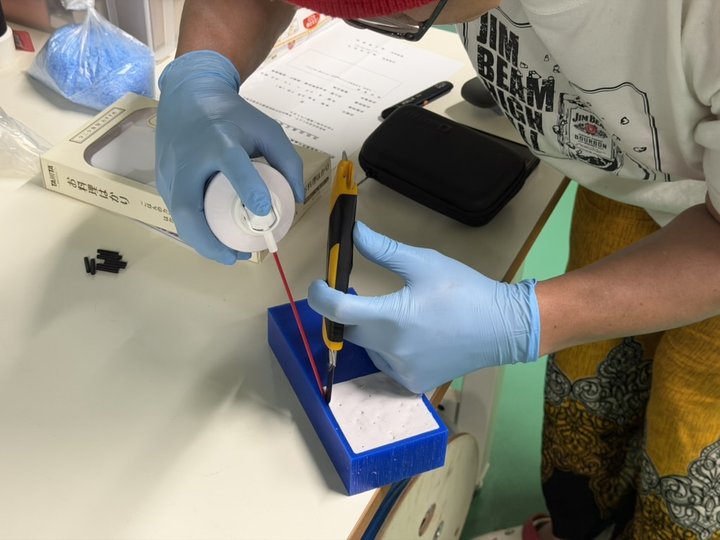
STEP 3b: Manual Finish with Handy Router
To fix the shape, I used a handy rotary tool to carve and smooth the wax surface by hand.
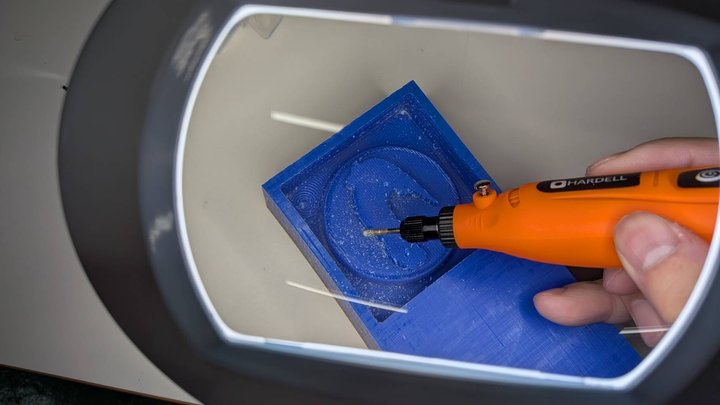
Working by hand allowed me to add natural curves and organic details that CNC alone could not produce. After finishing, the gecko shape looked much more realistic and had the right flat-relief feeling.
STEP 4: Pour Silicone into the Mold
Materials used:
| Material | Product |
|---|---|
| Silicone rubber | Wave Silicone Gum 1kg (Wave) |
| Urethane resin | Wave Resin Cast Ex. (Wave) |
| Epoxy resin | SANAAA White Epoxy Resin (SANAAA) |
| UV resin | Generic UV resin (Amazon) |
For safety data and full comparison, see the Group Assignment page.
I mixed two-part liquid silicone and poured it slowly into the machined wax mold.

Pour in a thin stream to avoid trapping air bubbles.
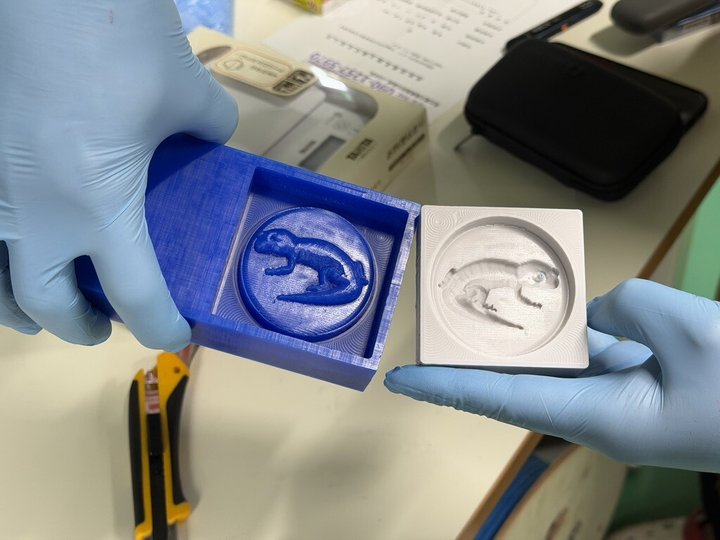
STEP 5: Remove the Silicone Mold from Wax
After the silicone cured, I separated it from the wax block. Blowing air between the two helped release the mold cleanly.
Comparing the blue wax block (left) and the white silicone mold (right) shows the positive/negative relationship clearly.
STEP 6: Cast Resin into the Silicone Mold
I poured casting resin into the silicone mold and let it cure.
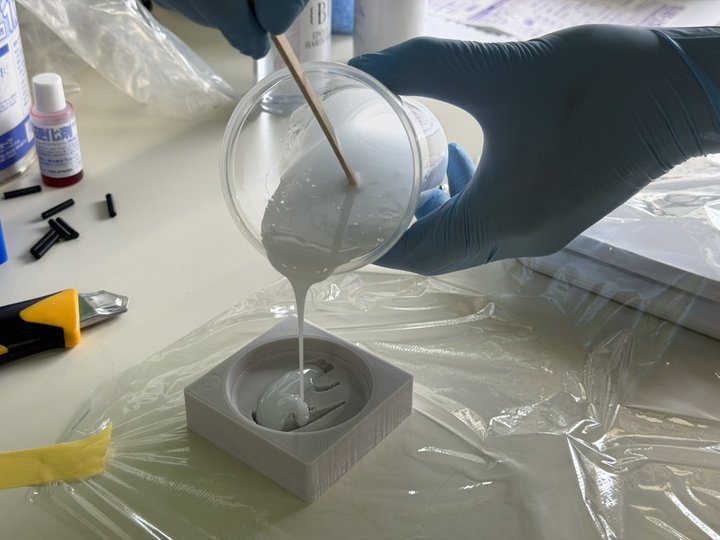
Because silicone is flexible, the cured part can be peeled out even if there are small undercuts.
STEP 7: Demold the Cast
After curing, I peeled the resin cast out of the silicone mold.
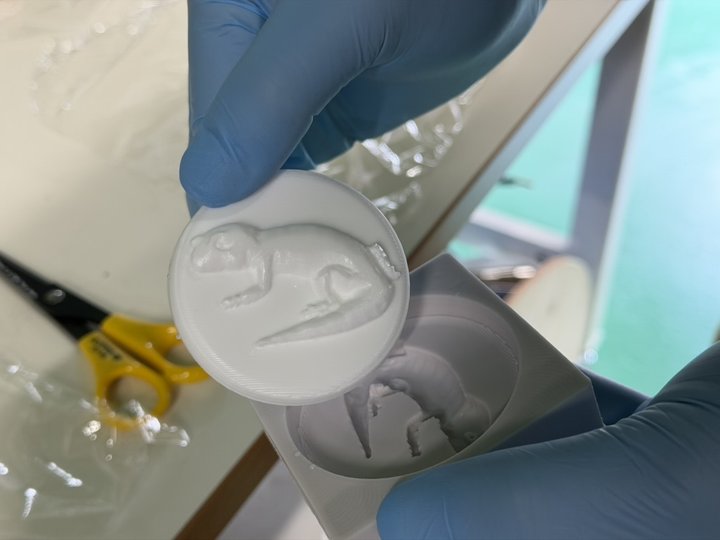
The gecko relief transferred cleanly to the cast!
Results and Notes
- The gecko detail was reproduced well
- CNC alone could not express the complex reptile body curves — manual finishing with a handy router was the key
- The silicone mold can be reused many times
Use in final project: This Gecko emblem will be attached to the front panel of the reptile habitat controller.
Design Files
- Gecko_outline_plain.svg — Gecko outline vector (Inkscape)
- Gecko_Shield.f3d — Gecko mold 3D model (Fusion 360)