
git
Git is a distributed version control system that tracks changes in any set of computer files.
Week not started
Git is a distributed version control system that tracks changes in any set of computer files.
EduTile is an interactive educational tool that uses modular puzzle pieces to teach STEM concepts. It responds to user interaction through light, vibration, screen feedback, and sensors. Educators can customize the physical and digital content, making it suitable for a wide range of topics and age groups.
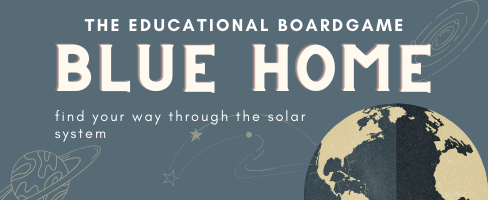
In 2021, I created a final project called Blue Home, an interactive educational board game about the solar system. It featured a 3D-printed astronaut, sensor-based interactions, and LED feedback to make learning space science engaging for kids.
EduTile builds upon the foundational ideas of Blue Home—interactivity, learning through play, and combining physical elements with digital logic—but takes it further with modularity, customizability for educators, and multiple outputs and sensors integrated into a single puzzle-like platform.
Compared to Blue Home, EduTile allows for broader educational content, more complex interactions, and better integration of electronics and design for real classroom use.
I will design all 3D printed enclosures, laser-cut puzzle pieces, three custom PCBs, the electronic circuits, and the web-based interface. The enclosure and interaction layout are customized specifically for the EduTile format.
Most electronics are sourced from DigiKey and Adafruit. PLA filament and magnets were sourced locally or from Amazon. 3D printing and laser cutting were done at Fab Lab Bahrain.
Total estimated cost: around $35–40 per unit
I designed and fabricated:
It will be evaluated based on functionality, interactivity, usability, and educational impact. If the puzzle pieces respond to user input with appropriate feedback (lights, screen, vibration), and if the system supports modularity and educator customization, then the project is successful.
I’ve learned how to integrate mechanical design with electronics and software into a single, user-friendly educational tool. I gained skills in modular electronics, interface design, rapid prototyping, and working within tight iteration cycles. The importance of user-centered design and system integration became clearer throughout this process.