


git
Git is a distributed version control system that tracks changes in any set of computer files.
This week I worked on making a web-based User Interface using Web Server for ESP32.
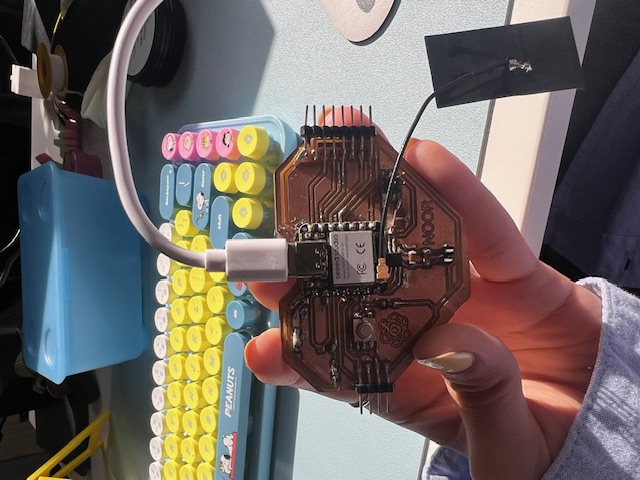
I started with the PCB I designed and produced in the previous weeks.
This documentation describes how I designed and implemented a user interface hosted on the ESP32 web server. The interface allows me to read temperature from a thermistor and control LEDs remotely from a web page.
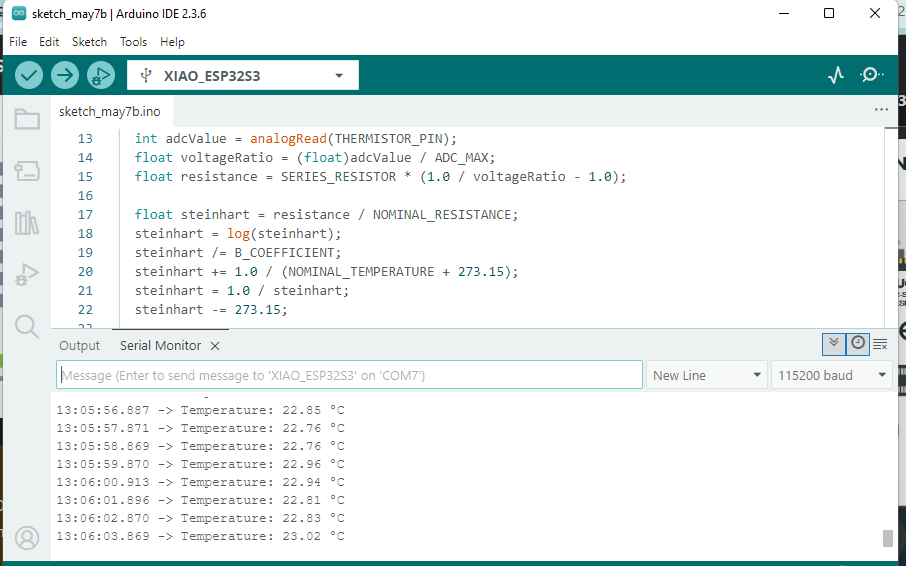
I started by testing if my PCB was correctly reading the temperature from a thermistor connected to pin A3. I used the Steinhart-Hart equation to convert the analog reading into degrees Celsius.
const int THERMISTOR_PIN = A3;
											  const float SERIES_RESISTOR = 10000;
											  const float NOMINAL_RESISTANCE = 10000;
											  const float NOMINAL_TEMPERATURE = 25;
											  const float B_COEFFICIENT = 3950;
											  const int ADC_MAX = 4095;

											  void setup() {
												Serial.begin(115200);
											  }

											  void loop() {
												int adcValue = analogRead(THERMISTOR_PIN);
												float voltageRatio = (float)adcValue / ADC_MAX;
												float resistance = SERIES_RESISTOR * (1.0 / voltageRatio - 1.0);

												float steinhart = resistance / NOMINAL_RESISTANCE;
												steinhart = log(steinhart);
												steinhart /= B_COEFFICIENT;
												steinhart += 1.0 / (NOMINAL_TEMPERATURE + 273.15);
												steinhart = 1.0 / steinhart;
												steinhart -= 273.15;

												Serial.print("Temperature: ");
												Serial.print(steinhart);
												Serial.println(" °C");

												delay(1000);
											  }
I confirmed that the temperature reading was accurate and responded to environmental changes.
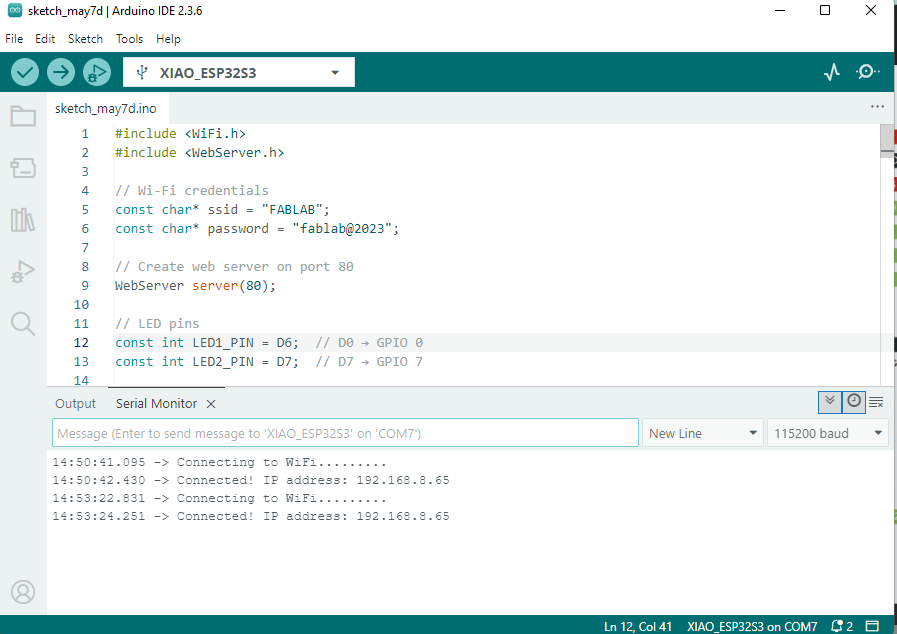
Next, I connected my ESP32 to Wi-Fi using the WiFi.h library. I printed the IP address to the Serial Monitor so I could access the web server from a browser.
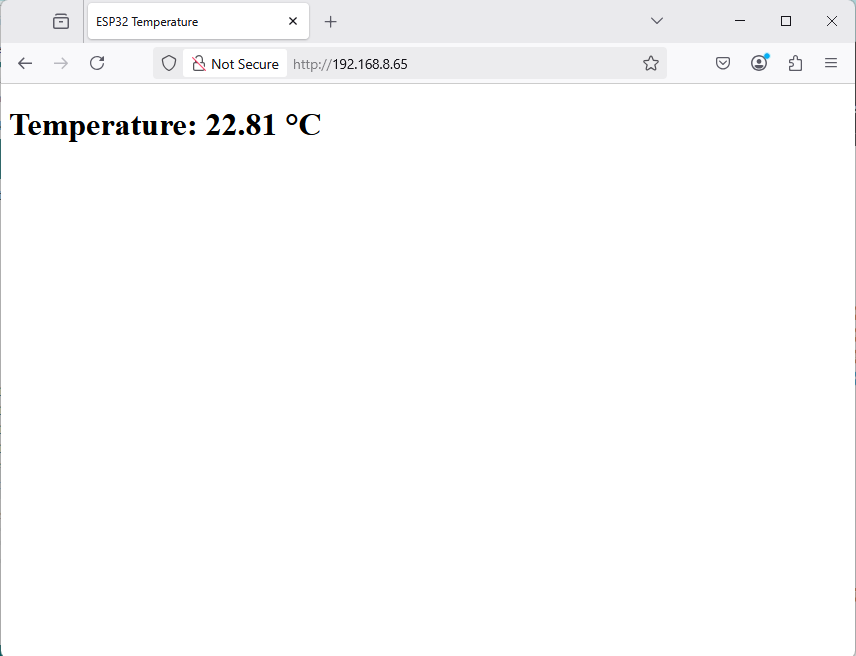
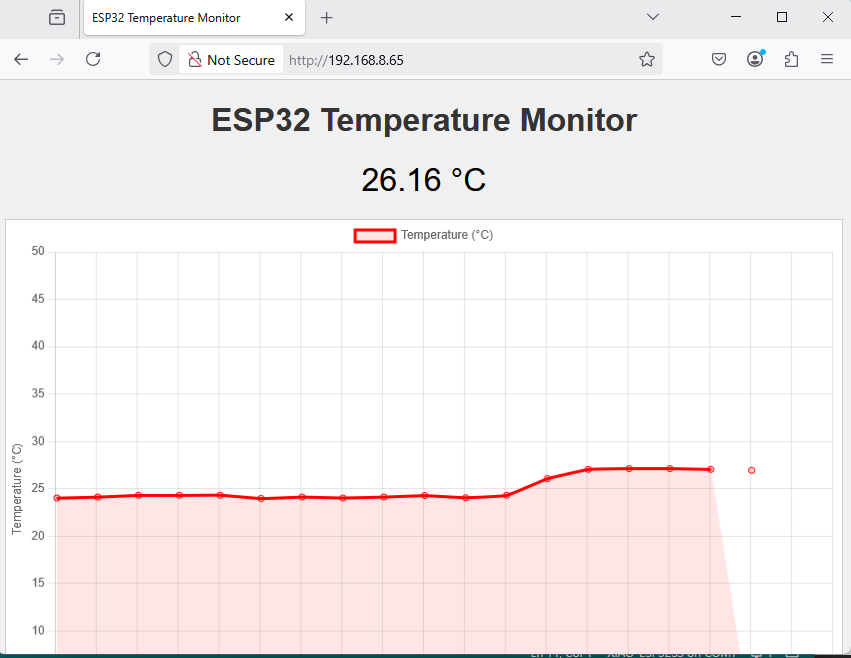
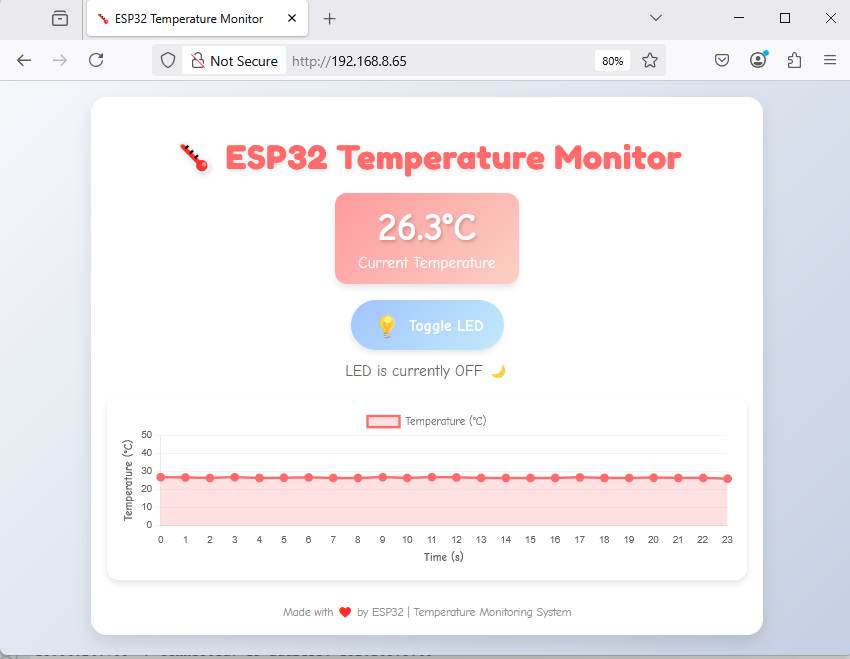
I used HTML and JavaScript (with Chart.js) to display the temperature data in real time as a graph. The webpage fetches temperature values from the ESP32 every second and updates the chart.
<script src='https://cdn.jsdelivr.net/npm/chart.js'></script>
										  <canvas id='tempChart' width='300' height='200'></canvas>
										  <script>
											let ctx = document.getElementById('tempChart').getContext('2d');
											let tempData = {
											  labels: [],
											  datasets: [{
												label: 'Temperature (°C)',
												data: [],
												borderColor: 'red',
												backgroundColor: 'rgba(255,0,0,0.1)',
												fill: true,
												tension: 0.1
											  }]
											};
											let tempChart = new Chart(ctx, {
											  type: 'line',
											  data: tempData,
											  options: {
												scales: {
												  x: { title: { display: true, text: 'Time (s)' } },
												  y: { suggestedMin: 0, suggestedMax: 50, title: { display: true, text: 'Temperature (°C)' } }
												}
											  }
											});
											let count = 0;
											setInterval(() => {
											  fetch('/temperature')
												.then(res => res.text())
												.then(temp => {
												  document.getElementById('temp').innerHTML = temp + ' °C';
												  tempData.labels.push(count++);
												  tempData.datasets[0].data.push(parseFloat(temp));
												  if (tempData.labels.length > 20) {
													tempData.labels.shift();
													tempData.datasets[0].data.shift();
												  }
												  tempChart.update();
												});
											}, 1000);
										  </script>
The ESP32 responds with the latest temperature reading every time /temperature is requested.


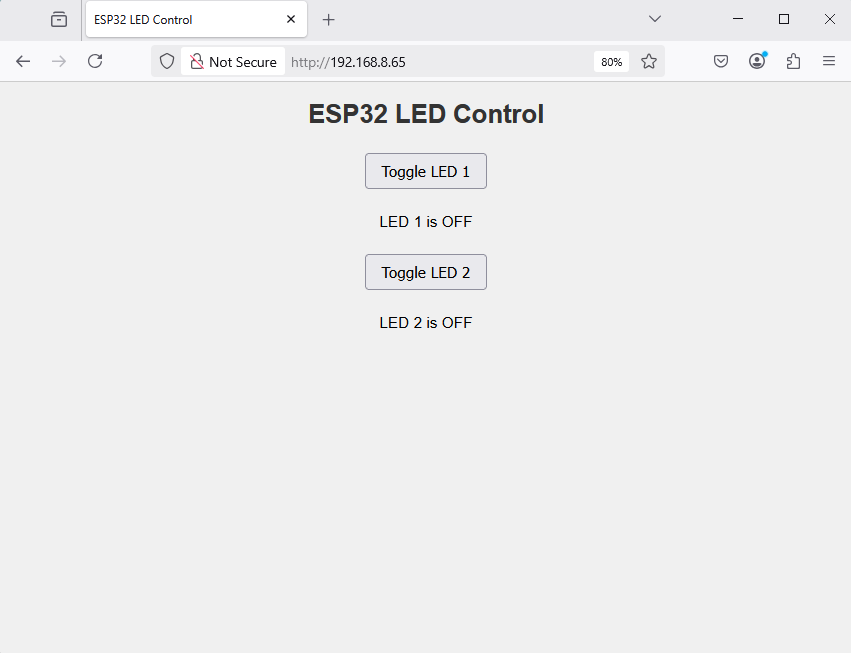
To interact with the hardware, I added a button to toggle an LED on pin D0. Clicking the button sends a request to /toggleLED, and the ESP32 responds by turning the LED ON or OFF and sending back the new status.
<button onclick="toggleLED()">Toggle LED</button>
										  <p id='ledStatus'>LED is OFF</p>

										  <script>
											function toggleLED() {
											  fetch('/toggleLED')
												.then(res => res.text())
												.then(status => {
												  document.getElementById('ledStatus').innerText = status;
												});
											}
</script>Finally, I expanded the interface to control two different LEDs (on D6 and D7). I created two buttons, each linked to its corresponding handler on the ESP32 web server.
<button onclick="toggleLED1()">Toggle LED 1</button>
										  <p id='led1Status'>LED 1 is OFF</p>
										  <button onclick="toggleLED2()">Toggle LED 2</button>
										  <p id='led2Status'>LED 2 is OFF</p>

										  <script>
											function toggleLED1() {
											  fetch('/toggleLED1')
												.then(res => res.text())
												.then(status => {
												  document.getElementById('led1Status').innerText = status;
												});
											}
											function toggleLED2() {
											  fetch('/toggleLED2')
												.then(res => res.text())
												.then(status => {
												  document.getElementById('led2Status').innerText = status;
												});
											}
										  </script>
The ESP32 keeps track of each LED state and updates the output pins accordingly.
/ – Serves the main HTML page/temperature – Sends back current temperature as plain text/toggleLED – Toggles a single LED and returns status/toggleLED1 – Toggles LED 1/toggleLED2 – Toggles LED 2The HTML interface uses JavaScript fetch calls to communicate with these routes, enabling real-time interactivity.
While I personally wrote the Arduino code for reading temperature from the thermistor using the Steinhart-Hart equation, I used DeepSeek to help generate the JavaScript and HTML code for the real-time graph.
I provided prompts such as:
DeepSeek responded with helpful and functional code snippets that I then integrated into my web interface. I customized the chart settings, labels, and data handling to match my needs. This saved me time and helped me understand how to use Chart.js effectively in an embedded system context.