6. Embedded programming
This is the documentation of week 6 activity Embedded Programming by Ahmad Tijjani Ishaq and Muhammad Jidda.
This weeks activity focusses on the use of various Development board and microcontrollers (embedded systems) for programming.
As for our individual Assignment it can be found here Jidda and Ahmed
The group task for this weeks activity are
- Browse Through data sheet of your microcontroller.
- Compare the performance and development workflows for other architectures
Data Sheet of Microcontrollers.
There are so many microcontrollers and development boards available but we would like to take a look at the following: - Raspberry Pi pico - Xiao Seed studio Rp2040 - Esp32
| Feature | RP2040 | ESP32 | Raspberry Pi Pico |
|---|---|---|---|
| CPU | Arm Cortex-M0+ Dual-core @133MHz | Tensilica Xtensa LX6 32-bit Dual-Core @160/240MHz | Arm Cortex-M0+ Dual-core @133MHz |
| Programmable Pins | 30 | 38 | 26 |
| Supply Voltage | 1.8-5.5V | 2.2-3.6V | 1.8-5.5V |
| RAM | 264 KB | 520 KB | - |
| ROM (Flash) | 448 KB | - | - |
| UART | 2 | 3 | - |
| SPI | 2 (OSPI) | 4 | - |
| Deep Sleep Consumption | 18 µA (Dormant), 39 µA (Sleep) | 10 µA | - |
| DAC | 8-bit, up to 2 channels | - | - |
| I2S | 1 | 2 | - |
| ADC | 4x 12-bit | 12-bit SAR ADC, up to 18 channels | - |
| Temperature Sensor | No | Yes | - |
| Hall Effect Sensor | No | Yes | - |
| GPIO | 30 | 32 (up to) | 26 |
| Touch Sensors | - | 10 | - |
| External SPIRAM | - | 16 MB (up to) | - |
| RTC Memory | - | 16 KB | - |
| Ethernet (LAN, RJ45) | - | 10/100Mbps | - |
| Height | 0.27559 in (7 mm) | 0.23622 in (6 mm) | 0.27559 in (7 mm) |
| Width | 0.27559 in (7 mm) | 0.23622 in (6 mm) | 0.27559 in (7 mm) |
RP2040:
Strengths:
- Cost-effective and suitable for budget-friendly projects.
- Dual-core ARM Cortex-M0+ processor provides good performance for various applications.
- Programmable I/O pins (30) offer flexibility for different projects.
- Low deep sleep consumption makes it suitable for battery-powered devices.
Weaknesses:
- Limited built-in peripherals compared to some other microcontrollers.
- No built-in Ethernet support.
When to Use:
- Ideal for projects with cost constraints.
- Well-suited for battery-powered or low-power applications.
- Suitable for projects requiring moderate processing power and GPIO flexibility.
ESP32:
Strengths:
- Dual-core Xtensa LX6 processor offers higher clock speeds.
- Rich set of built-in peripherals, including Wi-Fi and Bluetooth.
- Higher number of GPIO pins (38) for more complex projects.
- Suitable for IoT applications due to integrated Wi-Fi and Bluetooth.
Weaknesses:
- Slightly higher power consumption compared to some microcontrollers.
- Cost might be higher compared to basic microcontrollers.
When to Use:
- IoT projects requiring Wi-Fi and Bluetooth connectivity.
- Projects with more demanding processing requirements.
- Applications where a rich set of built-in peripherals is crucial.
Raspberry Pi Pico:
Strengths:
- Affordable and beginner-friendly.
- Dual-core ARM Cortex-M0+ processor provides good performance.
- Suitable for education and learning embedded systems.
- USB connectivity and ease of programming with MicroPython.
Weaknesses:
- Limited built-in peripherals compared to more advanced microcontrollers.
- No built-in Ethernet support.
When to Use:
- Educational projects for beginners.
- Prototyping and quick development using MicroPython.
- Budget-friendly projects that require a balance between features and cost.
Considerations:
-
Power Consumption:
-
For low-power or battery-powered applications, the RP2040 or Raspberry Pi Pico may be preferable due to their lower deep sleep consumption.
-
Connectivity:
-
If Wi-Fi and Bluetooth connectivity are essential, the ESP32 is the obvious choice.
-
Budget Constraints:
-
For projects with tight budget constraints, the RP2040 or Raspberry Pi Pico could be more suitable.
-
Educational Purposes:
-
The Raspberry Pi Pico might be a better choice for educational purposes, especially for beginners learning about microcontrollers.
Ultimately, the choice depends on the specific requirements of your project, considering factors such as processing power, connectivity, budget, and ease of use.
Performance and development workflows for other architectures
We would take a look at Micro bit, pi pico and xiao rp2040.
| Feature | Raspberry Pi Pico RP2040 | BBC micro:bit | Seeeduino XIAO RP2040 |
|---|---|---|---|
| Microcontroller | RP2040 (Arm Cortex-M0+) | nRF51822 (Arm Cortex-M0) | RP2040 (Arm Cortex-M0+) |
| Clock Speed | Up to 133MHz | 16MHz | 48MHz |
| Programmable Pins | 26 GPIO Pins | 19 GPIO Pins | 11 GPIO Pins |
| Built-in Peripherals | ADC, PWM, UART, SPI, I2C, PIO | Accelerometer, Magnetometer, Temperature Sensor, LED Matrix | ADC, PWM, UART, SPI, I2C, DAC |
| Connectivity | None (USB programmable) | Bluetooth (BLE) | None (USB programmable) |
| Power Supply | 1.8-5.5V | 3V (2x AAA batteries) | 3.3V |
| Programming Language Support | C/C++, MicroPython | Block-based, MicroPython | Arduino, CircuitPython |
| IDE Support | Thonny, VS Code, Arduino IDE | Microsoft MakeCode, Python Editor, Mu | Arduino IDE, Seeeduino IDE |
| Community Support | Strong community support | Active community | Growing community |
| Form Factor | Small, DIP-40 Package | Compact, board with LEDs | Ultra-small, mini board |
| Price | Inexpensive | Affordable | Budget-friendly |
Performance and Development Workflow Comparison:
Raspberry Pi Pico RP2040:
- Performance: Moderate clock speed, versatile GPIO, suitable for various applications.
- Development Workflow: Supports C/C++ and MicroPython. Variety of IDEs available, strong community support.
Development Workflow:
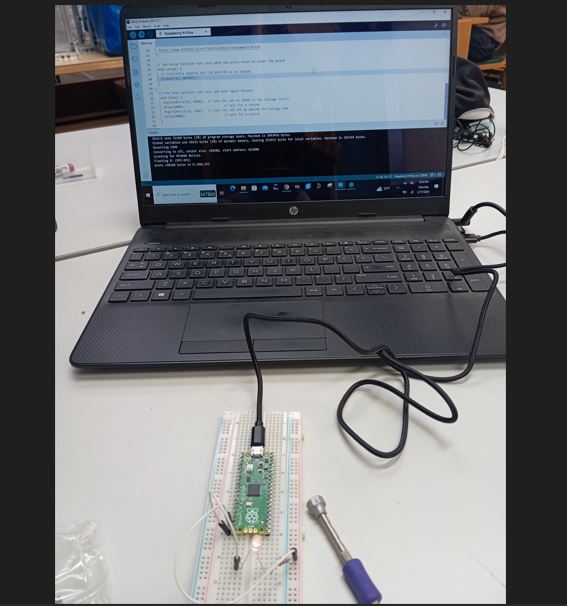
We used arduino IDE for programming our pi pico and the processes are as follows: - firstly we add the repo of rp2040 based boards into our arduino prefernces by going to file, preference, additional board and adding the following url (https://github.com/earlephilhower/arduino-pico/releases/download/global/package_rp2040_index.json) - Then we go to tools port and select the appropriate port that our pico is connected to. - Then we go to boards and sellect rp2040 based boards and then sellect pi pico, it is always at the top.
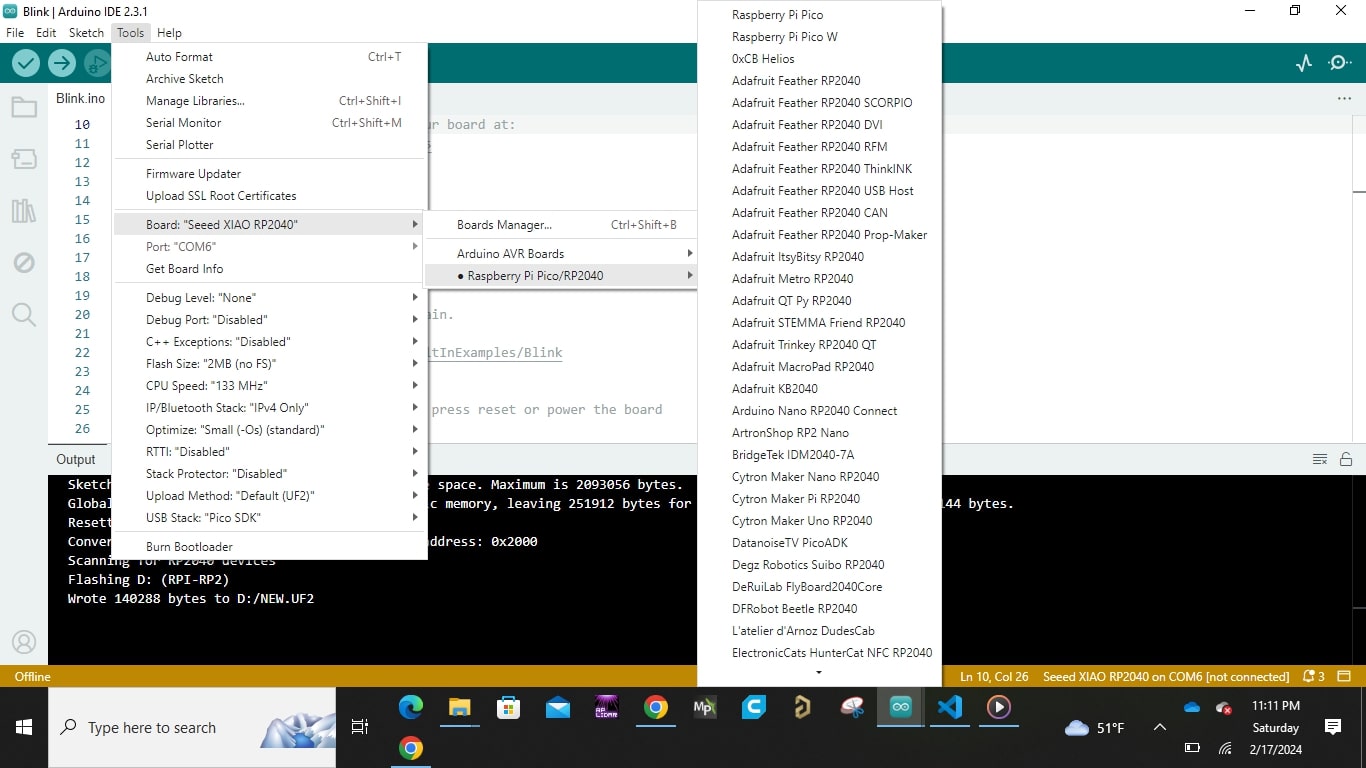
- After that we can test a blink example and it works fine.
BBC micro:bit:
- Performance: Limited processing power, designed for education and simple projects.
- Development Workflow: Primarily for educational use. Block-based programming, MicroPython support. Suitable for beginners.
Development Workflow:
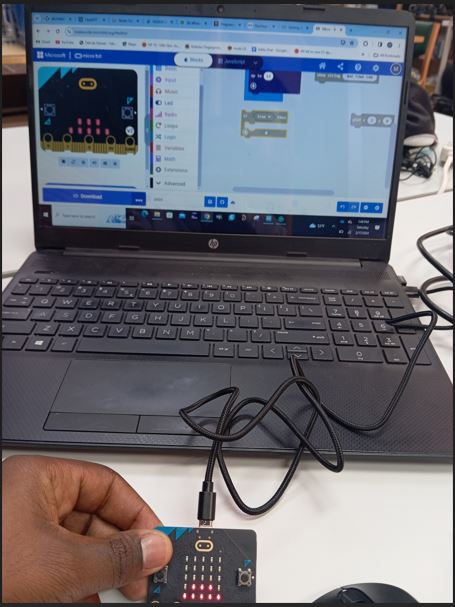
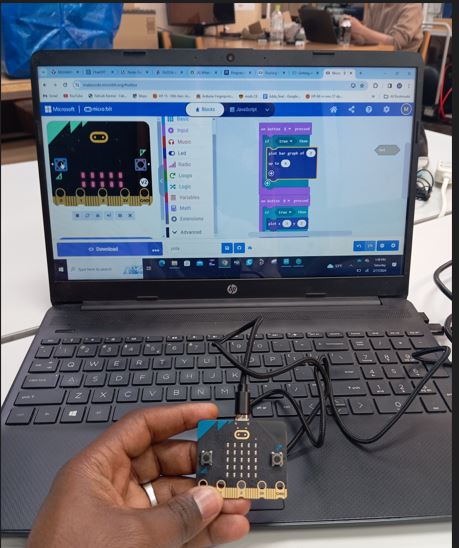
For micro bit the workflow is as follows:
1. Unboxing:
- Take the micro:bit out of its packaging and inspect the board.
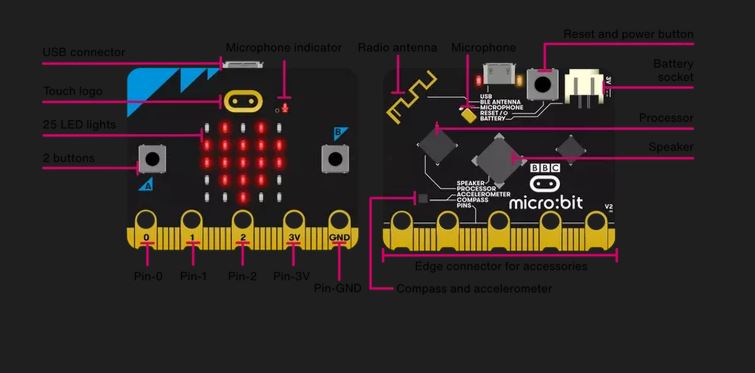
2. Powering On:
- Insert two AAA batteries into the battery holder on the back of the micro:bit or power it via USB.
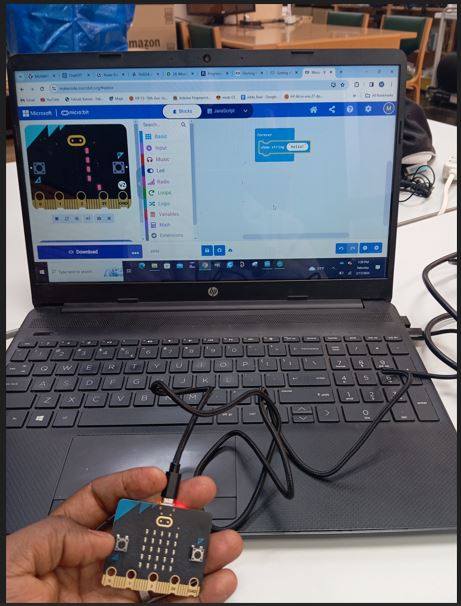
3. Connecting to a Computer:
- Connect the micro:bit to your computer using a USB cable.
4. Programming Environments:
- Choose a programming environment compatible with micro:bit, such as:
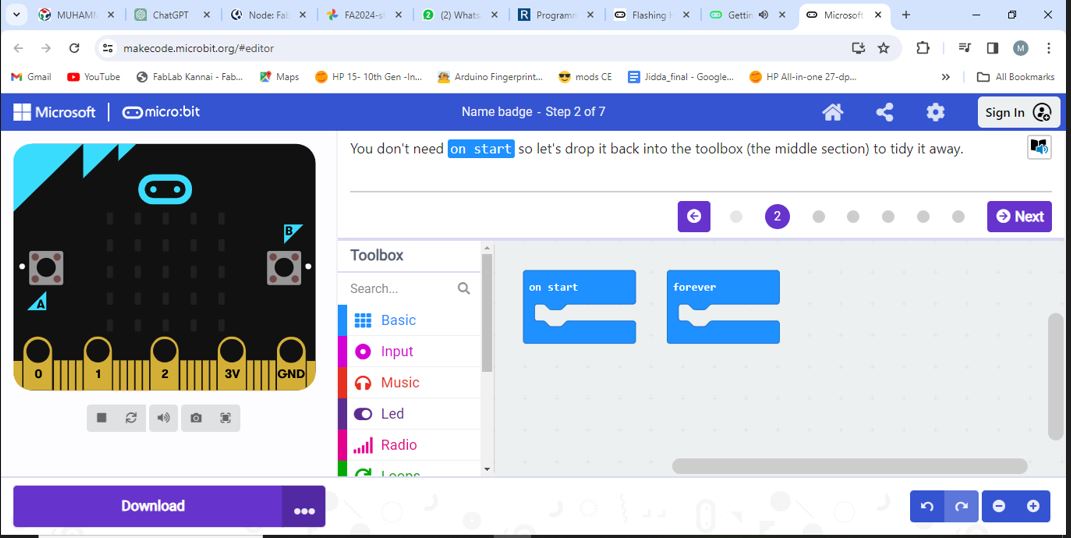
- MakeCode: An online block-based programming environment developed by Microsoft.
- MicroPython: A Python variant designed for microcontrollers.
5. Programming the micro:bit:
For MakeCode: - Go to MakeCode website. - Create a new project. - Drag and drop blocks to create your program. - Download the program onto the micro:bit.
Additional Tips:
- Always disconnect the micro:bit from the computer before powering it independently using batteries.
- Check for firmware updates periodically to ensure your micro:bit has the latest features.
Seeeduino XIAO RP2040: - Performance:
Moderate clock speed, compact design.
- Development Workflow:
Supports Arduino and CircuitPython. Small form factor, suitable for space-constrained projects. Growing community support.
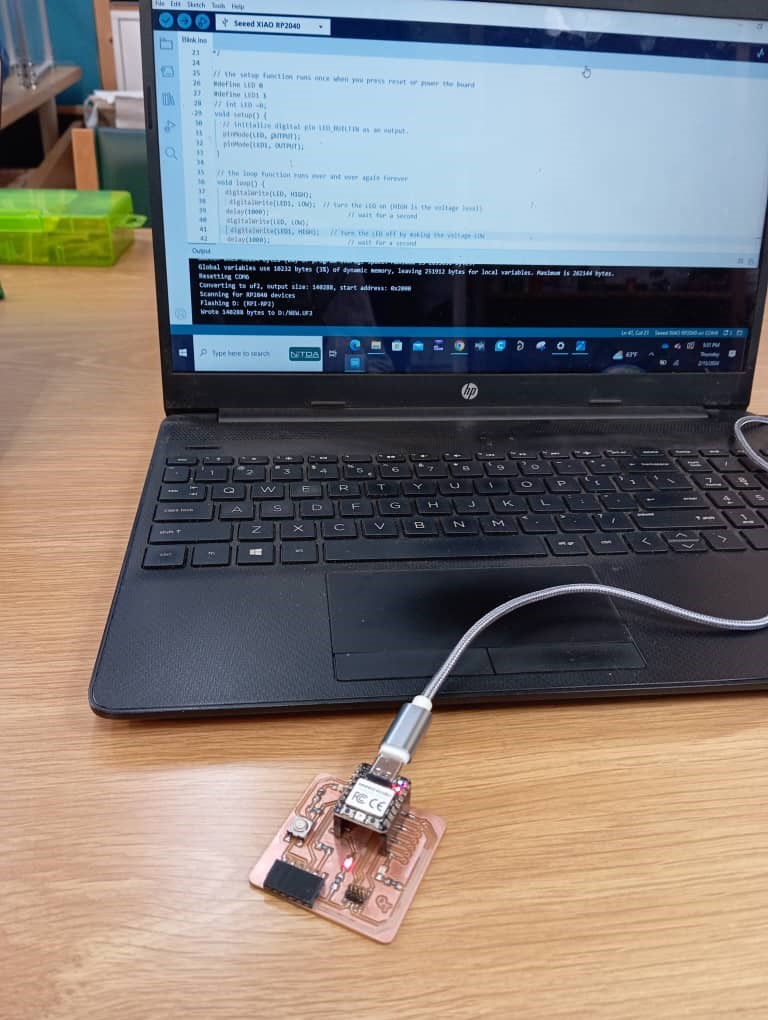
Development Workflow:
We used arduino IDE for programming our pi pico and the processes are as follows: - firstly we add the repo of rp2040 based boards into our arduino prefernces by going to file, preference, additional board and adding the following url (https://github.com/earlephilhower/arduino-pico/releases/download/global/package_rp2040_index.json) - Then we go to tools port and select the appropriate port that our pico is connected to. - Then we go to boards and sellect rp2040 based boards and then sellect seed xiao rp2040. mostly one has to scroll down the list to get to it.
-
After that we can test a blink example and it works fine.
Conclusion
- Both pico and seed xiao uses the rp2040 hence their workflow is similar and easy to work with.
- the micro bit uses either micro python or the online MakeCode website which most people are not fan of. As for the micro python coding a lot of people are mostly used to the arduino IDE and thats a draw back.
- Like stated earlier they are tons of microcontrollers out there and its a matter of choice to people.