12 Molding and casting
Members: Hajime Itoh / Koji Yamada
Group Assignment Overview
This is the group assignment of the week.
  - Review the safety data sheets for each of your molding and casting materials,
  - Then make and compare test casts with each of them
  - Compare printing vs milling molds
1. Review of the Safety Data Sheets
1-1. List of Chemical Materials Available at FabLab Kannai
Here are the list of materials available in stock at FabLab Kannai.
Matt Wax
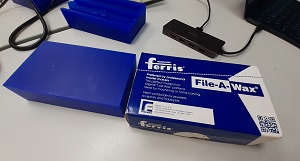
This is a wax used for carving and milling wax by jewelers, sculptors and hobbyists. File-A-Wax has a few color variations: Blue, Purple, Turquoise, Green, Gold and Orange, and each of them has different characteristics in terms of flexibility, hard carvability, hardness (Shore D), adoptability to high-speed CNC and viscosity. We use the Blue wax most frequently. It’s composed of polyethylene waxes, additives, and oil soluble dyes. Safety Data Sheet is posted immediately under the product description.
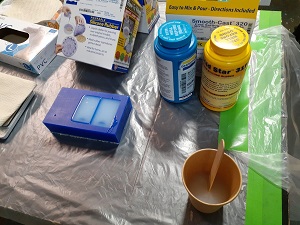
Silicone Rubber
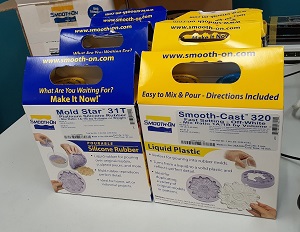
This is a liquid rubber for pouring over original models and it reproduces perfect details of the original models. If there is a original model nearby, we could get the mold for making replica by placing the original model in the sink and then pouring the silicone rubber into it. The package consists of two bottles. As long as the two liquids are separated, no chemical reaction will take place. We prepare the material for molding by mixing these two liquids before pouring into the original model.
When you go to the website of the product, on the righthand side of the top page, you could see technical data of this mateiral. That includes: (i) Mix Ratio By Volume (1A:1B); (ii) Mix Ratio By Weight (1A:1B); (iii) Pot Life (time for the mixed liquid to be solid); (iv) Cure Time (time required for taking the original out), (v) Shore Hardness, etc. Safety Data Sheet is posted under the technical data for downloading.
Cure time varies by room temperature. It is worth while to test the cure time of the same material and mold in different environmental settings. Due to the time constraints, we couldn’t proceed to this test. However, compared to the past experience of our lab in mid winter, while one of our team members tried casting and molding with Smooth-On materials this week, we felt that the time it took for the silicone rubber and liquid plastic to go solid was shorter in spring to early summer season.
Shore Hardness is the scale of the material hardness after it becomes solid enough. Smooth-On releases the following hardness scale in their website.

Urethanes Resin
Liquid Plastic “Smooth-Cast 320” / Liquid Plastic “Smooth-Caset 300”
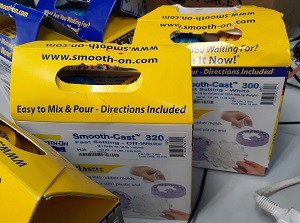
Once we make the rubber molds with the above liquid rubber, we could proceed to make the plastic replica by pouring this liquid plastic into rubber molds. It turns to a solid plastic and reflects the perfect details of the mold. One package consists of two bottles of materials, and you first have to mix them by the proportion recommended by the technical data of the product webpage.
When you go to the website of Smooth-On, the difference between 320 and 300 is color. Here is the URL link of the SDS. Looks like the same SDS is attached to the above two models.
Liquid Urethane Colorants
The above urethane resin available in our lab has only two color varieties: white and Off-White. What if we want to put color to your design? In such cases, we add the colorant to the resin before we pour it to the silicone mold. We learned that only 0.01% to 3% of total system weight will be good enough to change the color characteristics to the resin we use.
We found that the different SDSs are prepared for different colors.
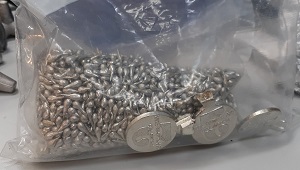
Metal
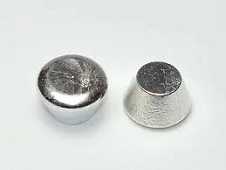
This alloy ingot is tin-based but Pb/Cd free and the most remarkable feature of this material is its melting point of 138 degrees Celsius. This means that:
-
We could use the 3D-printed molds for casting the metal. The melting points of the 3D-printing materials are higher than 200 degrees Celsius.
-
It starts melting quickly. But in most cases as we keep on aiming the burner at the metal, the material temperature will reach far higher than the melting point. Once it melts, it takes time for the temperature to go down to the melting point. That gives us time for casting.
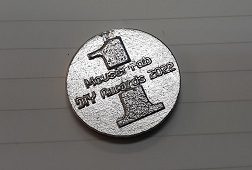
Besides this group assignment, one of the team members, Koji, used this material and tried molding and casting of a medal. For details, please read Koji’s Individual Assignment for Week12.
Tin also has a relatively low melting point of 231.9 degrees Celsius. But due to this melting point, we cannot use the 3D-printed plastic mold for casting tin.
1-2. Structure of the Safety Data Sheets
We compared the Safety Data Sheets between different chemical materials. This is the basic structure of the SDSs and it’s almost the same across diffeent mateirals. We also looked at the SDS for Bismuth Based Alloy Ingot. Then we found that the same framework was applied to the metal material in Japanese language.
Section 1: Identification
Section 2: Hazards Identification
Section 3: Composition/Information on Ingredients
Section 4: First Aid Measures
Section 5: Fire Fighting Measures
Section 6: Accidental Release Measures
Section 7: Handling and Storage
Section 8: Exposure Controls/Personal Protection
Section 9: Physical and Chemical Properties
Section 10: Stability and Reactivity
Section 11: Toxicological Information
Section 12: Ecological Information
Section 13: Disposal Considerations
Section 14: Transport Information
Section 15: Regulatory Information
Section 16: Other Information
It may be difficult to go through the whole sheet in one go. We had better read the sections relevant to the activities we are going to carry out. For example, when we carry out casting with hazardous materials, we had better read the sections on “First Aid Measures,” “Fire Fighting Measures,” “Exposure Controls/Personal Protection,” “Toxicological Information,” and “Disposal Consideration.” Based on the descriptions, we should prepare the work environment and personal protection equipment.
1-3. Safety Instructions Given By Instructor
Before we worked on our own molding and casting, our instructor gave us briefing on the safety measures.
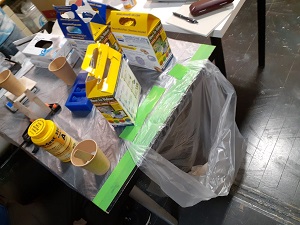
Ventilation
- We should open the window and switch on the fans to release the bad odor and toxic objects out.
Personal Protection
-
We should wear glasses and groves to protect ourselves. Groves should not be reused. Once we take them off, we should not wear the same groves. We should wear new groves every time.
-
We should cover the table with vinyl sheet to prevent any exposure to chemical materials.
Disposal
-
Also, disposal bags should be placed near the work bench so that we could dump all wastes into the disposal bag.
-
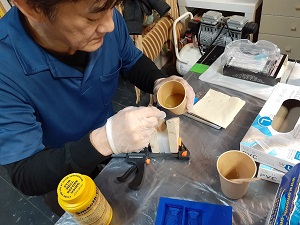
When we mix the Smooth-On liquids of blue and yellow bottles, the chemical reaction starts and the cup will get heat. When we dump the residue of the Smooth-On material mixture, we should make sure that the chemical reaction is finished.
Protection of the Work Environment
- We should not touch any uncovered place, chair, desk… so that we could ensure that our workplace is protected from any exposure of toxic chemicals.
Other Structural Arrangements
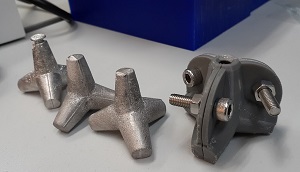
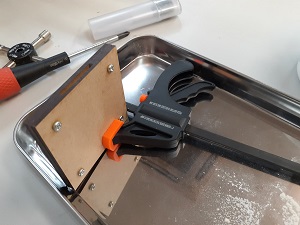
When we cast material, we should make the structural measures to hold the mold with the clamp so that we could be hands-free and stay away from the toxic materials or the high-temperature metal and the mold.
2. Comparison of the Test Casts
At the time of the local session, the two students have done only the following hands-on activities and they are documented in their websites:
| Student | Design | Molding Process | Casted Material |
|---|---|---|---|
| Ito | Chess Piece | Wax molding with CNC milling machine >> Silicone rubber mold | Liquid plastic (Smooth-Cast 320)/Bismuth-based alloy |
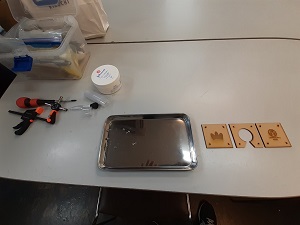
| Yamada | Medal | Wax molding with CNC milling machine >> Silicone rubber mold | Liquid plastic (Smooth-Cast 320) |
| Lasercut MDF mold | Bismuth-based alloy |
Since the molding and casting hands-on was conducted on a separate occasion one after another, the comparison was described in more details in our individual assignment pages. After observing each activity of ours, we have come up with the tentative conclusion:
-
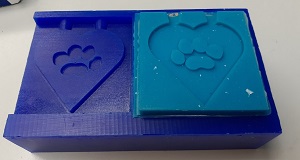
Milling: The first obstacle both of us faced was the trade-off between the complexity of the design and the difficulty in wax-milling. Both of us compromised on the design complexity. Ito proceeded to milling with unsatisfactory design and Yamada replaced his first design with more simple Plan B. Once he started milling the Wax, he broke three endmills. He could finish milling anyway, but it was still difficult to get the texts well embossed. Also, in order to save time for milling, Yamada only selected the XZ direction when he made a toolpath with Mods and that seemed to have affected the milling result.
-
Casting with Liquid Plastic: Both had tough time pouring all the Smooth-Cast liquid into the silicone mold before it became hardened. We enlarged the casting/ventilation holes by cutting the silicone mold a few times until the holes became large enough for us to make it full. .
-
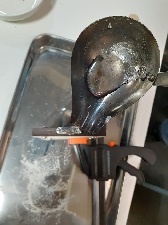
Casting with Alloy: Compared to the casting with liquid plastic, it seemed that casting with Bismuth-based alloy was much easier. Once the material is heated by burner, it takes much time for the liquid material to be solidified. That gives us enough time to pour all the melted alloy into the mold. Although Yamada tried it with lasercut MDF mold, we can expect that we could fill alloy in the silicone mold very quickly. Ito tried it with the same silicone mold and it went well. However, we must be careful of the temperature of the melted alloy. If we heat it too high beyond around 230 degrees Celsius, which is the melting point of the silicone mold, this scenario may not work.
3. Printing Molds vs Milling Molds
As already indicated in the previous section, depending on the tool diameter of the endmill for the complexity of the design, we may not be able to make a mold as we want. However, if we make a hard mold with a FDM/FFD 3D printer, we may face another trade-off issue: fineness vs printing time. Usually 3D-printing takes much time. If we would rather increase the fineness of the design, then it takes more time. And even with the maximum fineness setting, we are not sure if we could get the smoothest surface we want.
The use of an SLA 3D-printer may help saving the printing time while achieving the fineness and design complexity we want. Although Yamada had past experience in operating an SLA printer and is sure that it could save time and print even a complex design, he has never tried printing a mold with the SLA printer before.
Compared to printing molds, milling molds could save time to prepare. If it’s not a small, thin and complex design and it requires much more rough cut before relatively less finish cut, probably milling molds could work better.
There are lots of things to consider before we choose the tool and the material. Taking all these factors into consideration, we should decide on our approach to the prototyping:
    - Size and complexity of the design;
    - Time we are allowed to spend;
    - Tools available;
    - Materials available;
    - Quantity of the products to make;
    - Usage: food processing, packaging, etc.