Assignments
1. Principles and practices
2. Project management
3. Computer Aided design
4. Computer controlled cutting
5. Electronics production
6. 3D Scanning and printing
7. Embedded programming
8. Computer controlled machining
9. Electronics design
10. Output devices
11. Input devices
12. Molding and Casting
13. Networking and communications
14. Interface and application programming
15. Wildcard week
16. System integration
17. Applications and implications
18. Invention, intellectual property and income
19. Project development
3. Computer Aided design
Assignment: Model (raster, vector, 2D, 3D, render, animate, simulate, ...) a possible final project, compress your images and videos, and post it on your class page.2D modeling
Image compression - ImageMagick
Because many of these concepts are new to me, I spent a lot of my time understanding them and tried to start with the basics and work my way up to the more complex. Considering this, I first tried to compress the images on my site using ImageMagick, I'm still not sure if I did it correctly, but at least I was able to verify that the size of the images decreased. I also transformed this screenshot from png to jpg format.
I have done a lot of image and file compression and reformatting, but I have always used tools available online, and I have never understood them in depth. At this point I have a problem, when I reduce the size of my image in ImageMagick (for example from 1000 kb to 500 kb), the image becomes very small. I understand that there are ways to decrease the size of a jpg file without affecting the quality, I will have to explore these options in the future, as I need to make progress with the other design tools.
Vector graphics
For the vector graphics, I decided to use Inkscape software. In order to familiarise myself with its functions, I decided to replicate the sketch I had made in PowerPoint the first week, in this case the image that corresponds to the parameters that are considered when placing the audio monitors in the recording studios (Floor Plan). I decided not to get too complicated with the details of the sketch.
2D software design
I also decided to try another 2D design software in order to become more familiar with it. I used QCAD, and most of the tutorials for this software focused on architectural drafting, which is not my main interest at this time. I followed a tutorial series that show how to use QCAD. Since my goal was just to get to know the software, I created a very simple sketch to specify the dimensions that the pedestal in my project might have. Although the final sketch is simple, I learned basic functions such as placing dimensions, drawing polygons, changing line dimensions, reversing line reference points, centering the sketch on the sheet, among others. Overall, I found this tool quite user-friendly. The following images show a screenshot of the software open during the work, and an image of the sketch I made for practice.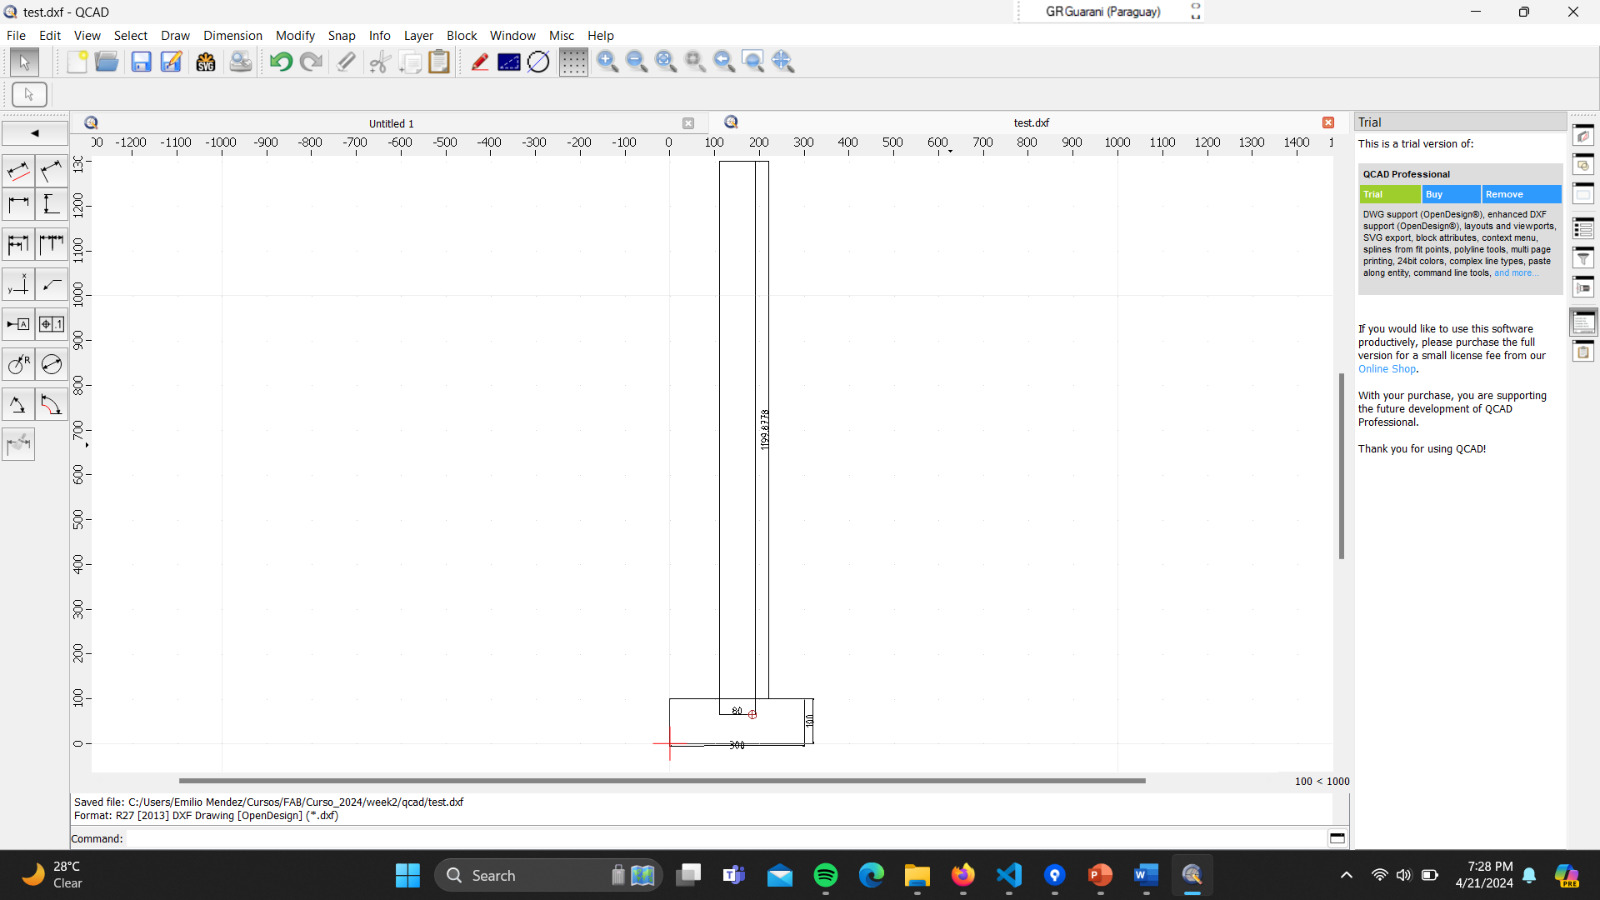
I'm only using the trial version of the software, so the SVG file appears with a message. But you can find the DXF file in the download section.

3D modeling
Now for 3D modeling, I decided to use Fusion 360. Again, starting with getting to know the basic functions of the software, I decided to design a simple part of my project, which would be the base and the mast that will hold the moving head of the robotic mount monitor. I followed the instructions of a video tutorial to do it step by step. During the process I tried to define real dimensions for these parts of the project, so I worked in centimetres. For example, the base is quadrangular and its dimensions are 30x30 cm, its height is 10 cm. The hole where the mast fits has a diameter of 8 cm (I think it should be less), and a depth of 9 cm. The mast has a height of 129 cm. In general, despite taking a couple of hours, the software seems quite intuitive and easy to use. However, it's worth noting that my design is straightforward and will likely require several adjustments to be functional. Below is a brief gif of the process, and also some images.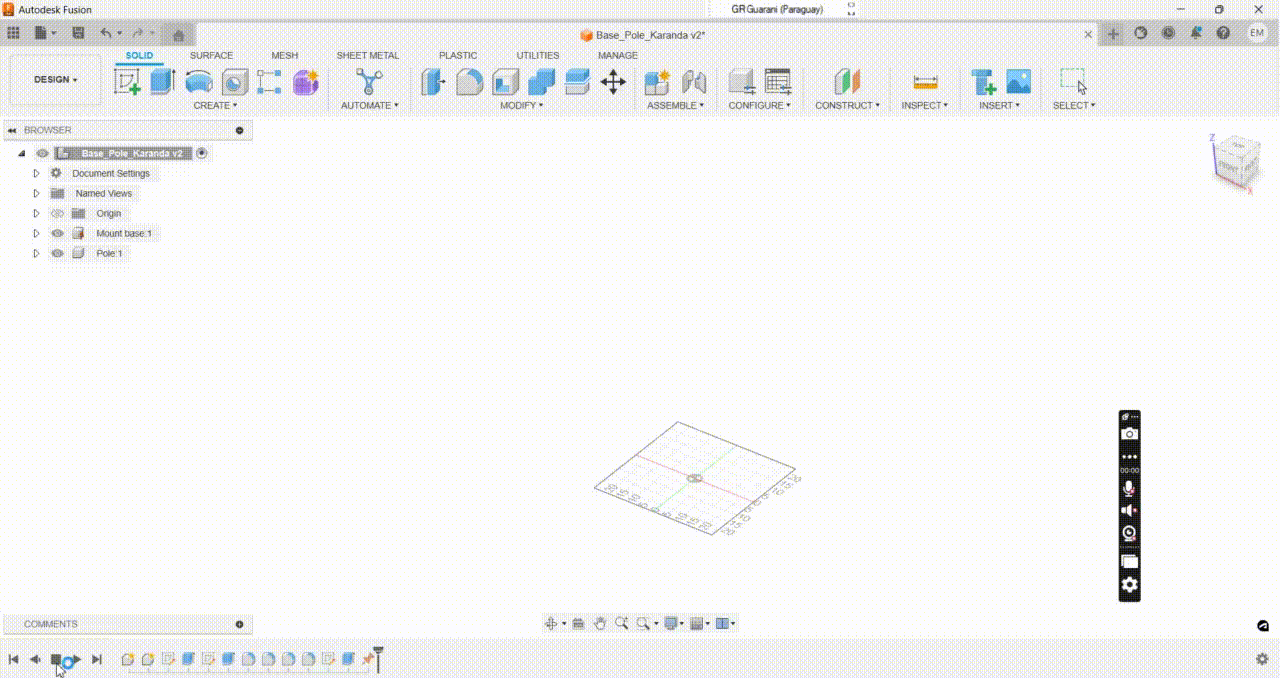
Here you can see the design after rendering