Assignments
1. Principles and practices
2. Project management
3. Computer Aided design
4. Computer controlled cutting
5. Electronics production
6. 3D Scanning and printing
7. Embedded programming
8. Computer controlled machining
9. Embedded programming
10. Mechanical Design
11. Input devices
12. Molding and Casting
13. Networking and communications
14. Interface and application programming
15. Wildcard week
16. System integration
17. Applications and implications
18. Invention, intellectual property and income
19. Project development
12. Molding and casting
Assignment:Group assignment:
review the safety data sheets for each of your molding and casting materials, then make and compare test casts with each of them compare printing vs machining molds
Individual assignment:
Design a mold around the process you'll be using, produce it with a smooth surface finish, and use it to cast parts
Planning
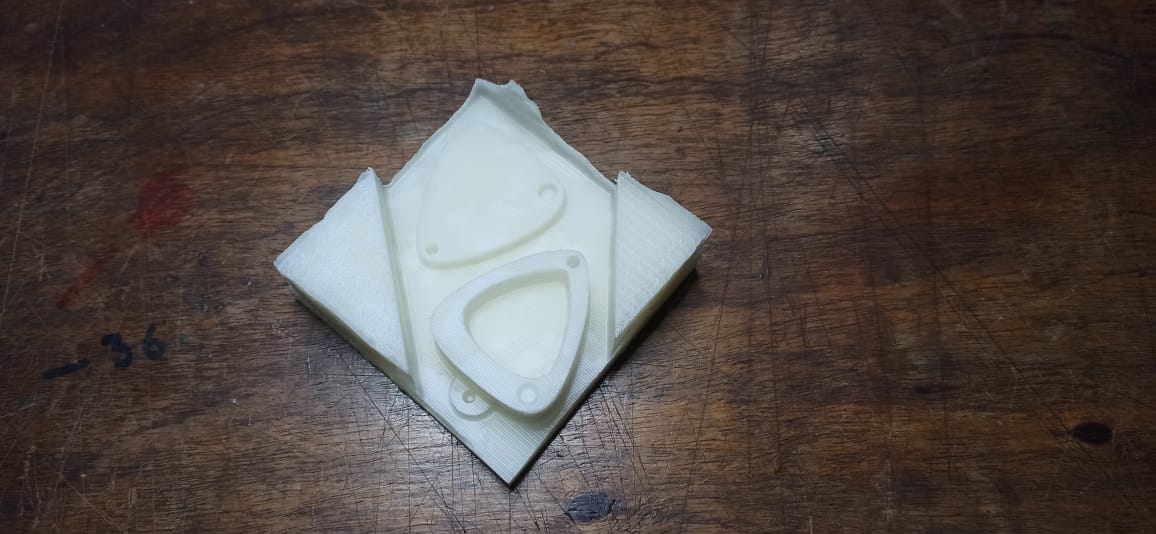
At first, I had decided to work with a pre-designed Guitar Pick Holder, for which I had downloaded the STL file. However, I encountered some issues when trying to generate the positive mold. After this, I decided to create my own design from scratch. I chose to make a keychain that serves as a case for guitar picks.Making the mold
After taking the measurements of the guitar pick, I designed the keychain using Fusion 360. The final result was as follows: Next, I exported each body (the case and the lid) in STL format. Both STL files were opened in FlashPrint5 to arrange them before milling, resulting in the following:
At the same time, I maked the file and exported in gx format to print the same object to compare with the milling process.
As machinable material, I used a mixture of paraffin and polyethylene. Initially, we started with the recommended ratio (approximately 1:1), however, as we assessed the consistency and appearance of the material while heating it, we added more polyethylene or paraffin as needed.
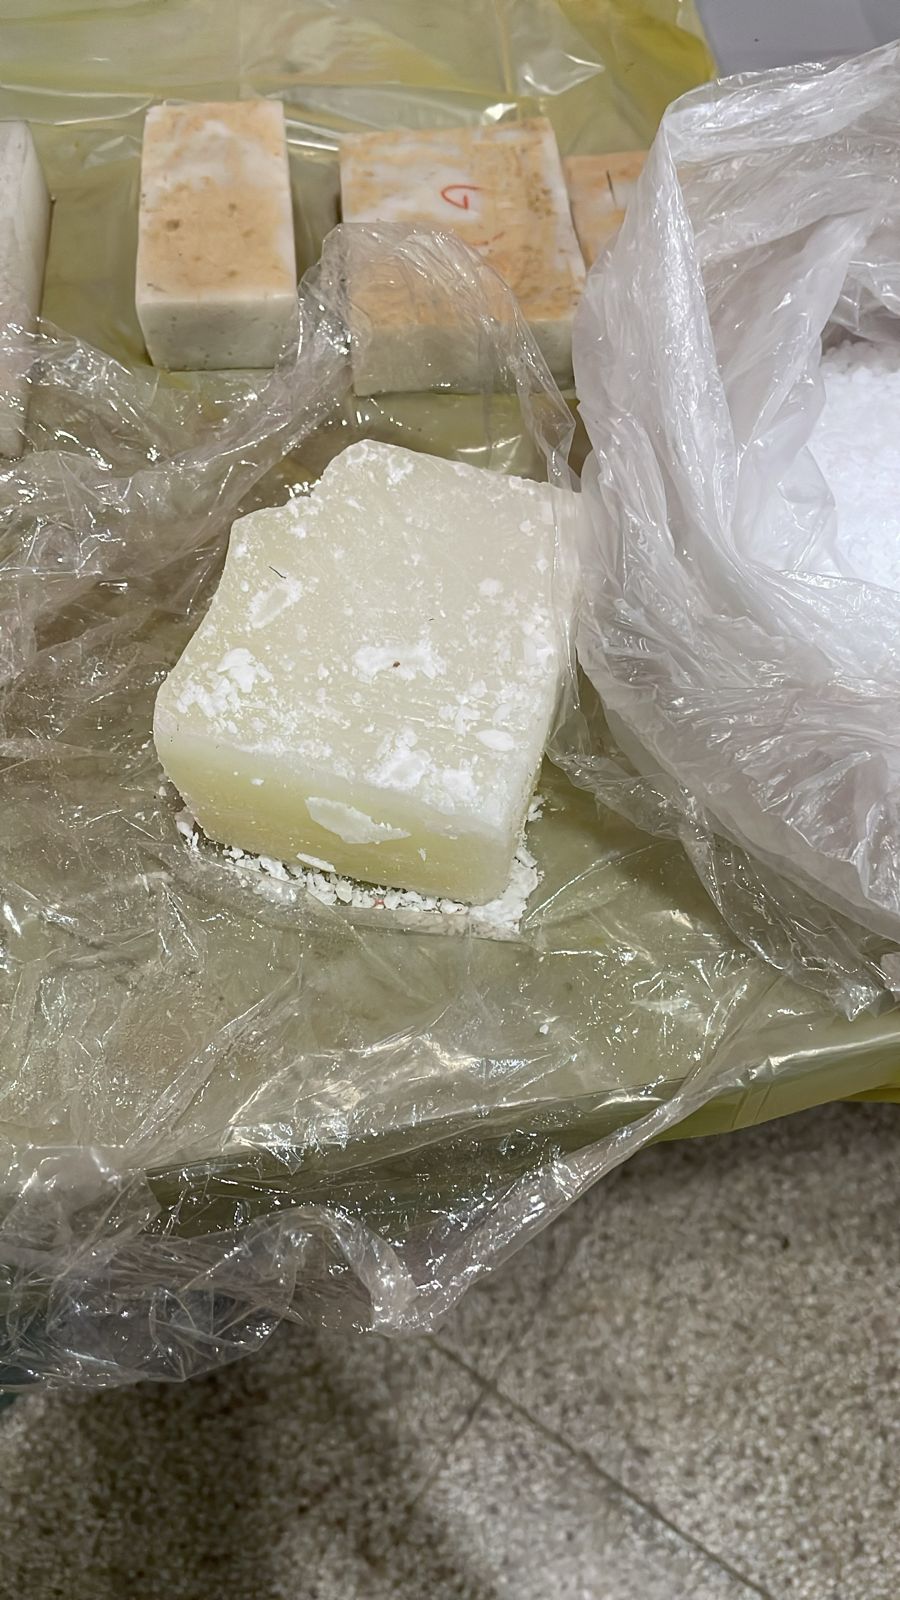
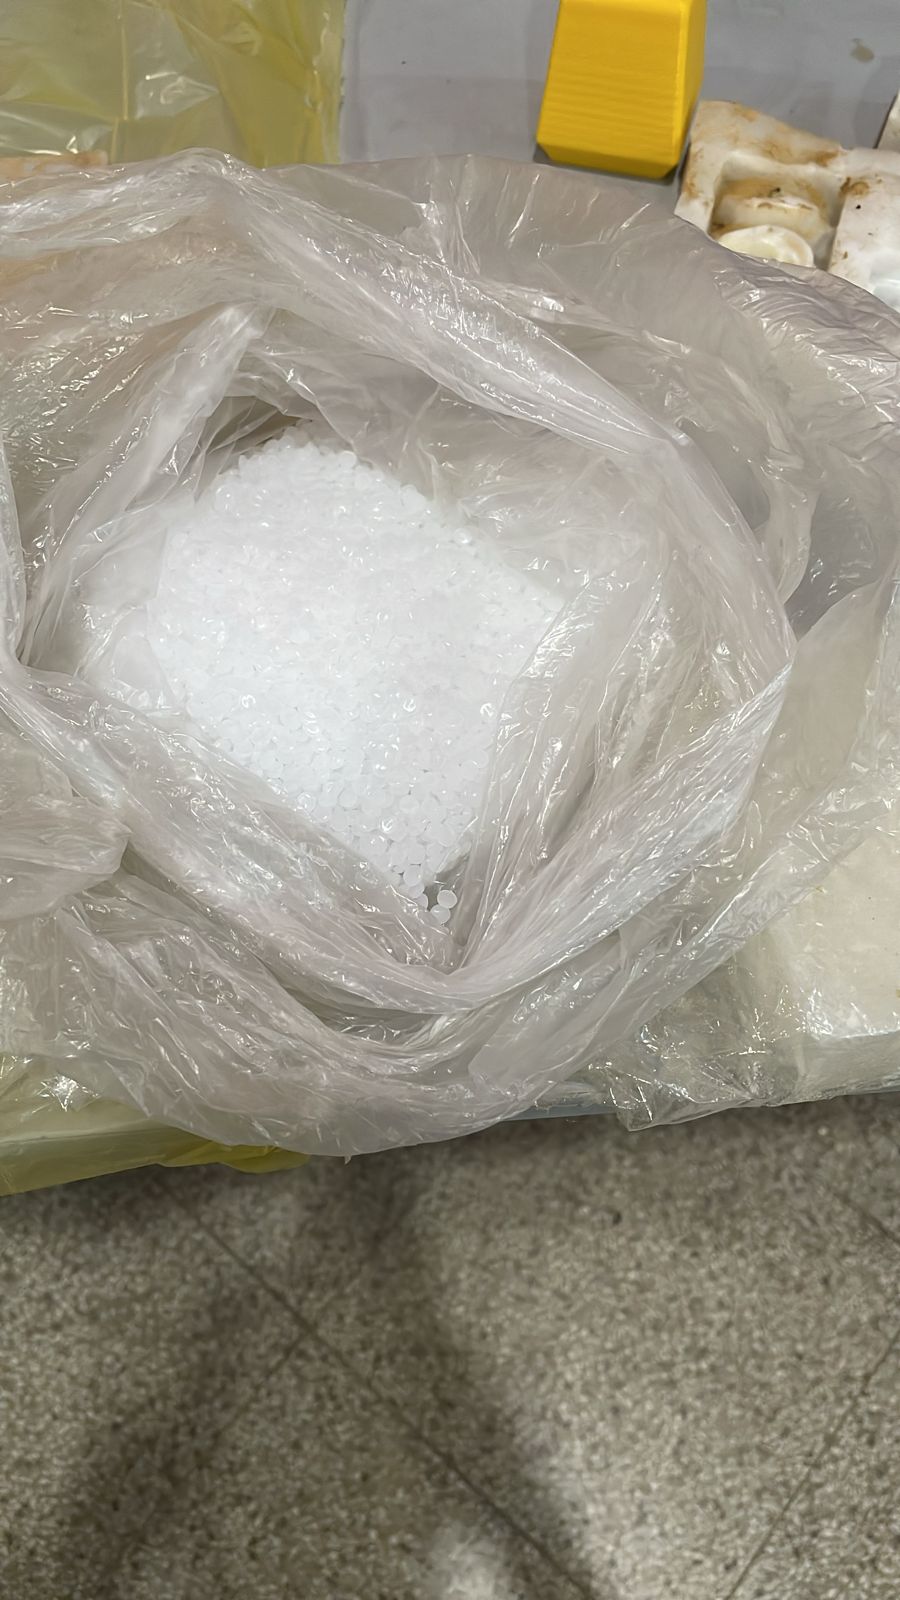
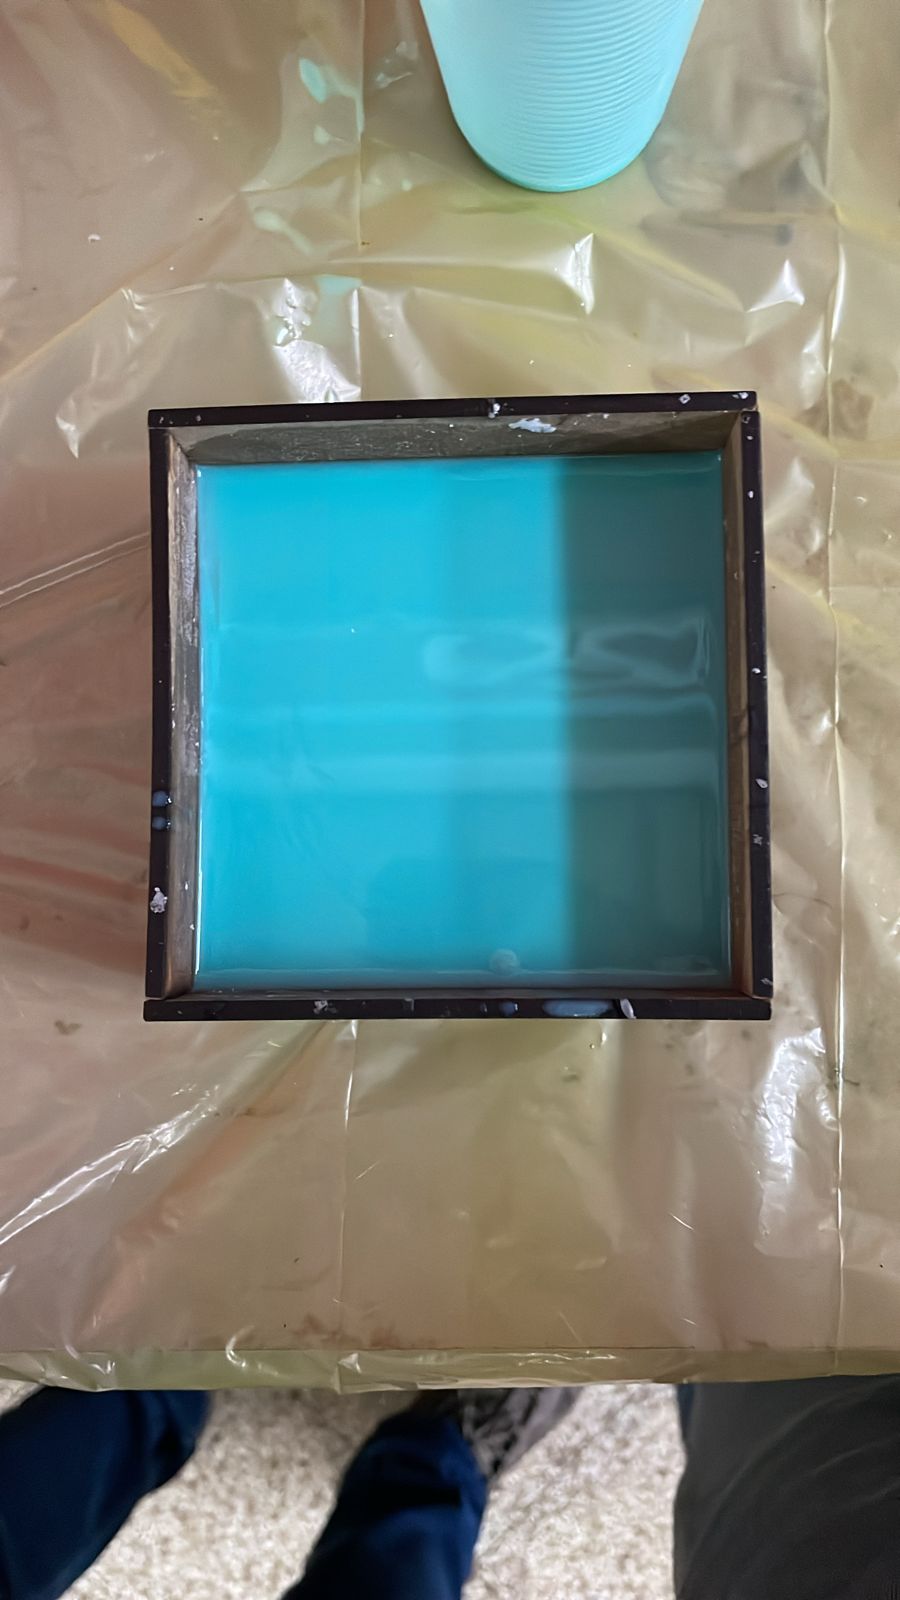
As a mold for the melted machinable material, we made boxes measuring 90x90x50 mm using MDF as the material. We sealed the corners of the boxes with tape to ensure there was no loss of material, and finally poured the melted machinable material into the box.


We left it at room temperature overnight to solidify.
To mill the positive mold, I used the milling machine "Roland MODELA Pro II MDX - 540" with a 1/8-inch diameter end mill. The diameter of the end mill is important for the design; for example, my design has holes where I will place screws. The diameter of these holes cannot be smaller than the diameter of the end mill; otherwise, an error will occur during the code generation and the holes will not be drilled. By clicking here, you can see the final milling setup used to generate the positive mold.
The first step, which is to generate the positive mold, turned out like this. After this, I reassembled the mold inside the box to pour the silicone and generate the negative mold.
Casting
I made a mistake in calculating and managing my time; I was unaware of the fact that these materials take so long to solidify. I left the silicone solidifying overnight, so the work is still in progress.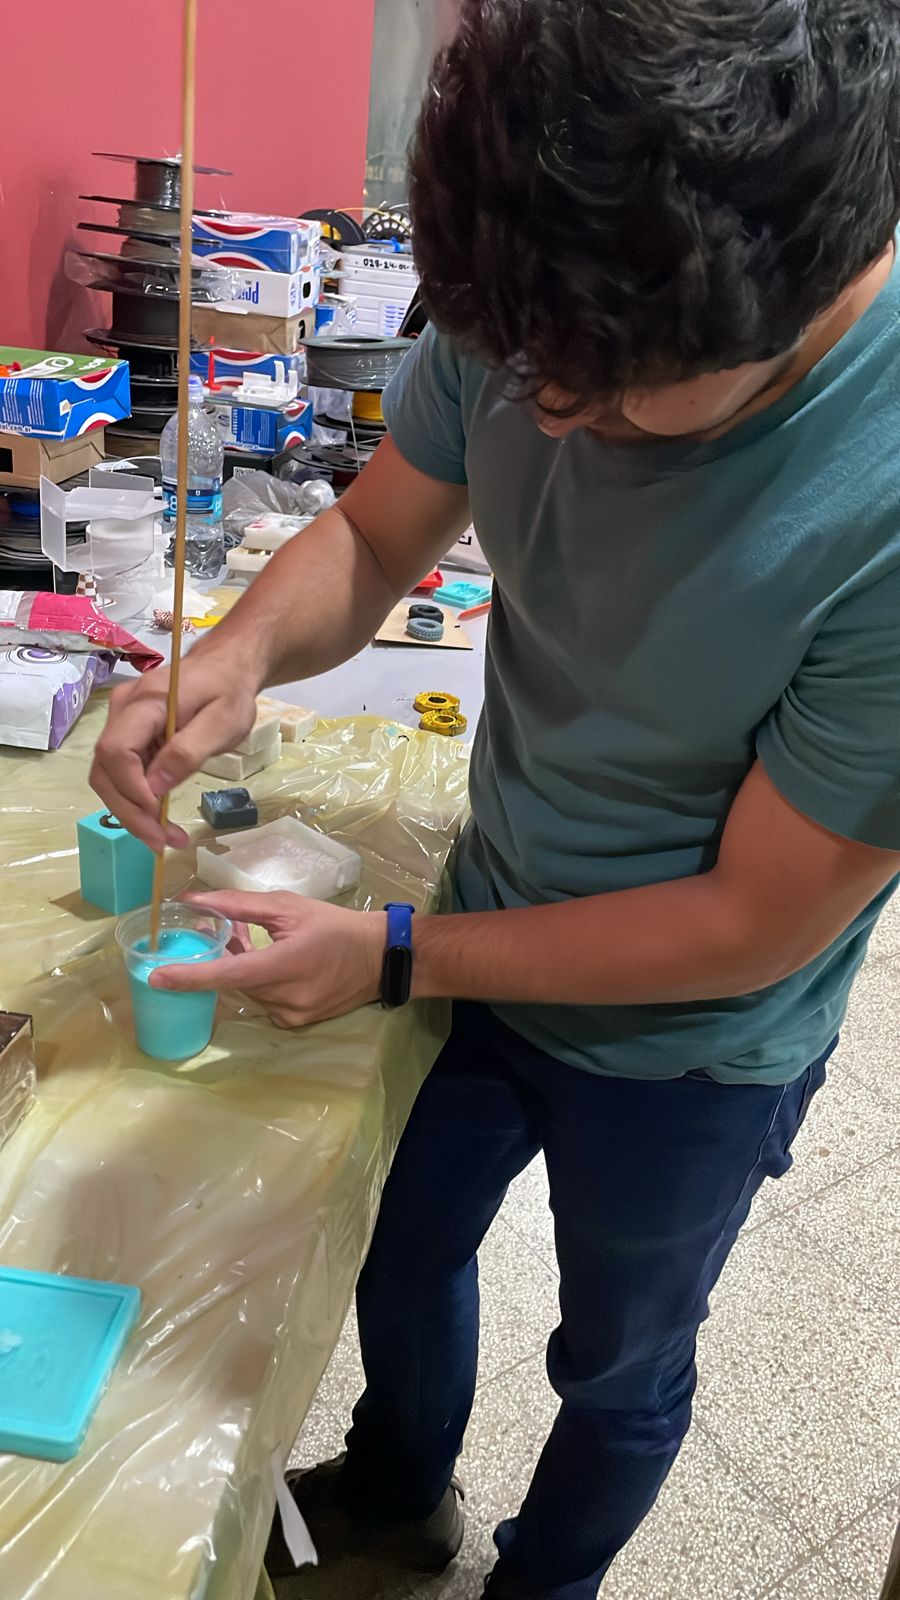
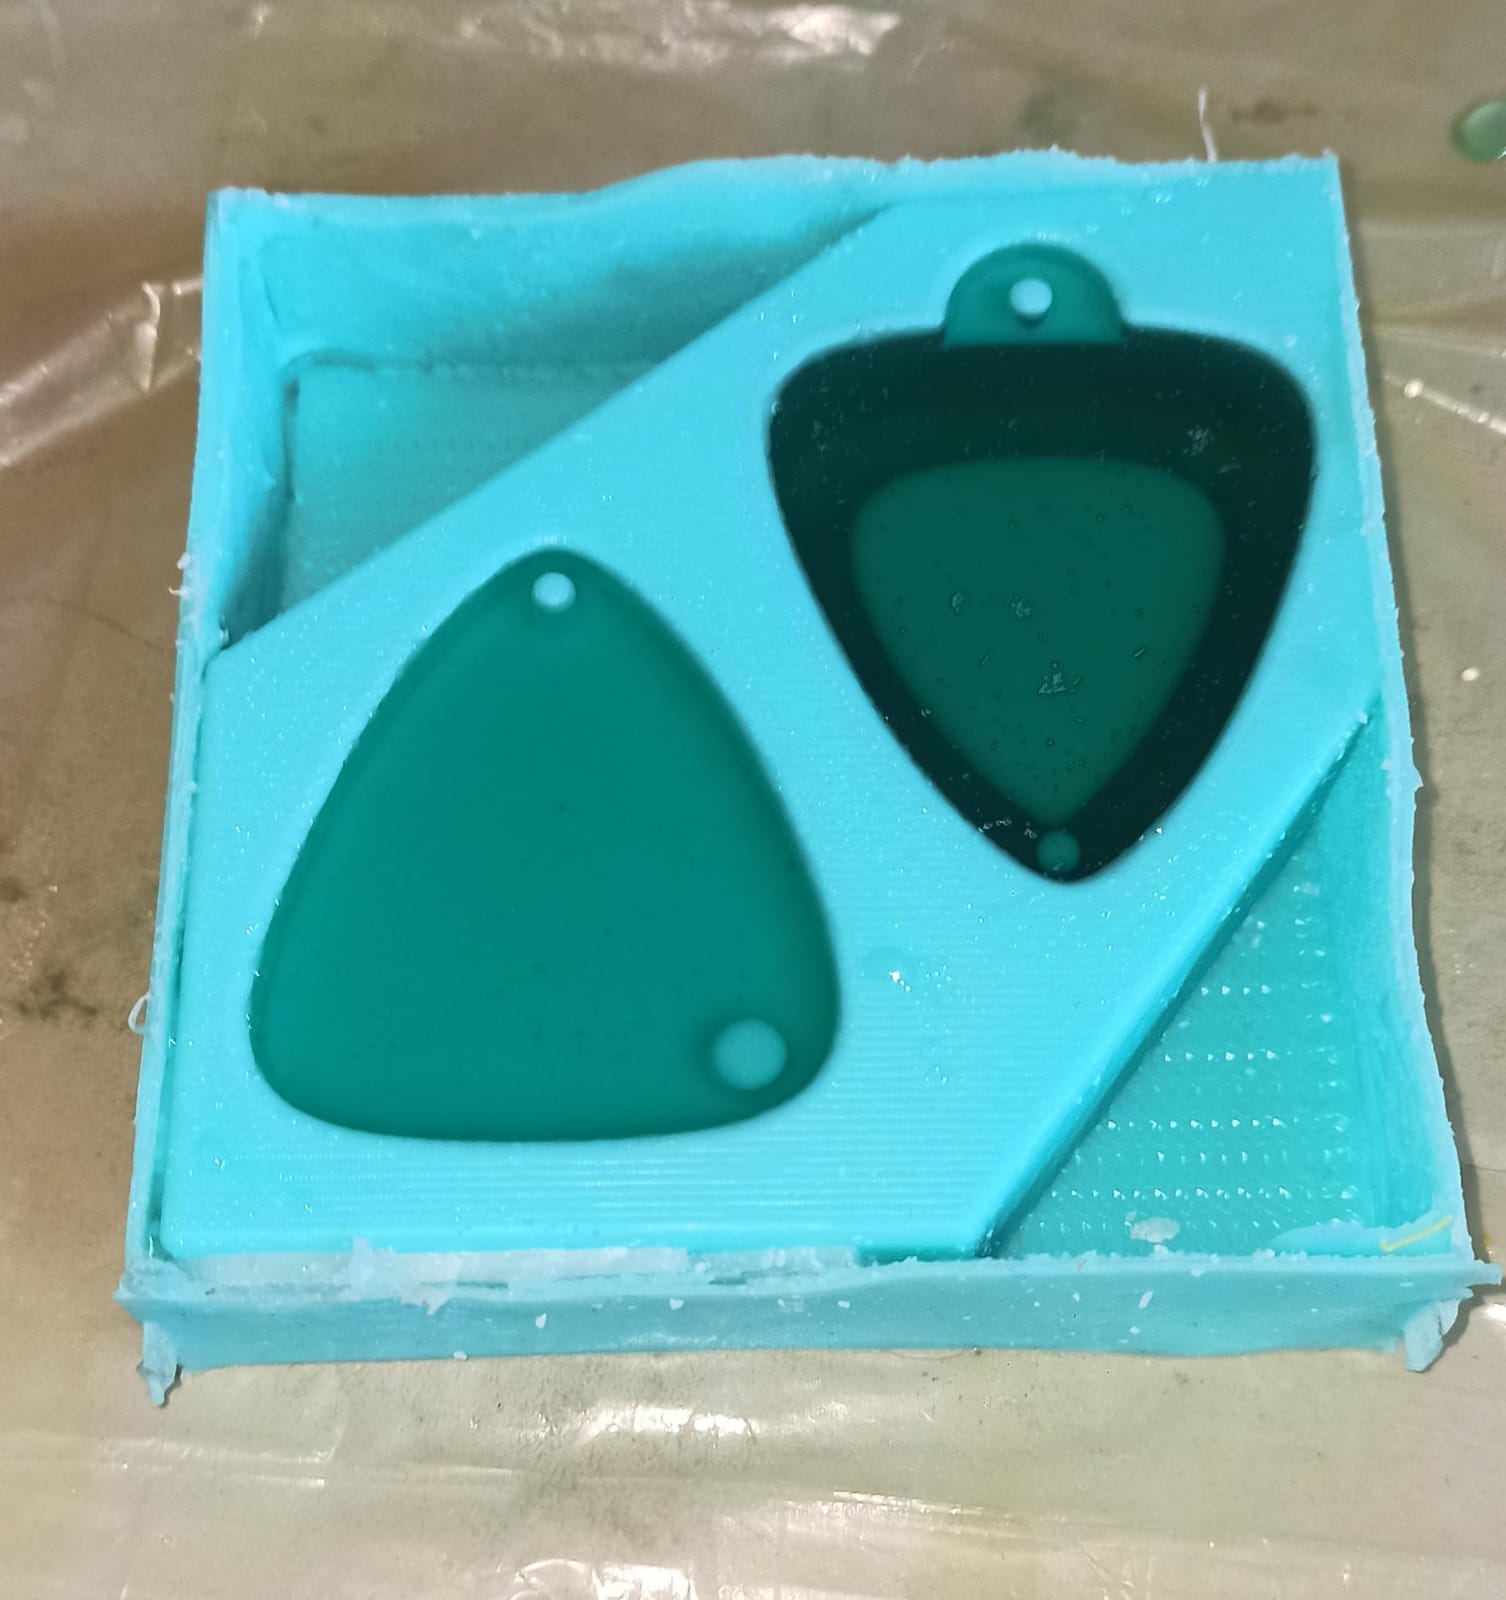
Using the silicone negative mold, I generated the final positive mold again. The material we used is epoxy resin. Epoxy resin is prepared by mixing a 1:1 ratio of resin to hardener (bottle A and bottle B). Epoxy resin is typically translucent, so I added a green color tint to it. In the following image, you can see the epoxy resin already poured into the silicone negative mold.
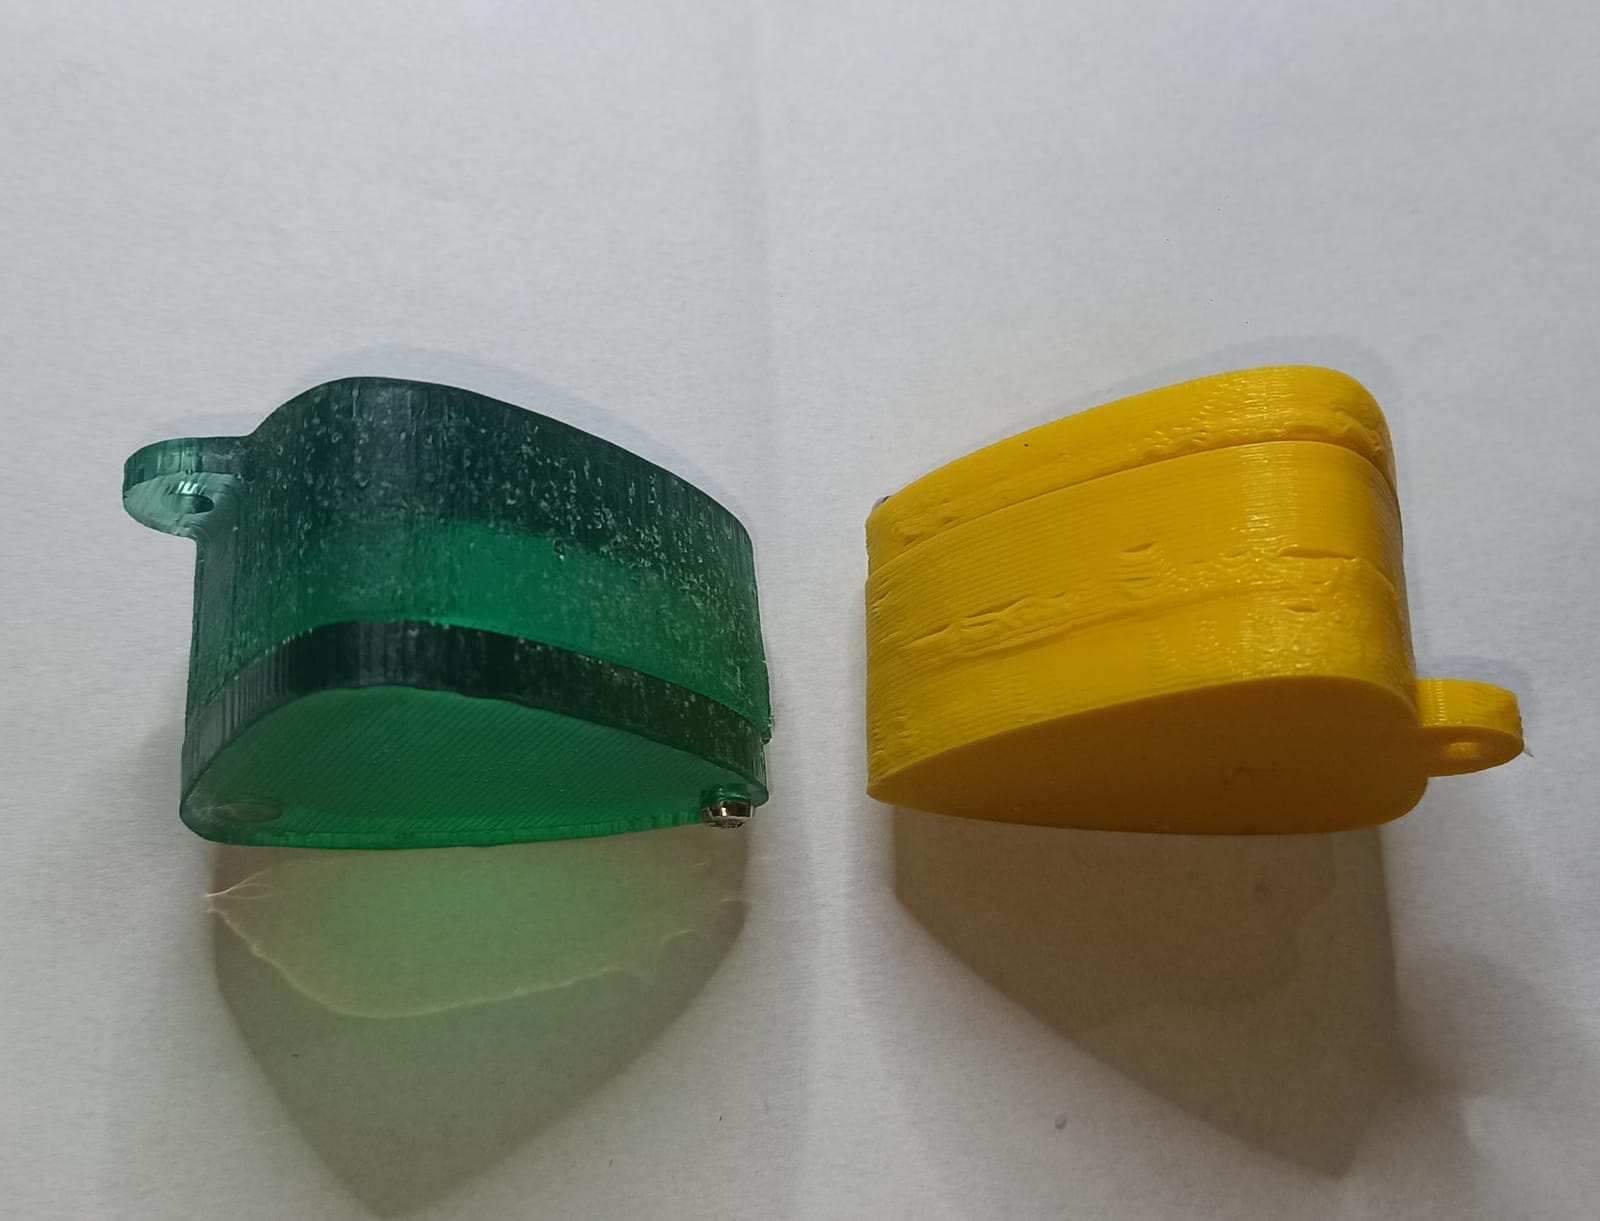
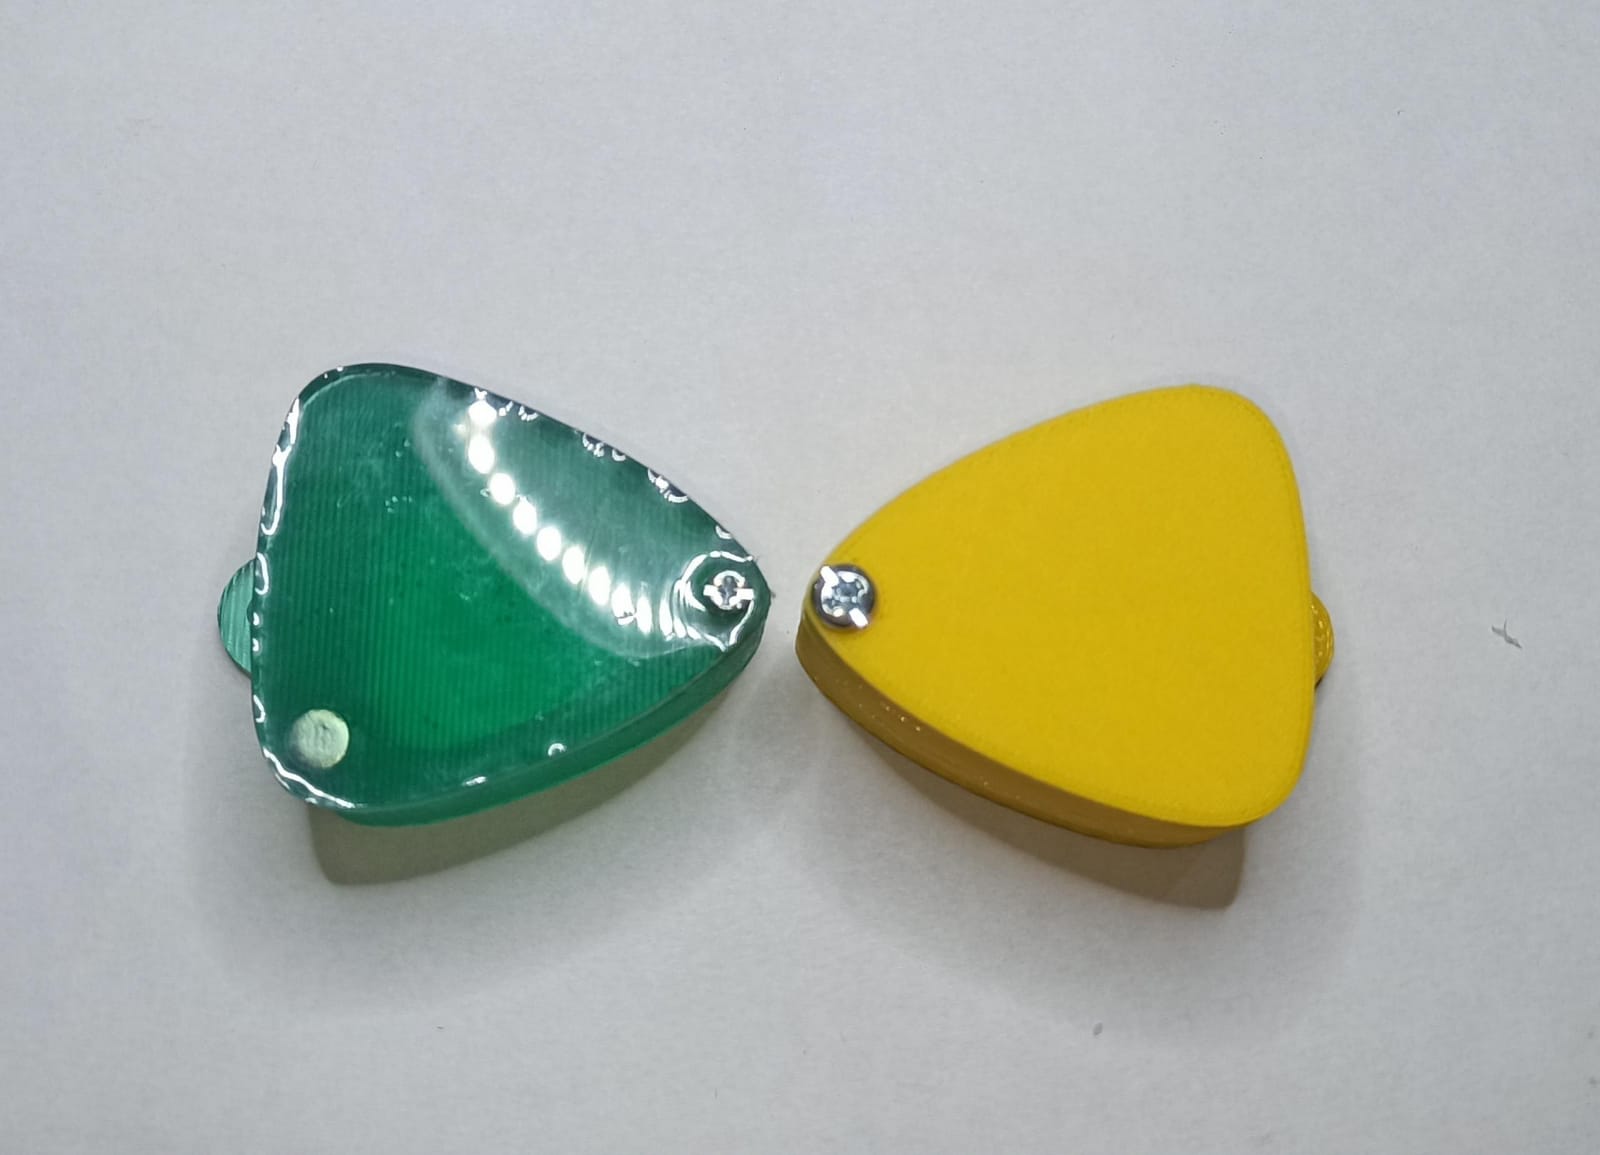
This is the final result
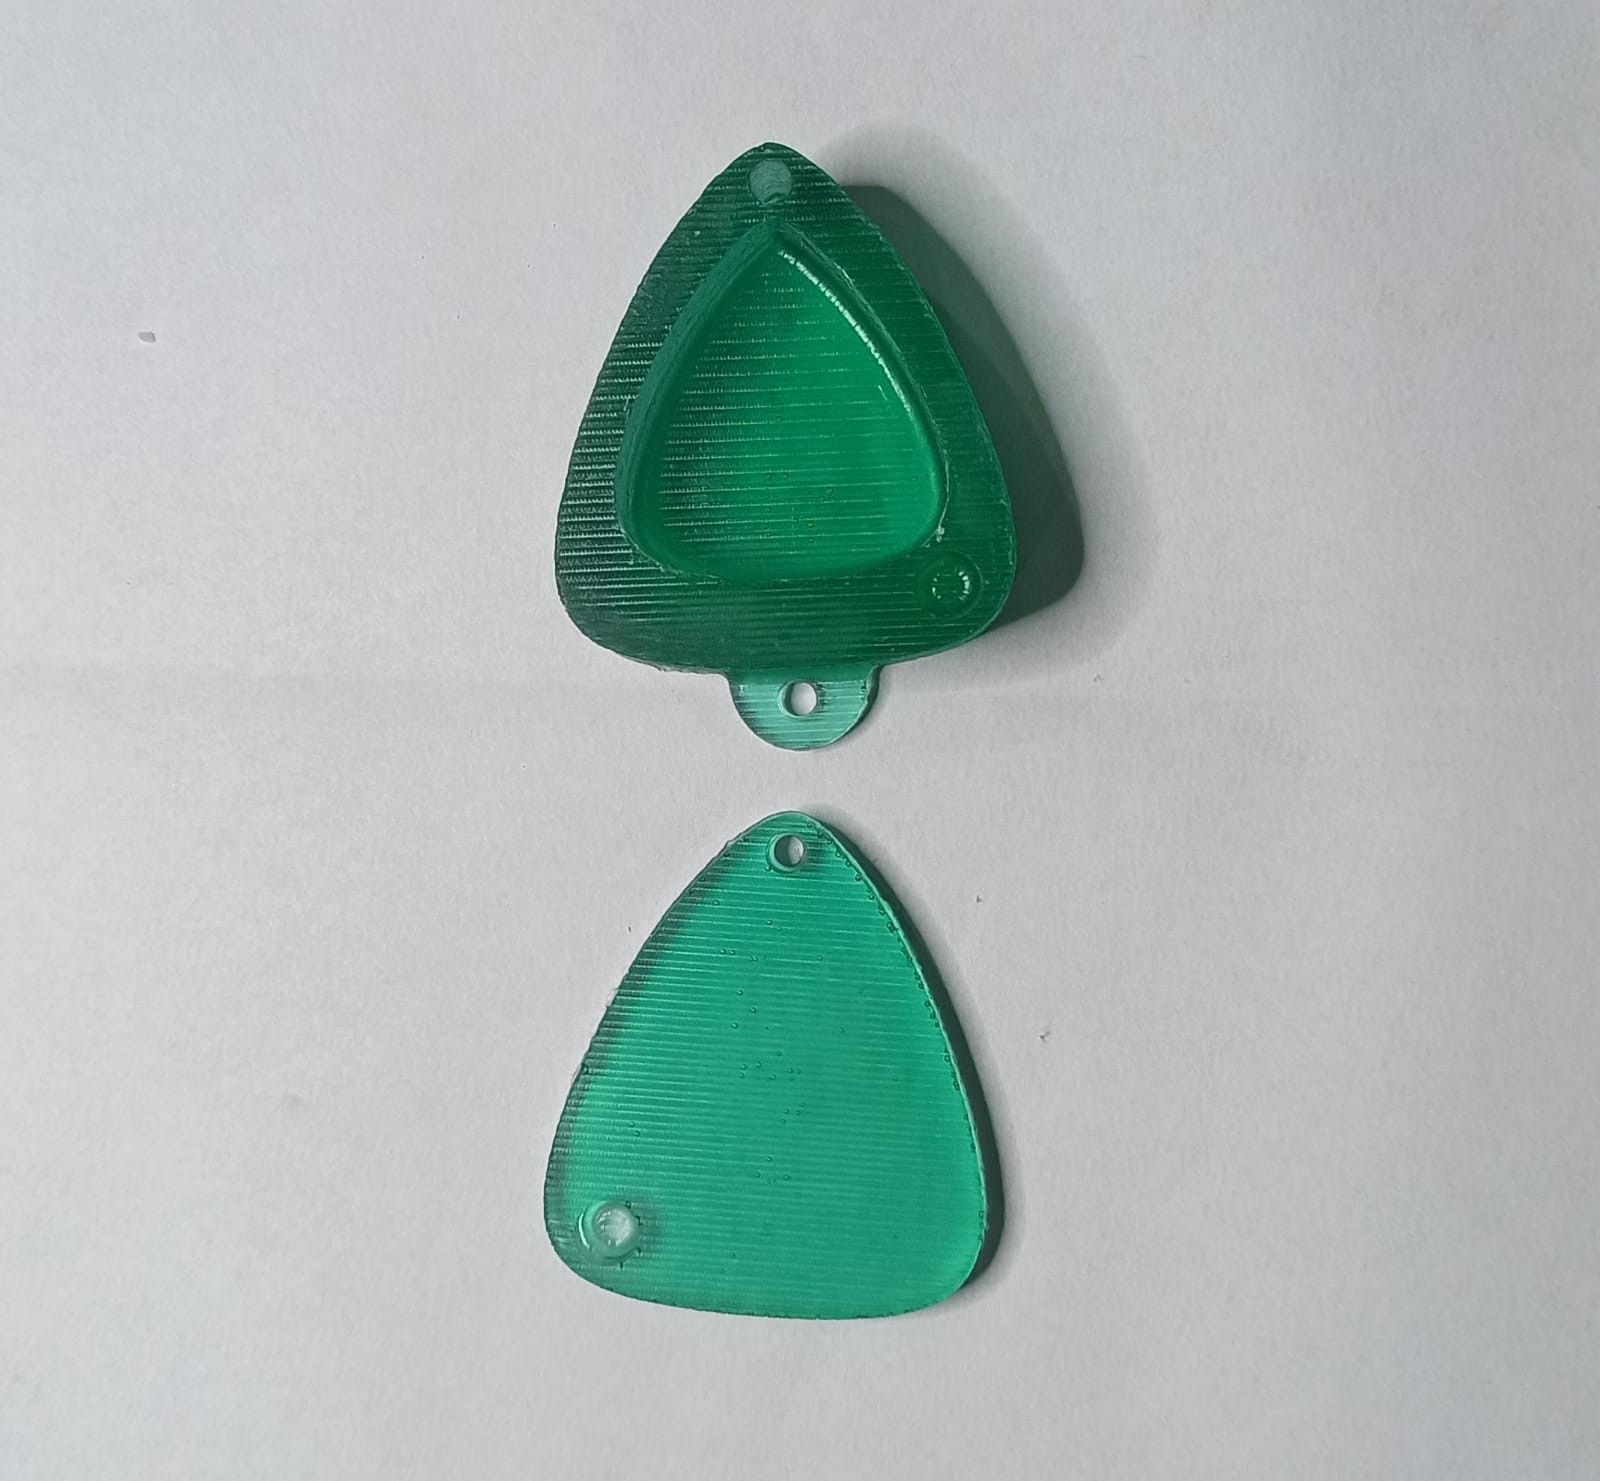
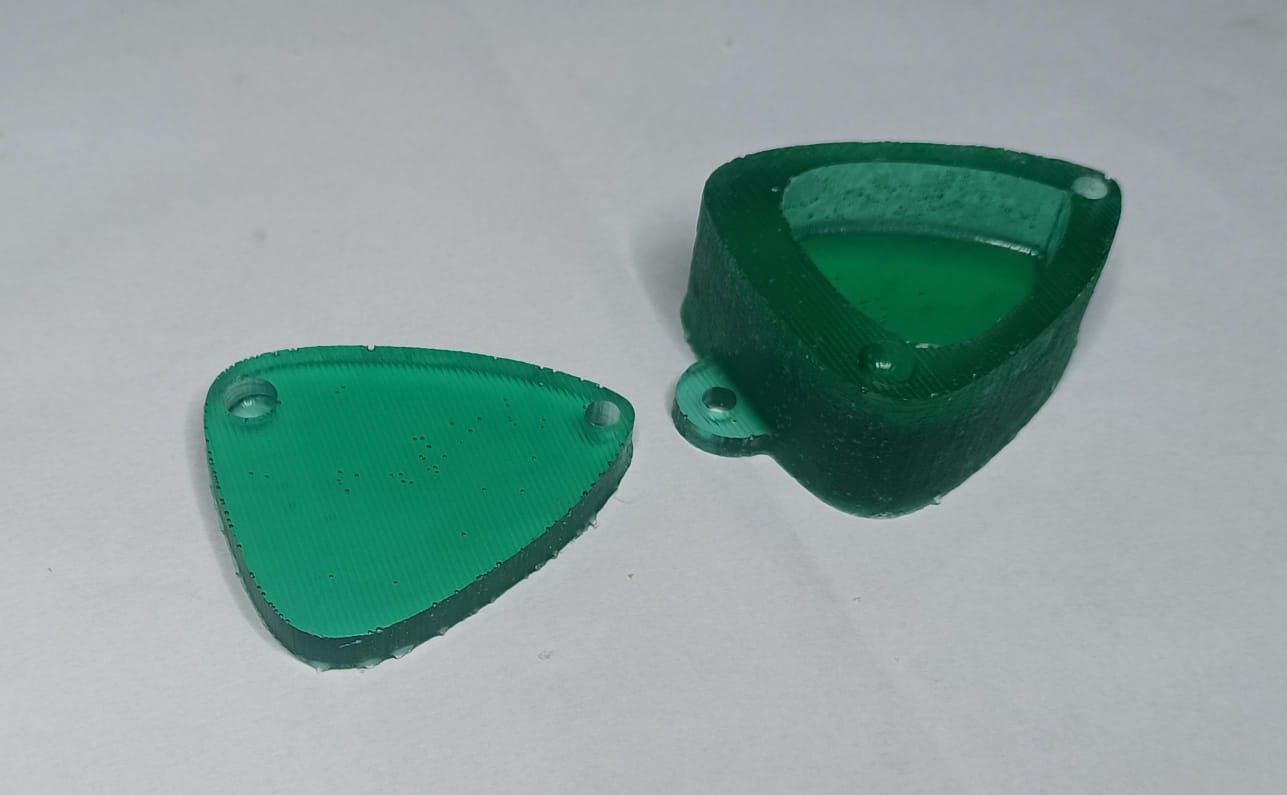
There you can see the result both of the printing version and the molding-casting version of the guitar pick case. The main difference between the two lies in the texture. With molding-casting, you obtain a smoother texture, while in terms of appearance, epoxy resin is shinier. On the other hand, the irregularities observed in the printing version may be due to the limitations of the printer or the lack of adjustment in the printing configurations.