My Final project notebook
First idea of final project (Week 1 Project management)
Learning outcome (What should be achieved)
- Communicate an initial project proposal
Introduction
In this page I’ll take note of all the thinking path I’ve been thought to make my final project. I had 3 ideas of final project:
- Paper recycling machine
- Small Olemon (it means Oled monster, reference to Poket-Monster: Pokemon!): Interactive pet with oled display
- TEMPY-1 : Temperature inside/outside comparator
Second idea of final project
Understand the learning outcomes
According to the Assignment and assessment book, a final project:
- integrates the range of units covered, answering:
What does it do? Who’s done what beforehand? What did you design? What materials and components were used? Where did they come from? How much did they cost? What parts and systems were made? What processes were used? What questions were answered? What worked? What didn’t? How was it evaluated? What are the implications?
I browsed the previous classes. I learned:
- How to modeling object in 3D with Fusion 360
- How to create printing file in the correct format(SVG, Gcode, …)
- How to cut something with laser cutter
- How to print something with 3D printer
- How to solder electronic components on a printed circuit board
- How to read and extract useful informations from datasheets
- How to design electronic circuits
- How to mill the PCB
- etc…
In input week, I implemented an interface showing temperature data collected from a thermistor.
I started to think what system can I build with a temperature sensor.
How temperature data are used in real life?
Temperature is a measure of how hot or cold something is. When we refer to the “Temperature of something,” we’re basically talking about the specific object or substance we are interested in. For example, when we say “18°C,” it doesn’t mean much unless we know what we’re referring to.
We encounter temperature in various contexts. For instance, weather temperature helps us decide whether to wear shorts or coats. Body temperature is essential because it indicates if we have a fever, if we are experiencing hypothermia (extreme cold). It serves as a survival indicator, as our body needs to maintain a specific temperature range to function properly. In laboratories, temperature is often a key factor in determining the outcome of an experiment. By carefully controlling and monitoring the temperature, scientists can observe how different substances or reactions behave under specific conditions.
I also have noticed that, temperature in interaction with humain body, can act like a ramdom generator.
In our Fablab we have 3 types of temperature sensor: - Temperature sensor : a type of semiconductor sensors, that convert the input signal, in locurence temperature into an electrical signal that can be easily processed, analyzed, and interpreted by a microcontroller. - Negative Temperature Coefficient (NTC) Thermistor - Positive temperature coefficient (PTC) Thermistor
Components
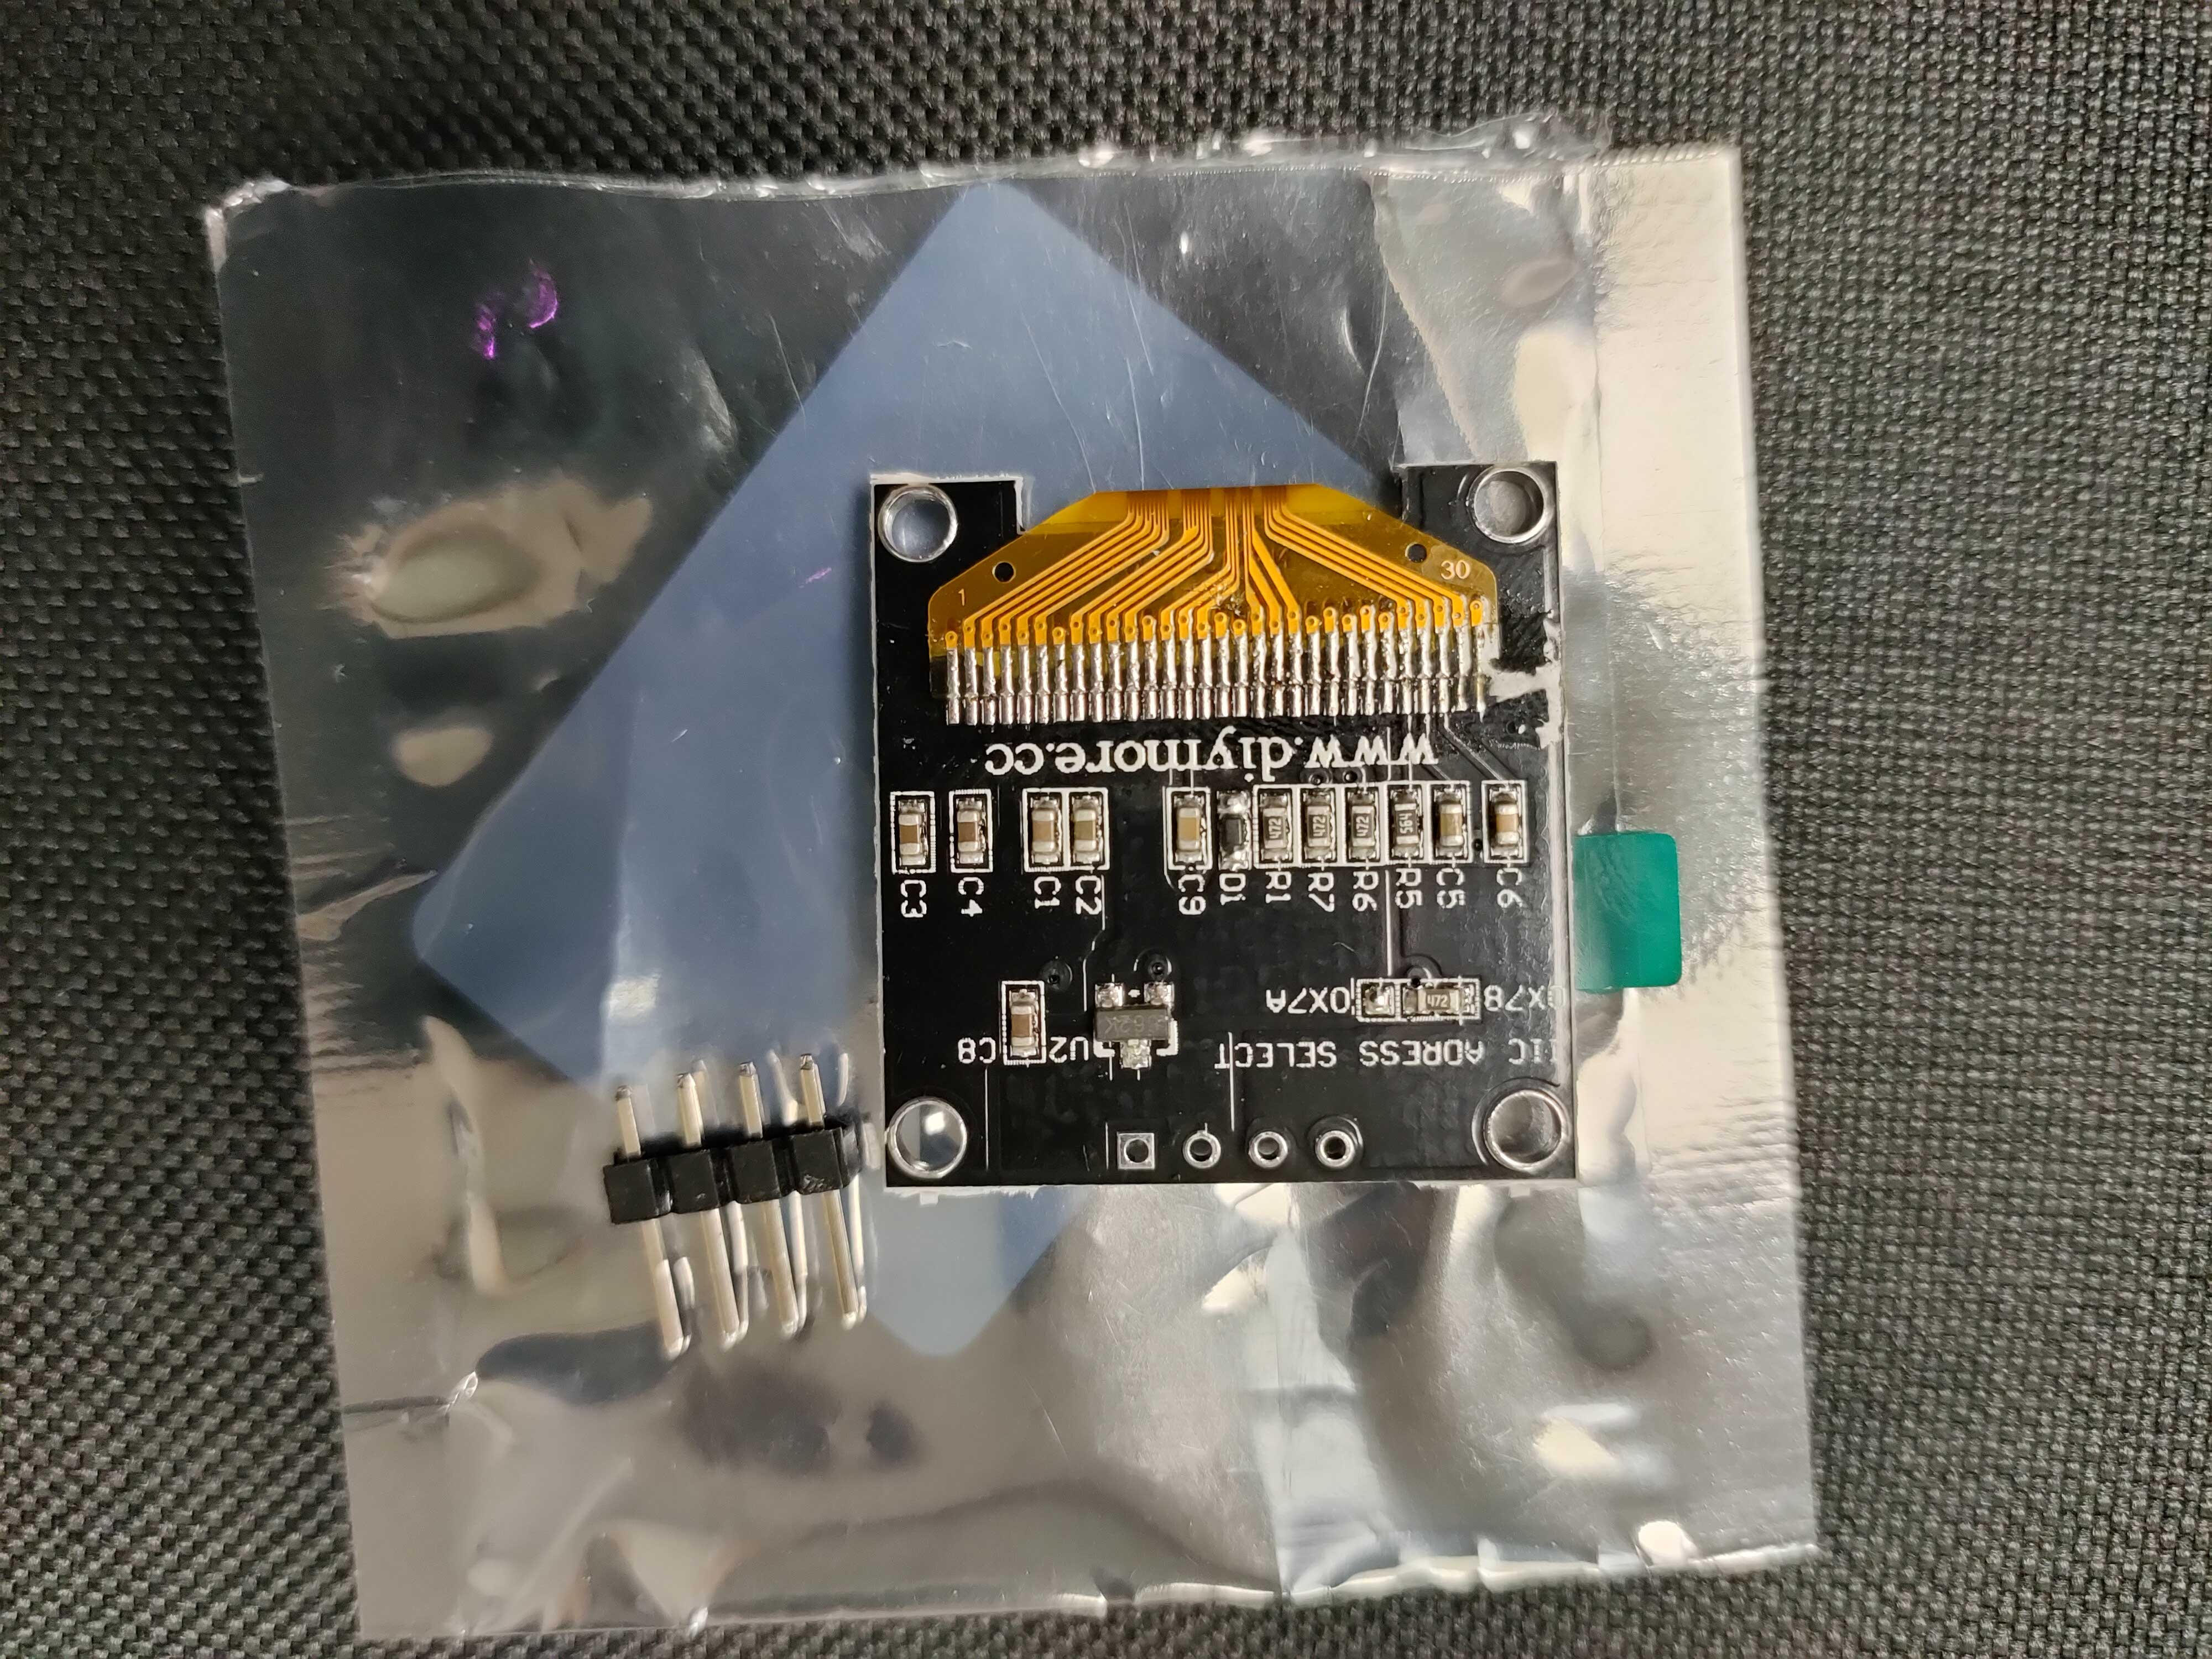
I went to Fablab and find the components that I’m going to use. I think observing, touching and trying to use the components you are interest in, is the best way to remember them.
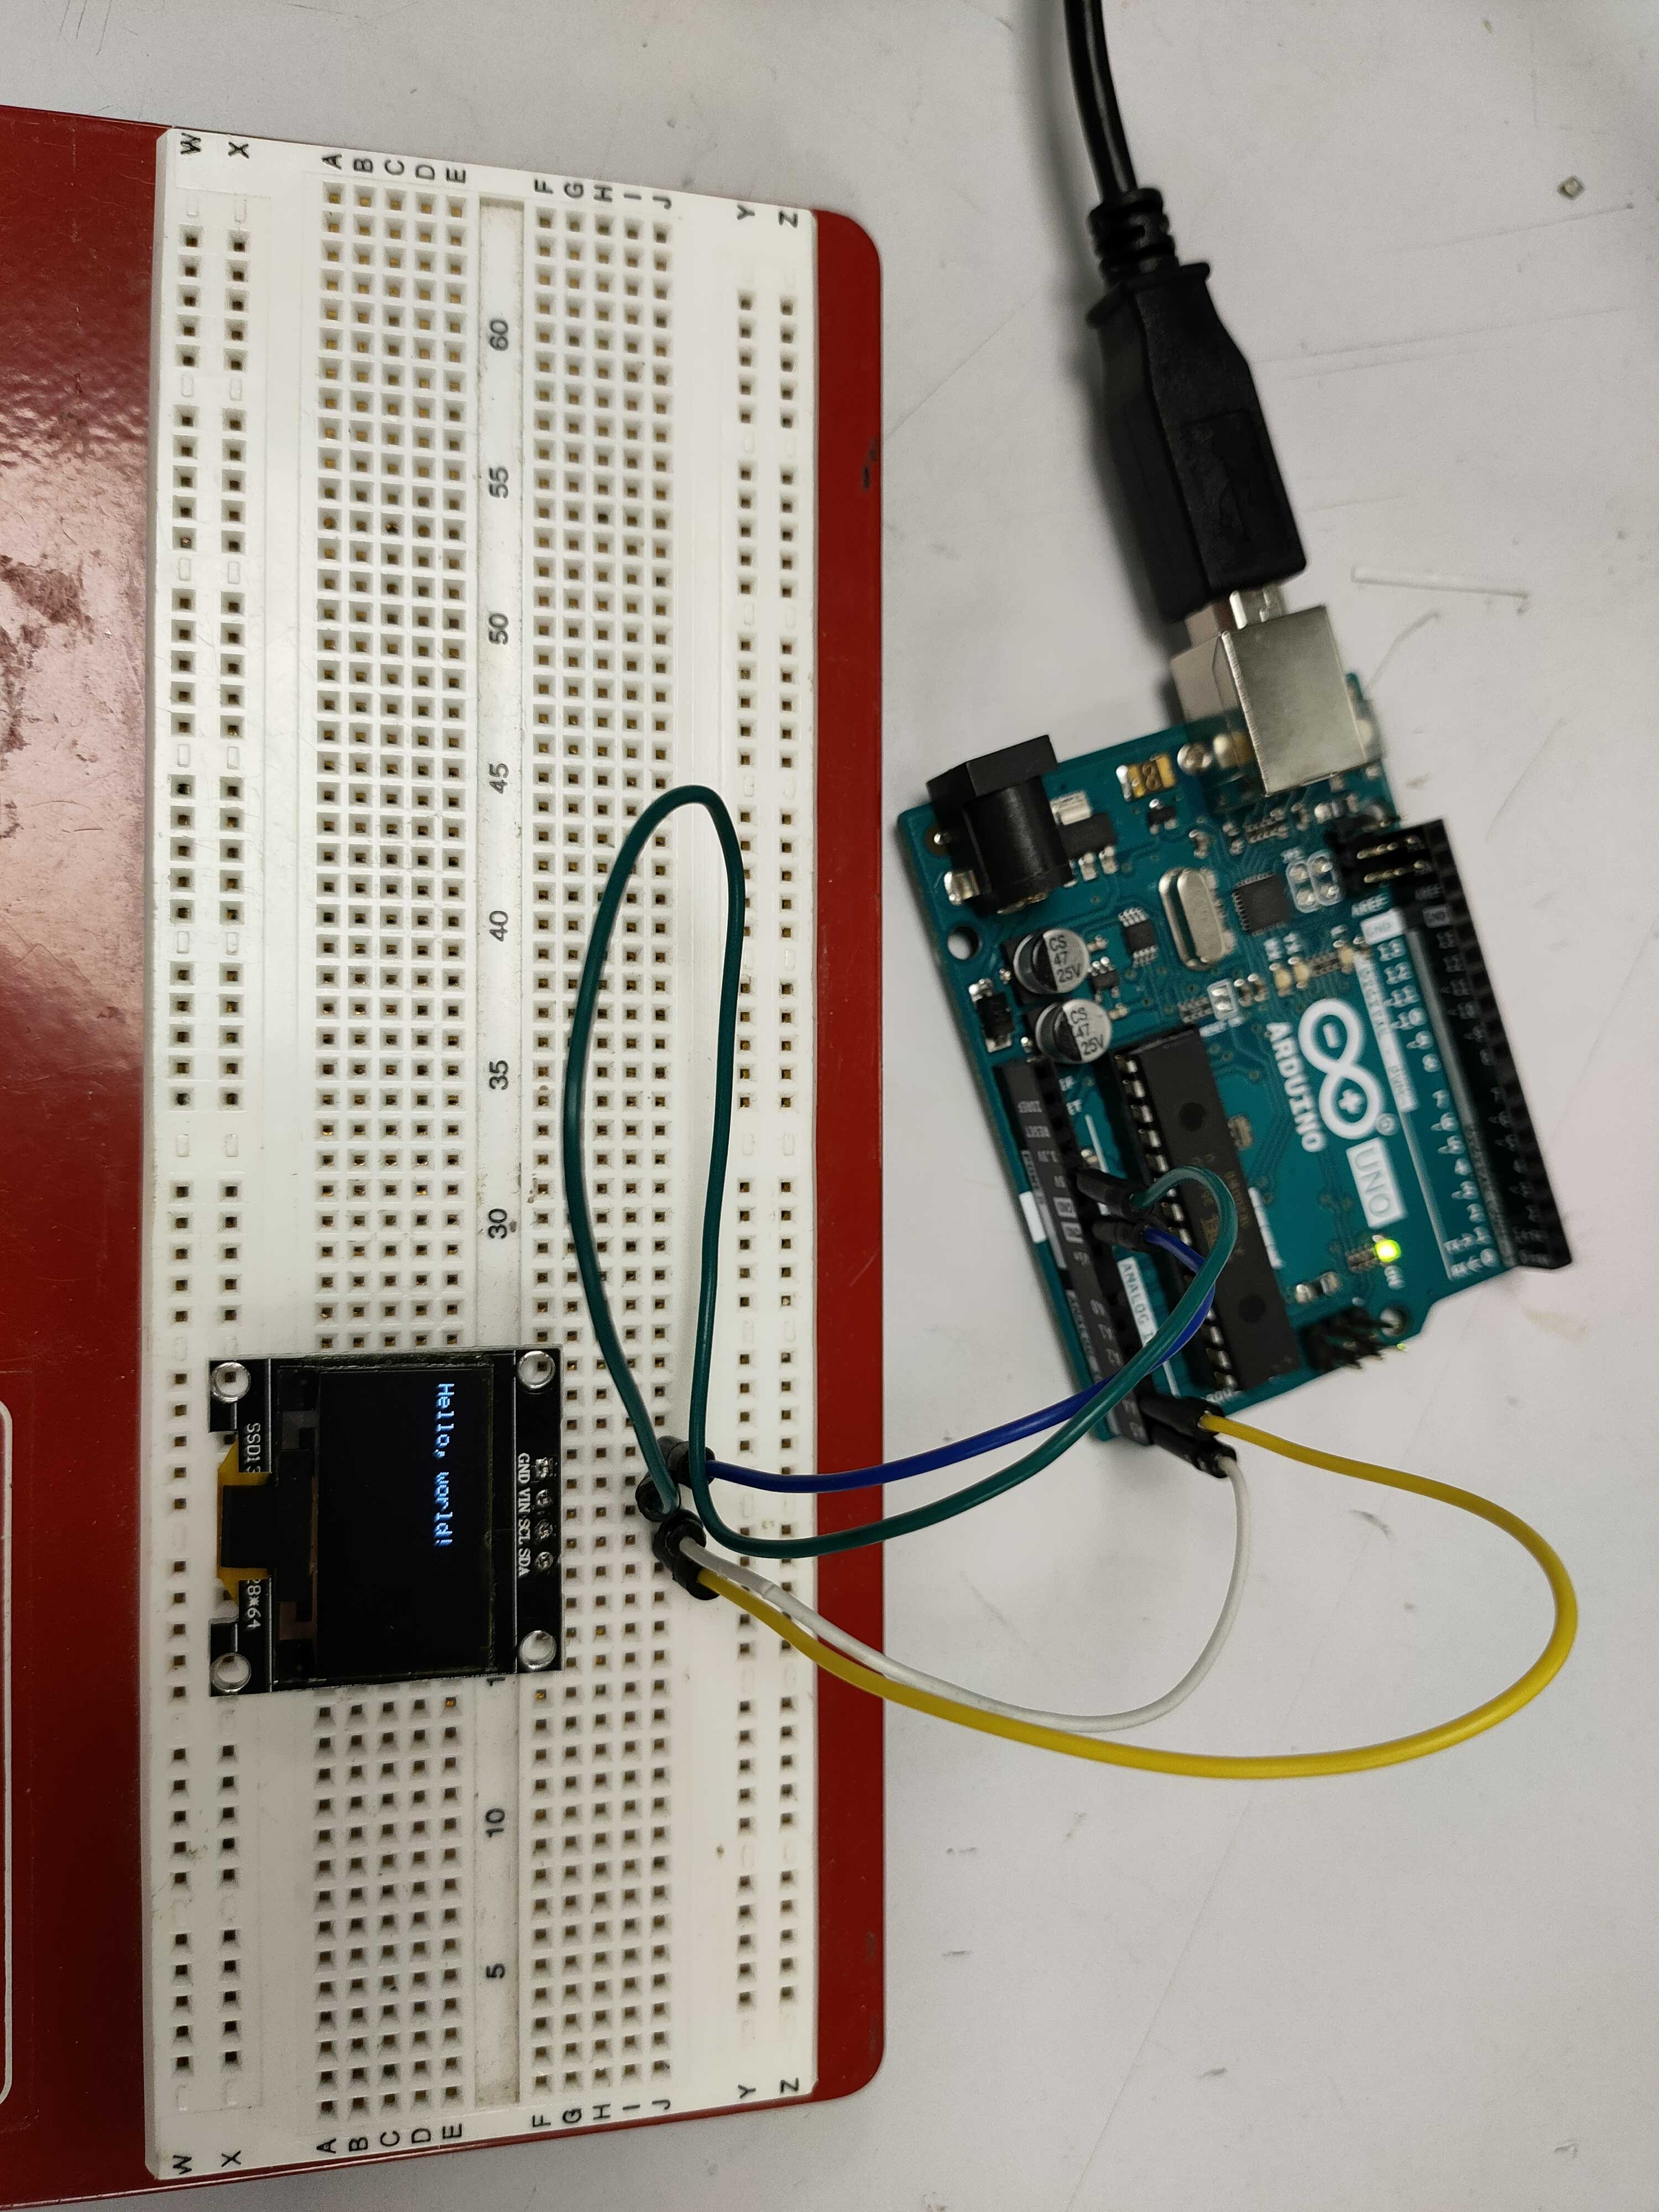
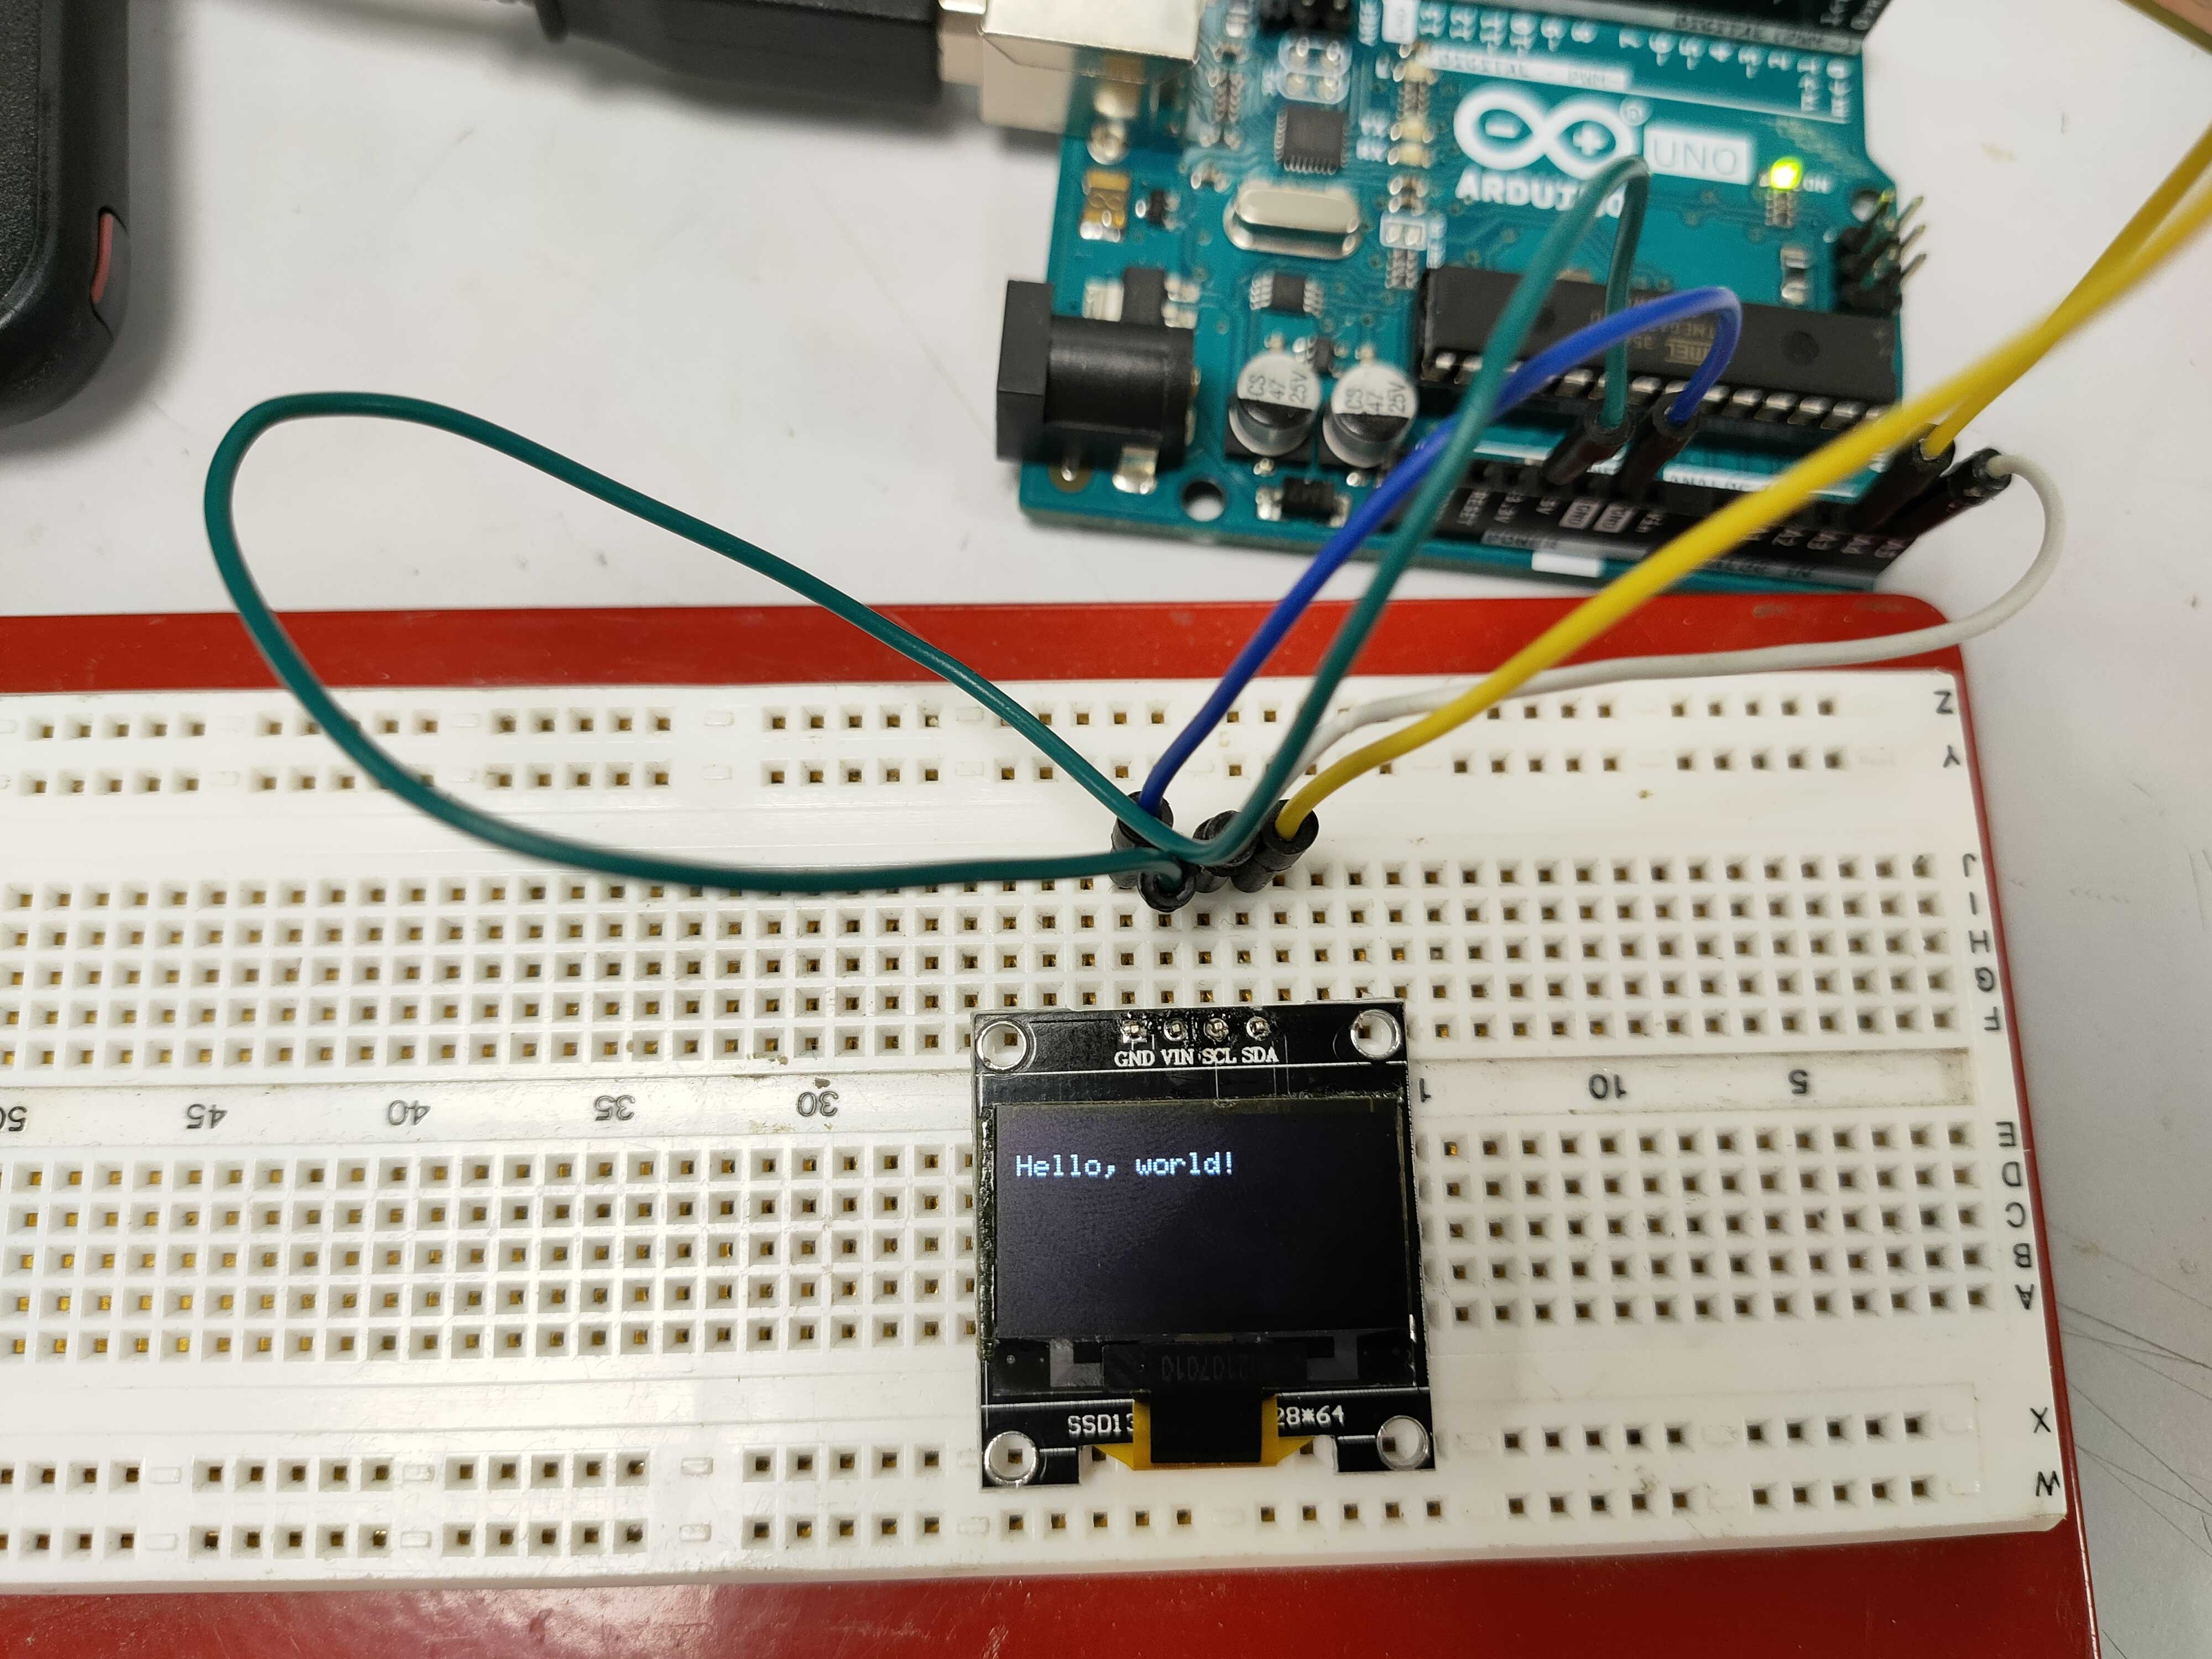
I choose an LED oled screen as output device, and tested it with an Arduino.
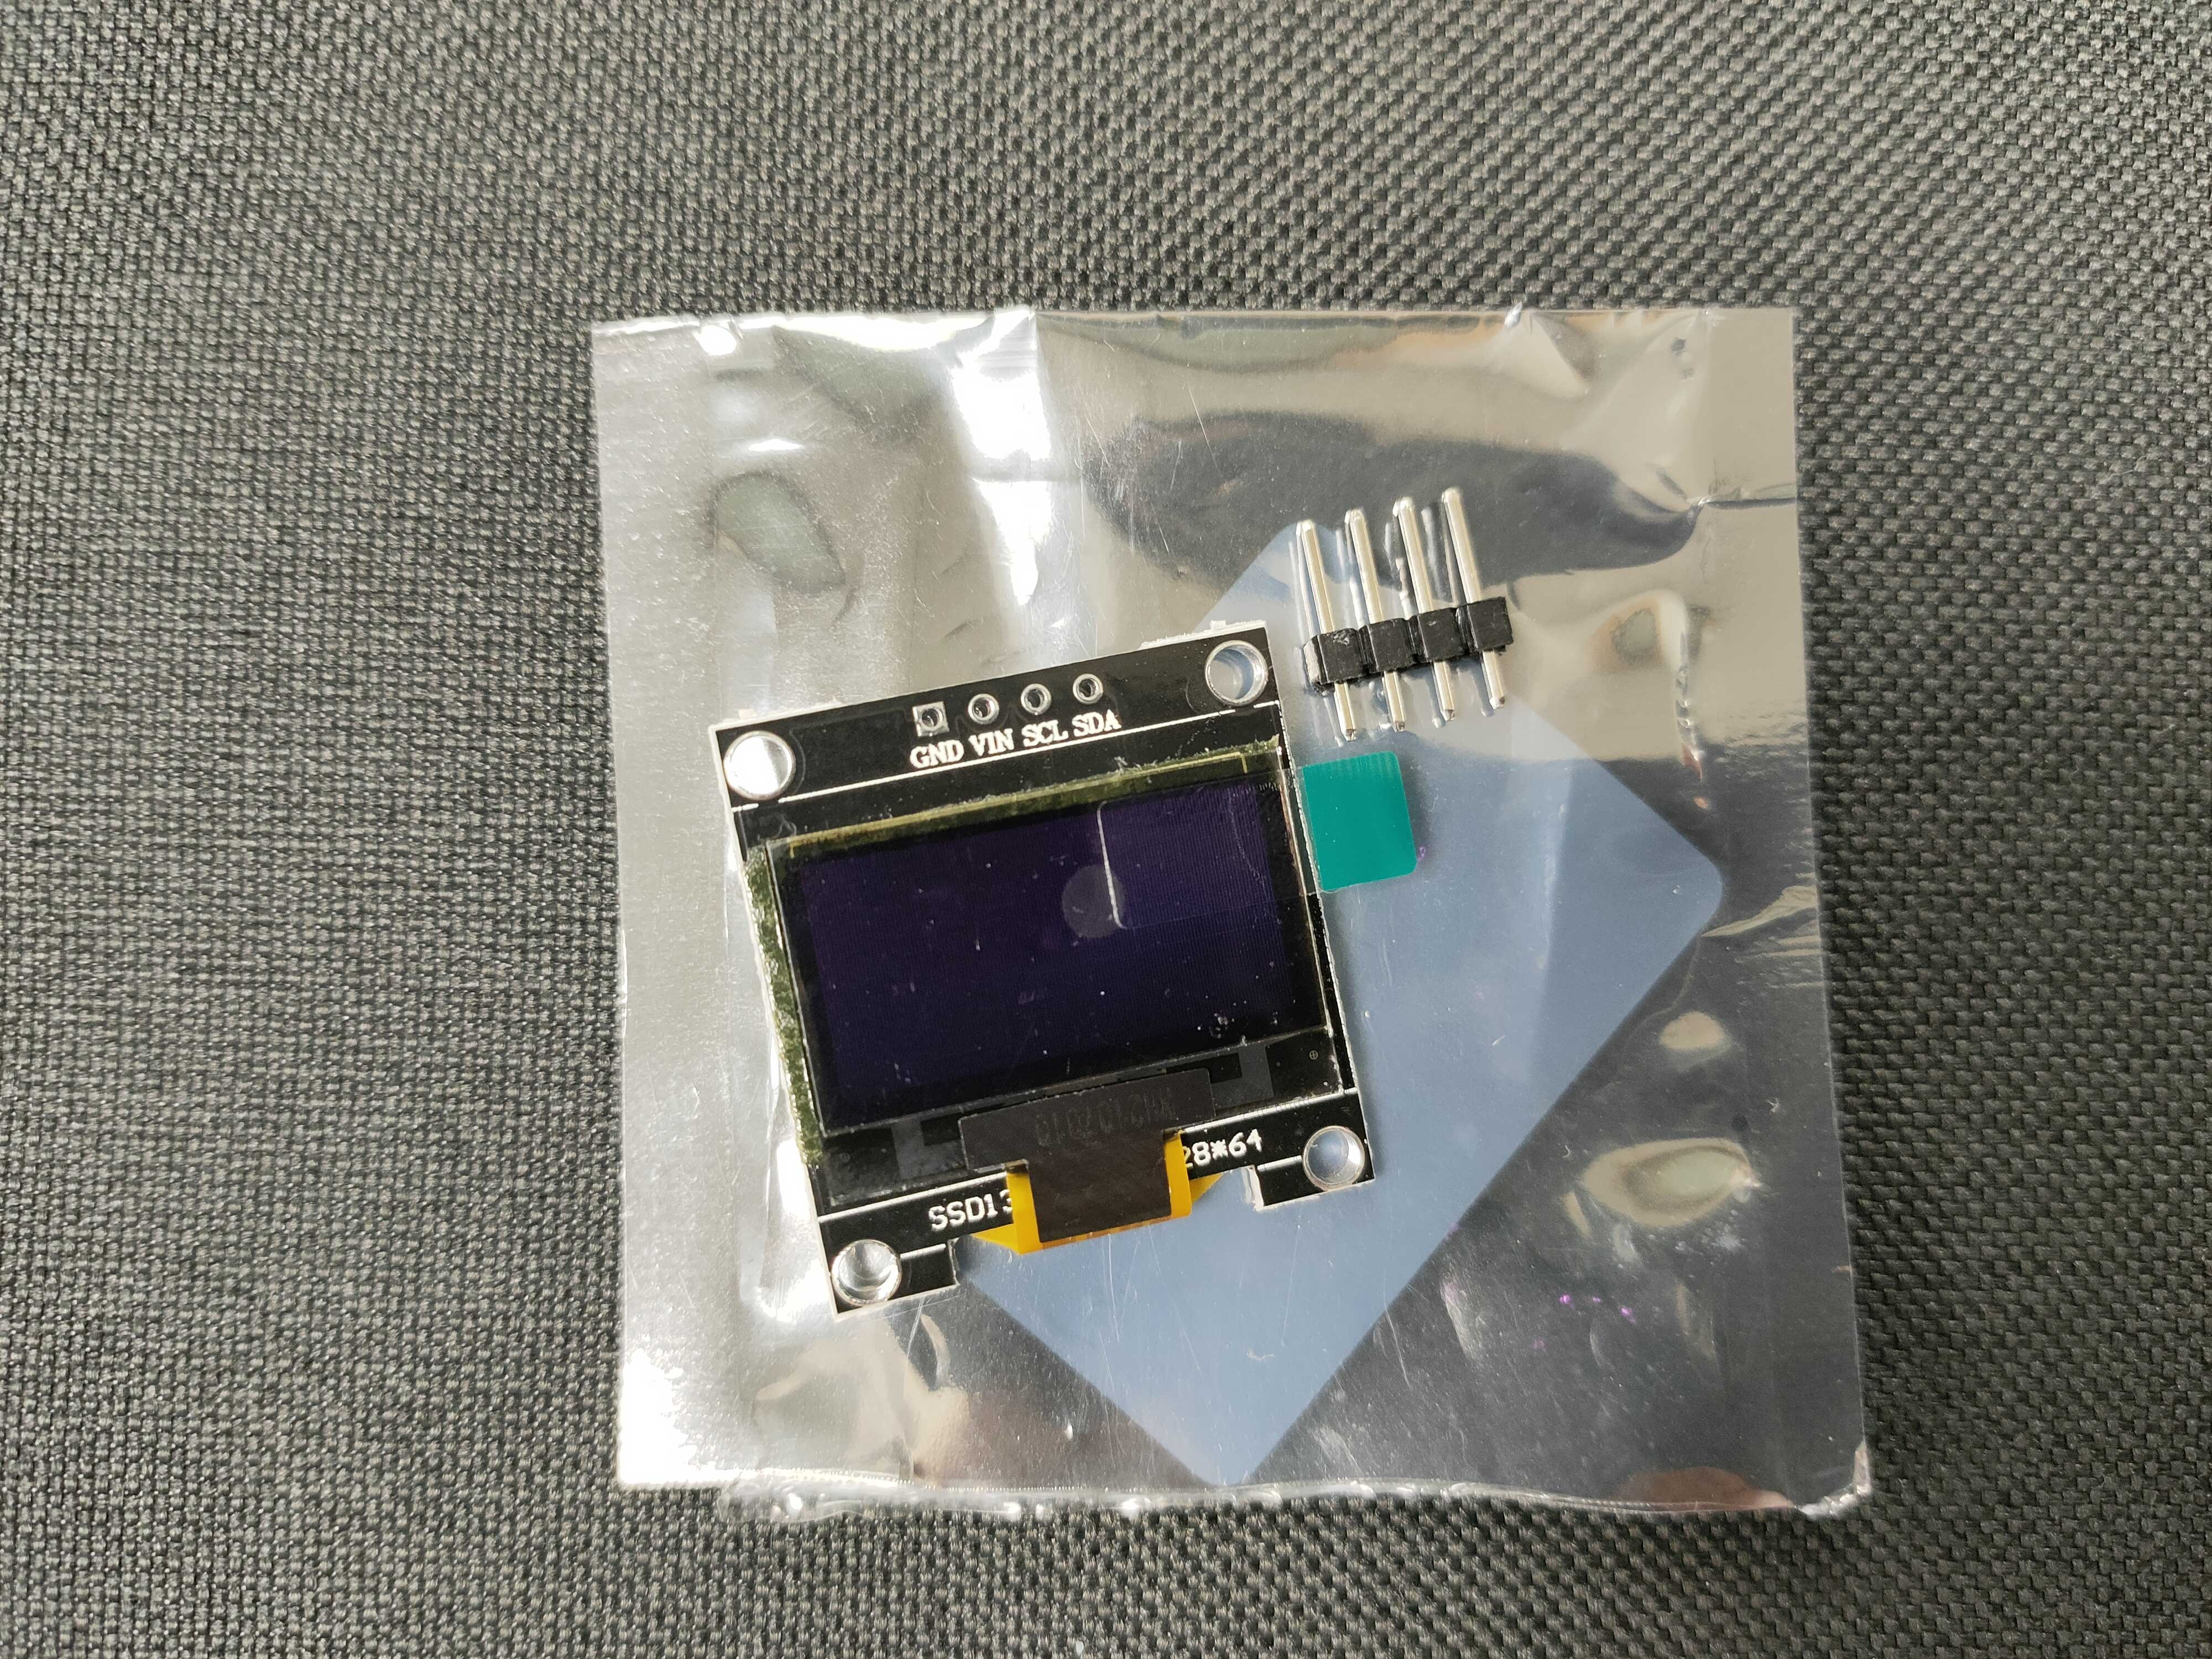
Printed a hello word on the screen

OLED ressource - how to draw image with OLED : https://www.mischianti.org/2021/07/14/ssd1306-oled-display-draw-images-splash-and-animations-2/
| ID | Name | Component | Manufacturer | Quantity | Cost | Image | Datasheet/Documentation |
|---|---|---|---|---|---|---|---|
| 1 | XIAO ESP32C3 | Microcontroller | Seeed Studio | 1 | $4.99 link |  |
-https://wiki.seeedstudio.com/XIAO_ESP32C3_Getting_Started/ - get started with web server:https://how2electronics.com/getting-started-with-seeed-xiao-esp32-c3-board/ |
| 2 | 128*64 LED display module SSD1306 | OLED Sreen | AdaFruit | 1 | $10.99 | 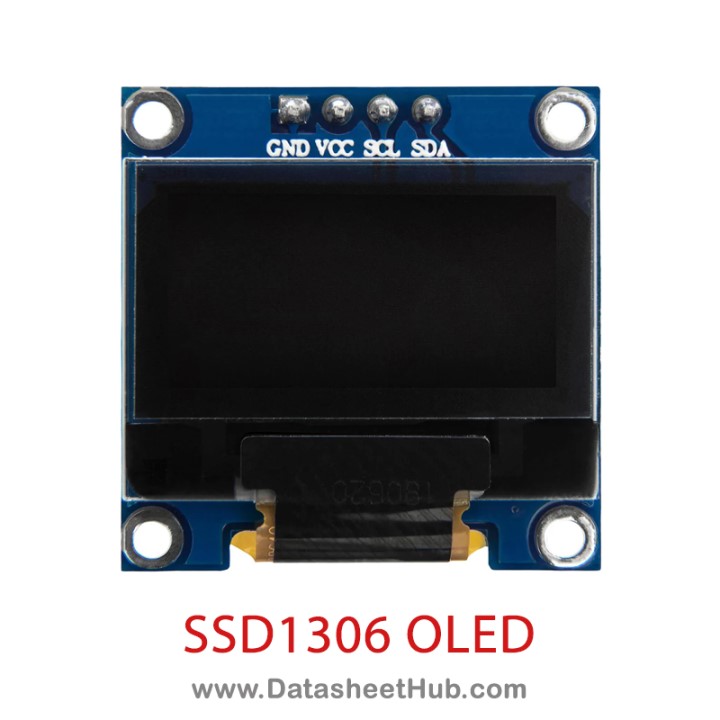 |
https://datasheethub.com/ssd1306-128x64-mono-0-96-inch-i2c-oled-display/ |
| 3 | TEMP SENSOR I2C | Temperature Sensor | MICROCHIP | 1 | $1.43(link) | 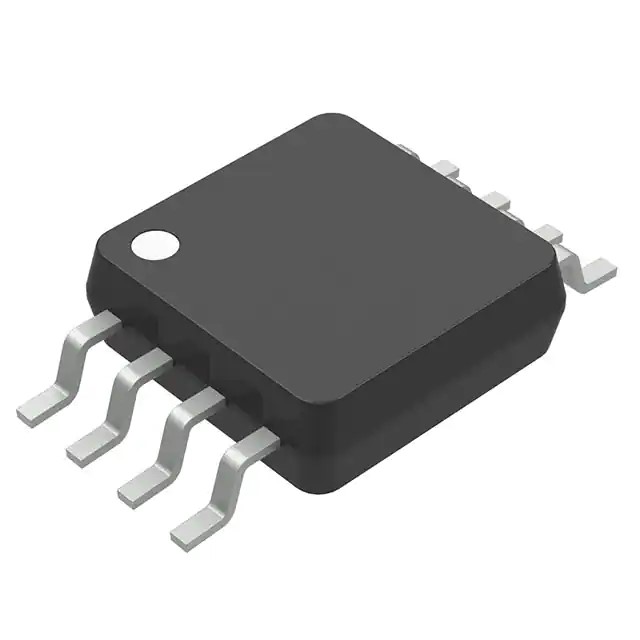 |
https://eu.mouser.com/datasheet/2/268/25095A-15487.pdf |
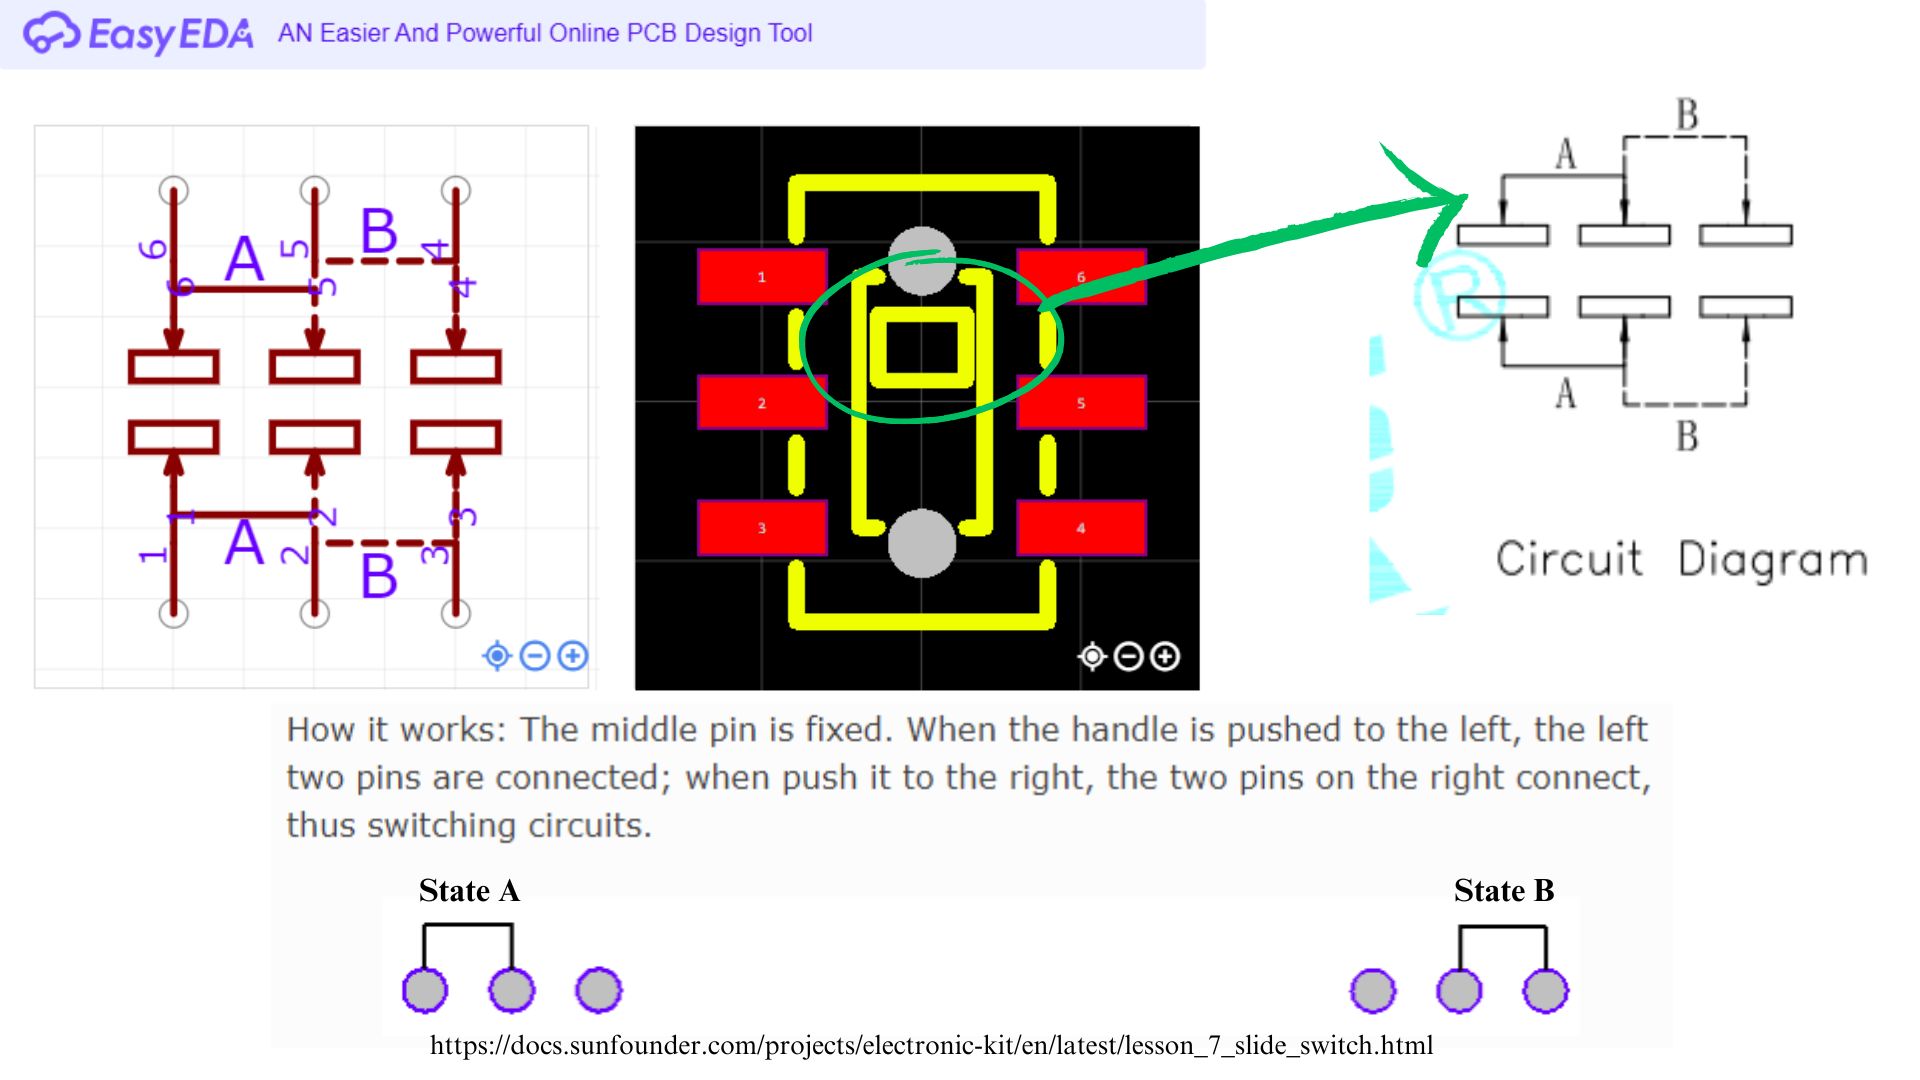
| 4 | K3-2380S-E1 | SMD Slide Switche | Korean Hroparts Elec | 1 | $0.2196 | 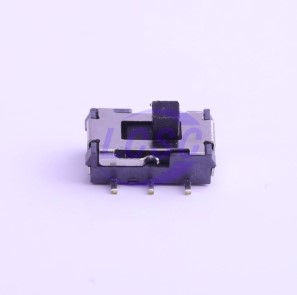 |
https://datasheet.lcsc.com/lcsc/2108131730_Korean-Hroparts-Elec-K3-2380S-E1_C145837.pdf |
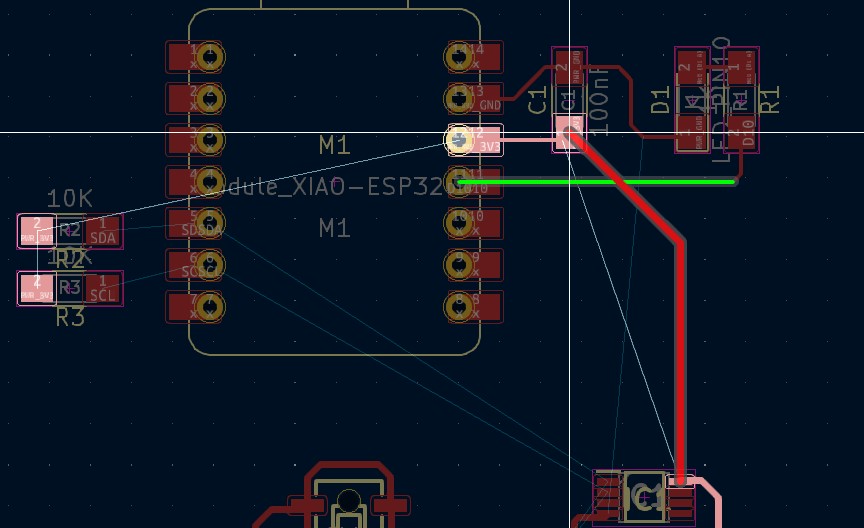
KICAD PCB design
KICAD - Schematic
I downloaded the schematic and footprint of several components that the KICAD library and fab library don’t have.
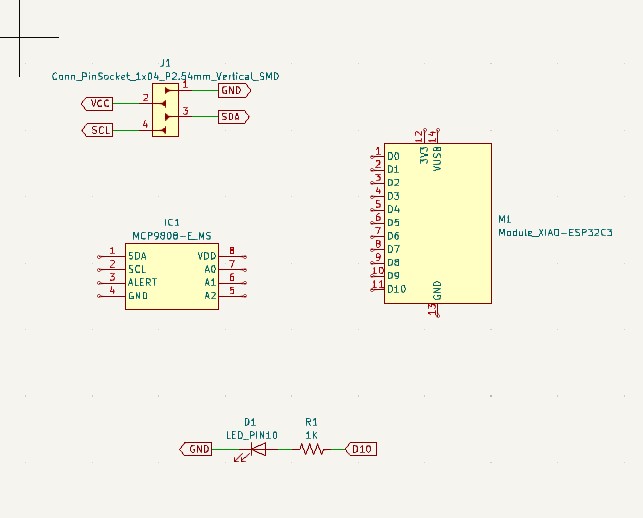
As soon I placed the components, I get confused. Because it seems like the OLED diplay and the temperature sensor both need I2C communication, they both have SDA/SCL pins. But I only have single SDA and SCL pin on my microcontroller. I realized soon that I need a I2C communication bus and assign their peripheral address.
Button Sate
ERC
Pin unspecified: https://docs.kicad.org/7.0/fr/eeschema/eeschema_symbols_and_libraries.html
Video
Finally the slide Switch was useless because the oled is powered directly by the switch.
BOM modified
| ID | Name | Component | Manufacturer | Quantity | Cost | Image | Datasheet/Documentation |
|---|---|---|---|---|---|---|---|
| 1 | XIAO ESP32C3 | Microcontroller | Seeed Studio | 1 | $4.99 link | |
-https://wiki.seeedstudio.com/XIAO_ESP32C3_Getting_Started/ - get started with web server:https://how2electronics.com/getting-started-with-seeed-xiao-esp32-c3-board/ |
| 2 | 128*64 LED display module SSD1306 | OLED Sreen | AdaFruit | 1 | $10.99 | |
https://datasheethub.com/ssd1306-128x64-mono-0-96-inch-i2c-oled-display/ |
| 3 | TEMP SENSOR I2C | Temperature Sensor | MICROCHIP | 1 | $1.43(link) | |
https://eu.mouser.com/datasheet/2/268/25095A-15487.pdf |
| 4 | Button_Omron_B3SN_6.0x6.0mm | Button | Omron | 1 | $0.2196 | 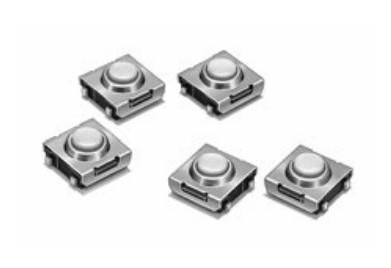 |
https://omronfs.omron.com/en_US/ecb/products/pdf/en-b3sn.pdf |
debouce_button: https://openlabpro.com/guide/push-button-interfacing-with-pic-microcontroller/
difference pull up button and pull down button pull up: light switch pull down: keyboard
I milled the final version of my PCB
I soldered my PCB
I exported the PCB from KICAD as STEP file and uploaded it into Fusion 360 so I could design a packaging that fits.
First Project
When I changed my mind, we are on the midterm. I dropped off the first project that I had in mind. Because I clearly will not have enough time to finish my project before the presentation. My first idea was a All-In-One paper recycling machine. It was huge for a beginner that just start from zero to prototyping. I’m thinking, maybe it’s better if I build my final project on what I learned during these weeks, as a first step on prototyping.
1. Brainstorming and list od ideas
Key words: Useful, Easy to use
Ideas: - A barcode scanner for products with expiration date - Paper recycling machine
2. Analyse and choice
Paper recycling machine
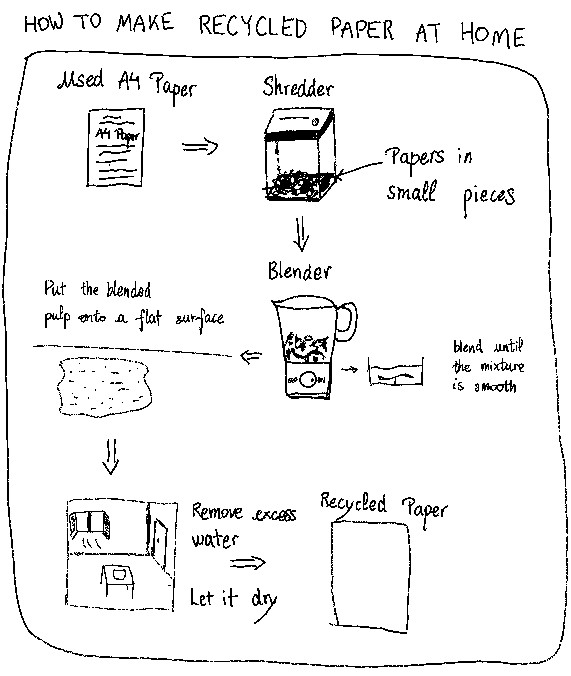
As a student I write down things on paper. Over time and years, I just get more and more outdated docs. Instead of buying new papers and store more documents, I wish there is a machine that could help me reduce paper waste, by recycling papers and transform them into . For example, a paper recycling machine that combine different machines in ONE machine paper shredder + mixer + sieve.
I did some research on Google. To find a proper way to re
capacitor 100nF to uF capacitor’s value?
3D model oled : https://grabcad.com/library/ssd1306-oled-display-128x64-1
#include <Wire.h>

void setup() {
  Serial.begin(9600);
  while (!Serial);

  Wire.begin();
  Serial.println("\nI2C Scanner");
}

void loop() {
  byte error, address;
  int deviceCount = 0;

  Serial.println("Scanning...");

  for (address = 1; address < 127; address++) {
    Wire.beginTransmission(address);
    error = Wire.endTransmission();

    if (error == 0) {
      Serial.print("I2C device found at address 0x");
      if (address < 16)
        Serial.print("0");
      Serial.print(address, HEX);
      Serial.println();
      deviceCount++;
    }
  }

  if (deviceCount == 0)
    Serial.println("No I2C devices found.");

  delay(5000); // Wait for 5 seconds before scanning again
}

#include <Wire.h>
#include <Adafruit_GFX.h>
#include <Adafruit_SSD1306.h>

#define OLED_ADDR 0x3C
#define SCREEN_WIDTH 128
#define SCREEN_HEIGHT 64

Adafruit_SSD1306 display(SCREEN_WIDTH, SCREEN_HEIGHT, &Wire, -1);

void setup() {
  Serial.begin(9600);
  Wire.begin();

  if (!display.begin(SSD1306_SWITCHCAPVCC, OLED_ADDR)) {
    Serial.println("OLED initialization failed!");
    while (1);
  }
}

void loop() {
  float temperature = readTemperature();

  display.clearDisplay();
  display.setTextSize(1);
  display.setTextColor(SSD1306_WHITE);
  display.setCursor(0, 0);
  display.println("Temperature:");
  display.setTextSize(2);
  display.setCursor(0, 28);
  display.print(temperature, 1);
  display.println(" C");
  display.display();

  delay(1000);
}

float readTemperature() {
  byte msb, lsb;
  float temperature;

  Wire.beginTransmission(0x18); // MCP9808 address: 0x18
  Wire.write(0x05); // Register address for temperature data
  Wire.endTransmission(false);
  Wire.requestFrom(0x18, 2); // Request 2 bytes of data

  if (Wire.available() == 2) {
    msb = Wire.read();
    lsb = Wire.read();
    temperature = ((msb & 0x1F) << 8) | lsb;
    temperature /= 16.0;
  }

  return temperature;
}
I’m thinking about using the wifi functionality of the board. I
#include <Wire.h> // I2C bus comminication lib
#include <Adafruit_SSD1306.h> //

#include <WiFi.h>
#include <HTTPClient.h>
#include <ArduinoJson.h>

#define OLED_ADDR 0x3C // The I2C peripheral address of the OLED
#define SCREEN_WIDTH 128
#define SCREEN_HEIGHT 64

const char* ssid = "Livebox-8160";
const char* password = "RU6mHfYLEiMJvXmD6R";

const char* api_key = "c9922f986f5ffb347ba8aa4ff6d78b1b";
const char* host = "api.openweathermap.org";

const char* location = "Paris";  // Change to your desired location

WiFiClient client;

Adafruit_SSD1306 display(SCREEN_WIDTH, SCREEN_HEIGHT, &Wire, -1); // Declare a object?

void setup() {
  Serial.begin(115200);
  Wire.begin();

  if (!display.begin(SSD1306_SWITCHCAPVCC, OLED_ADDR)) {
    Serial.println("OLED initialization failed!");
  }

  float temperature_inside = readTemperature();
  float temperature_outside;

  display.clearDisplay();
  display.setTextSize(1);
  display.setTextColor(SSD1306_WHITE);
  display.setCursor(0, 0);
  display.println("INSIDE");
  display.setTextSize(2);
  display.setCursor(0, 15);
  display.print(temperature_inside, 1);
  display.println(" C");

  display.setTextSize(1);
  display.setCursor(0, 35);
  display.println("OUTSIDE");

  WiFi.mode(WIFI_MODE_STA);
  WiFi.begin(ssid, password);

  while (WiFi.status() != WL_CONNECTED) {
    Serial.print(".");
    display.setTextSize(1);
    display.setCursor(0, 55);
    display.print("Loading WeatherAPI...");

    display.display();
    delay(2000);
  }

  Serial.println("");
  Serial.println("WiFi connected");
  Serial.print("IP address: ");
  Serial.println(WiFi.localIP());


}

void loop() {

  if (WiFi.status() == WL_CONNECTED) {
    HTTPClient http;

    String url = "http://";
    url += host;
    url += "/data/2.5/weather?q=";
    url += location;
    url += "&appid=";
    url += api_key;

    http.begin(url);

    int httpResponseCode = http.GET();
    Serial.println(httpResponseCode);

    if (httpResponseCode > 0) {
      String payload = http.getString();

      DynamicJsonDocument doc(1024);
      deserializeJson(doc, payload);

      float temperature_outside;

      temperature_outside = doc["main"]["temp"];
      temperature_outside -= 273.15; // Convert temperature from Kelvin to Celsius
      Serial.println("Temperature_outside:");
      Serial.println(temperature_outside);

      display.clearDisplay();
      display.setTextSize(1);
      display.setCursor(0, 35);
      display.println("OUTSIDE");
      display.setTextSize(2);
      display.setCursor(0, 46);
      display.print(temperature_outside, 1);
      display.println(" C");
      display.display();

    }

    http.end();
  }

  float temperature_inside = readTemperature();

  display.setTextSize(1);
  display.setTextColor(SSD1306_WHITE);
  display.setCursor(0, 0);
  display.println("INSIDE");
  display.setTextSize(2);
  display.setCursor(0, 16);
  display.print(temperature_inside, 1);
  display.println(" C");
  display.display();

  delay(30000); // 30000 ms = 30 seconds


}


float readTemperature() {
  byte msb, lsb;
  float temperature;

  Wire.beginTransmission(0x18); // MCP9808 address: 0x18
  Wire.write(0x05); // Register address for temperature data
  Wire.endTransmission(false);
  Wire.requestFrom(0x18, 2); // Request 2 bytes of data

  if (Wire.available() == 2) {
    msb = Wire.read();
    lsb = Wire.read();
    temperature = ((msb & 0x1F) << 8) | lsb;
    temperature /= 16.0;
  }

  return temperature;
}
I use the openweather’s API, Current Weather . https://openweathermap.org/current