Week 7 - Computer controlled machining

Assignments | Week 7 | Computer-controlled machining
Group assignment
- Complete your lab’s safety training
- Test runout, alignment, fixturing, speeds, feeds, materials and toolpaths for your machine
- Document your work to the group work page and reflect on your individual page what you learned
Individual project
- Make (design+mill+assemble) something big
Learning outcomes
- Demonstrate 2D design development for CNC production
- Describe workflows for CNC production
Another whole new chapter of my learning trip. When Neil says computer-controlled machining, I would imagine a huge machine cutting a large piece of wood. I would also imagine a machine that is cutting a metal board, and the part that is being cut turns into red.
Group assignment
The next day after the global lecture, we had the safety training with our intructor Stephane.
1. Fablab’s Safety training
Turn on/ Turn off Shopbot Dust collector power on check
ALWAYS HAVE YOUR HAND ON TOP OF THE THE STOP BUTTON
Wear protection glasses and earphone
-
Turn on the Shopbot by flipping the switch.
-
Loosen the support that holds the dust extraction hose and remove it.
-
Install the milling cutter into the spindle. The chuck opens with the notched wrench attached to the key located under the switch. Hold the notched wrench with the left hand and the regular wrench with the right hand. To loosen, push the keys outward; to tighten, pull them toward yourself. Then reattach the dust extraction hose.
-
Secure the material to the sacrificial board using clamps or double-sided tape. Use 4 clamps for wood (one on each side of the board) and 6 clamps for aluminum (double up on 2 opposite sides).
-
Set the X and Y zero at the bottom left of the area to be machined (when standing behind the computer). By entering the distances directly into the control panel, move the head to the size of the object to be created to ensure that everything fits properly.
-
Move the head to the center of the piece and set the Z zero. Place the metal plate under the milling cutter and secure the clamp to the milling cutter.
-
Launch the Z origin setting while holding the emergency stop in hand.
-
Remove the plate and the clamp, then click OK.
-
Run the milling cutter idle for a few minutes to warm up the motor.
-
Open the GCode file generated by VCarve or Fusion.
-
Put on safety glasses and noise-canceling headphones.
-
Press the emergency stop button and start the machining process. The dust extractor will start automatically. For aluminum, disable the dust extractor.
Machining must be continuously monitored. Use the emergency stop button if any suspicious noises are heard.
2. Tests on machine
In our lab, we already have the feeds and speeds set up for all the materials we have.
Group assignment Test runout, alignment, fixturing, speeds, feeds, materials and toolpaths for your machine
Imgs
3. What did I learn?
Everything I learned in this week is new for me, but I can still classify them:
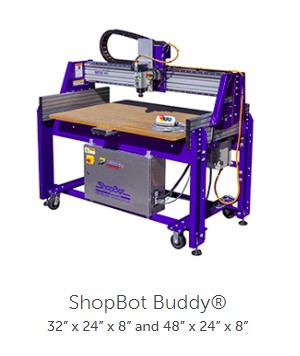
About the shopbot - The shopbot is a machine that can cut (with end mills) or make hole (with drill) on large format materials. - How to use the Shopbot, the workflow. - The shopbot is problably the most dangerous machine in your lab. So, only use it when you are sober, clearheaded, able to think logically and coherently. It’s important to rest well in order to avoid making bad decision.
About the design part - Import the 2D sketches from Fusion 360 design file as DXF
Individual project
During the global lecture, I wrote down some tips that Neil gave us. 1. Find the material before designing.
1. Ideas, Trial and Error
I spent a day in fablab, documenting and finding ideas for this week’s assignment. I observed the objets we have in our lab, we can find table, chair, bookcase all of these are source of inspiration!
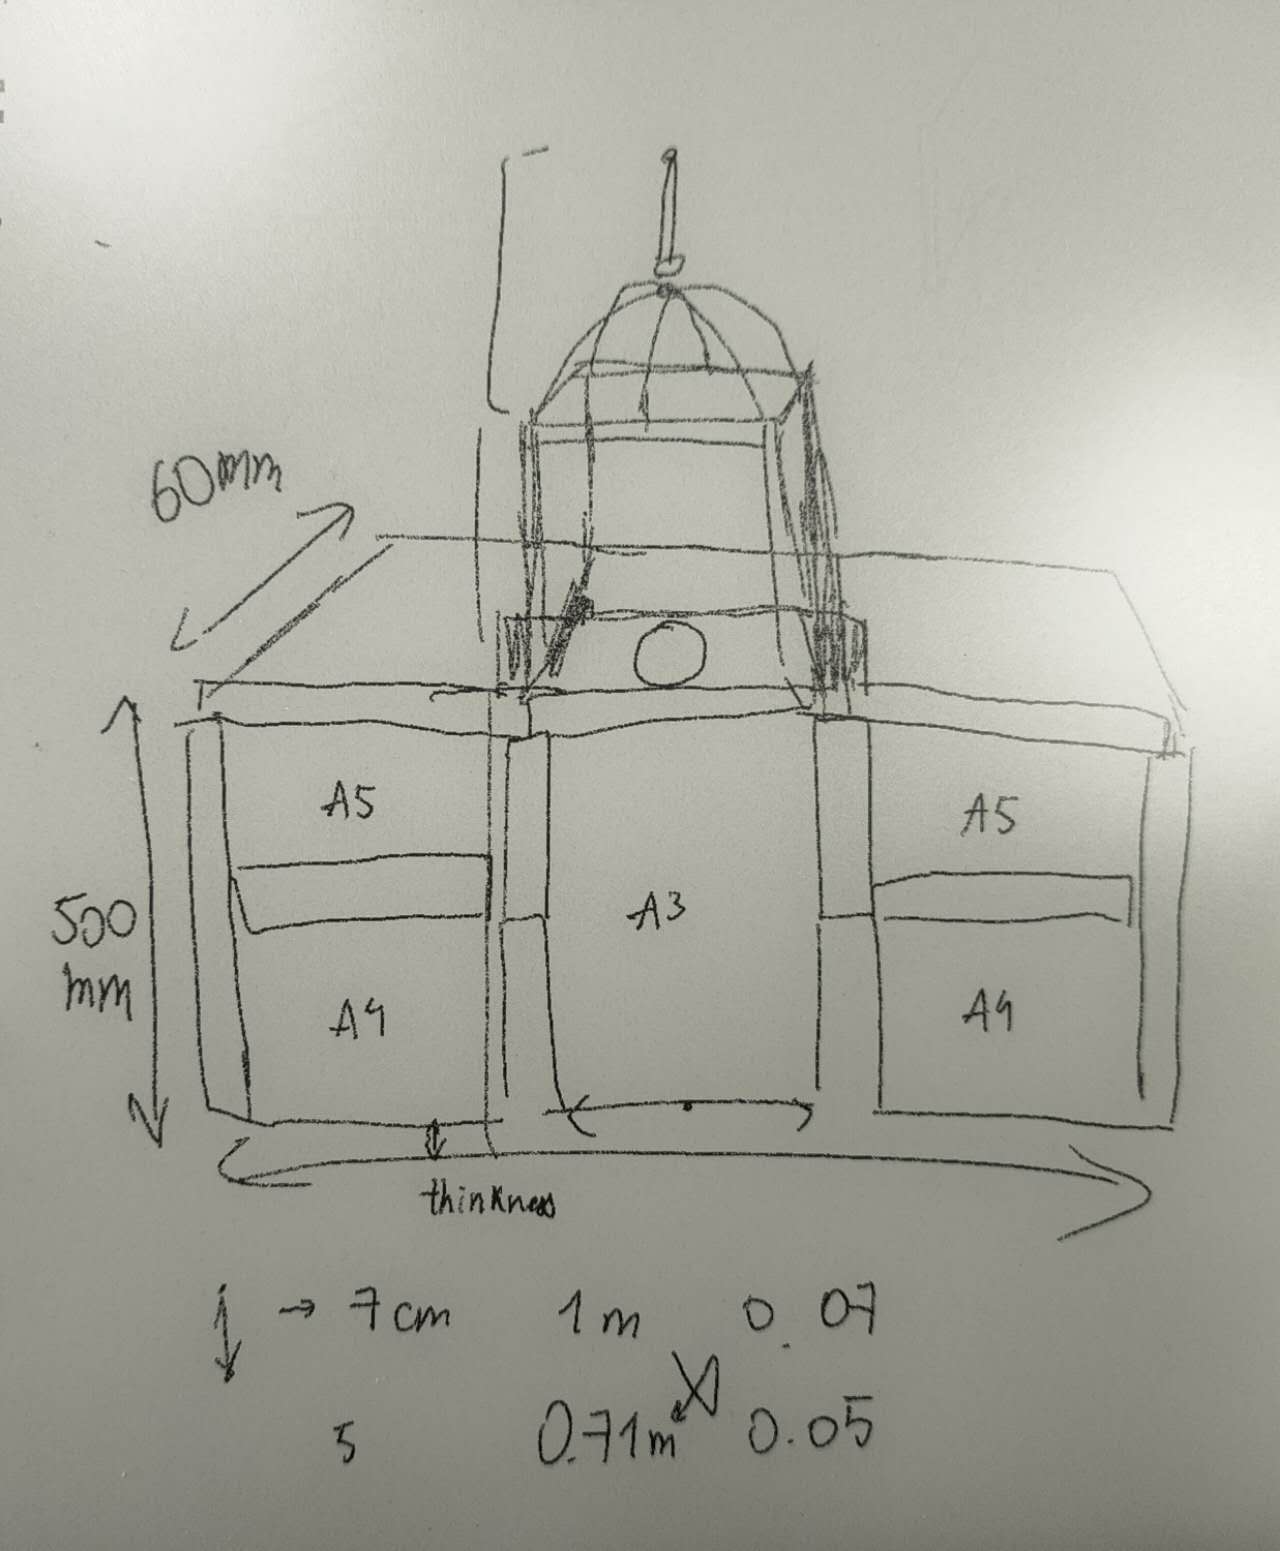
At first I compared the utilily and my needs, and I went for a bookcase. My idea was to make a bookcase, inspired by the historic monument : Chapelle de la Sorbonne. It was clear in my imagination but
![../../images/week07/fablab_1] ![../../images/week07/fablab_2]
Now I’m try to sketch forms on my tablet. It is so hard. Because I’m simplifying a very complex architectural form into ordinary geometrical form. I also need to maintain the balance between details and forms. If I spend too much time on details, I will not have enough time to do machining.
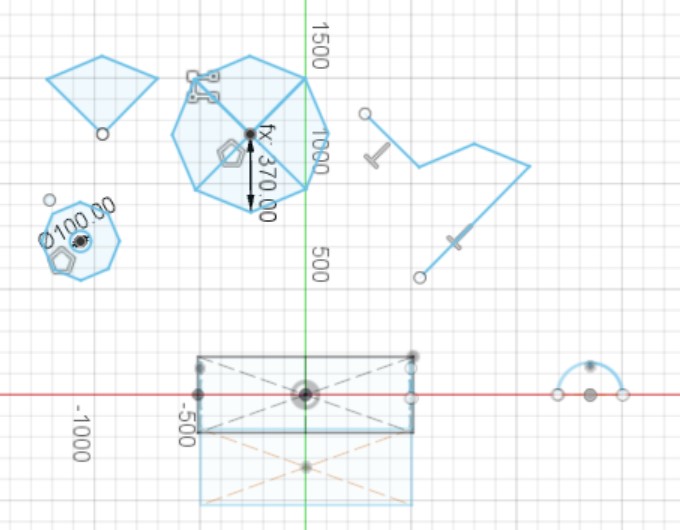
Fusion 360
Honestly, at this moment of my life, I think the design part is the most difficult task to achieve.