9. Embedded programming
Learning outcomes
-
Identify relevant information in a microcontroller datasheet.
-
Implement programming protocols.
Like the previous weeks , student are expected to complete two (2) categories of weekly assignment.
-
Group assignment:
-
Compare the performance and development workflows for other architectures
-
Document your work to the group work page and reflect on your individual page what you learned
-
-
Individual assignment:
-
Read the datasheet for your microcontroller
-
Use your programmer to program your board to do something
-
Group Assignment
For our Group assignment we had to compare the performance and development workflows for other architectures and document our findings.
The Group Assignment page is as follows Link
Group Members:
-
Nervene Bhagwandass
-
Christopher Proute
-
Terrence Carew
-
James Khan
-
Marvin Holloway
-
Ravi Baldeo
Individual Assignment
For my individual assignment I had to read the datasheet for your microcontroller and use the programmer to program your board to do something. I got a copy of the data sheet for the Attiny 412 microcontroller on alldatasheet.com
Some key points are:
-
AVR 8-bit CPU
-
Flash Memory 4 kB

Programming
I made the ATTINY 412 board in in Electronic Design week. I also made UPDI in my Electronics production week
I connected my FTDI cable > UPDI> electronic design board

I modified the code below form Zhengya-gong
-
I have to define a library containing ATtiny412 details, which is why the first line is #include and then the pin name to be configured.
-
According to my schematic, the button is connected to pin PA1 and the LED is connected to pin PA2. Next I need to configure the button as input and LED as output. This explains the statement pinMode again. Note that when the button is pressed, it provides a way, so the pin button is logic “0” when it is pressed, otherwise it stops at the resistor.
-
The logic is “1” when the button is not pressed. That’s why in my if statement, when the button is pressed, I put it! (Not) because the if statement is true, because! ‘0’ = ‘1’. The digitalread () statement is used to check the status of the pin digitalwrite () using write-on-pin. This is why when the button is clicked on the lead, not the click causes a continuous write program.
-
I click on the upload program to load it into the ATtiny microcontroller.

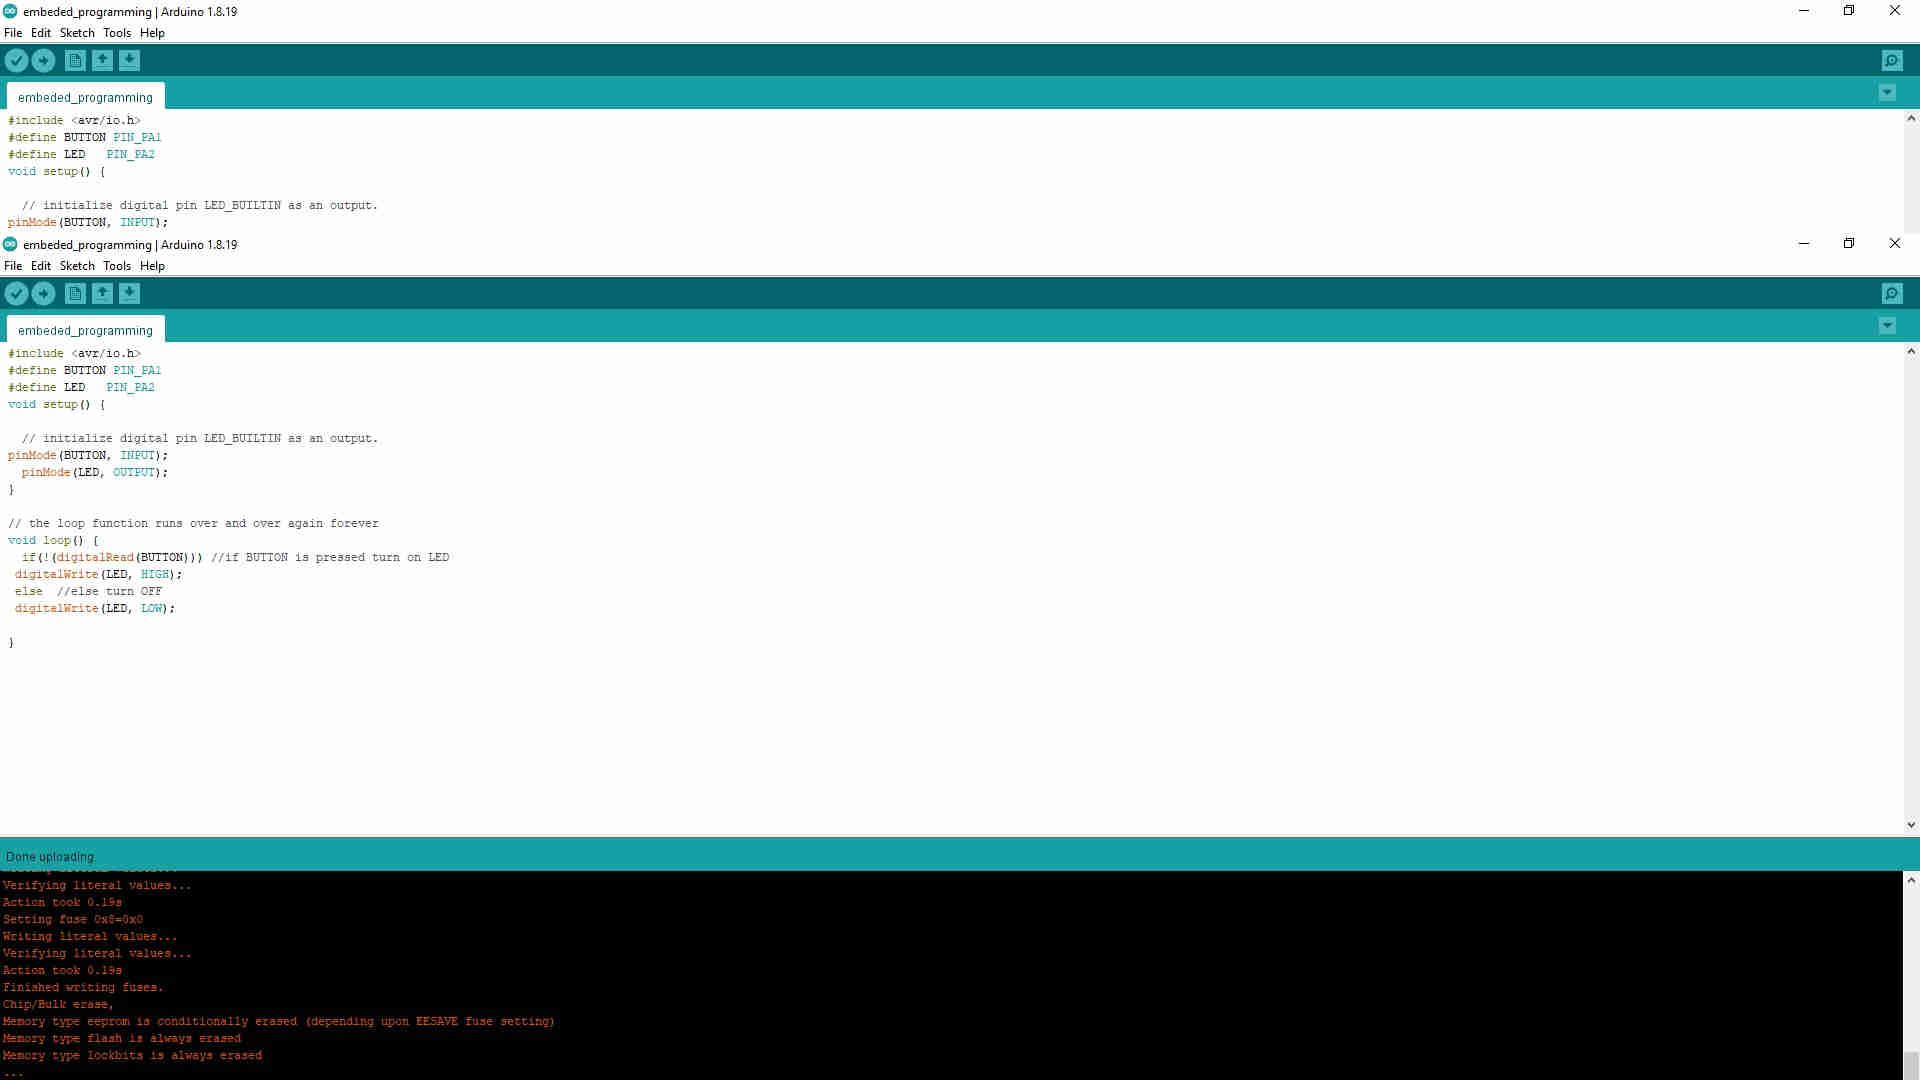
#include <avr/io.h>
#define BUTTON PIN_PA1
#define LED   PIN_PA2
void setup() {

  // initialize digital pin LED_BUILTIN as an output.
pinMode(BUTTON, INPUT);
  pinMode(LED, OUTPUT);
}

// the loop function runs over and over again forever
void loop() {
  if(!(digitalRead(BUTTON))) //if BUTTON is pressed turn on LED
 digitalWrite(LED, HIGH);
 else  //else turn OFF
 digitalWrite(LED, LOW);

}
The results when the button is pressed, the light is turned on.
