1. Project Management
Learning outcomes
-
Explore and use website development tool(s)
-
Identify and utilise version control protocol(s)
Individual Assignment
-
Build a personal site describing you and your final project.
-
Upload it to the class archive.
-
Work through a git tutorial.
I have followed Git tutorial
The first thing I did was download both Git and Git Bash and install them both .
Git Bash is going to be the terminal that I am going to use.
Once both terminals are installed, I open Git Bash and I will create my SSH-Key. Open Git Bash
Note : Always be mindfully when entering correct commands
    •   First step. I need to identify myself: Type git config --global
        user.name“your_username” and press enter and then type git
        config --global user.email “your_email” and press enter again.

    •   Second step. I check if I have any SSH-Key created. Type
        cat ~/.ssh/id_rsa.pub (If you see a long string starting with
        ssh-rsa that means that you already have a key so you can skip the
        next step).

    •   Third step. Generate my own SSH-Key: Type ssh-keygen -t rsa -C
        “your_email” Here we press enter until you see your “key’s randomart
        image”.

    •   Fourth step. Let’s see our public key. Type cat ~/.ssh/id_rsa.pub
         and that huge string is our key.This is how it looks in the git
         bash terminal.

I copied my key and opened my Gitlab web page. Clicked the dropdown on my profile icon to the top right side > clicked settings > To the left side I selected SSH keys > paste my key in the designated area.

Cloneing My Repository From the Cloub to Local
The first thing I need to create a folder called “fa2022” on my desktop where I can save my repository clone.
    •   First: Open a Terminal the GitBash (Windows).

    •   Second: Navigate to the folder where you want to store the folder
         with the Archive. For example: cd ~/Desktop/fa2022

    •   Third: Clone the archive.
        git clone git@gitlab.fabcloud.org:academany/fabacademy/2022/labs/vancouver/students/nervene-bhagwandasss.git
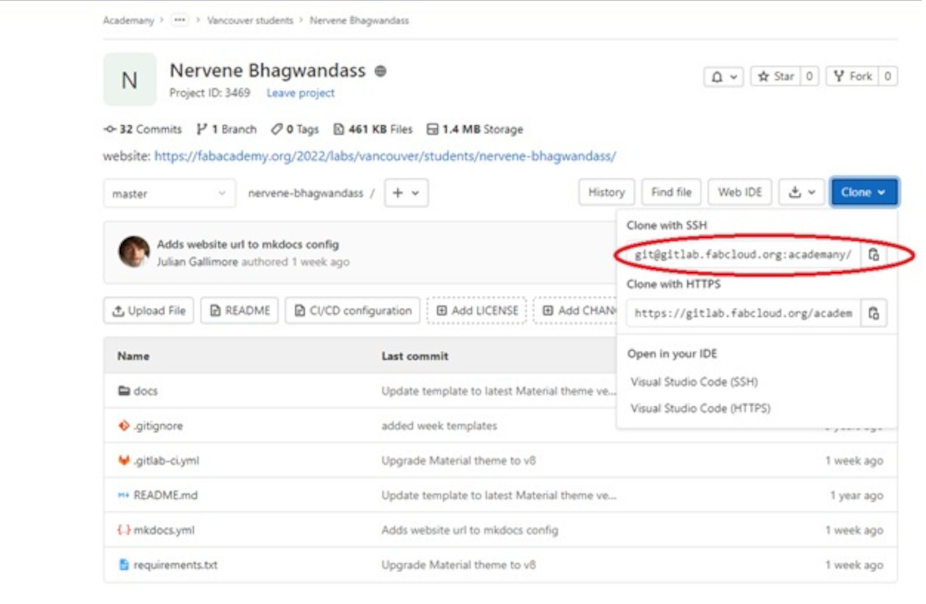 • Fourth: Once the address and commands have been copied correctly, press enter and the repository will be downloaded to our computer.
Developing website Using Brackets
I used brackets for my website development.
Brackets is a modern, light weighted, and powerful source code text editor. It is mainly used for the web development. We can download it form the official website Brackets

After downloading your repository and installing Brackets
- Open Brackets software> File>open folder>”repository address”.
The red highlight area is where you can select which markdown file you want to work on. I’m presently working in week 01.
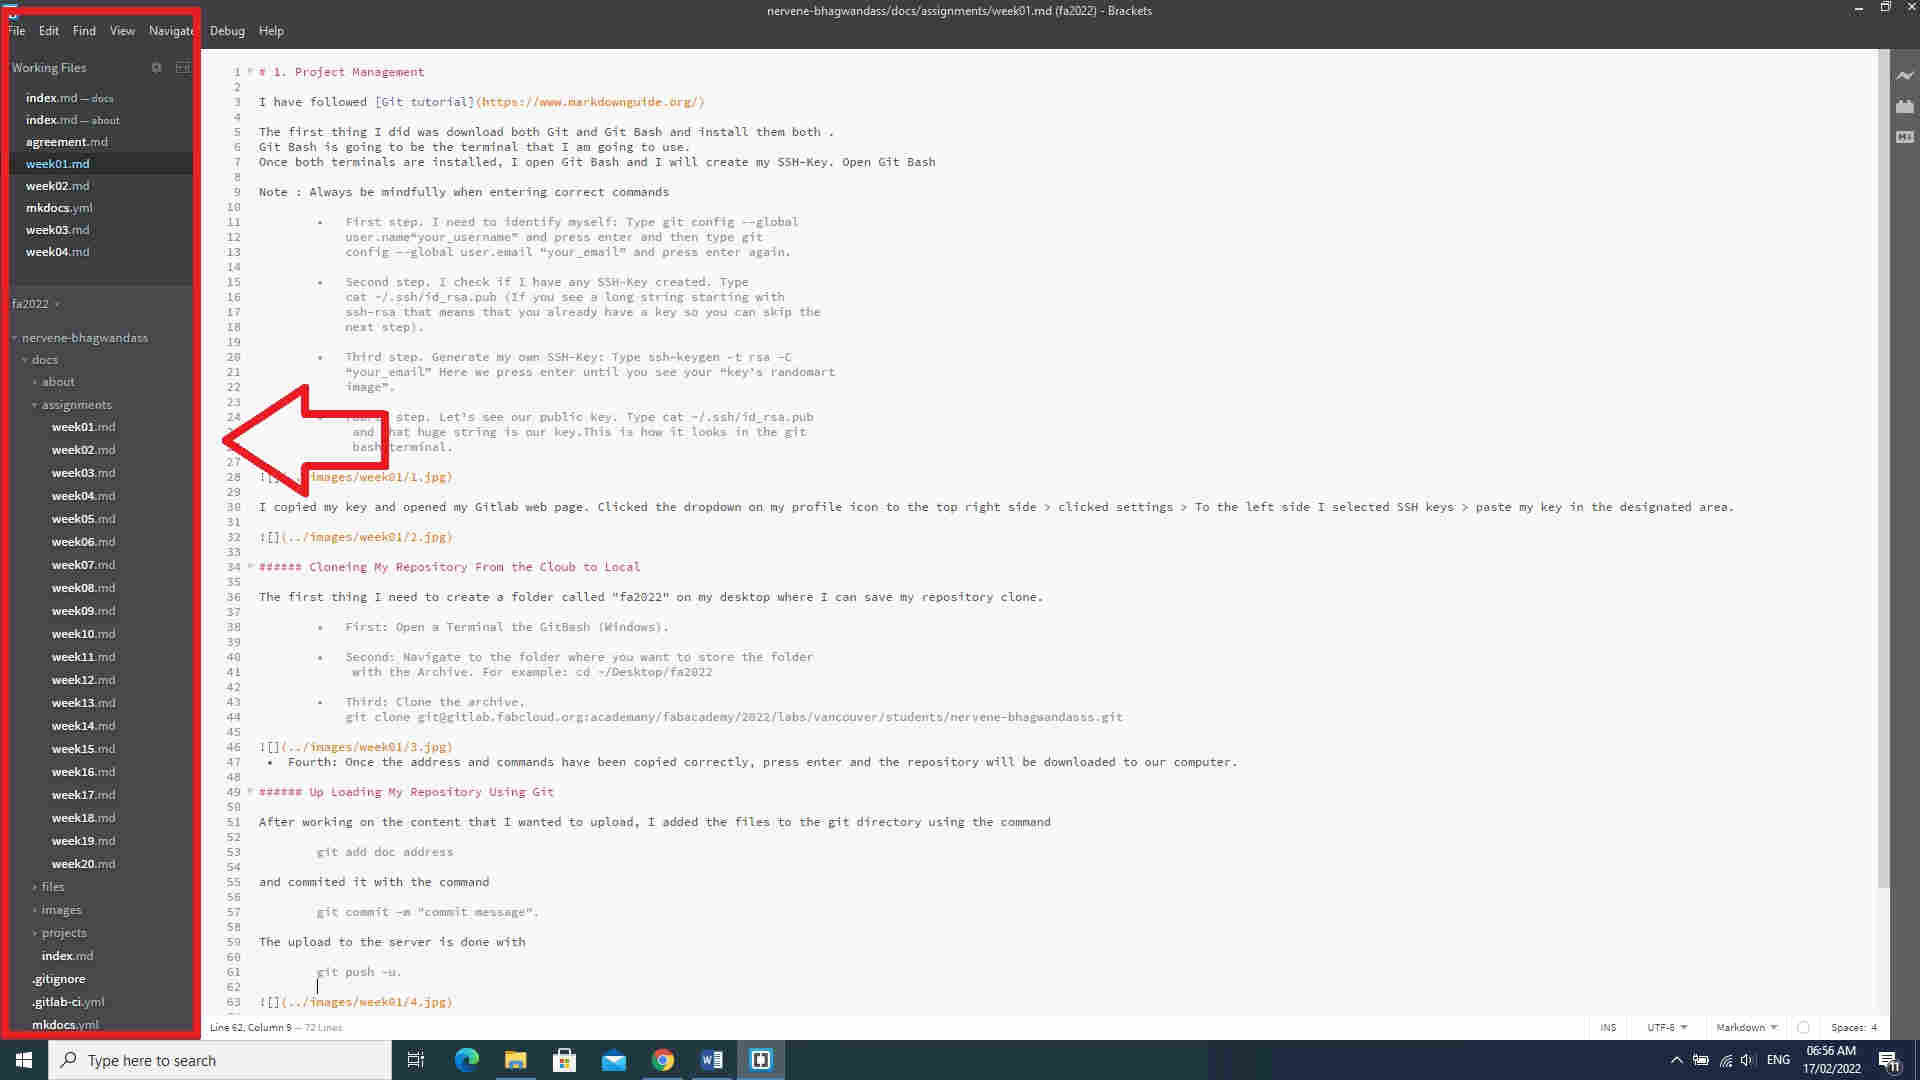
- The green highlighted are is the bracket workspace .It is the area where you can add the content for you website (text, image, link etc.)
A nice cheat I compile all documentation in Microsoft word and then copy and paste into the workspace.It help with grammatical errors and spelling etc.
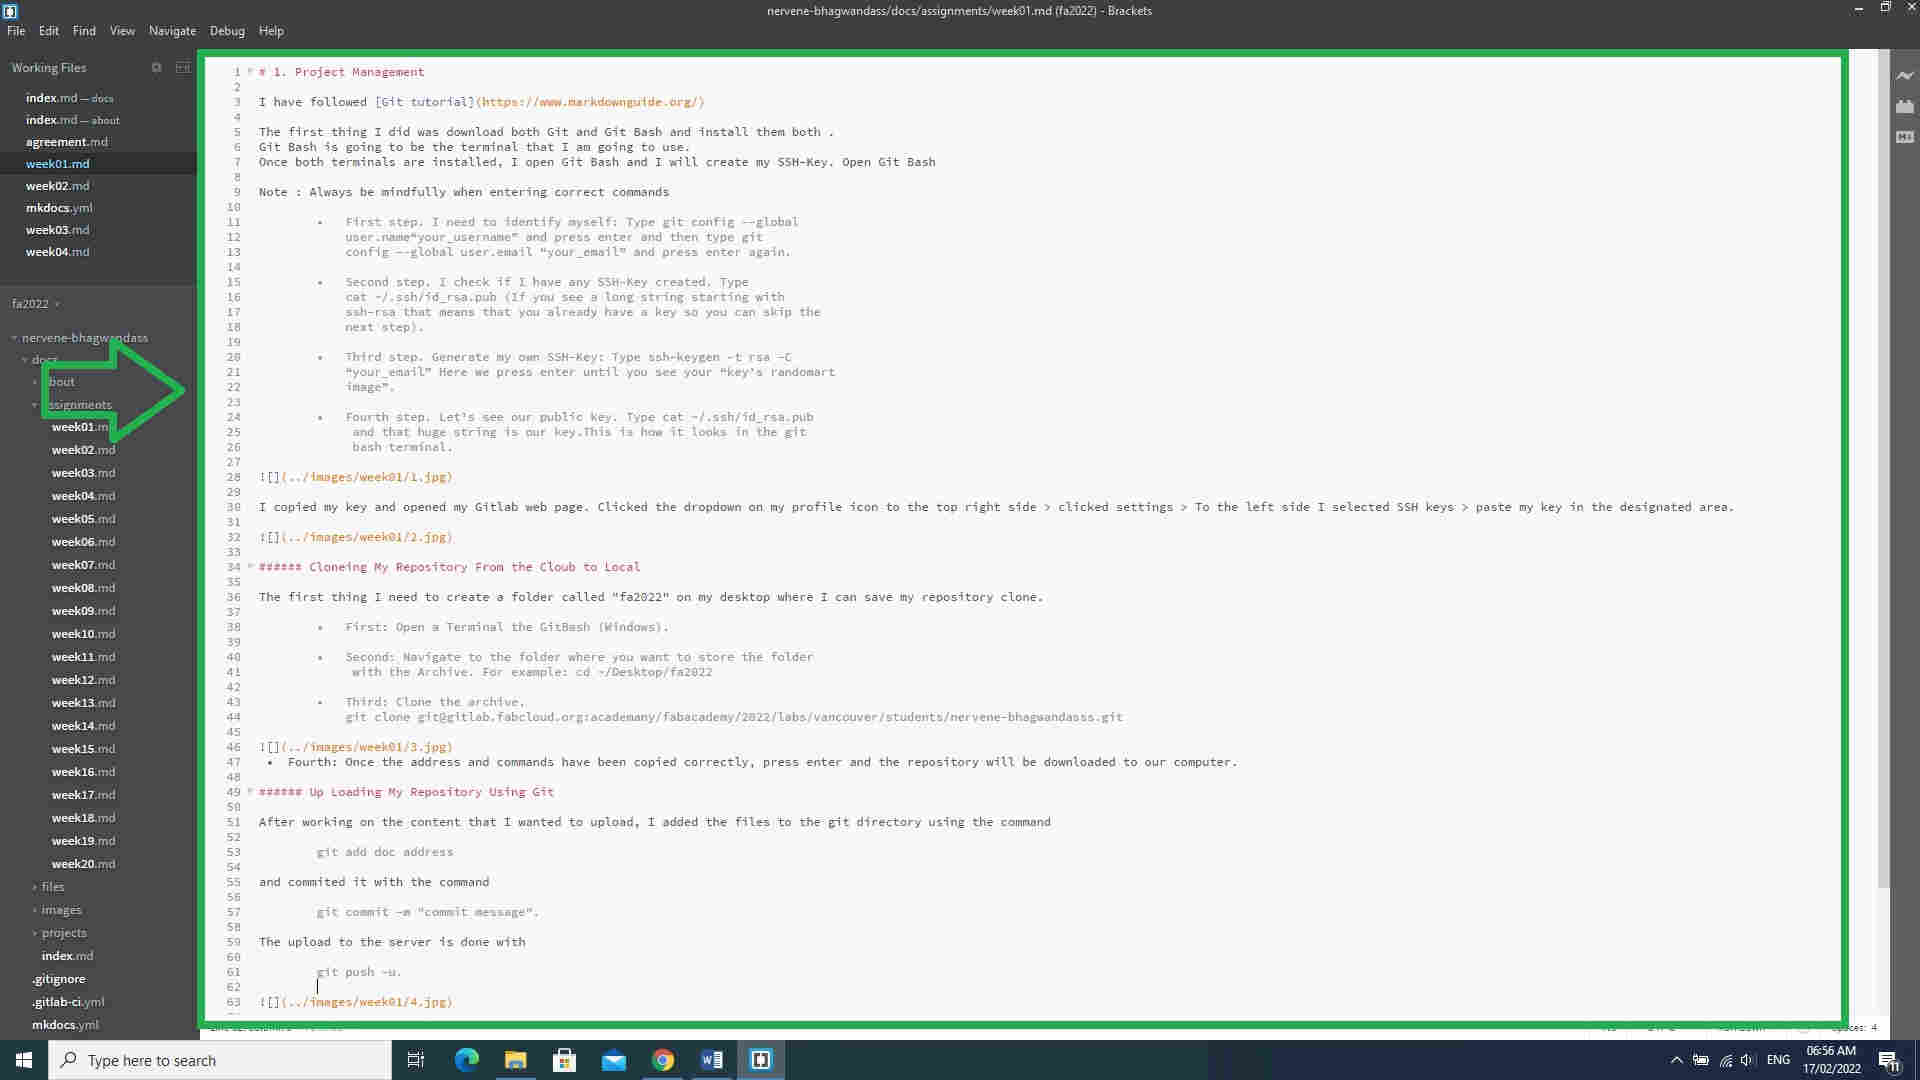
- Preview is another use tool which allow me to preview the look of the document before uploading.

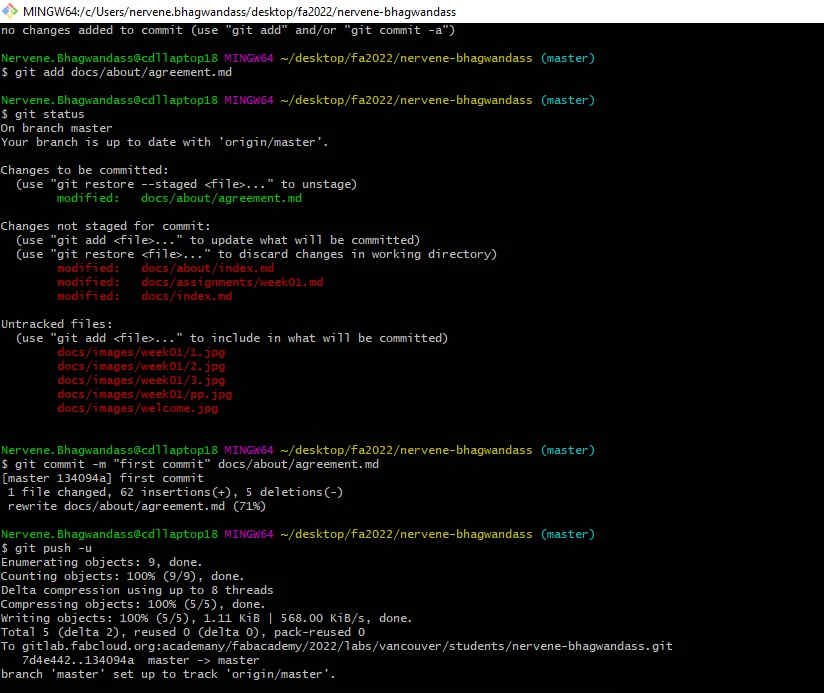
Up Loading My Repository Using Git
After working on the content that I wanted to upload, I added the files to the git directory using the command
Call the location of the repository
cd ~/desktop/fa2022/nervene-bhagwandass
The git status command displays the state of the working directory and the staging area
git status
Add the specific document you want to commit
git add doc address
and commited it with the command
git commit -m "commit message".
The upload to the server is done with
git push -u.