16. Interface and application programming
This week I worked on Interface and application programming and the assignment was to write an application that interfaces a user with an input or output device that you made.
For me, I choose my output device as you can see it in output device assignment.
Research
To start my assignment as usual I sart with searching for keywords in my assignment and those are:
Application: which is a type of computer program designed to carry out a specific tasks; those tasks can be personal, educational, or business function. Applications or computer applications are designed to assist end-users in accomplishing a variety of tasks which may be related to productivity, creativity, or communication. Examples of application programs: Accounting softwares, Microsoft EXCel, Microsoft Word,…
Application can be a web based application or a mobile application
Web based application is an application program accessed from a web browser; a browser is an application which is used to browse over internet such as Chrome, Firefox,Safari....
Mobile application you dawnload it and install it in your mobile phone, it is accessed through your mobile phone.
User interface: Consist of sets of commands, graphical display formats, and other devices provided by a program to allow the user to communicate with the application or the computer. Graphical User Interface(GUI) is also a desktop application which helps you to interact with computer; It is a type of interface that allows user to interact with electronic device through graphic icons and visual indicators.
On my side, I want to make a mobile application and there are many free and commercial software which can help you to make your own mobile application and on of the free software is MIT App Inventor which I choose to use in making my own mobile application.
MIT APP INVENTOR
I have learnt a free and open source application to create mobile applications known as MIT App Inventor which allows you to develop app for android phones using a web browser and either a connected phone or emulator.
App Inventor has two parts on is Designer (which allows you to select components for your mobile app and arrange them in such a way your mobile application will look like) and the other is Block(which allows to specify how the components should behave, the task to perform). App Inventor offers a way to connect your phone with the App Inventor to visualize your aplication while designing so that you can test your work as you build. Once you are done you can package your application and produce a stand-alone application to install.
To use MIT App Inventor, I brouse it on this link and Below is the interface provided to me. I clicked on Create App ang Login using my google account.
Then, I created a new project named JoyeuseApp.

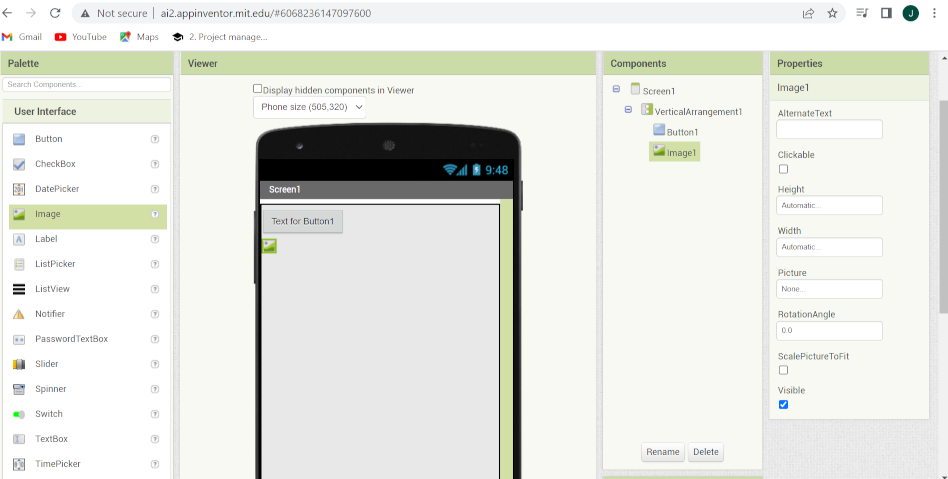
Below, is JoyeuseApp created project and it comes with an interface like a phone with allows me to add on and arrange my mobile app components.

I added a button on the interface as shown below
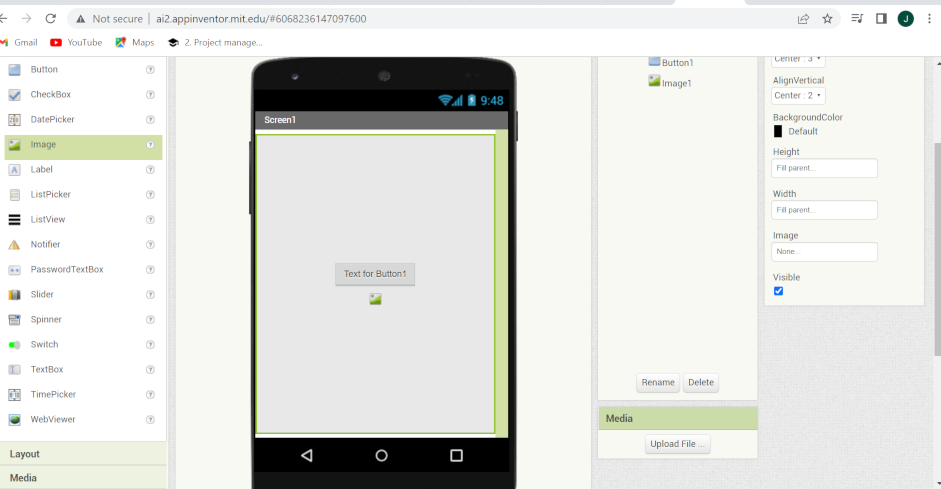
I have alligned my button to the center and set Width and Height Fill parent.
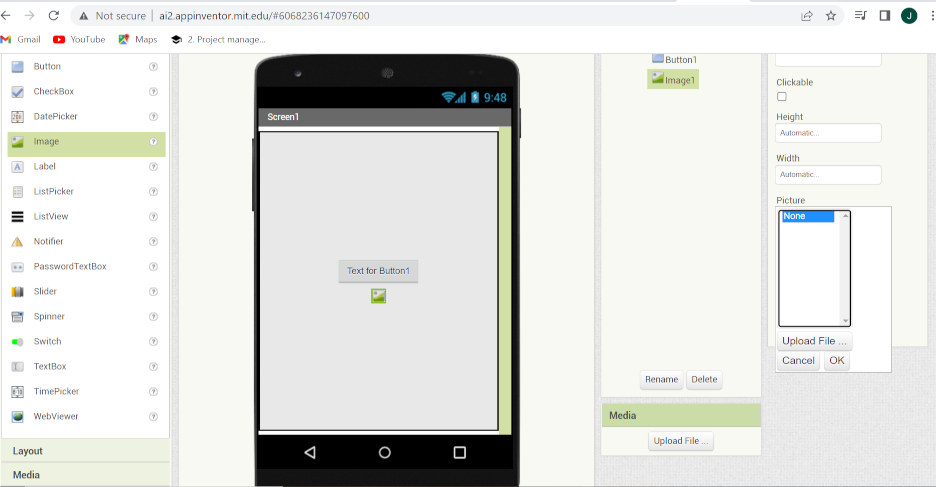
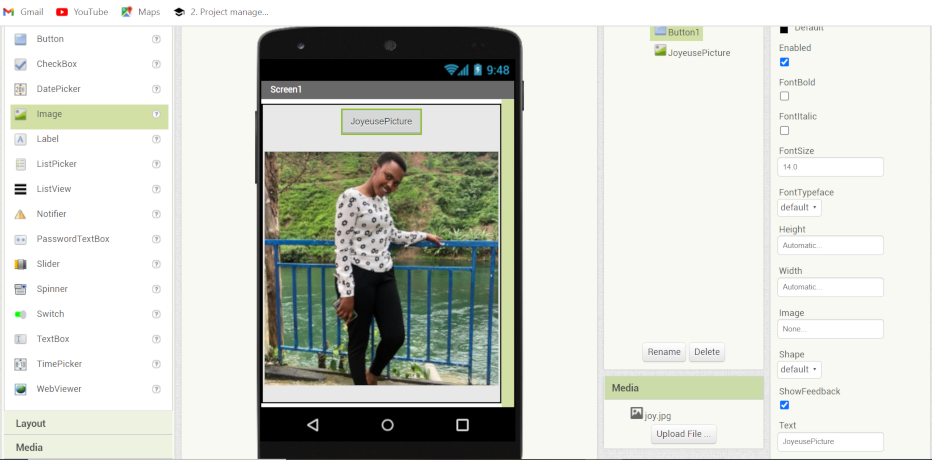
Below, I have clicked on None and Upload my picture as a file then click Ok
Below, my picture is uploaded

Below, I changed the name image1 to JoyeusePicture
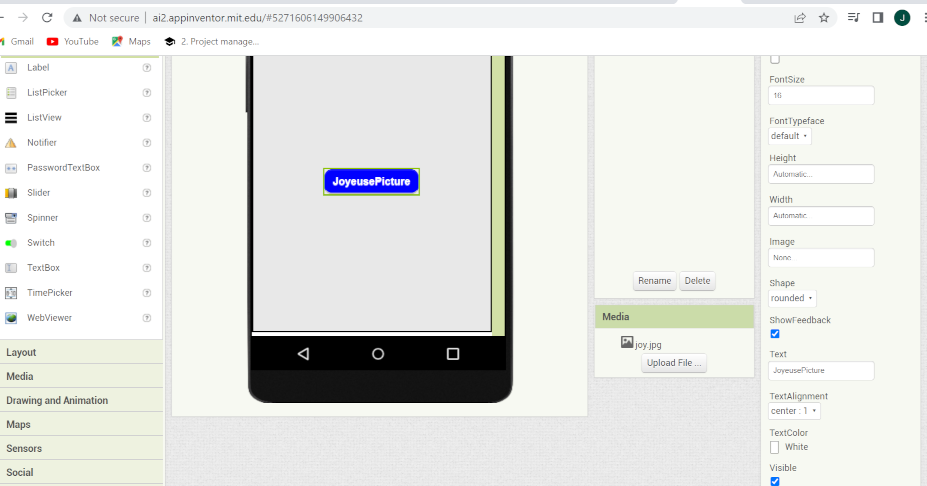
Below, is my created mobile app with font

Below, is Block part where I set the behavior of my button
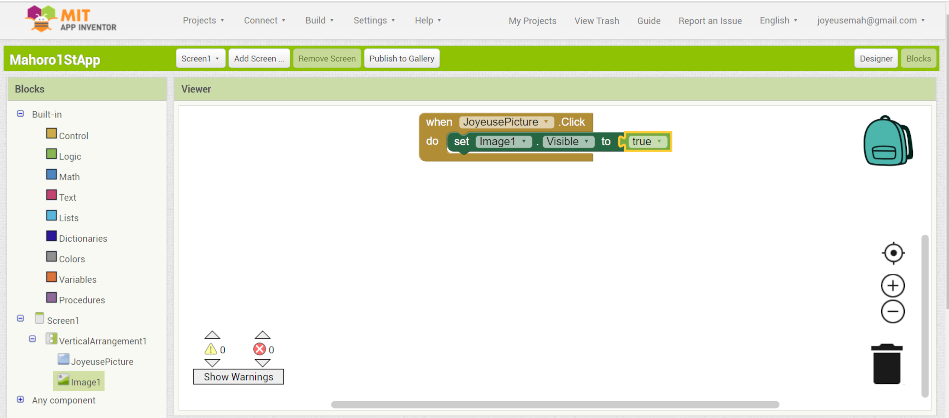
Below, is my app. When you click on JoyeusePicture it will show you my picture as I have setted it in the Block part
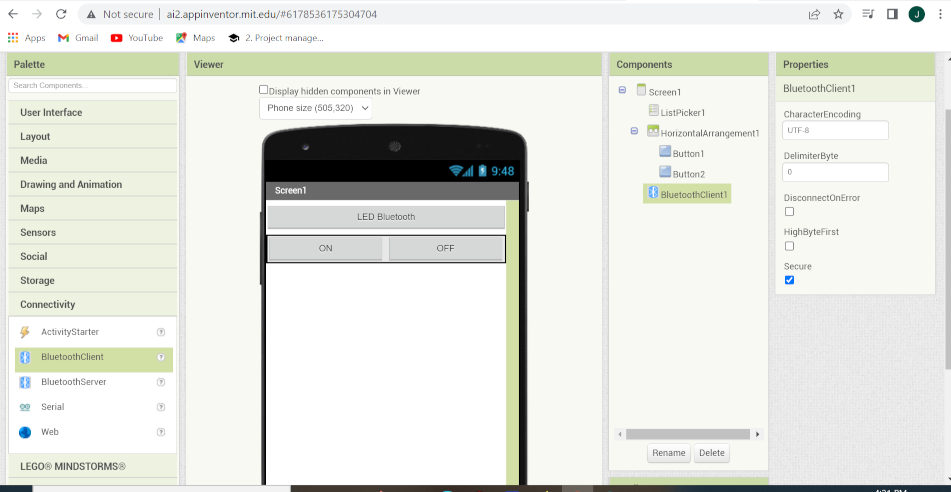
Then, I designed my LED Controller using MIT App Inentor and I have installed it on my smart phone.
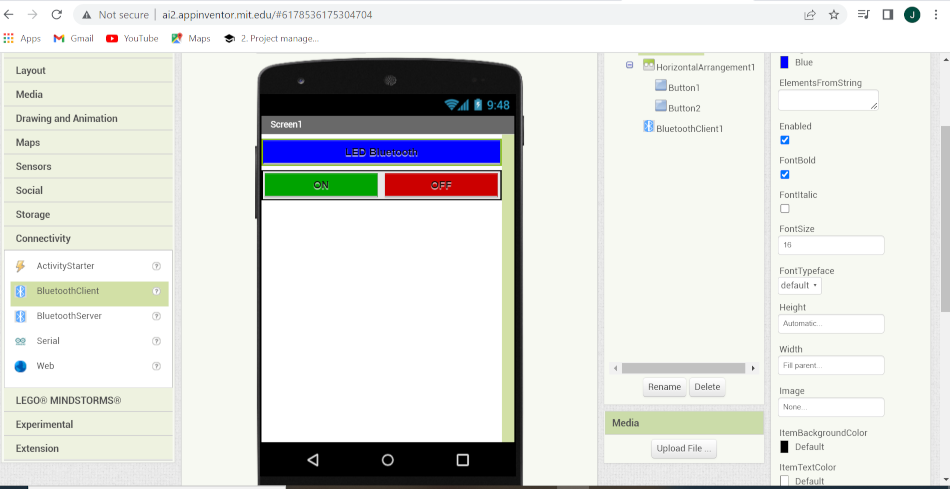
Below, is the design part of my app
Below is the Block part to set my app behaviors.
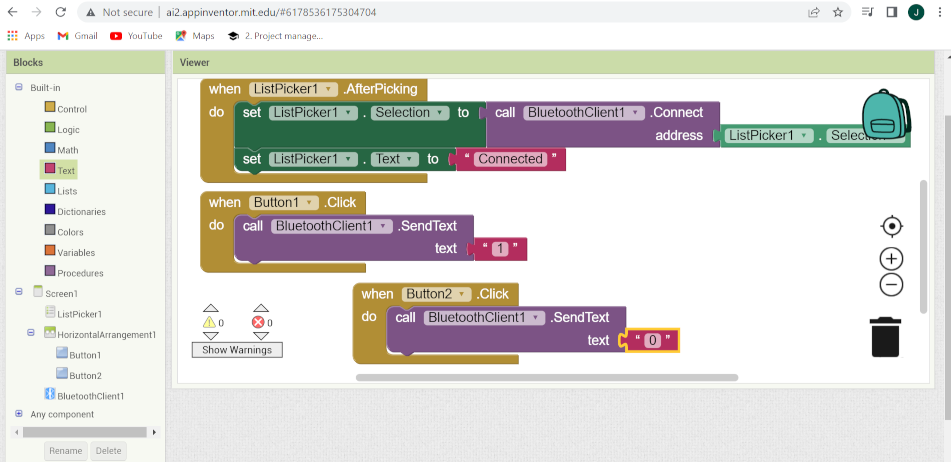
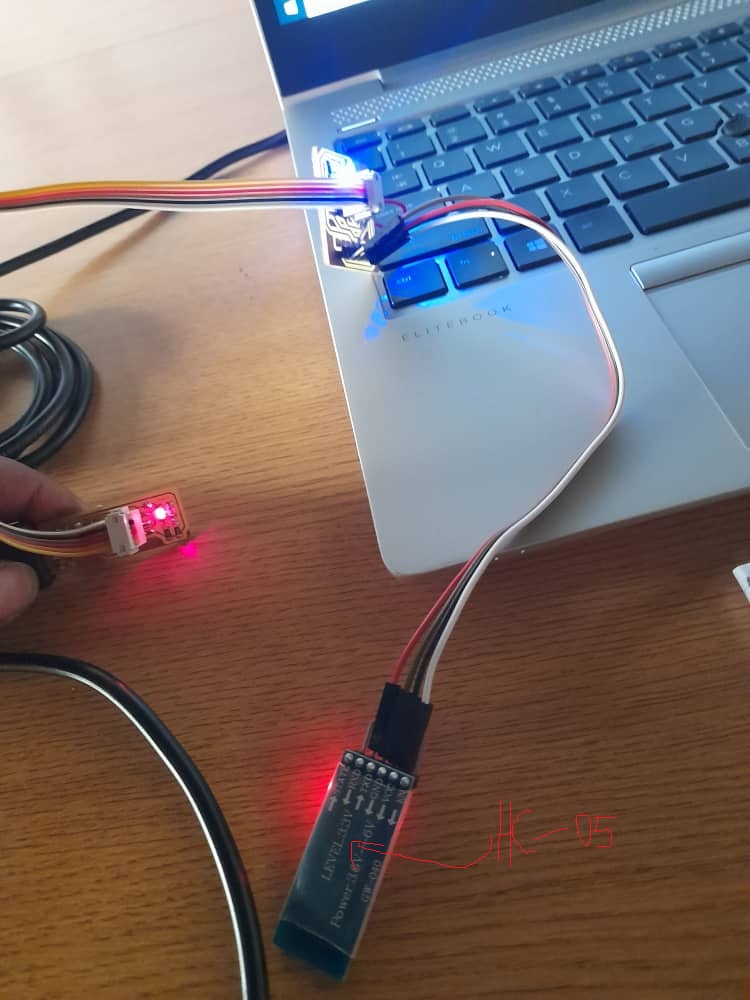
Below, is the final interface for my LEDController mobile application, and I have used it to control LED using HC-05 bluetooth module and it works.
I have dawnloaded AI2 Companion app on play strore of my phone and installed it on my mobile phone in order to access my app on my phone; Then I connected my phone to MIT App Inventor through clicking on Connect —> AI Companion and the interface openned to scan my QR code and I scanned it and try to access my designed app on my phone and it works. As you can see how I did it on my First App in MIT App Inventor.

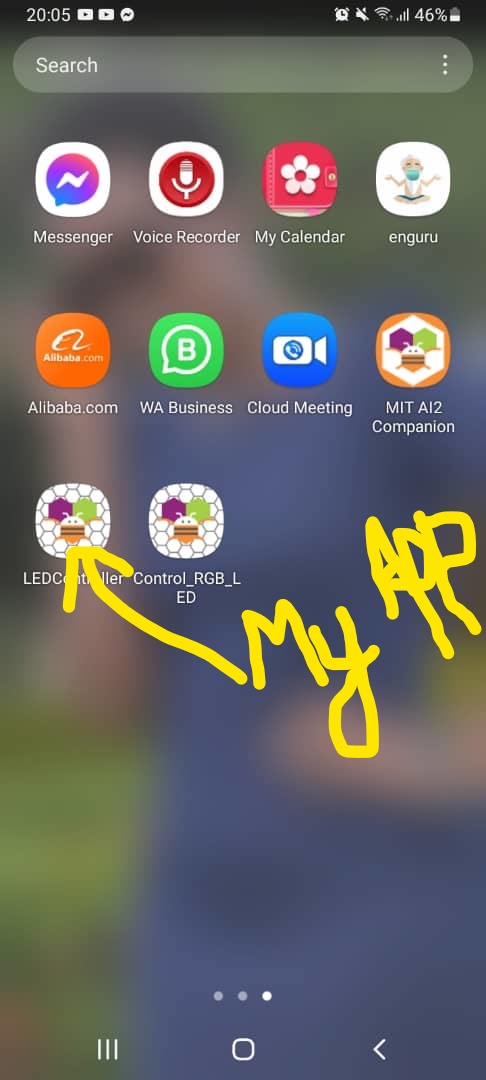
I also dawnloaded my created app through selecting build, connecting app and scan the QR code, I dawnloded it and install it on my phone as you can see below.
HC-05 Bluetooth module
To control my LED output board using the created mobile app, I have to use HC-05 bluetooth module as it is a wireless communication establishment between my mobile application and my output board.
Below is the schematic design of my ATtiny 45 output board with HC-05 bluetooth module.
Electronic design

Below, I was assigning footprints to my electronic design.

Below, is the PCB to be plotted to produce SVG files to be putted in Gimp

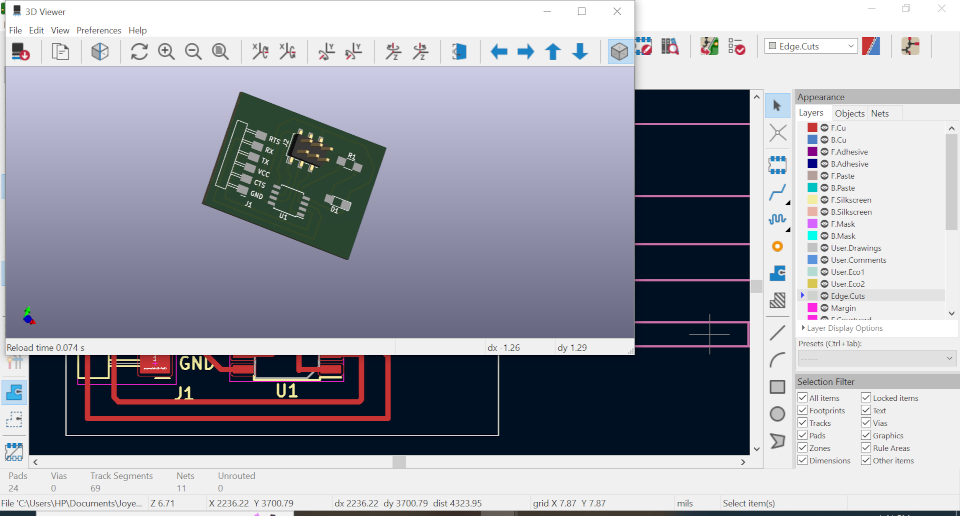
Below, is the 3D View of my output PCB
Below is Fcu in Gimp which will be putted in mods

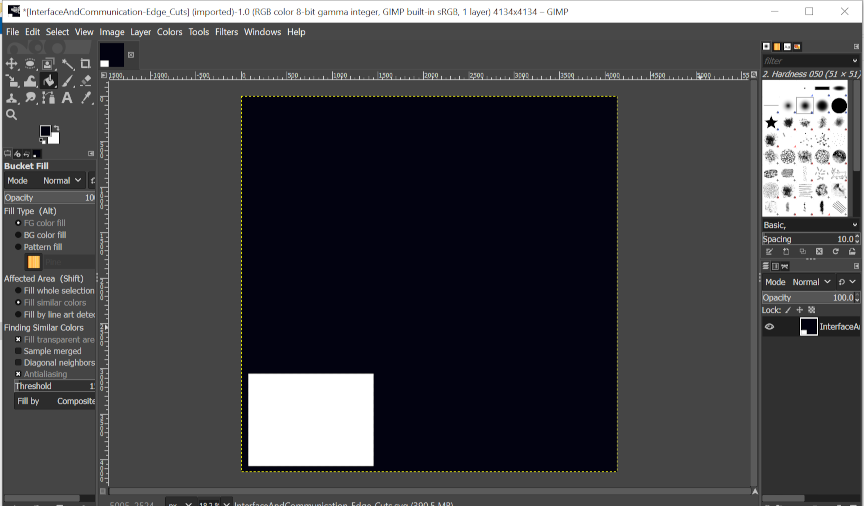
Below is EdgeCuts in Gimp to be putted in mods
Produced board
Below, is my output bord which has LED as ouput device, and I want to control this LED using my created LEDController mobile application.
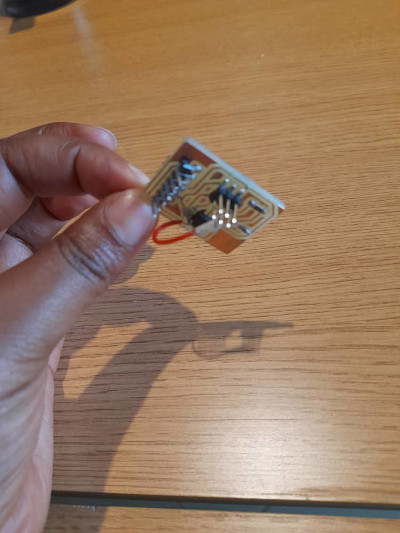
Below, Is the LED board wth HC-05 bluetooth module(which is marked with a red pen).
Codes used to program my board
char IncomingValue = 0;

void setup()

{

 Serial.begin(9600);

 pinMode(3,OUTPUT);

 }

void loop()

{

 if(Serial.available()>0)

 {

  IncomingValue = Serial.read();

  Serial.print(IncomingValue);

  Serial.print("\n");

  if(IncomingValue == "1")

  {

    digitalWrite(3,HIGH);

    delay(1000);

   }

   else if (IncomingValue == "0");

   {

    digitalWrite(3, LOW);

   }

 }

}
Video
The video show how my interface work with the bluetooth and I have apened the bluetooth of my phone and when I used my LEDController mobile App to turn ON and OFF my board LED it doesn’t work, I still searching for how to correct it.
Dawnload Files Here