16. Interface and application programming
Assignment
Individual assignment: Write an application that interfaces a user with an input &/or output device that you made.
Group assignment: compare as many tool options as posible.
What i did this week
. Learnt the bacics of API
. Created an App using MIT App inventor
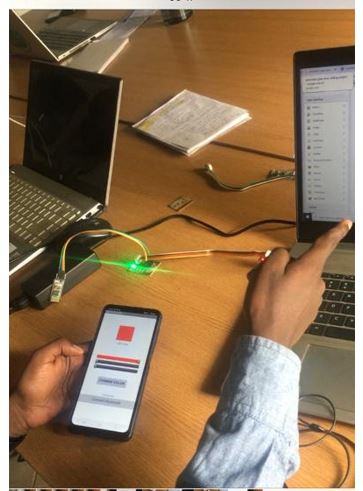
. Programed the board i designed in the output week to lightRGB LED.
. Controlled the RGB LED using the mobile App with the help of the bluetooth module.
Introduction
An Application Programming Interface(API) is a connection between computers or between computer programs.it is type of interface offering a service to other pieces of software.APIs allow one software service to access data from another software service without the developer’s needing to know how the other service work.
MIT APP INVENTOR
App inventor for Android is an open source web application from google,.It allows you developing applications for android fones using a web browser and either a connected phone or emulator.
Creating the Android App for lighting RGB LED
The Android App will be created using a free web application which is MIT App inventor.MIT App Inventor is place to get started with Android development, because it allows you to build simple apps with drag-n-drop.
you need a Google account to sign up for MIT App Inventor and here’s the login page: http://ai2.appinventor.mit.edu.
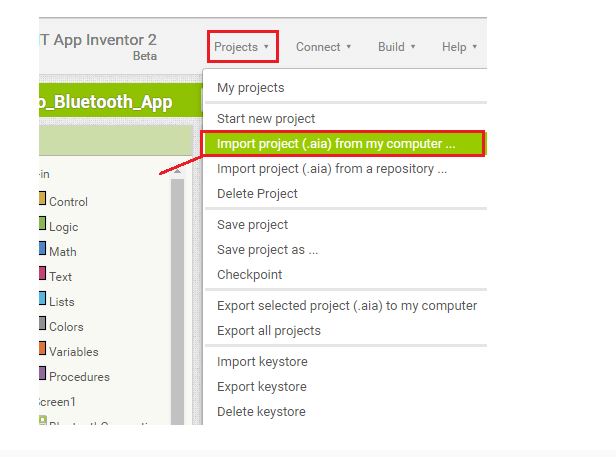
After login in to projects>Import project(.aia)from my computer and upload the.aia file. Click here to download the .aia file.
After uploading the .aia file. you will see the application on the MIT App Innventor software.
Designer
With MIT App Inventor you have 2 main sections: designer and blocks.
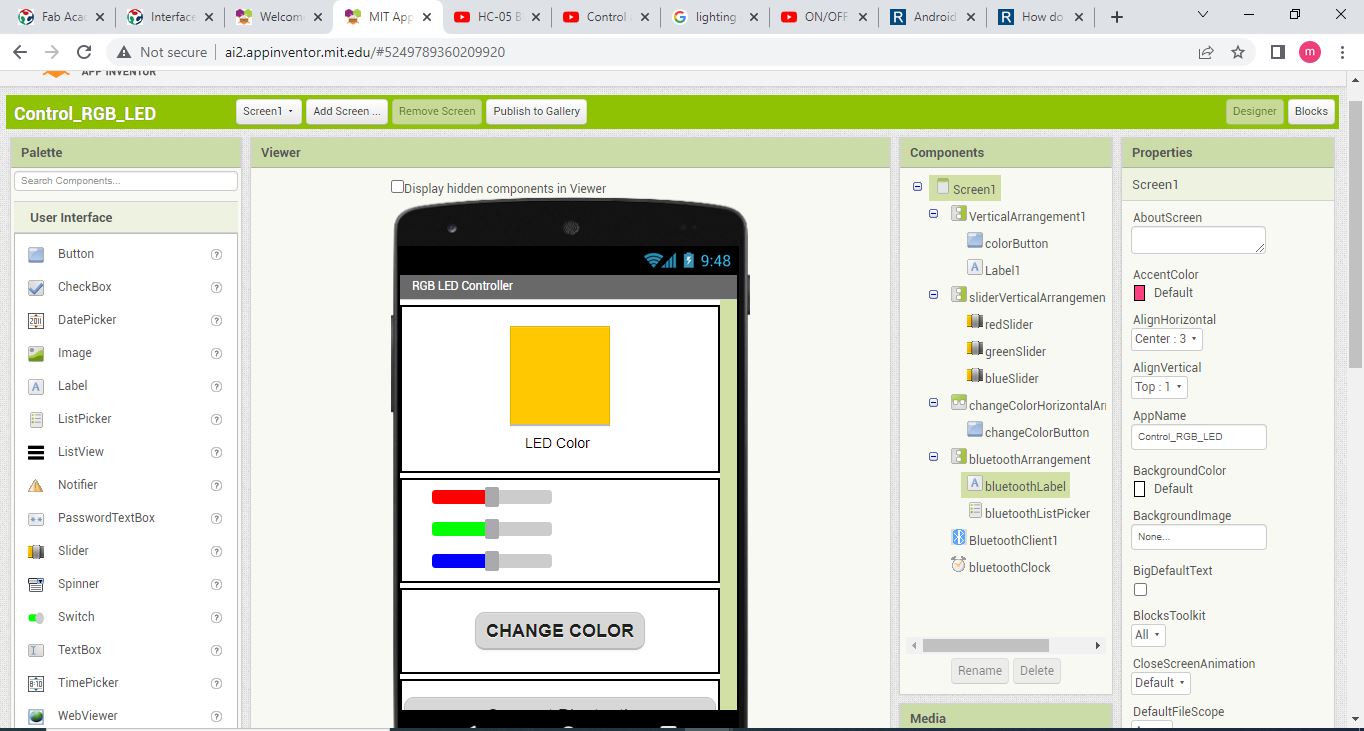
The designer is what gives you the ability to add buttons, and text, add screens and edit the overall app look.int the App Inventor software the app looks like this:
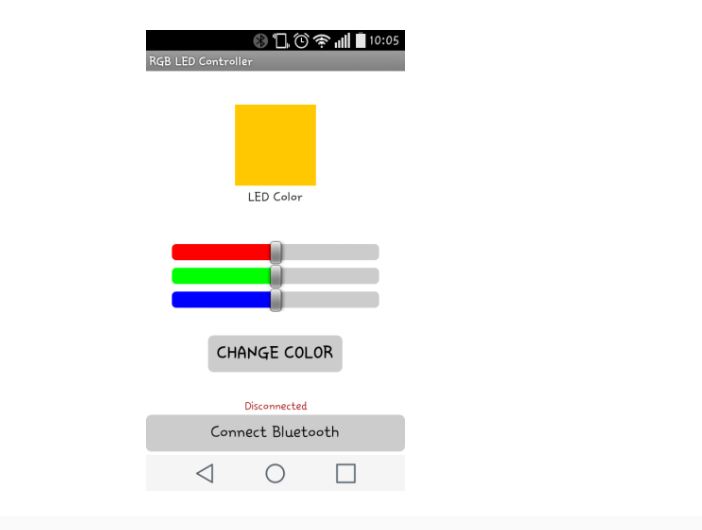
The app looks different in the software and in your smartfone.This is the how the app looks in our smartfone.
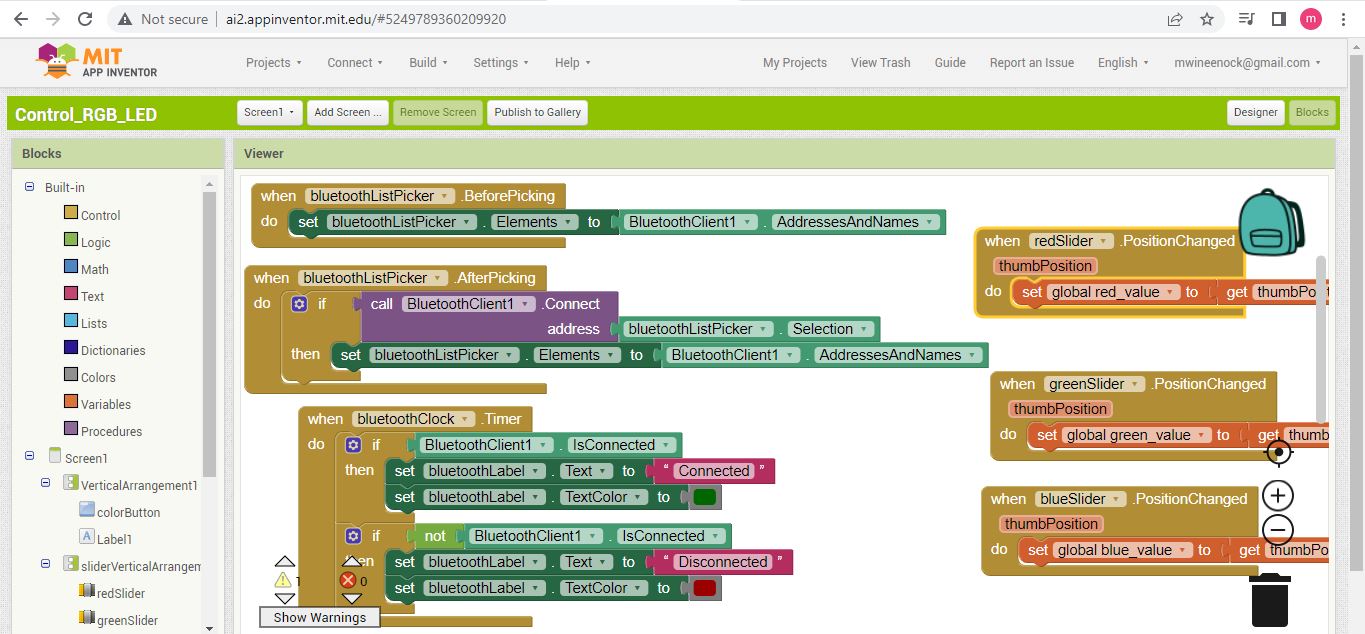
Blocks
you have the blocks section.The blocks is what allows to create custom functionality for your app, so when you press the buttons it actually does something with that information.These are blocks for this app.
Installing the App
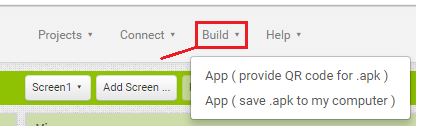
To install the app in your smartfone, go to the the Builb tab.
. You can download the. apk file, connect your smartphone to your computer and move the .apk file to the phone.
. Or you can either generate a QR code that you can scan with your smartfone and automatically install the app in your smartphone.
Below, I made schematic design in which RGB LED colors changes according to arrengement of colors will be controlled by smartphone. I used KiCAD Software.
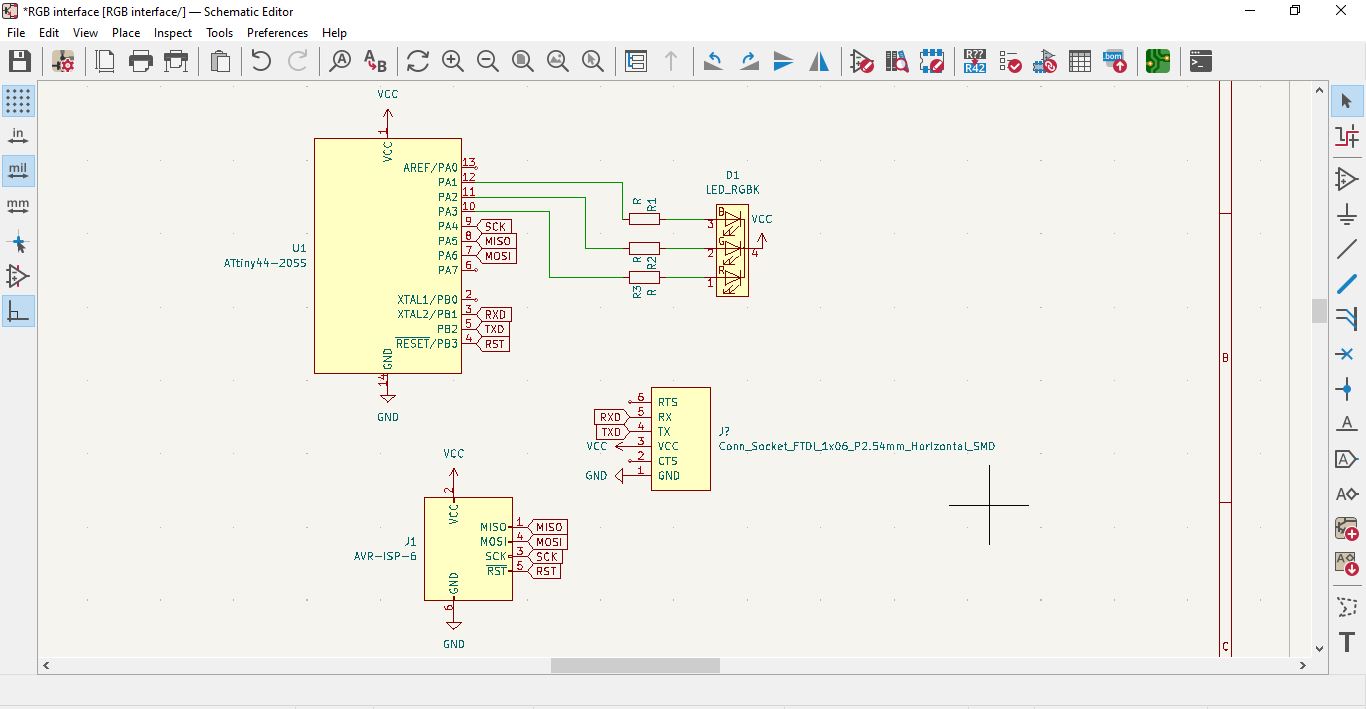
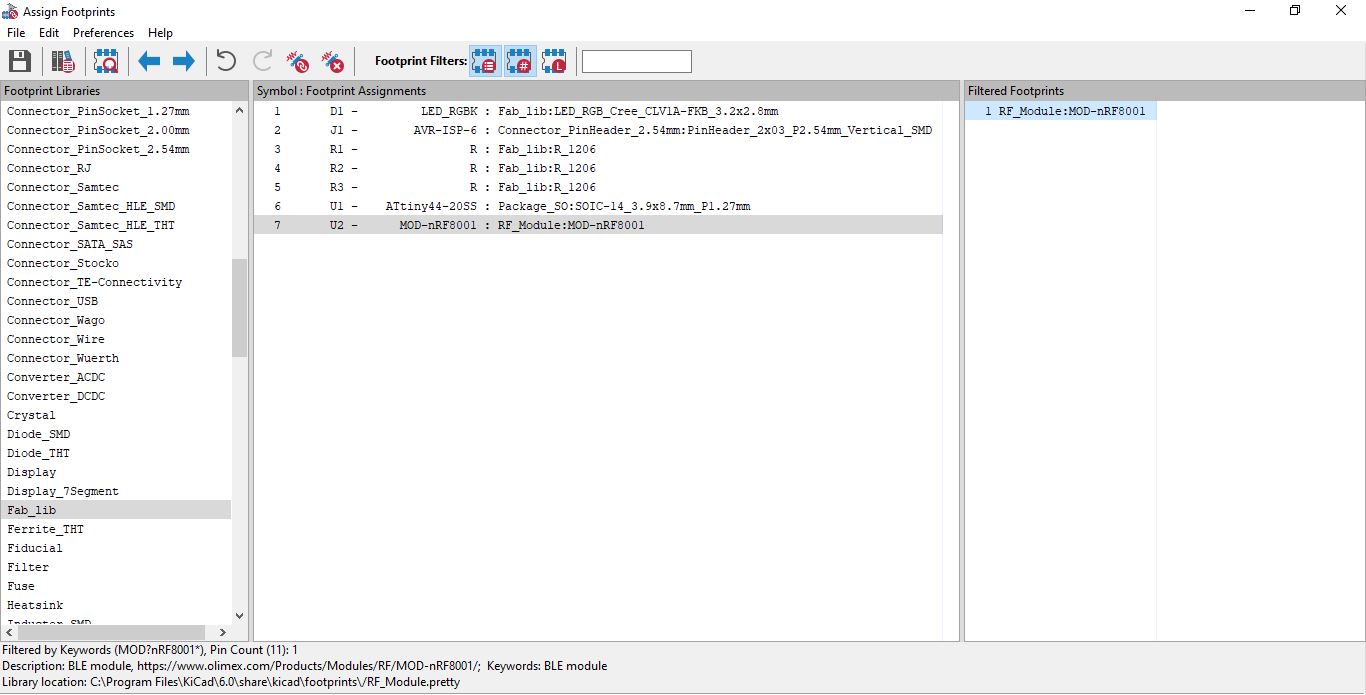
I assigned into footprints to fablib components.
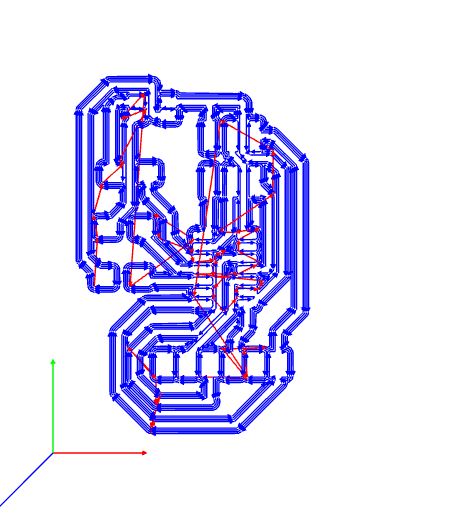
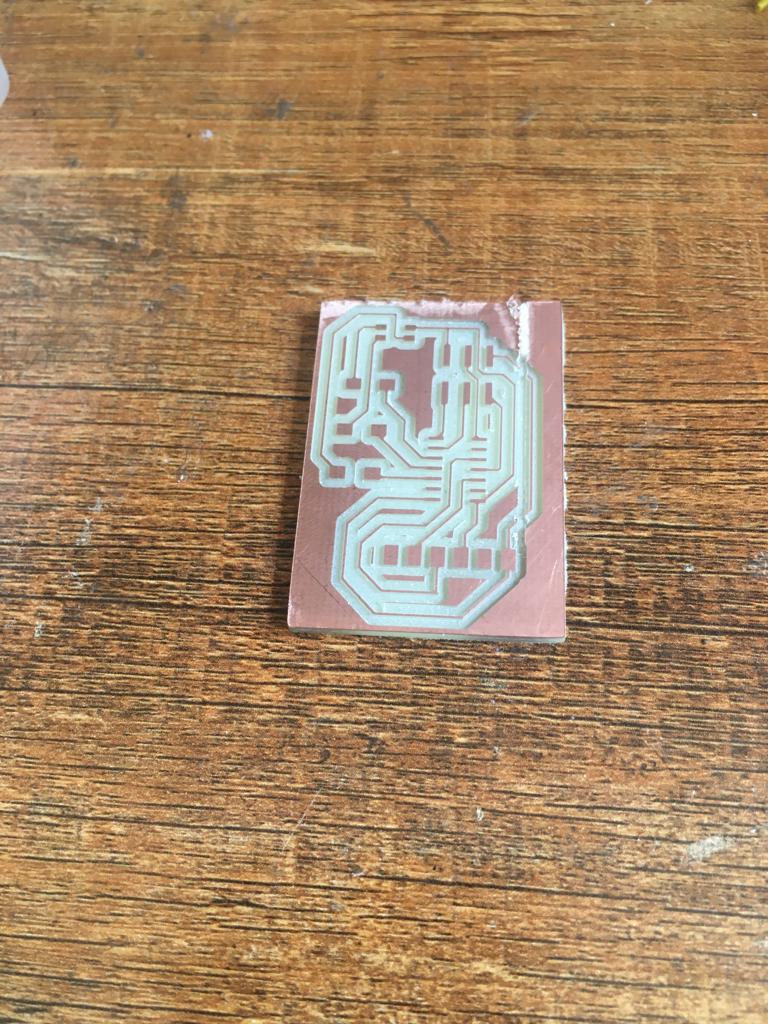
Below, I made Route tracks in PCB and plot to produce F.CU svg and Edge cuts files.
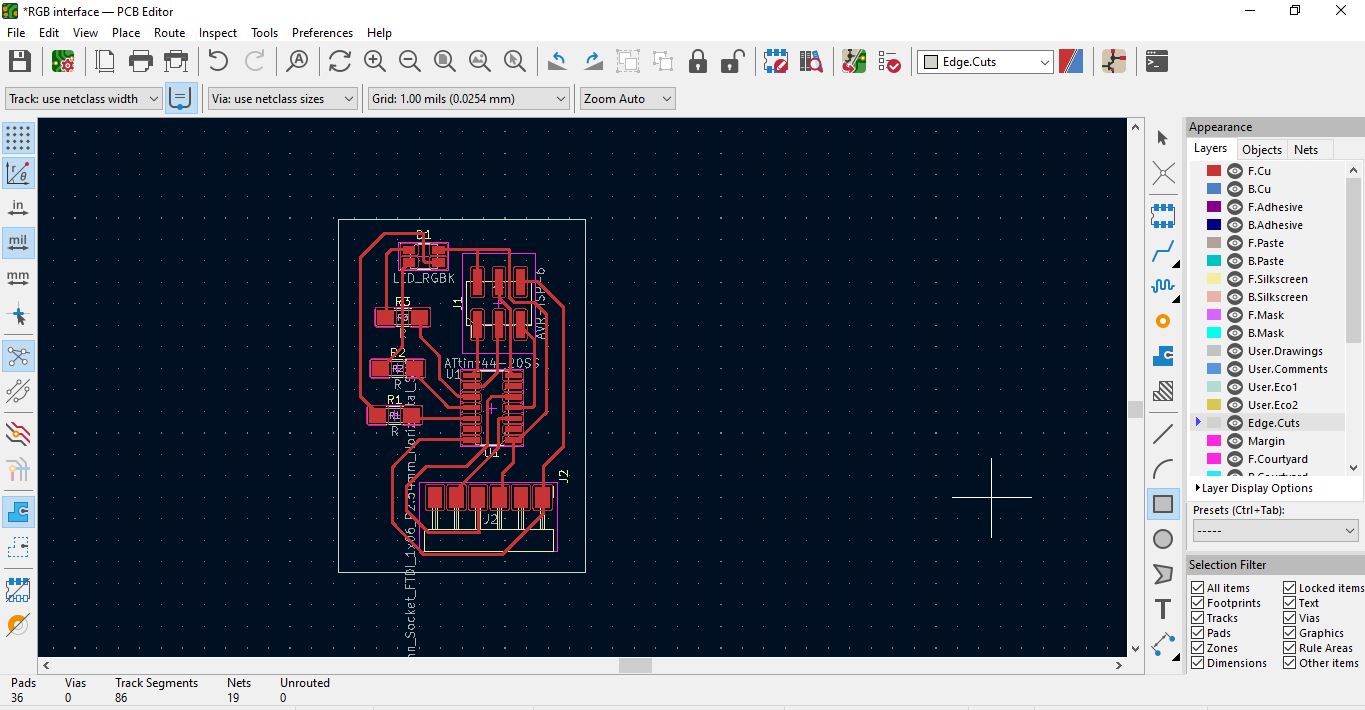
F.CU mill tracks.
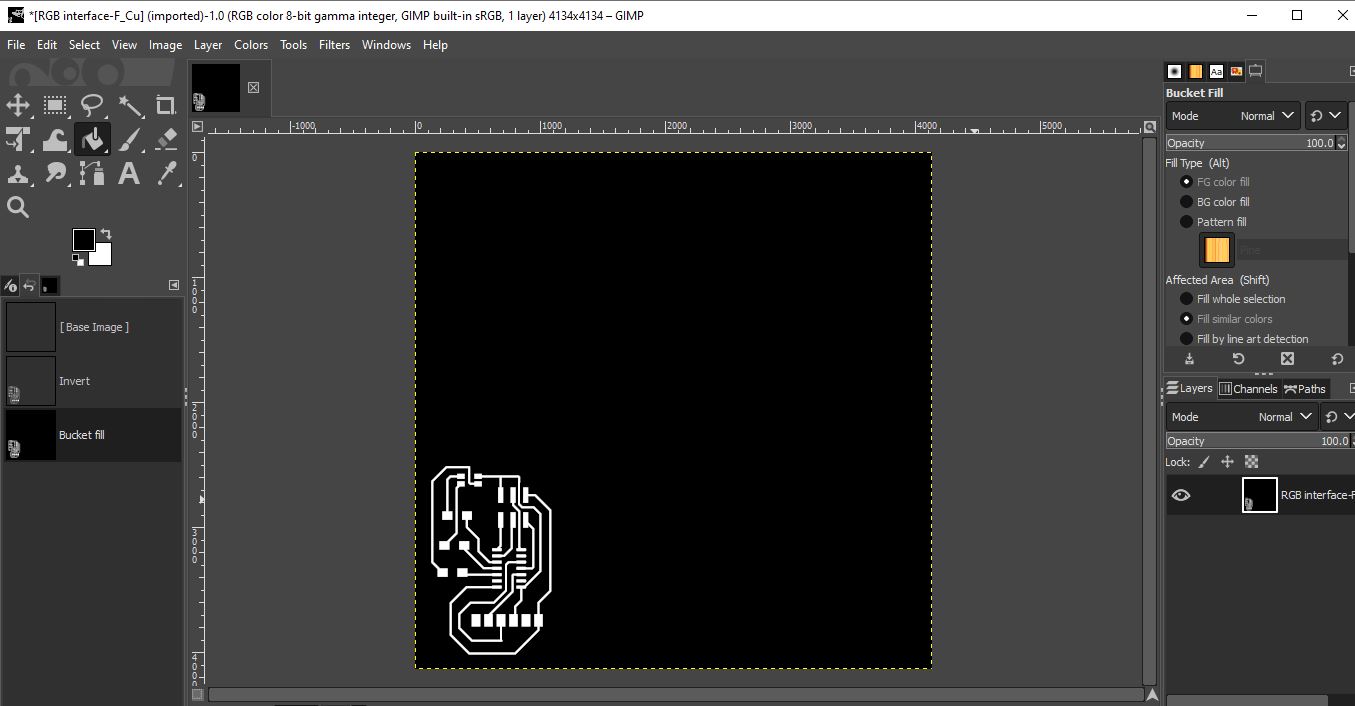
Below, is F.CU image in Gimp to produce F.CU PNG to export in mods.
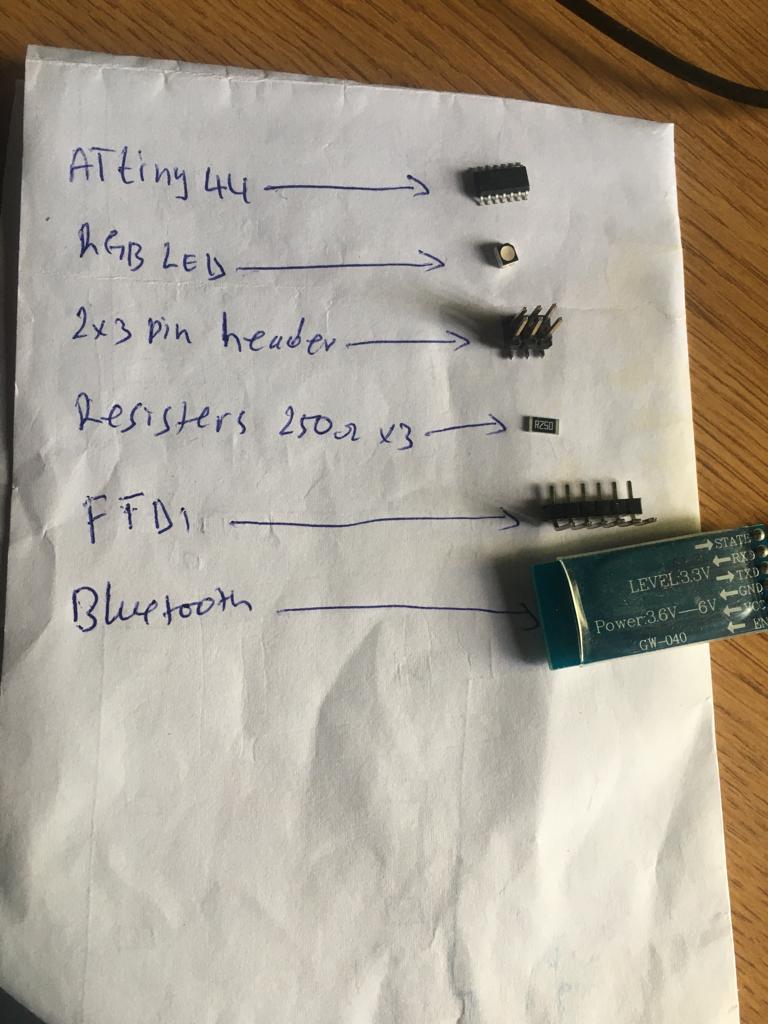
Below is list of components to be solidered.
After i have to pass my F.CU PNG and Edge cuts PNG in mods to abtain rml files and send them to Roland machine to print PCB.
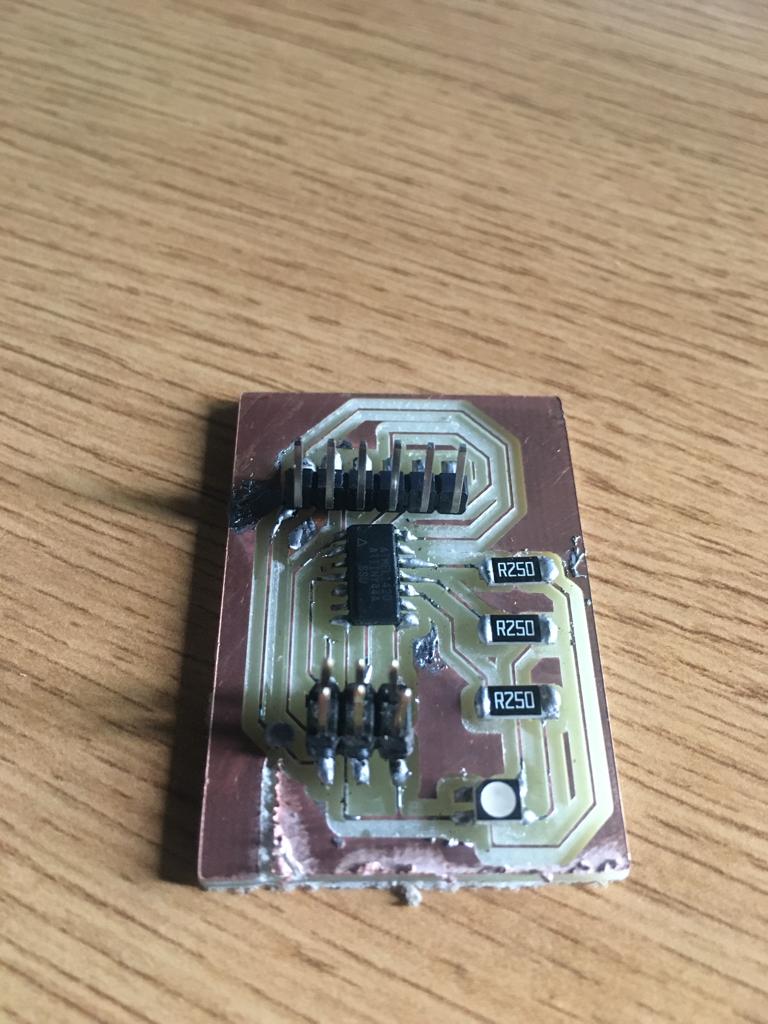
Below is solidered board
Arduino code for the project
#include <SoftwareSerial.h>

SoftwareSerial text(PB1, PB2); //Rx, Tx

#define max_char 7
char message[max_char];
char r_char;
byte index = 0;
int i;

int bluePin = PA1;
int greenPin = PA2;
int redPin = PA3;

int blueValue = 255;
int greenValue = 255;
int redValue = 255;

String blueTempValue;
String greenTempValue;
String redTempValue;

int flag = 0;
char currentcolor;

void setup() {
  pinMode(bluePin, OUTPUT);
  pinMode(greenPin, OUTPUT);
  pinMode(redPin, OUTPUT);

  text.begin(9600);

}

void loop() {

  while (text.available() > 0) {
    flag = 0;

    if (index < (max_char - 1)) {
      r_char = text.read();
      message[index] = r_char;
      if (r_char == 'B') {
        currentcolor = 'B';
        blueTempValue = "";
      }

      else if (r_char == 'G') {
        currentcolor = 'G';
        greenTempValue = "";

      }

      else if (r_char == 'R') {
        currentcolor = 'R';
        redTempValue = "";

      }

      if (currentcolor == 'B' && r_char != 'B') {
        blueTempValue += r_char;
      }

      else if (currentcolor == 'G' && r_char != 'G') {
        greenTempValue += r_char;
      }
      else if (currentcolor == 'R' && r_char != 'R') {
        redTempValue += r_char;
      }

      index++;
      message[index] = '\0';

    }


  }

  if (flag == 0) {
    analogWrite(bluePin, 255 - blueTempValue.toInt());
    analogWrite(greenPin, 255 - greenTempValue.toInt());
    analogWrite(redPin, 255 - redTempValue.toInt());

    text.println(message);
    flag = 1;
    for (i = 0; i < 14; i++) {
      message[i] = '\0';
    }

    index = 0;
  }

}
RGB RED is lighting green color
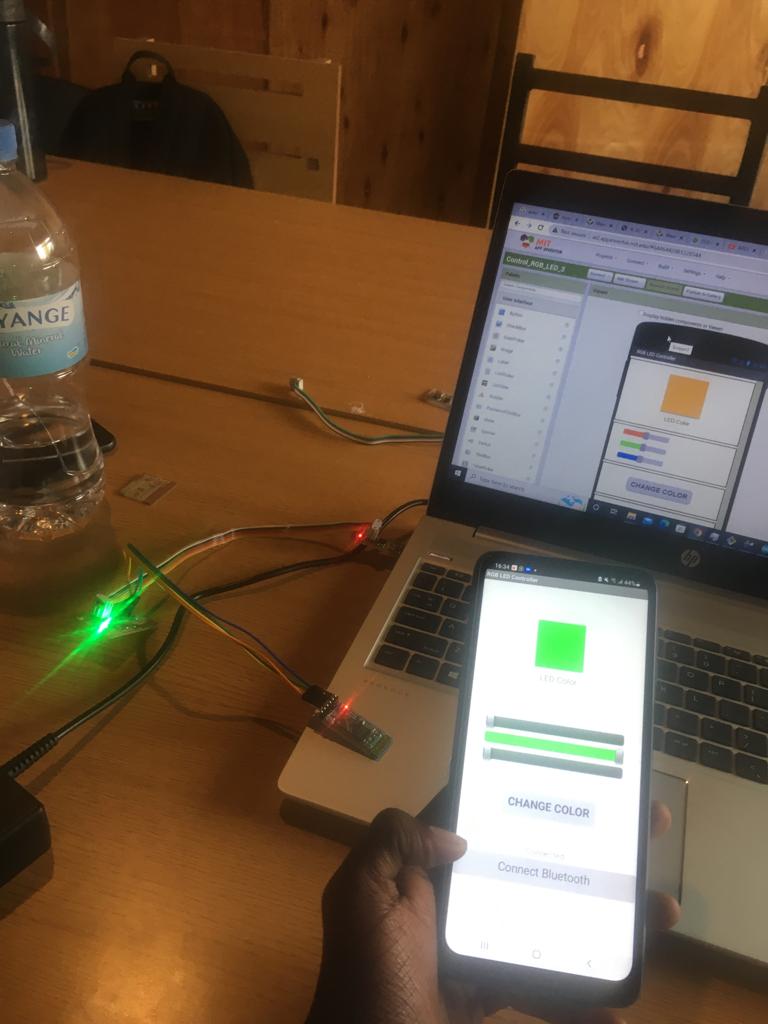
When i change color from green to red the it doesn’t change my bluetooth failed to connect to MIT App inventor.
Dowload files.