Pointing machine
Group members
Introduction (Antero)
During the Neil's introduction lectures for Machine Building week we were shown a previous years machine building project as an example. More information at 06:20 in the Vimeo video recording of the lecture..
The project presented to us was A Hanging Clock by Yadu Sharon from FablabKerala. We found the project really innovative and interesting. We decided to make a display for a themometer by using the same principle for displaying the values.
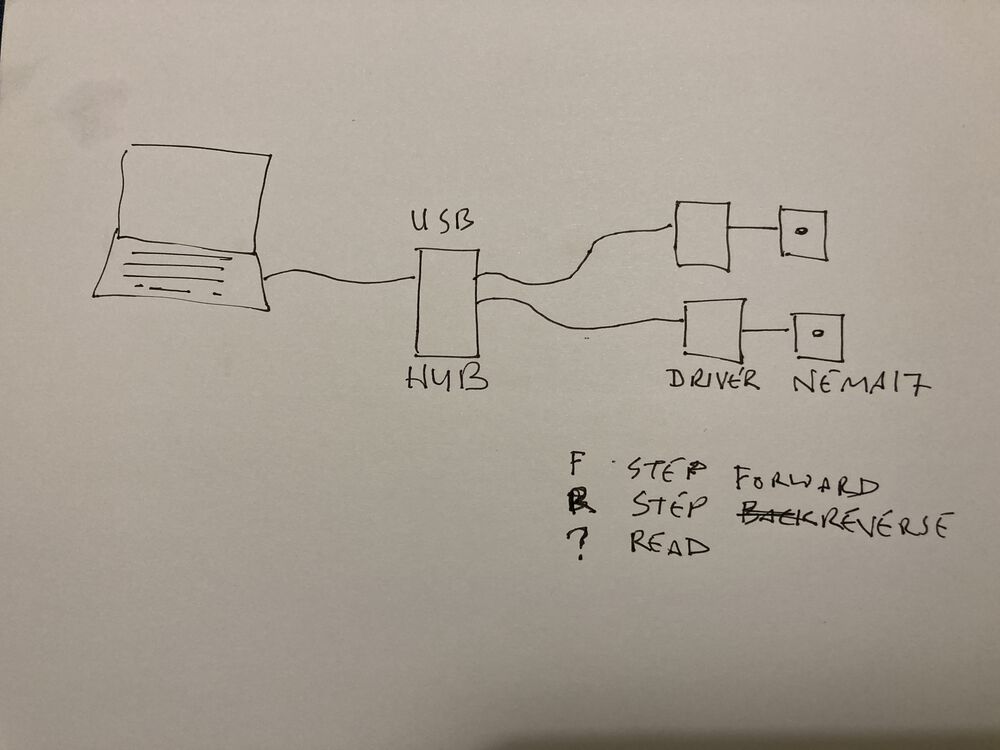
Original design that inspired us used a dedicated board. We decided to use a general purpose PC paired with a USB3 Hub controlling Urumbu stepper motors for displaying the temperature.
Urumbu
According to the Urumbu project creators (Neil Gershenfeld and Alfonso Parra Rubio)"Urumbu" is the Malayalam word for small ants found in Kerala, and like these ants Urumbu eliminates traditional machine controllers and replaces them with simplified stateless nodes. "Urumbu significantly simplifies the hardware by moving all embedded configuration into real-time parallel programming." In the other words, dedicated microcontroller board can be replaced by general purpose multi-core computer, which uses its multiprocessing and process synchronization in order to control the motors properly through the fast USB bus in real time. We had already Urumbu based stepper motor controllers and compatible USB hubs available in Oulu, so we designed the project around these assets. Because USB3 bus can be considered as a transparent layer in today's computer systems i.e. the complexity of USB3 is hidden from the user, Urumbu simplifies motor control tasks considerably.
In an Urumbu based system, each motor is considered as one USB3 based control node. The motor is powered by USB3 bus. Signaling used in an Urumbu system is USB2. USB3 is not strictly required for messaging, but it can provide more current compared to previous USB versions.
The control program itself is going to be implemented in Python. In principle, one process for the user interface and another process which talks in real time to the motors is required. The control process decides, when the motor should take a step. In the case of temperature, any local or remote source for the temperature data can be used as a basis for generating the control pulses to the motor.
More information of Urumbu project can be found from the Urumbu project page.
Ideas Presented (Team)
First meeting 7.4.22 (8am BST/10am EEST)
Purpose of meeting to decide on what we'll be building and how we might do that. Start sorting out how to cover the team work. Feel out what roles people may be suited to.
(sketches made during the meeting)
Two axis cable machine to play single notes on a piano
Inspired by CoreXY machines.
Imagine a coreXY style cable machine with the main beam suspended over a piano. An arrangement of cables (below) can be imagined that would drive a light second axis to press a key.
4 axis robot arm.
Tutors felt this may be a bit ambitious.
Two axis cable machine to suspend pointer.
Inspired by project presented during lecture.
Antero brought to the table the fantastic suspended clock. The original machine uses linear rails with a nice flexed joint in the travelling parts. Belt driven, with the sole cable routed cleverly from an attachment to a belt on the back of the machine round to the front.
We realised that it could be made as a cable machine. Less rigid but mechanically simpler and with the potential for the system to be quite flexible in scale.
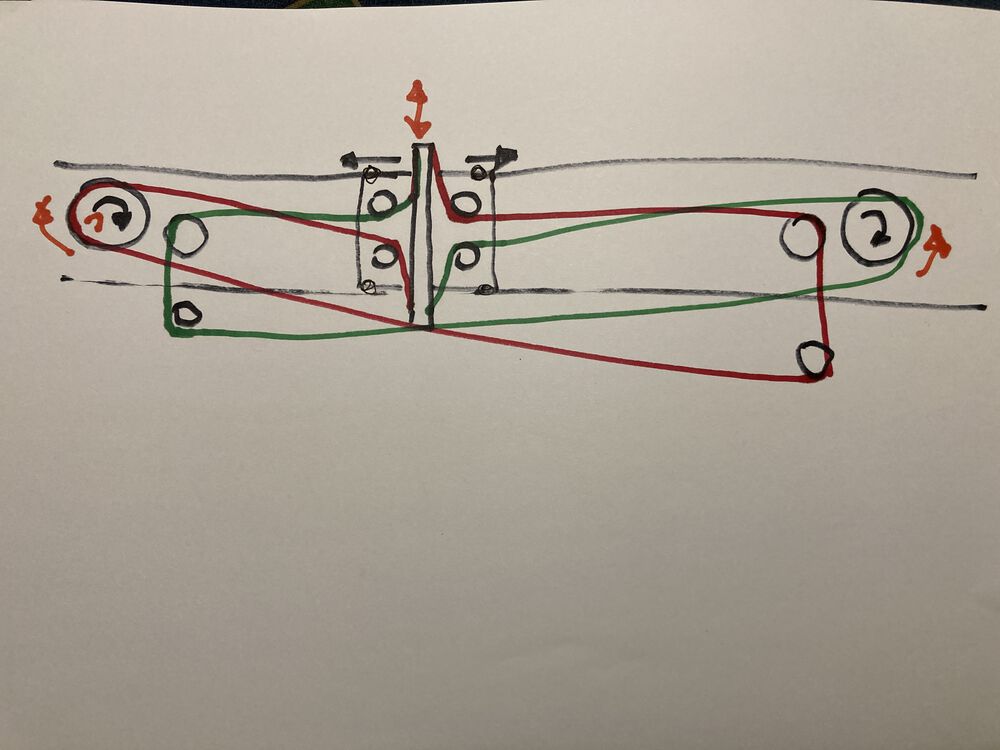
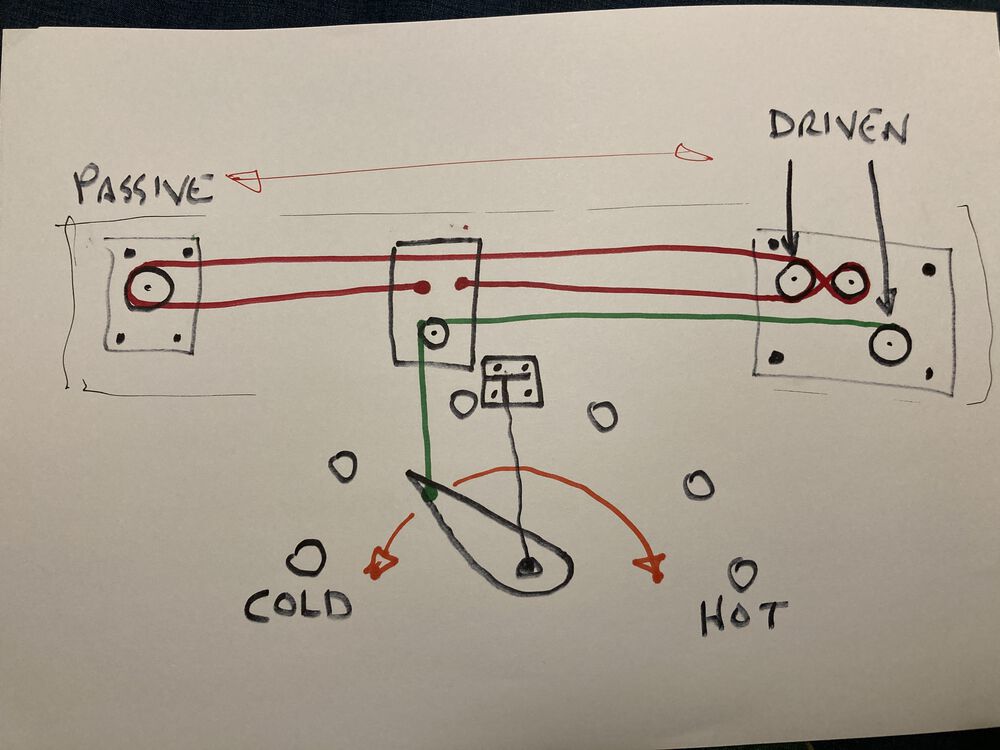
Driven by two 'capstan' style fishing line drivers the cable arrangement is sketched here as well as the very simple architecture for the drivers using Urumbu as the foundation.
The tail end of a pointer is suspended in a static position, the 'live' end of the pointer is moved by our XY cable machine. Markers that get pointed out could be temperature indicators, or anything else you feel like pointing at.
Decision
Team decided on Pointing machine based on CoreXY style cable using Urumbu driven steppers.
Minimum Viable Proposition
- In the 1-2m scale.
- Two axis machine, Urumbu drivers.
- Cable driven, fishing line ala CoreXY
- 3D printing, Laser cutting, (Large router only if required for scale).
Future:
- 3rd axis, activating some aspect of the pointer, flip/rotate/light up.
Gathering parts
Oulu have already been working on Urumbu
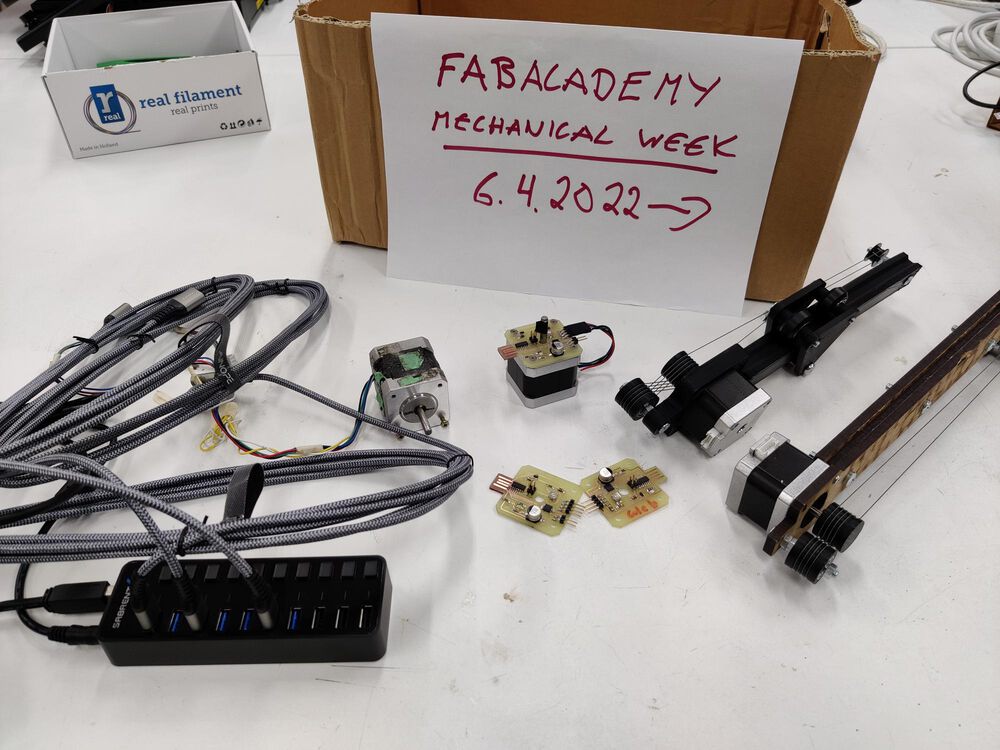
We can see two ready to go single axis test articles. One 3D printed, one laser cut.
Mock-up (John)
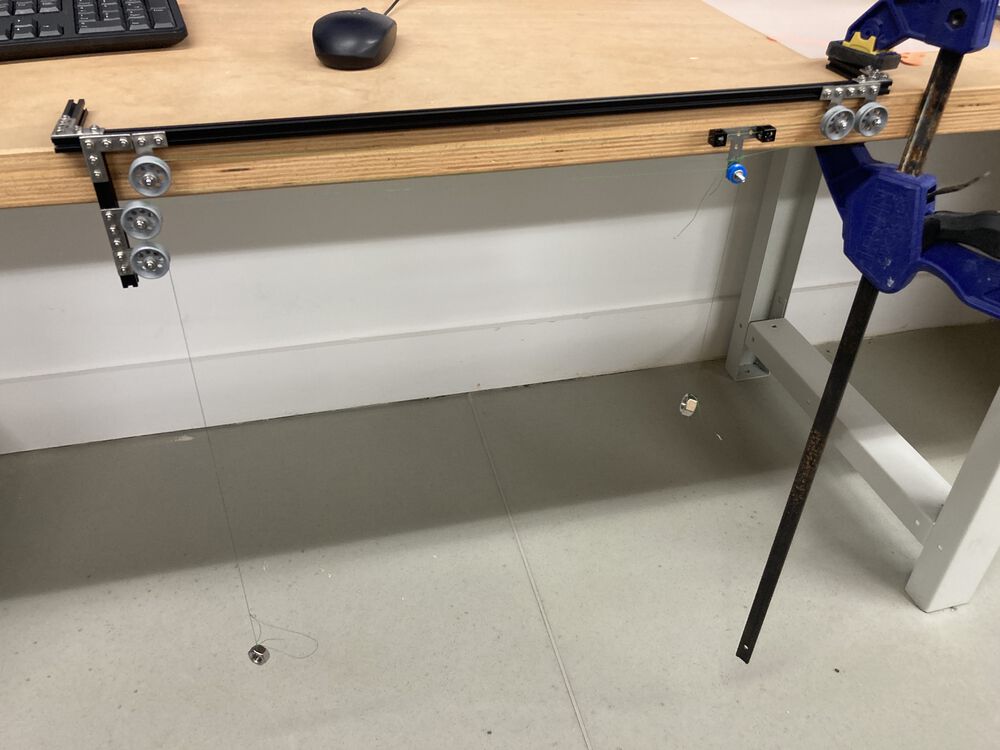
Decided to make up a quick study in Bangor, and mocked up the proposed system to see what we could learn.
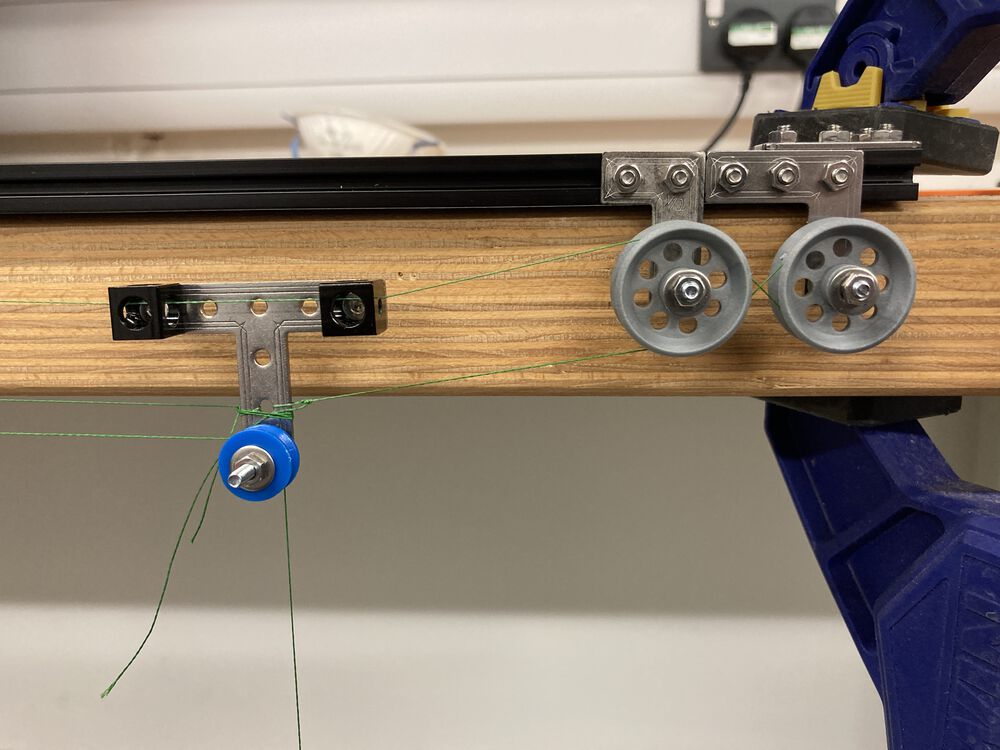
- Lesson 1: try buying the bright red fishing line next time, the green is hard to see in pictures.
Made with MakerBeam 10mm extrusion, some cheap pulleys and 20lb braided fishing line. The capstan drivers are emulated by using two plain pulleys and winding a single figure of eight through them. Surprising how much apparent stability in the line you gain from so little extra.
We'll describe the two axes as X across and Y up and down. You can see that the driver for X is horizontal and the driver pulleys for Y are vertical. As there is just one cable being fed across the machine for the Y, the other end is dropped down to a counterweight / tensioner, that is, there is a free end of the Y cable that needs to be handled.
Notes:
- Most notable, axes are not independent in this type of machine. You need to move two motors to shift a single axis whilst maintaining position in a related axis.
- if cables are in a plane but their anchor points in the carriage are not, the carriage will try to tip to match the plane of the cables.
- in the mock-up, the second actuator is on the left, no reason it shouldn't be on the right so that all the electrical cabling is down one side.
- Like the water jet cutter mentioned in the lecture, the end of the machine is not part of a rigid system. If we move quickly we can expect the system to deform.
First steps in manufacture (Max)
Revision 1
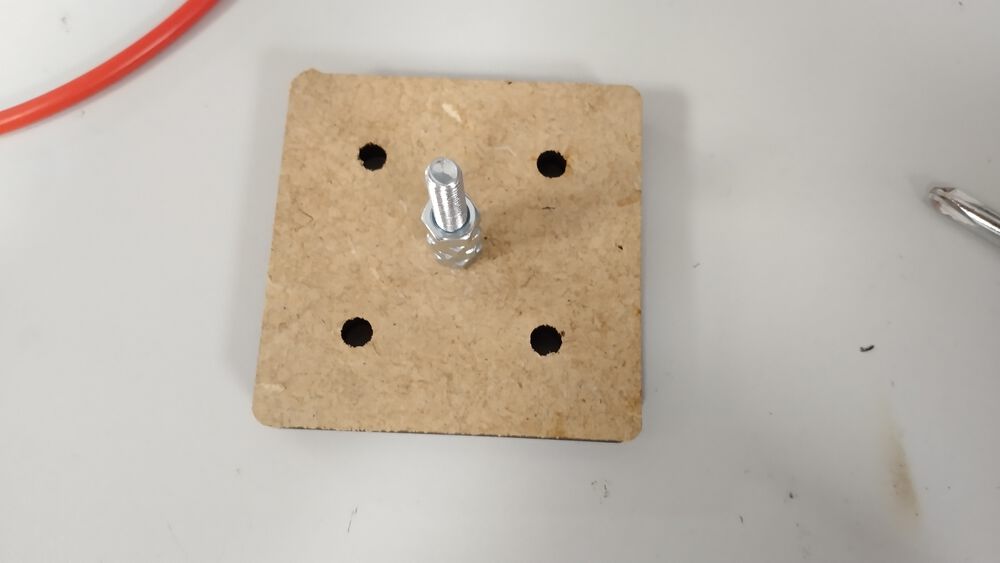
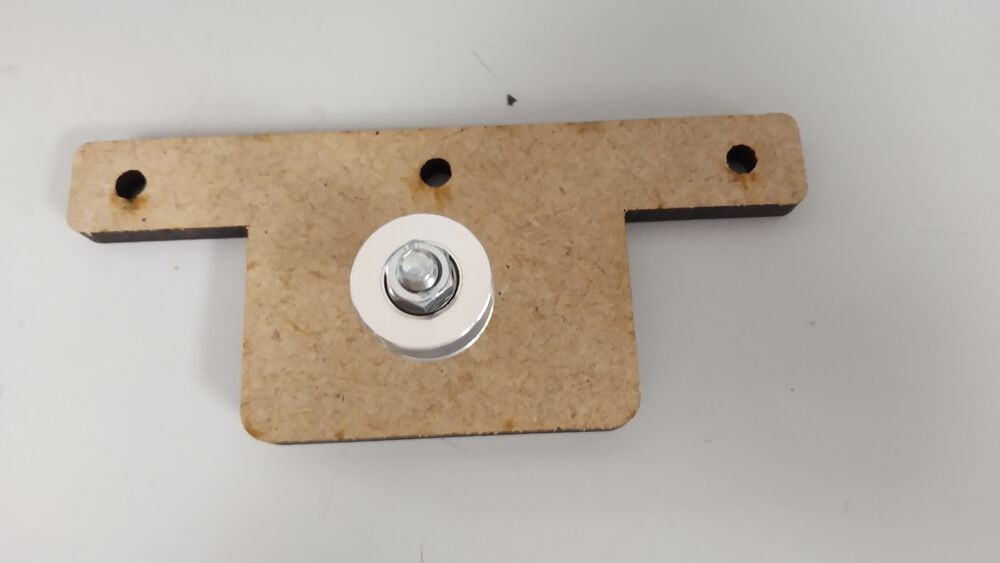
Our first steps in producing a realised machine are some laser cut motor mounts seen below fresh off the machine and with motors and pulleys installed. Also in the first image a draft of the 'carriage' that will be floating on the cable, anchoring the in motion pulley.


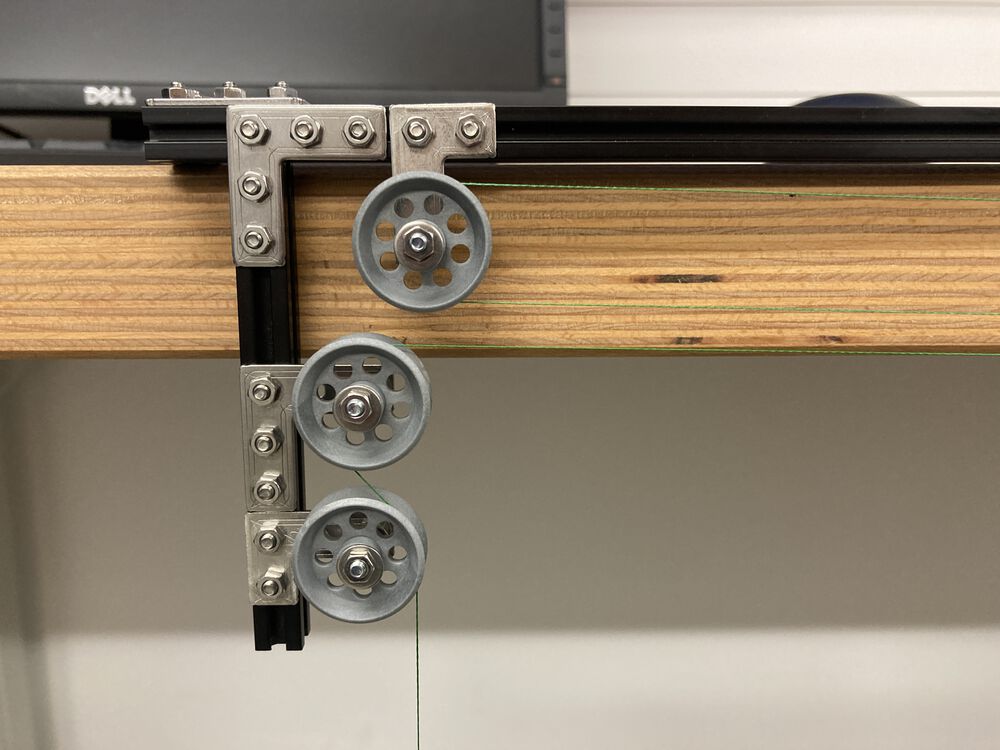
Revision 2
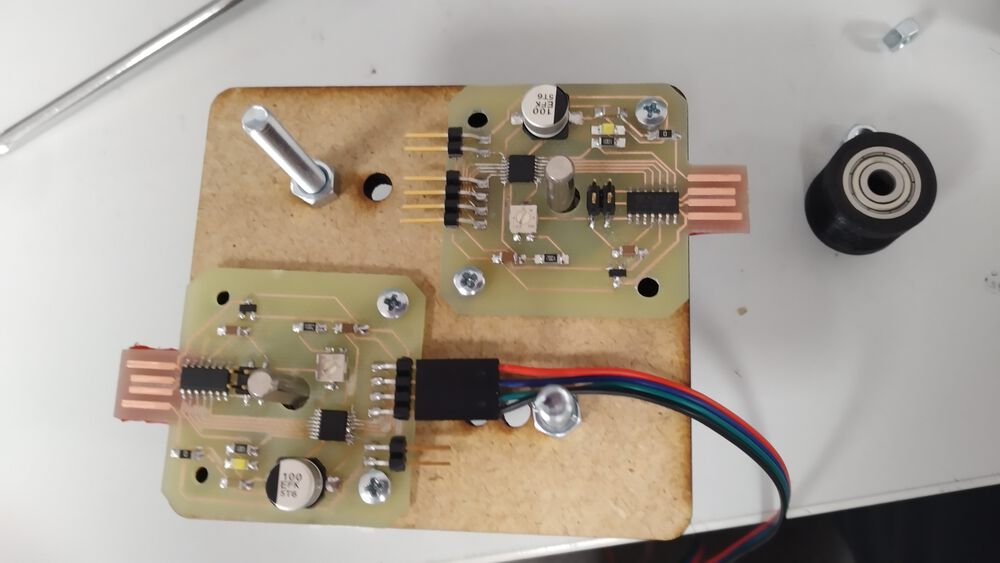
Next revision, we have the motor mounts paired with their capstan partners, a dual setup for our two axis cable XY style machine.

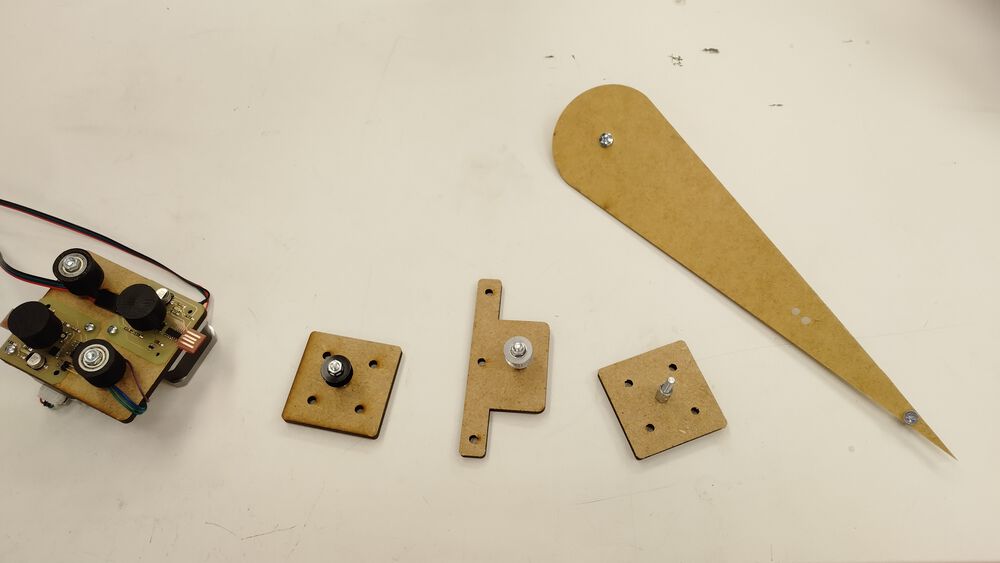
For the middle of the machine we'll have a suspended pulley
and at the other end of the main X axis we have a single pulley ready to be mounted and an anchor to suspend the static end of the pointer.