6. 3D Scanning and printing
This week I have been working on 3D printing and three-dimensional scanning.
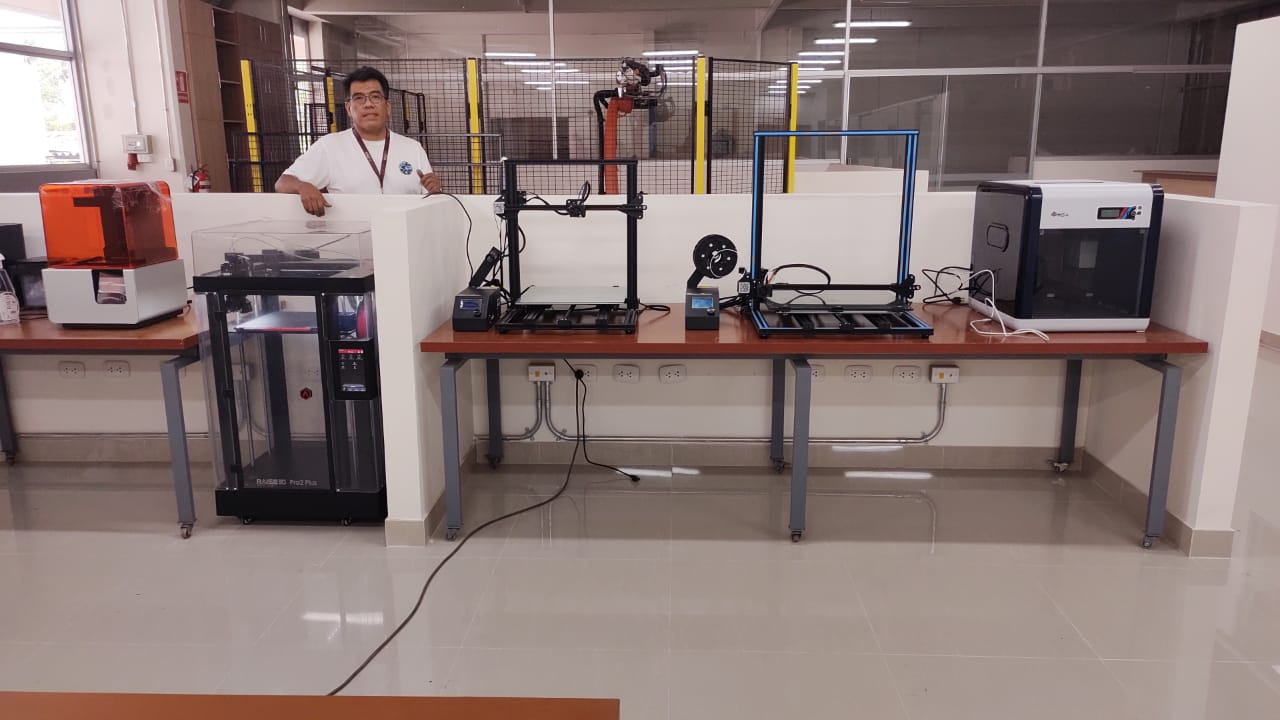
In the lab we have the following 3D printers:
- Form2 by Formlabs
- Pro Plus by Raise3D
- Da Vinci 2.0 A Duo from XYZprinting
- CR10 S4 by Creality
- CR10 S5 by Creality
Group Assignment
Testing the FDM printers
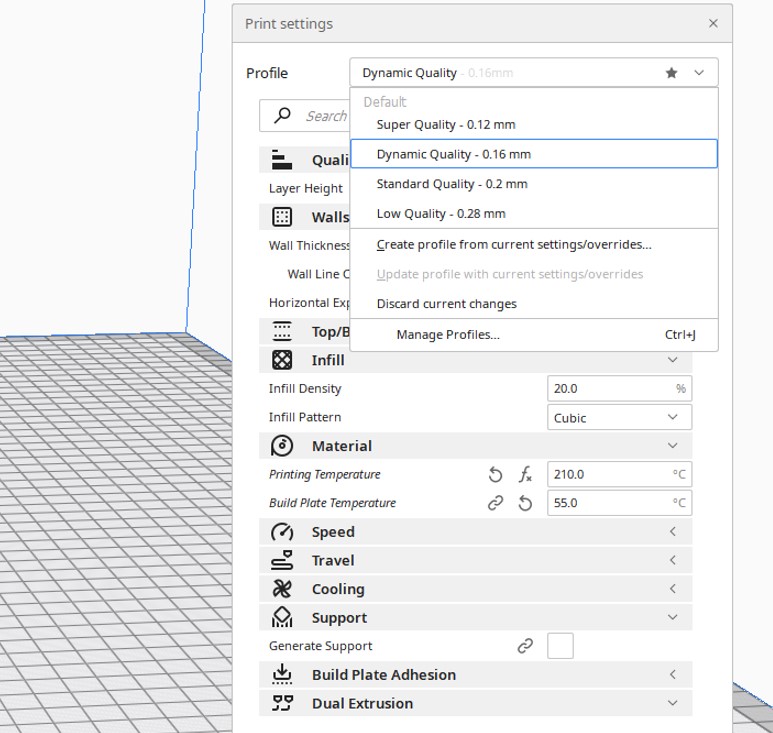
For the Creality printers we used the Ultimaker Cura software which is very easy to use.
Before using the printer it is necessary to take some precautions: - Verify that the filament is not brittle, for this you should bend parts of the filament to see if it supports the bending, otherwise you should change the filament. - Verify that you have enough filament. - Verify that the surface is clean. In the case of the Creality it has been seen that the impression adheres much more by placing a layer of hair spray.
The most important parameters are:
- Quality: which depends on the thickness of the layers which can be 0.28, 0.20, 0.16 and 0.12 mm. We have worked with 0.16mm
- Infill: which is measured as a percentage. We have worked with infills of 20 to 30%.
- Material: for PLA material the recommended nozzle temperature was 210°C and for build plate 55°C.
- Supports: for the tests we did not use supports.
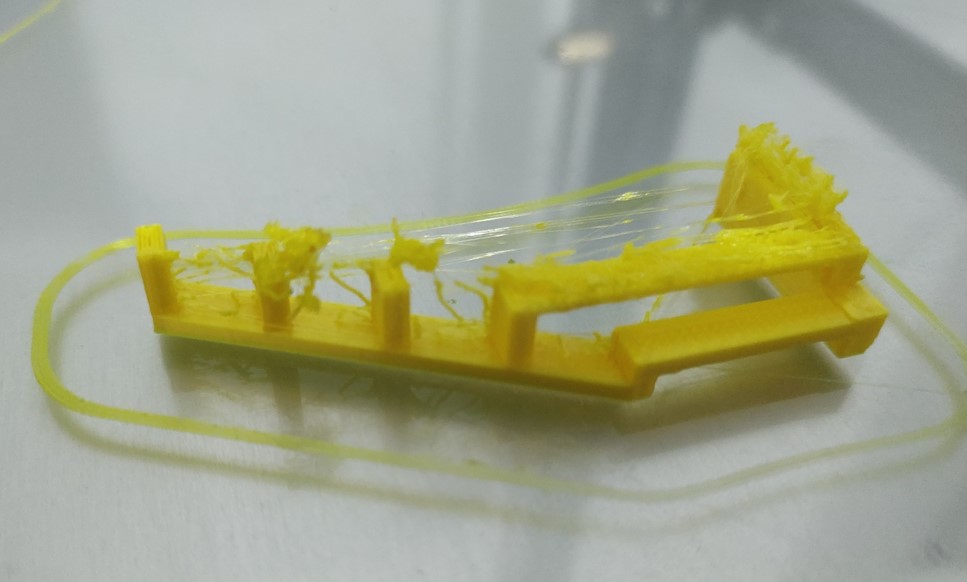
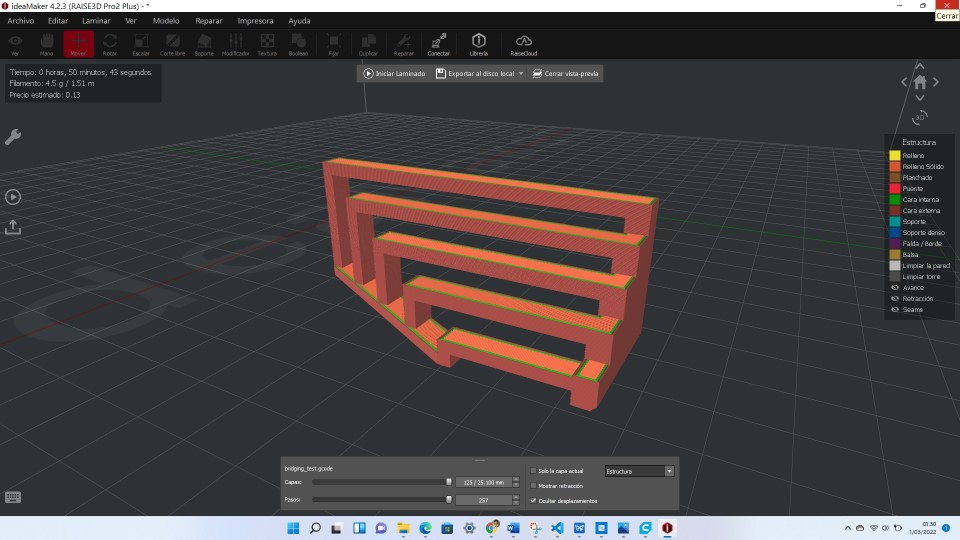
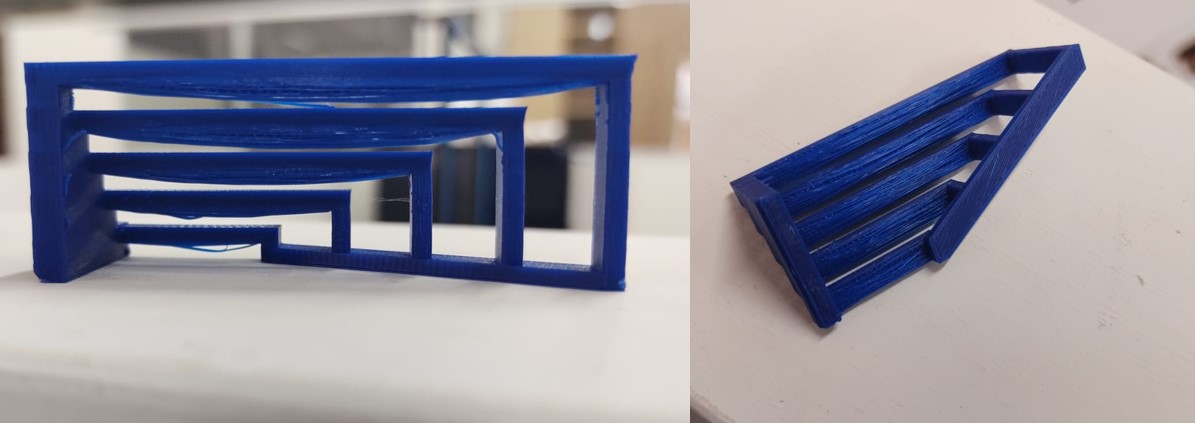
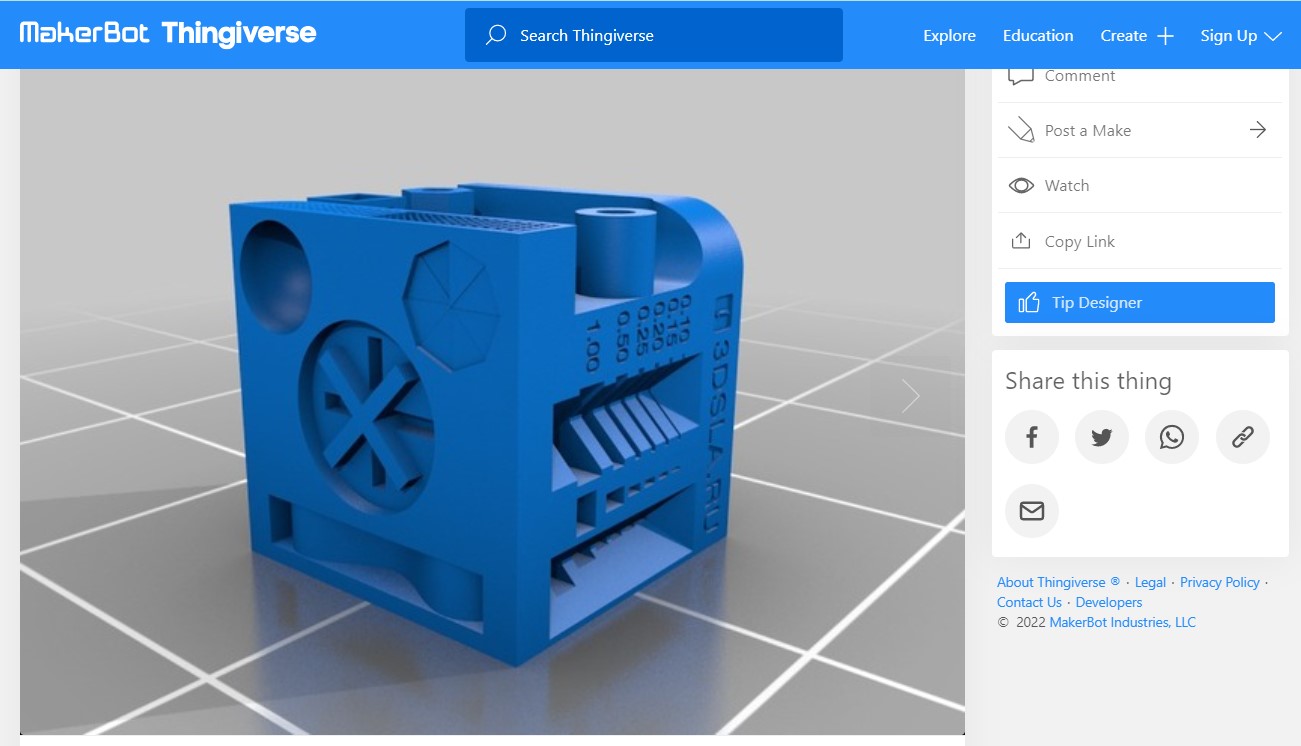
For the tests we used some designs downloaded from Thingiverse and others proposed by the FabAcademy.

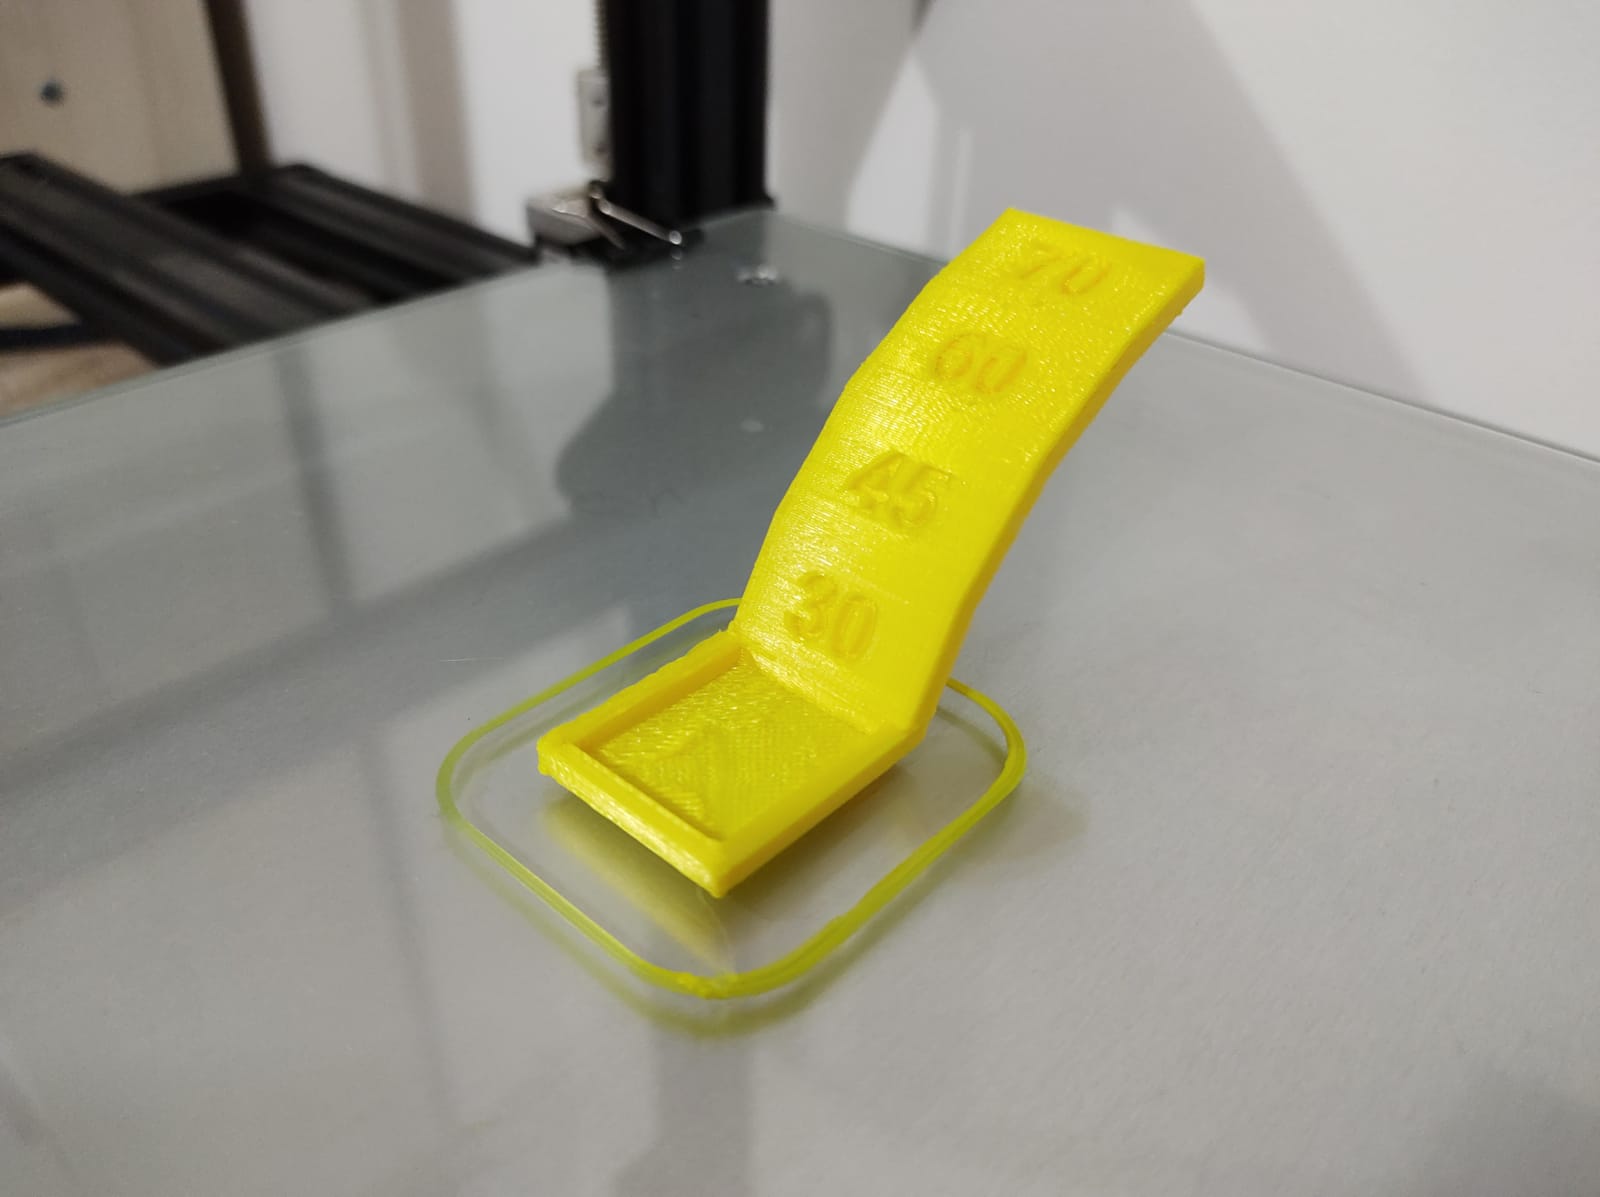
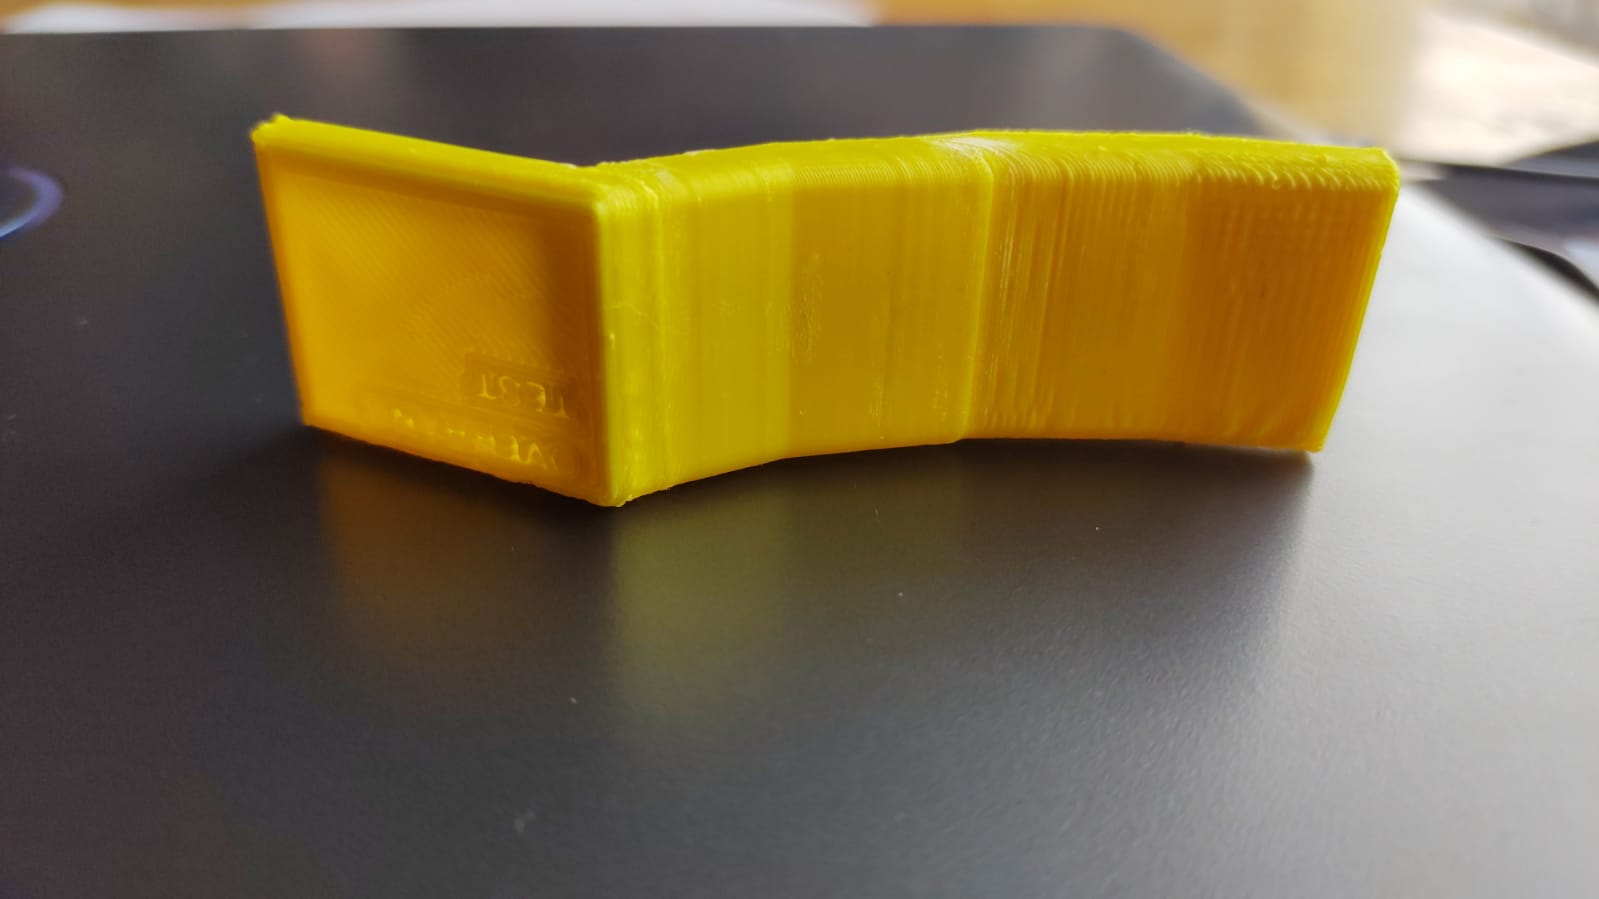
Up to 70 degrees it is possible to build objects without supports, however, the bottom finish is not the best.

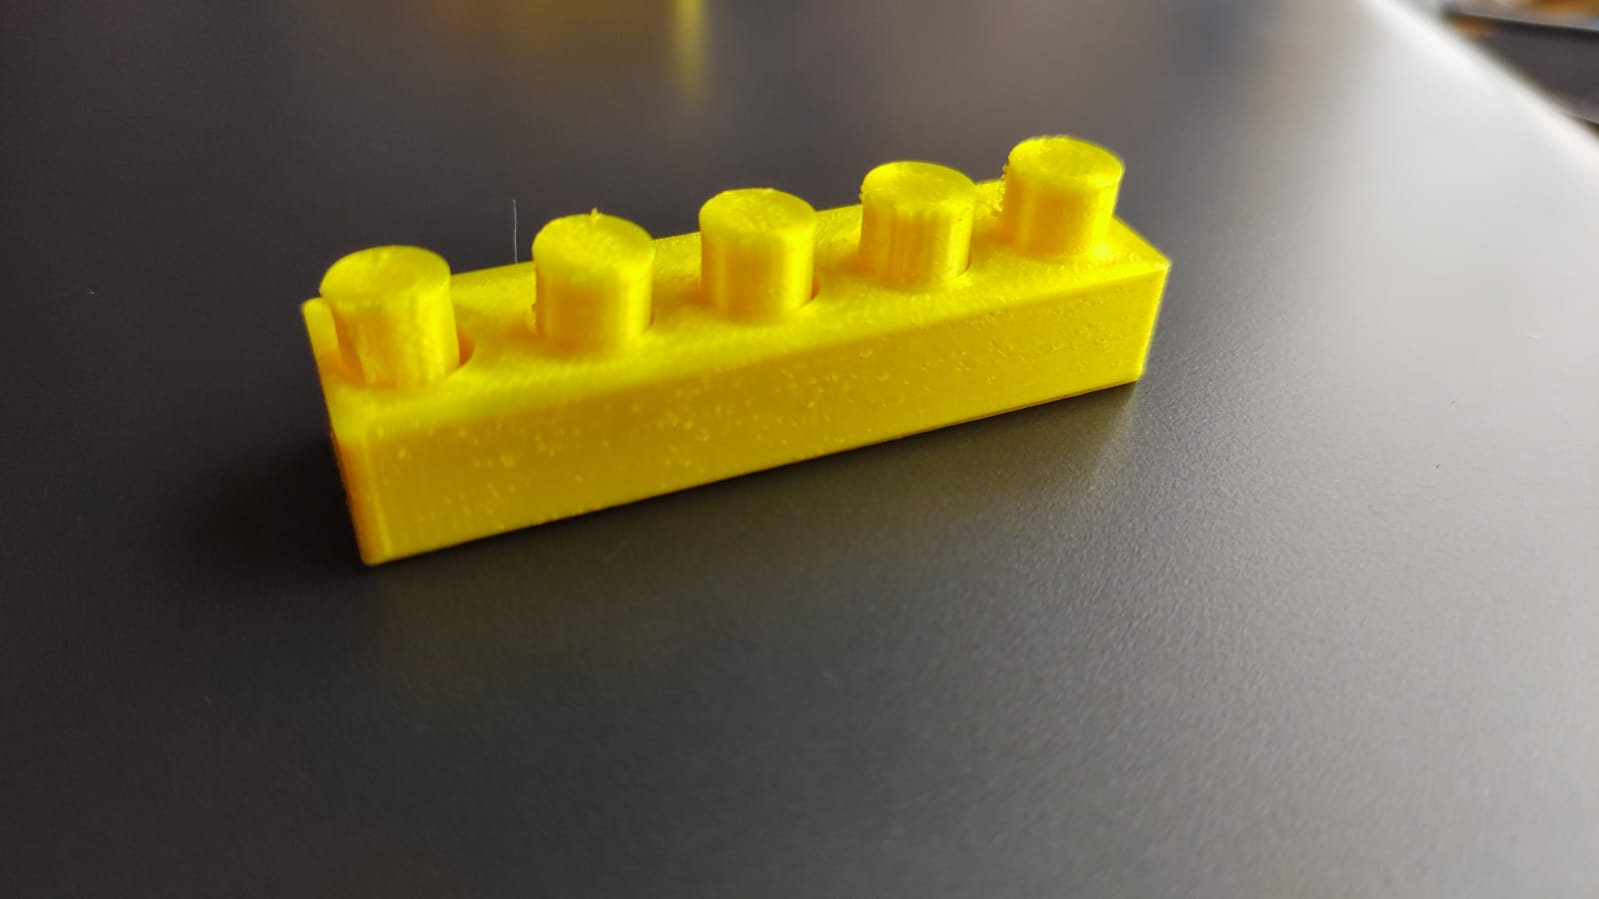
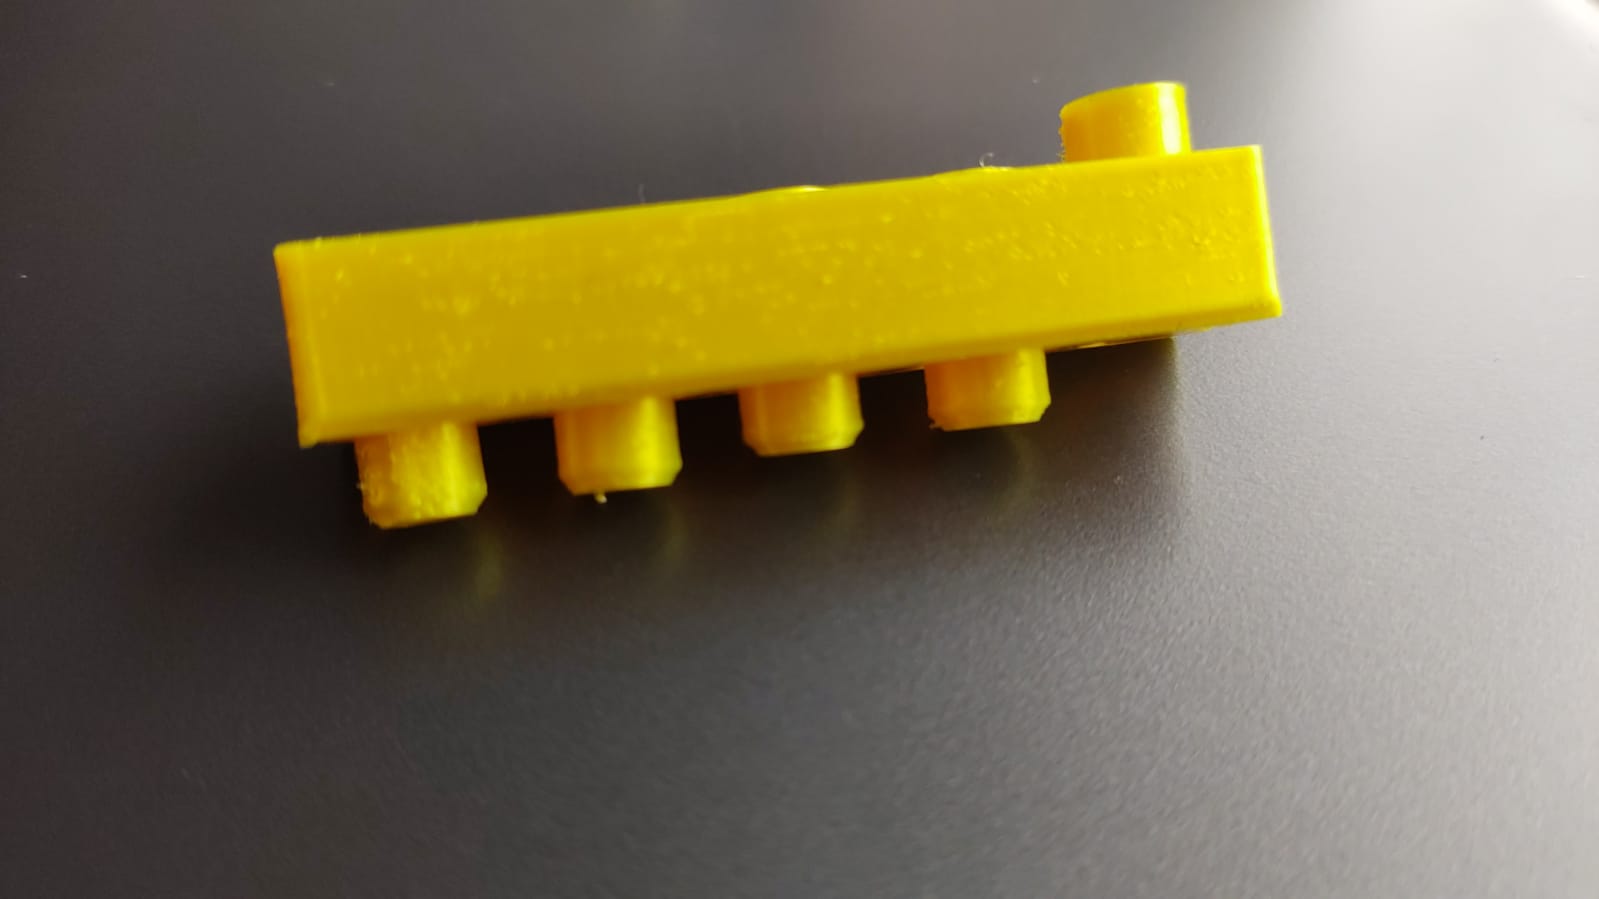
As for the minimum clearance dimension for objects not to stick, it has been found that as little as 0.3 mm is successfully achieved.
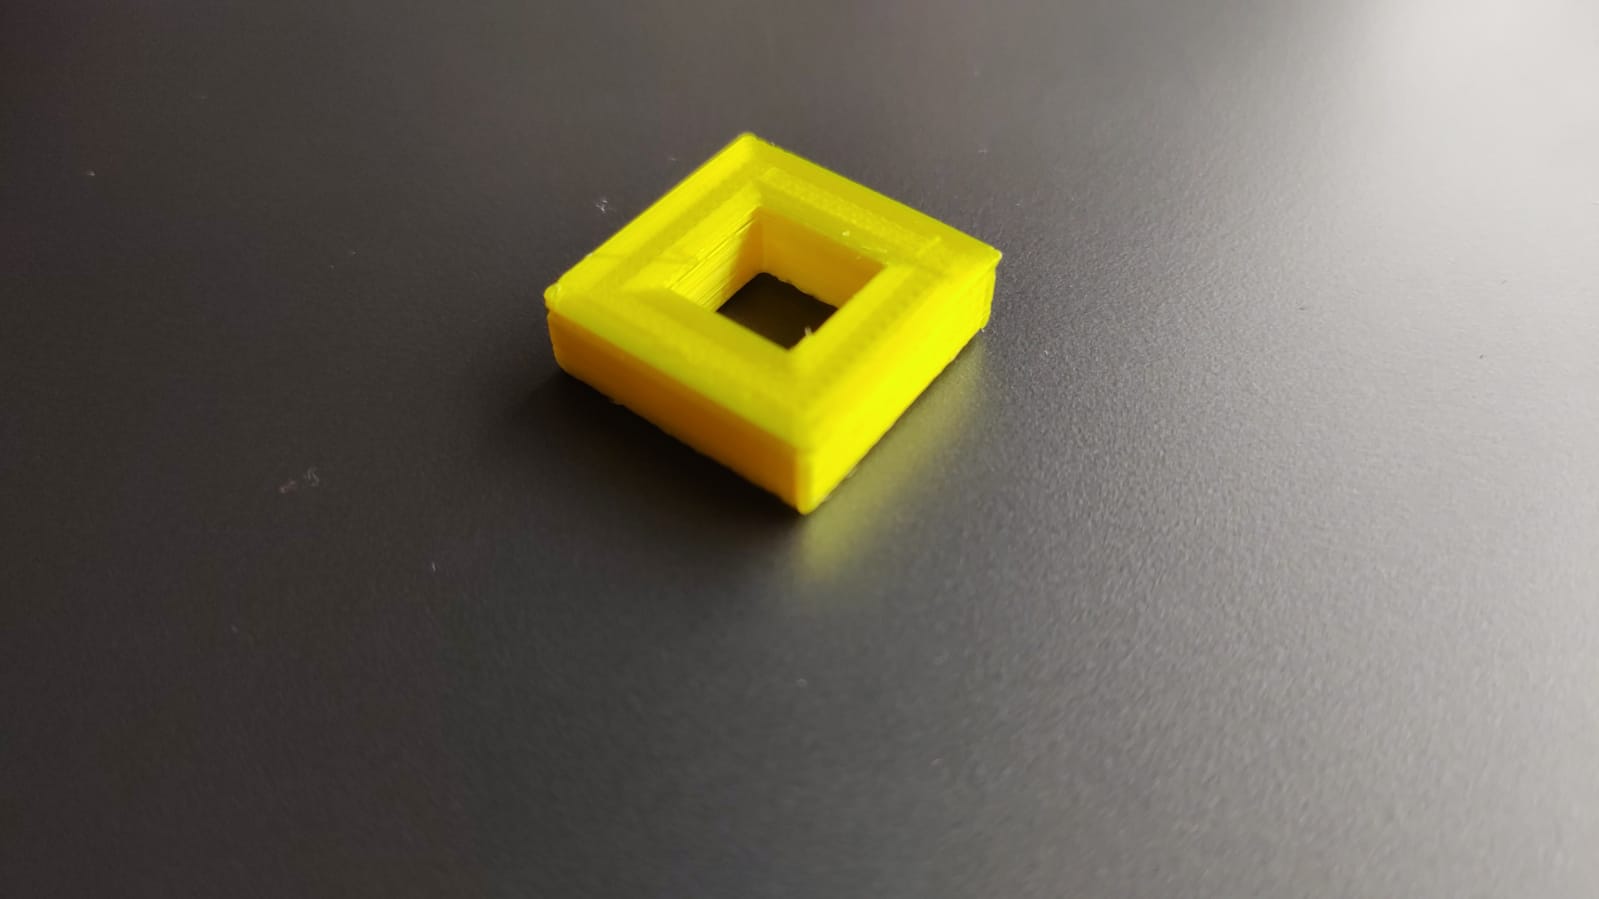
As for the tolerance reflected in the final dimensions achieved in 3D printing, it has been observed that there is a variation of 0.5mm in both cases (inside and outside dimensions).


The most difficult thing about working with these printers is the levelling of the bed and the filament build-up in the nozzle.
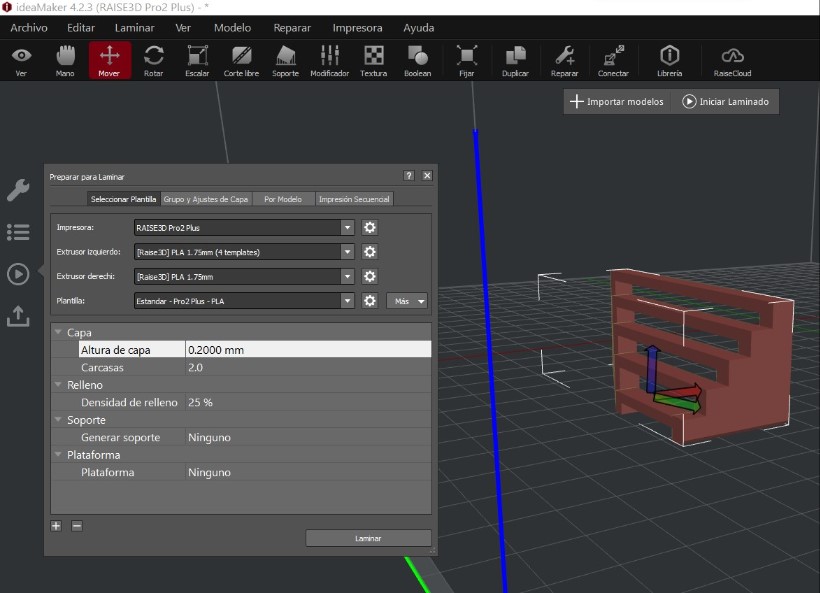
The Raise3D Pro Plus printer has its own software called Ideamaker which shows similar features as Ultimaker Cura but with a different interface.
We use a layer thickness of 0.20mm (standard), the temperatures recommended by the software, no supports or infills.

Testing the SLA printer
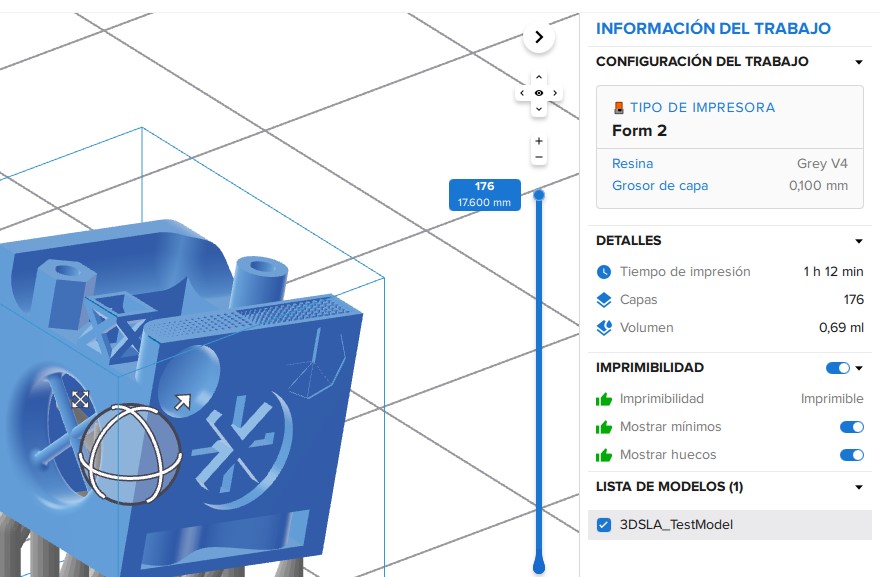
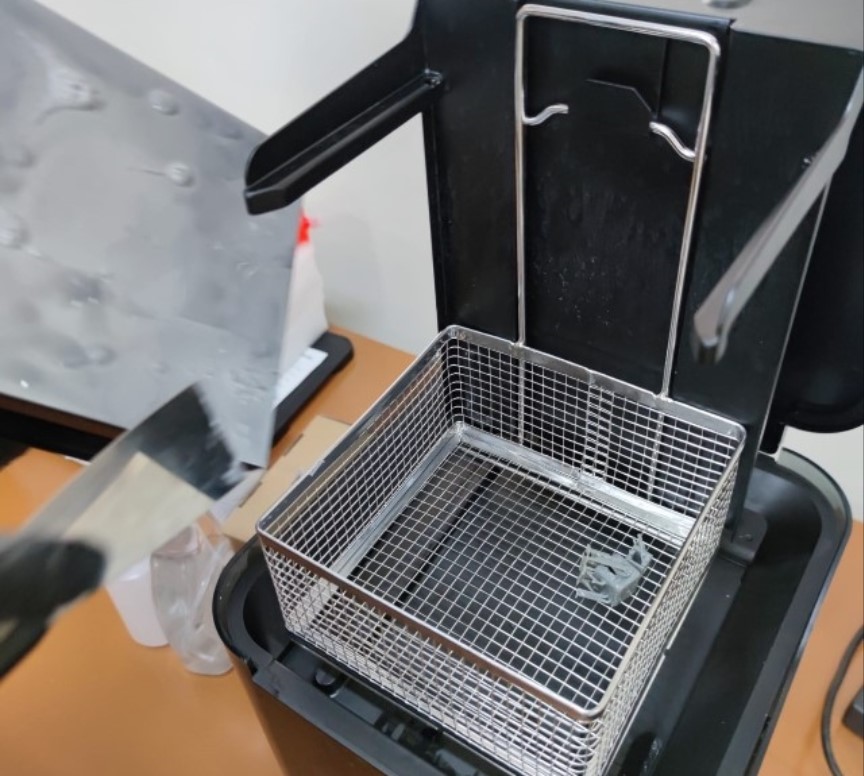
The Form2 printer using liquid resin is a very different technology to FDM. To set up the print we use this brand’s own software called Preform
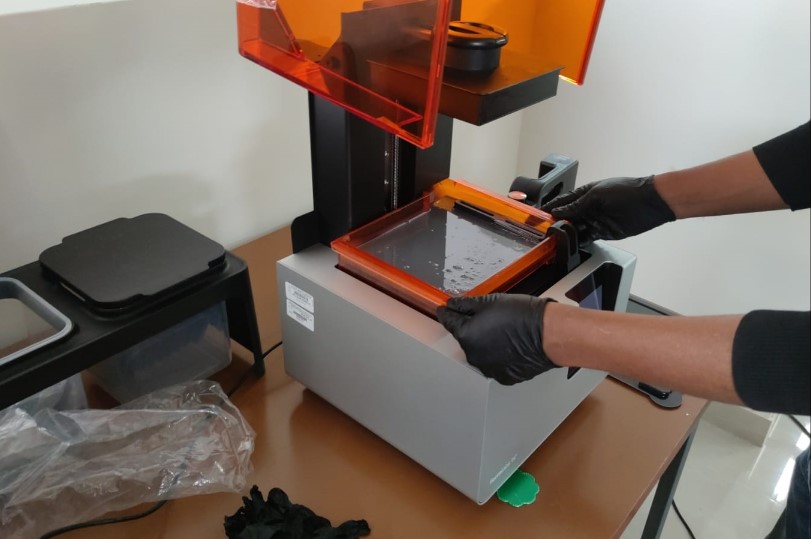
Before using the Form2 printer, some precautions are necessary:
- Verify that the resin levels in the tank are the minimum.
- Open the lid of the container.
- Have nitrile gloves to handle everything because the resins used can be a bit harmful as well as difficult to remove.
- Have isopropyl alcohol for curing once the printing is finished.
Then, the first thing to configure is
- The printer type
- The type of resin
- The thickness of the layer
To do the tests we used the test we found in Thingiverse
 Then the “print in a click” or magic wand tool makes it much easier to find the right twist for the best print. Then the support configuration is the other parameter to be configured.
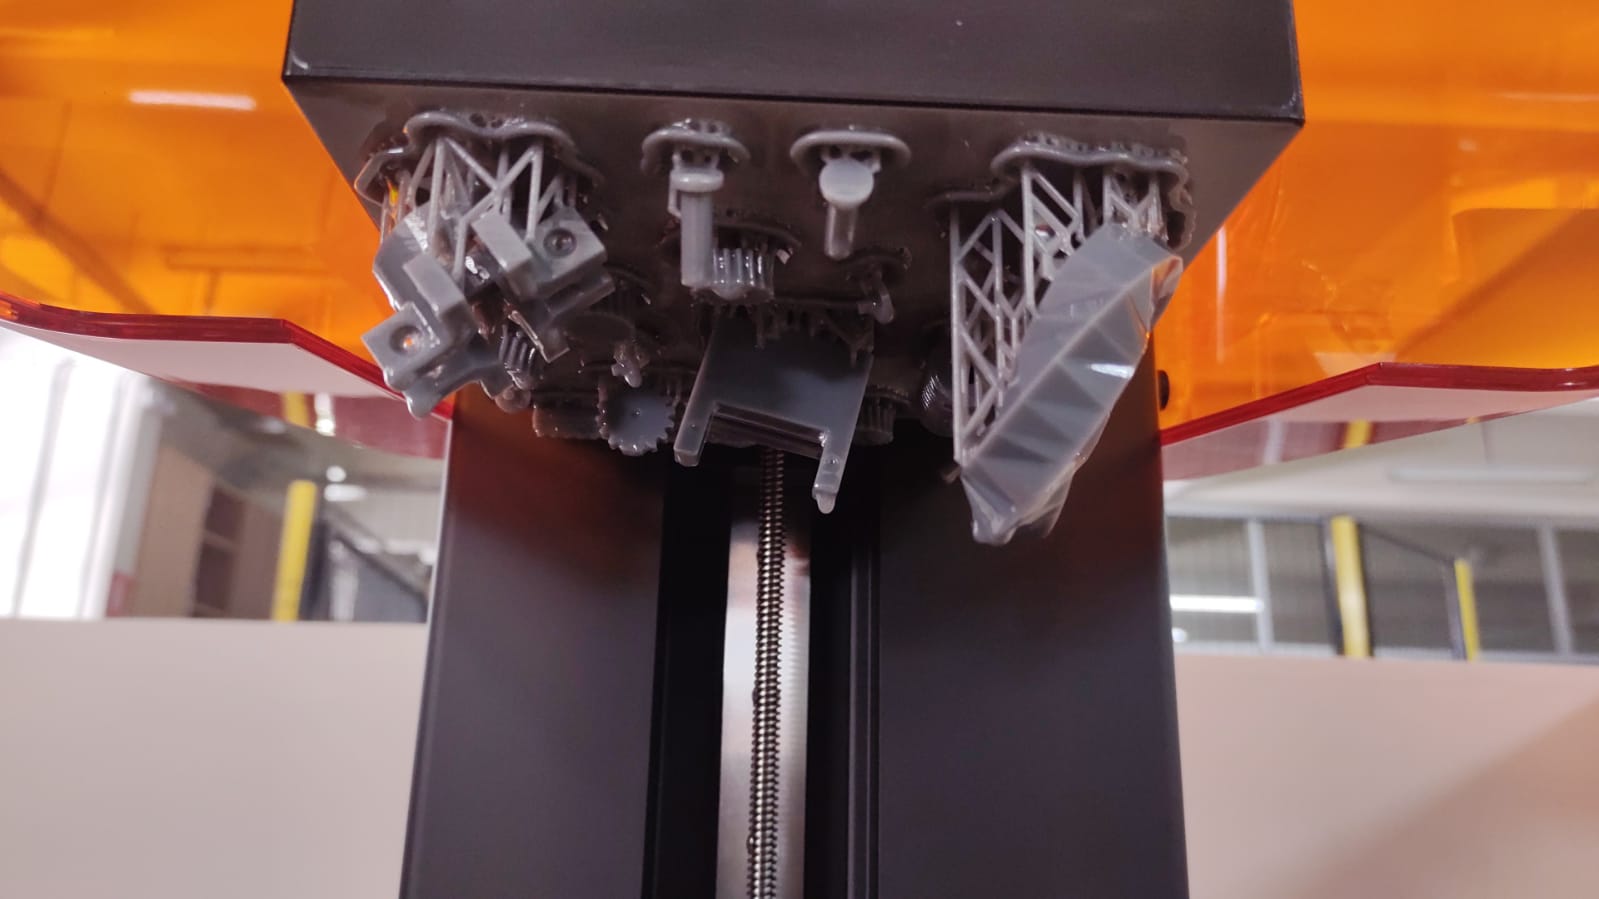
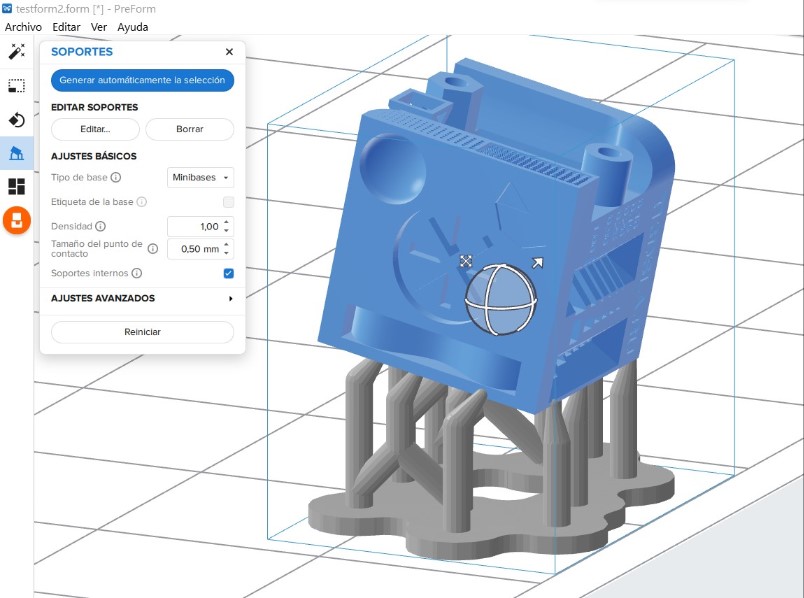 A special job is to prepare the printer for printing. Care must be taken with the tank and the placement of the cartridge with the lid open.

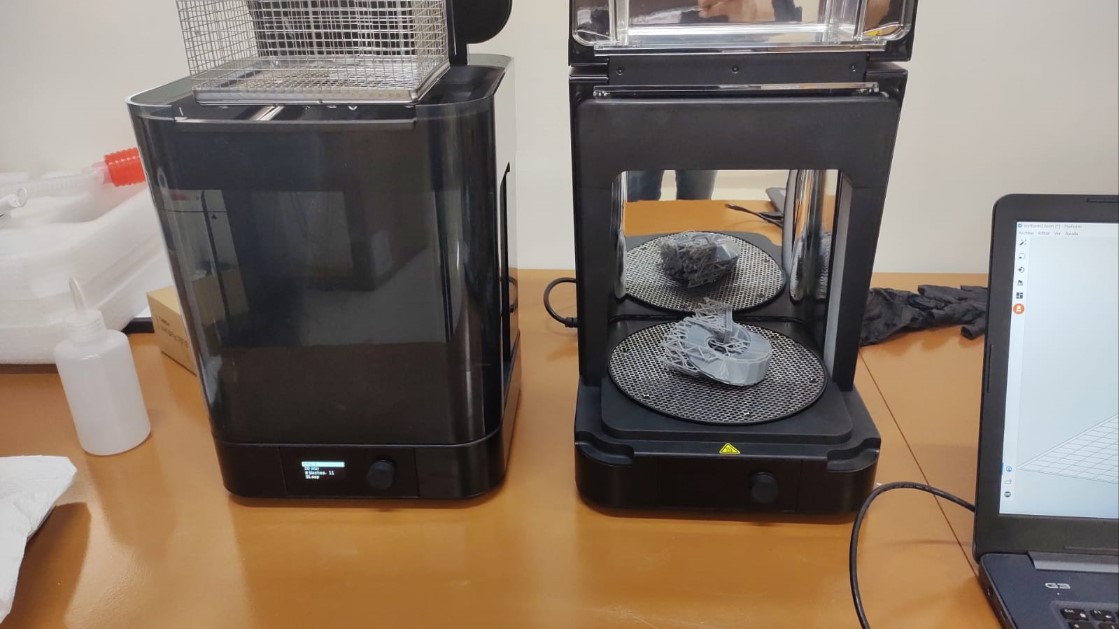
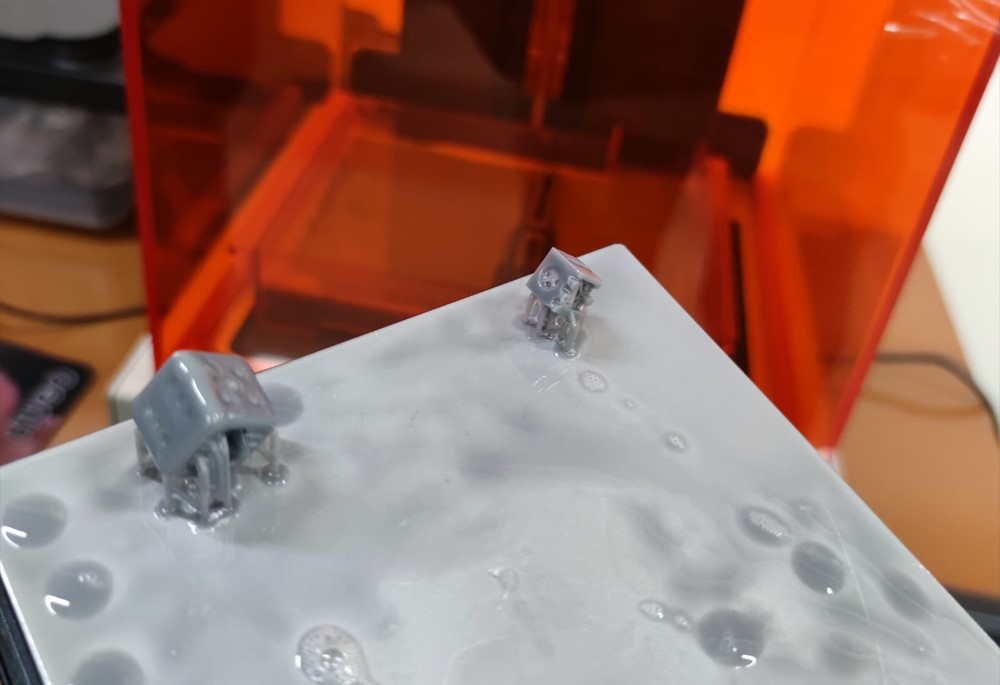 After printing, the post-finishing is a process assisted by Form Wash and Form Cure, which optimises and automates the washing and post-curing process.
We can conclude that the FDM printing process is apparently easier and cleaner than STL, however, when nozzles become clogged and when the bed becomes uneven, a lot of time can be wasted setting up these aspects in filament printing, whereas the resin printing process, although messier and more time-consuming post-processing, is more reliable.
Individual Assignment
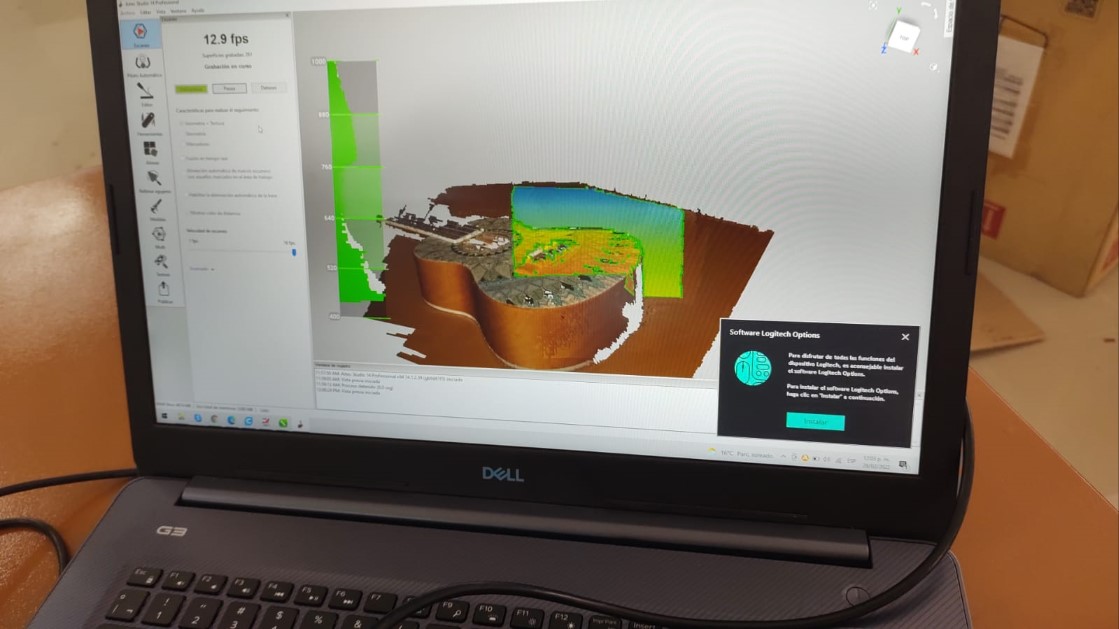
In the lab we have an Artec Eva by Artec3D, it is a structured light 3D scanner that allows to capture textures and colour with these features:
- 3D accuracy of 0.1 mm,
- 3D resolution of 0.2 mm
- Minimum target size of 10 cm
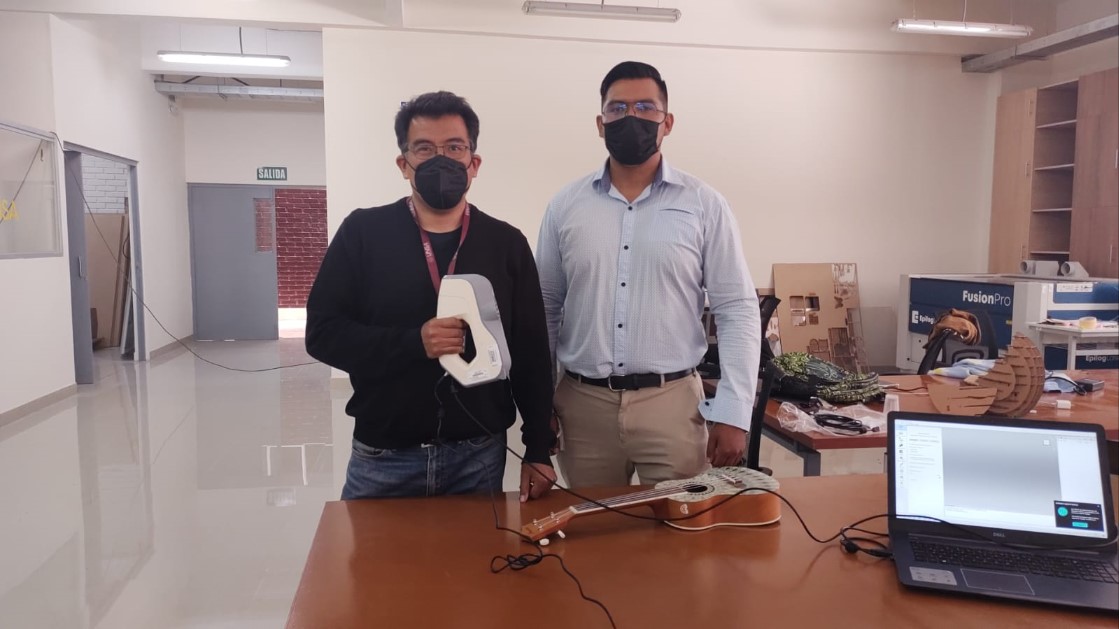
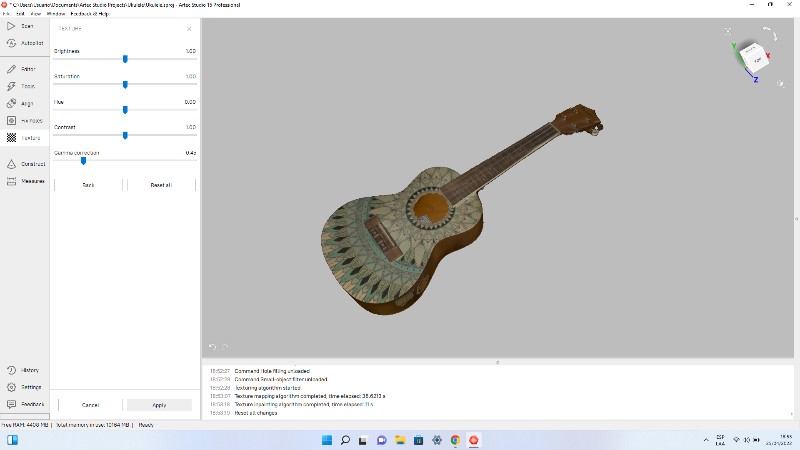
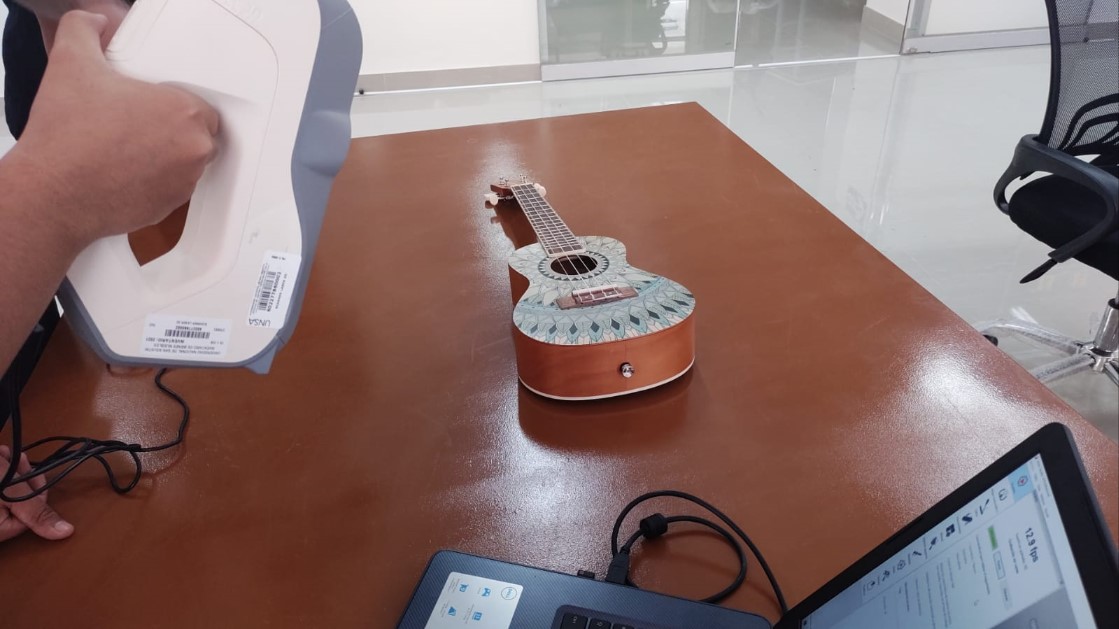 The scanner uses its own software called Artec Studio

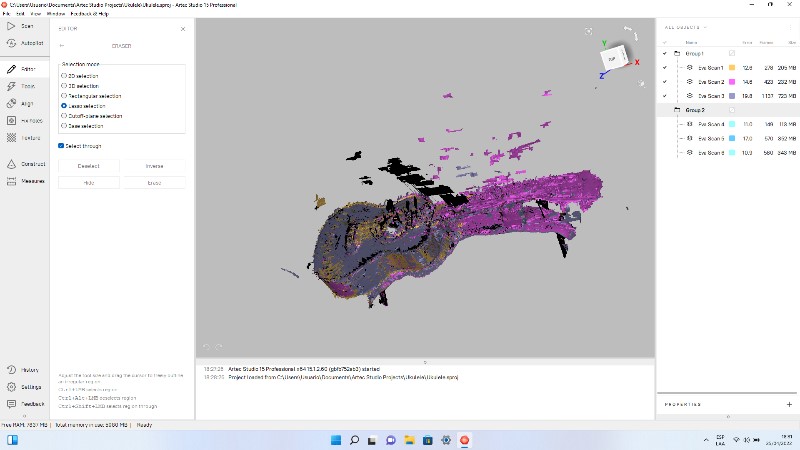
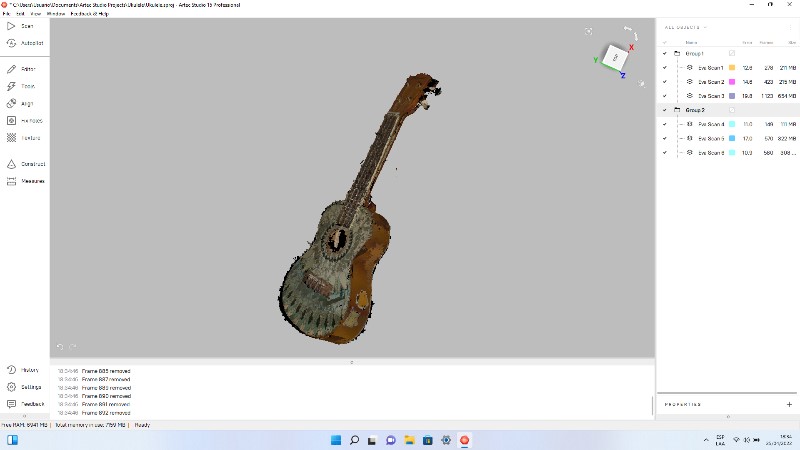
To edit the object within the software, the “autopilot” option was used, which allows the user to follow the steps to edit the object in a friendly and efficient way. The most complicated thing is to align it because you have to find 3 points of each scanned part that match with other 3 similar points of the part you want to join.
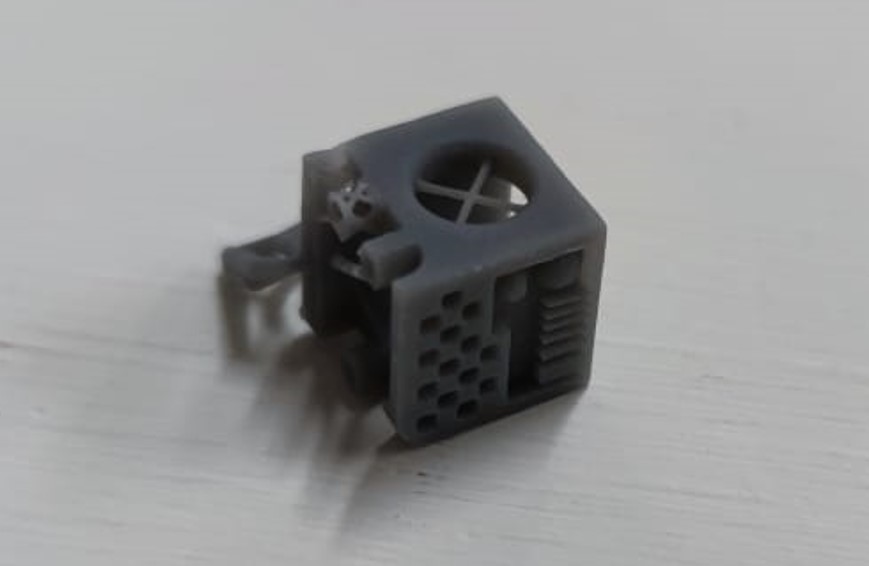
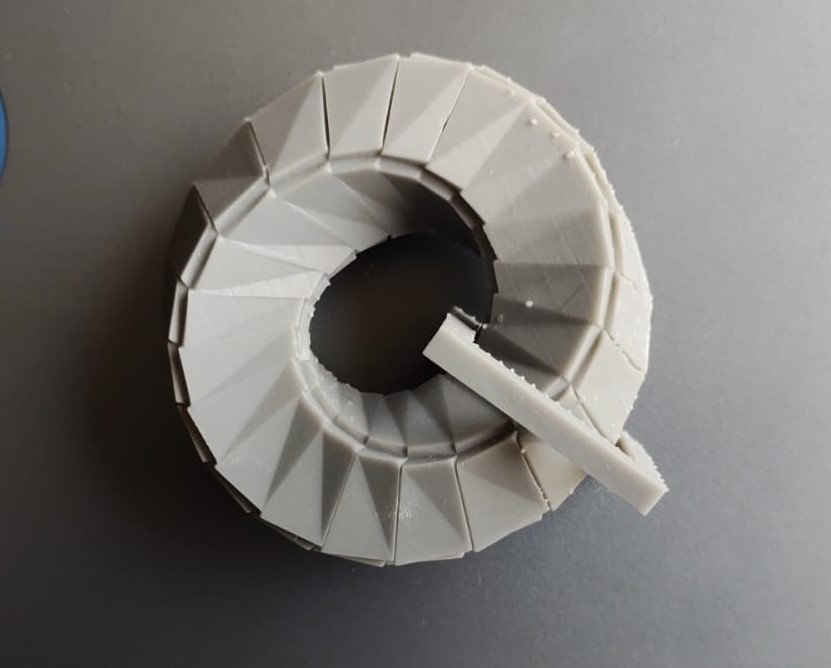
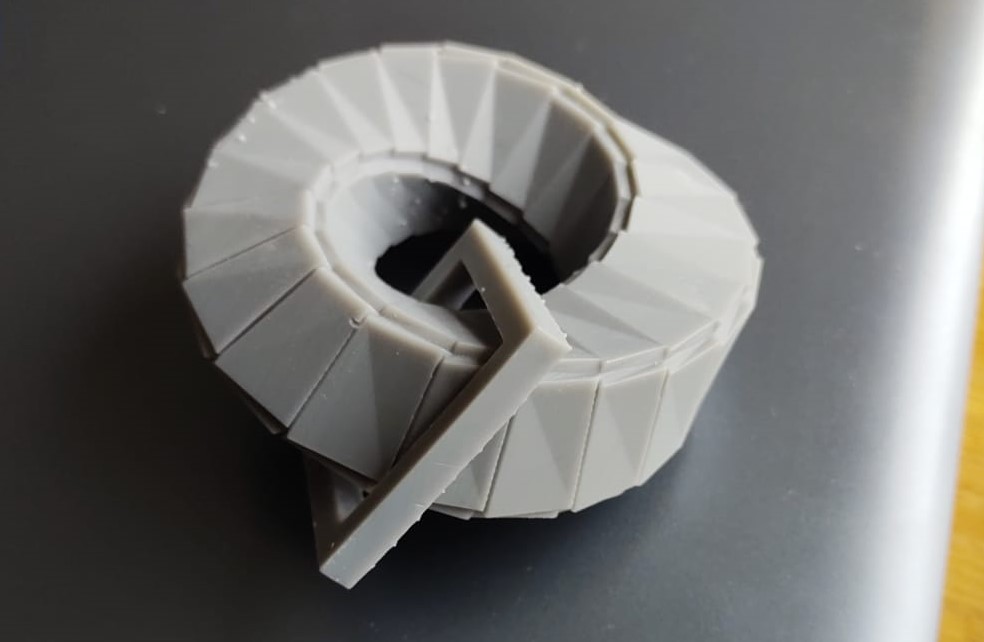
For 3D printing I used a parametrically designed Mobious Ribbon downloades from thingiverse which I edited in AutoCAD by inserting a square ring.
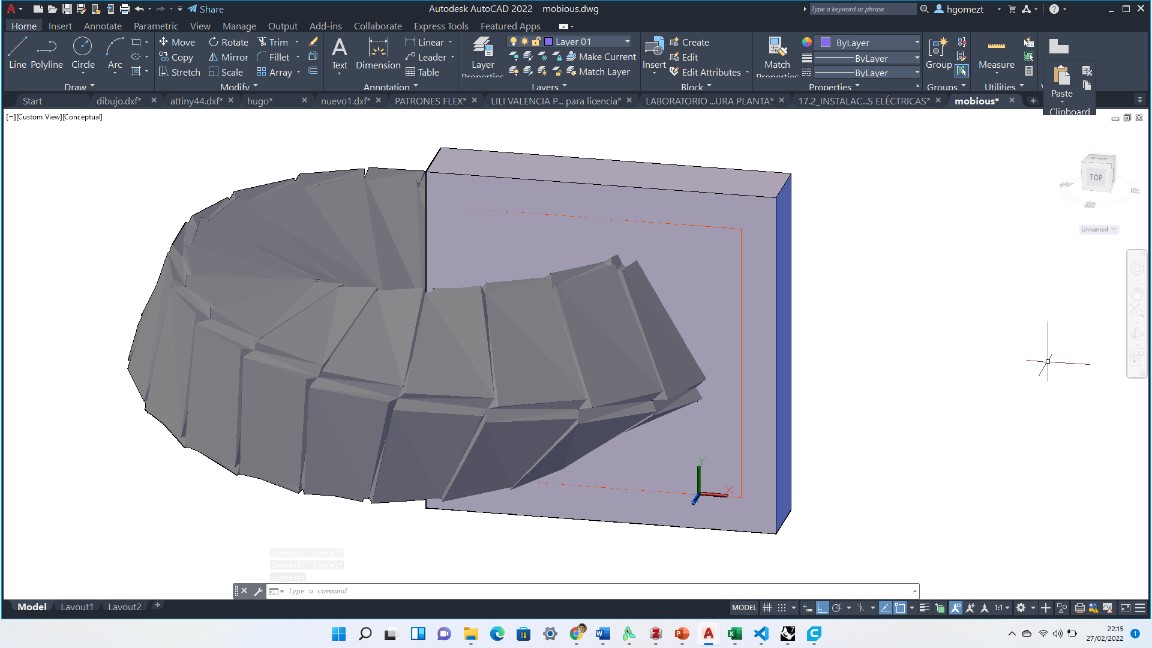
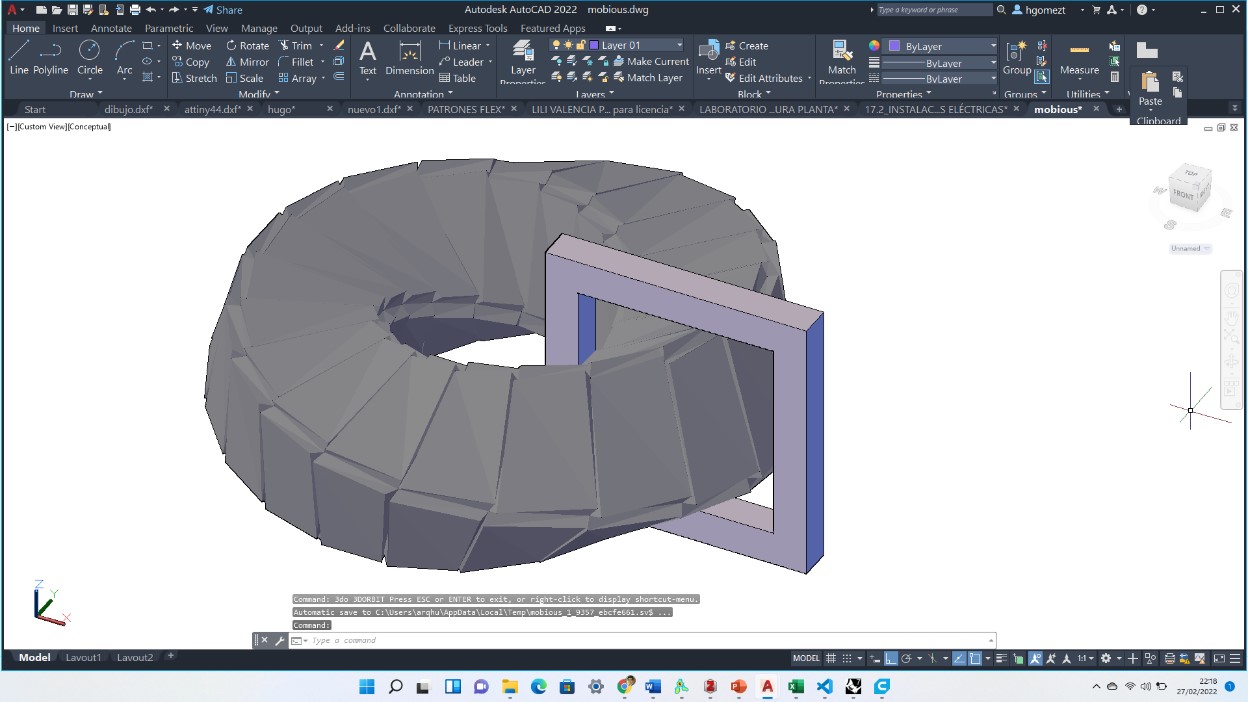
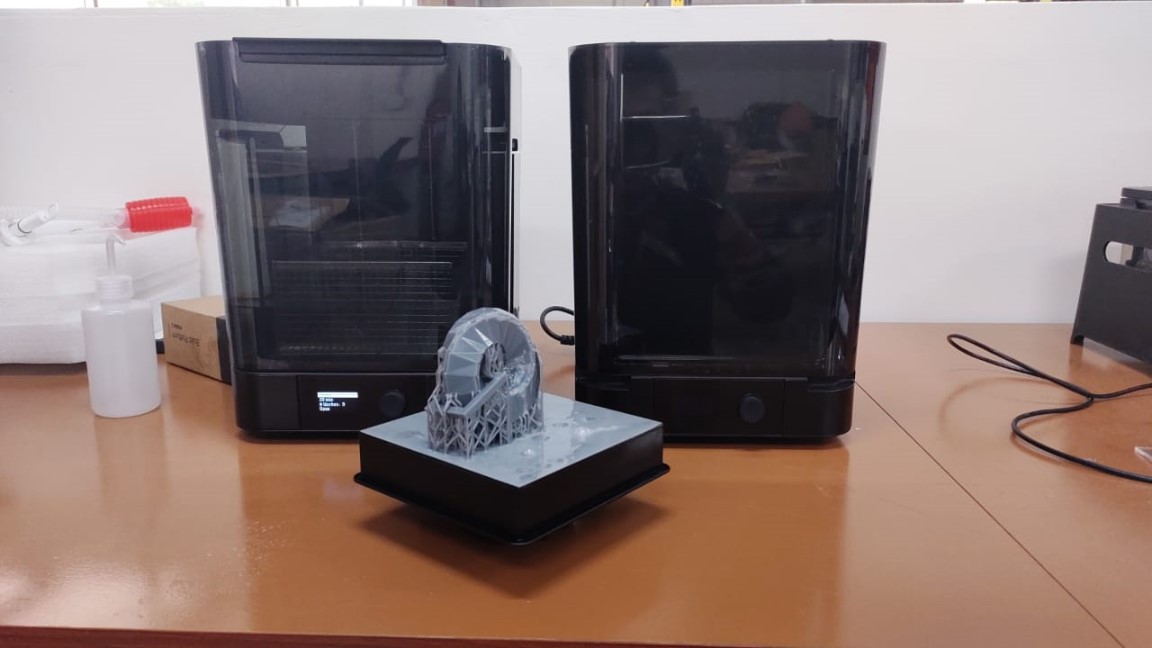
The print was made in Form2
 It is important to note that the object has a better finish if the curing and drying steps are followed.
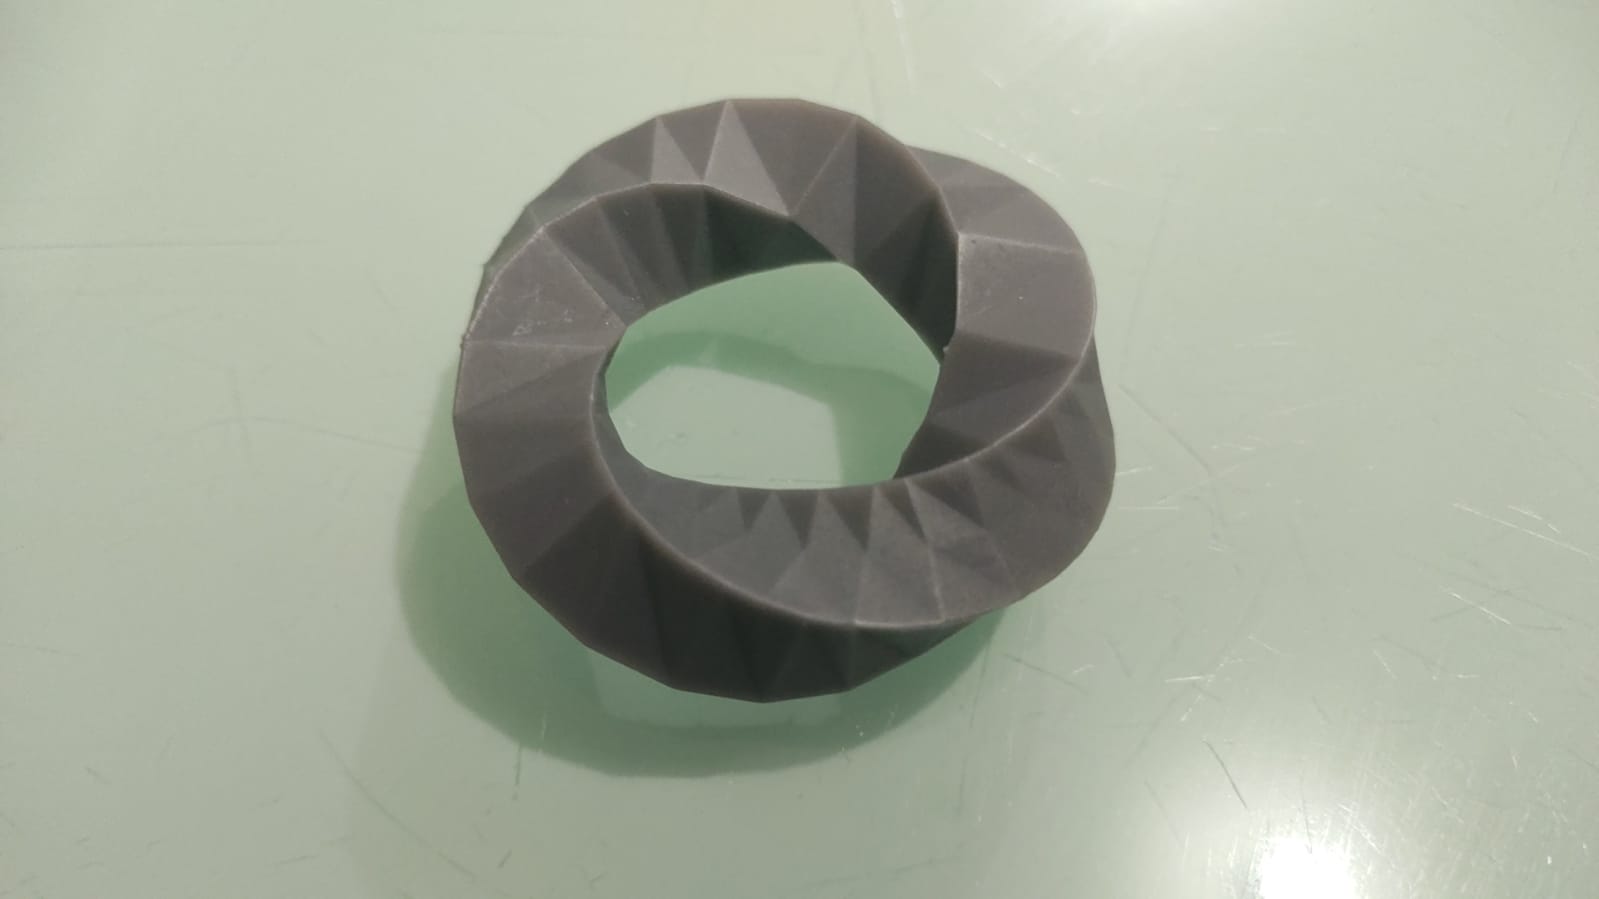
After this first experience, I decided to design my own Moebious Tape using Rhinoceros and Grasshooper software.
My opinion after using both printing technologies is that SLA printing is much more efficient than FDM printing, in both cases a post finishing process is required to remove traces from the supports.