13. Input Devices
This week: measure something: add a sensor to a microcontroller board that you have designed and read it. Group assignment: probe an input device’s analog levels and digital signals
Building and Programming Another Board
Cliffnotes: several issues designing, milling, and building up this board; lots of troubleshooting–including a bad Attiny1614! A rare case of: it’s not me it’s you.
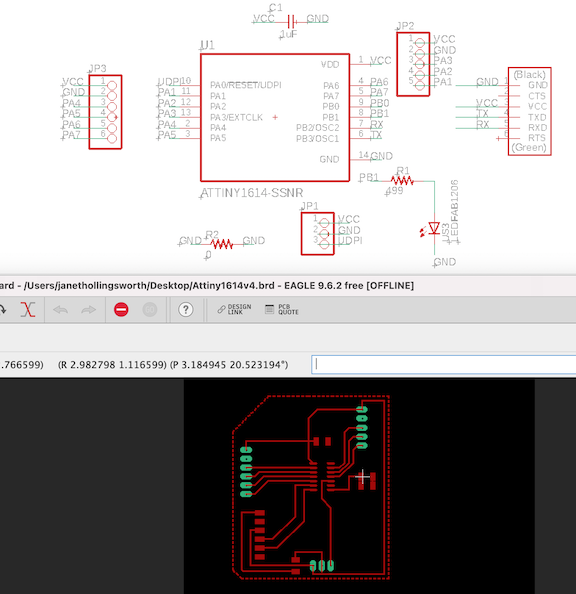
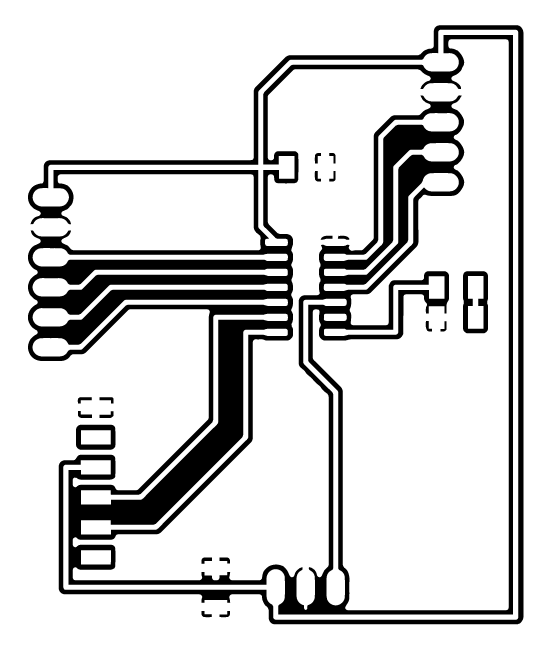
Created board in Eagle (ground pour) using the Attiny1614 microprocessor with lots of breakout pins for future versatility:
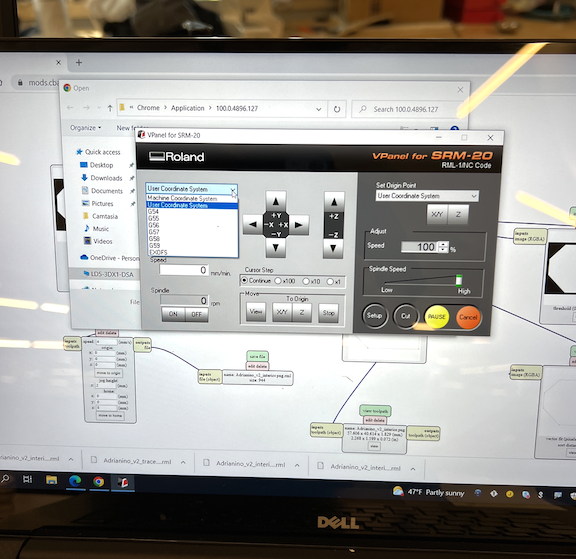
Used Mods to create the traces and outline paths (design files linked at bottom). Remembering how to zero x y z on the mill:
Z-depth issues in the mill–troubleshooting by leveling the spoil board:
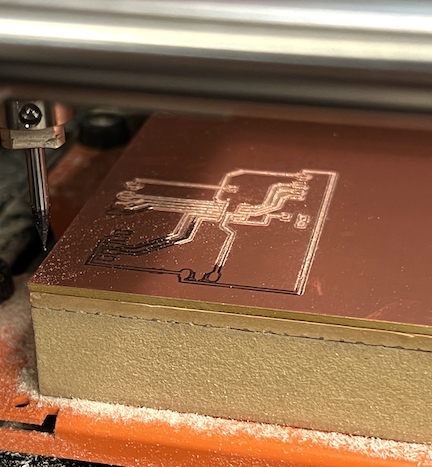
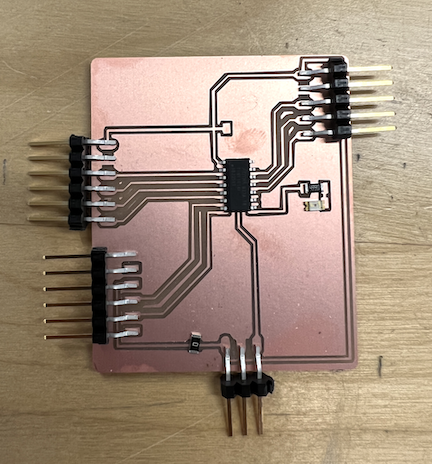
Got the board milled; laying out the components for reference:
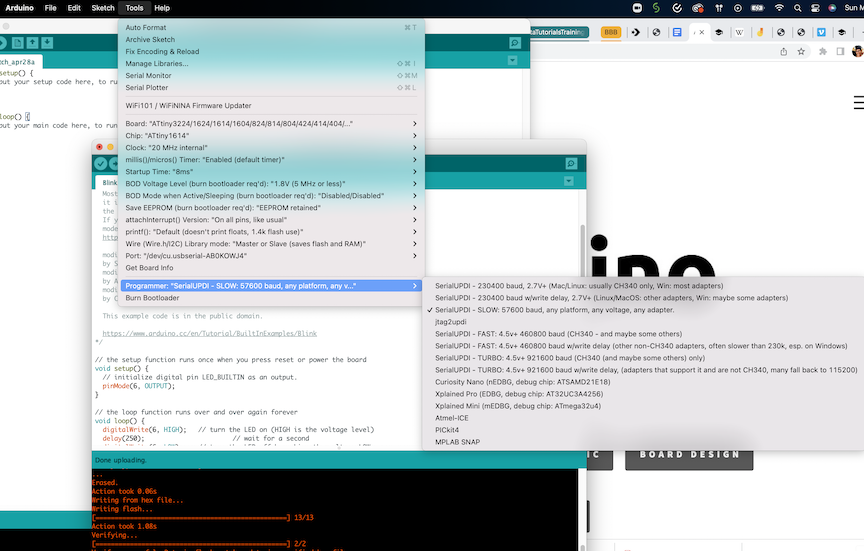
Loading JSON board manager: http://drazzy.com/package_drazzy.com_index.json and setting up the right Programmer settings in Arduino:
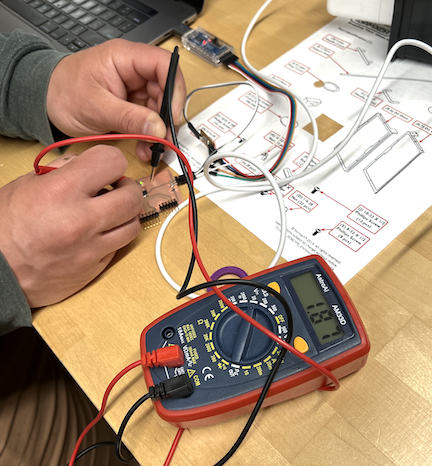
Weirdness with the board; Troubleshooting tracing voltage with the multimeter–there was a strange V drop across the Attiny1614 (the LED was always on… it was weird):
Being such a nube, I was hesitant to think it was really a bad component; but I rebuilt a new board with new components and voila! A working, blinking board that can now be used for input/output devices. Used a UPDI programmer and FTDI component to connect to the board. A video showcasing the Blink function in Arduino (pin 8 on the attiny1614 and pinout 6 in Arduino):
Blinking my Attiny1614 Board with Arduino IDE by me on Vimeo.
Going further: using my ATTINY1614 board to work with a Sound Detector and control an LED based on high sound triggering LED to stop blinking:
Using a Sound Detector Input and LED Output by me on Vimeo.
Reference Shoutout
- Adrian Torres documentation
Arduino Code used to Blink ATTINY1614
// the setup function runs once when you press reset or power the board
void setup() {
  // initialize digital pin LED_BUILTIN as an output.
  pinMode(6, OUTPUT);
}

// the loop function runs over and over again forever
void loop() {
  digitalWrite(6, HIGH);   // turn the LED on (HIGH is the voltage level)
  delay(250);                       // wait for a second
  digitalWrite(6, LOW);    // turn the LED off by making the voltage LOW
  delay(250);                       // wait for a second
}