9. Embedded programming
Group assignment: compare the performance and development workflows for other architectures
Individual assignment: read the data sheet for your microcontroller use your programmer to program your board to do something extra credit: try other programming languages and development environments
Research
This week was the first time that I heard of embedded programming, so I did some prior research to understand what embedded programming is and what its purpose is.
Embedded programming involves the process of programming microcontrollers (MCUs) to design softwares or others. This type of programming is useful to design and program a unique MCU for a device that does not operate in full-scale or conventional methods such as large scale laptops or other devices.
Data Sheet for MCU
Before starting with this weeks assignment, I first learned how to read the data sheet for the MCU. The MCU available in our lab was Attiny 1614, which is similar to but different from Attiny 44 that others frequently use.
A big difference between Attiny 44 and Attiny 1614 is that Attiny 44 requires an ISP while an Attiny 1614 can be used using UPDI interface.
From the data sheet, I was able to observe electrical specifications, pin definitions, and hardware implementation examples in the context of the MCU.
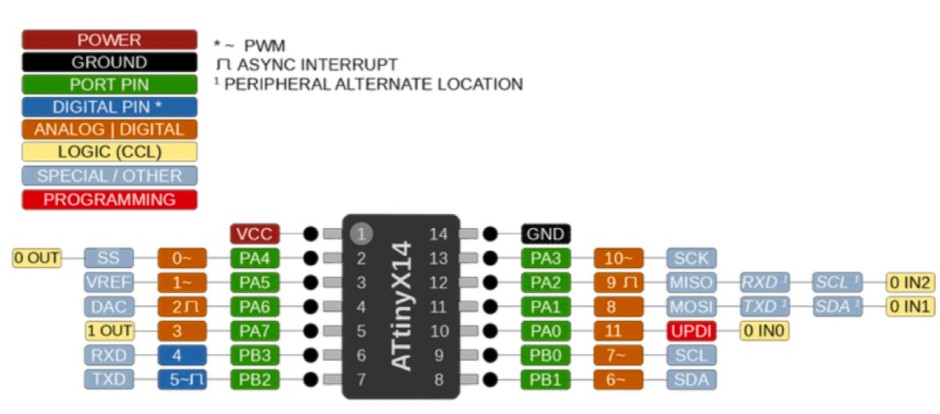 The importance of this pinout is that it documents the pins that connects to specific components. The color code detailed in the legend in the top left corner in the image describes the function of the transmitted signal, such as programming, VCC (voltage at the common collector which supplies voltage), or GND (ground which is the reference point for signals in which the voltage is 0). By looking at this pinout, I was able to design my schematics for my PCB.
Compare to other architectures
I did not have a group since I was the only student taking the Fab Academy course at BOLD Lab Seoul. Therefore, I did not have other group members’ architecture to compare workflows with.
Programming
For this week, I had to program my board. Again, I used Arduino IDE and used most of its example codes to make changes and upload the code. A programming that I had done in the previous week was to turn on and off the blue LED by using button as an input.
I went to Arduino and opened the example code for buttons. Then, I looked at the data sheet and the pins on my board and changed the constants to set the pin numbers for button (input) and LED (output) to be applied for the code. By looking at pinout, I was able to find that the button was at pin 10 and that the LED was at pin 6.

const int buttonPin = 10; // the number of the pushbutton pin
const int ledPin = 6; // the number of the LED pin
int buttonState = 0;
void setup() {
// initialize the LED pin as an output:
pinMode(ledPin, OUTPUT);
// initialize the pushbutton pin as an input:
pinMode(buttonPin, INPUT);
}
void loop() {
// read the state of the pushbutton value:
buttonState = digitalRead(buttonPin);
// check if the pushbutton is pressed. If it is, the buttonState is HIGH:
if (buttonState == HIGH) {
// turn LED on:
digitalWrite(ledPin, HIGH);
} else {
// turn LED off:
digitalWrite(ledPin, LOW);
}
}
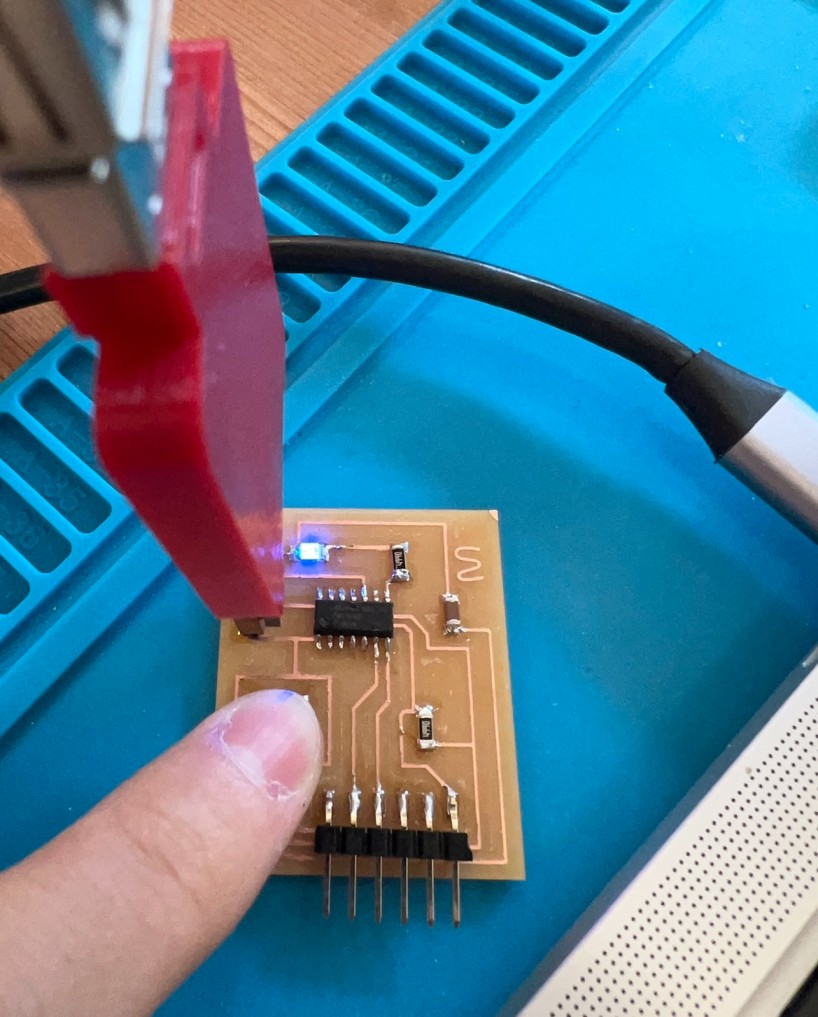
The blue LED light image is also shown below!
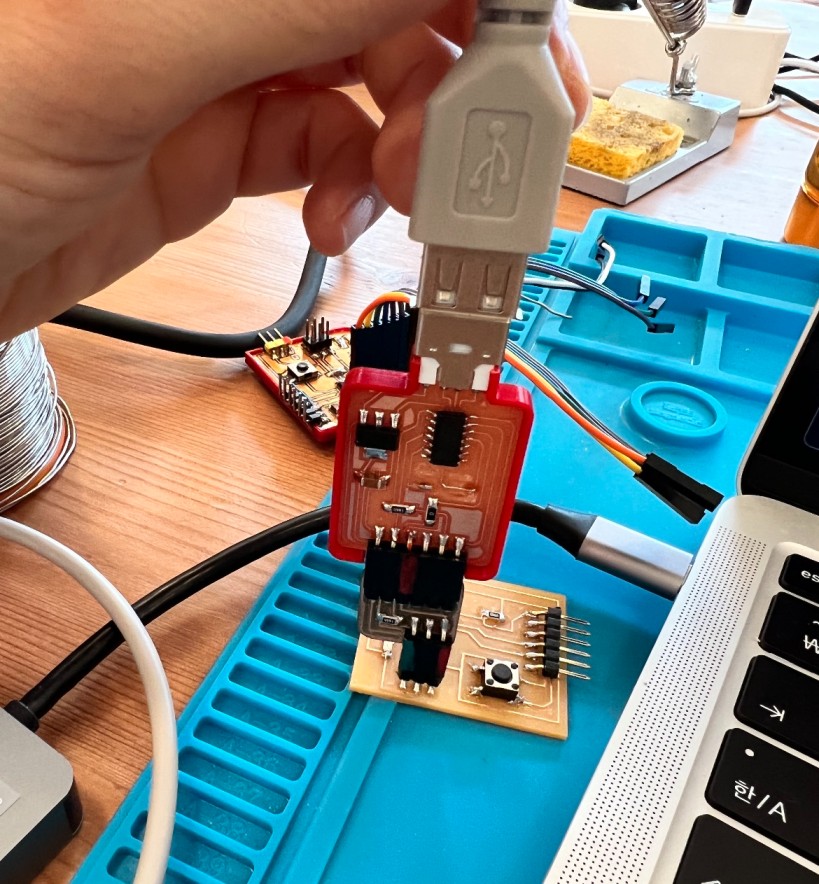
Then, I connected the board to the SAMD11C connector and plugged into my laptop using a USB adaptor since I only had a C-type plug.
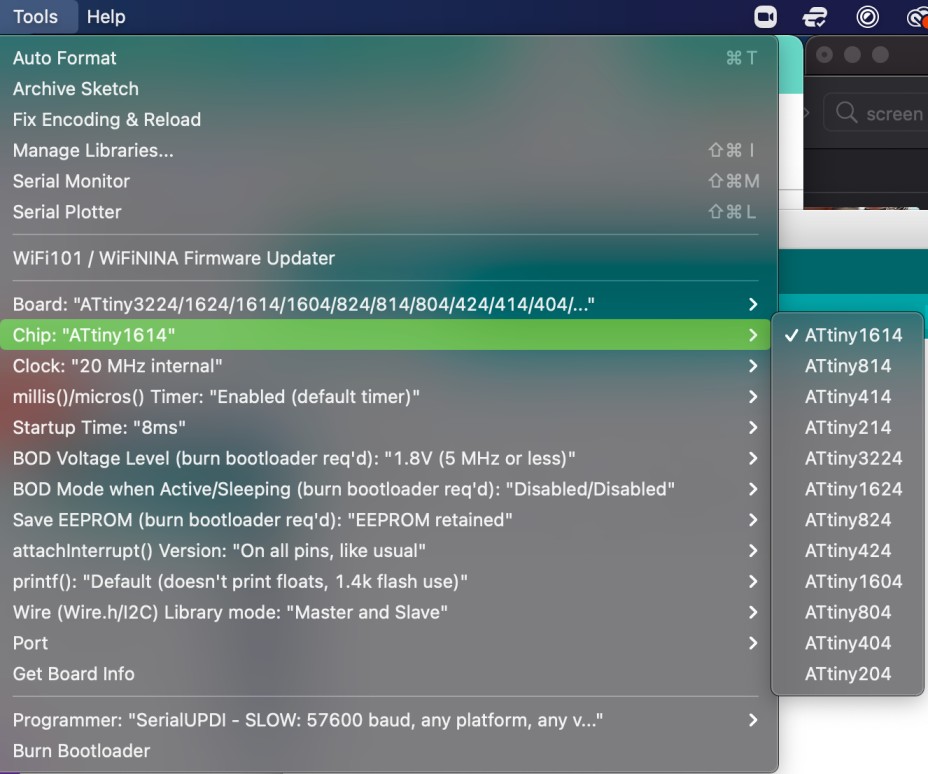
For the libraries, I already had megaTiny core (which was used for this week) and Adafruit (used for different week) downloaded. For megaTiny core, I could not find the library when I went to “manage libraries” so I used this link.
- megaTiny Core Installation Link
After that, I uploaded the code. I made sure that the board and chip was selected and then burned bootloader to program! I finally pressed the upload button in the code page to run the program.
 Here is an image of the LED successfully turned on!
Troubles
Though I am not sure why my laptop did not recognize the board, the board did not automatically appear in Arduino. Therefore, I went to system information to check the name of the board before checking the board and chip settings on Arduino!