10. Molding and casting
This week’s molding and casting experiment
Assignments
Group Assignment
  review the safety data sheets for each of your molding and casting materials,
     then make and compare test casts with each of them
     [Link to Group Assignment](https://fabacademy.org/2022/labs/barcelona/students/barcelona-group-assignment/assignments/week09-molding/molding-and-casting/)
Individual Assignment
  design a mold around the stock and tooling that you'll be using,
     mill it (rough cut + (at least) three-axis finish cut),
     and use it to cast parts

     Evaluated on:
         Linked to the group assignment page and reflected on your individual page what you have learned
         Reviewed the safety data sheets for each of your molding and casting materials, then made and compared test casts with each of them
         Documented how you designed your 3D mould and created your rough and finish toolpaths for machining, including machine settings
         Shown how you made your mould and cast the parts
         Described problems and how you fixed them
         #Included your design files and ‘hero shot’ of the mould and the final object

“If you want to build a ship, don’t drum up the men to gather wood, divide the work and give orders. Instead, teach them to yearn for the vast and endless sea.” Antoine St Exupery
Calcots Field Trip
Reflections
This week we learned about molding and casting, a complete maker universe unto itself. A comment during recitation on combining 50’s style machines for making with digital fabrication made me think of the Dave Gingery series of maker material and Lindsay Publications. He shows how to make an entire machine shop from scratch, starting with the aluminum and steel castings and going up from there.
I can now make a lot of things from plywood, but not the plywood itself. I started wondering where does all this plywood come from in a fabcity? Valduara makes flat plywood size panels by laminating together 25 mm thick boards they mill from the forest there.
Which brought up the question: What are the primary production/raw material flows in a fabcity? What could that look like? Biorefineries is one answer.
Iowa Biorefinery - Making all the precursors for the chemicals needed by a modern economy chemicals out of plants instead of oil

Because the cellulose feedstock for a biorefinery is bulky, it is not easy to ship to just a few regional/national biorefineries - Iowa State University’s Biomass Energy Conversion lab argues that birorefineries are inherently local and distributed. And biomaterials made from chemicals feedstocks are 10 to 100 times more valuable than fuels made from biomass.
Link to ISU biorefinery presentation
ISU has identified 7 processes from which most chemicals can be made:
- Pyrolysis
- Gasification
- Anaerobic Digestion
- Fermentation
- Supercritical Fluids
- Alcohol Production
- Biodiesel production
Needed a floor protector for my house, laser cut one out of heavy scrap cardboard instead of buying one. Local production!
Overview
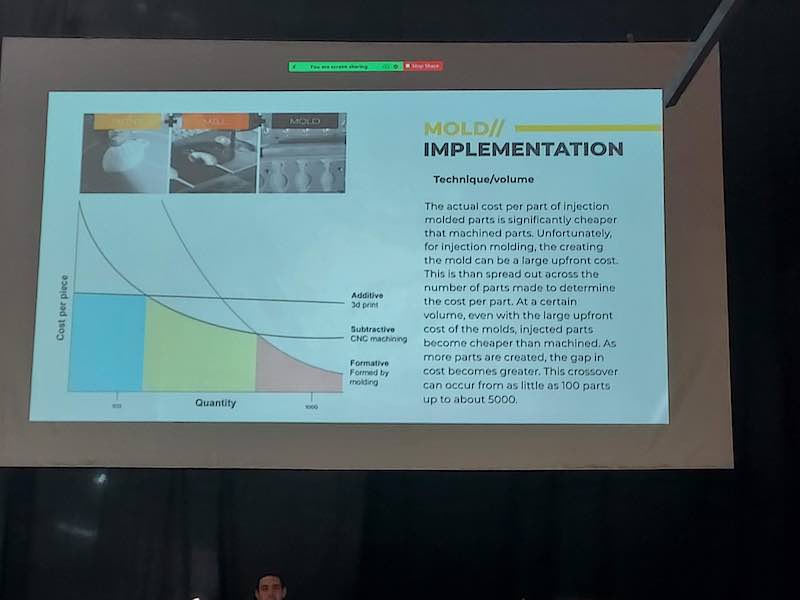
This is a great graphic from Eduardo’s presentation that shows the cost per part of different digital fabrication techniques. According to this graph, for 100’s of parts, 3d printing is cheaper, for 100’s to 1000’s cnc is cheaper, for high 100’s to 1000’s, molding and casting is cheaper.
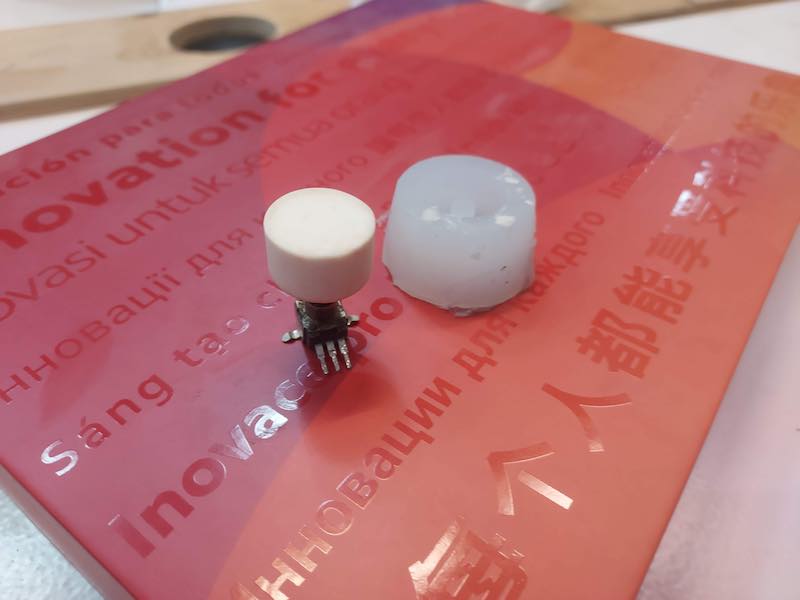 Hero Shot - Finished guitar volume knob and mold
Molding and Casting process
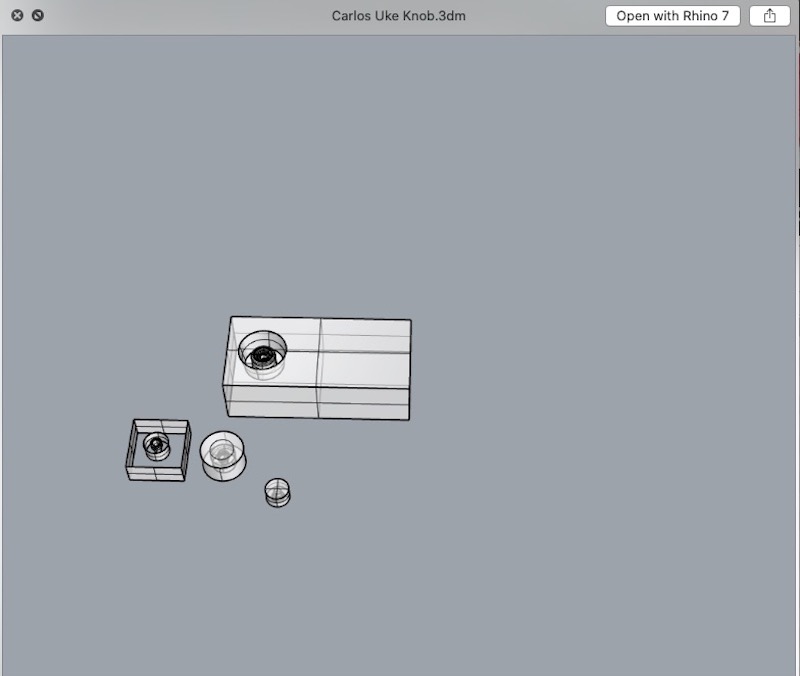
I decided to make a knob for a Carlos Santana electric ukulele I am designing (hard object, soft material for mold, hard material to make the mold).
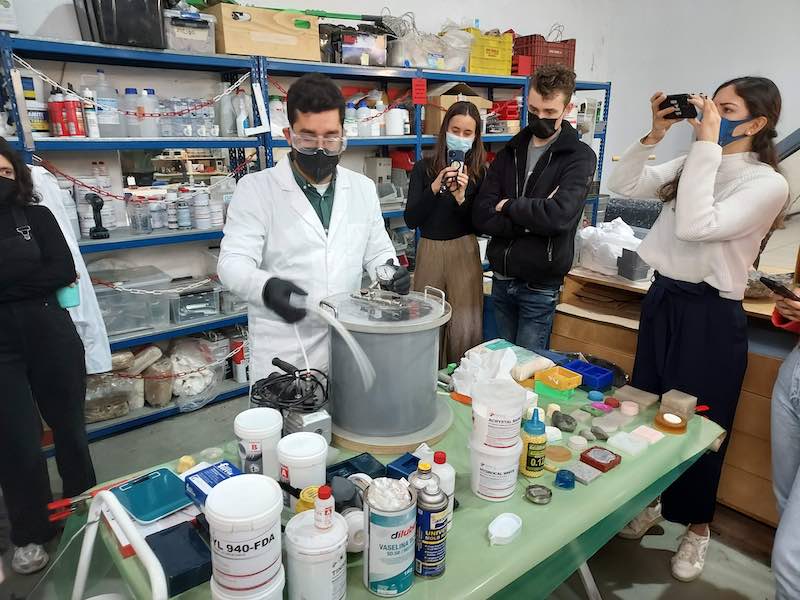 Eduardo demonstrates the molding and casting process including using a vacuum pump to minimize bubbles. Bubbles are the bane of casting with many of the materials we use in Fabacademy.
Work flow for cutting molds with the Roland mill
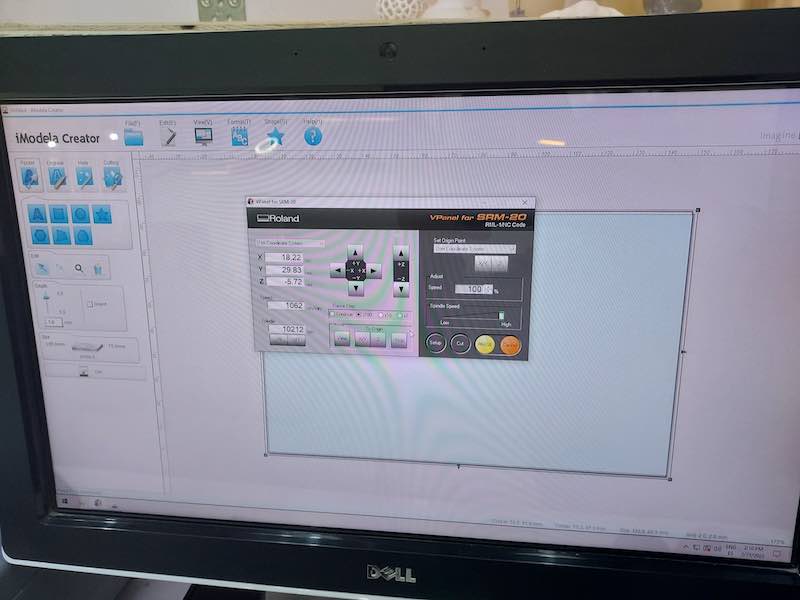
Here is the process I used to make my mold and cast my object. I used the Roland SRM 20 mill.
1) Design the object in 3D using Rhino.
2) Export an STL file
3) Import the STL into the Roland Modella software
4) Set material, bit and cutting parameters
- The material I used is molding wax.
- You need to do separate files for the rough 2.5 d cut and the finish 3d cut. The rough cut is 2.5 d with what look a bit like contour lines. It takes a lot of material away. The final cut is full 3-d milling, and takes just enough material away to turn the countour levels of the rough cut into smooth gradients.
- I used the same 3.175 mm bit flat end 4 flute bit for both rough and finish cuts
5) Export gcode and upload it to Fabacademy Cloud
6) Download gcode from Fabacademy Cloud into computer connected to the Roland SRM 20
7) Set the xyz origin. Set the XY origin at the lower left corner, the Z origin is at teh surface of the wax. Sometimes the wax needs to be smoothed with a leve cut across the XY plane at teh surface. The wax was fixed to the bed of the mill with double-sided tape.
8) Load the gcode into the Vpanel software for the SRM 20
9) Execute the gcode for rough cut, then execute the gcode for finish cut.
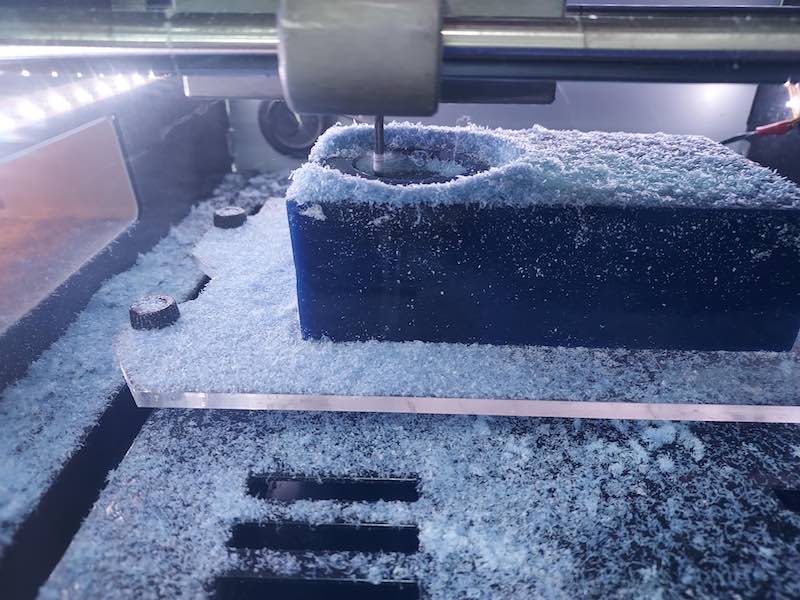
Milling the positive mold using modeling wax
The final object I am making is a hard object. So I need a soft mold to pour the final object into. To make the soft mold, I need to make a hard mold which I milled out of wax.
Milling the wax mold requires two passes - the first pas is a 2.5 d cut, like a topo map. The second pass is a full 3d cut that smooths 2.5 d first cut.
The process is detailed in the photo and videos below
Rhino File
_
2.5 d rough cut video Milling my mold video - rough cut video
3d final cut video Milling my mold - final cut video
Molds ready for filling

Making the negative image mold from silicone
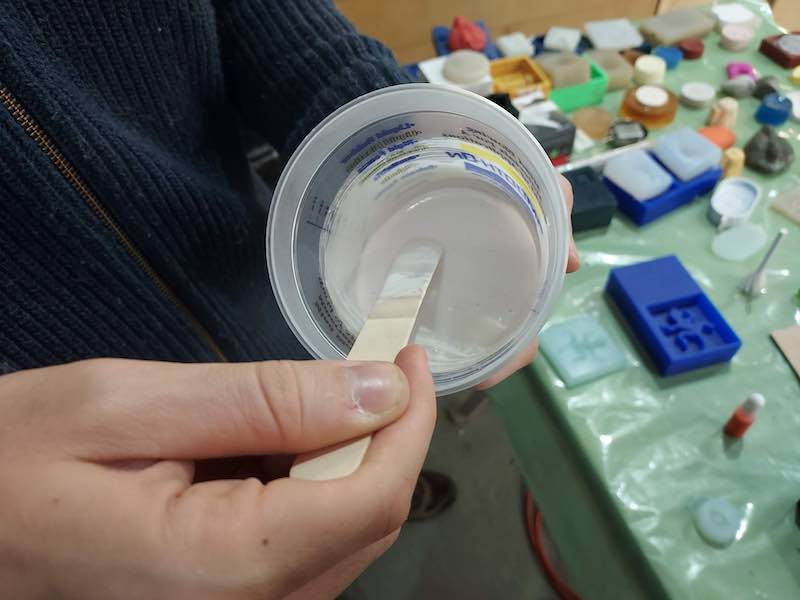
Mixing the casting material for the negative image mold

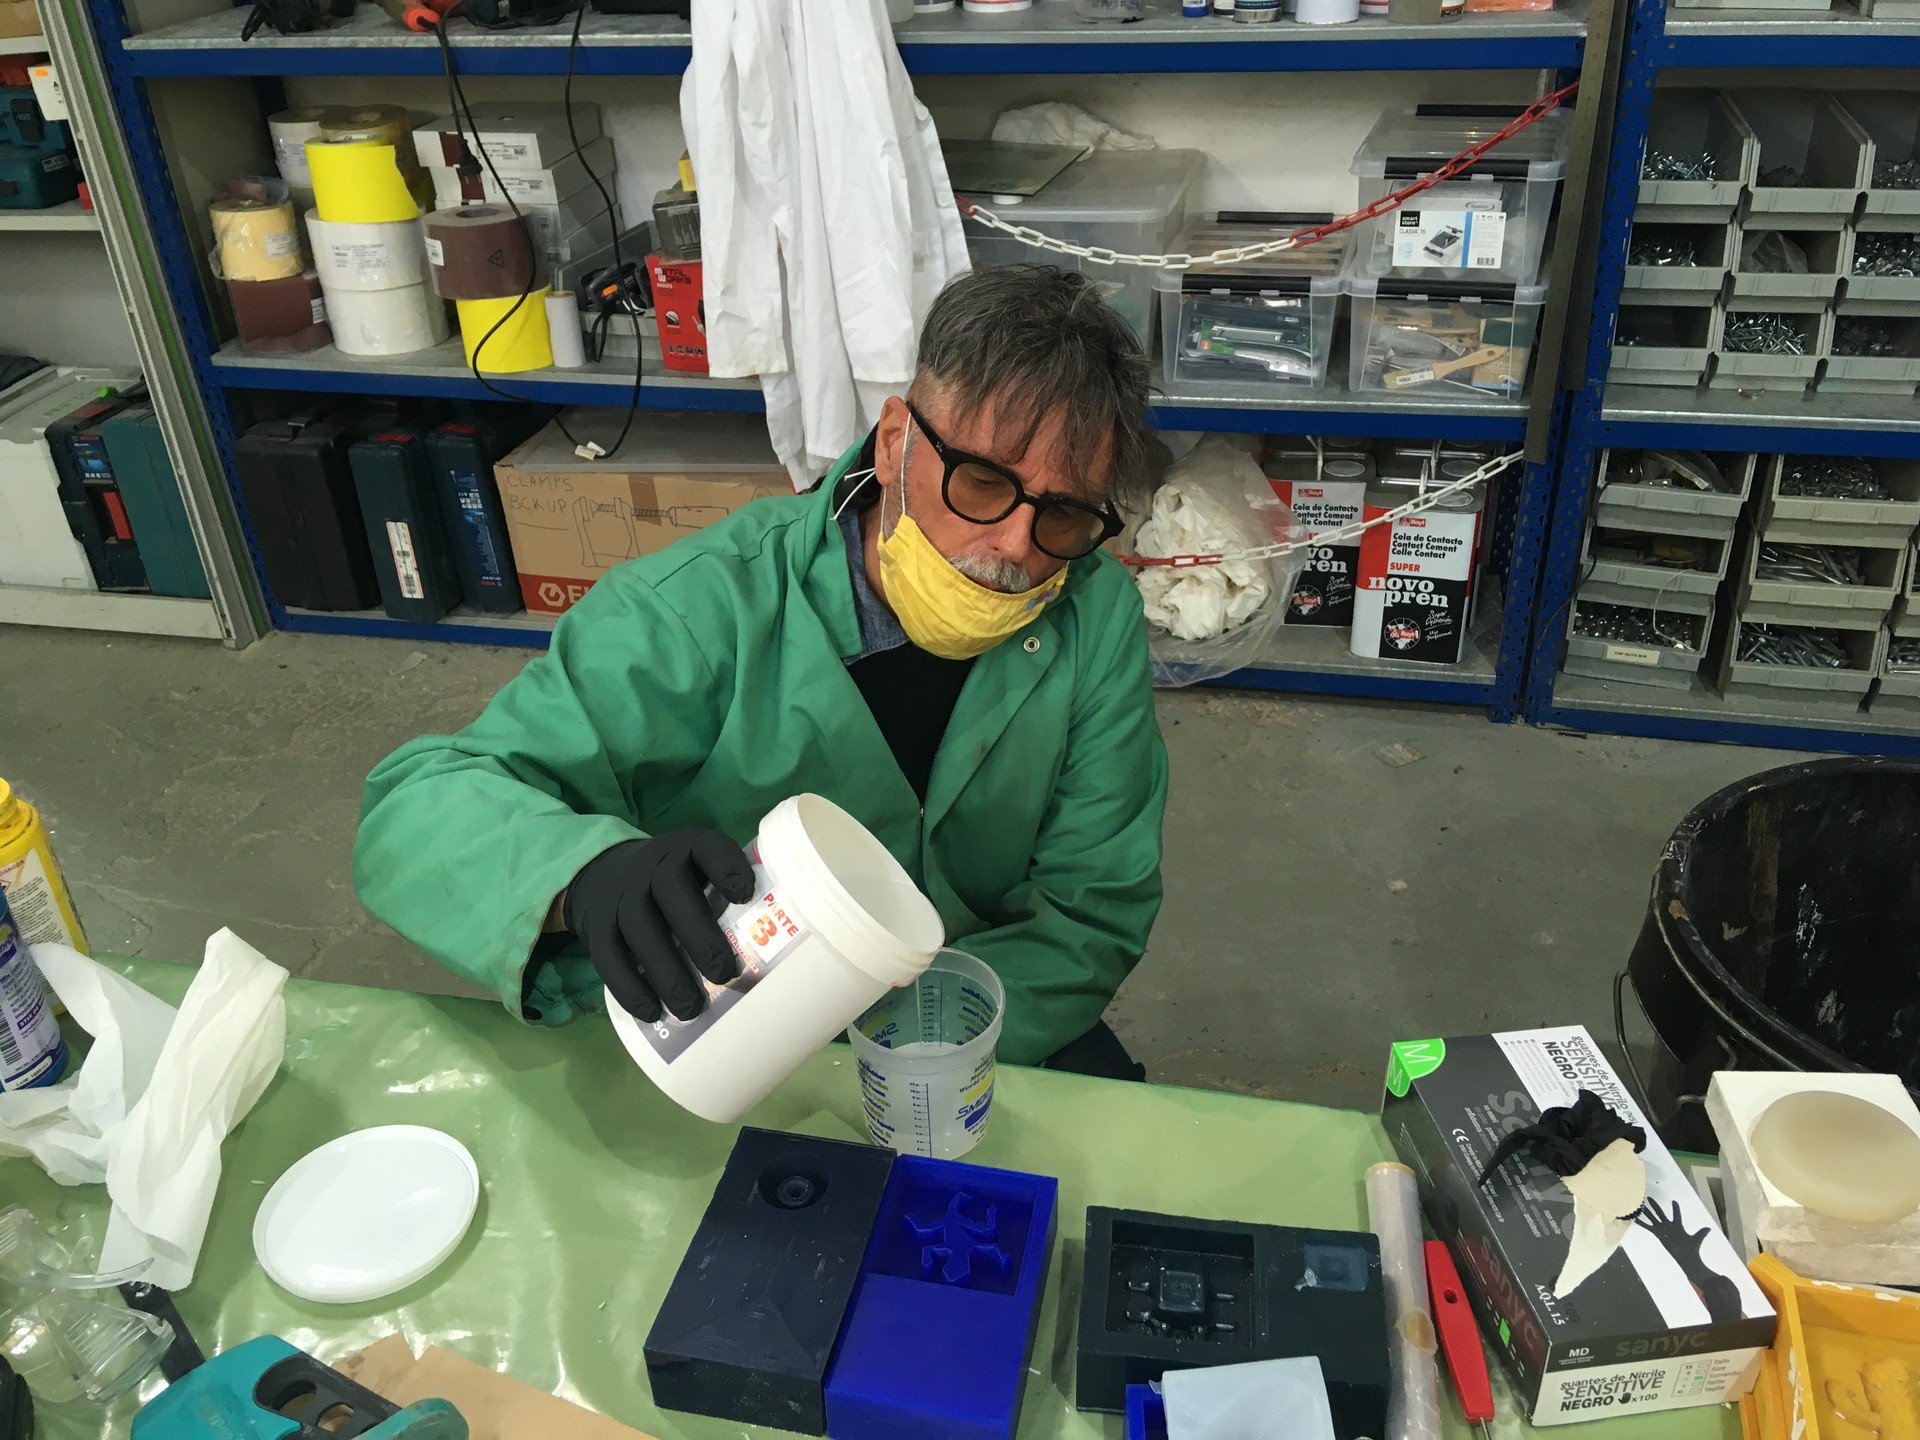
It is important for the casting material to be well mixed or it may not set properly
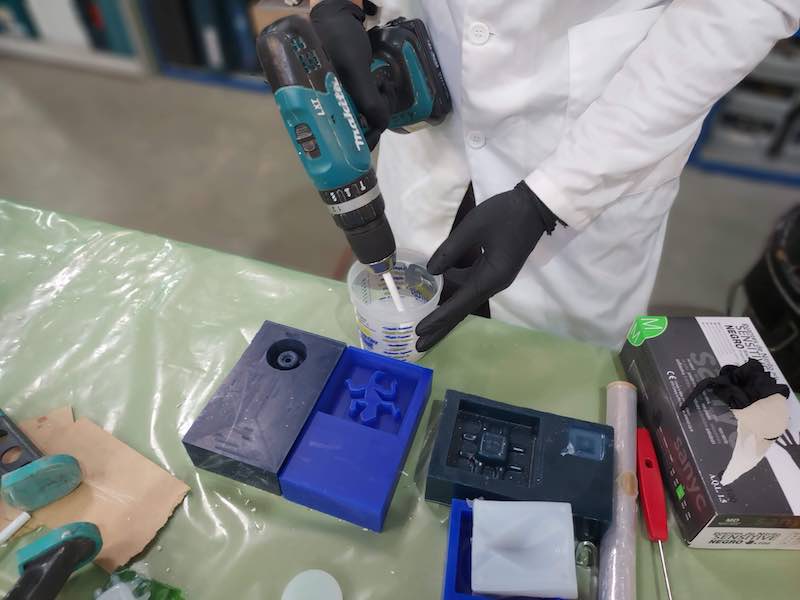
Here’s a video of Adai pouring the mixed casting material
It’s important to pour the casting material to minimize bubble formation
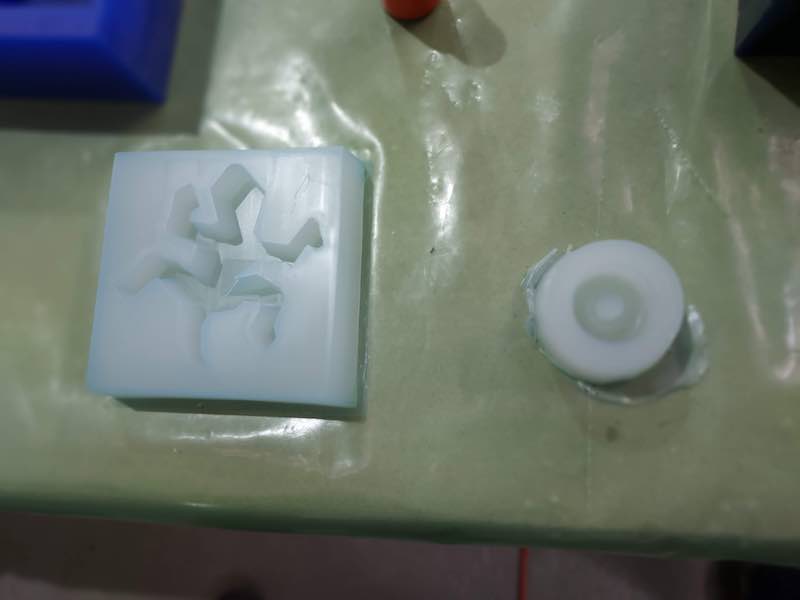
Here’s what flexible negative mold look like
We used an oven set at 40 degrees C to hasten the curing of the silicone.
Casting the positive image into the mold from the previous step.
We poured a thin stream from on high into a corner and let the mold fill gradually to avoid bubbles.
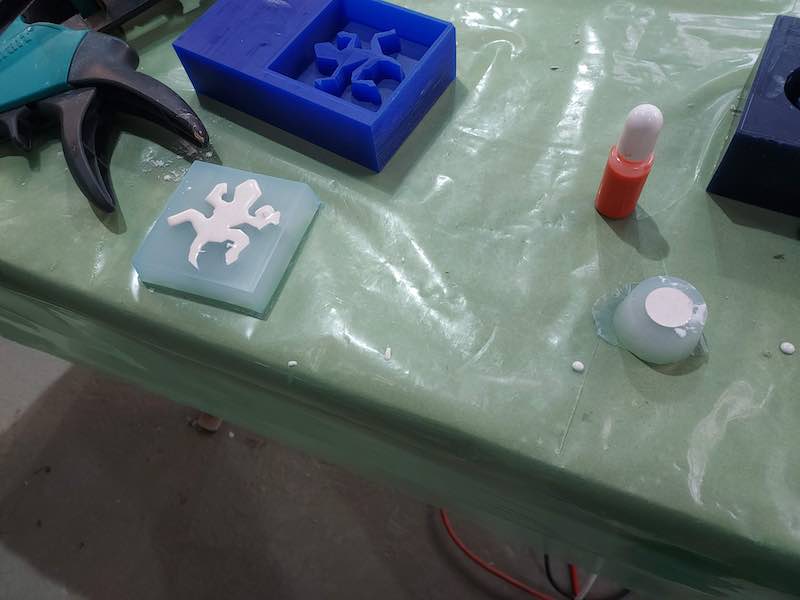
The Final Part!
Success!
Other Projects
I am working on a mold for making carob bars for my son with the image of his dog on it.
Group Project
Group project is linked here
Files
This file is 3.9 mb, so I hosted it off site Guitar volume knob rhino file
This file is too big to host on my repository