3. Cutting machines
Overview of the week
This week we learned about laser cutting and vinyl cutting machines. Prior to this week, I had been using my weekly assignments as a sort of blog for my experience at Fabacademy BCN. After showing my work at the regional share, I could see that that was getting cumbersome and confusing. This week I am starting separate blogs pages on this web site here.
I continued learning to use Fusion and began the learning curve on Rhino.
I made some progress on my final project. I bought a toaster oven from a scrap dealer, a solar panel off Wallapop, and some meters from Amazon. I made a solar oven from a car windshield protector and tested it on the roof.
Assigment and assessment overview
Assignment:
group assignment:
characterize your lasercutter’s focus, power, speed, rate,
kerf, joint clearance and types
individual assignment:
cut something on the vinylcutter
design, lasercut, and document a parametric construction kit,
accounting for the lasercutter kerf,
which can be assembled in multiple ways,
and for extra credit include elements that aren’t flat
Assesment:
Learning outcomes
Demonstrate and describe parametric 2D modelling processes
Identify and explain processes involved in using the laser cutter.
Develop, evaluate and construct the parametric construction kit
Identify and explain processes involved in using the vinyl cutter.
Have you answered these questions?
linked to the group assignment page
Explained how you parametrically designed your files
Documented how you made your press-fit kit
Documented how you made your vinyl cutting
Included your original design files
Included your hero shots
Discussion of Assignment
Group Assignment:
The group assignment web site is
Specs for the Fablab BCN laser cutters:
Manufacturer: Trotec
Power: 100 watts
Power range: 0-100
Max speed:
Speed range: 0-1
Kerf: 0.15 mm
Frequency range: 0 - 20,0000
Bed size small format machine:
Bed size large format machine: 300 x 600 mm
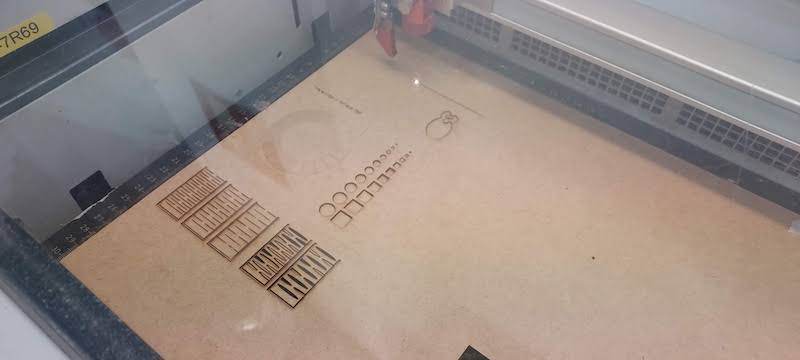
For the group assignment, we got an overview of the laser cutters at the Fablab from Josef and then went to work making a couple of items to try out settings on the laser cutter and to learn the work flow of the laser cutter.
Here’s the laser cutter workflow:
Design something in 2d
Export it as a file that can be read by Rhino, DXF recommended
Upload the file to the IAAC cloud
https://cloud.iaac.net:5001/
Download the file from the IAAC cloud to a computer connected to the device you want to use
Open the file with Rhino on the computer connected to the cutter
Check dimensions etc of the file to make sure it is ok
Set up colors/layers to control cut order and group things that need the same laser settings
Do file -> Print to the cutter job control software
Look at the file in the job cntrol software to make sure the dimensions etc are ok
Set up the proper cut order using colors/layers
Set up the focus and start position for the laser
Check to see if the ventilation is on
Click on the run icon
It’s good to do a small test cut to verify that the speed, power, and frequency settings are appropriate for the material you are using.
I exported the file I created using Fusion as a dxf as recommended. On import into Rhino, it was the wrong size. All the info on layers and colors was lost. So I had to resize it in Rhino and set up layers and colors in Rhino and speed, power and frequency in the job control software for the laser. May be worthwhile learning Rhino, Josef says that it is better at 2d design than Fusion.
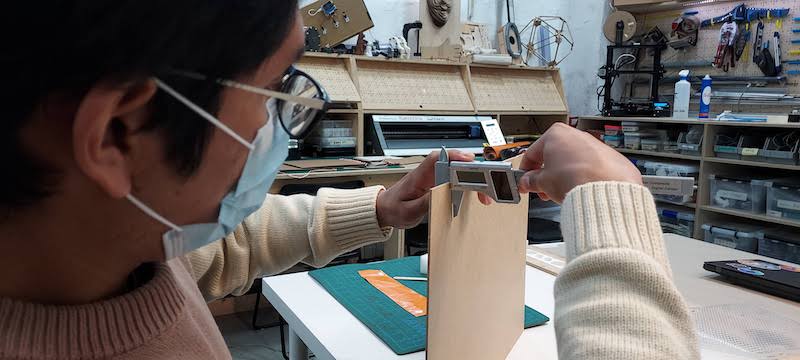
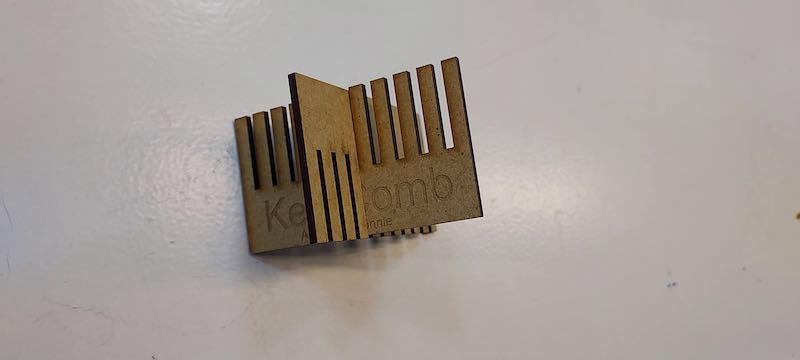
We divided the group assignement into teams of two. Angel and I designed a kerf comb and a box with 12 strips cut out of it to measure the kerf of the laser cutter. I designed the kerf comb with a parameter for material thickness so that it could be used with different materials. I set the spacing of the comb slots to change at .05 mm increments. I tried to use parameters to make the incremental changes to the slots but it doesn’t seem that you can do recursion with Fusion parameters. I looked on line and asked Josef and it seems that it is not possible. So in the end I drew that part of it manually.

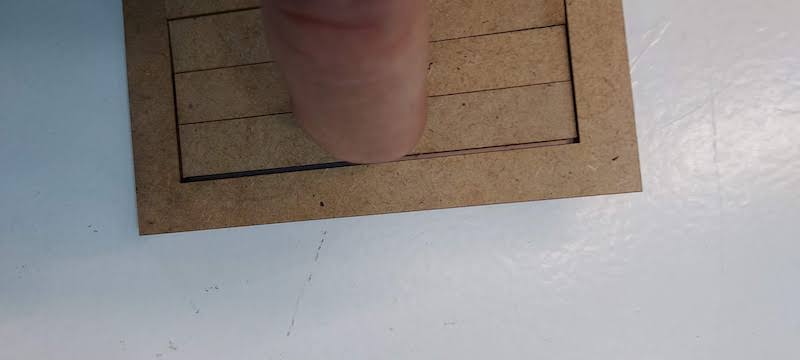
We found that the laser kerf is 0.15 mm.
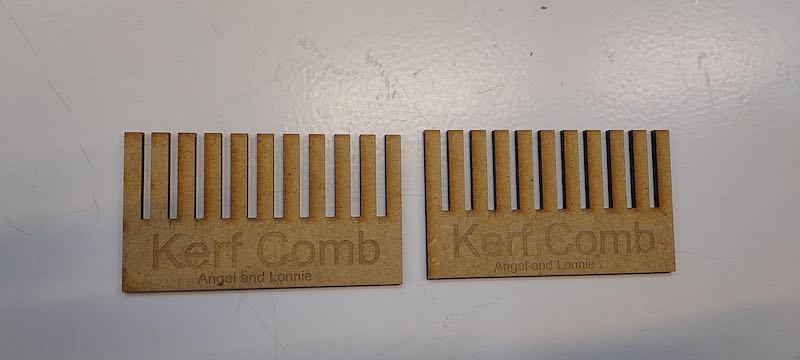
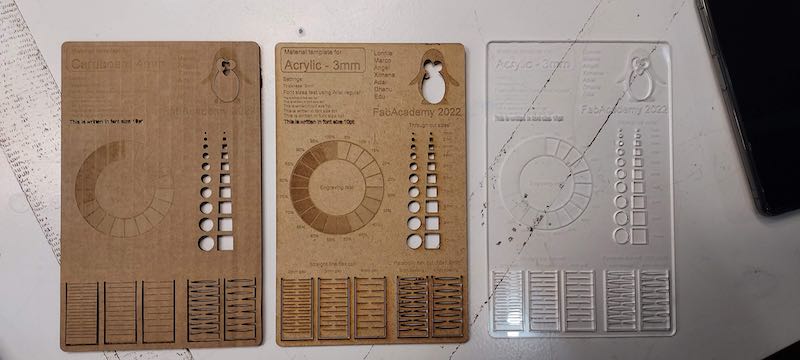
We cut an MDF sample board
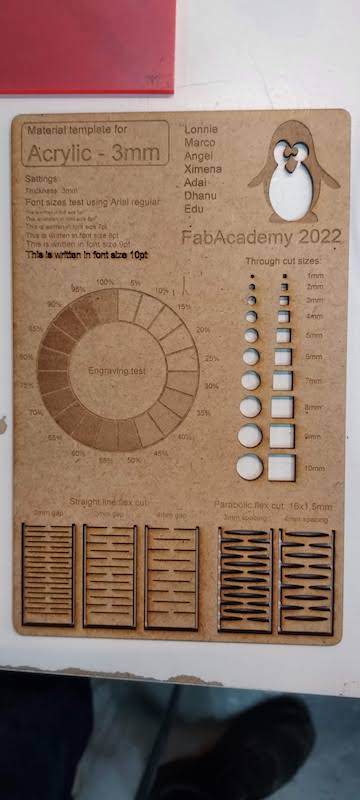
Josef pointed out that the extra burn marks on some of the letters is related to the curviness of the letters - curvy letters cause the machine to slow down due to acceleration changes and burn more.
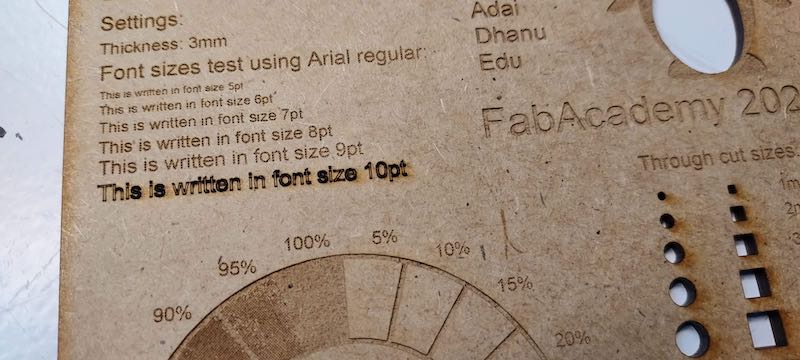
Josef suggested that slowing down the speed of the laser would minize the variation in letter burn.
Here are the other boards using different materials made by others in our group:
Making Something in the Vinyl Cutter
The process for setting up the Cameo vinyl cutter is:
Put some vinyl in the machine
1. Turn the machine on
2. Line the vinyl up with the Cameo rollers
3. Release the roller tension lever
4. insert the vinyl in the machine and reset the tension lever
5. Upload the file, make sure it includes a weeding box, and set the parameter for blade length, speed, force and number of passes. The cameo automatically sets the blade length to what you select in software.
6. click send, the cut begins
7. When the cut is over, weed it
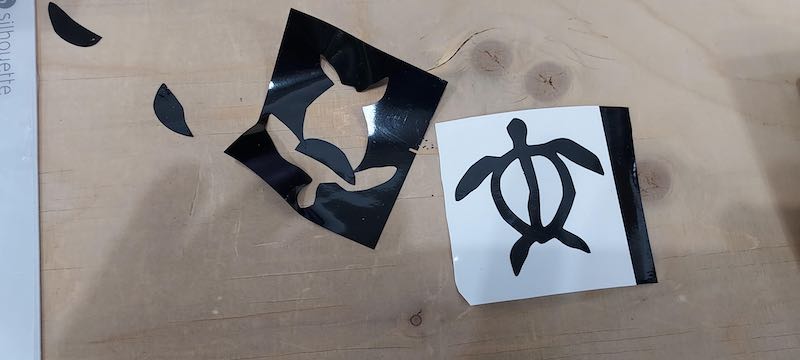
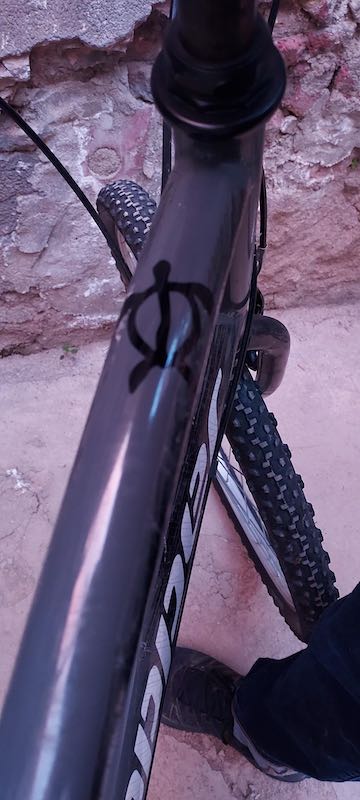
I made honu stckers for my bike and computer. Honu is the Hawaiian word for turtle. In Hawaiian mythology, turtles are associated with transcendence and with wayfinding. It is an image with a lot of significance for me and connects me to roots in Hawaii.
I found an image on line and modified it for use with the laser cutter (turned bitmap into vector and resized it) using Inkscape.
I found a honu jpg image on line here from an Etsy site.
I used Inkscape and Librecad to modify the file I downloaded. I used the Path -> Trace Bitmap command in Inkscape to trace the outline and change it into a vector file. I had to play around with parameters a bit to get the edges crisp. I exported the file as an SVG in Inkscape and converted it to dxf with Librecad.
I’ve done this before and it all went pretty smoothly. One confusing thing is that Inkscape puts the vector image it creates right on top of the existing bitmap image - it seems like nothing happened. You need to select the vector image and move it a bit to see that there are actually two images after the Trace Bitmap command is executed.
Honu jpeg image

Honu DXF image in Librecad

Honu vinyl cut sticker
Honu sticker on my bike
Second sticker - different color and size
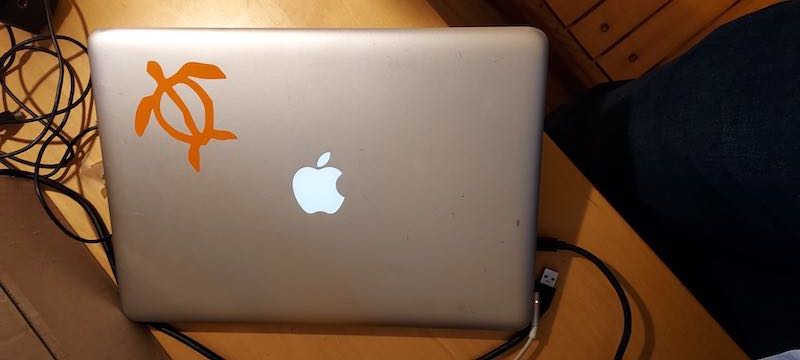
I made a second sticker to cover my MAC logo as a small protest against consumerism. It wouldn’t stick to my computer or my notebook or even a piece of paper. The pieces of the sticker just fell off when I transferred them. Perhaps the glue is old on the vinyl I used? Will try again on a new piece of vinyl.
Reflections on Vinyl cutting
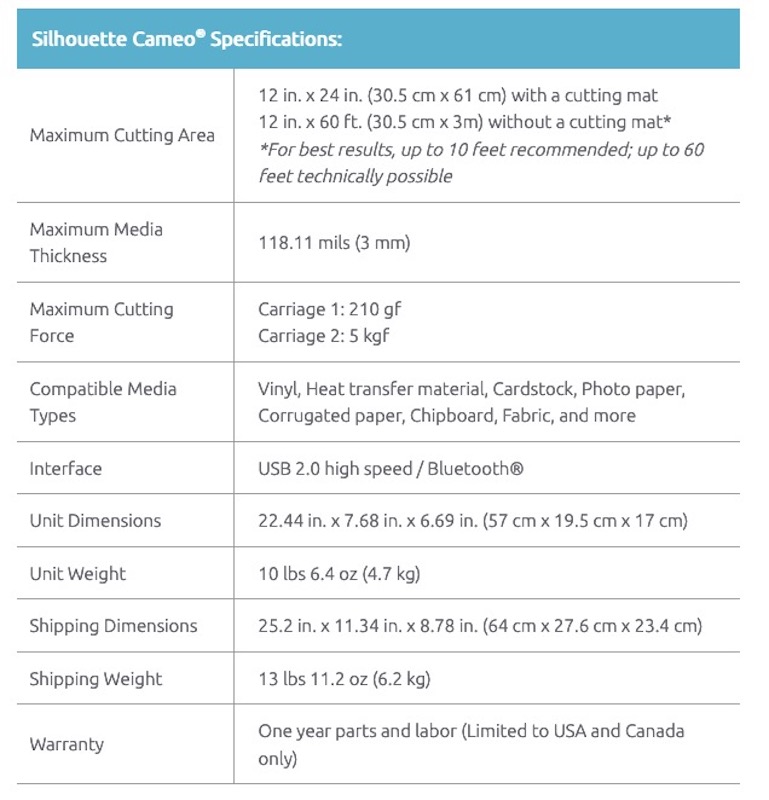
I used the Sihouette Cameo vinyl cutter. The parameters of the vinyl cutter are:
-
Blade Length - this is automatically set on the Cameo during during a the start of phase of a cut. The blade mechanism mechanically clicks through to the setting you selected in intializing the cut. Range is 1-10.
-
Speed - slower for more intricate cuts. Range 1-5
-
Force - how hard the cuttign blade is pushing down. Range 1 - 35
-
Passes - number of times the machine does the cut.
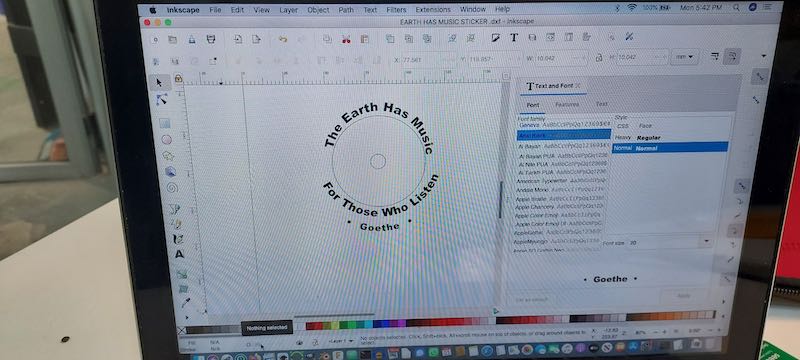
I found the recommended settings for shiny vinyl (Blade 1, Speed 5, Force 8, Passes 1) to be not strong enough - a test cut did not separate. The cameo has a test button that prints a small test cut. I changed the settings to Blade 4, Speed 5, Force 10, Passes 1 and the test and sticker cut and separated well. I tried a couple of different colors and sizes. Here’s a screenshot of the file in Inkscape.
Was interested to see that you can cut up to 3mm sheets of MDF, cardboard, and balsa with the Cameo.
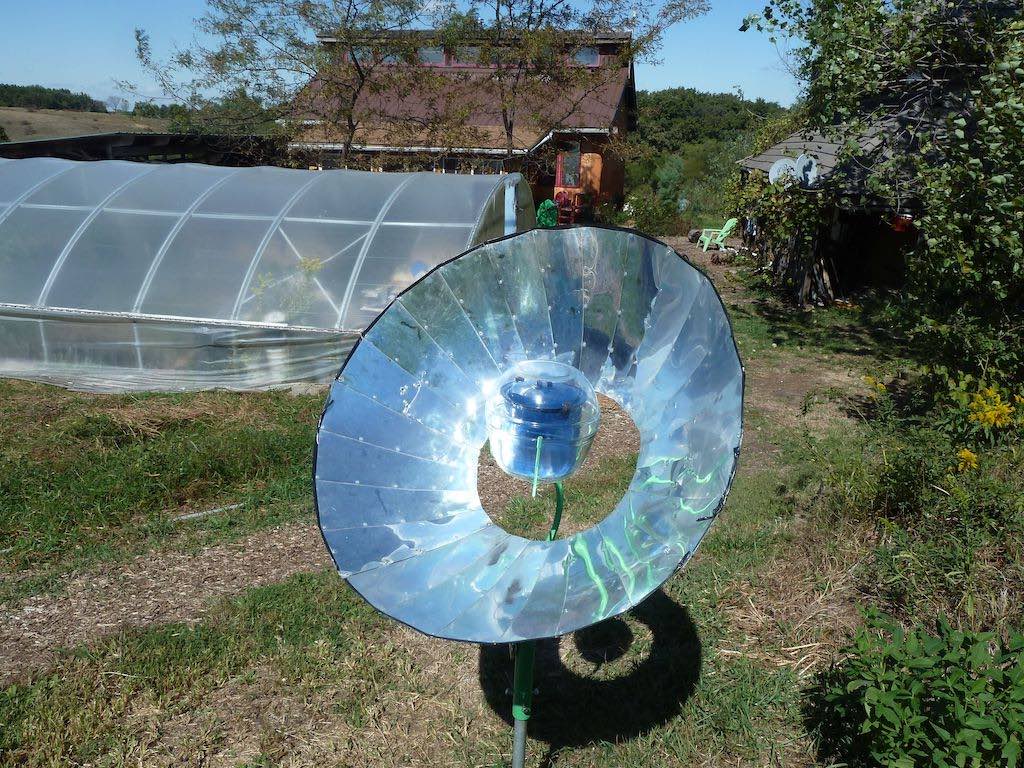
I did enough to meet the requirements of the assignment and need to catch up on other assignments so I will leave vinyl cutting for now but look forward to coming back to it again. Would like to try to cut reflective mylar and aluminum foil for reflectors for concentrating the sun’s rays like on this solar cooker:
Perhaps I could cut balsa parts for a recreational blimp design. The specs indicate that it can cut 3mm mdf, which I what I used in my laser cutting assignment. I’d like to try cutting 2.5 mm mdf with the Cameo.
Parametric Dome Construction Kit
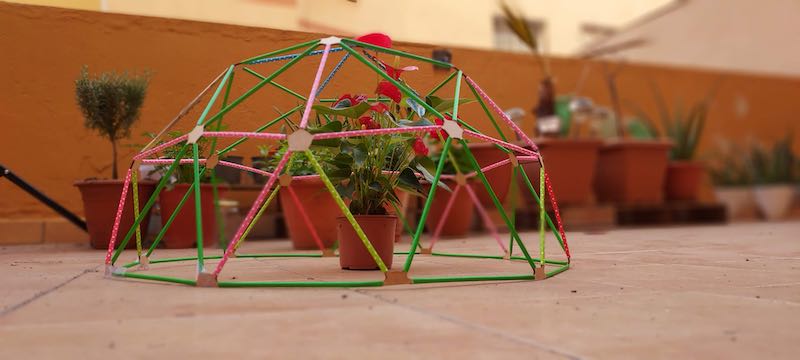
I’ve been fascinated by the elegant effciency of geodesic domes since hearing Buckminster FUller speak at the Maine Maritime Institute in 1979. Domes cover the most amount of area for the least amount of wall and roof surface are of any structure. I still have a copy of the 70’s era Dome Cookbook. I lived in a dome tent one winter in Hawaii. It was cheap to ship there, inexpensive to buy, and elegant way to provide shelter from the rains on the Big Island. I powered it with solar energy.
I used this assignment to better understand dome geometry and associated calcualtions for bulding them. They use spherical geometry - the three angles of a triangle do not add up to 180 degrees.
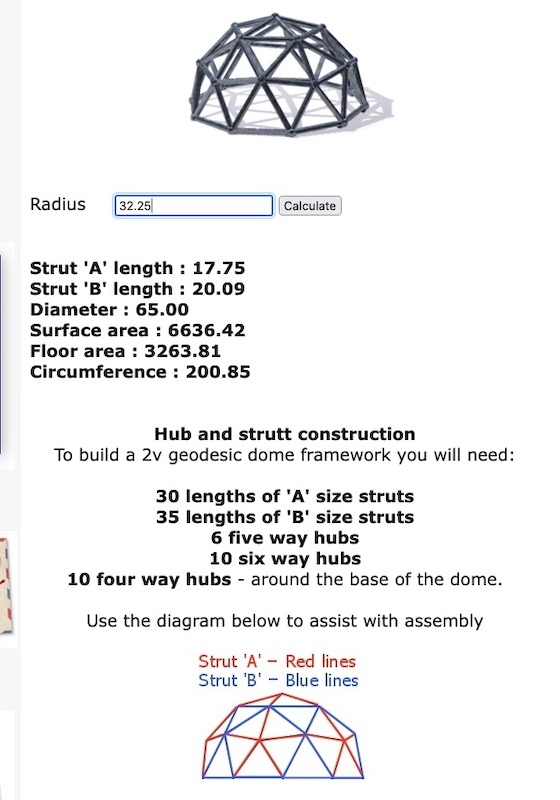
Domes start with a triangle. Geodesic domes are charcterized by frequency - the number of times a basic triangle is divided into smaller triangles. The higher the frequency, the more the dome resembles a sphere. Here is a great video that gave me the background on dome geometry and everything I needed to know to make the parts for a dome. I also found this web site useful in doing the calculations for the 2v dome I built with my kit.
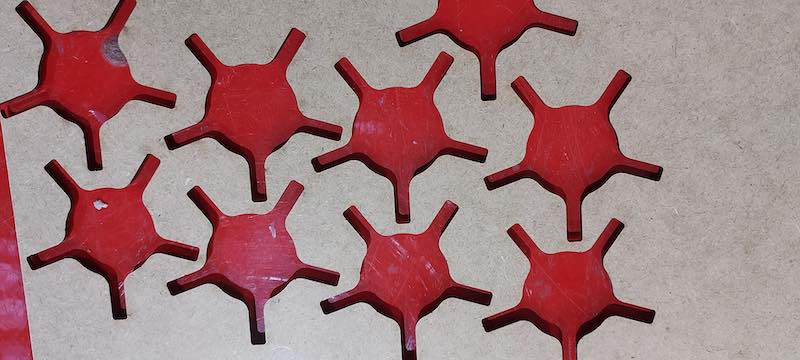
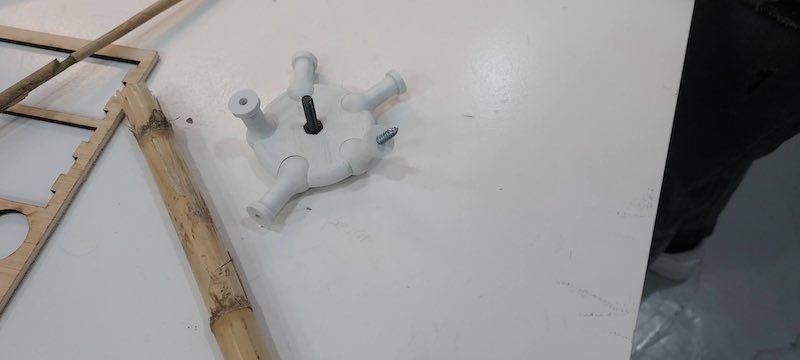
The frame of a dome is made of struts that are connected by hubs. All geodesic domes have just two kinds of hubs - 5 stub and 6 stub hubs. A 2v dome has just two different lengths of strut. The different lengths of strut allow the dome to bend inwards on itself. I used 20 cm soda straws from a chinese market. The shorter ones are 88% of the length of the longer ones. I cut them with the laser cutter.

Another goal of my kit is to figure out how to use natural unprocessed materials like bamboo, cane, and round wood limbs in dome construction. Cane is common in rural Catalunya and can be had in about the same diameter as the straws I was using. I cut sme cane to length with teh laser cutter and used it in the dome. I hope to build whole dome with cane. Cane is easily available in larger diameters and perhaps could be used to create larger domes. I plan to build some bigger hubs with my paramtetric design and add living hinges to them.
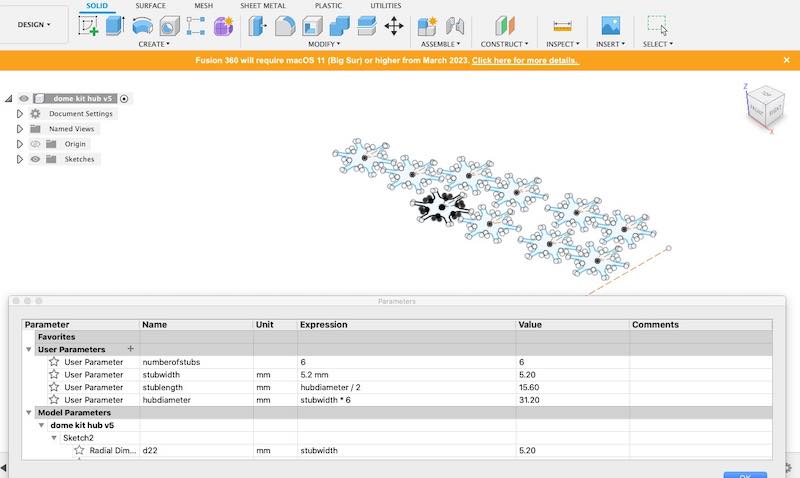
Parametric Hub Design Using Fusion
I did a parametric designs for the dome hubs using Fusion. The spreadsheet-like interface was easy for me to use.
I used Fusion to create a design for a simple hub that uses drinking straws for struts to experiment with building geodesic domes.
It turns out that all frequencies of geodesic domes use 5 and 6 stub hubs for the structure and 4 stub hubs where the dome connects to the ground, so I only needed to design 3 different hubs. The number of struts depends on the frequency of the dome - a 2 v dome only uses two different sized struts.
I continued to struggle with using Fusion to do simple 2 d designs. Josef recommended trying Rhino and I spent two weeks on and off tryign to get a download key for an evaluation version of Rhino. It never showed up in my email including my spam folder. Had to contact Mcneel to get the problem straightened out.
For my first build, I built a 2v dome - above are dimensions from a dome calculation tool.

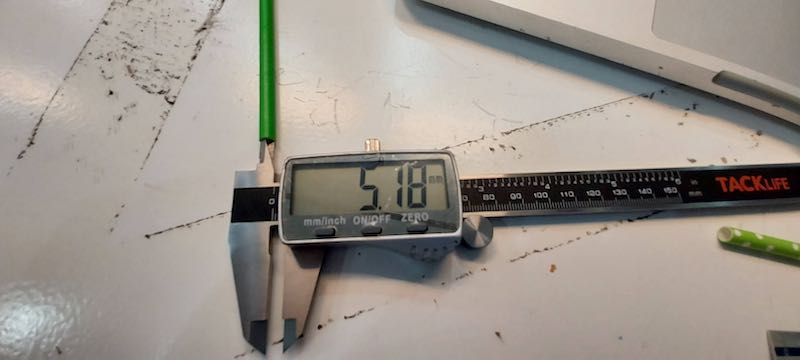
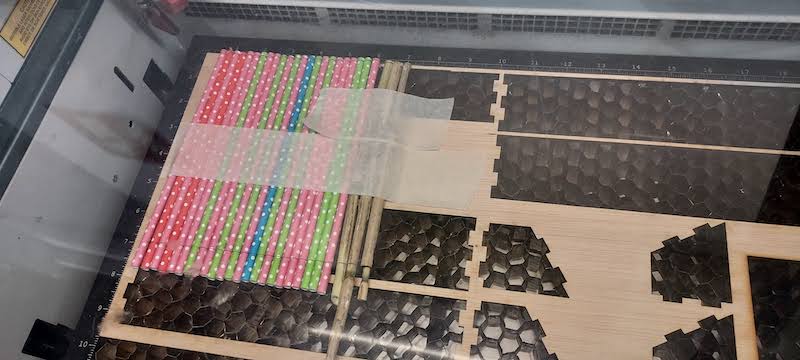
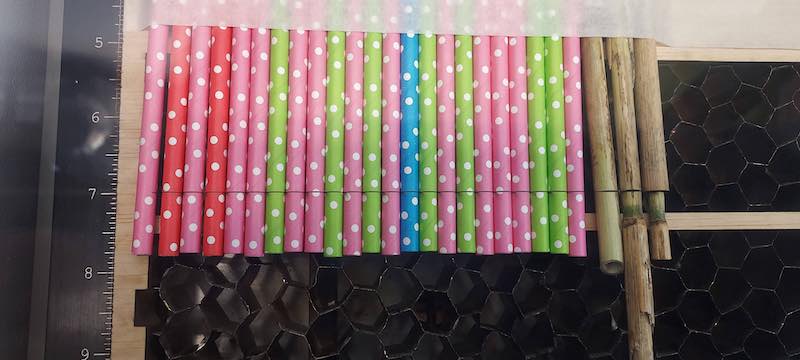
I used the length of the straws (20 cm long by 5.2 cm wide) for the longer strut. I cut the shorter struts with the laser cutter by taping them side by side to a board.
I cut a couple of pieces of cane (arundo donax) from a local river that are the same diameter as the straws. It is widely available in rural Catalunya. In version 2 I will use cane or small bamboo instead of straws and use the parametric model I developed here to make the appropriately sized hub. Would like to make full sized domes with local bamboo and simple hubs in Hawaii.
Future Work and Reflections
I’d like to make full size domes with bamboo using bigger versions of these hubs made of 8 mm ply and using living hinges on each stub. I could cut bamboo that is within 1 inch diameter and use the smallest diameter bamboo to set the stub width of the parameteric hub model I built. All other hub dimensions key off stub diameter.
In addition to learning about paramteric CAD, I learned a lot about how geodesic domes are designed and constructed. Buckminster Fuller is an influence in my thinkng and my work - I heard him speak at the Maine Maritime Academy around 1979. It has been a dream of mine to figure out geodesic dome geometry and it was thrilling to see this flimsy and light weight components create a strong structure due to dome geometry. I had to exeriment a bit to get a construction sequence that worked - what worked for me was to build the bottom first.
I initially tried to build the dome with the stubs in the same plane as the stub. I thought the flexbility of the straw might work to create the proper angles. But that didn’t work. Turns out the MDF can be folded/creased into a flexible joint. Josef suggested adding a living hinge to each stub - I look forward to imlementing this. This could make this design practical for bigger dmes requiring thicker plywood hubs.
It could be interesting to try and 3d print a geodesic dome in the air.
While I was working on the project I found out that Julia (an IAAC faculty member that works with school kids on fab based STEM learning) is working on 3-d printed hub designs so kids can use found materials or round wood directly from trees to make domes.
Parameteric Shaker Construction set # 2
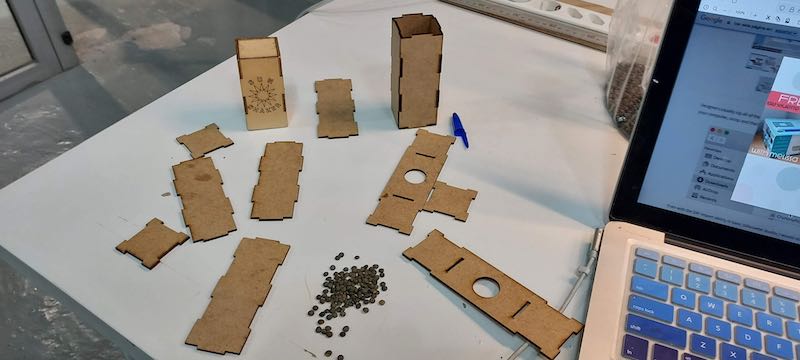
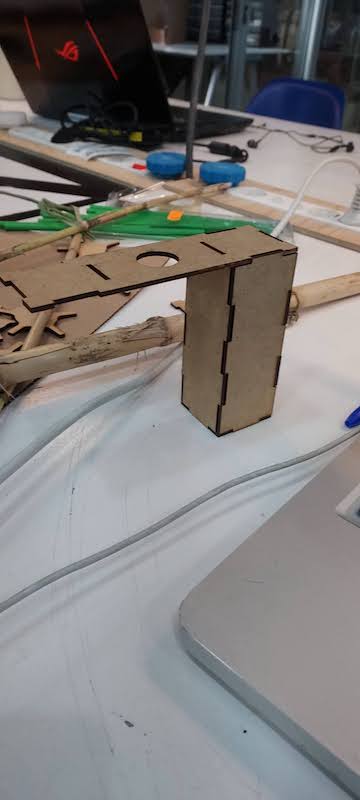
A shaker is a percusssion instrument featuring a hollow body filled with small object that creates a sound when it is shaken. I built a parameteric construction set to experiment with different ways building rectangular box shakers. These are finger joint boxes that can be connected in numerous ways to creat single or multiple shakers of various sizes.
I included the kerf as a parameter in Fusion so the boxes fit tight but be easy to disassemble.
Lots to say here but I already meet the requirements for this assignment with the previous project - I am behind on other documentation so I will quit here.
I filled the shakers with small french greem lentils and use them in jam sessions on the roof of iAAC.
Pasta Laser Cut
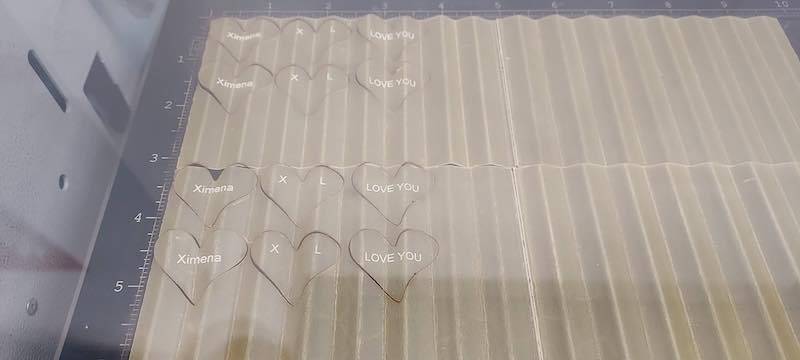

I cut some pasta shapes for Valentines day from lasagna noodles. I used the settings for 5 mm cardboard for cutting and raster of text. The first pass didnt go all the way through because of the corrugations in the lasgagna so I did two passes. This worked great.
Haven’t cooked it yet.
Useful links
Dome explaination video
2v Dome Calc Web Site - this was useful in figuring out a component list and visualizing how all the parts fit together
Files
Screenshot of the parameters for v5 of my Fusion 360 dome hub design
parametric fusion file for dome hubs