CAM - Group Projects
Laser Cutting
This week we decided to work in 3 pairs and tackle the group task
Acrylic - Pair 1 - Dhanu and Edu
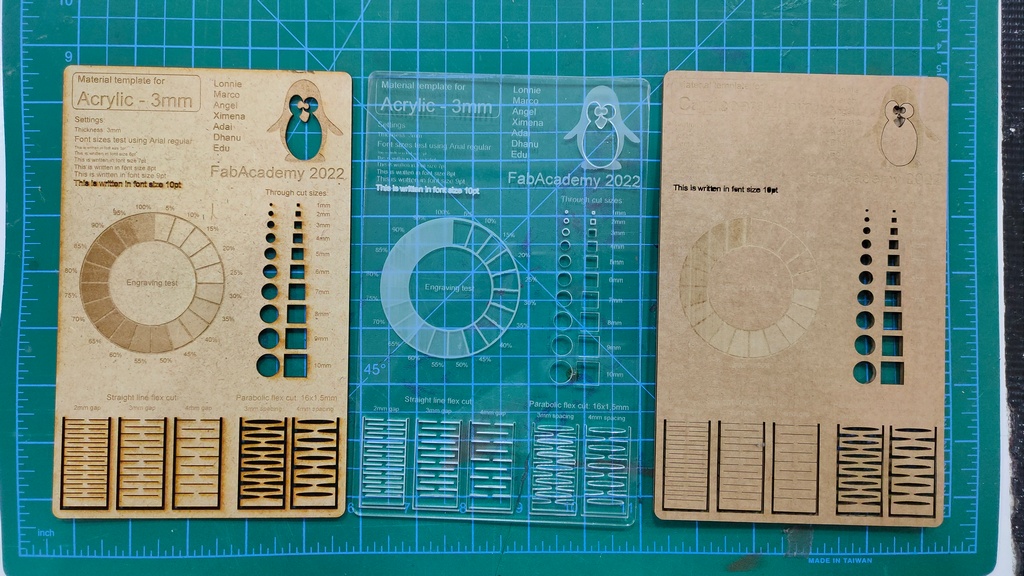
Since we were the first on the laser cutter, we decided to create a custom template for the team.
We downloaded a standard engraving template and we customized it with a logo and the all of our names, in order to put our Rhino skills to the test.
The next thing we did was finding out the correct laser settings for Transparent Acrylic. The Barcelona Fab Academy has a large cheatsheet, next to the printer, that has the most common settings for common materials.
The settings for Acrylic
| Operation | Power | Speed | Frequency |
|---|---|---|---|
| Cutting | 95 | 0.5 | 20,000 |
| Engraving | 70 | 100 | 20,000 |
| Raster (low) | 40 | 100 | 1,000 |
| Raster (med) | 60 | 100 | 1,000 |
| Raster (high) | 80 | 100 | 1,000 |
Once we were ready and had configured the settings, we had to calibrate the laser focus using one of these pieces.
Once we had correctly set the laser focus we decided to make a small test print, to make sure we had everything correctly.
The test print went well. We were, at last, ready for the definitive print of our masterpiece.
The laser printer
Lessons learned:
Cardboard - Pair 2 - Marco and Adai
The first group made a custom template for the team so we decided to get the same one.
After we had the template on Rhino was the moment to get to the parameters for the laser. Checking the cheat sheet that is on the laser room we started the first cut.
This first cut was a small square with another one smaller inside that we hatched to try both parameters, Raster and Cut. In the first try we saw that the small square was cut perfectly but the hatch was very low, and we could not see it, so we made some more cuts and rasters increasing the power in 5 points each time. Once we had the raster on the desired strength we started the final cut.
The first group had already changed the colors of the lines to make firs the raster, second the engraving of some lines, third the inside cuts and at the end the outline, so we double-checked that every thing was ok, we calibrated te focus of the machine, checked that the fumes extractor was on, and we started the cut.
The settings for Cardboard
| Operation | Power | Speed | Frequency |
|---|---|---|---|
| Cutting | 40 | 1 | 1,000 |
| Engraving | 40 | 2 | 1,000 |
| Raster (low) | 70 | 80 | 1,000 |
| Raster (med) | 80 | 80 | 1,000 |
| Raster (high) | 90 | 80 | 1,000 |
We did not test the engraving that should be only marcking the surface of the material and we thought that if we just double the speed of the cut would marck the surface but not cut it, we were wrong… The machine end up cutting the material all the way trough. Another ting that was not as expected was that some letters that were in red (the color we set to engrave) the machine understood that it was a raster because it did not had any vectors, was like a hatch. But everything end up very well!
MDF - Lonnie, Angel, Ximena
For the group assignment, we got an overview of the laser cutters at the Fablab from Josef and then went to work making a couple of items to try out settings on the laser cutter and to learn the work flow of the laser cutter.
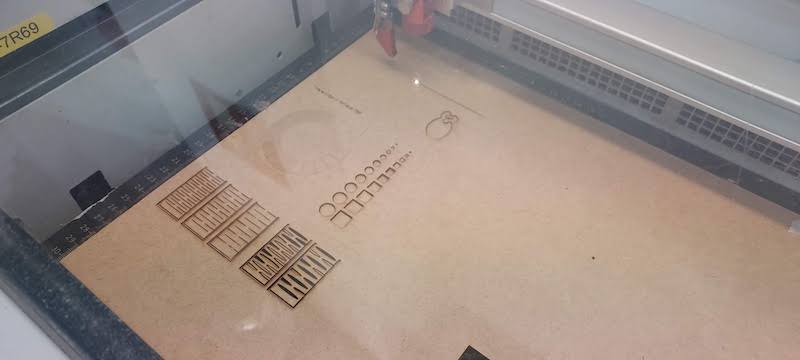
We cut and shared with our group several objects to determine parameters of the Trotect laser cutter at fab academy Barcelona.
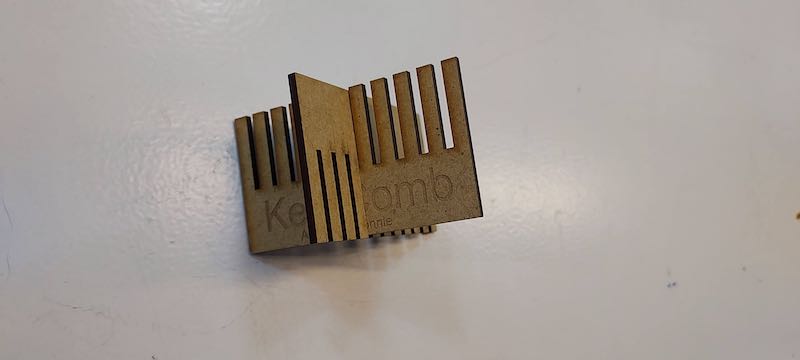
- a kerf comb to determine kerf
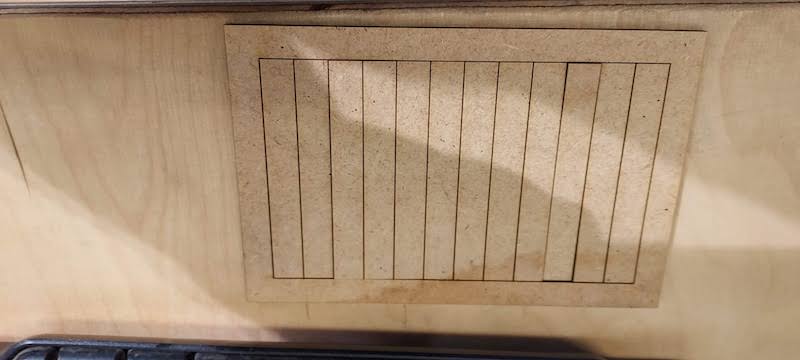
- a kerf box as another way to determine kerf
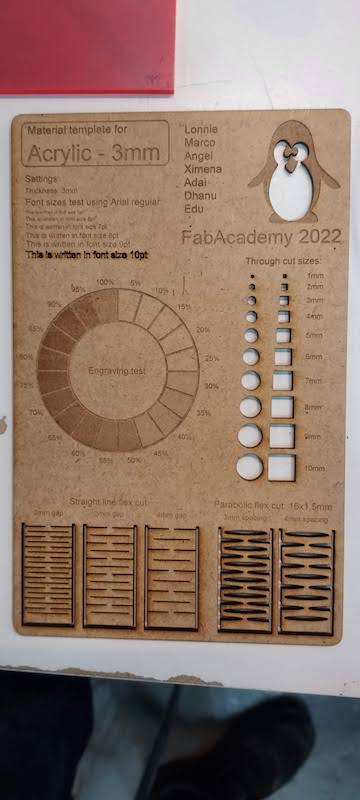
- a test engraving template using the design that had been customized by Dhanu and Edu.
Specs for the Fablab BCN laser cutters:
Manufacturer: Trotec
Power: 100 watts
Power range: 0-100
Max speed:
Speed range: 0-1
Kerf: 0.15 mm
Frequency range: 0 - 20,0000
Bed size small format machine:
Bed size large format machine: 300 x 600 mm
Setting for cutting and engraving MDF
| Operation | Power | Speed | Frequency |
|---|---|---|---|
| Cutting | 55 | .5 | 1,000 |
| Engraving | 40 | 2 | 1,000 |
| Raster (low) | 70 | 80 | 1,000 |
| Raster (med) | 80 | 80 | 1,000 |
| Raster (high) | 90 | 80 | 1,000 |
Here’s the laser cutter workflow:
Design something in 2d
Export it as a file that can be read by Rhino, DXF recommended
Upload the file to the IAAC cloud
https://cloud.iaac.net:5001/
Download the file from the IAAC cloud to a computer connected to the device you want to use
Open the file with Rhino on the computer connected to the cutter
Check dimensions etc of the file to make sure it is ok
Set up colors/layers to control cut order and group things that need the same laser settings
Do file -> Print to the cutter job control software
Look at the file in the job cntrol software to make sure the dimensions etc are ok
Set up the proper cut order using colors/layers
Set up the focus and start position for the laser
Check to see if the ventilation is on
Click on the run icon
It’s good to do a small test cut to verify that the speed, power, and frequency settings are appropriate for the material you are using.
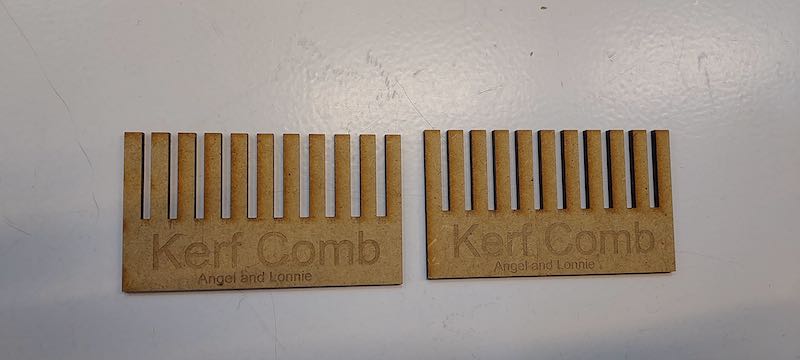
The Kerf Comb
I exported the file I created using Fusion as a dxf as recommended. On import into Rhino, it was the wrong size. All the info on layers and colors was lost. So I had to resize it in Rhino and set up layers and colors in Rhino and speed, power and frequency in the job control software for the laser. May be worthwhile learning Rhino, Josef says that it is better at 2d design than Fusion.
Angel and I designed the kerf comb with a parameter for material thickness so that it could be used with different materials. We set the spacing of the comb slots to change at .05 mm increments. We tried to use parameters to make the incremental changes to the slots but it doesn’t seem that you can do recursion with Fusion parameters. We looked on line and asked Josef and it seems that it is not possible. So in the end I drew that part of it manually.
Kerf Box

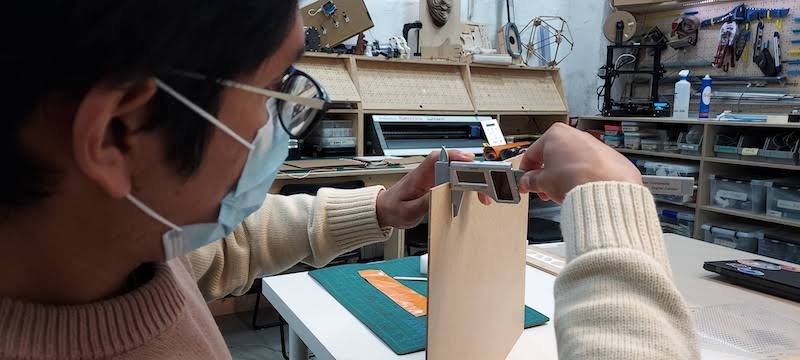
Angel and I designed and cut a box with 12 strips to measure the kerf of the laser cutter.
Kerf Measurement
Using the kerf comb and the kerf box we found that the laser kerf is 0.15 mm.
MDF Test Board
We cut an MDF test board using the file made by Edu and Dhanu.
Josep pointed out that the extra burn marks on some of the letters is related to the curviness of the letters - curvy letters cause the machine to slow down due to acceleration changes and burn more.
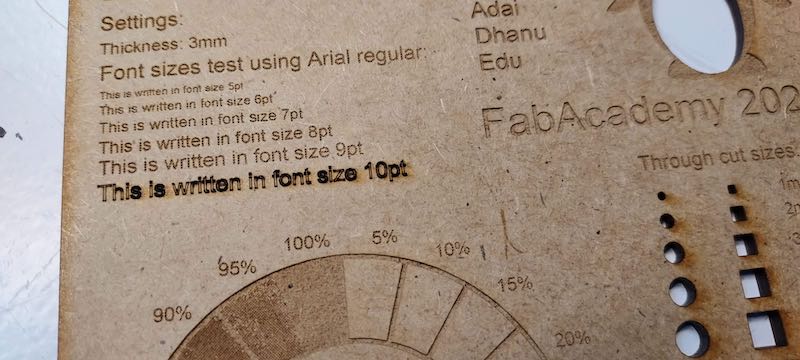
Josep suggested that slowing down the speed of the laser would minimize the variation in letter burn. We ran out of time to try this.
Here are the other boards using different materials made by others in our group: