Interface and Application Programming
For this week's assignment we had a group and individual project.For the group assigment we had to compare as many interface and application-building tool options as posible.
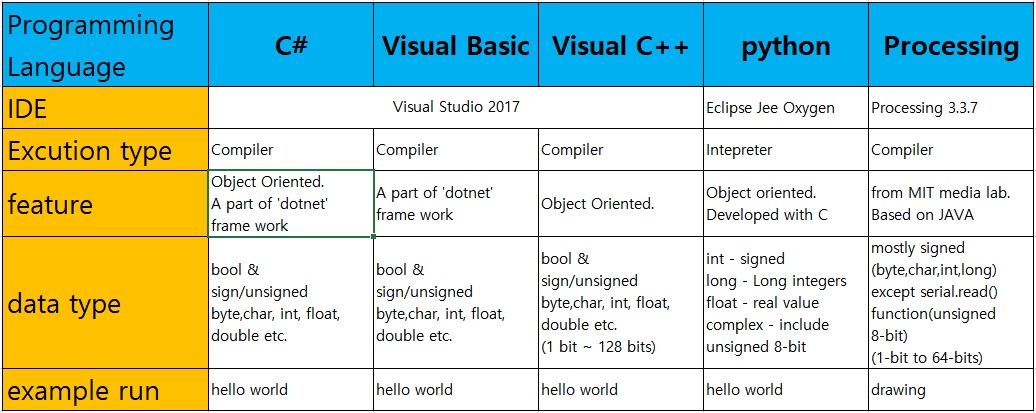
I found this helpful diagram done by fab academy alumn kim youngsik here is their website
link here!Individual assignment
write an application that interfaces with an input and/or output device that you made
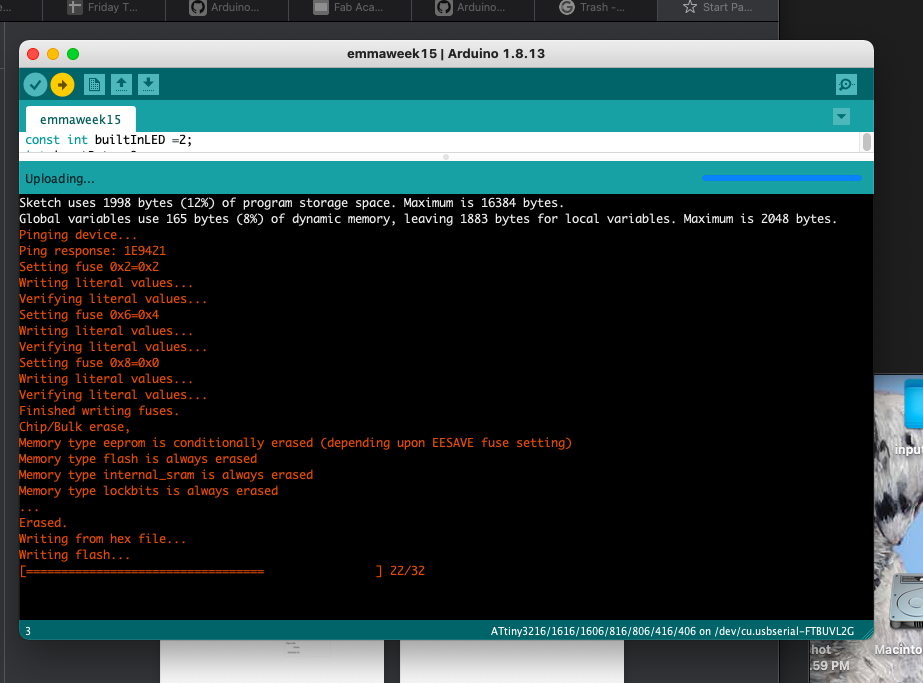
Step 1 Write Arduino code

I started by created code that Turned the LED ON when Arduino receives ‘1’ and then Turn LED OFF when Arduino receives ‘0’
STEP 2: Send serial data via Pythone
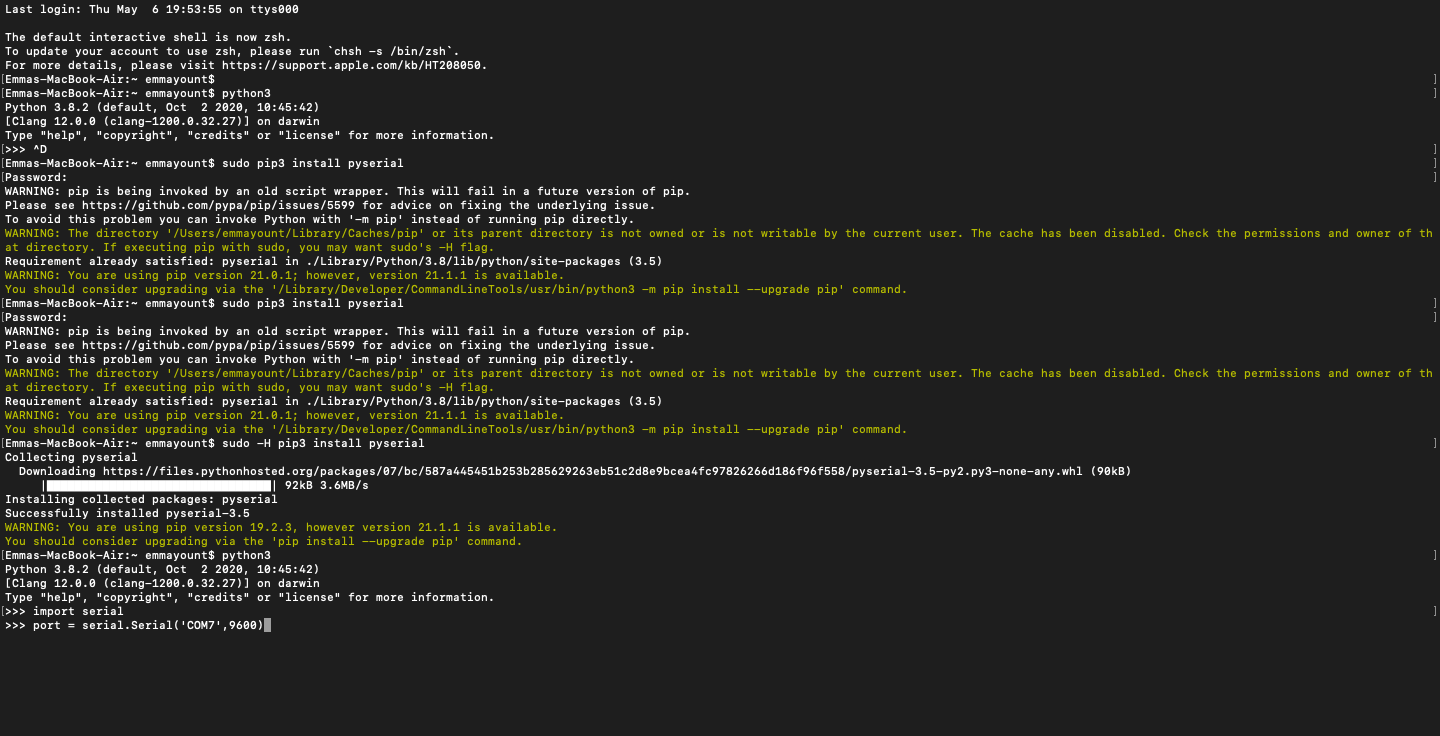
In my terminal I had to installing python3 I did this by entering these command lines: Then I entered these funtions into the python3 terminal
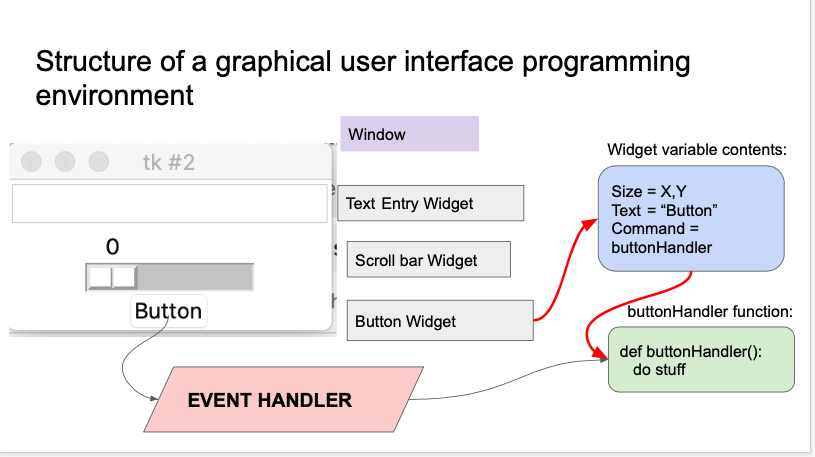
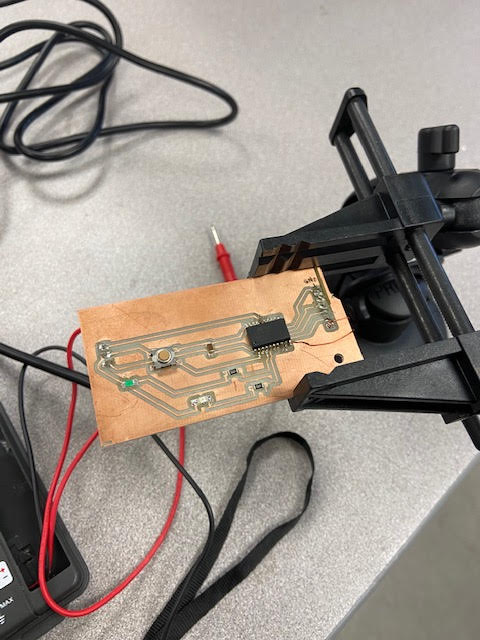
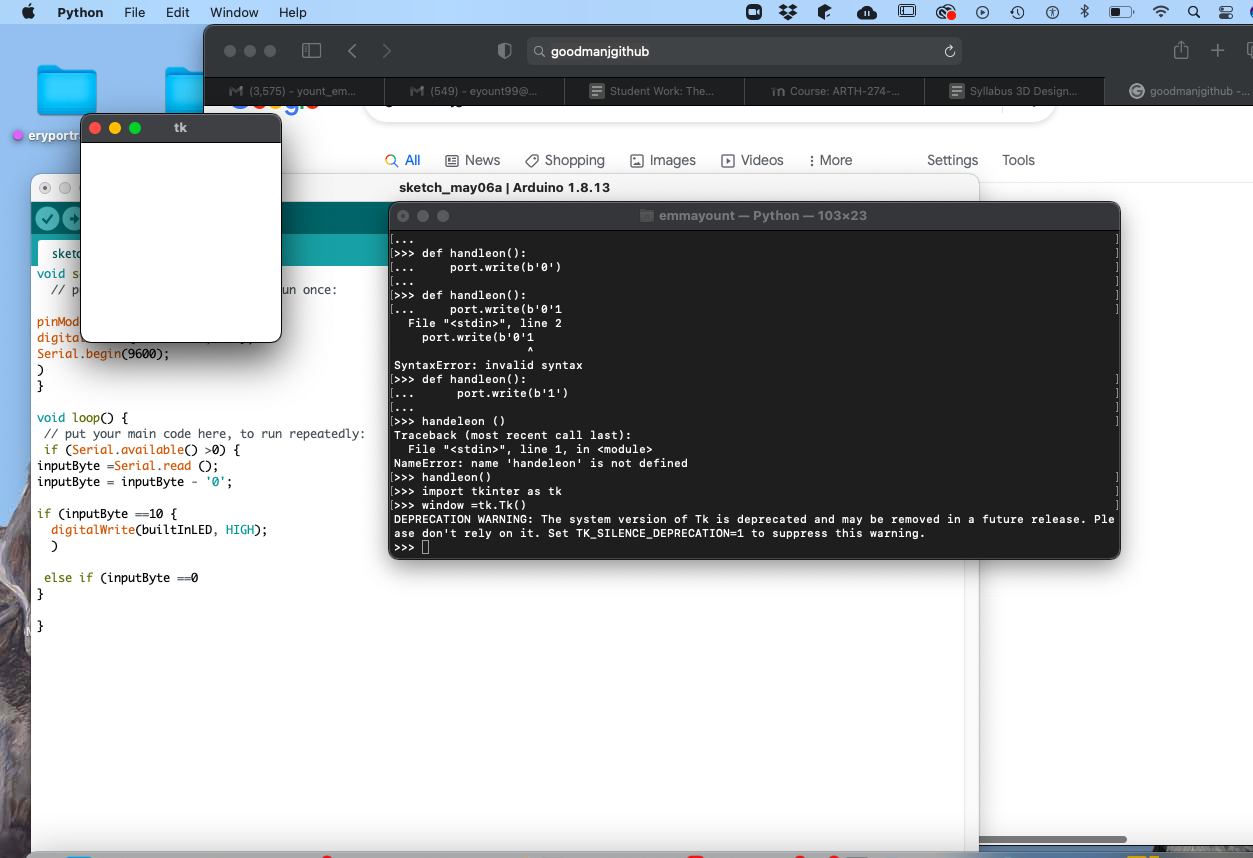
Here I ended these funtions into a new file that is stored in my brackets window to create the button funtion Here is a helpful diagram my professor created to explain the structure of a graphical user interface programing environment I used my atTiny 1616 board I made during electronic Design week for this project. Here is the link to my design and milling process link here
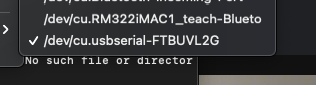
To program the board I connected my board to the 3 pin connector head and ran the arduino code. I also had to edit my python code to make the usb read the proper name of the serial number on the connector. I initially forgot to do this and spent a good hour tring to figure out why the code was not sending correctly!
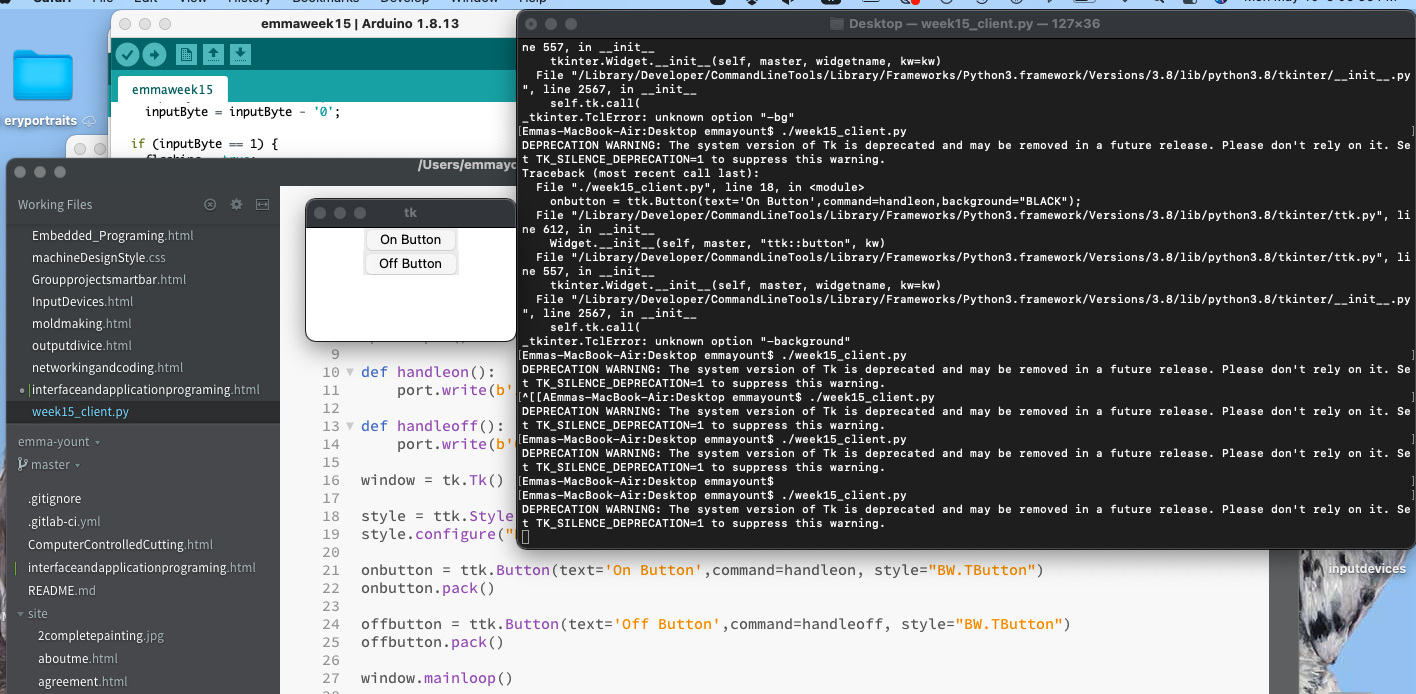
Then I connected my board to the 6 pin head and ran the python program I had created. Here is the link to my python code. link here Here is my tk button set up, python and arduino programing code all displayed on my laptop screen!
Once my board was programmed and working I decided to change the code and alter the look of my python GUI buttons to have blue font and make the led light blink in a sequence. The blinking sequence unintentionally turned out to mimic the pattern of a heart beat! I used this page to learn how to alter the color of my tk button.
link here!
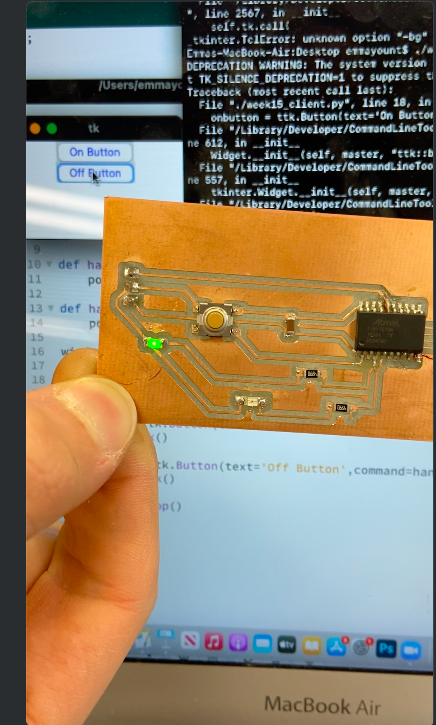
My board next the the buttons and code!
Here is the link to a video of my board and the code as I press the on and off buttom!
link here
All other Code files for this week are linked here
pip3 install serial
python3
>>> import serial
>>> port = serial.Serial('COM7',9600,timeout=1)STEP 3: add handler functions
>>> def handleon():
port.write(b’1’)
>>> def handleooff():
port.write(b’1’)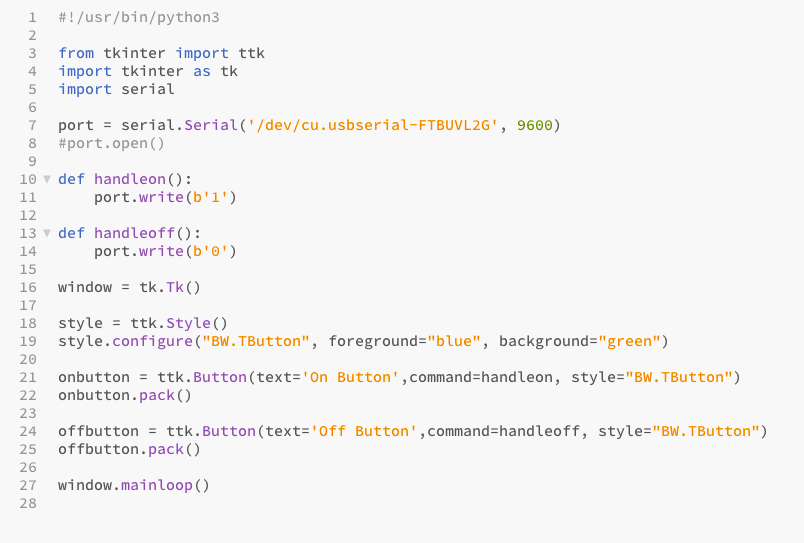
STEP 4: Create a GUI
>> window = tk.Tk();
>>> onbutton = tk.Button(text=’On’,command=handleon)
>>> onbutton.pack()
>>> offbutton = tk.Button(text=’Off’,command=handleoff)
>>> offbutton.pack()
>> window.mainloop();
(ctrl-c)
final touches