9. Mechanical design, Machine design
Member
Group Assignment
- design a machine that includes mechanism +actuation +automation
- build the mechanical parts and operate it manually
- document the group project and your individual contribution
Our Idea
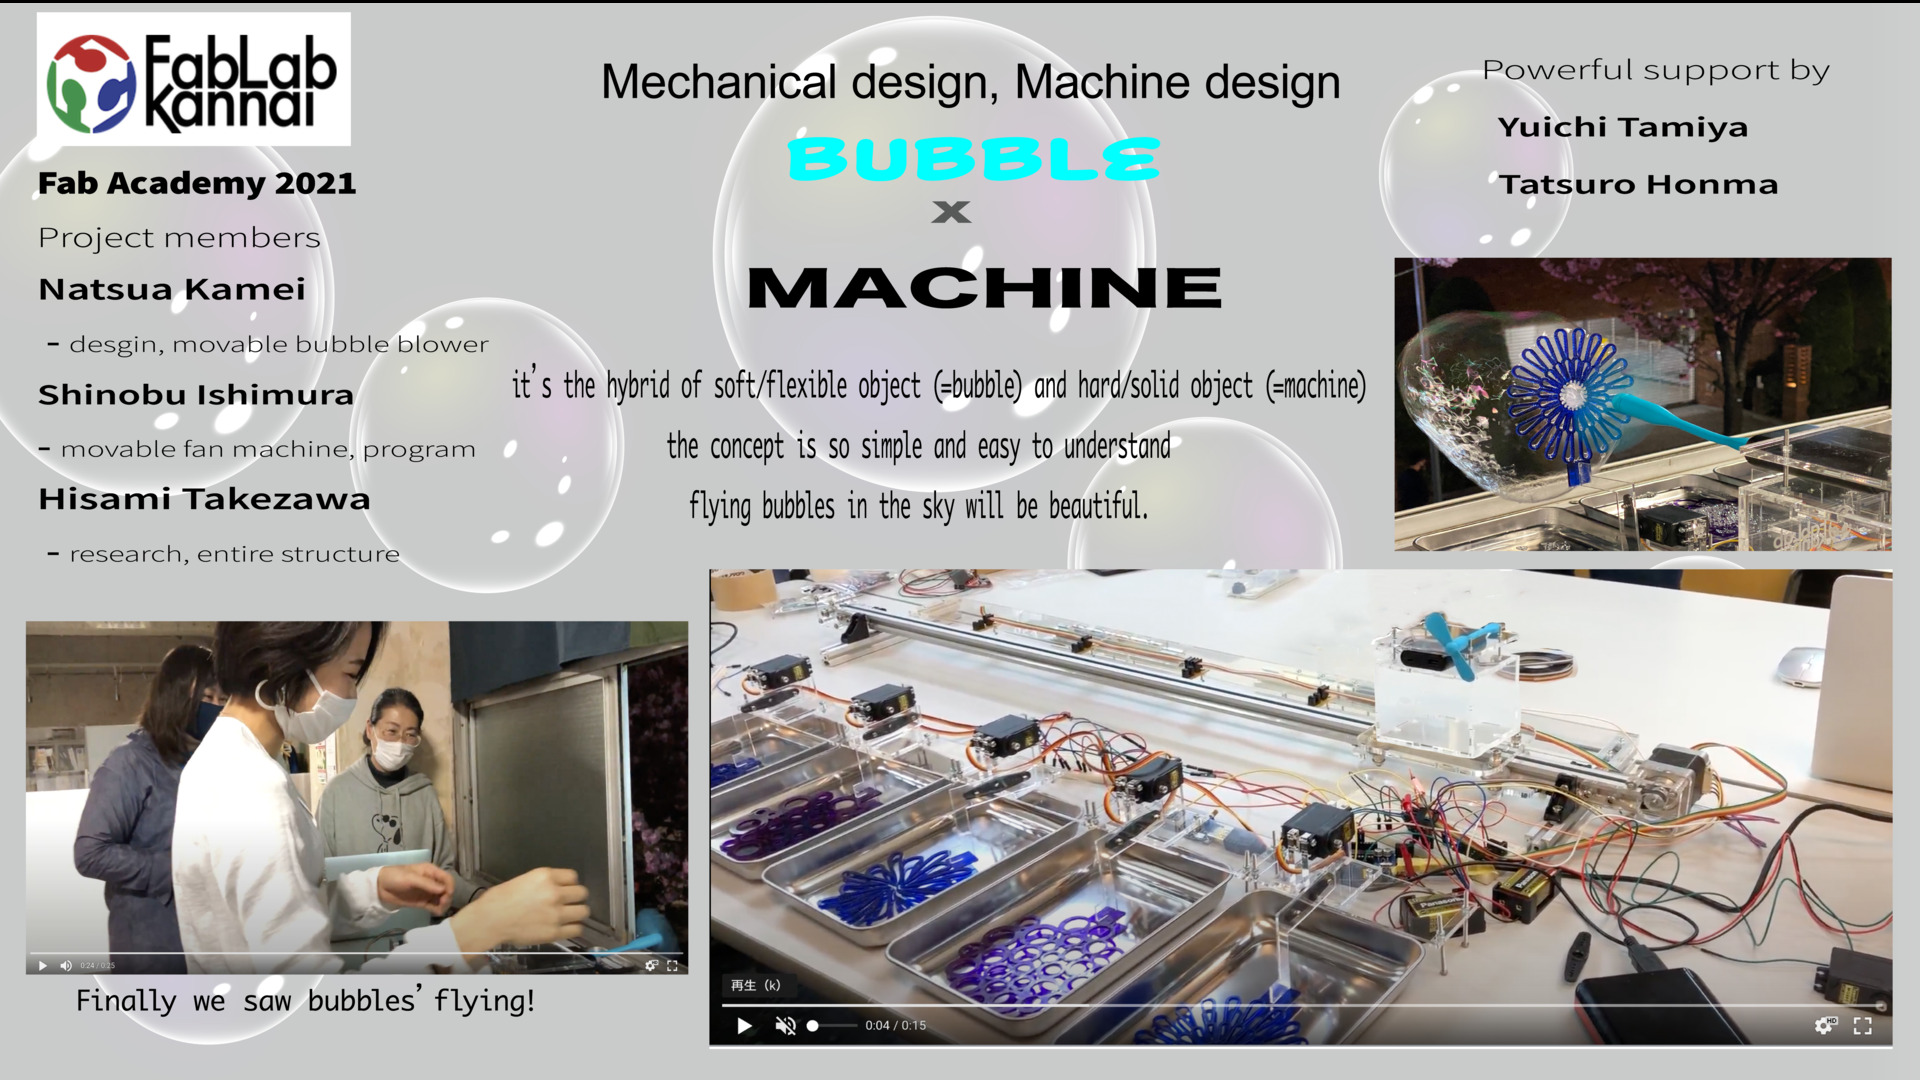
Before the local session on Saturday, we had several meetings to talk about the idea of our machine. We found the idea of making machine that blows bubbles automatically might be interesting because…
- it’s the hybrid of soft/flexible object (=bubble) and hard/solid object (=machine)
- the concept is so simple and easy to understand
- we assume the presentation video with the image of flying bubbles in the sky will be beautiful.
Researching
Next we did research for a similar project. There are tons of bubble making machines already in the world and the research helped us to decide the structure of our bubble machine.
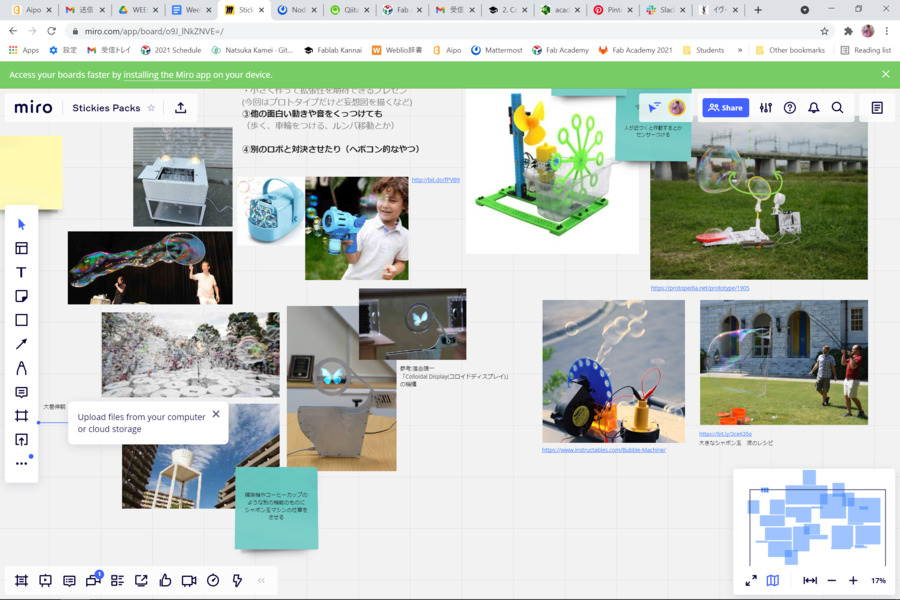
Ref:Foam Clouds
Drawing Rough sketches
These are the rough sketches we each draw to think about the construction of our machine.
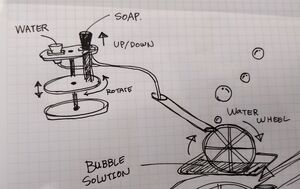
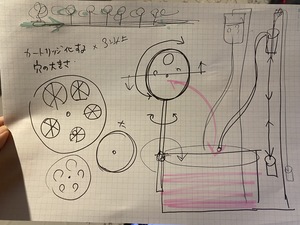
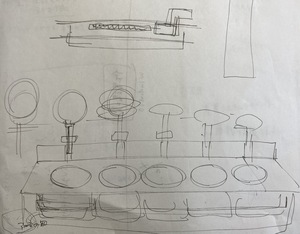

Basic Constructions
First sketch
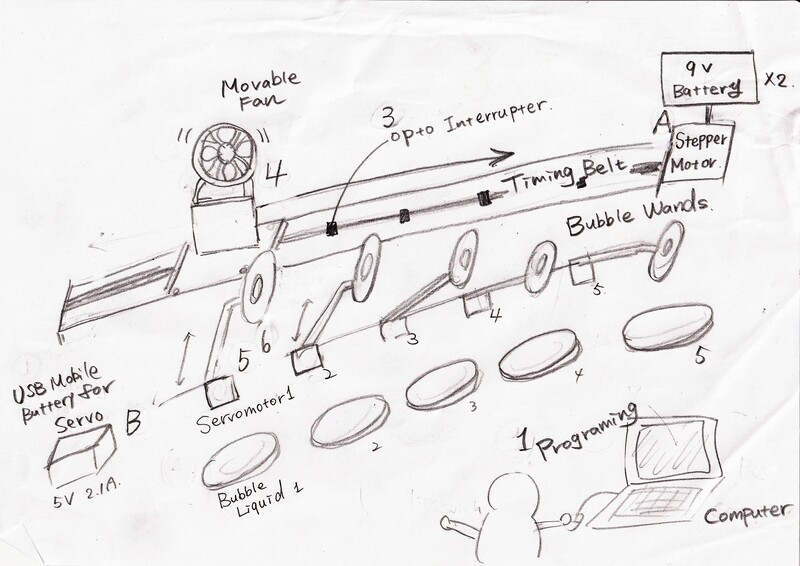
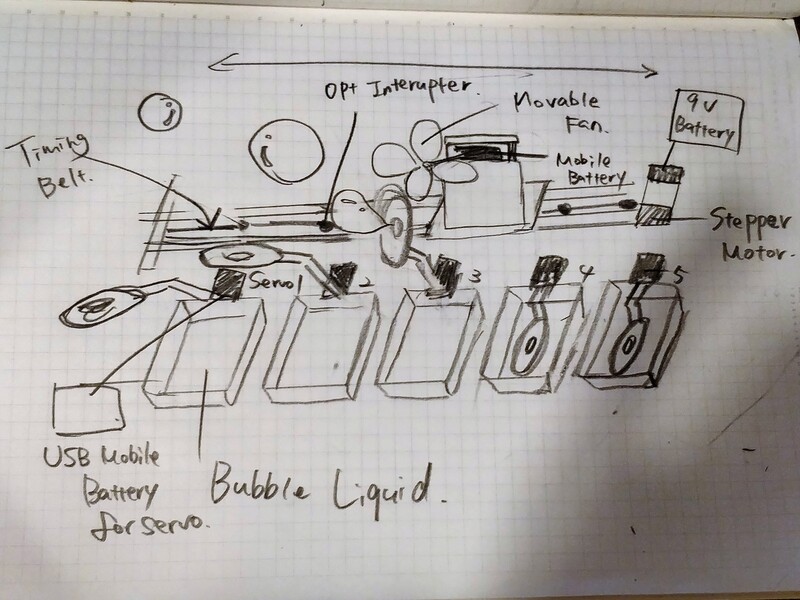
Final sketch
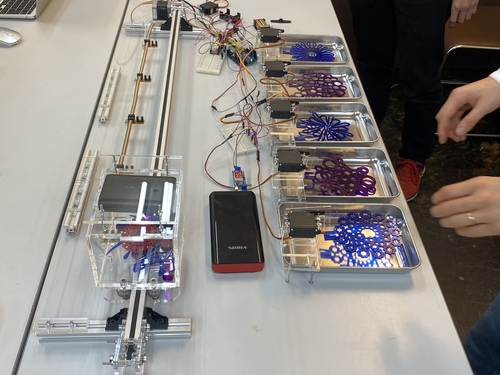
Final figure(without fan)
◆Preparing
A. Energize Arduino and insert the two batteries(9V) into the battery boxes for the stepper motors
B. Connect the power adapter and switch on DC-DC converter for the the servo motors
C. Fill in the soap liquid for bubbles to dishes
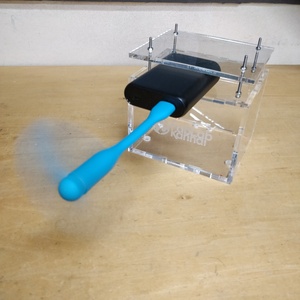
D. Connect the fan to USB adapter
◆How the machine works
- Turn on start switch to run the program
- The base of movable fan moves by stepper motor
- Detect the place of the base by opto interrupter
- Stop the stepper motor
- Turn up the bubble wand by servo motor
- Turn down the bubble wand by servo after pausing for 5 seconds
- After Repeating 2-6 for four more times, the stepper mortor will be stopped.
After several discussions, we decided WHAT we make and WHY it’s interesting. Then we confront a huge and important question. HOW it works??? So in this stage, we needed to think about the mechanisms. With the support of our great instructors, we learned different kinds of materials, parts, and motors for our machines.
Experimenting of Blowing Bubbles
Honestly, this was one of the fun parts of the week for me. I purely enjoyed making bubbles on the rooftop of the building our fablab is in, and learned the basic structure of it. It helped us to understand the structure of blowing bubbles and the shape of bubbles.
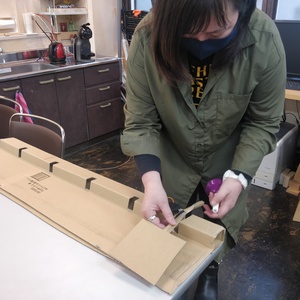
Getting Materials
Grouping
To use time efficiently, we divided all tasks into three groups and each person was in charge of one part.
- Shinobu for Movable fan and programming
- Natsuka for Movable bubble wands and designing
- Hisami for Positioning and Researching
The decision in each part affects others, so cooperation and active communication were very important and we found the difficulties of group project….
1.Shinobu for Movable Fan, Programming
I have designed and assembled structures for liner movement of fan table. Then programmed to move parts to blow bubbles.


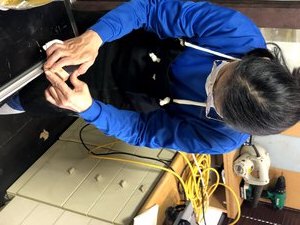
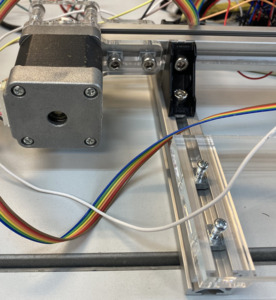
◆Rail for liner movement I made V-Slots in upper side and bottom of aluminum’s frame for V-wheels. (left side and right side to use for stepper motor’s belt)
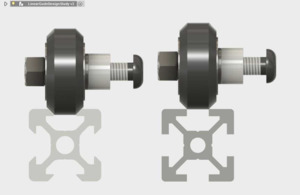
The machine didn’t shave both edges equally. Then I shaved twice for single slot. The second shave did with the different side of the machine from the first shave.
After the shaving, the edges were coarse. I used fine sandpaper to make the edges smooth.
![]()
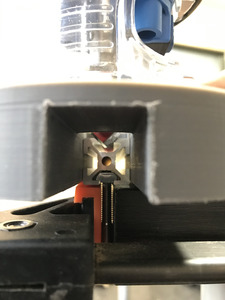
◆Stepper Motor
We used a stepper motor and a belt to move a fan table.
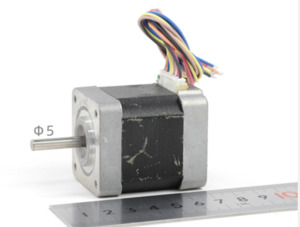
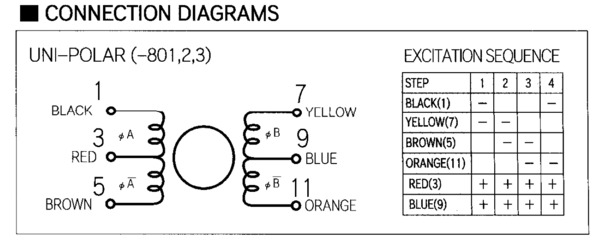
- Stepper motor - KH42KM2-802
- Unipolar
- Step angle: 1.8 (=200 steps/rev.)
- Shaft diameter: 5mm
- Voltage 12V, Current 0.4A, Winding resistance 30Ω
- Holding torque: 3.2 kgf·cm
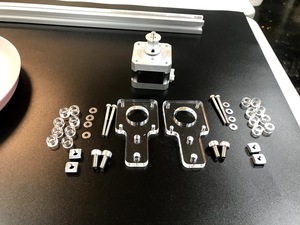
I designed acrylic parts and laser cut to fix the motor to the frame.
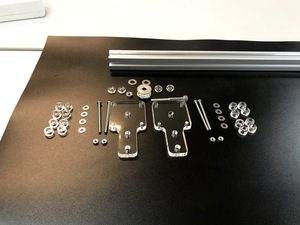
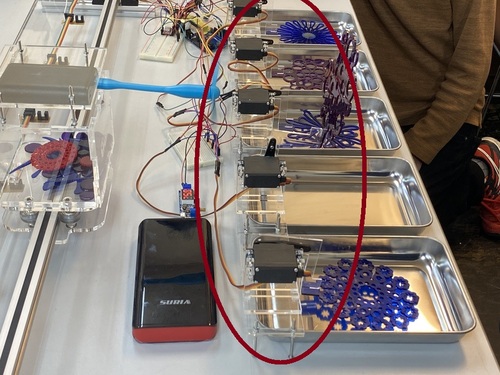
◆Servo Motor
We used 5 Servo motors to stand wands up.
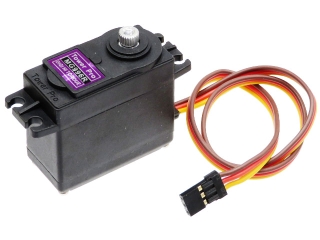
- Servo Motor - MG955
- Operating voltage 4.8V-6.6V
- Stall torque: 9.4kgf·cm(4.8V), 11kgf·cm(6V)
Servo Motor Pin Assignment - Organge code connect to Uno Analog pin (ex. A1 stands for Analog #1 pin)
- Port A1 Servo #5
- Port A2 Servo #4
- Port A3 Servo #1
- Port A4 Servo #3
- Port A5 Servo #2
Red and Brown codes connect bread board’s VCC and GND respectively.
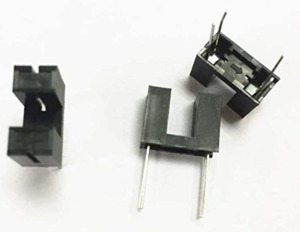
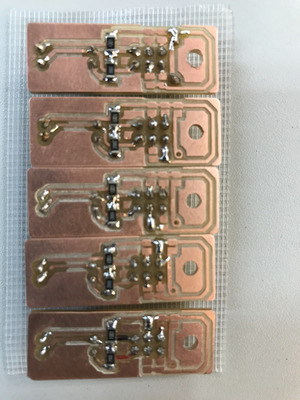
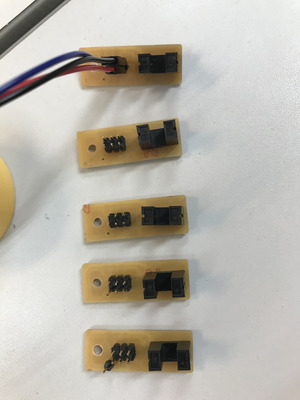
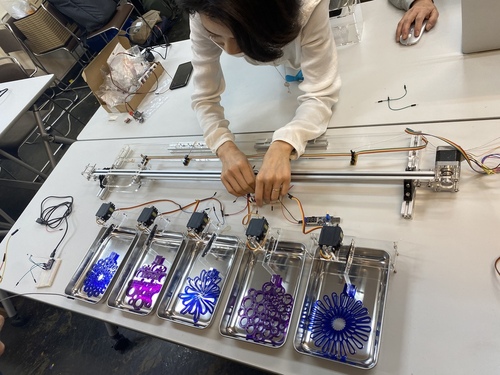
◆Fan table and Opto interrupter
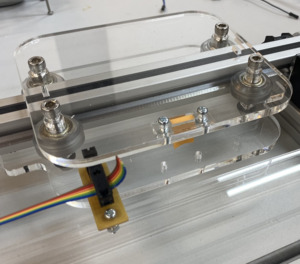
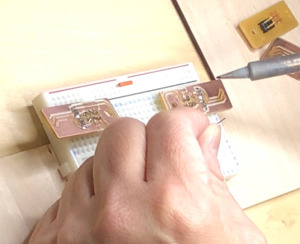
I have designed tables to put V-wheels and place a Fan. Actual “interrupter” was a piece of an orange color paper. Opto interrupers placed in front of each wands respectively and connected with rainbow cable. The PCBs were bridged differently by soldering.

◆Electric parts
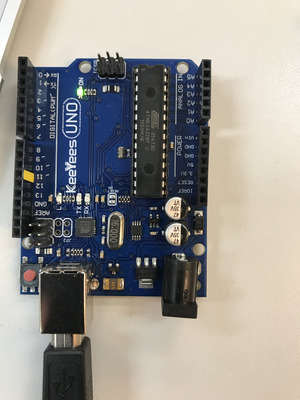
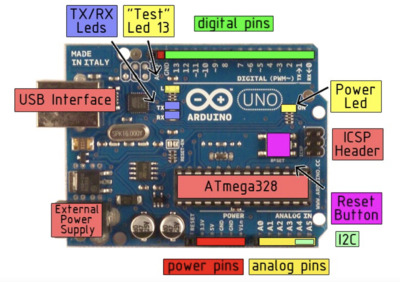
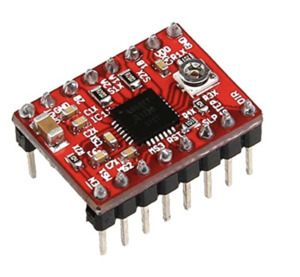
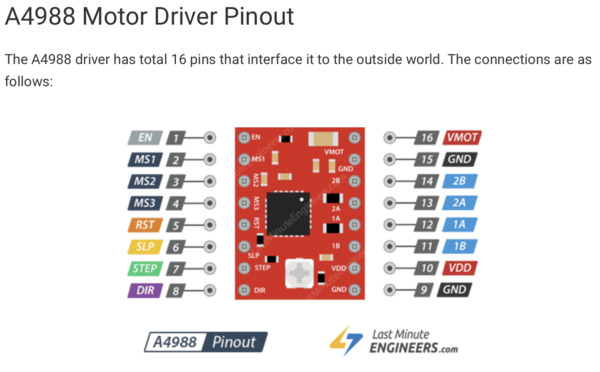
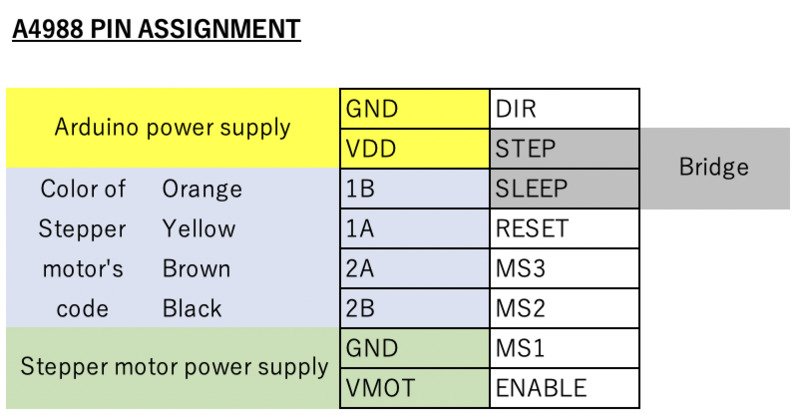
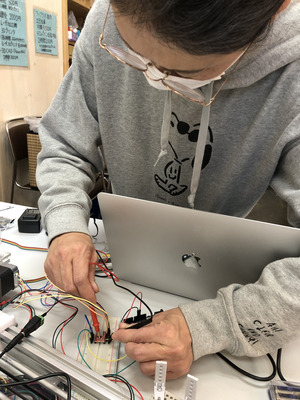
We used Arduino UNO as microcontroller and motor driver - HiLetgo RepCap A4988. A Heatsink put on the motor driver chip. The digital pins of Arduino Uno used for the stepper motor control.
Originally we planned to have limiter switch to move the Fan table back to start position. However the motor drivers got troubles after several movement testing even though installing new one and no problem at the beginning. Then we gave up the auto returning. Although we tested 4 to 5 motor drivers, the results were the same. We just used a limit switch as starting the moves of the Fan table.
Used Limit switch was TOOHUI - T241
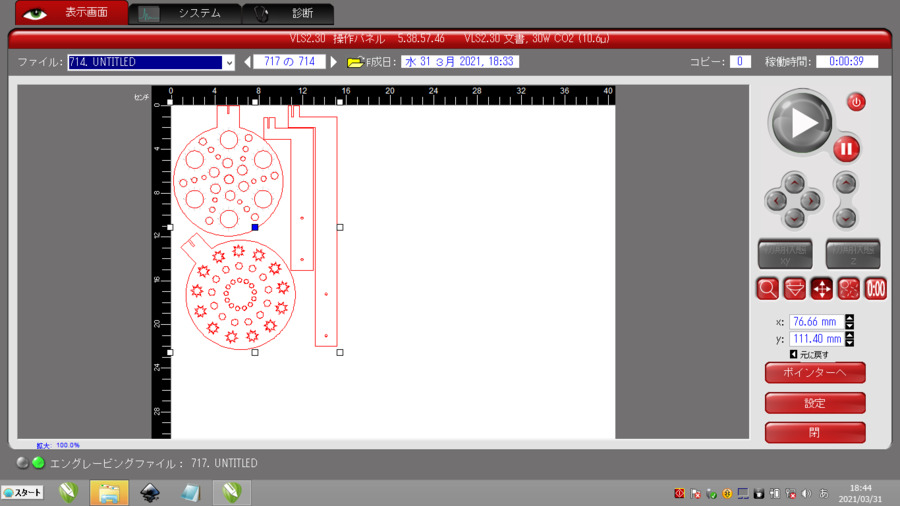
◆programming
Basically I started programming from each part of machine movement, such as motor moves clockwise - counterclockwise, the fan table stop at opto interrupter’s station as expected, and so on. Then combined each of them one by one. Arduino IDE has good examples for stepper, servo and sensor. I really enjoyed the benefits in this project.
When I added a program to existing one, sometimes we saw nothing happened although it worked before the addition.
We made good use of serial monitor by adding text in the program to find where errors exist by having echos during programing processes. Since there were lots of try and errors, it was very helpful for me. (removed from final program already)
For the details: (Link to Shinobu’s individual page)
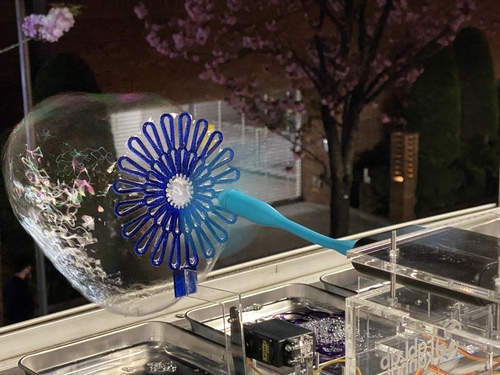
2. Natsuka for Movable Bubble Wands, Designing
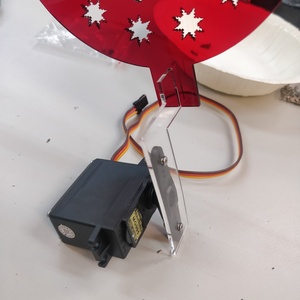
I was in charge of designing and making 5 bubble wands and fixed base for them, and acrylic box to fix the movable fan.
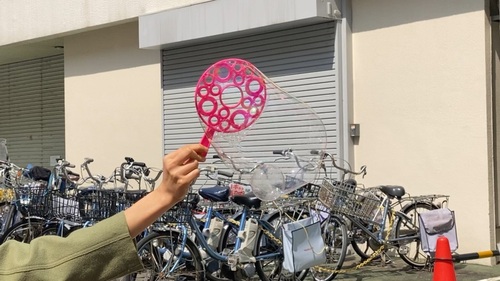
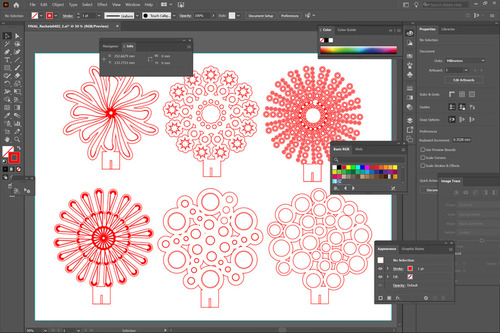
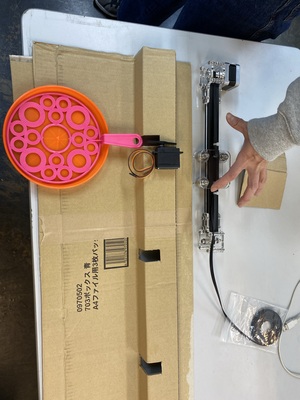
◆Bubble Wands
This is the final vector data of five bubble wands and outcome.
The material is 2mm acrylic board.
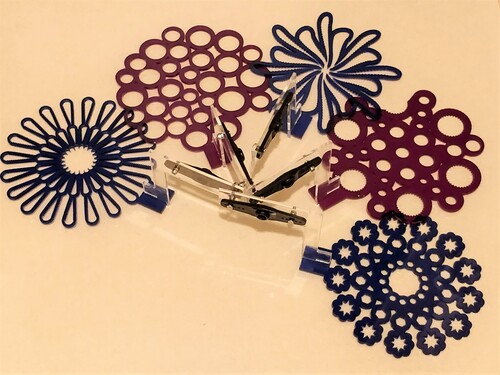
I added the slit on the bottom so that It can be connected to handles.
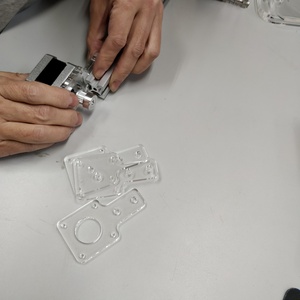
For the handles, I made the holes to fix the servomotor with the screws.
Many trials and failures before final one…


◆Entire base for the bubble wands and soap dishes
For the base to fix the 5 servomotors to move the bubble wands, I used 2mm acrylic board.
I used 35 screws and 55nuts to assemble it, so it took much more time than I imagined!!
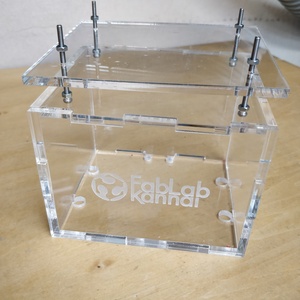
◆Acrylic box to set the movable fan
To fix the movable fan, I decided to make acrylic box. I enjoyed the designing step for this.
I needed to make its heights same as the heights of the middle point of bubble wands. To figure out the correct heights, my instructor supported me a lot.
For the details: Natsuka’s individual page
3. Hisami for Positioning and Researching
For the details: (Link to Hisami’s individual page)
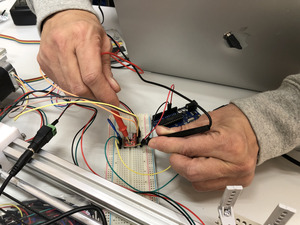
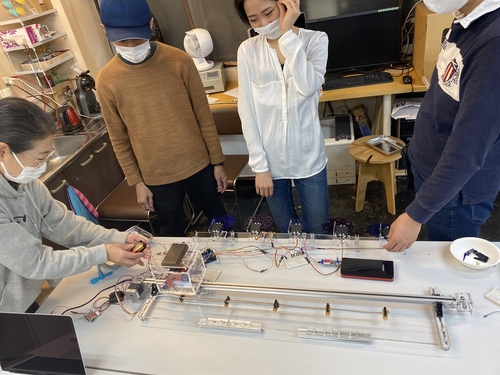
Wiring
wiring has another difficulties. To understand each pin number for programming easier, we should connect 5 bubble wands in order. wiring parts on bread board were not so tight, we couldn’t move our machines much....
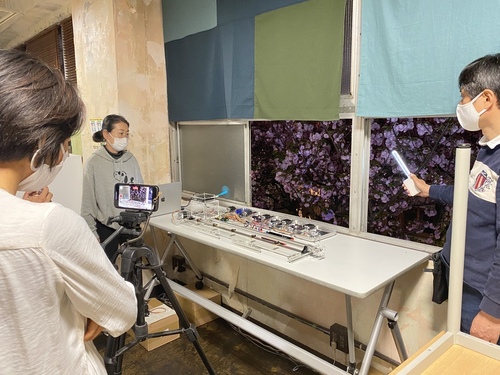
Taking the Video
The street in front of Fablab Kannai is named “Kannai Cherry Blossom Street”, and as the name suggests, cherry blossoms bloomed brilliantly this weekend.
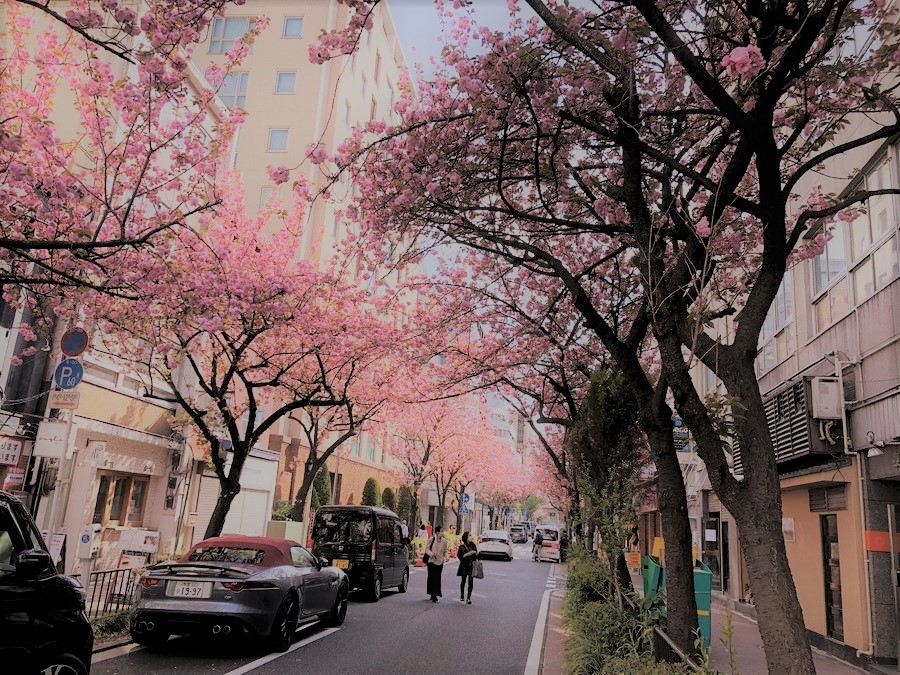
So we decided to take video in the background of cherry blossoms.
Final Results
Slide made by Shinobu Ishimura
Video made by Natsuka Kamei
“Spring Will Be a Little Late This Year” by Red Garland for soundtrack